Este post también está disponible en:
![]()
![]() Español
Español ![]()
![]() Français
Français

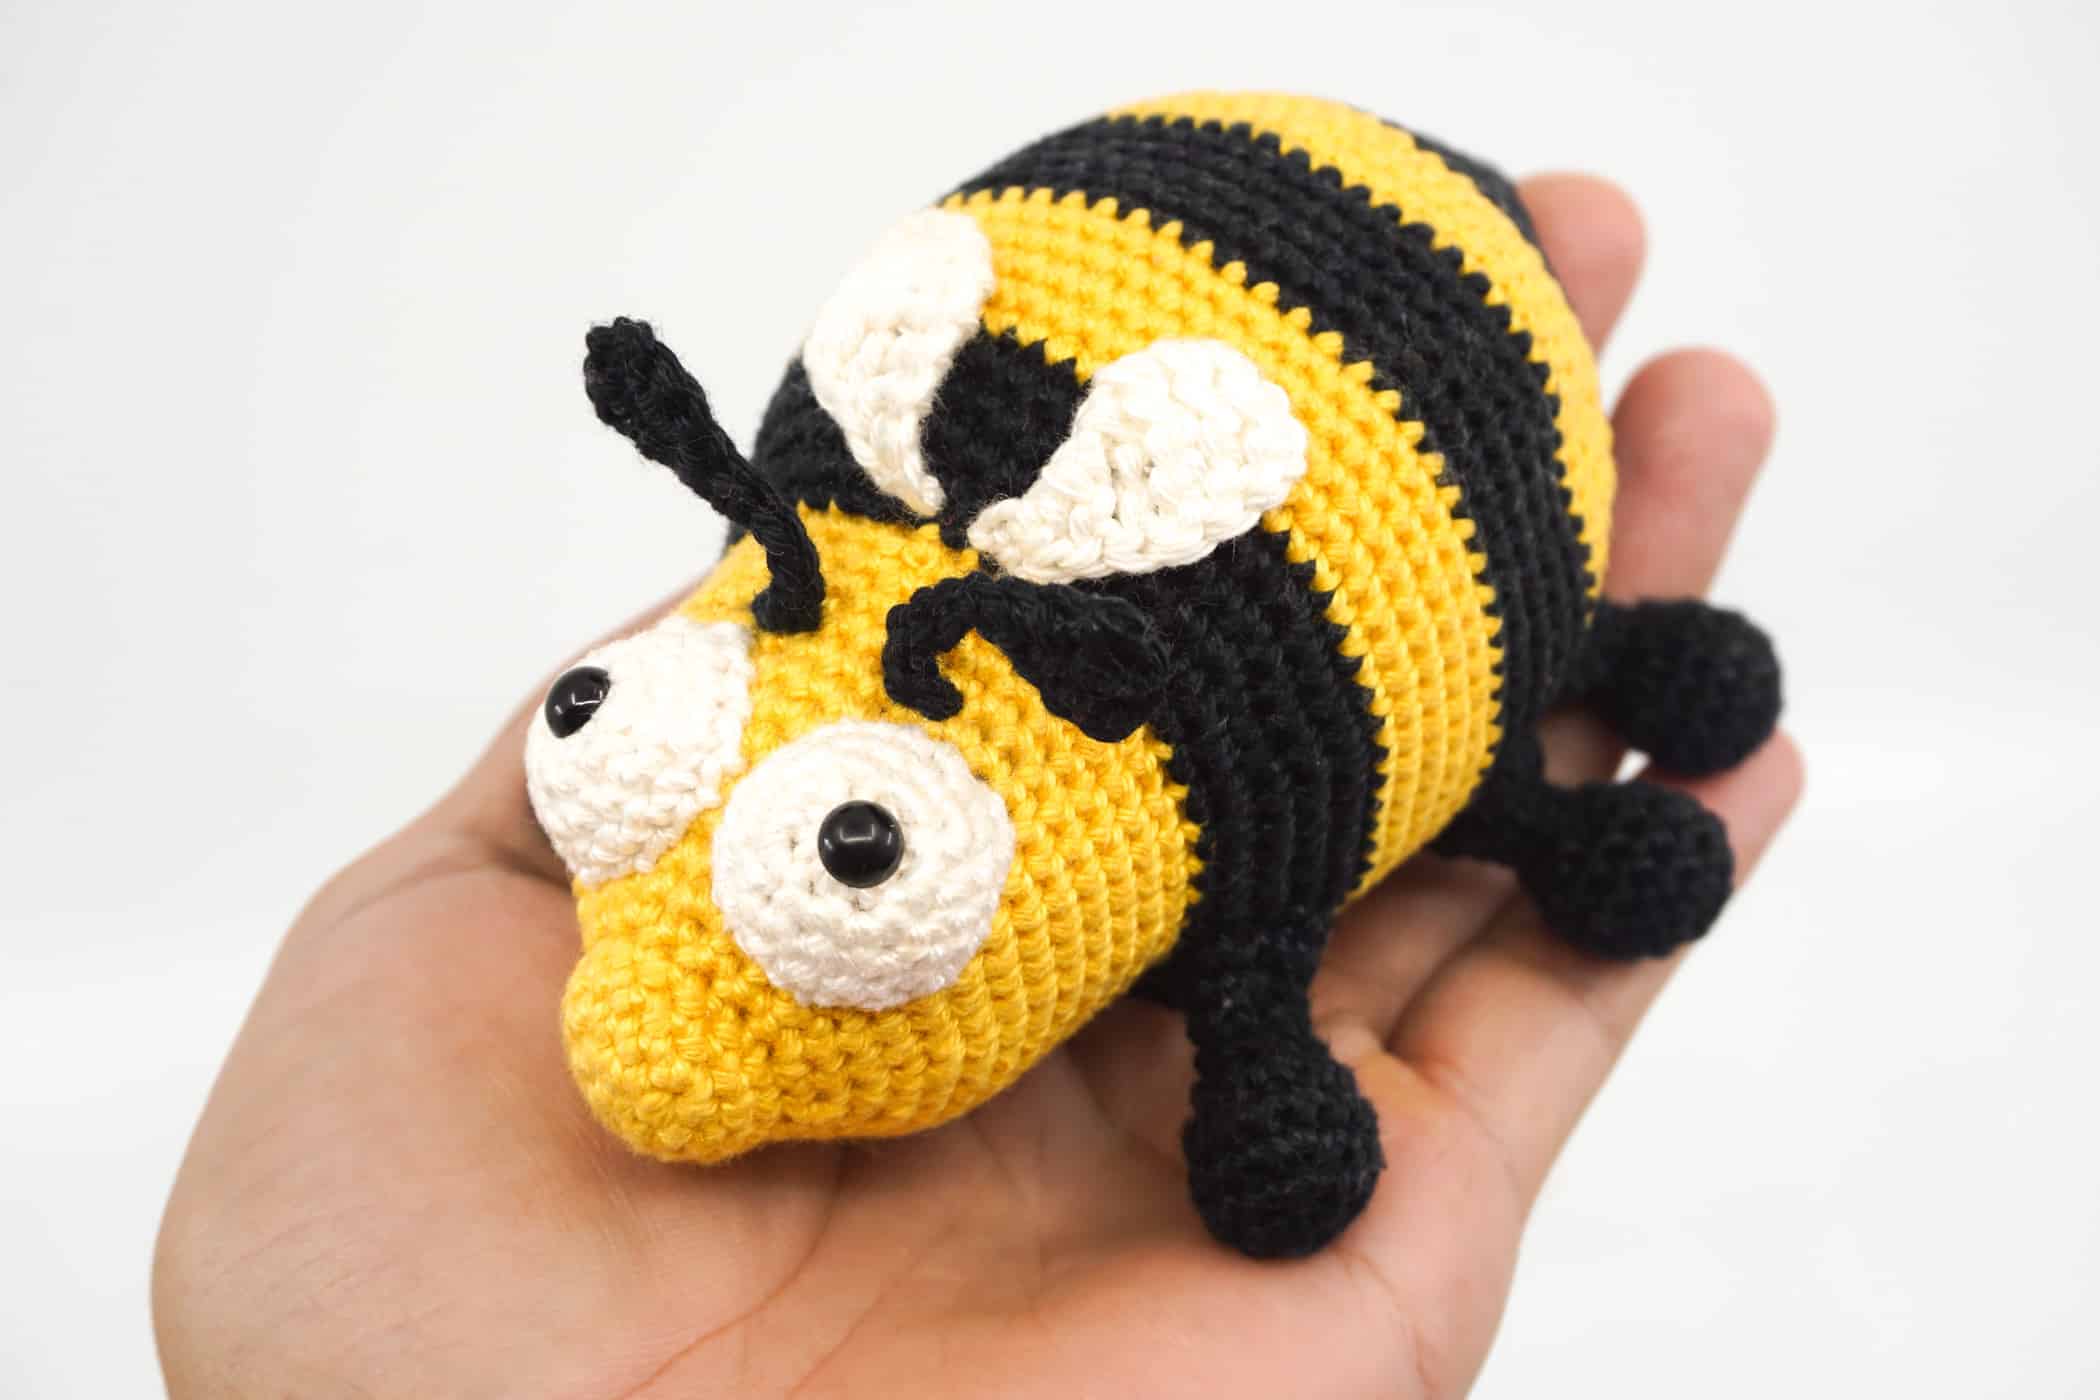
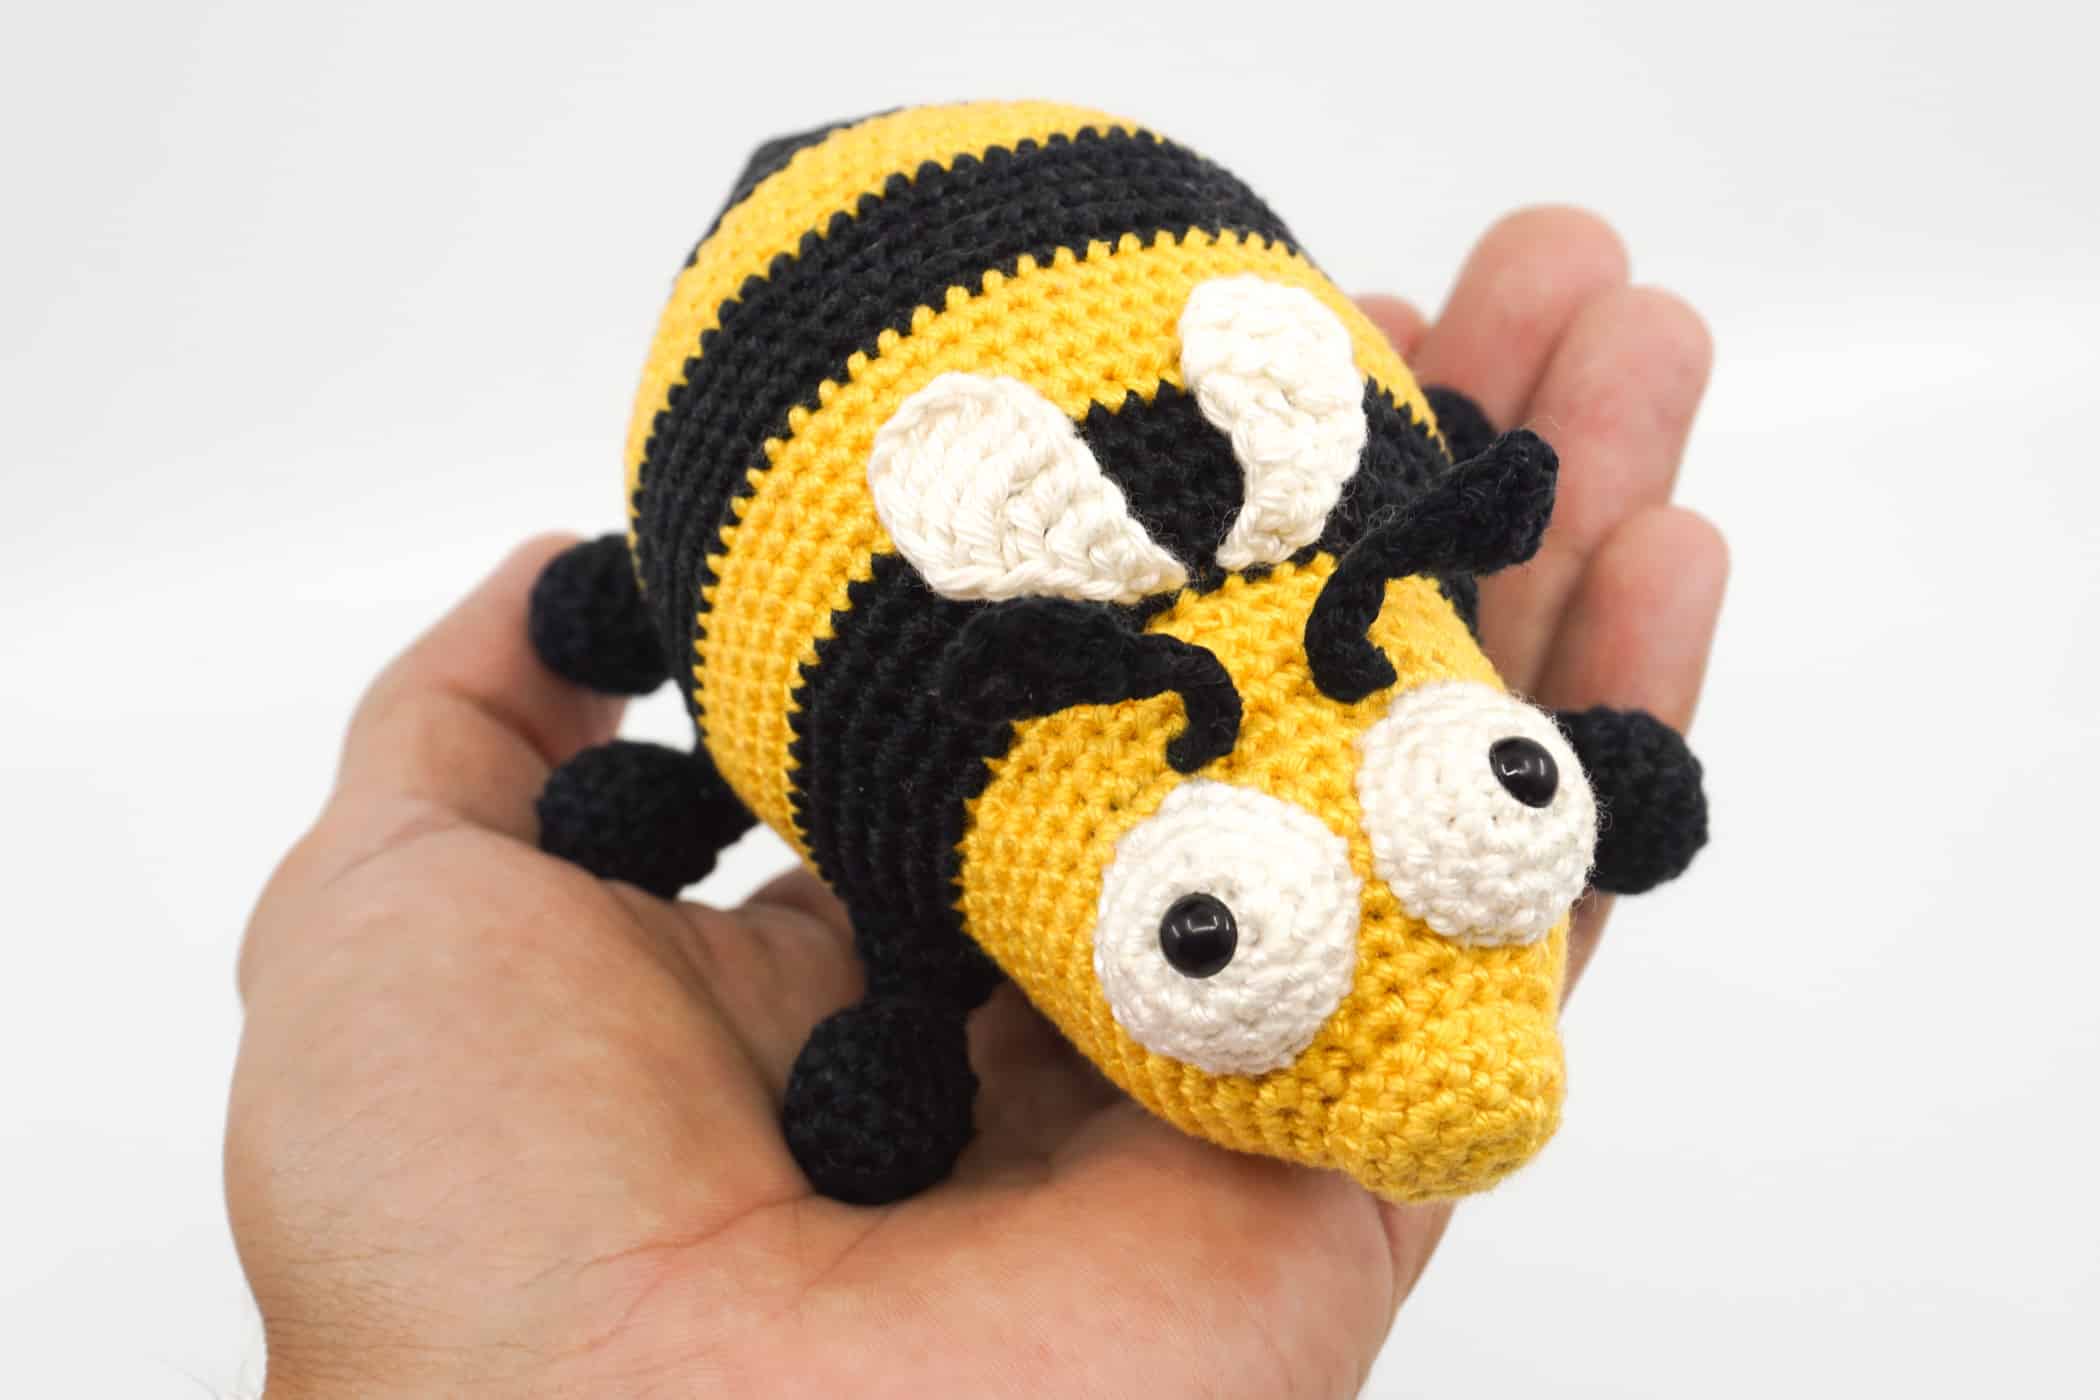
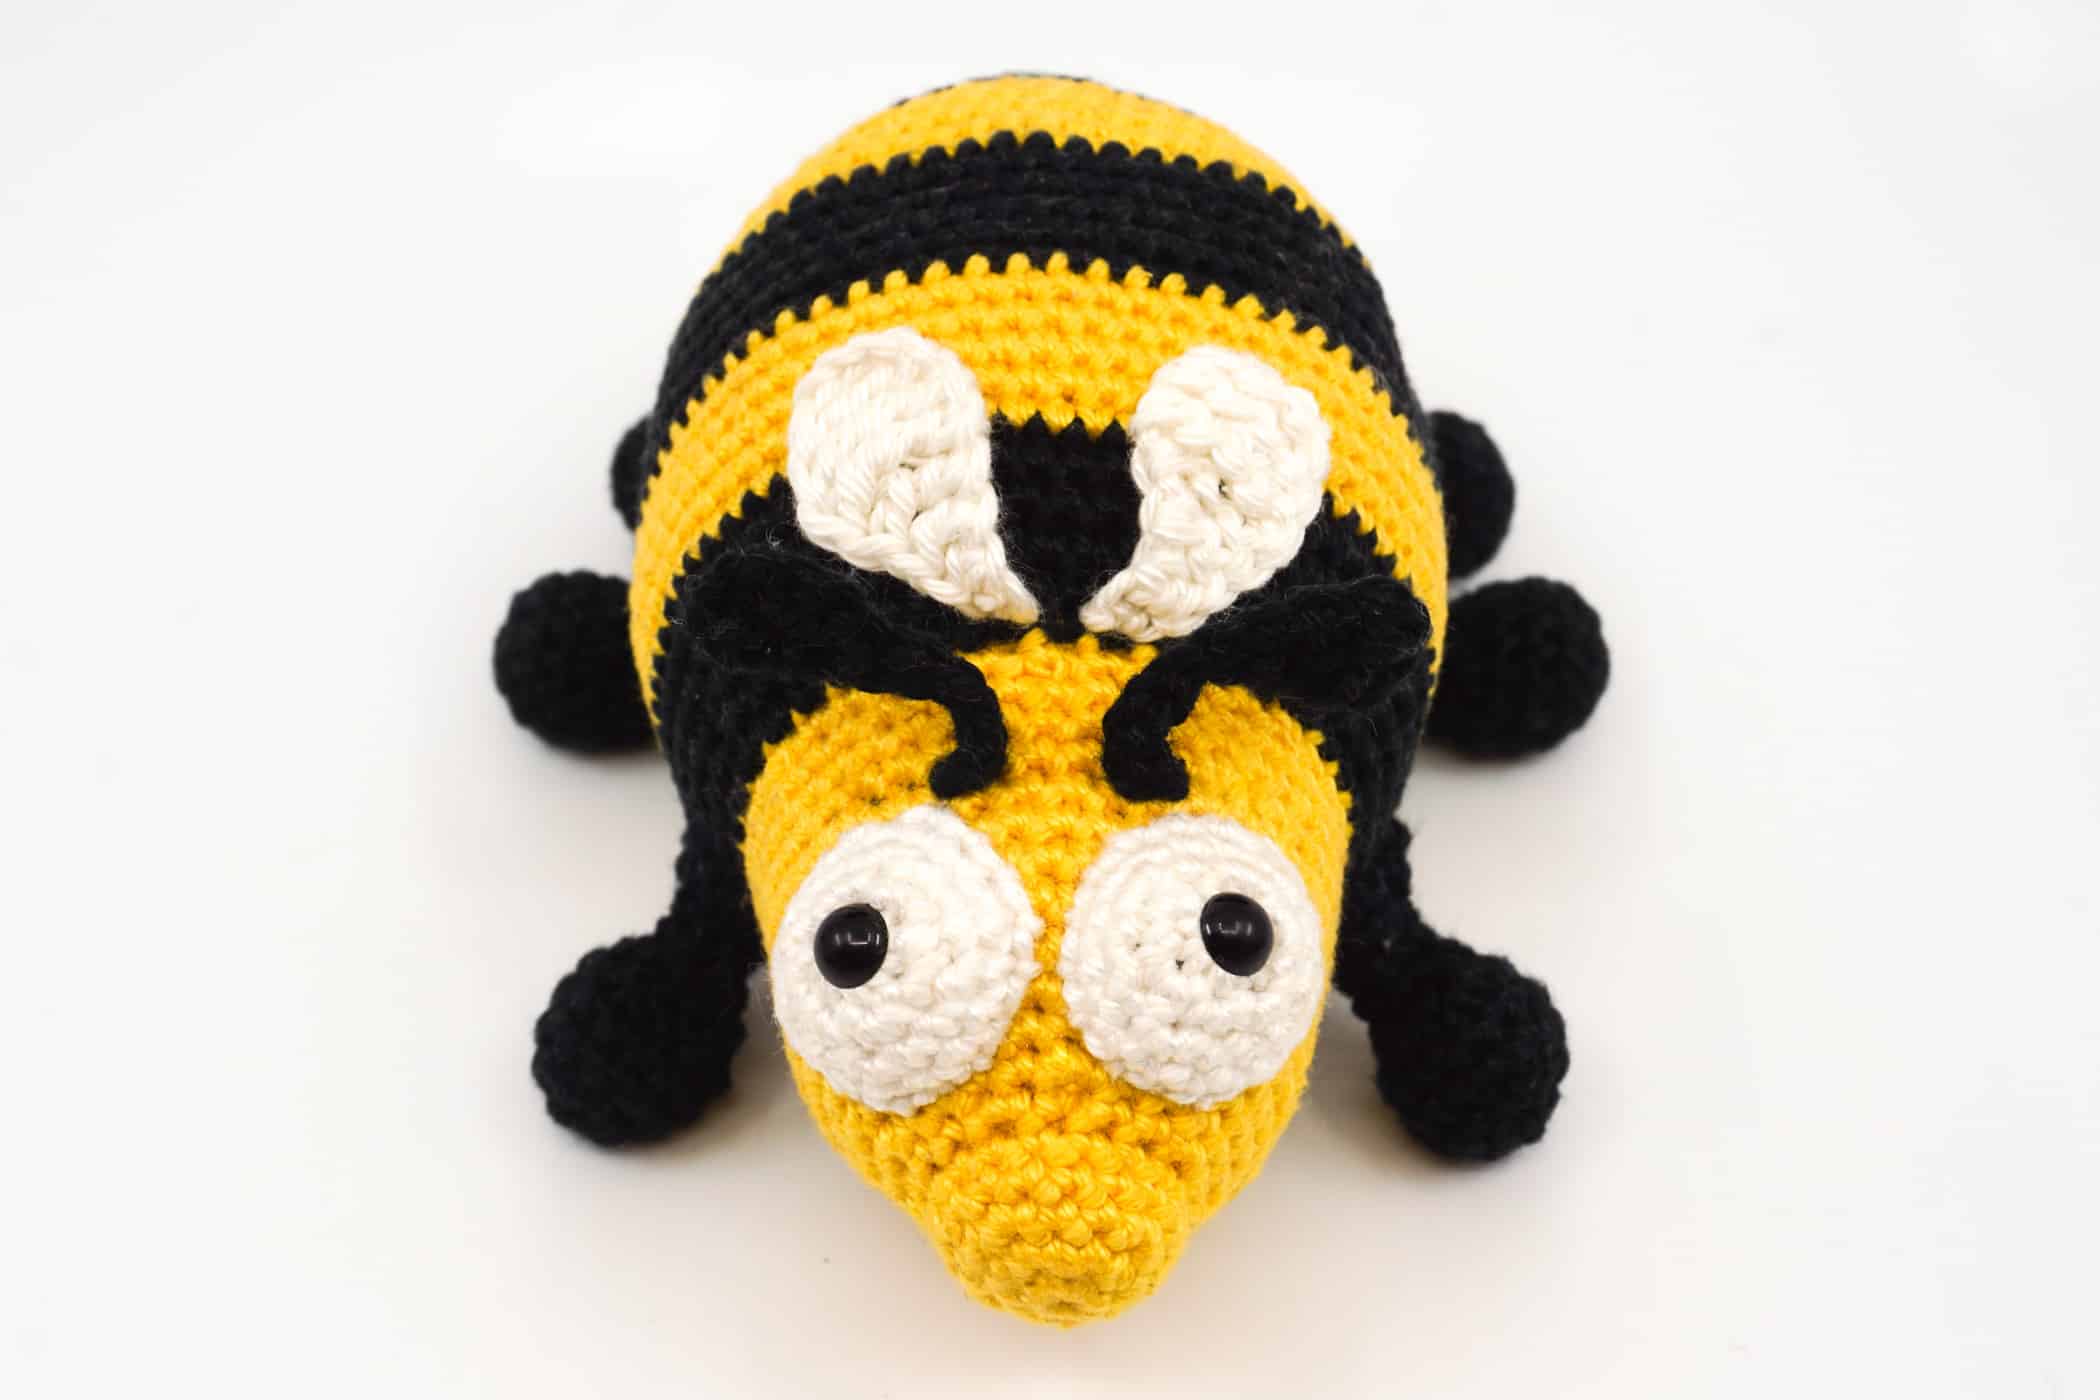
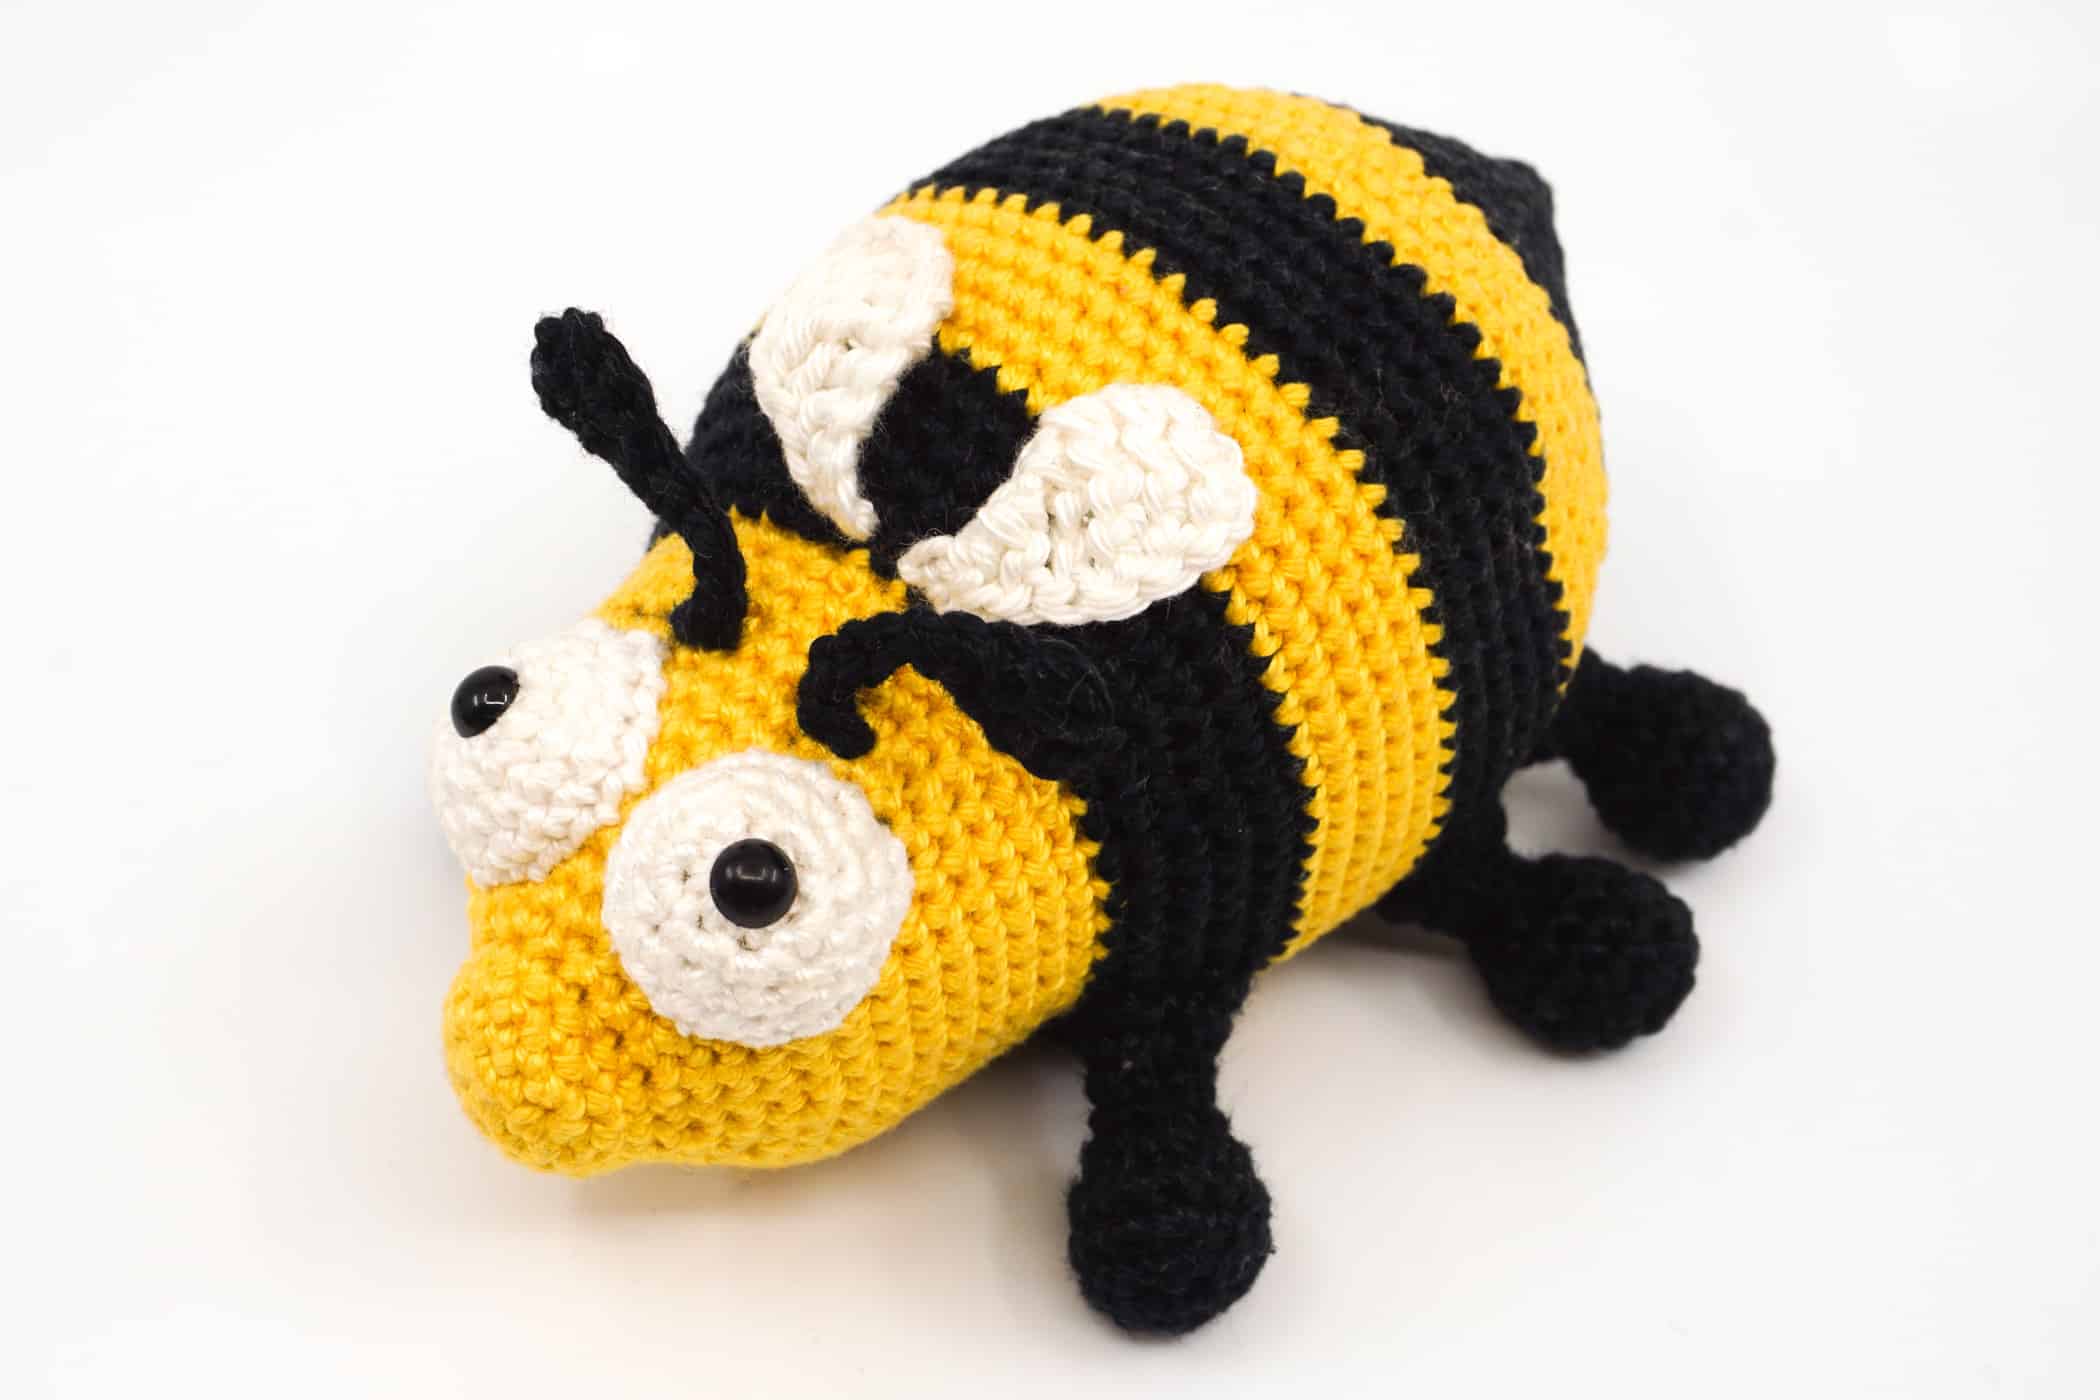
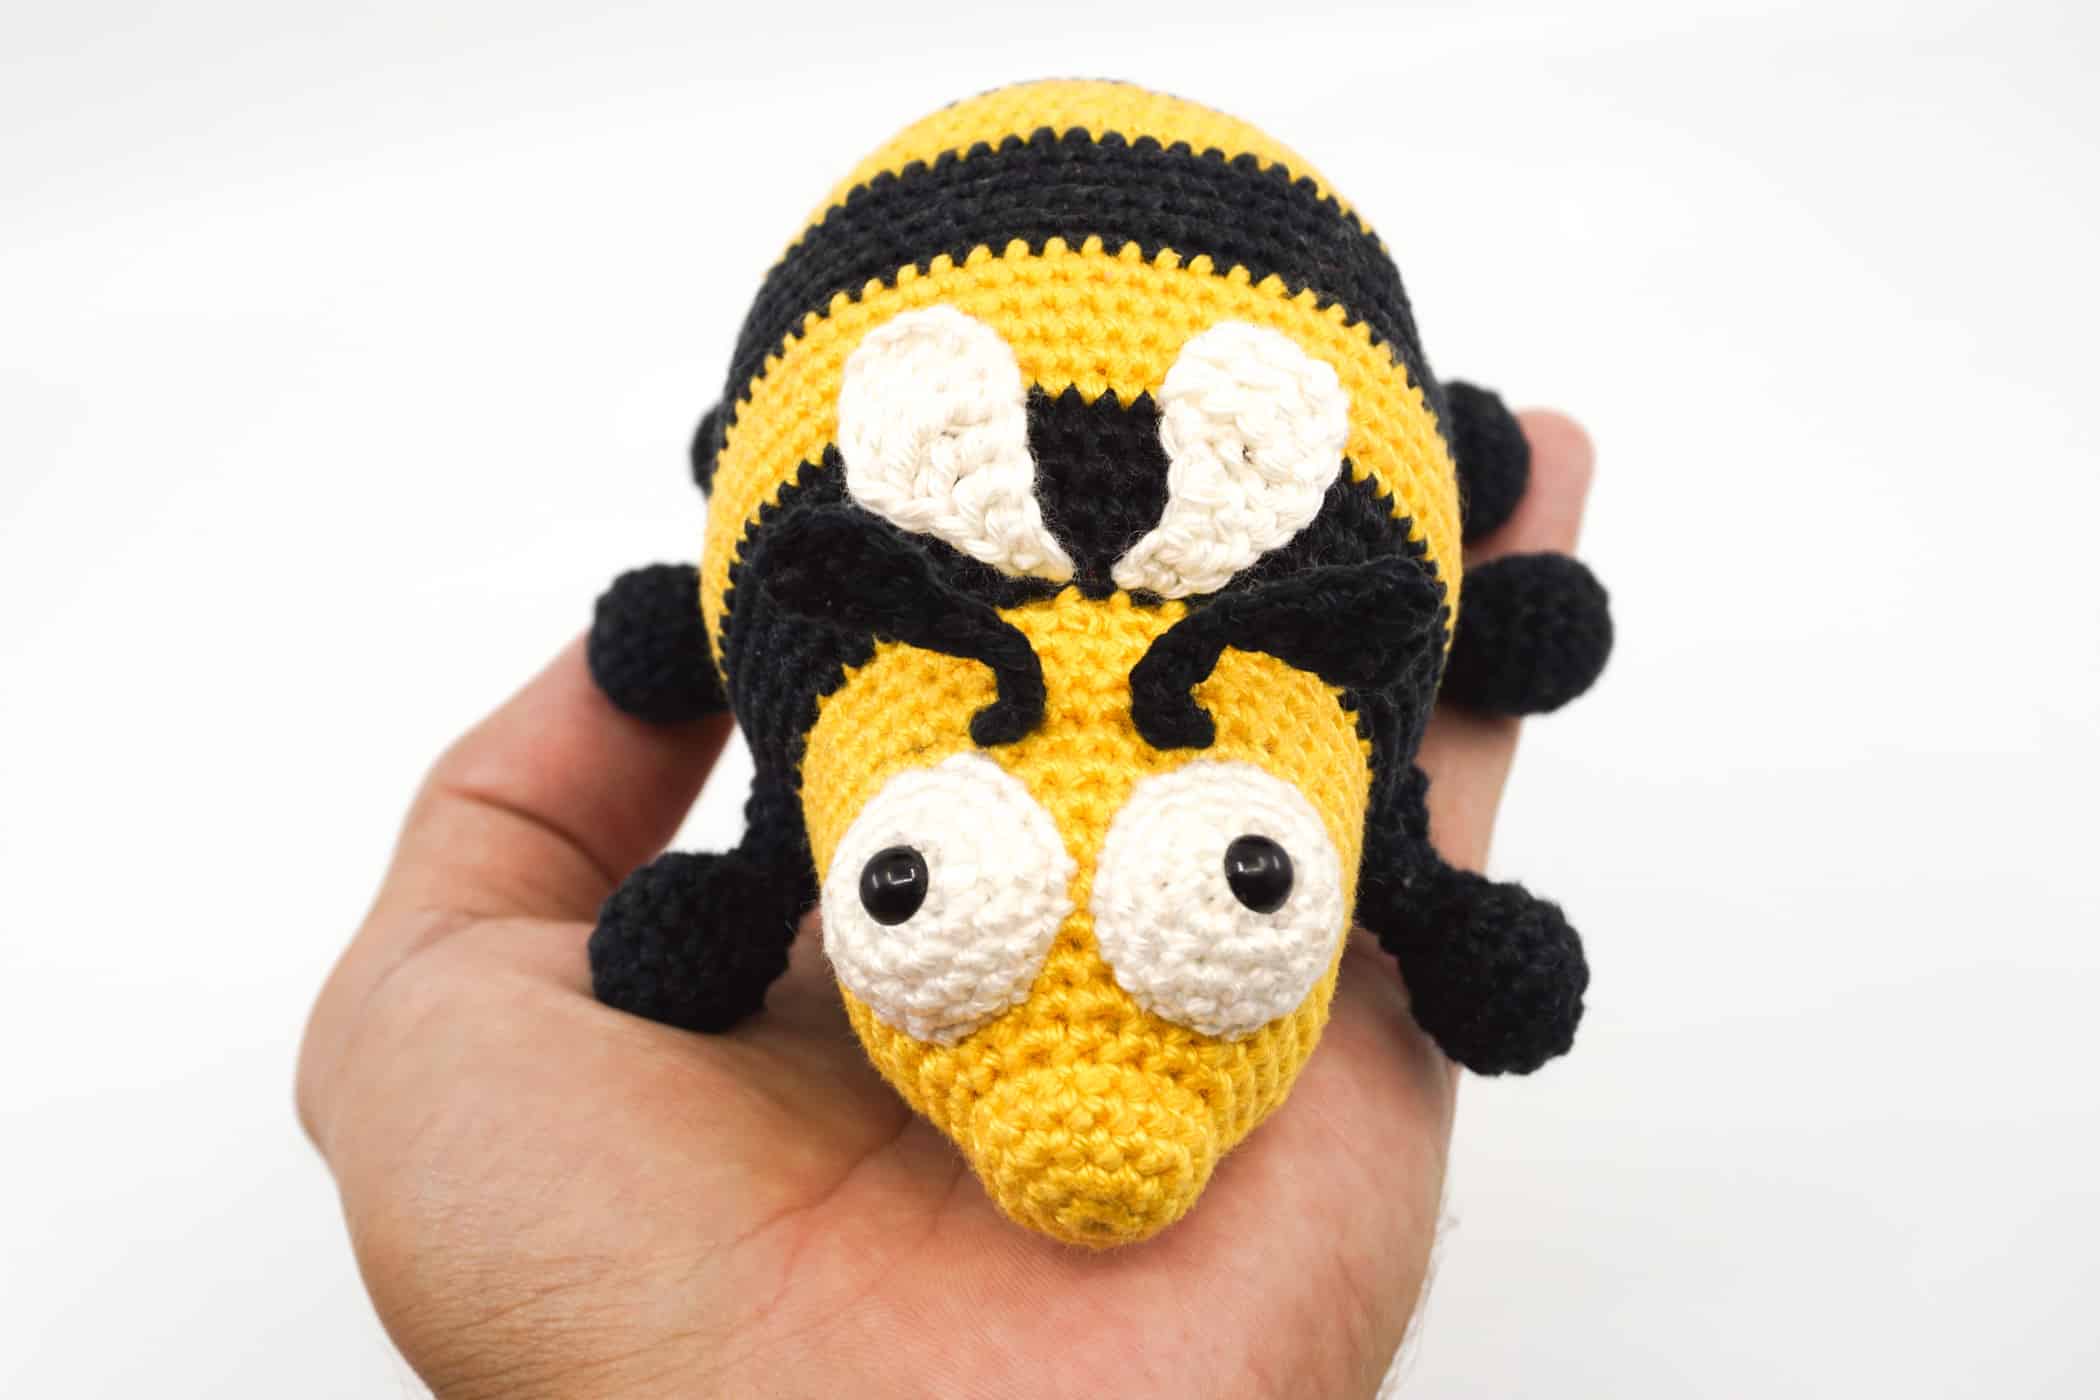
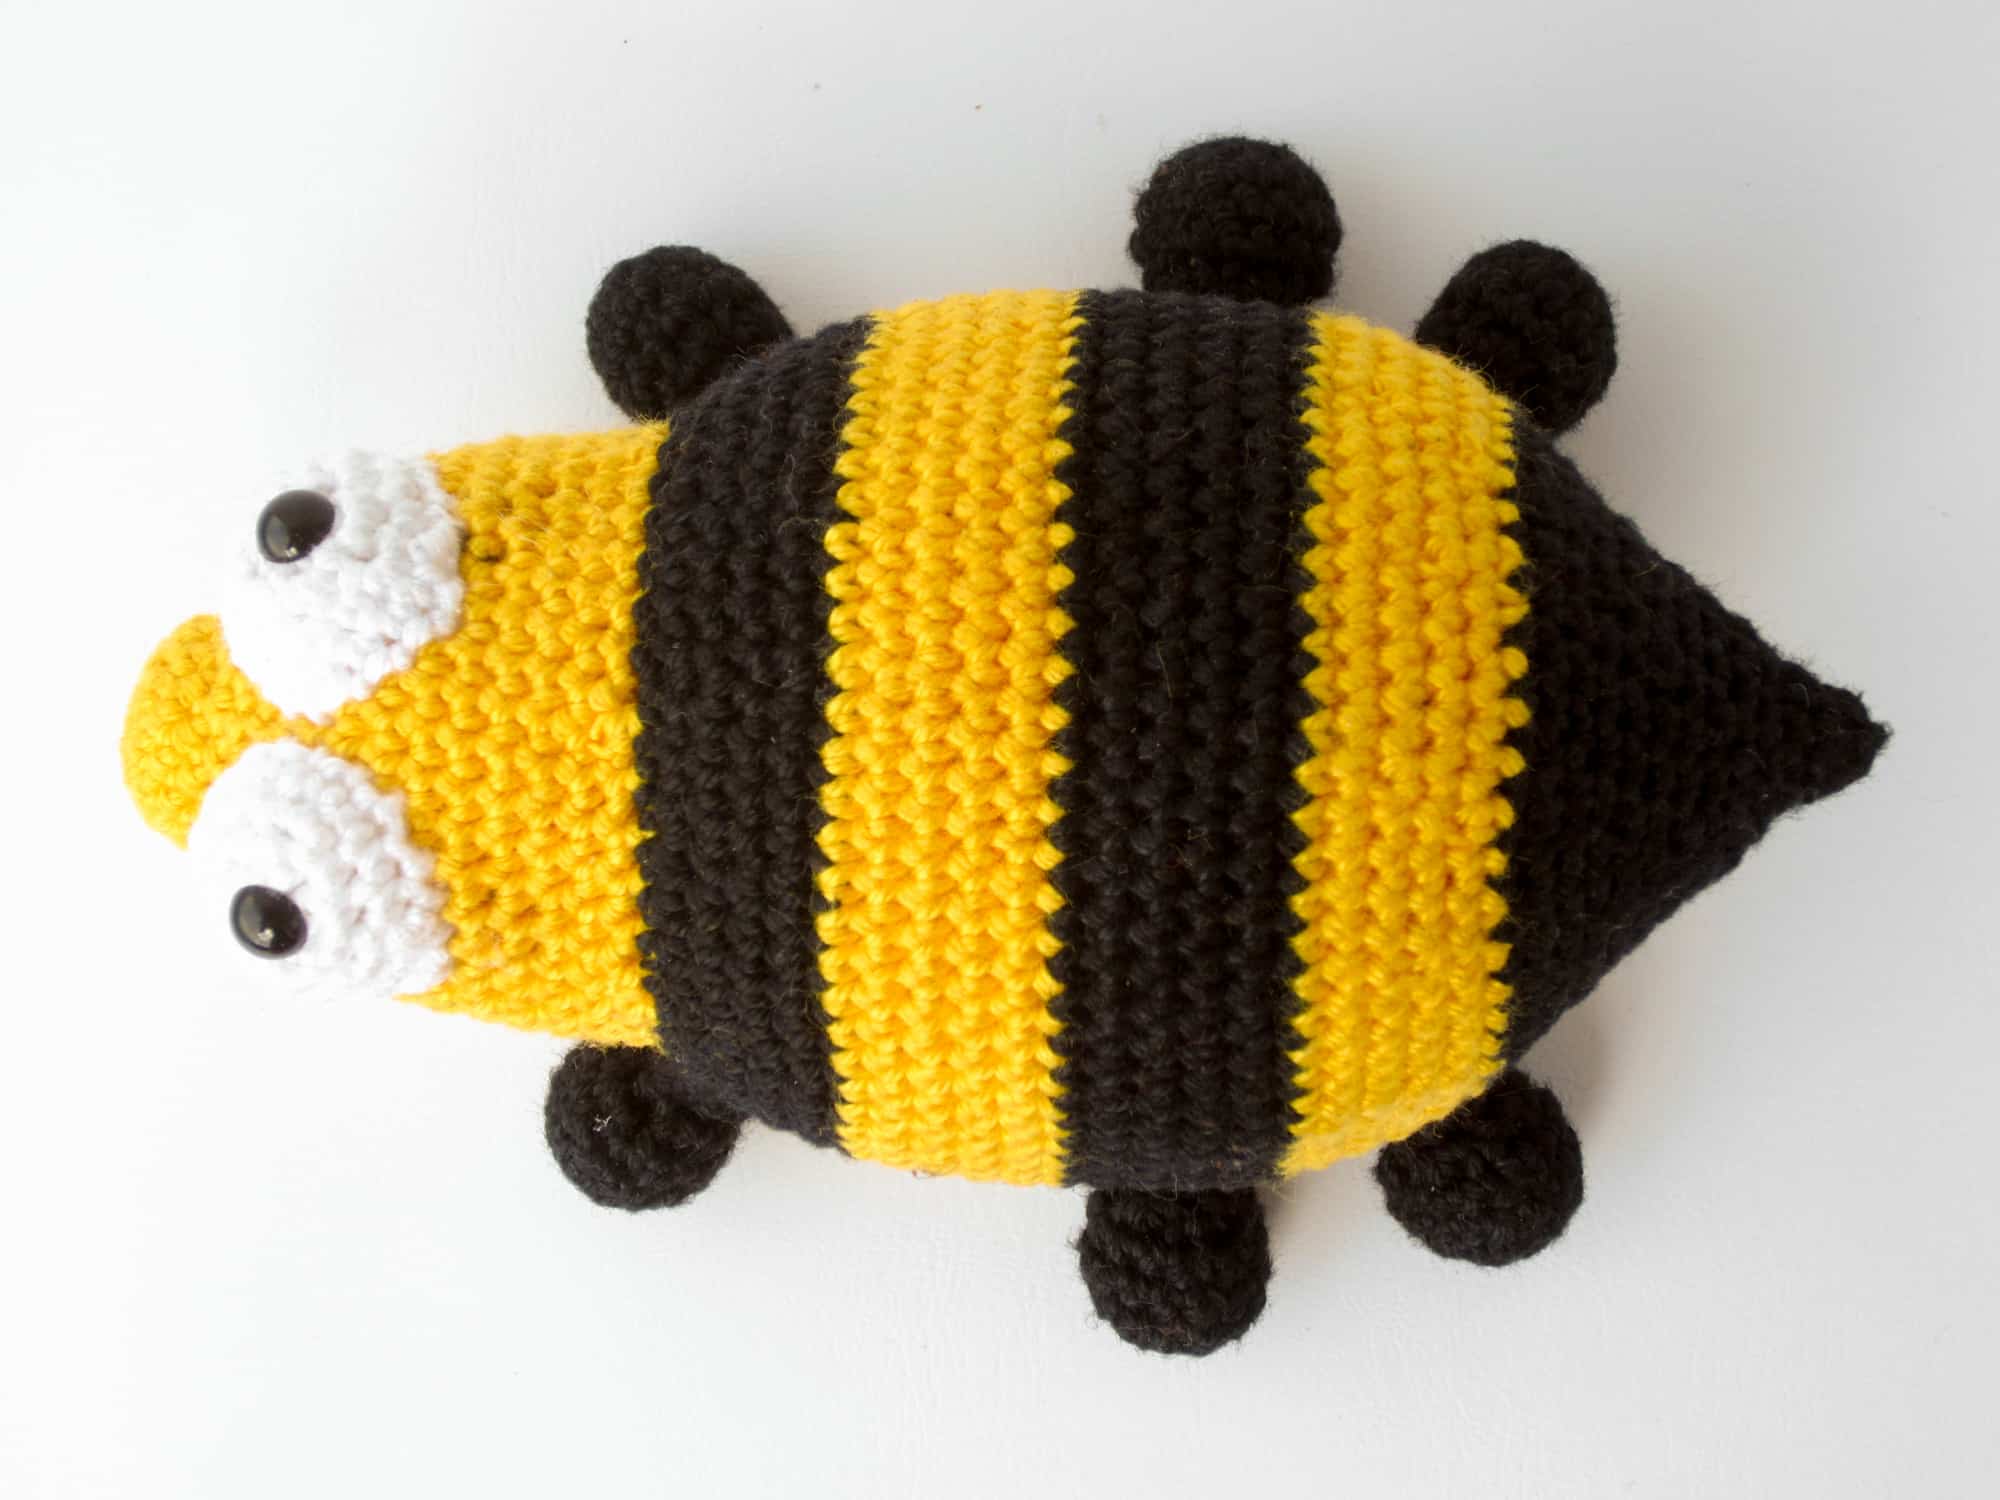
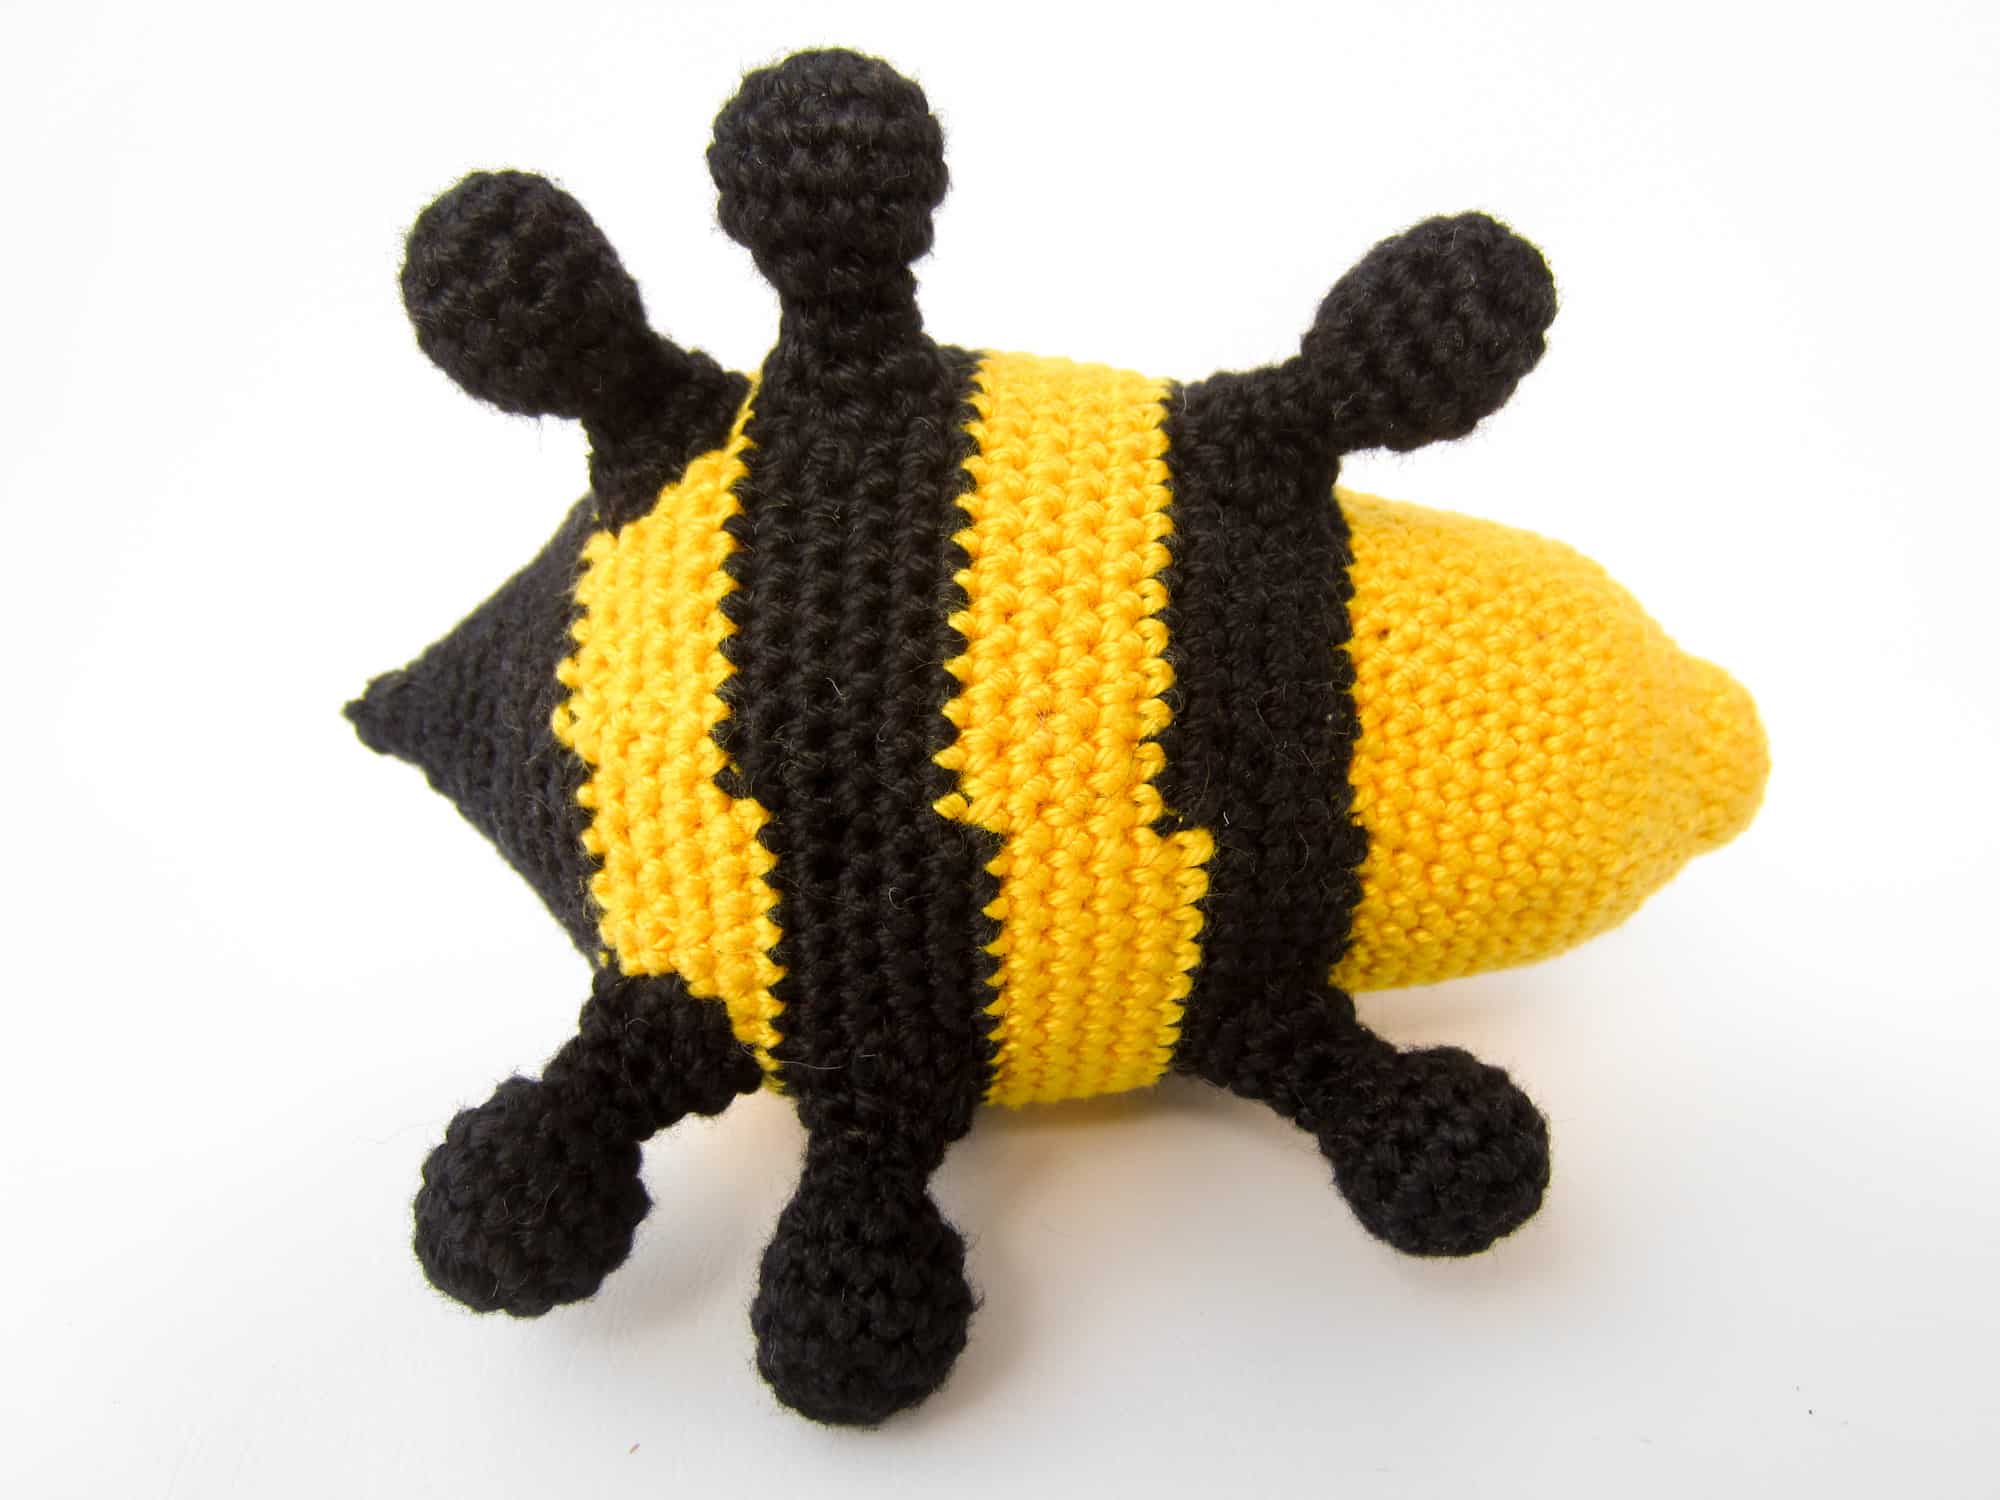
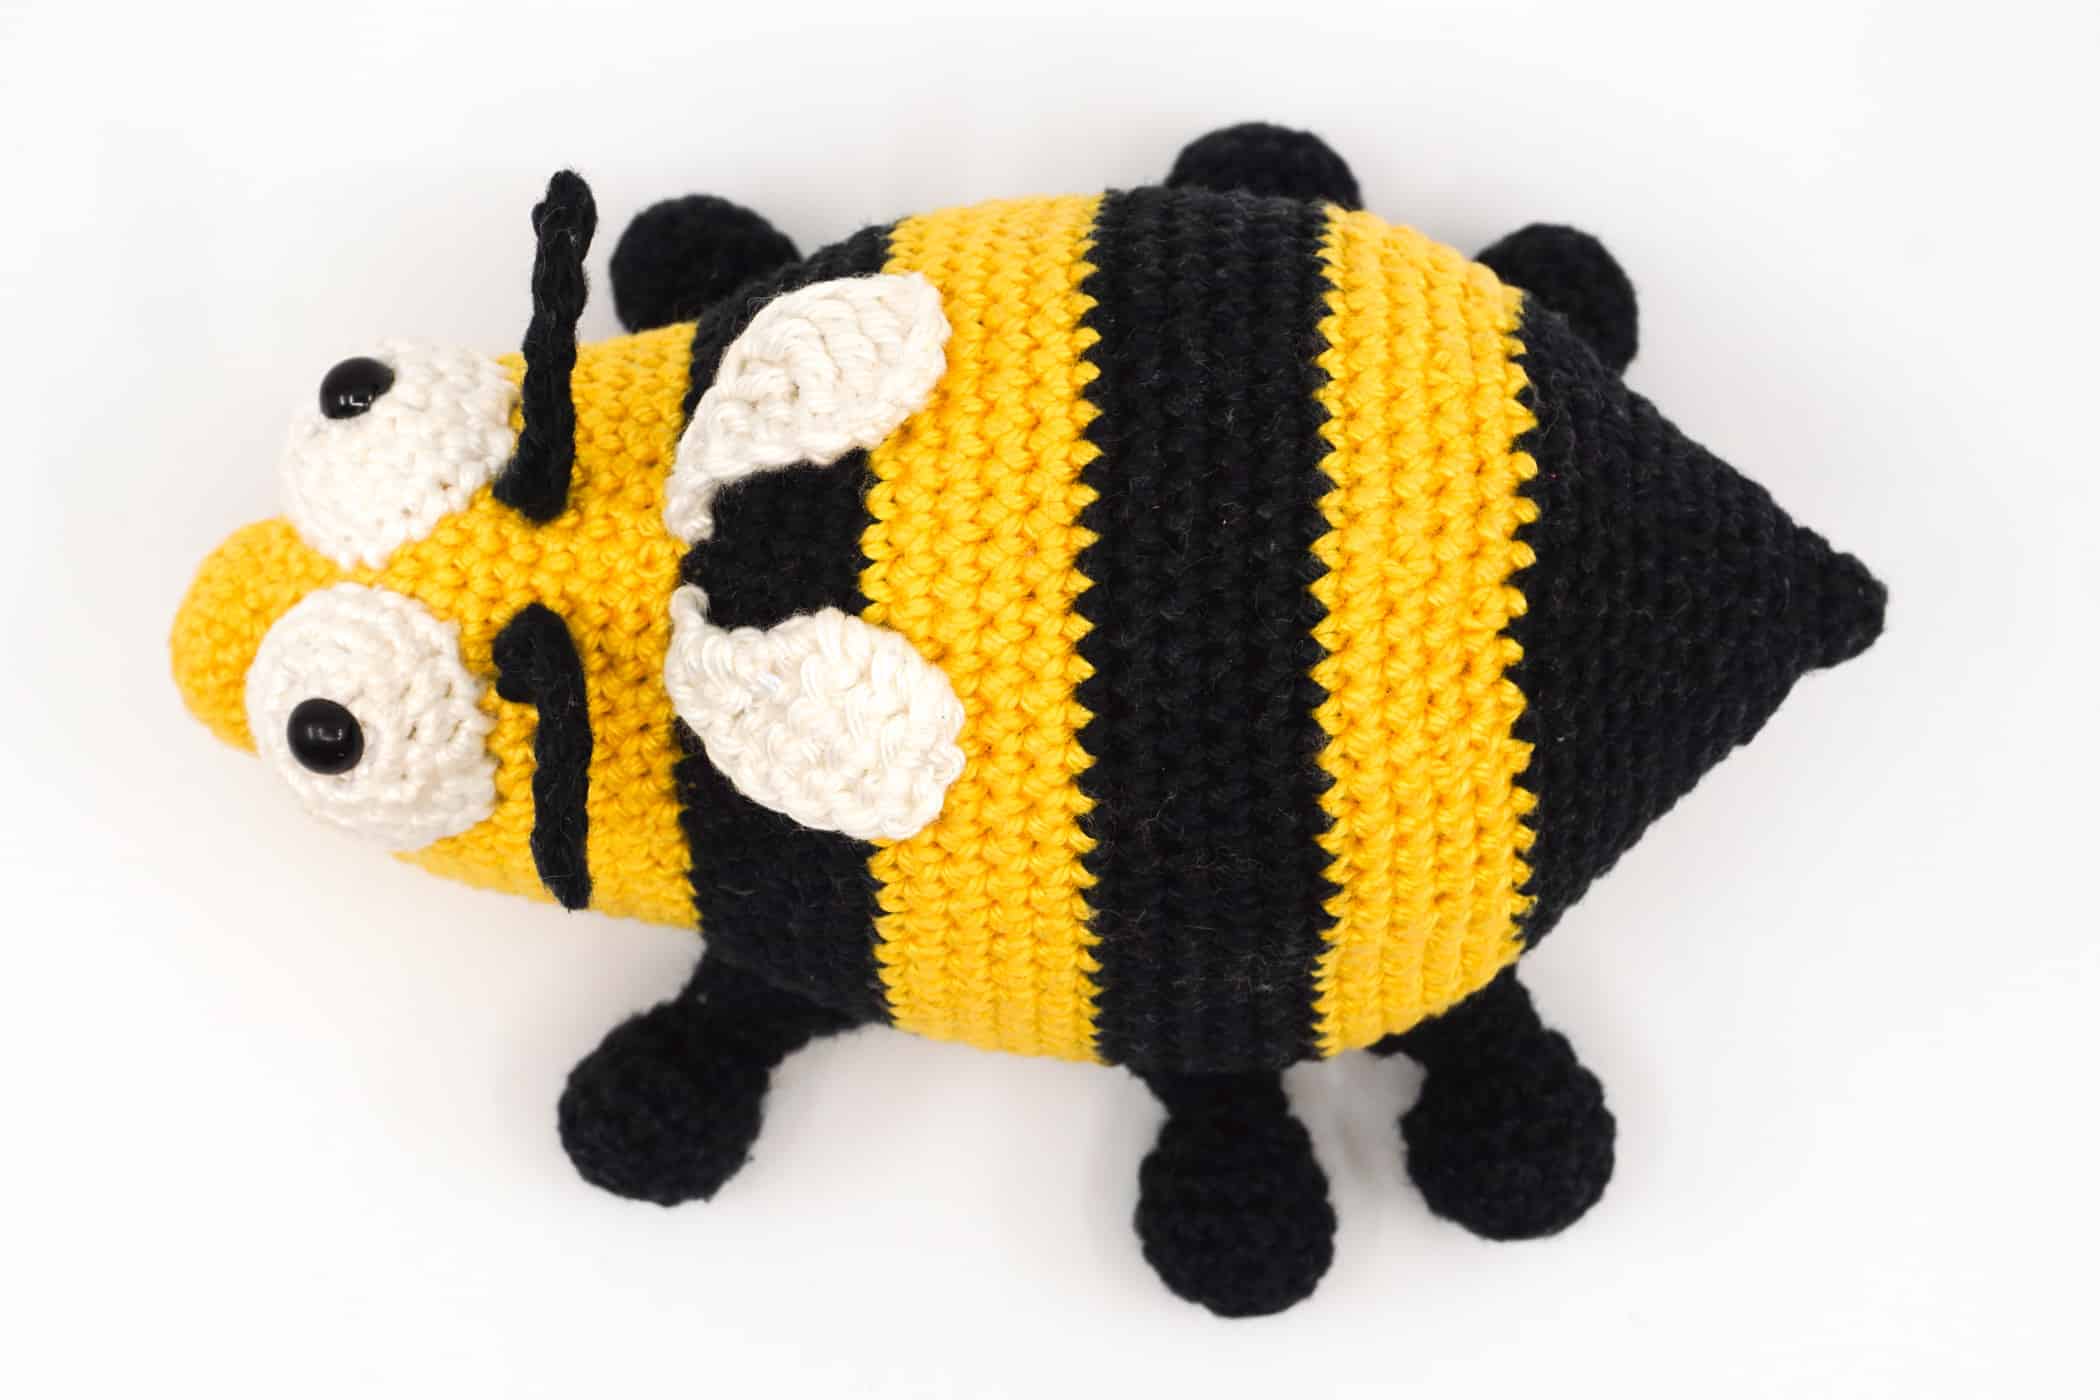
The chubby bee, the best pollen collector and the biggest honey lover in the whole beehive. True to the motto “If you work hard, you can also eat a lot of honey”, the chubby bee collects like no other bee to eventually consume half of this work herself.
And as long as the wings go along with it, it will continue to collect pollen and devour the honey with pleasure … much to the chagrin of the beekeepers.
This amigurumi bee bee not only serves as a wonderfully cuddly toy, but also wonderfully as a gawking doorstop, aerodynamic projectile to defend your own honey bread or as a paperweight.
This crochet bee is crocheted with chain stitches, slip stitches, single crochet stitches, half double crochet stitches, double crochet stitches, treble crochet stitches and double treble crochet stitches in spiral rounds and in rows and is easy to crochet.
The depicted amigurumi bee has been crocheted with the “Schachenmayr Catania” yarn with a 2.5 mm crochet hook and has a length of 15 cm and a height of 8 cm.
Free Chubby Bee Crochet Pattern
ATTENTION: The pattern, in whole or in parts, may not be published, resold, translated, changed or exchanged in any way whatsoever!
Needed Techniques
- Slip Knot
- Magic Ring
- Chain Stitch
- Slip Stitch
- Single Crochet (sc)
- Half Double Crochet
- Double Crochet
- Treble Crochet
- Double Treble Crochet
- Increase
- Decrease
- Crochet into Front and Back Loop
- Color Change
- Close Openings
- Sewing
Needed Materials and Tools
To order the materials click on the respective link (affiliate link).
- Colors: black, white, yellow
- This pattern was crocheted using the “Schachenmayr Catania” yarn (100% Cotton, Meterage: 125 m, Yarn Ball Weight: 50 g, Yarn Weight: Sport – 5ply / Fine (2)) in the following colors:
- Black (Schwarz (110)), White (Weiß (106)), Dandelion (Löwenzahn (280)), Nature (Natur (105))
- 2.5 mm Crochet Hook
- 6 mm Safety Eyes
- Polyfill
- Scissors
- Tapestry Needle
- Stitch Marker


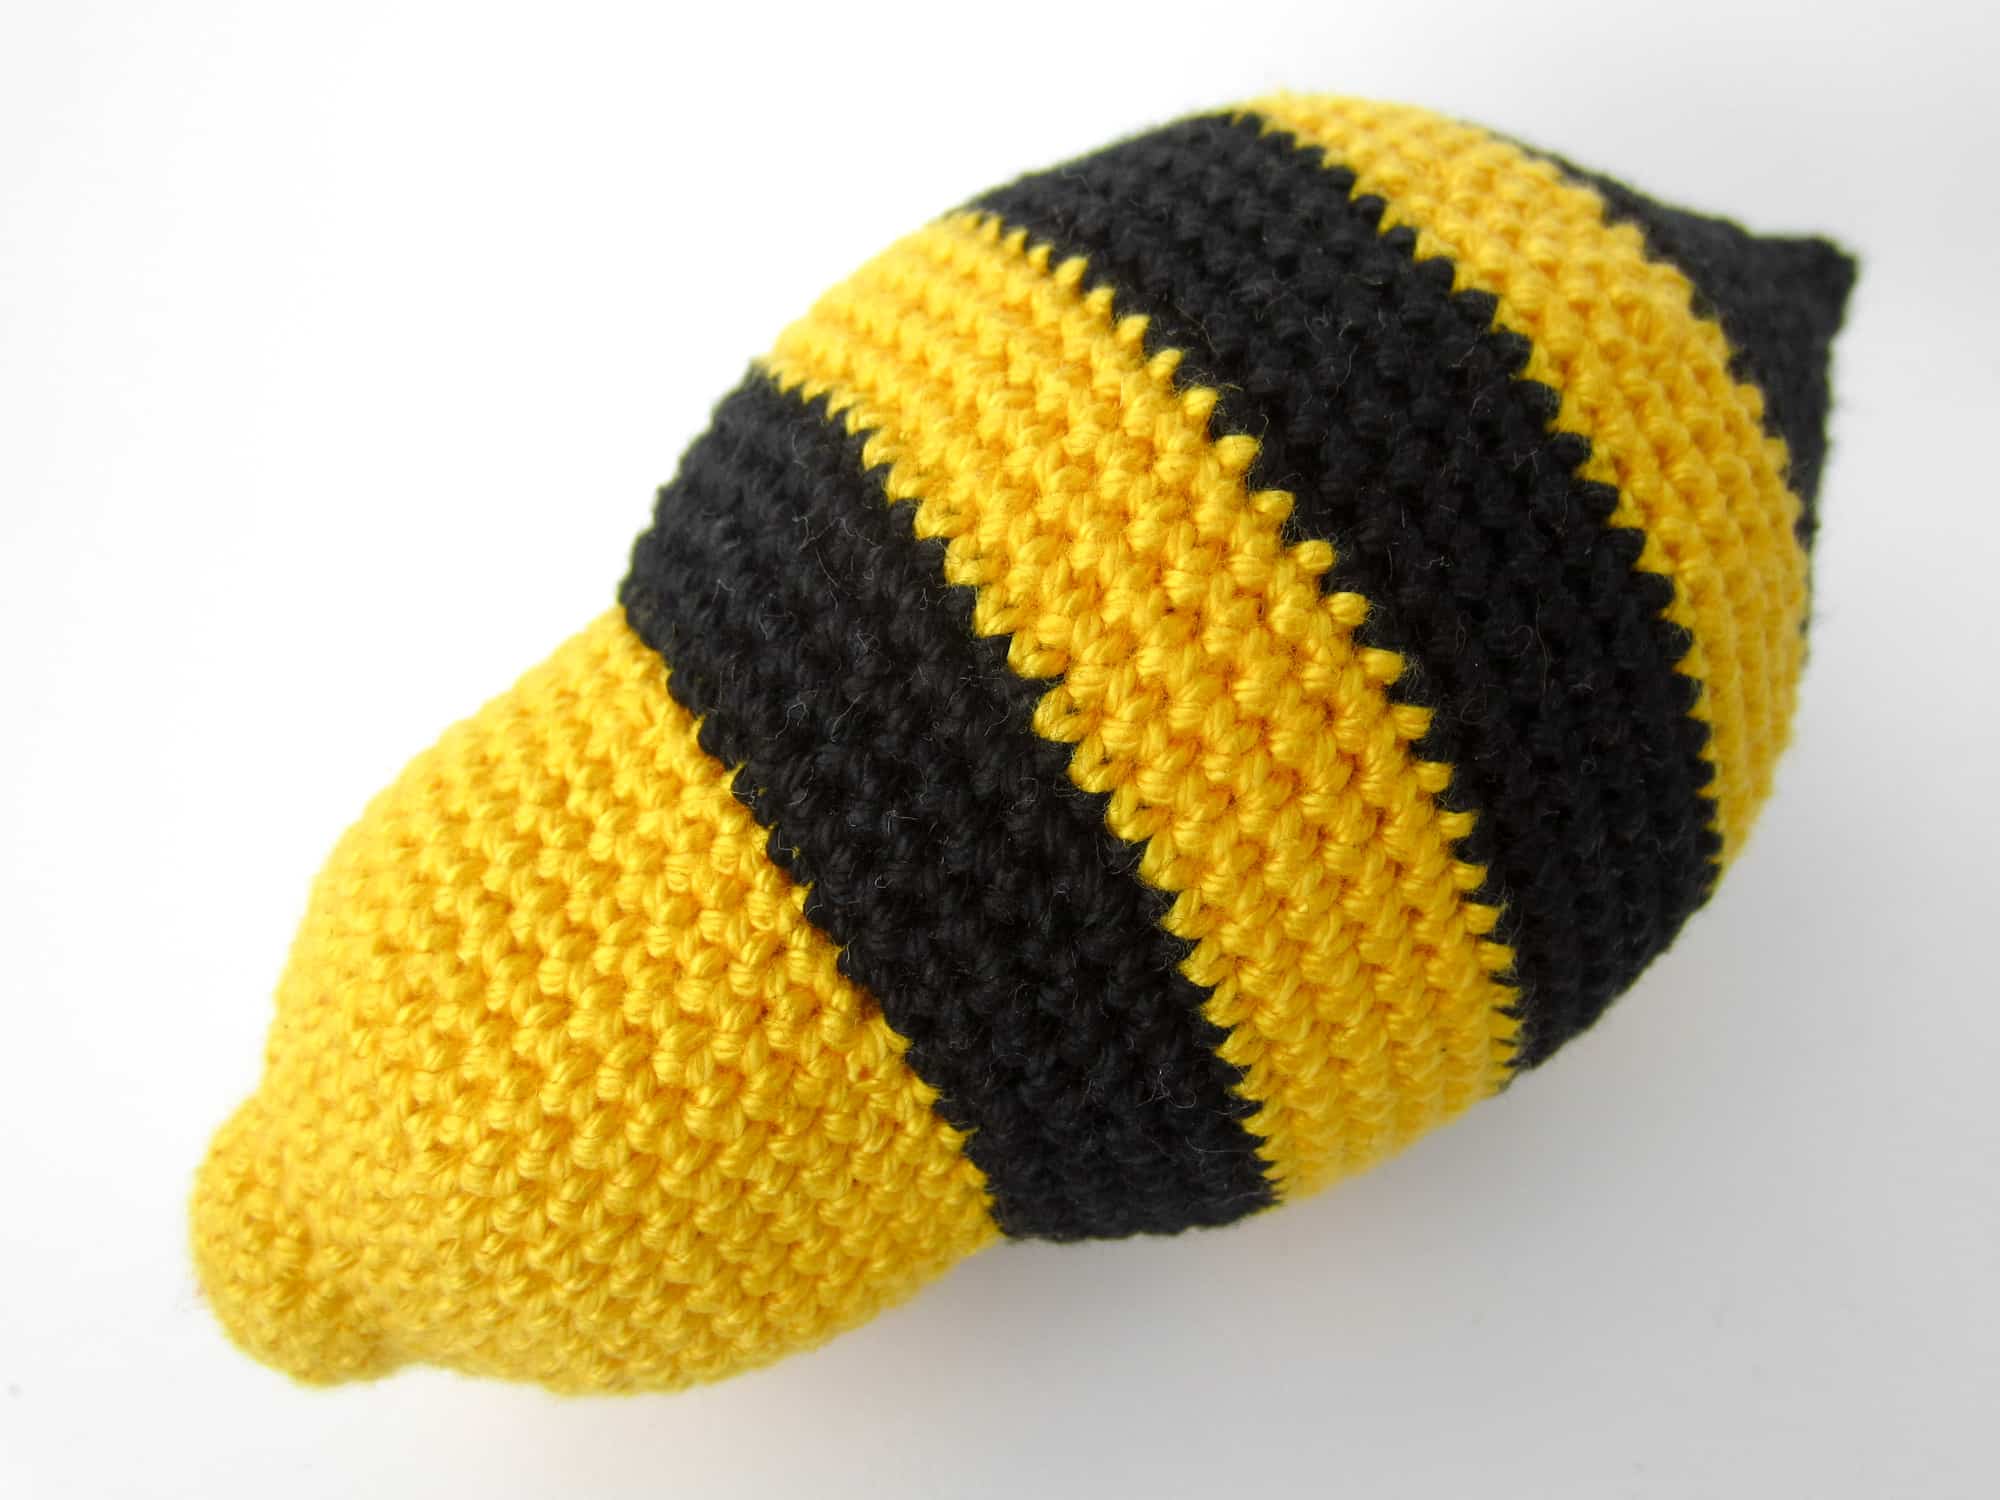
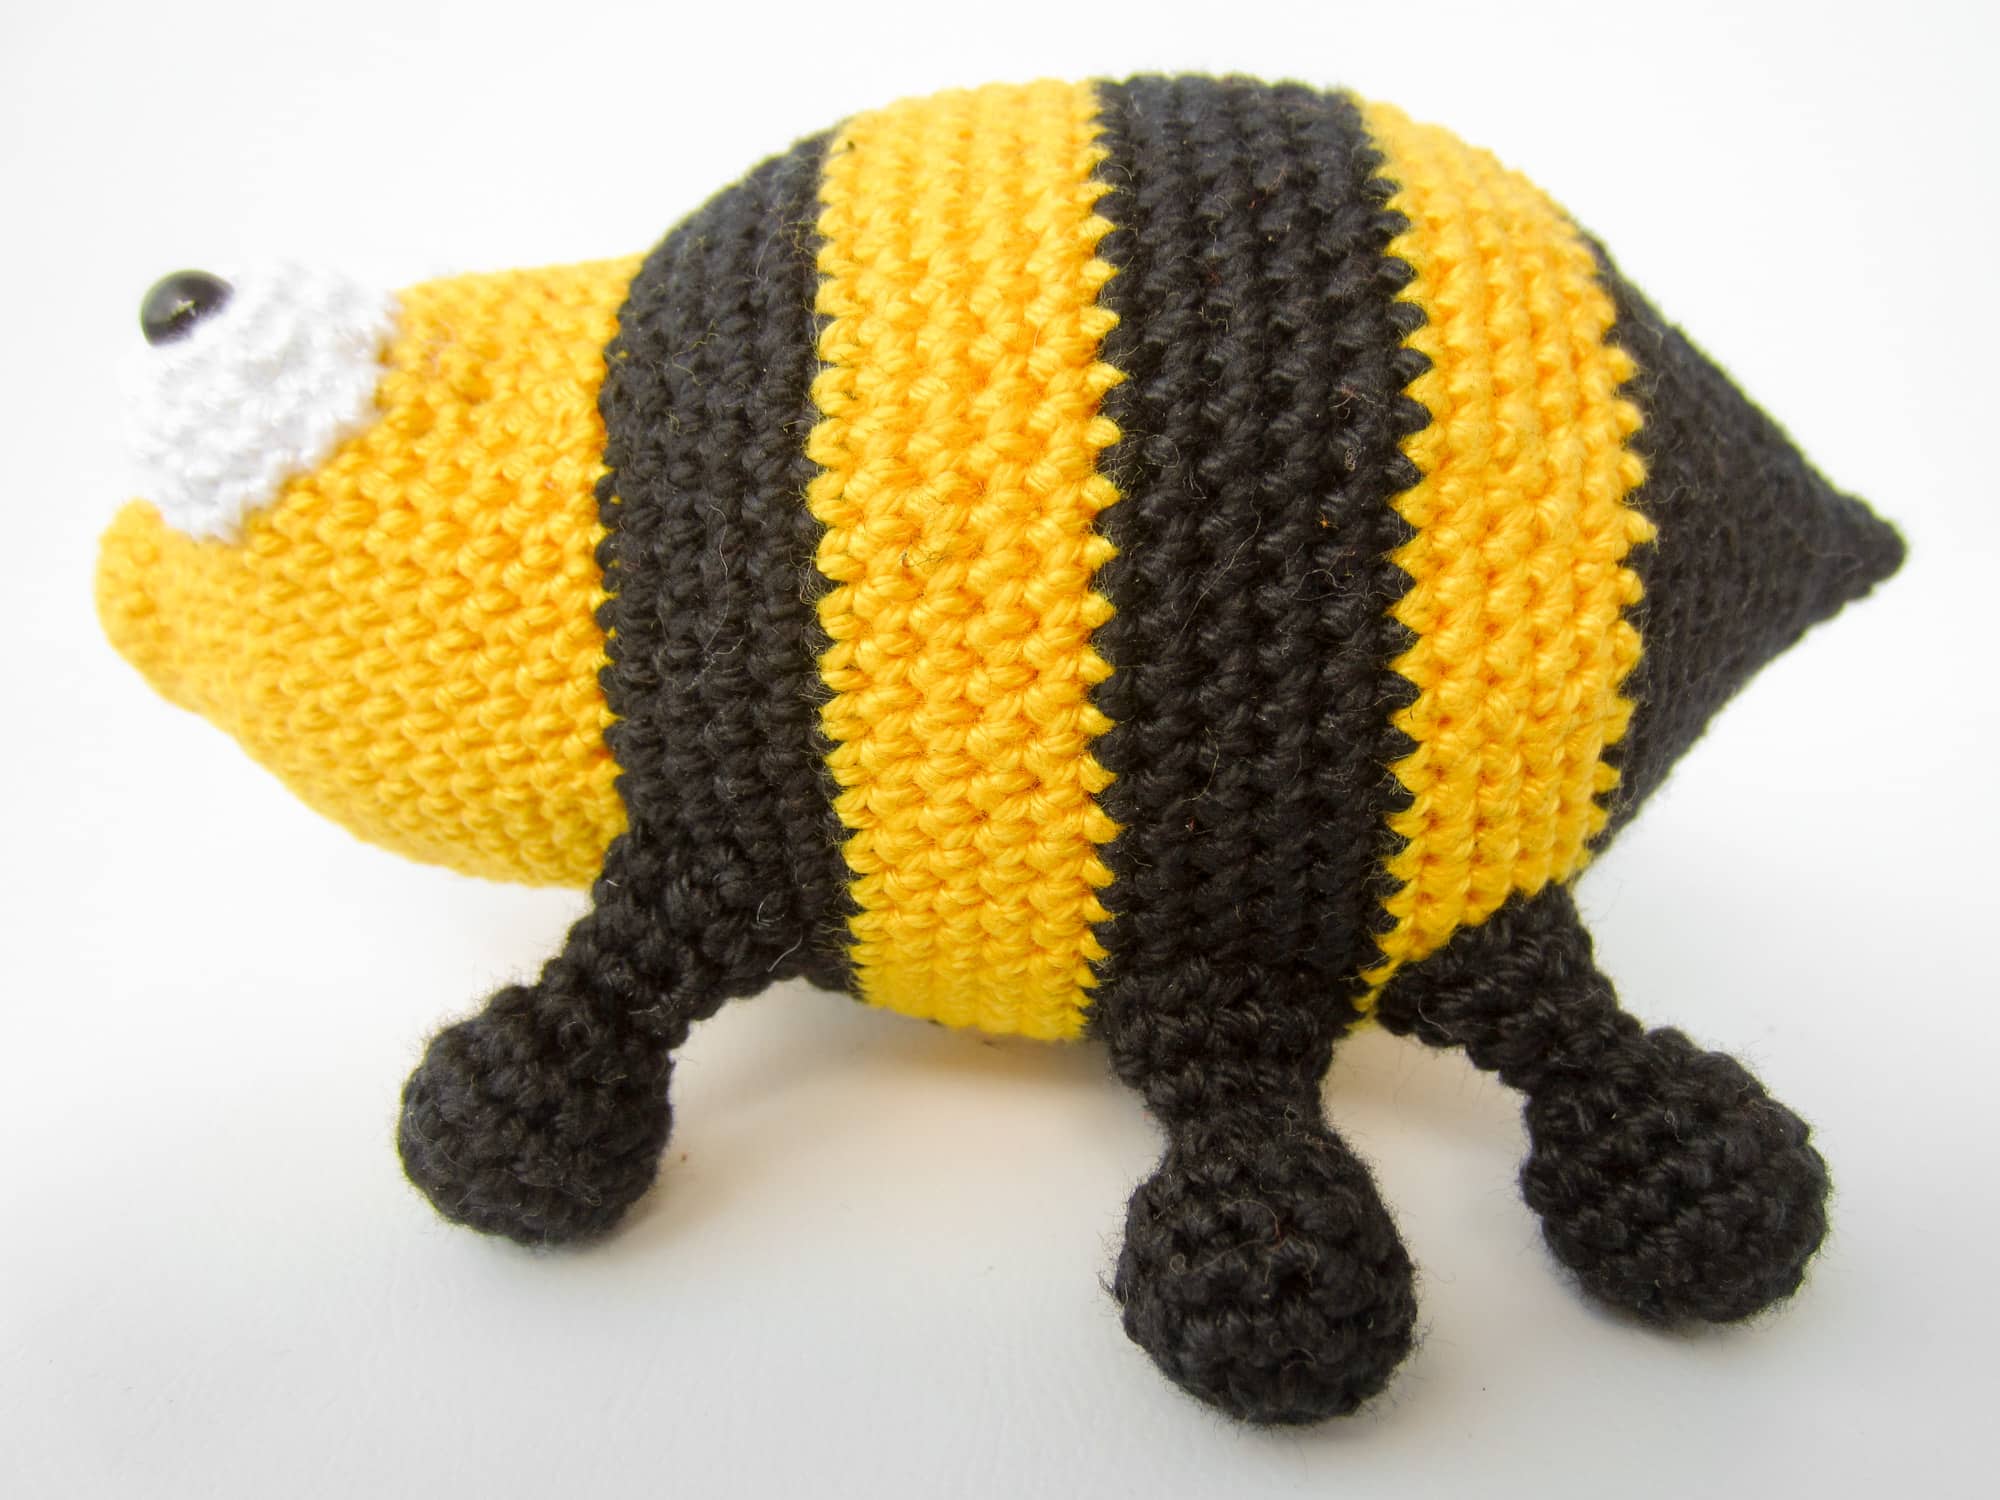
Crochet the Head, Body and Sting
The head and body is crocheted in one piece in Dandelion and Black in spiral rounds with single crochet stitches.

Use the check boxes to mark your finished rounds, rows and steps.
- Crochet the head and body in spiral rounds in Dandelion.
- Round 1: 6 sc into the Magic Ring (6 stitches).
- Round 2: [1 increase] repeat till end of the round (12 stitches).
- Round 3: [2 sc, 1 increase] repeat till end of the round (16 stitches).
- Round 4-5: 2 rounds, each round 16 sc (16 stitches).
- Round 6: Crochet the complete round into the front loop only. [3 sc, 1 increase] repeat till end of the round (20 stitches).
- Round 7: 2 sc, 1 increase, [4 sc, 1 increase] repeat 3 times, 2 sc (24 stitches).
- Round 8: [3 sc, 1 increase] repeat till end of the round (30 stitches).
- Round 9: 2 sc, 1 increase, [4 sc, 1 increase] repeat 5 times, 2 sc (36 stitches).
- Round 10: [5 sc, 1 increase] repeat till end of the round (42 stitches).
- Round 11-17: 7 rounds, each round 42 sc (42 stitches).
- Round 18: [5 sc, 1 decrease] repeat till end of the round (36 stitches).
- Round 19: Color change to Black. Crochet the complete round into the front loop only. [5 sc, 1 increase] repeat till end of the round (42 stitches).
- Round 20: 3 sc, 1 increase, [6 sc, 1 increase] repeat 5 times, 3 sc (48 stitches).
- Round 21: [7 sc, 1 increase] repeat till end of the round (54 stitches).
- Round 22: 4 sc, 1 increase, [8 sc, 1 increase] repeat 5 times, 4 sc (60 stitches).
- Round 23: [9 sc, 1 increase] repeat till end of the round (66 stitches).
- Round 24: Crochet only 1 sc.
- Round 25-29: Color change to Dandelion. 5 rounds, each round 66 sc (66 stitches).
- Round 30: Crochet only 1 sc.

- Round 31-35: Color change to Black. 5 rounds, each round 66 sc (66 stitches).
- Round 36: Crochet only 1 sc.
- Round 37-38: Color change to Dandelion. 2 rounds, each round 66 sc (66 stitches).
- Round 39: Crochet only 1 sc.
- Round 40: [9 sc, 1 decrease] repeat till end of the round (60 stitches).
- Round 41: 4 sc, 1 decrease, [8 sc, 1 decrease] repeat 5 times, 4 sc (54 stitches).
- Round 42: [7 sc, 1 decrease] repeat till end of the round (48 stitches).
- Round 43: Crochet only 1 sc.
- Round 44: Color change to Black. 3 sc, 1 decrease, [6 sc, 1 decrease] repeat 5 times, 3 sc (42 stitches).
- Round 45: Fill the head and body with polyfill. [5 sc, 1 decrease] repeat till end of the round (36 stitches).
- Round 46: 5 sc, 1 decrease, [10 sc, 1 decrease] repeat 2 times, 5 sc (33 stitches).
- Round 47: [9 sc, 1 decrease] repeat till end of the round (30 stitches).
- Round 48: 4 sc, 1 decrease, [8 sc, 1 decrease] repeat 2 times, 4 sc (27 stitches).
- Round 49: [7 sc, 1 decrease] repeat till end of the round (24 stitches).
- Round 50: 3 sc, 1 decrease, [6 sc, 1 decrease] repeat 2 times, 3 sc (21 stitches).
- Round 51: [5 sc, 1 decrease] repeat till end of the round (18 stitches).
- Round 52: 2 sc, 1 decrease, [4 sc, 1 decrease] repeat 2 times, 2 sc (15 stitches).
- Round 53: Fill the unfilled area of the body with polyfill. [3 sc, 1 decrease] repeat till end of the round (12 stitches).
- Round 54: 1 sc, 1 decrease, [2 sc, 1 decrease] repeat 2 times, 1 sc (9 stitches).
- Round 55: [1 sc, 1 decrease] repeat till end of the round (6 stitches).
- Finish: Cut the yarn generously, close the opening and weave in and hide the leftover yarn.
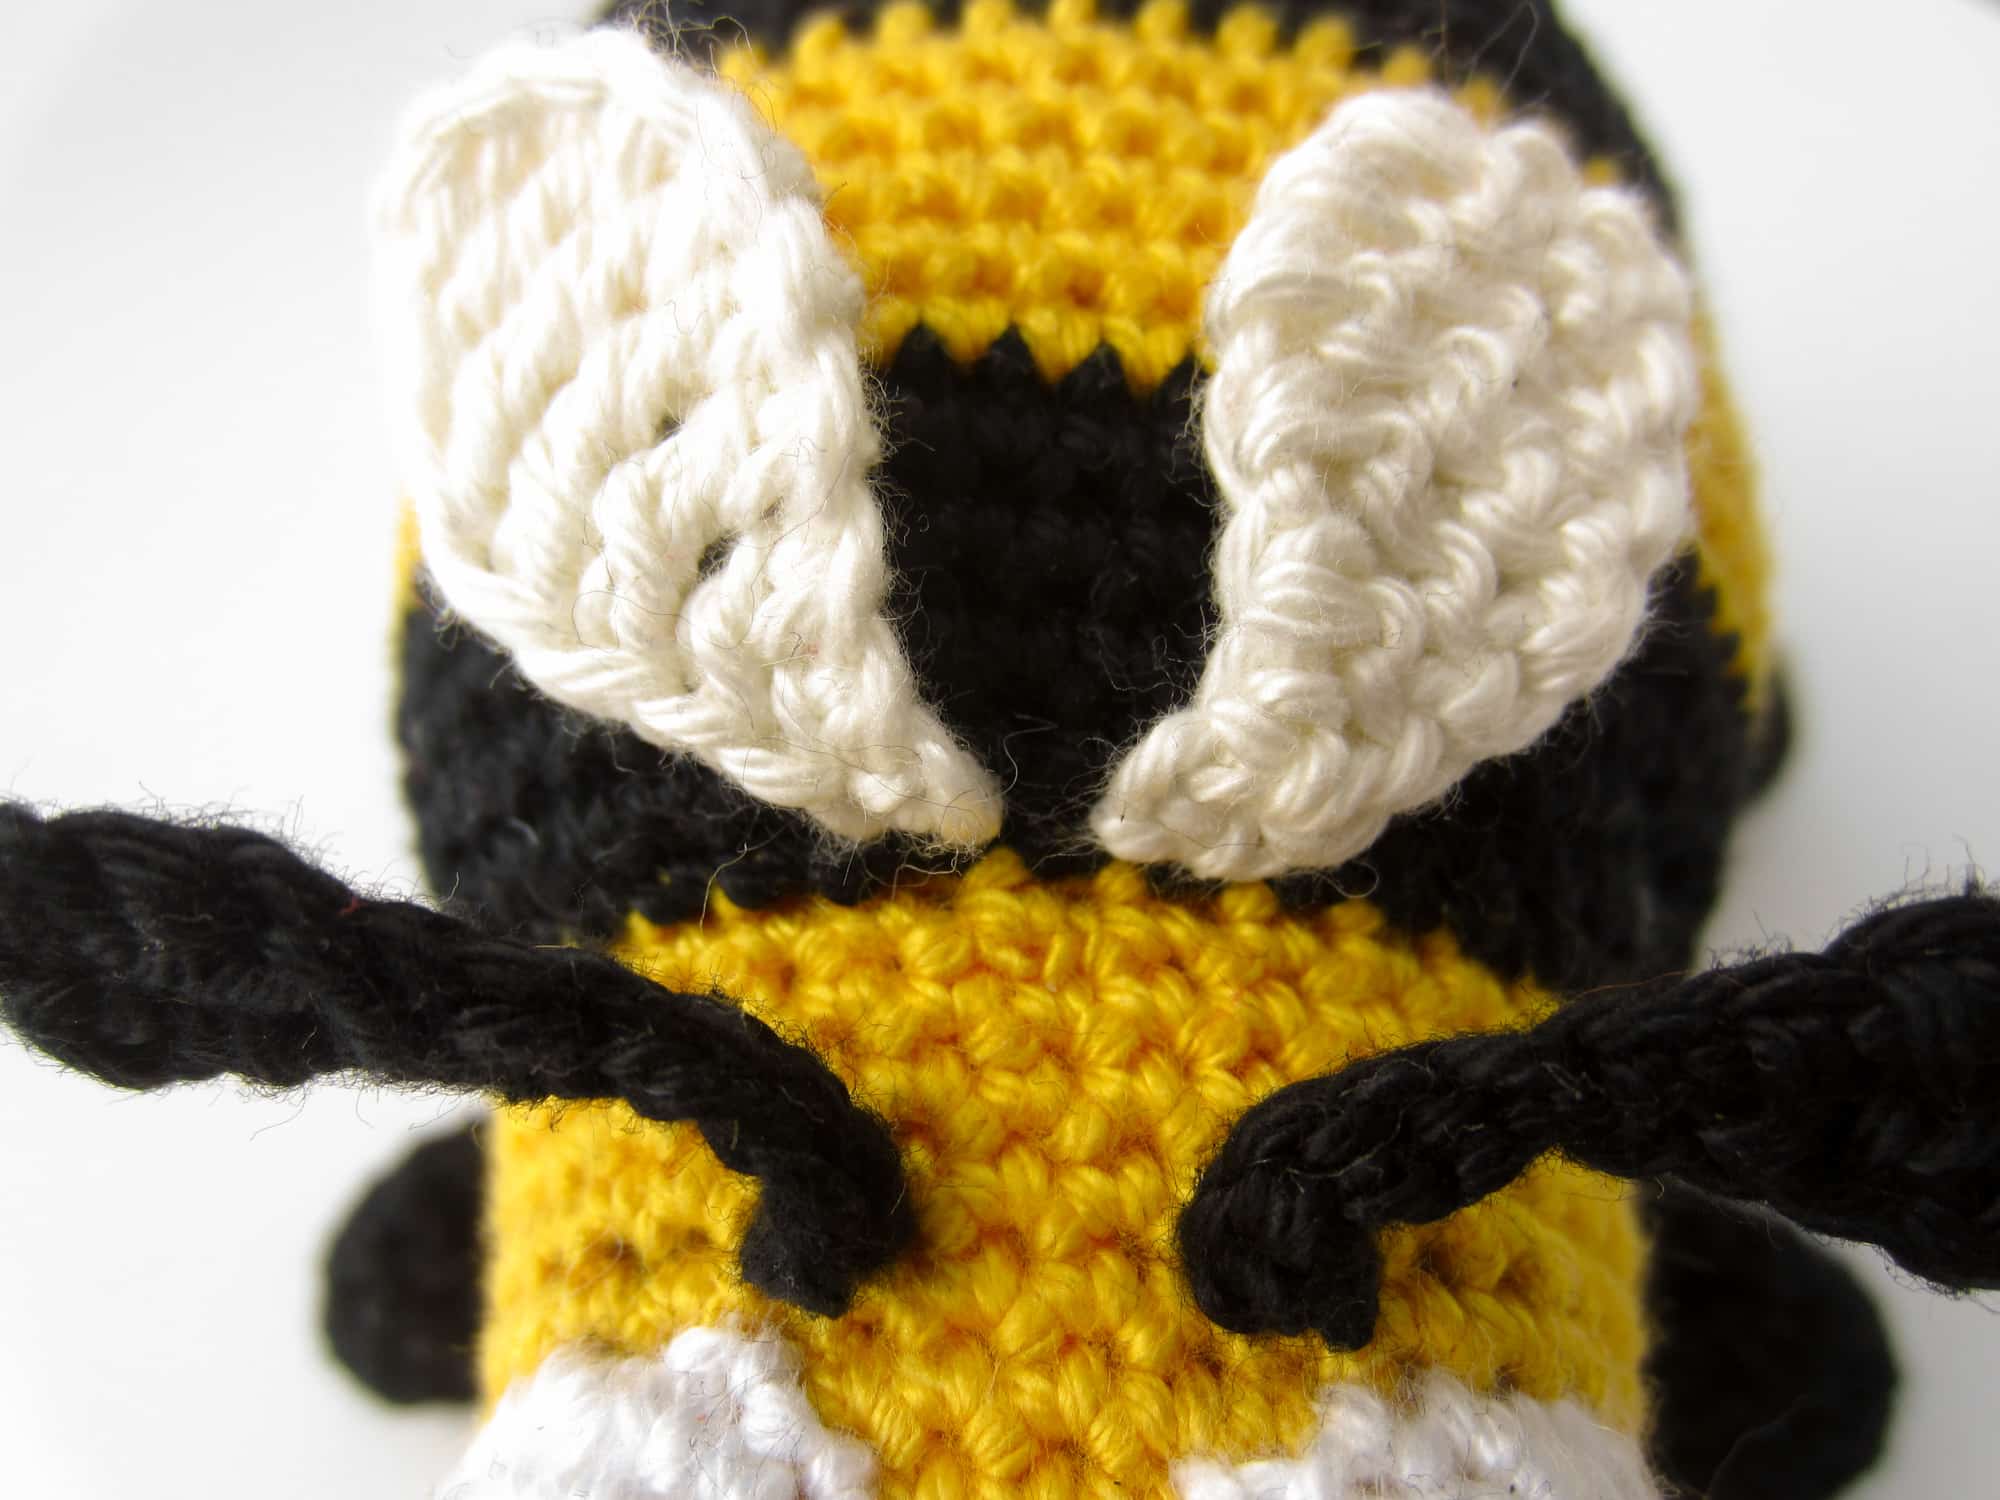
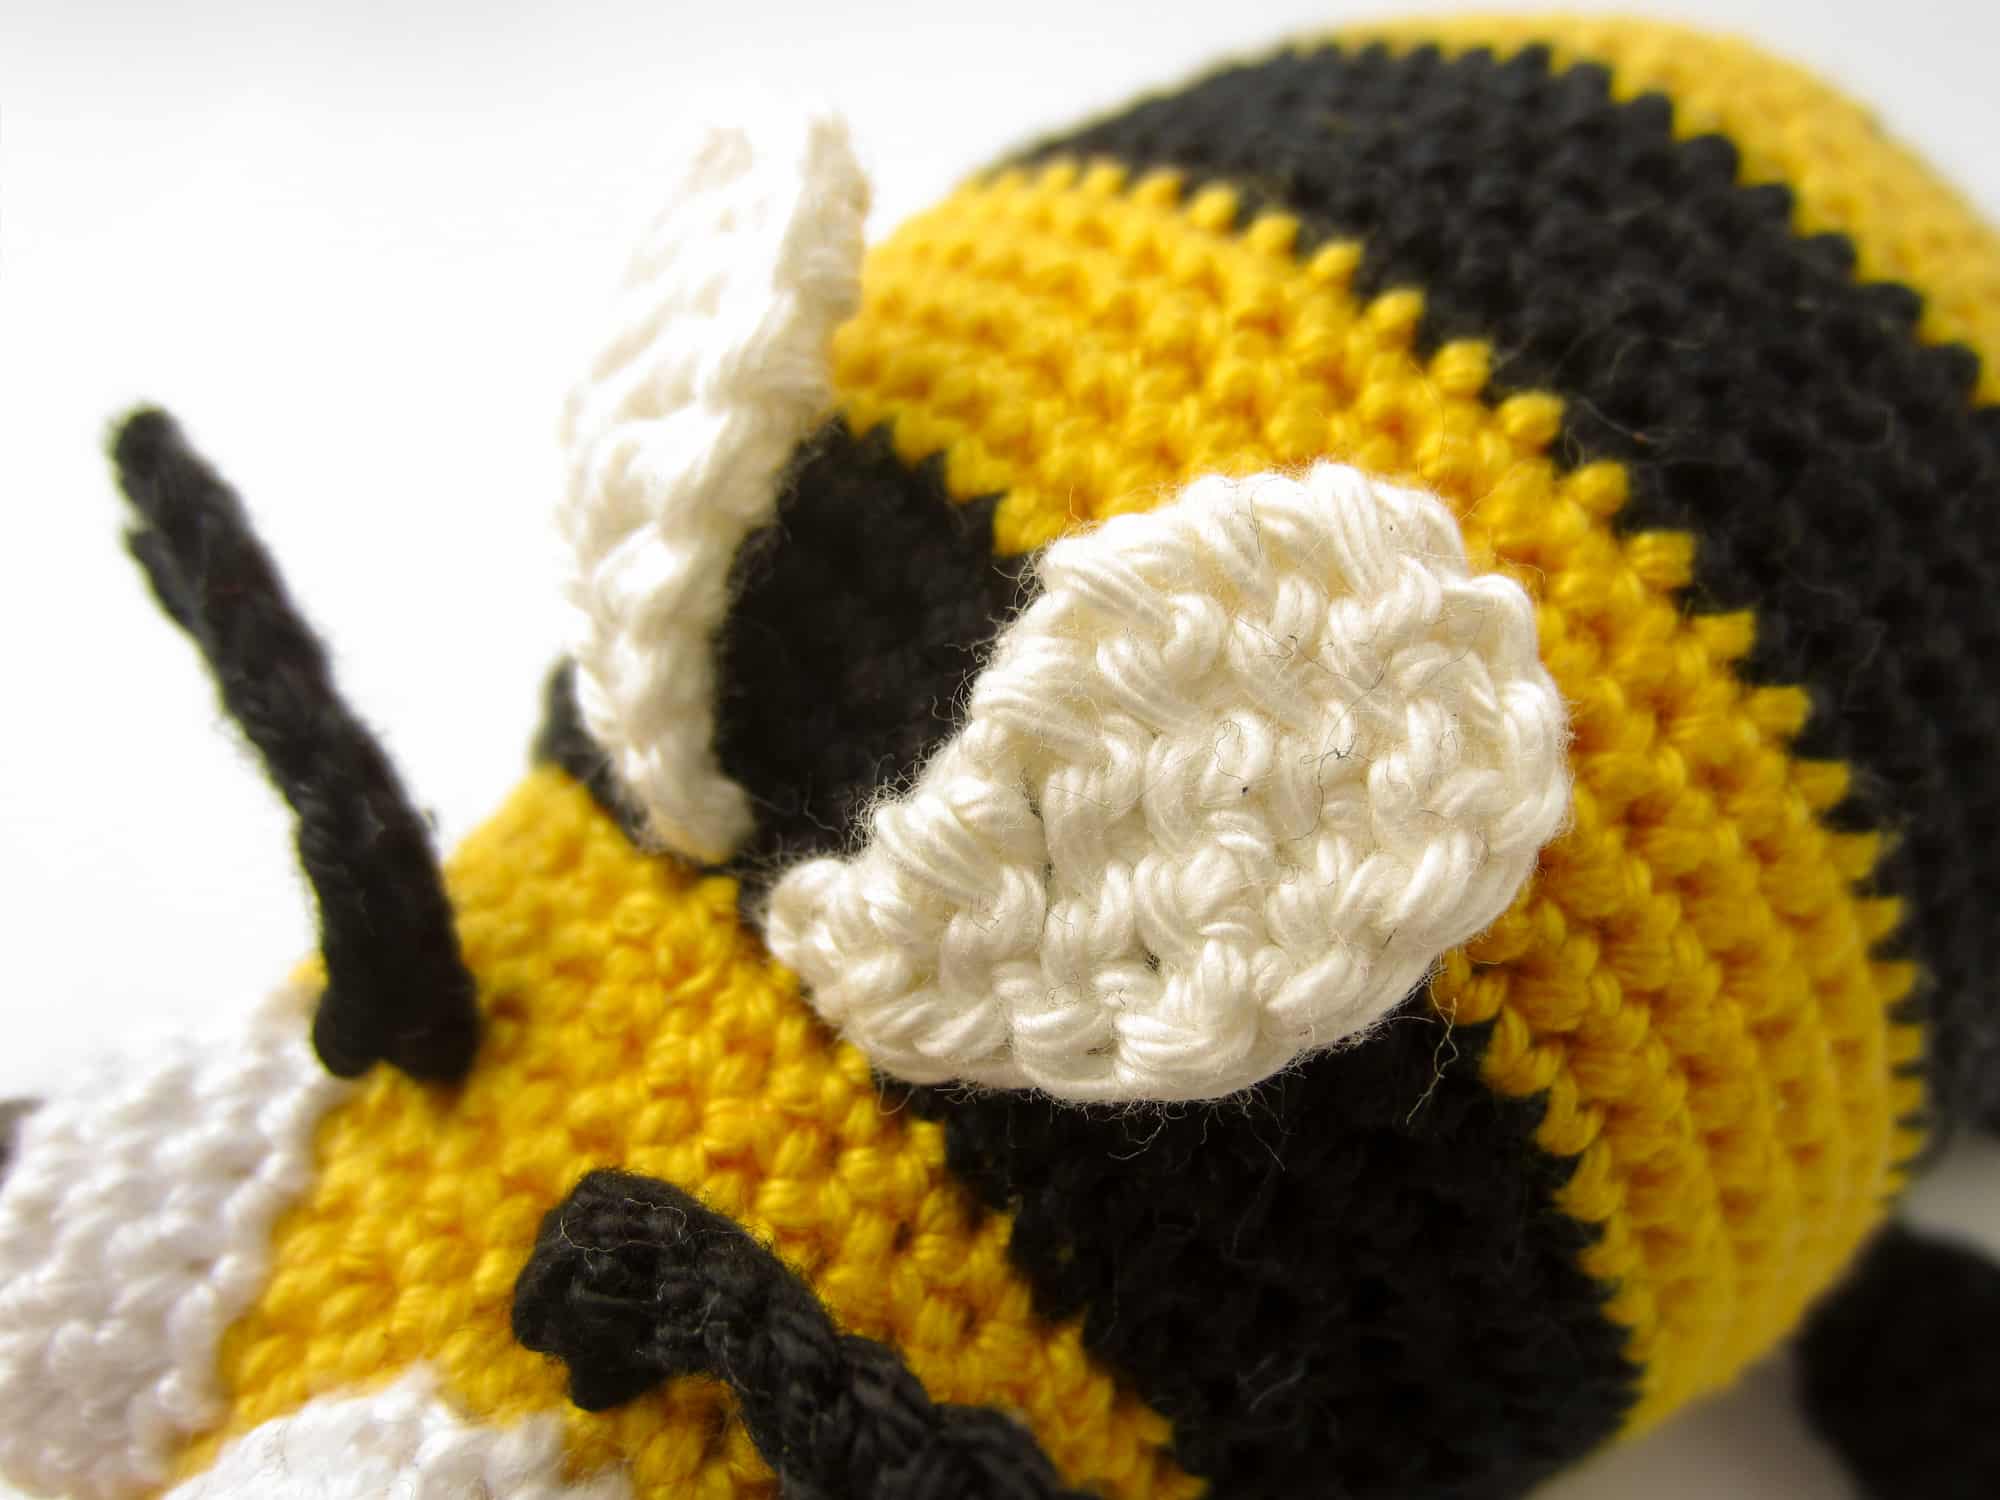
Crochet the Wings (2x)
The wings are crocheted in Nature in rows with chain stitches, treble crochet stitches, double treble crochet stitches, double crochet stitches and half double crochet stitches. Crochet a total of 2 wings.
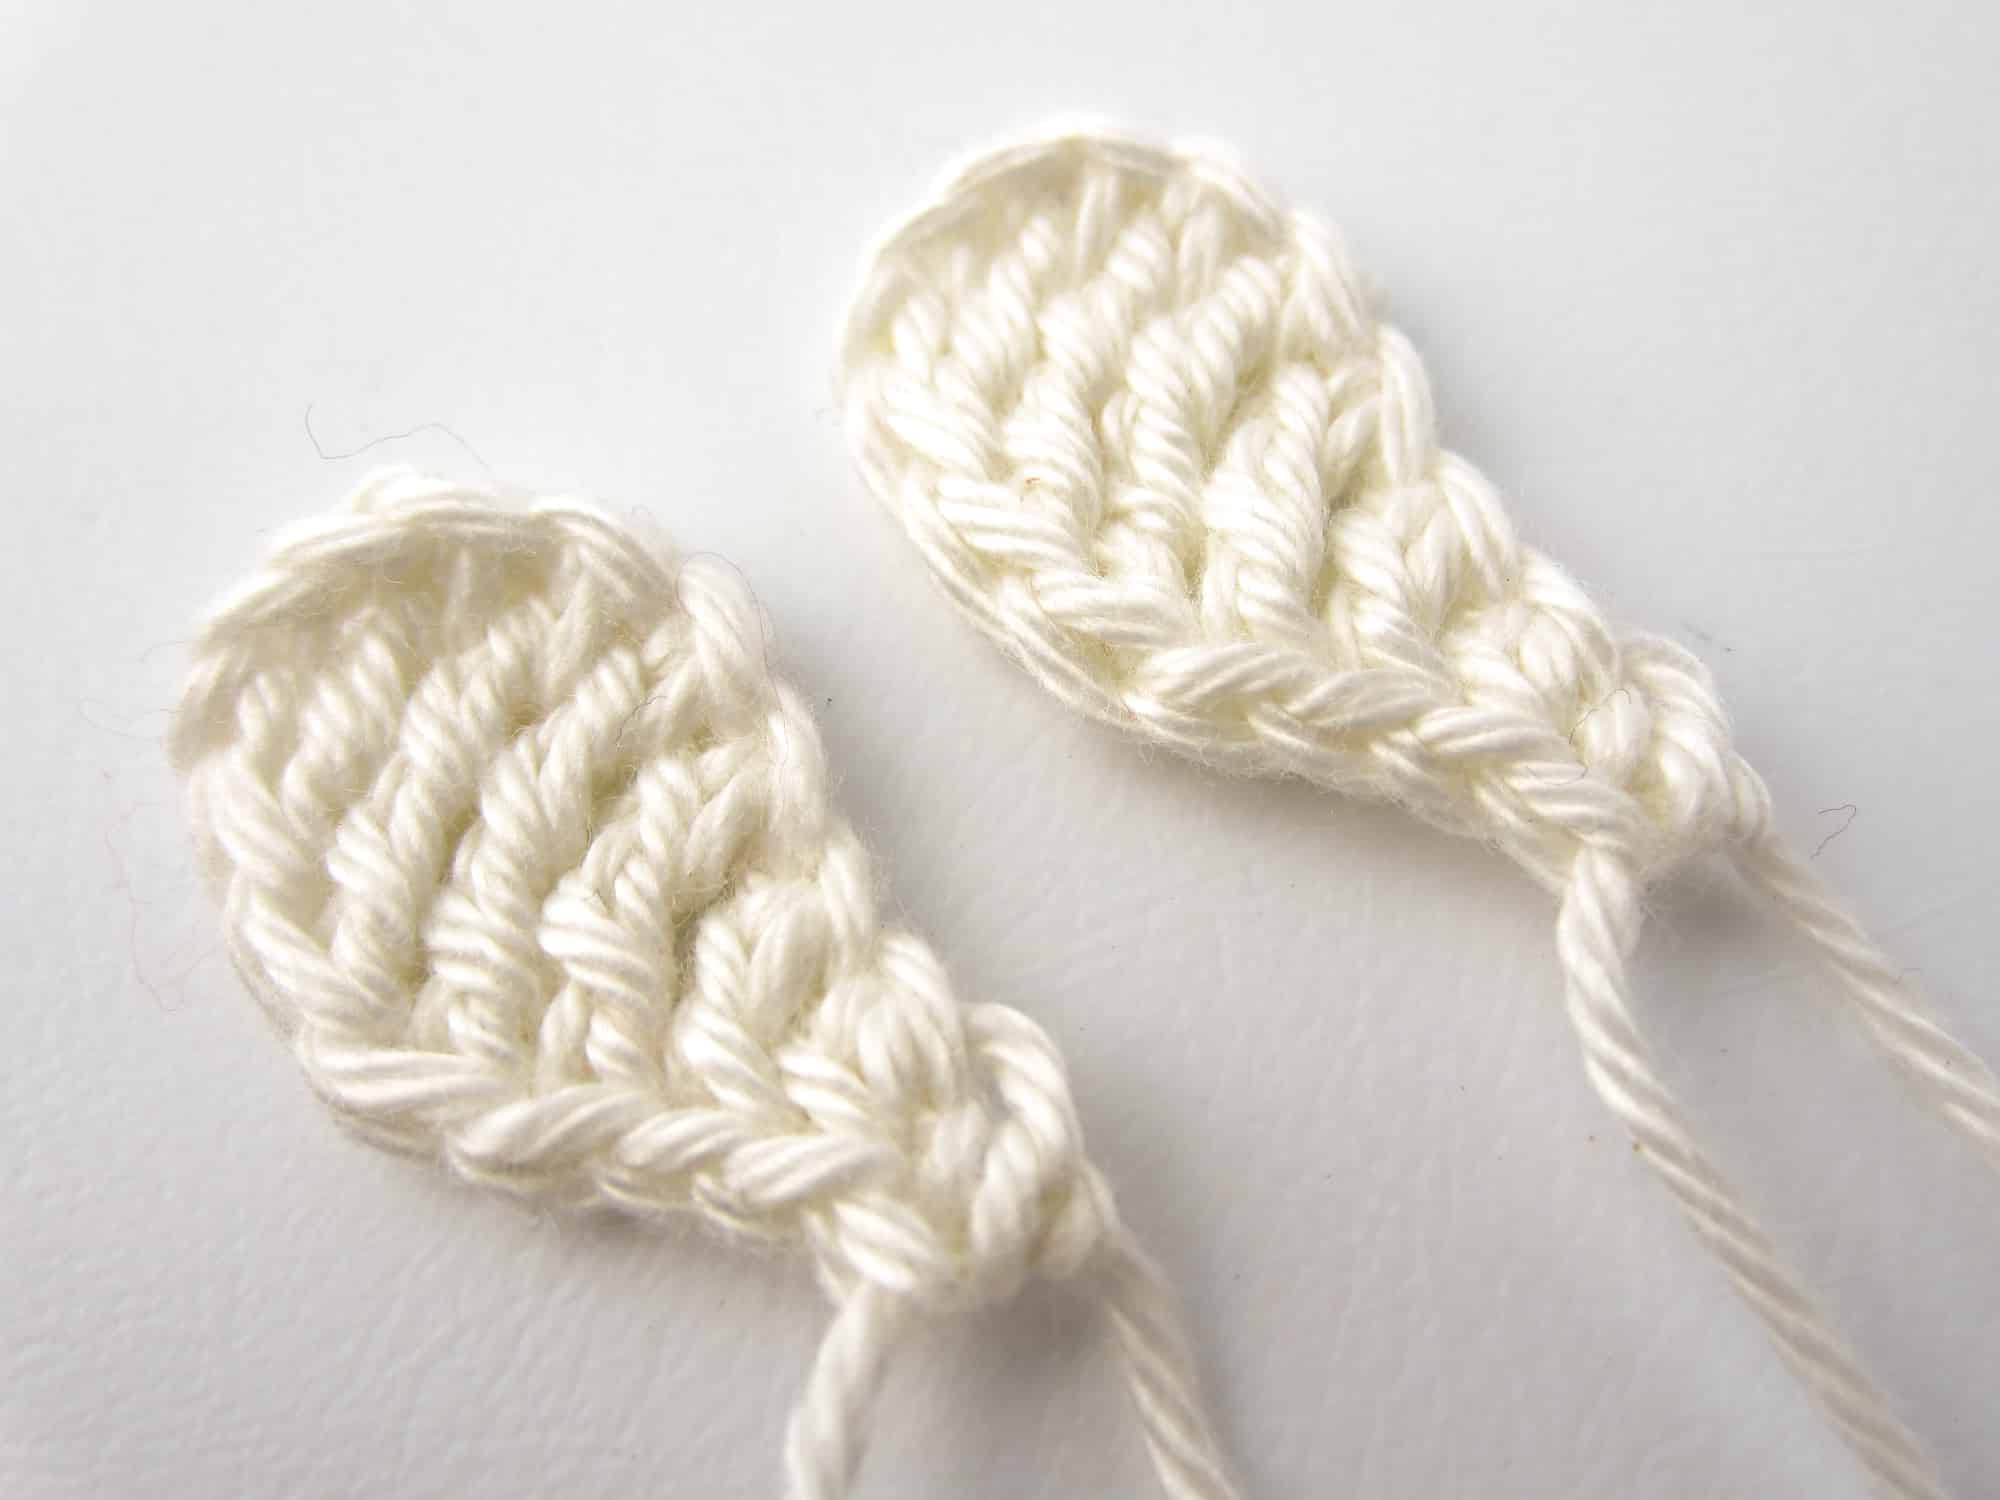
- Crochet the wings in rows in Nature.
- Row 1: Crochet 10 chain stitches (10 stitches).
- Row 2: 1 treble crochet into the 4th stitch from the hook, 2 double treble crochet, 1 double crochet, 1 half double crochet, 1 sc (6 stitches).
- Finish: Cut the yarn generously and leave a long tail for sewing.
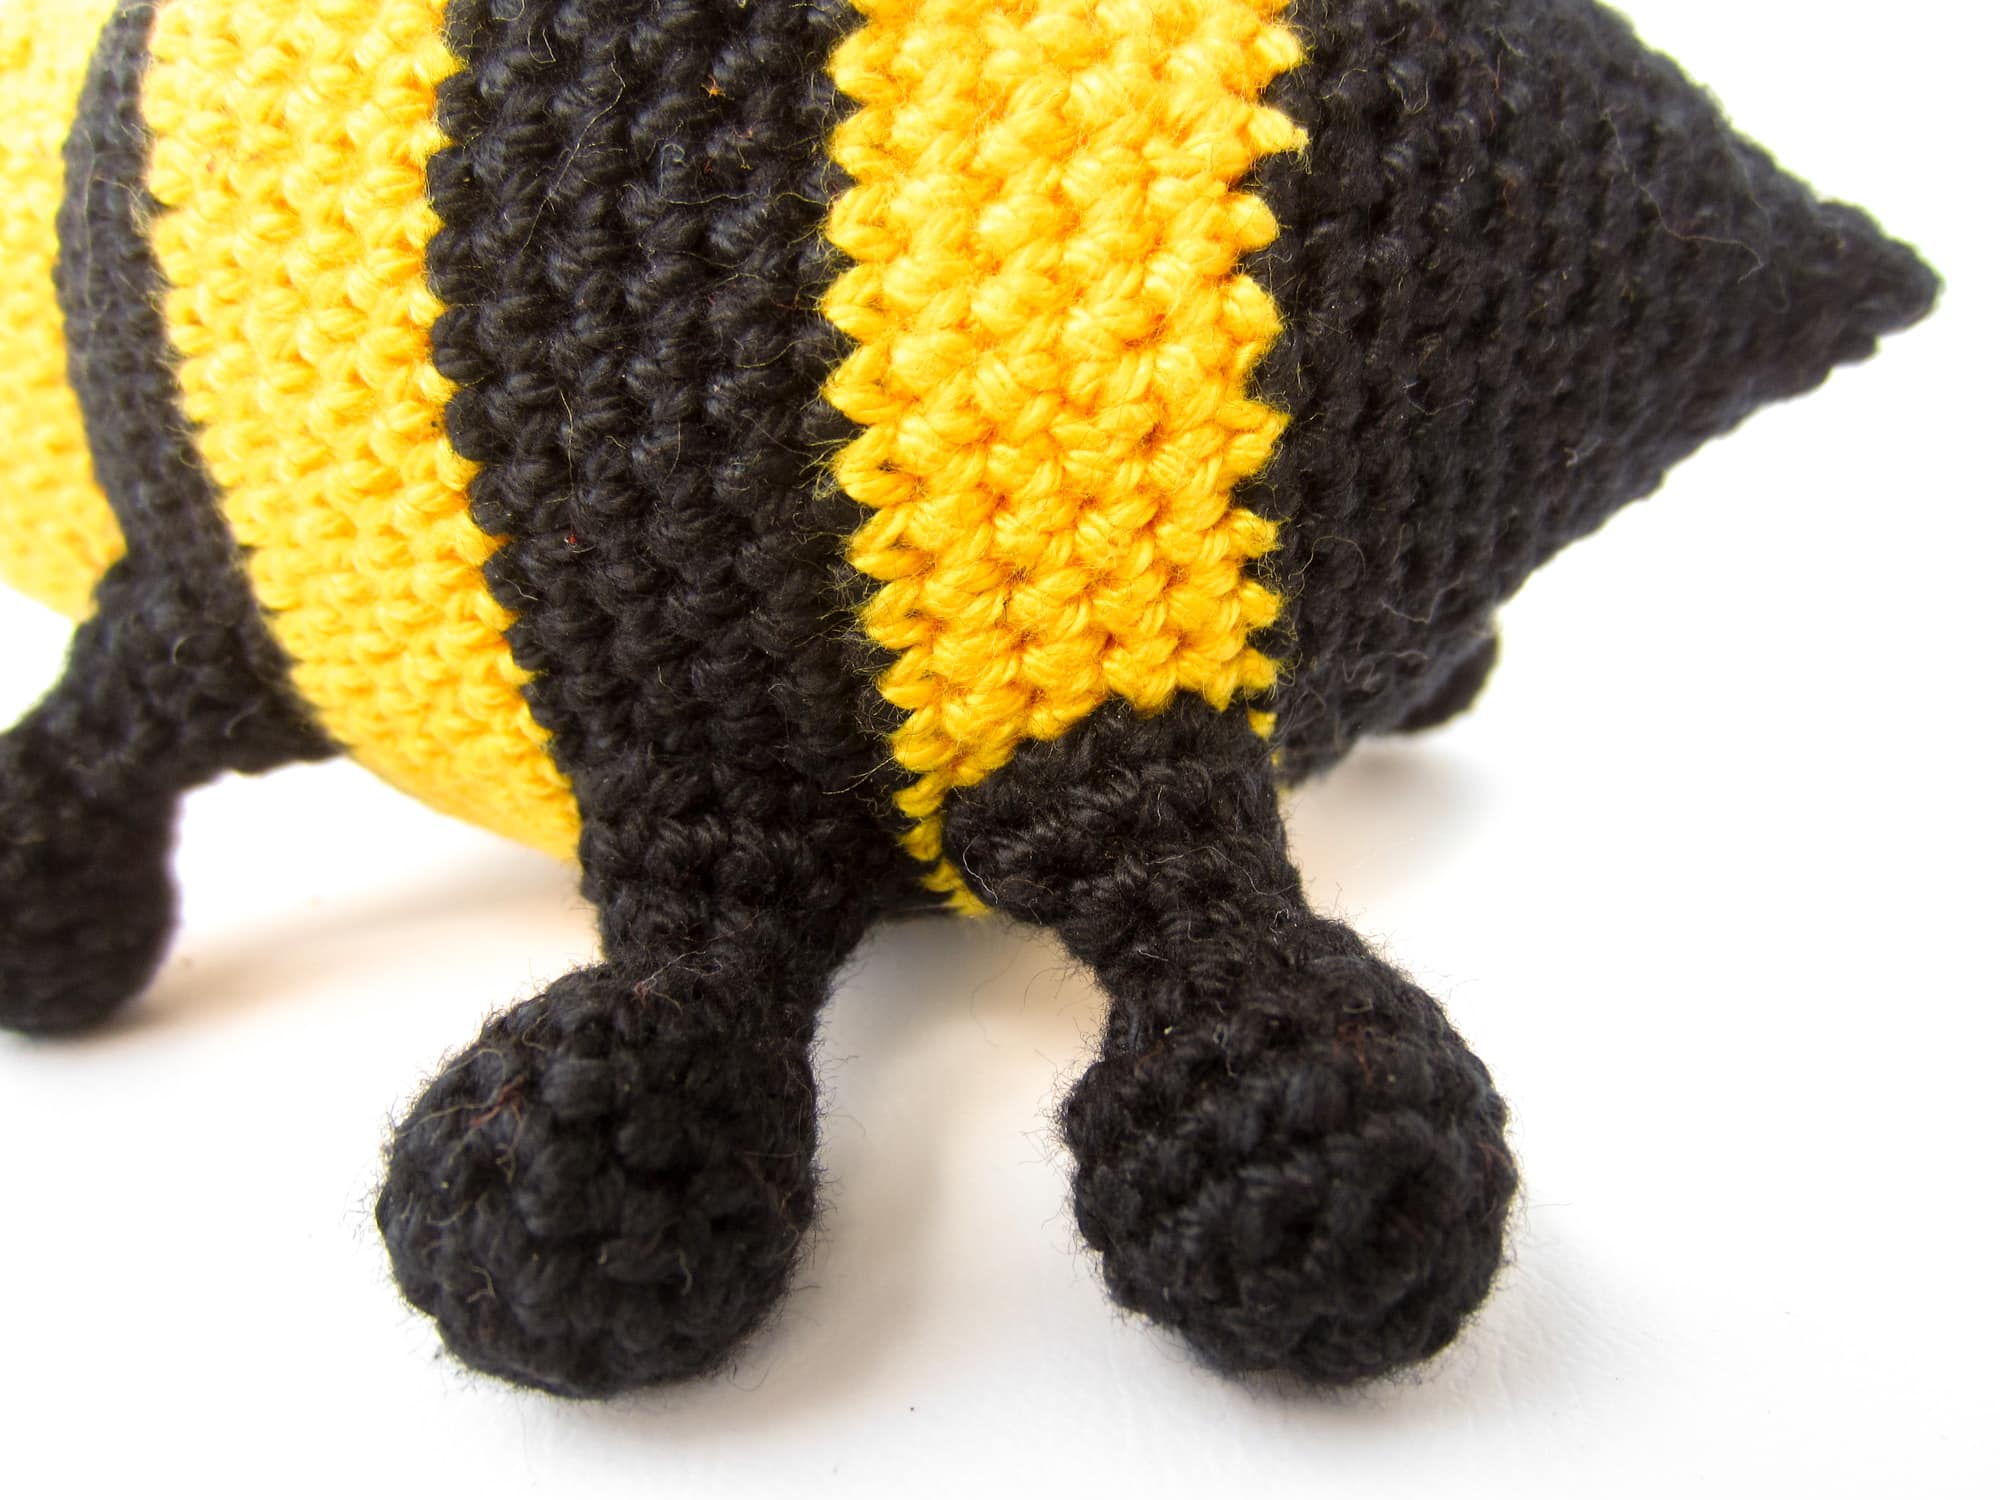
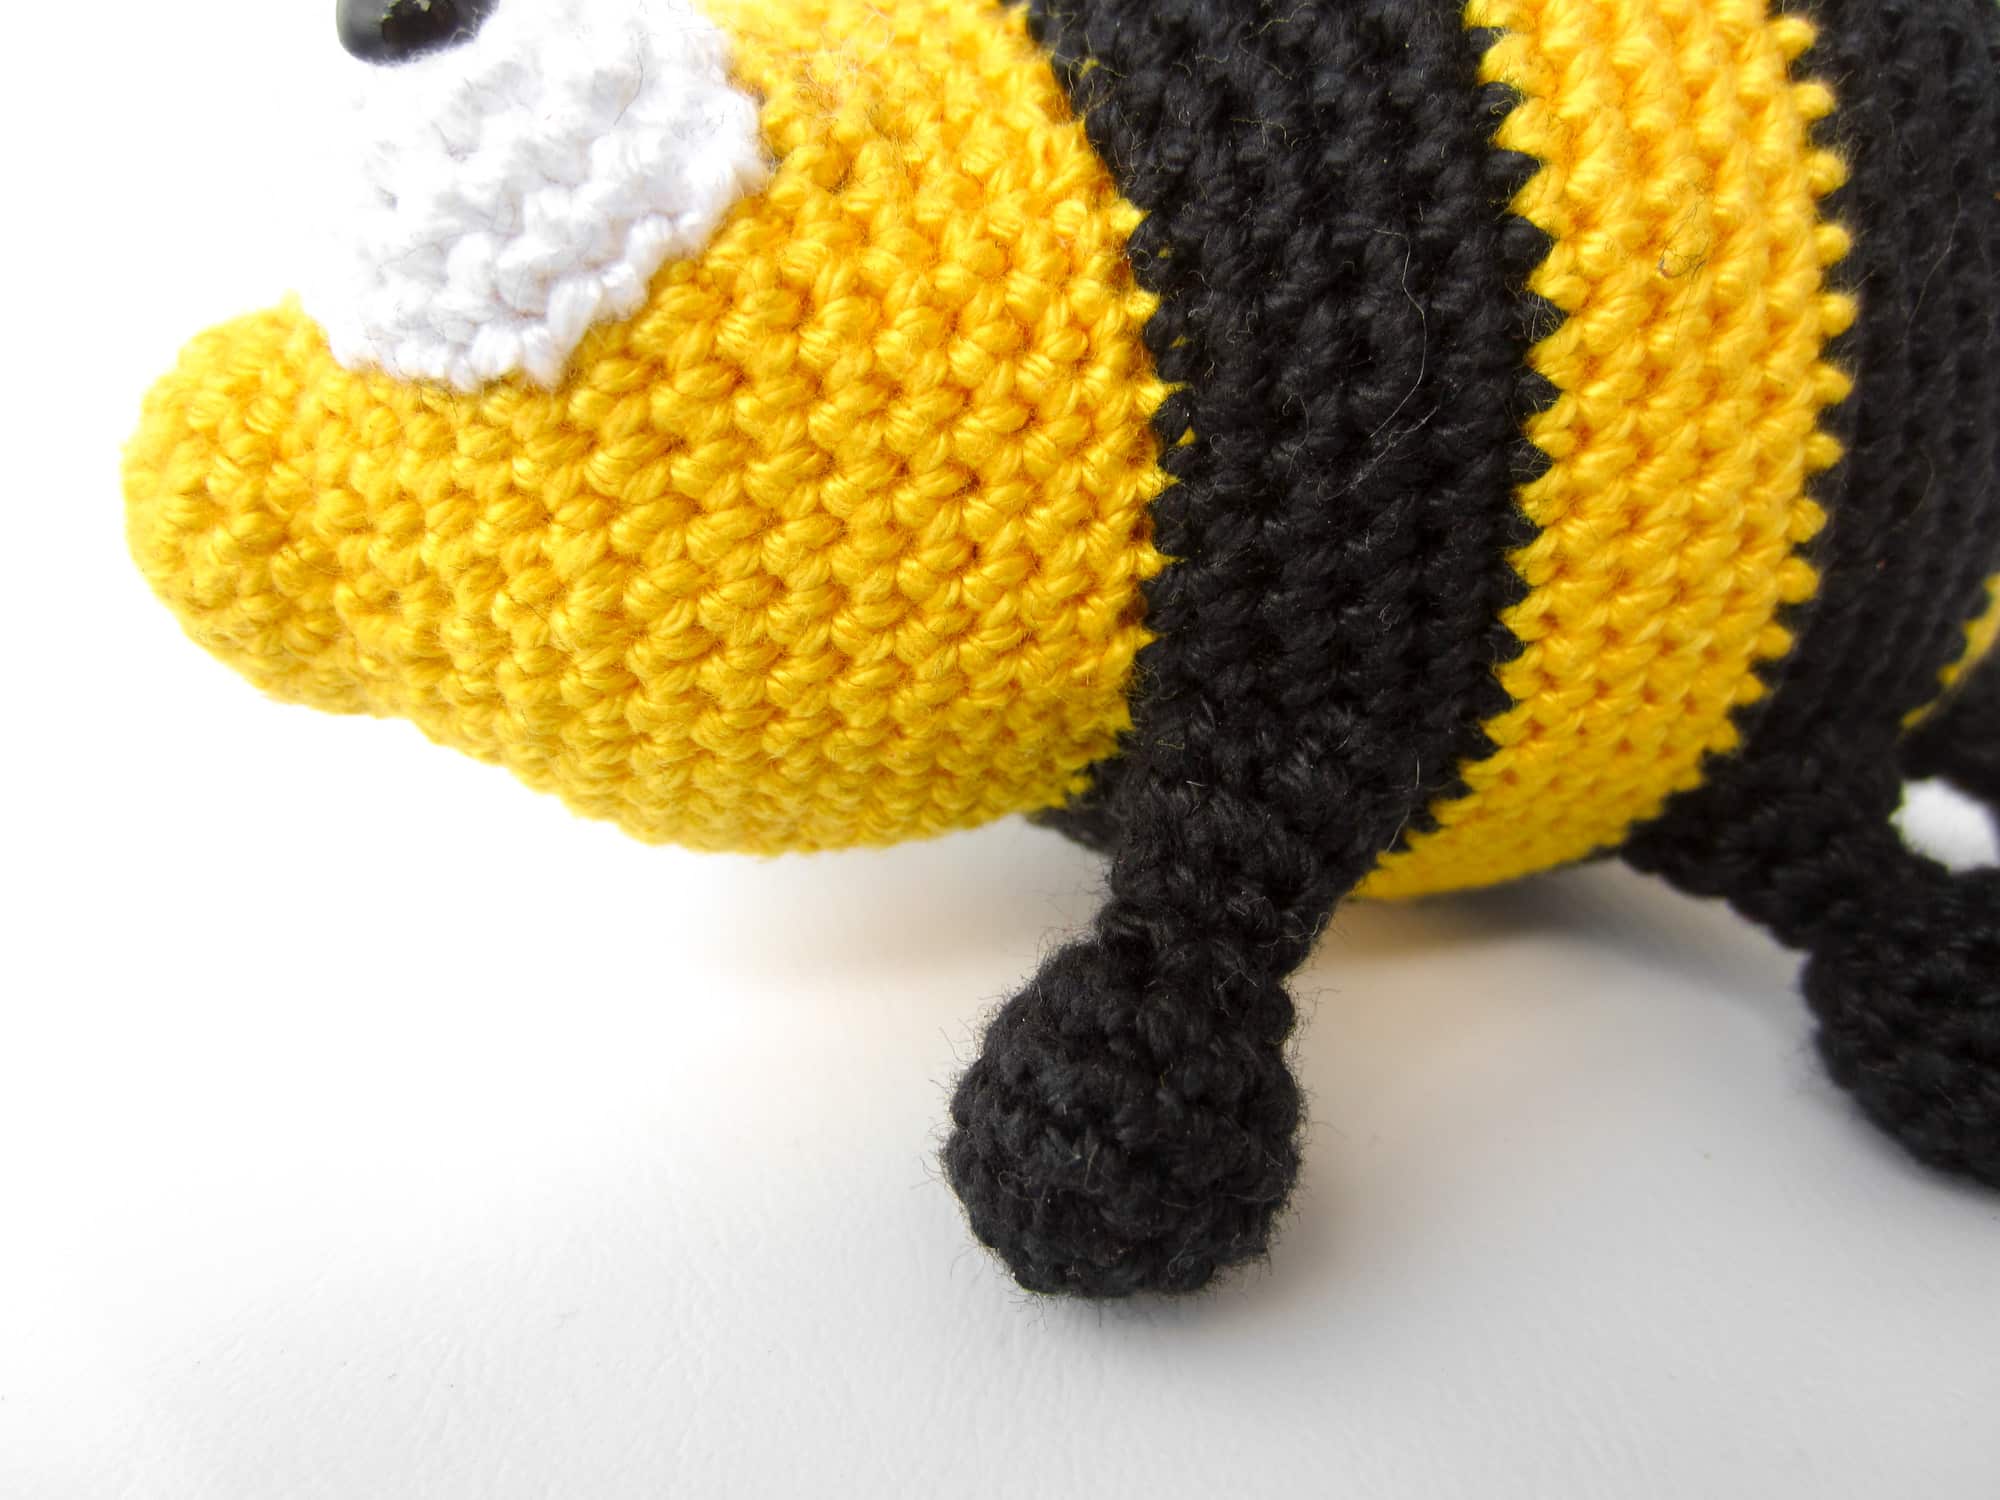
Crochet the Legs (6x)
The legs are crocheted in Black in spiral rounds with single crochet stitches. Crochet a total of 6 legs. The finished legs do not need to be filled with polyfill.
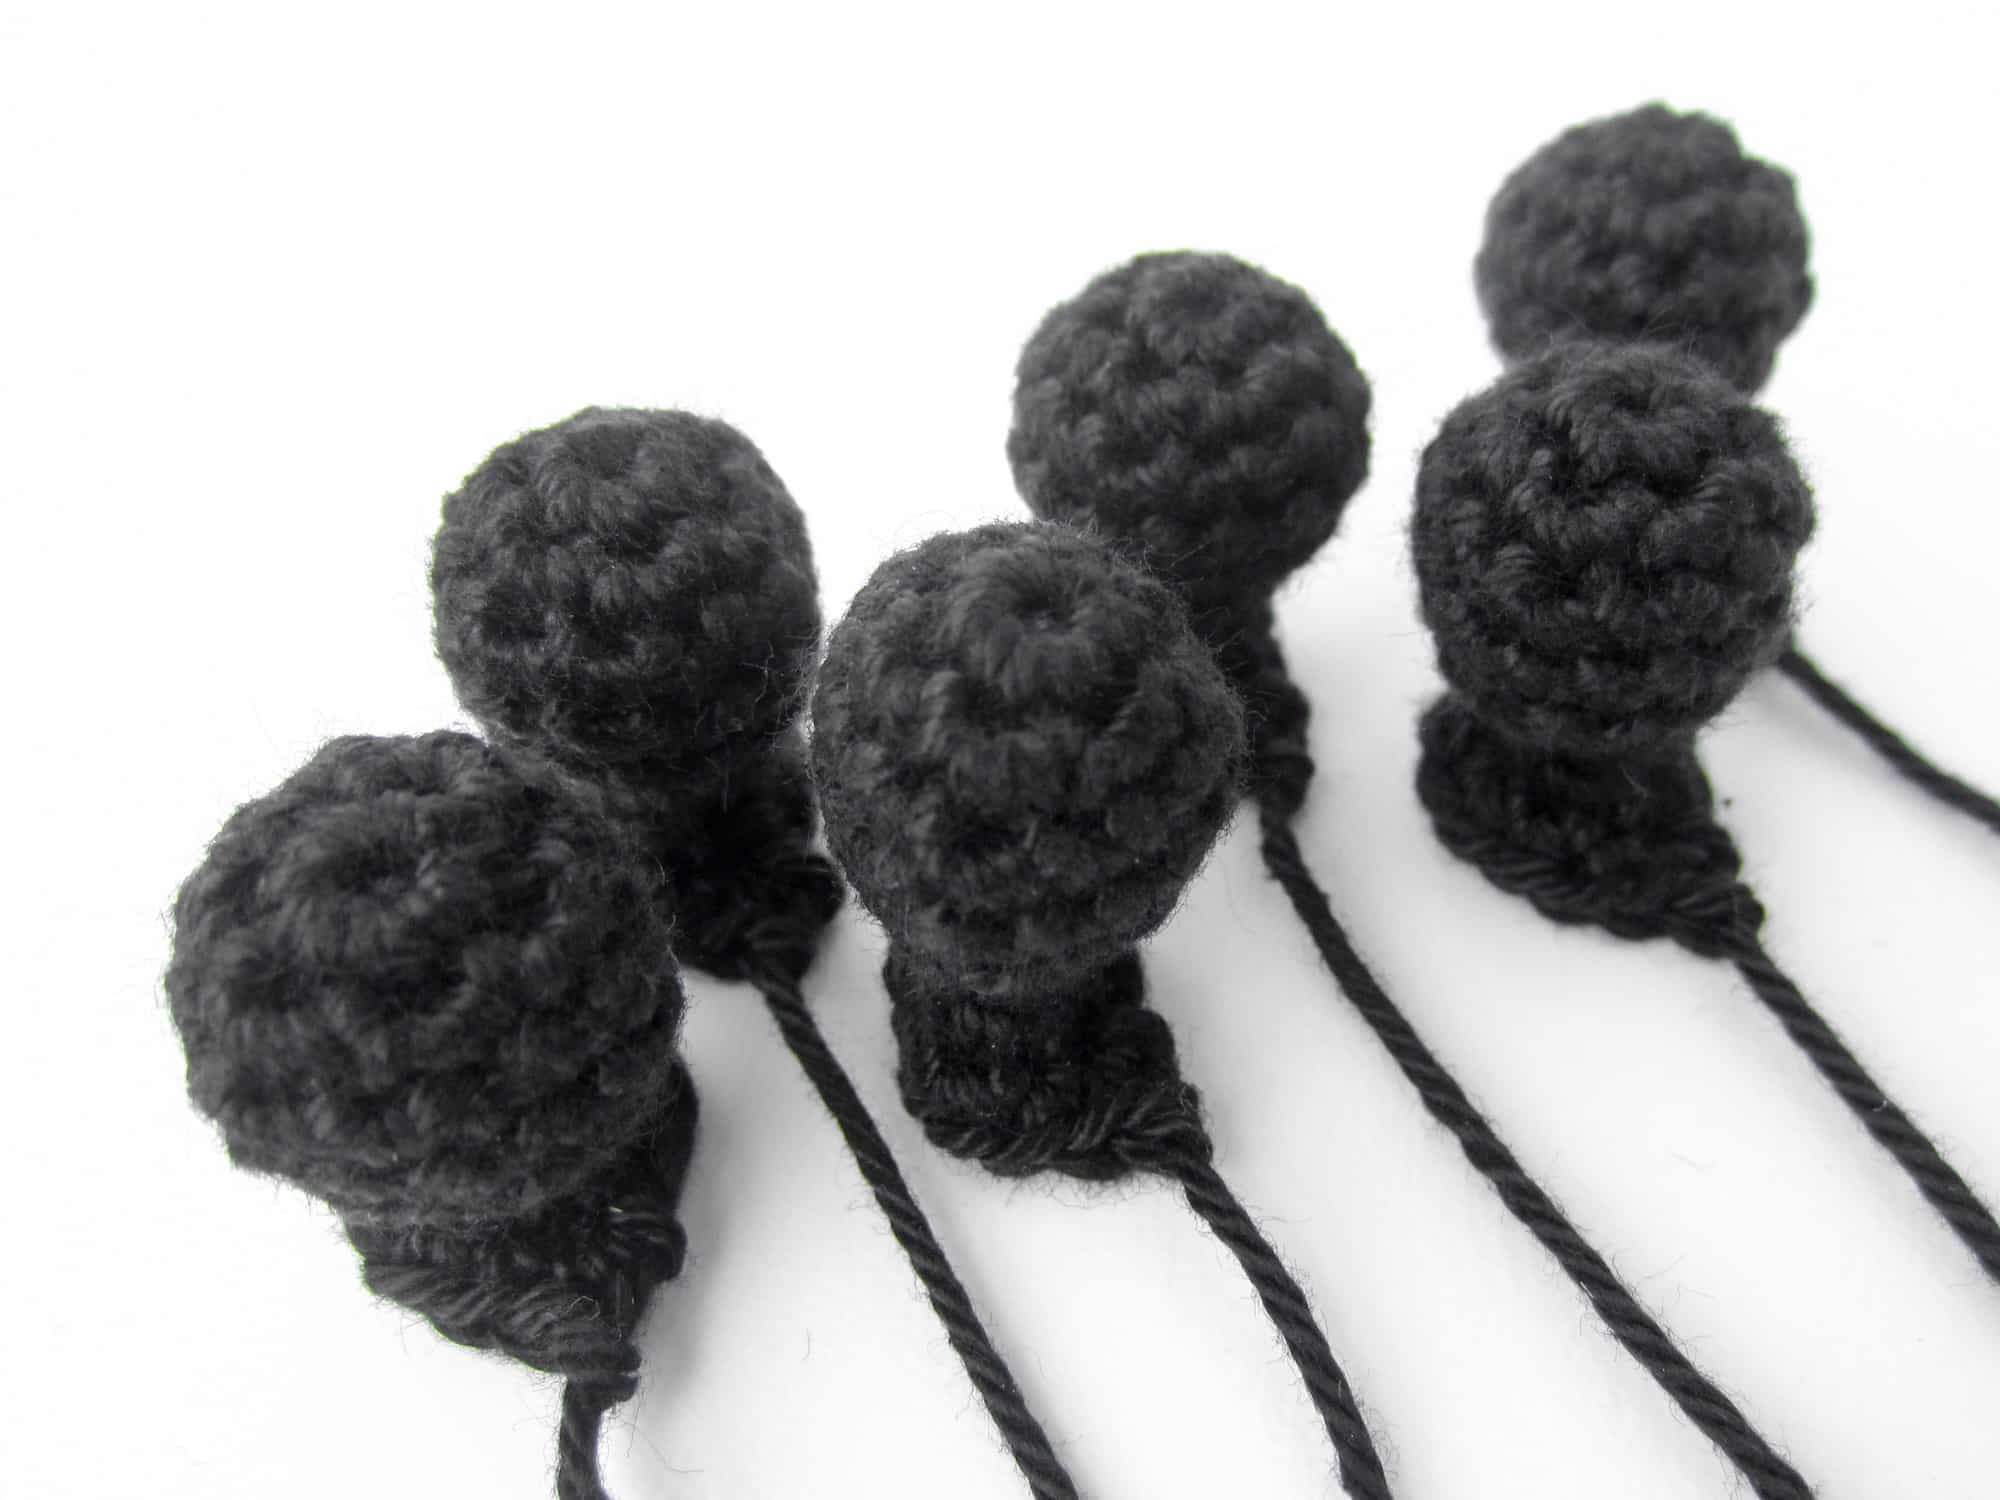
- Crochet the legs in spiral rounds in Black.
- Round 1: 6 sc into the Magic Ring (6 stitches).
- Round 2: [1 increase] repeat till end of the round (12 stitches).
- Round 3: [3 sc, 1 increase] repeat till end of the round (15 stitches).
- Round 4: Crochet 15 sc (15 stitches).
- Round 5: [3 sc, 1 decrease] repeat till end of the round (12 stitches).
- Round 6: 6 decreases (6 stitches).
- Round 7: Crochet the complete round into the front loop only. Crochet 6 sc (6 stitches).
- Round 8: [1 sc, 1 increase] repeat till end of the round (9 stitches).
- Round 9: [2 sc, 1 increase] repeat till end of the round (12 stitches).
- Finish: Cut the yarn generously and leave a long tail for sewing.
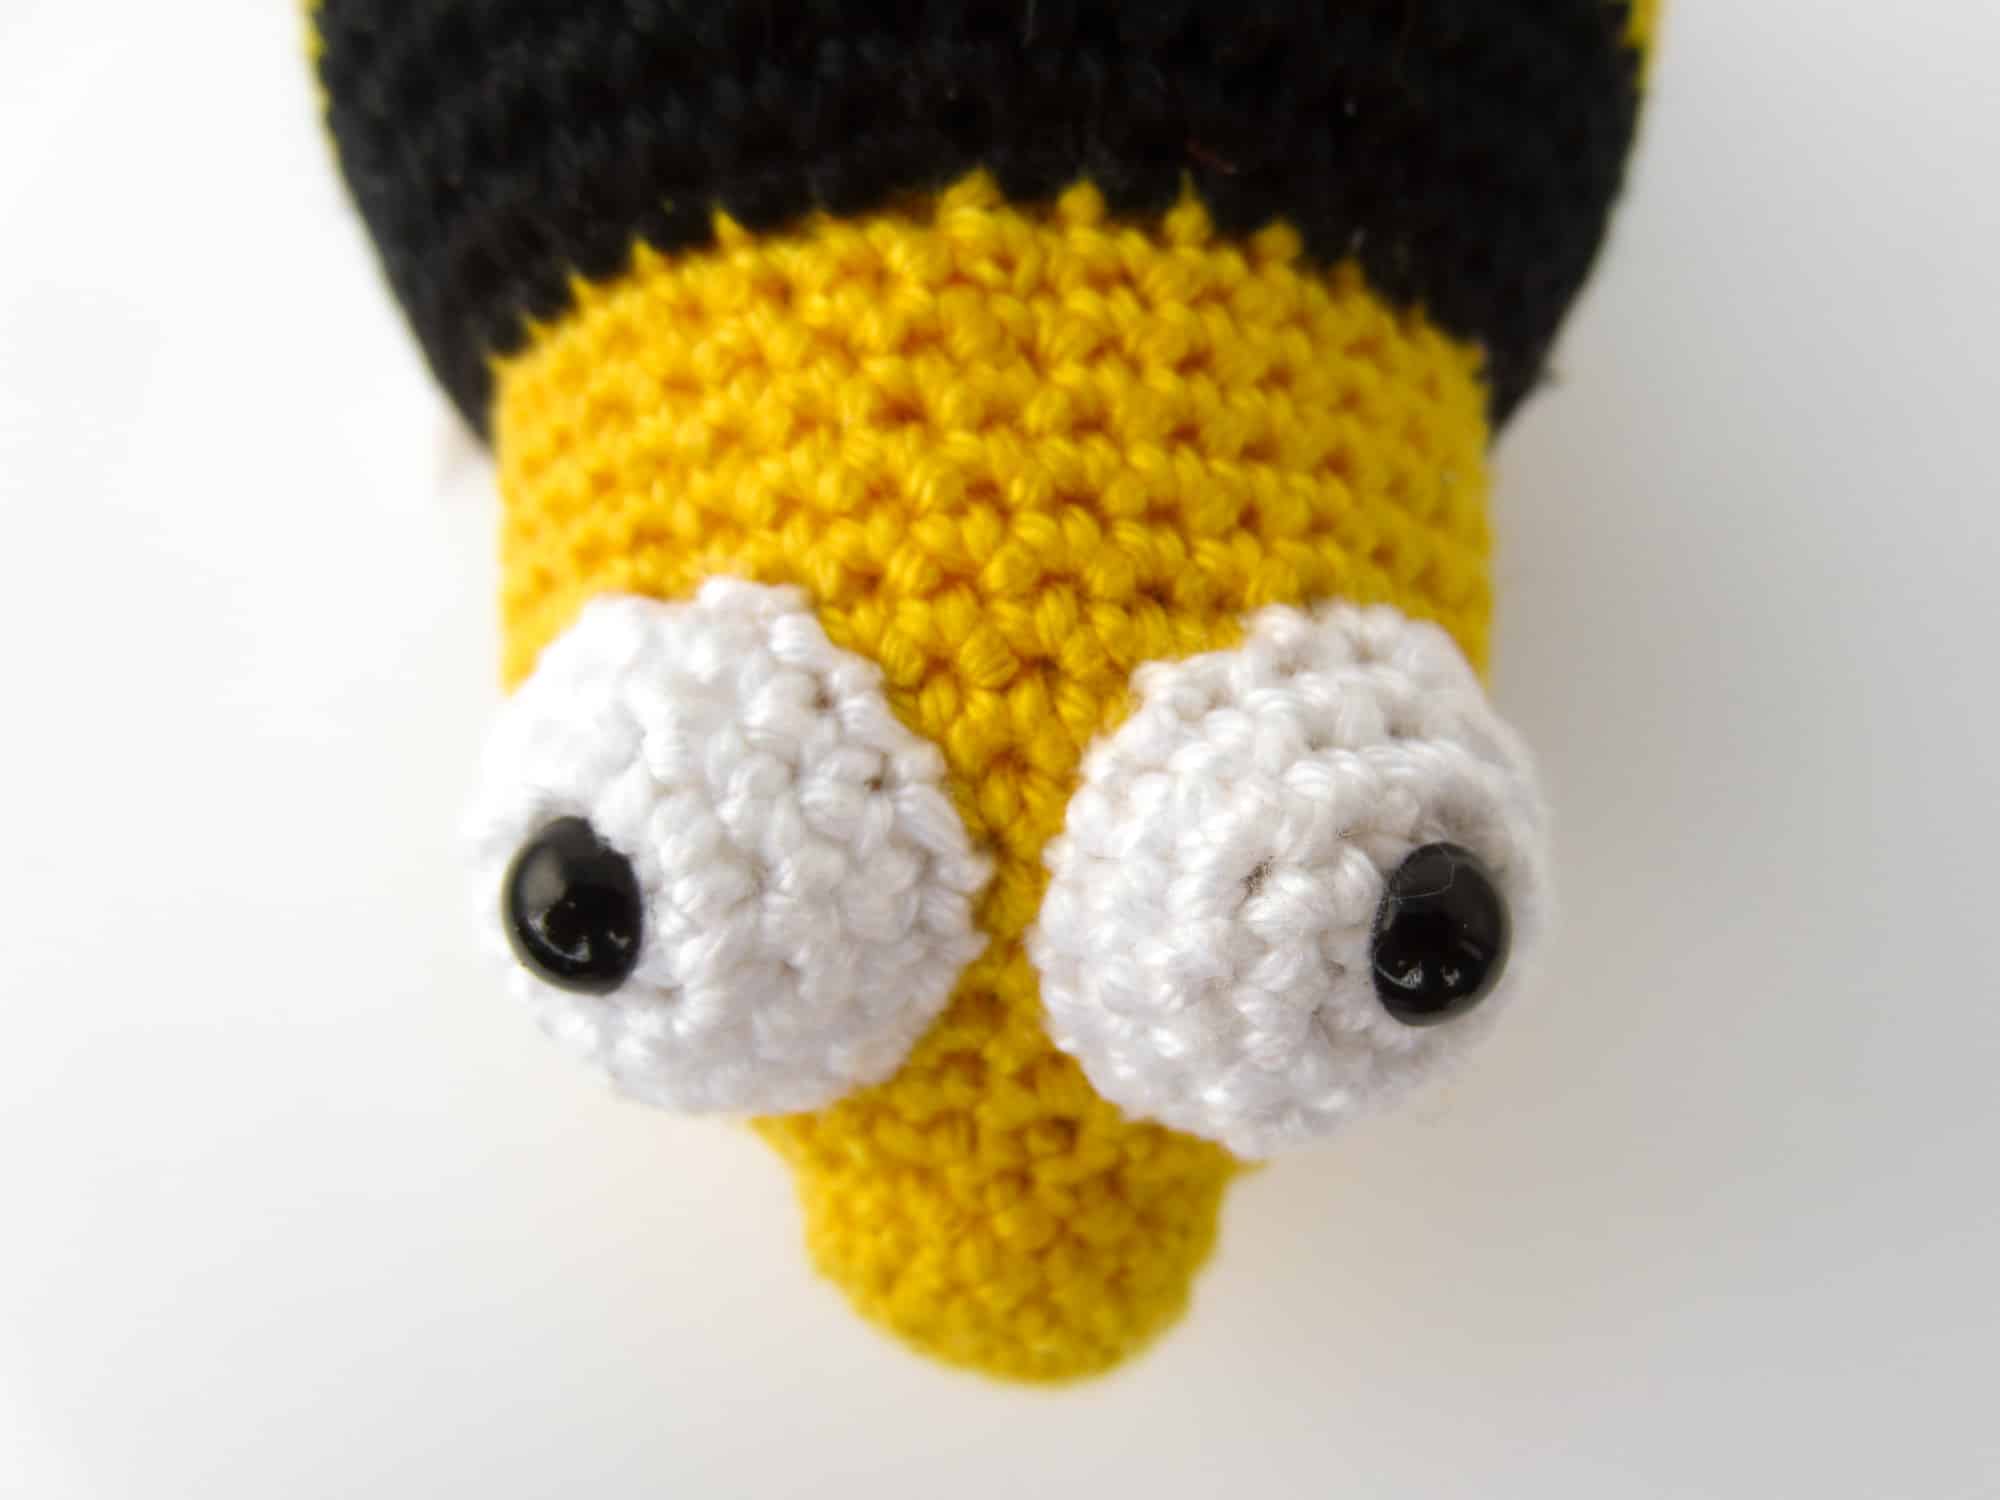
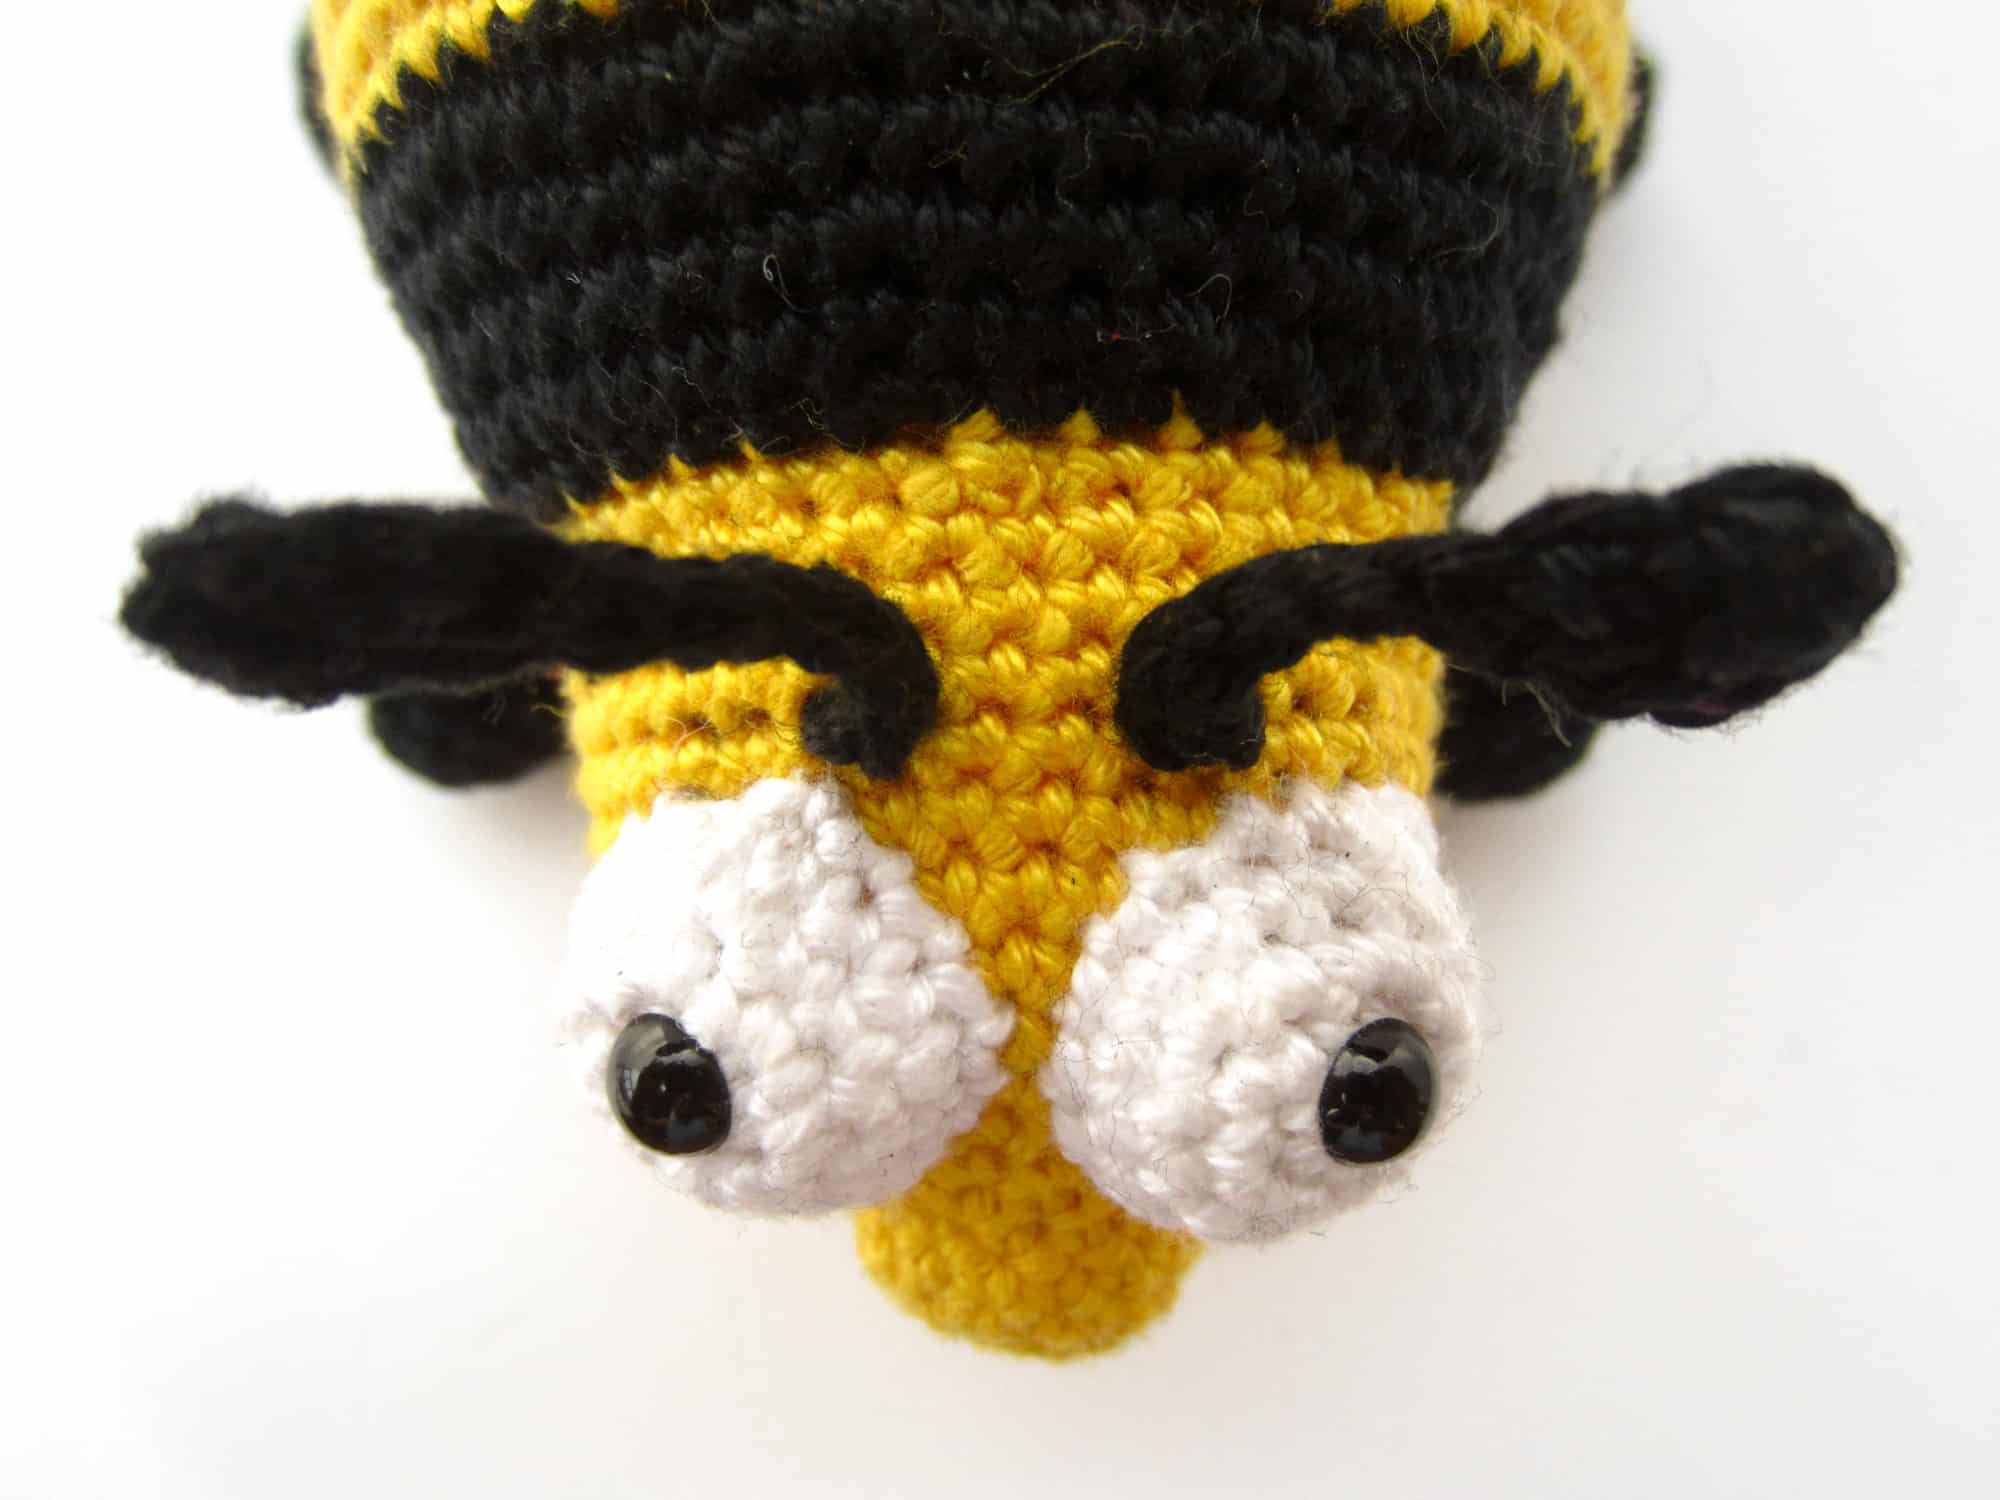
Crochet the Eyes (2x)
The eyes are crocheted in White in spiral rounds with single crochet stitches. Crochet a total of 2 eyes.
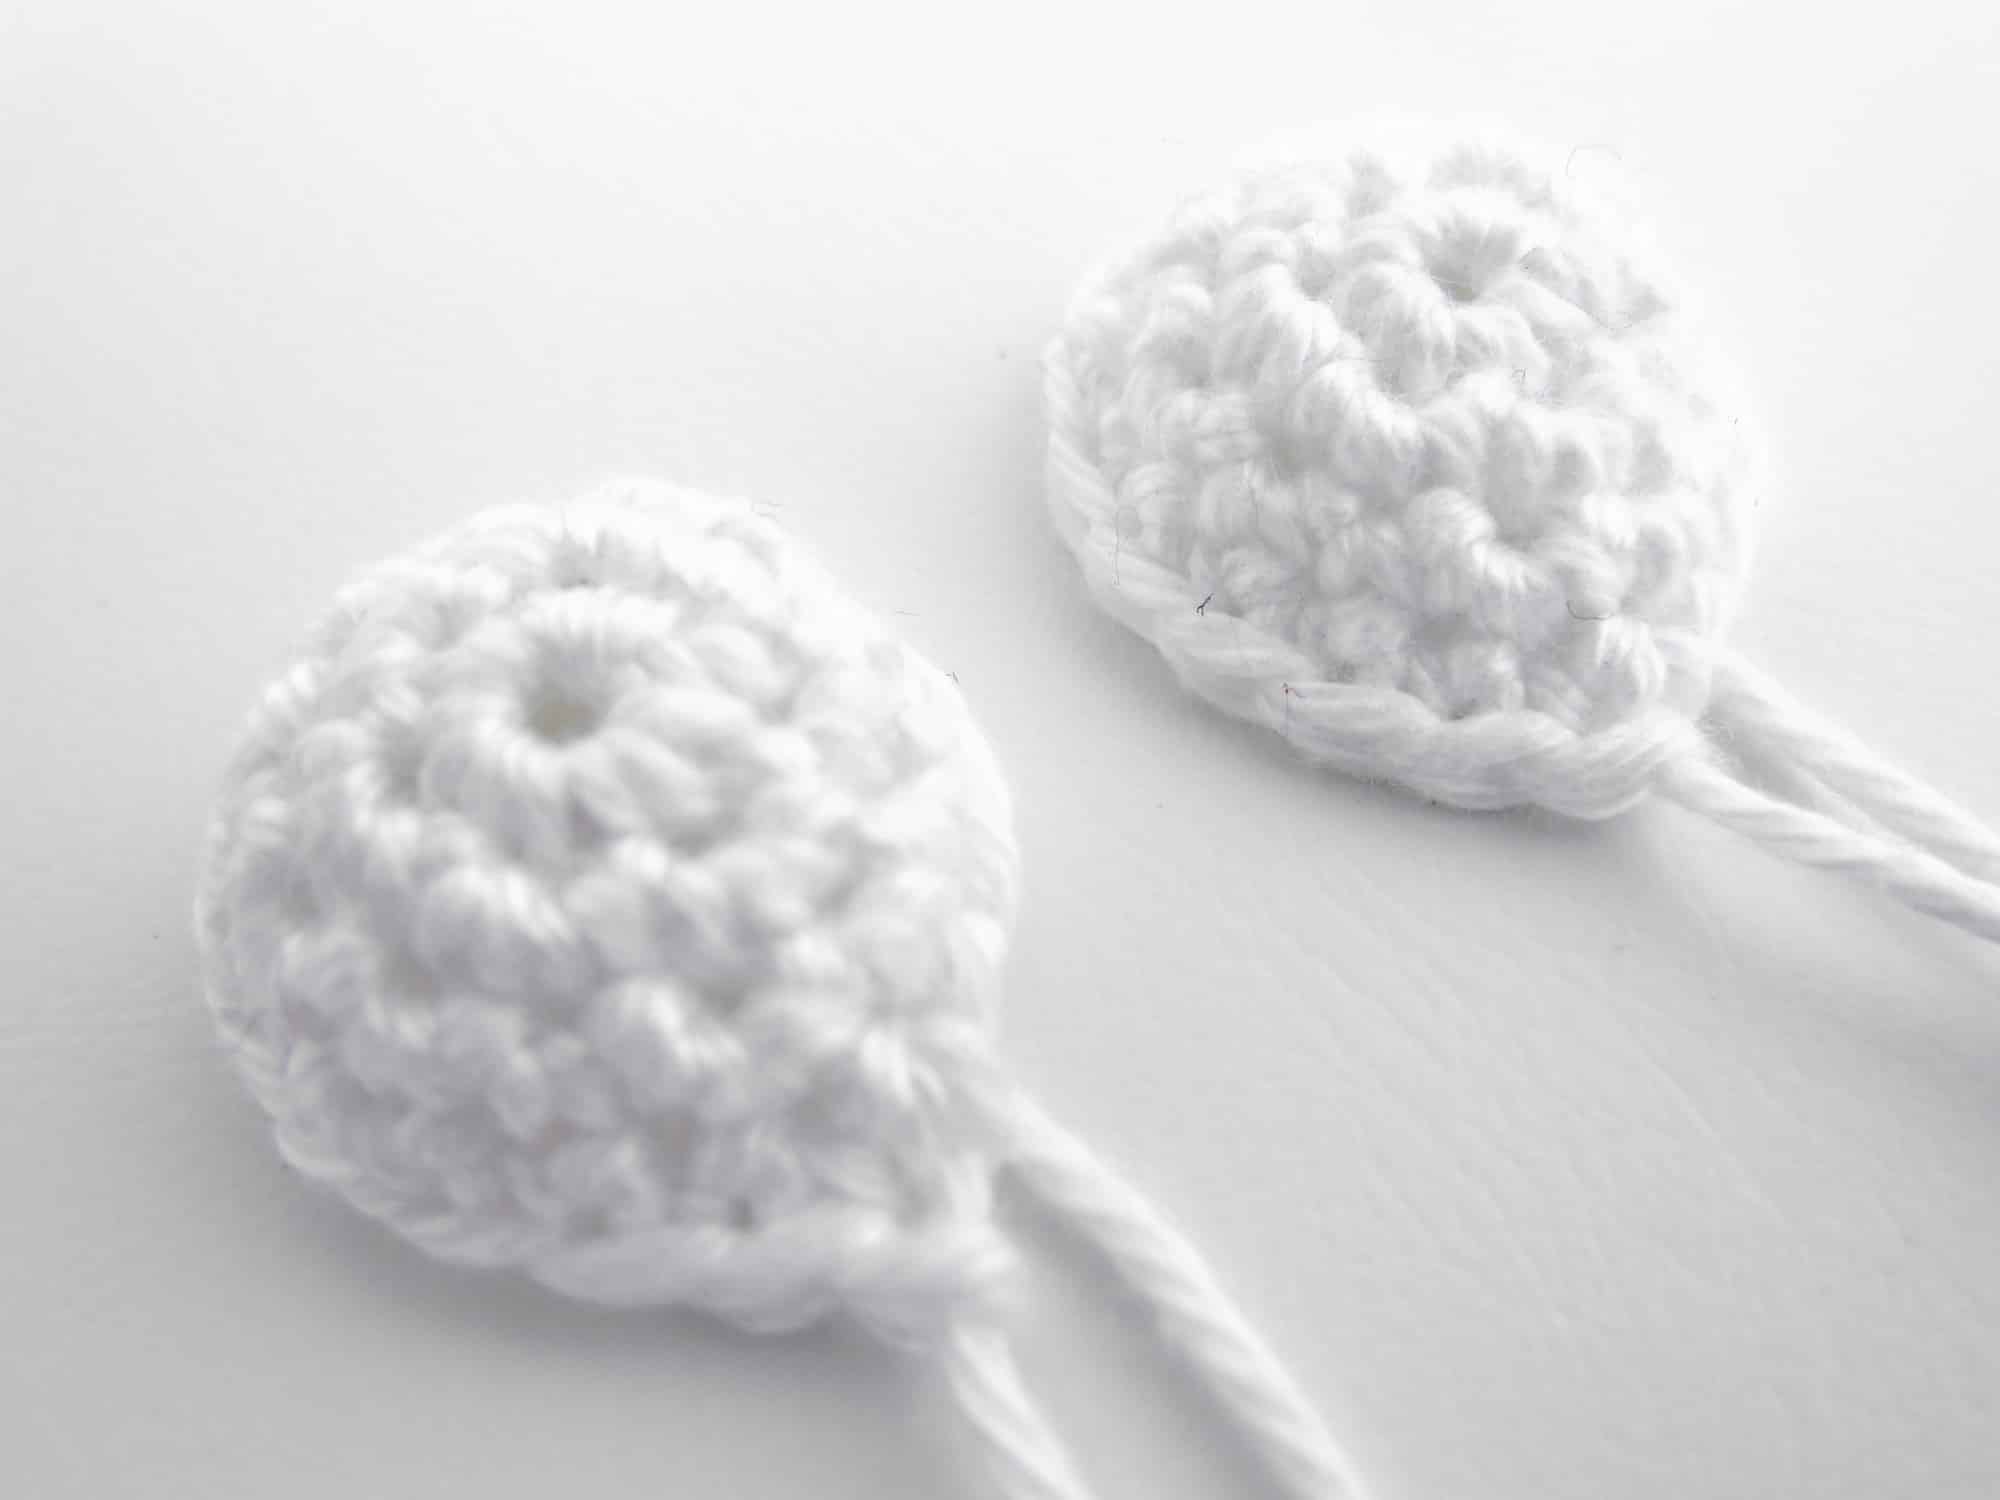
- Crochet the eyes in spiral rounds in White.
- Round 1: 6 sc into the Magic Ring (6 stitches).
- Round 2: [1 increase] repeat till end of the round (12 stitches).
- Round 3: 1 sc, 1 increase, [2 sc, 1 increase] repeat 3 times, 1 sc (16 stitches).
- Round 4: Crochet 16 sc (16 stitches).
- Finish: Cut the yarn generously and leave a long tail for sewing
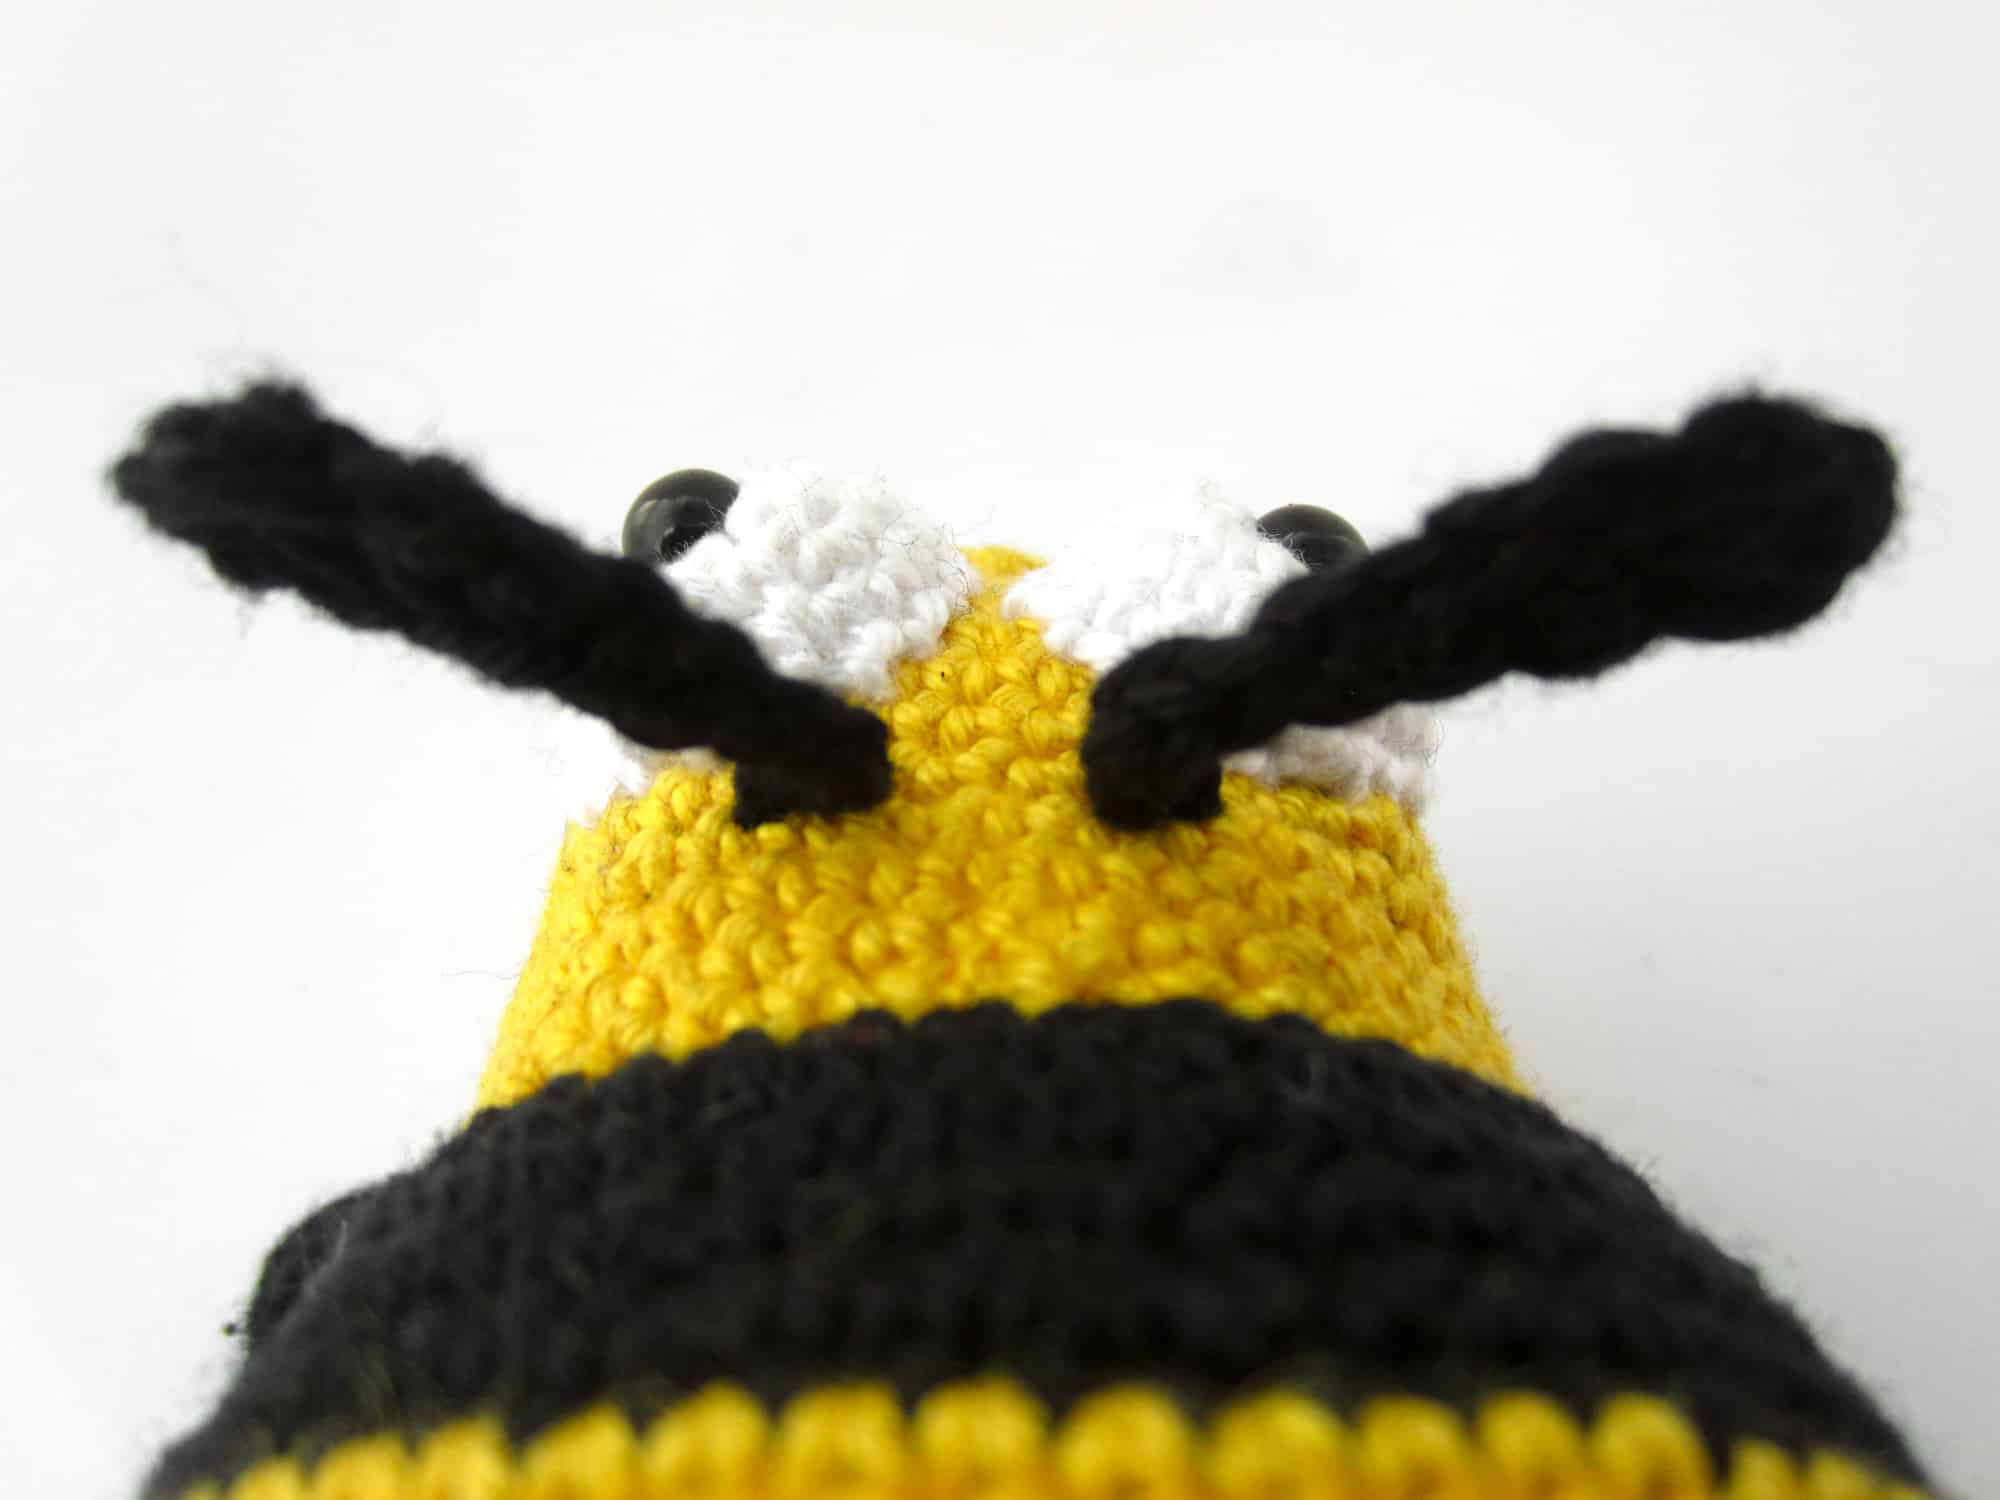
Crochet the Antennae (2x)
The antennae are crocheted in Black in rows with chain stitches, double crochet stitches, half double crochet stitches and slip stitches. Crochet a total of 2 antennae.
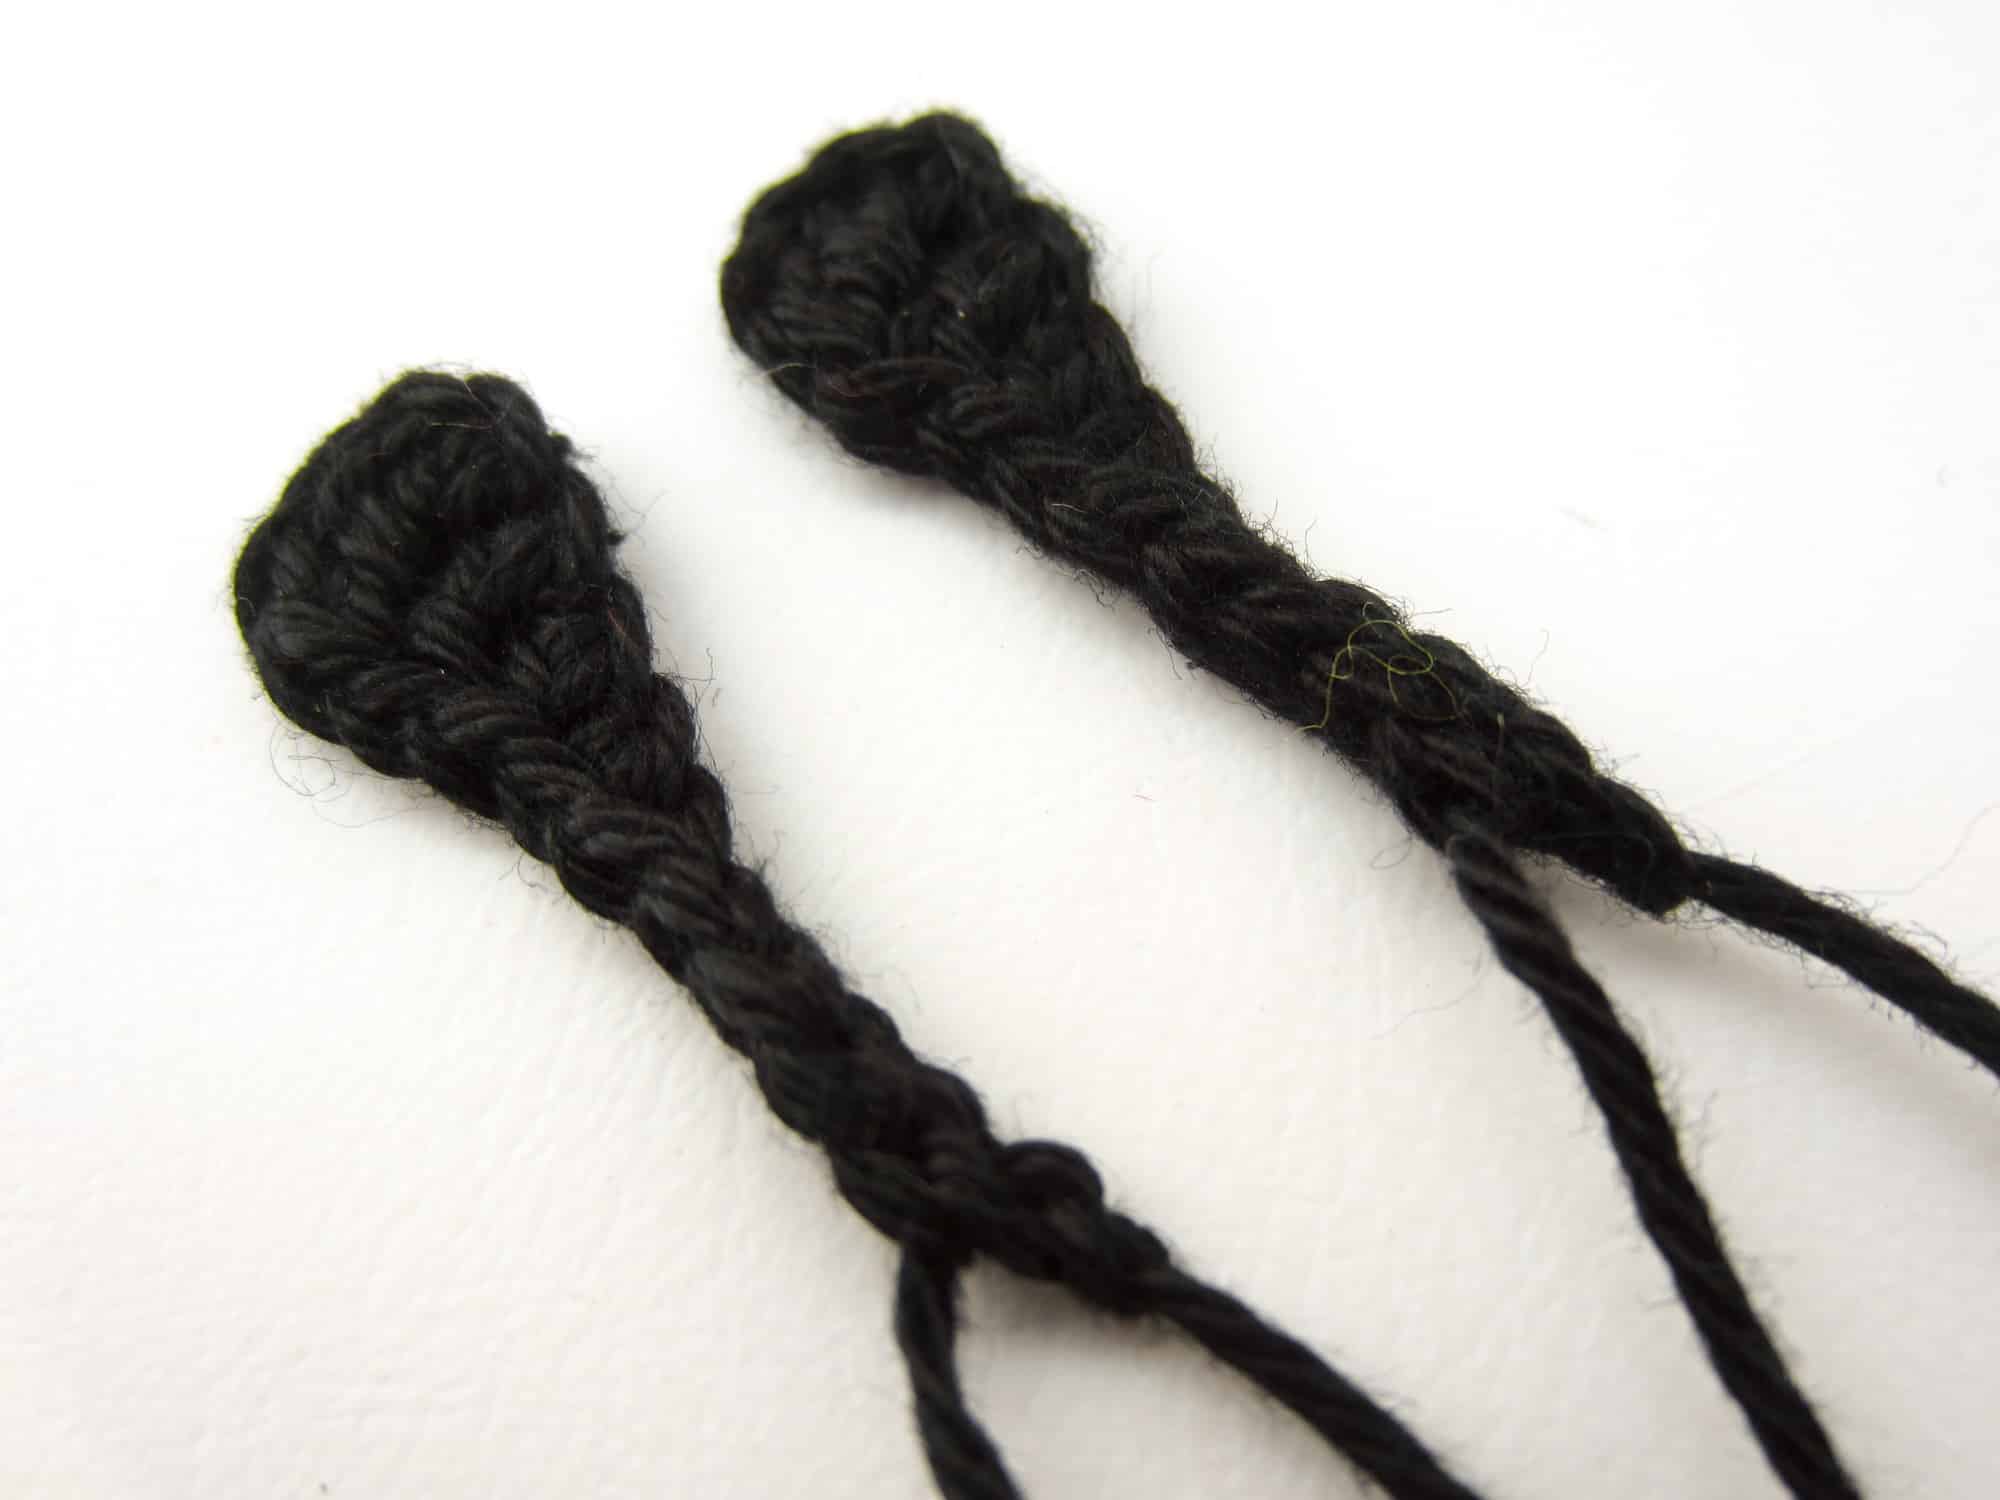
- Crochet the antennae in rows in Black.
- Row 1: Crochet 12 chain stitches (12 stitches).
- Row 2: 1 double crochet into the 4th stitch from the hook, 1 double crochet, 1 half double crochet, 1 sc, 5 slip stitches (9 stitches).
- Finish: Cut the yarn generously and leave a long tail for sewing
Assembling
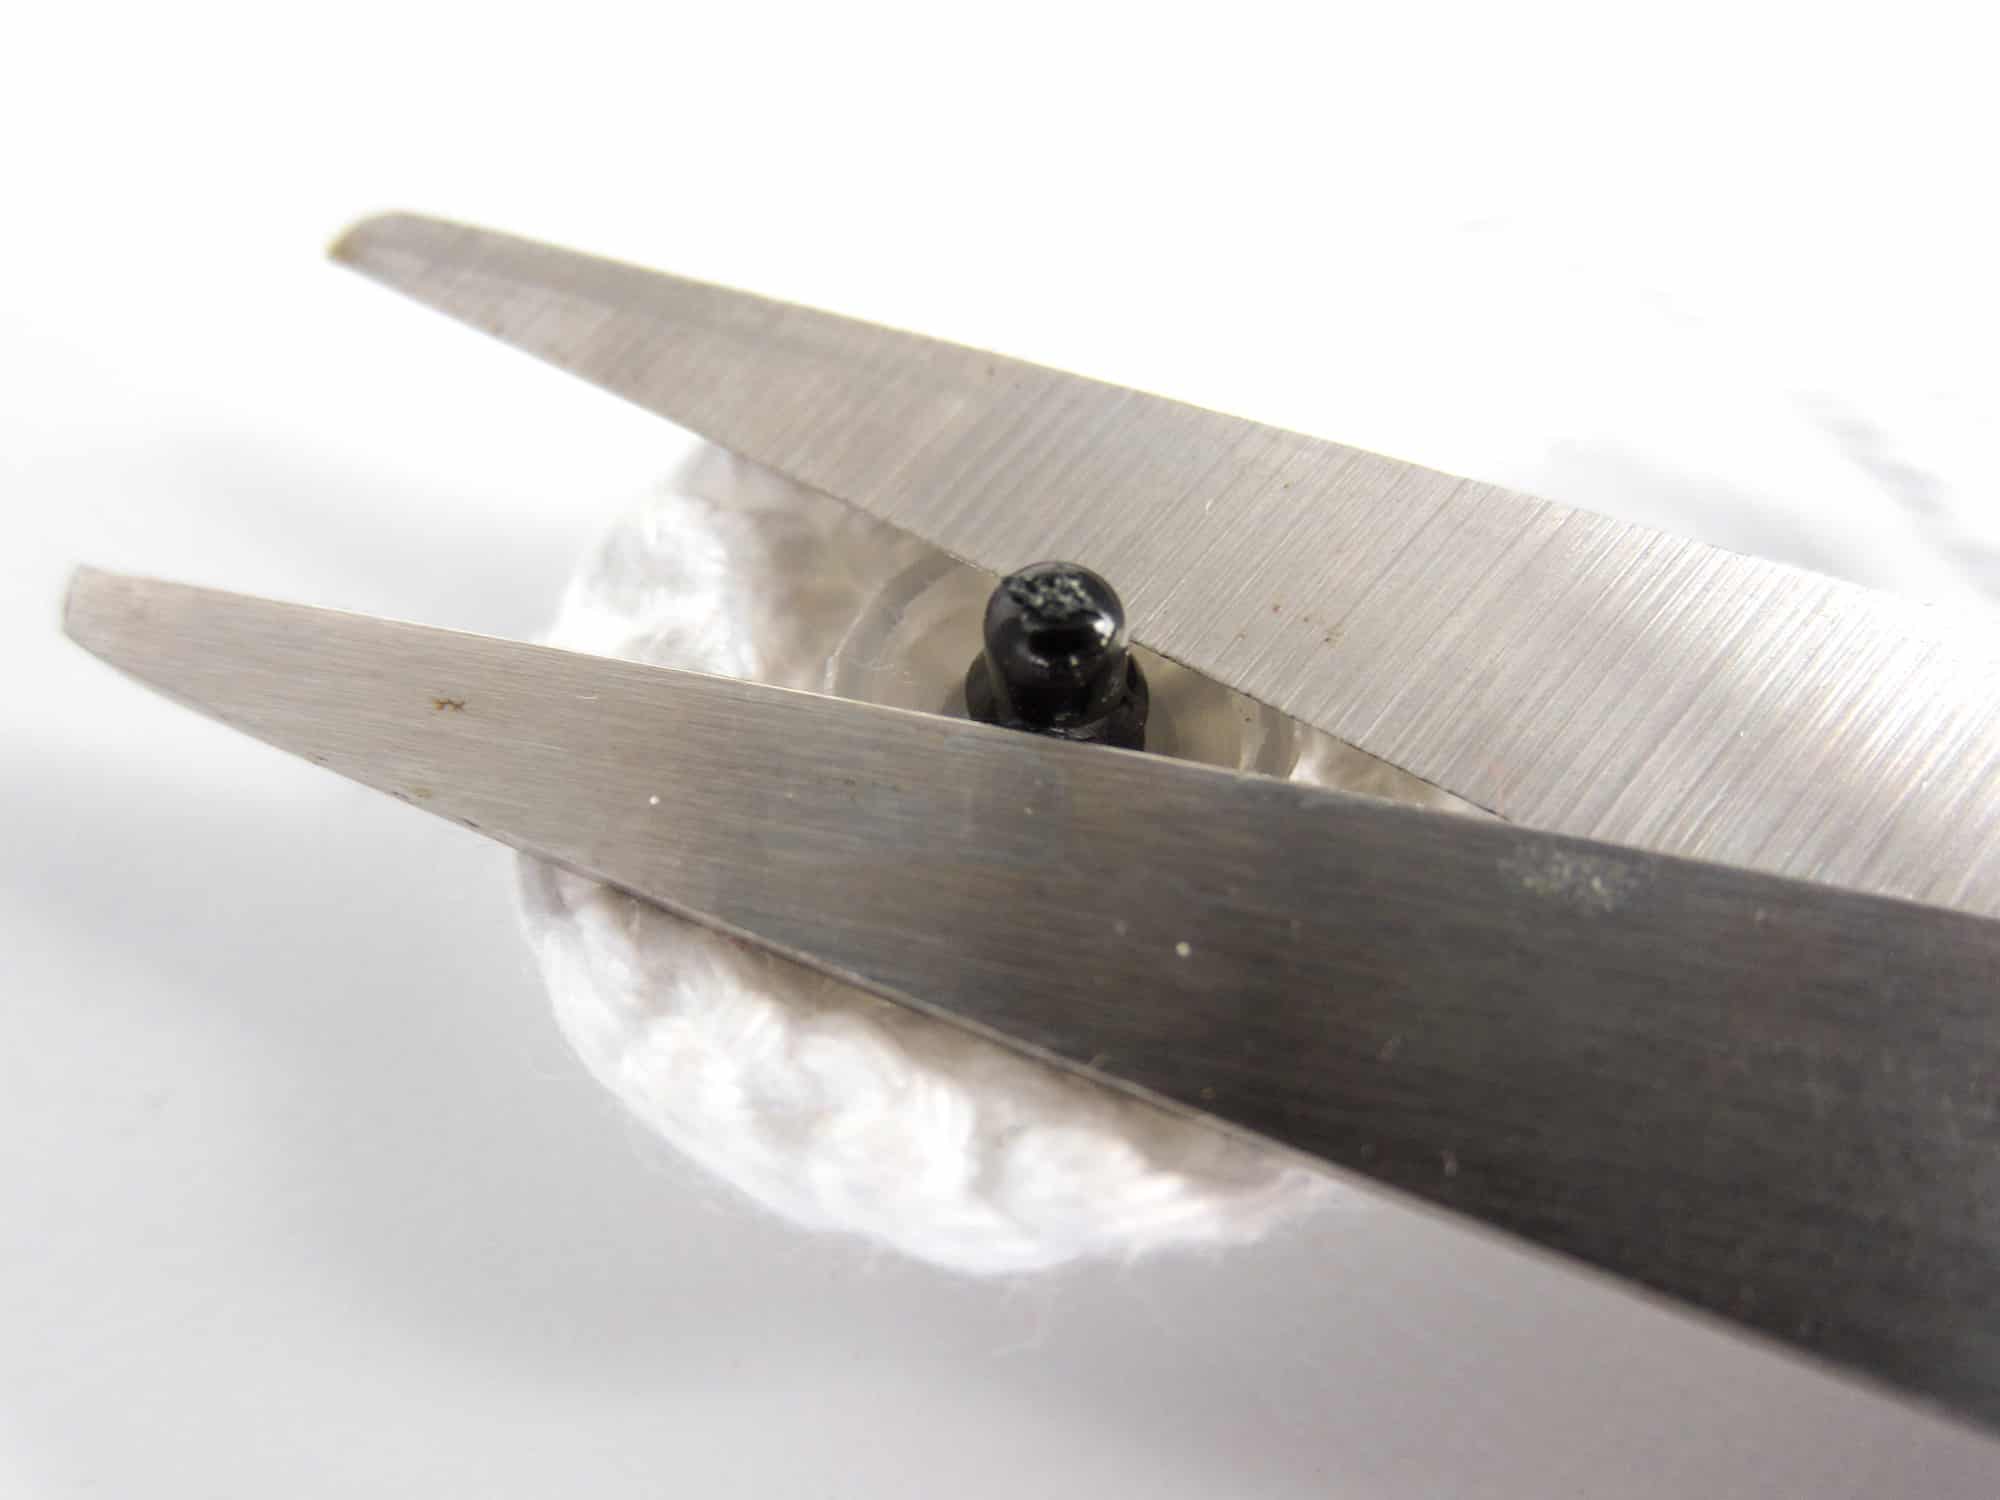
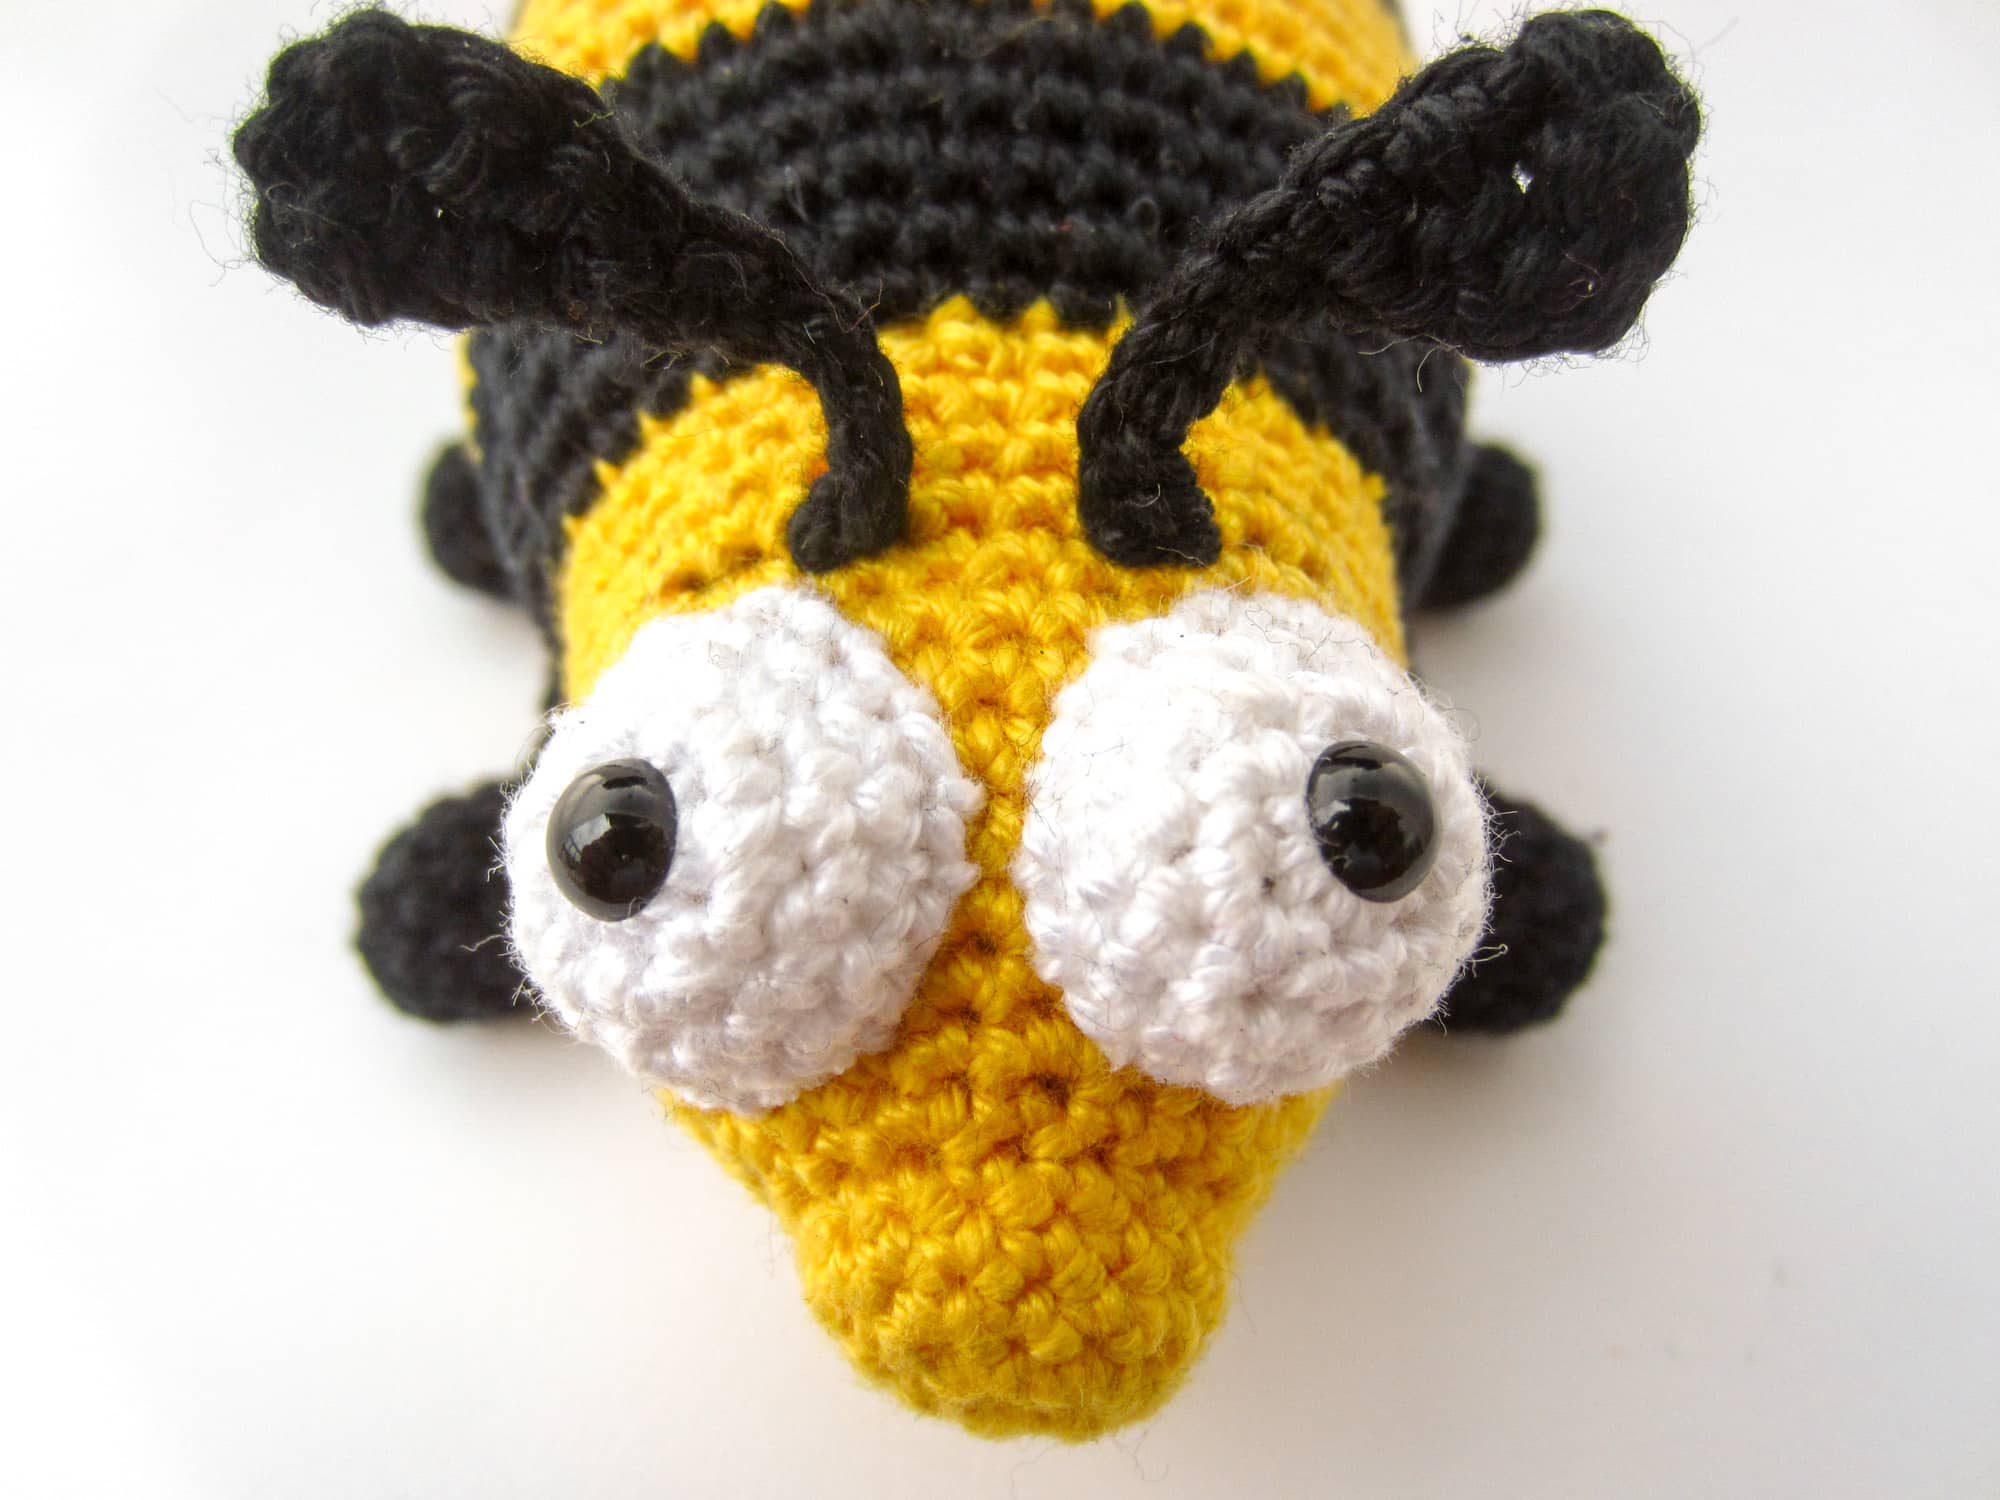
Pupils: The pupils are 6 mm safety eyes which have to be shortened a little after attaching to the eye so that the eye itself is not unintentionally deformed after sewing it onto the head.
Push the safety eye through the middle of the crocheted eye. If you have problems pushing the safety eye through the middle of the crocheted eye, take a crochet hook and pierce it through the middle to enlarge the opening.
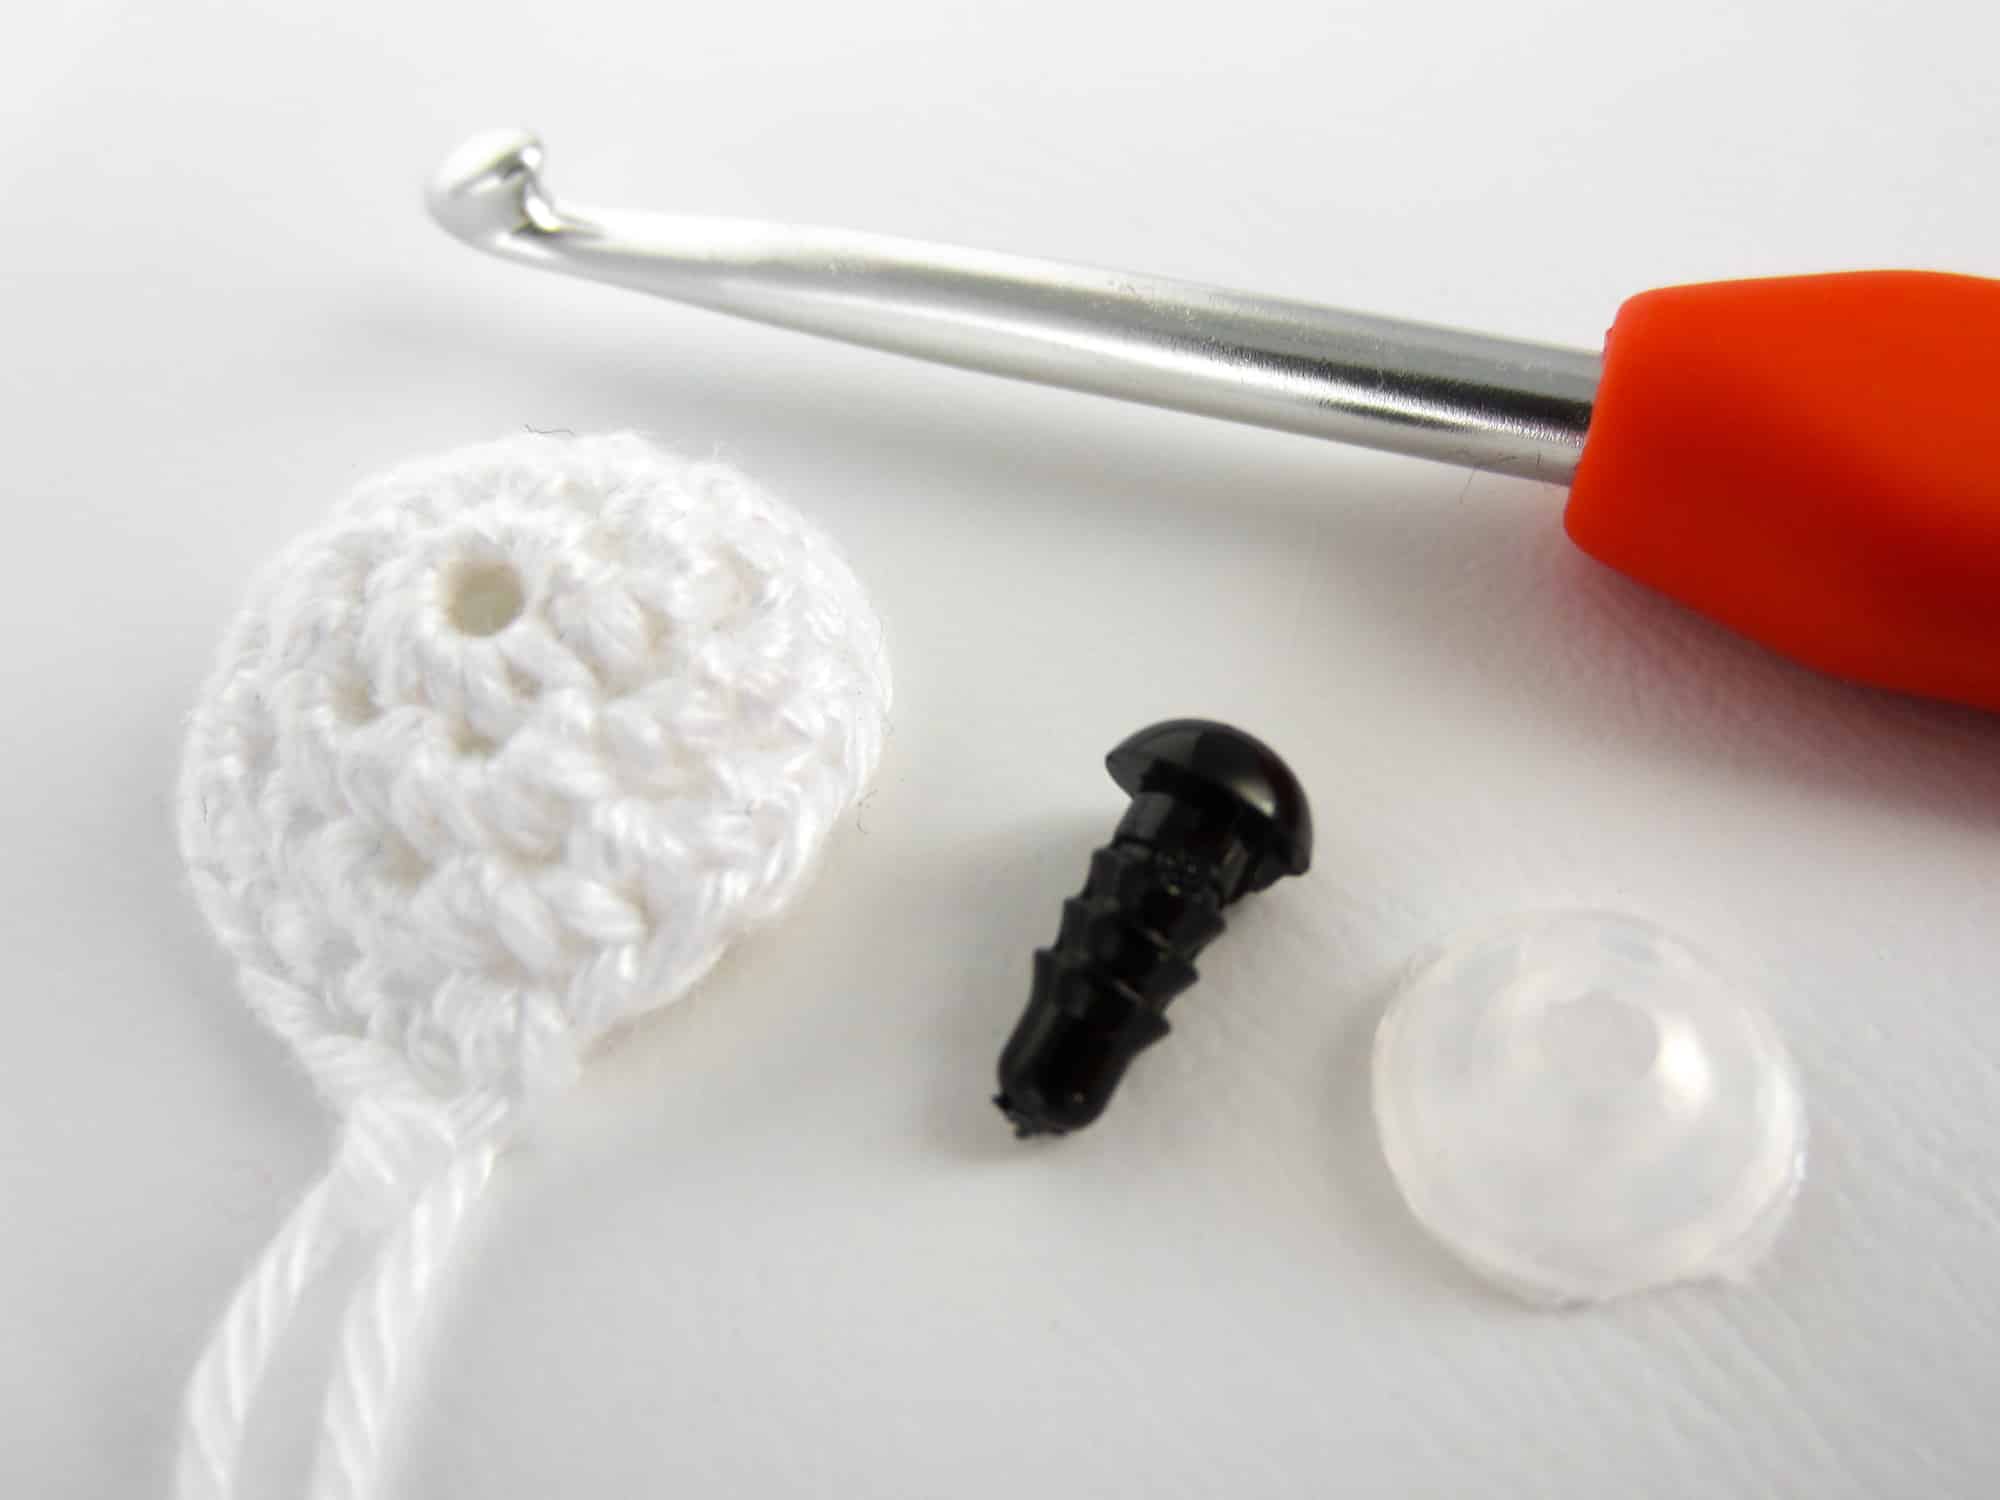
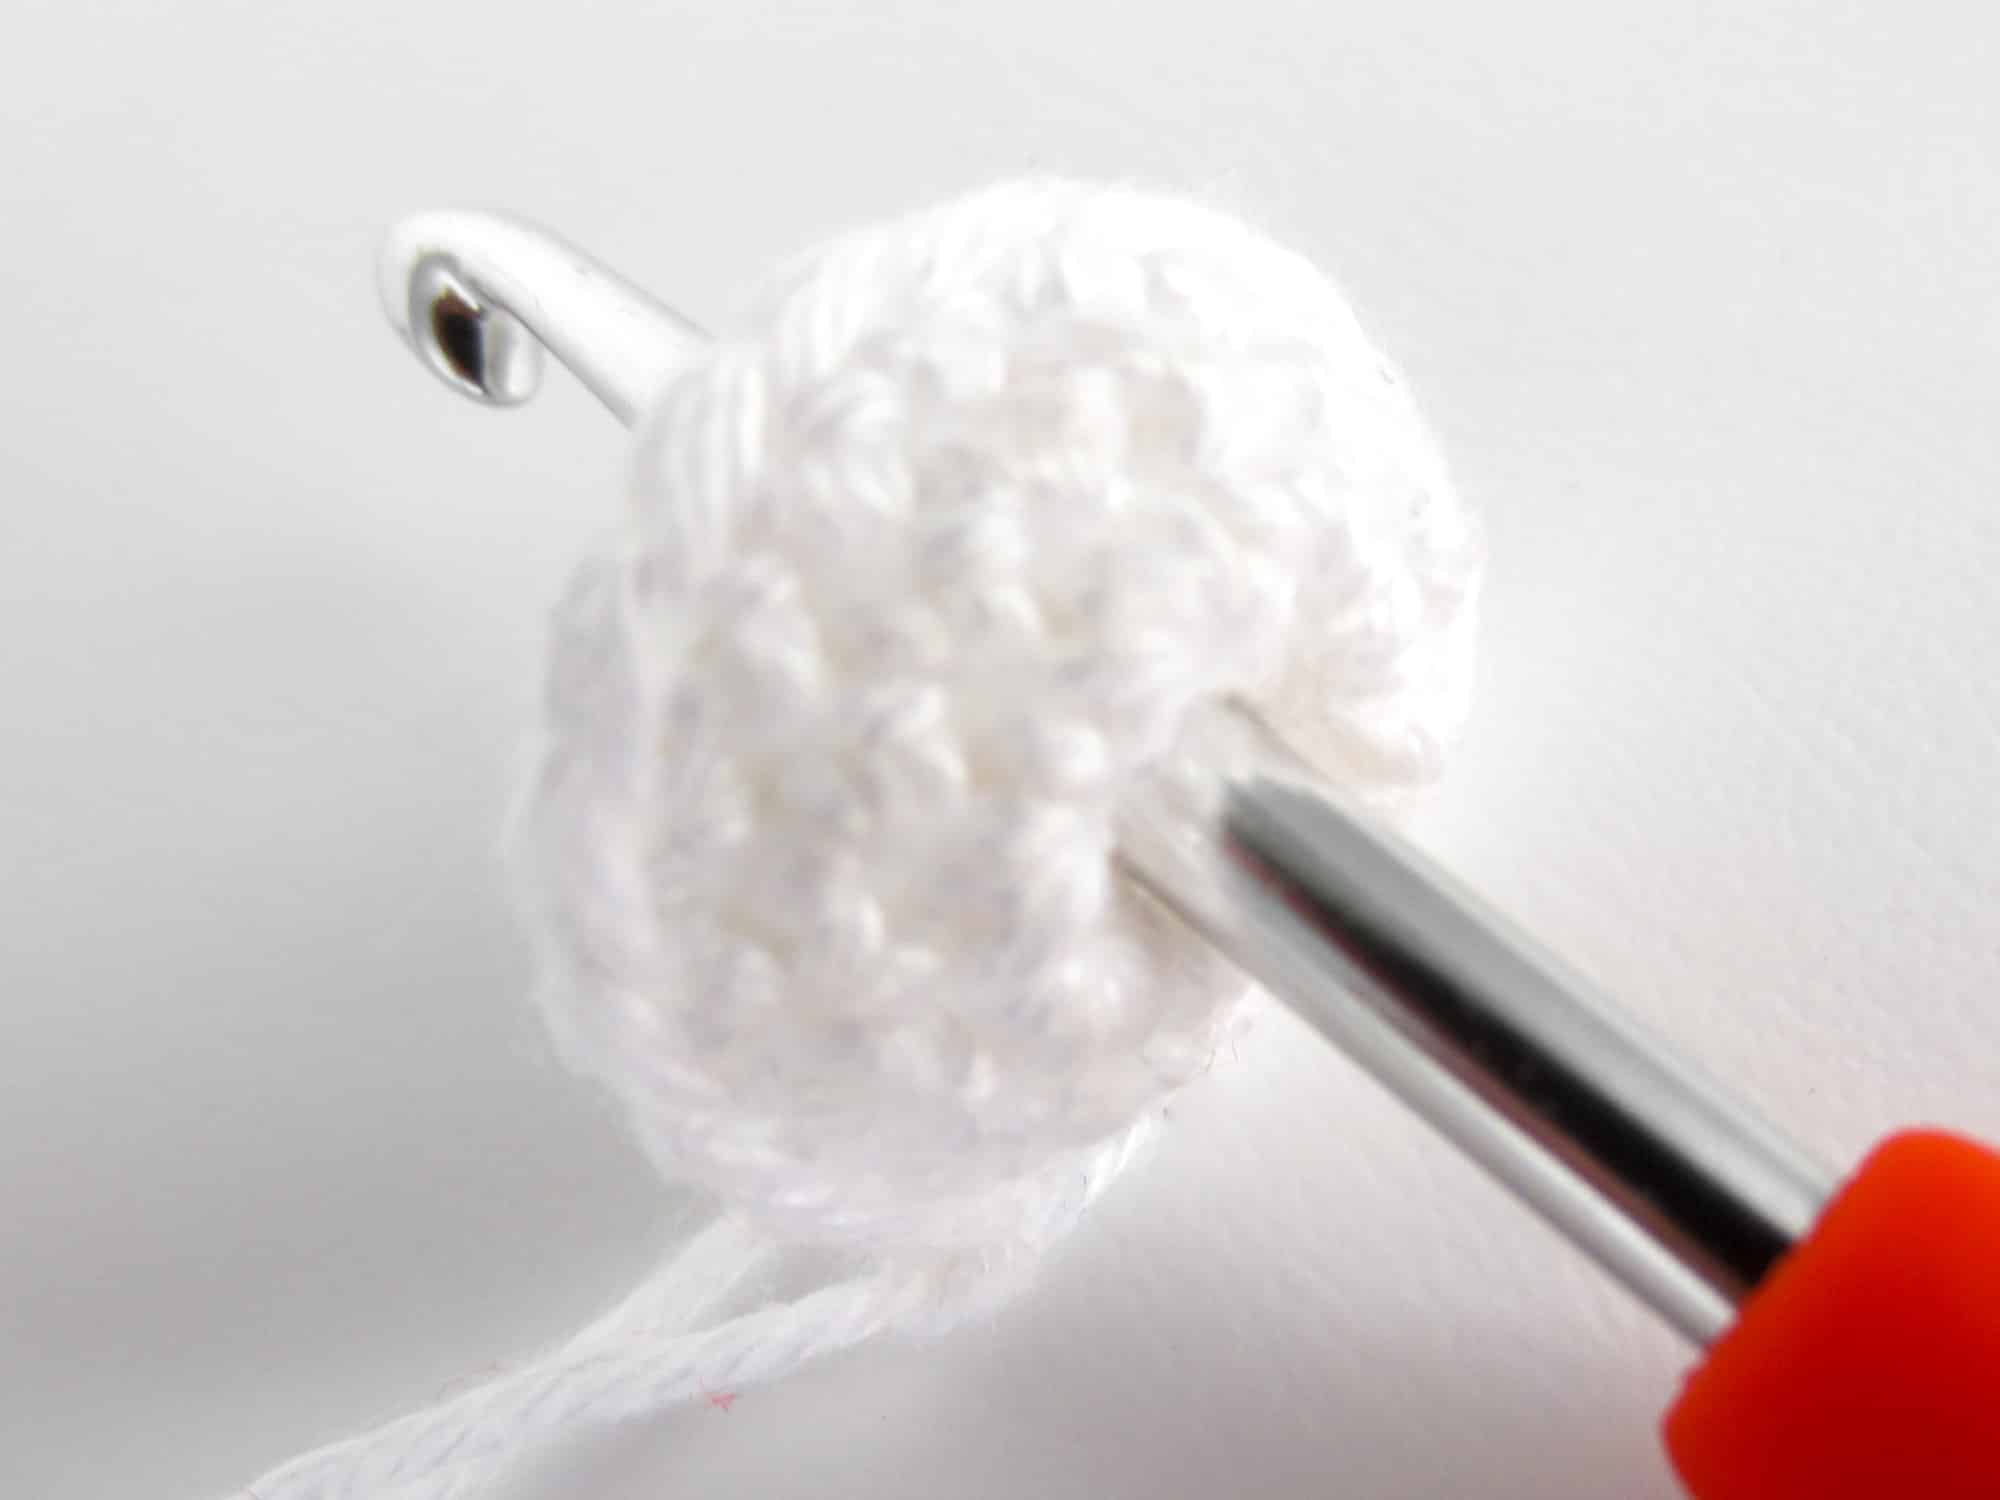
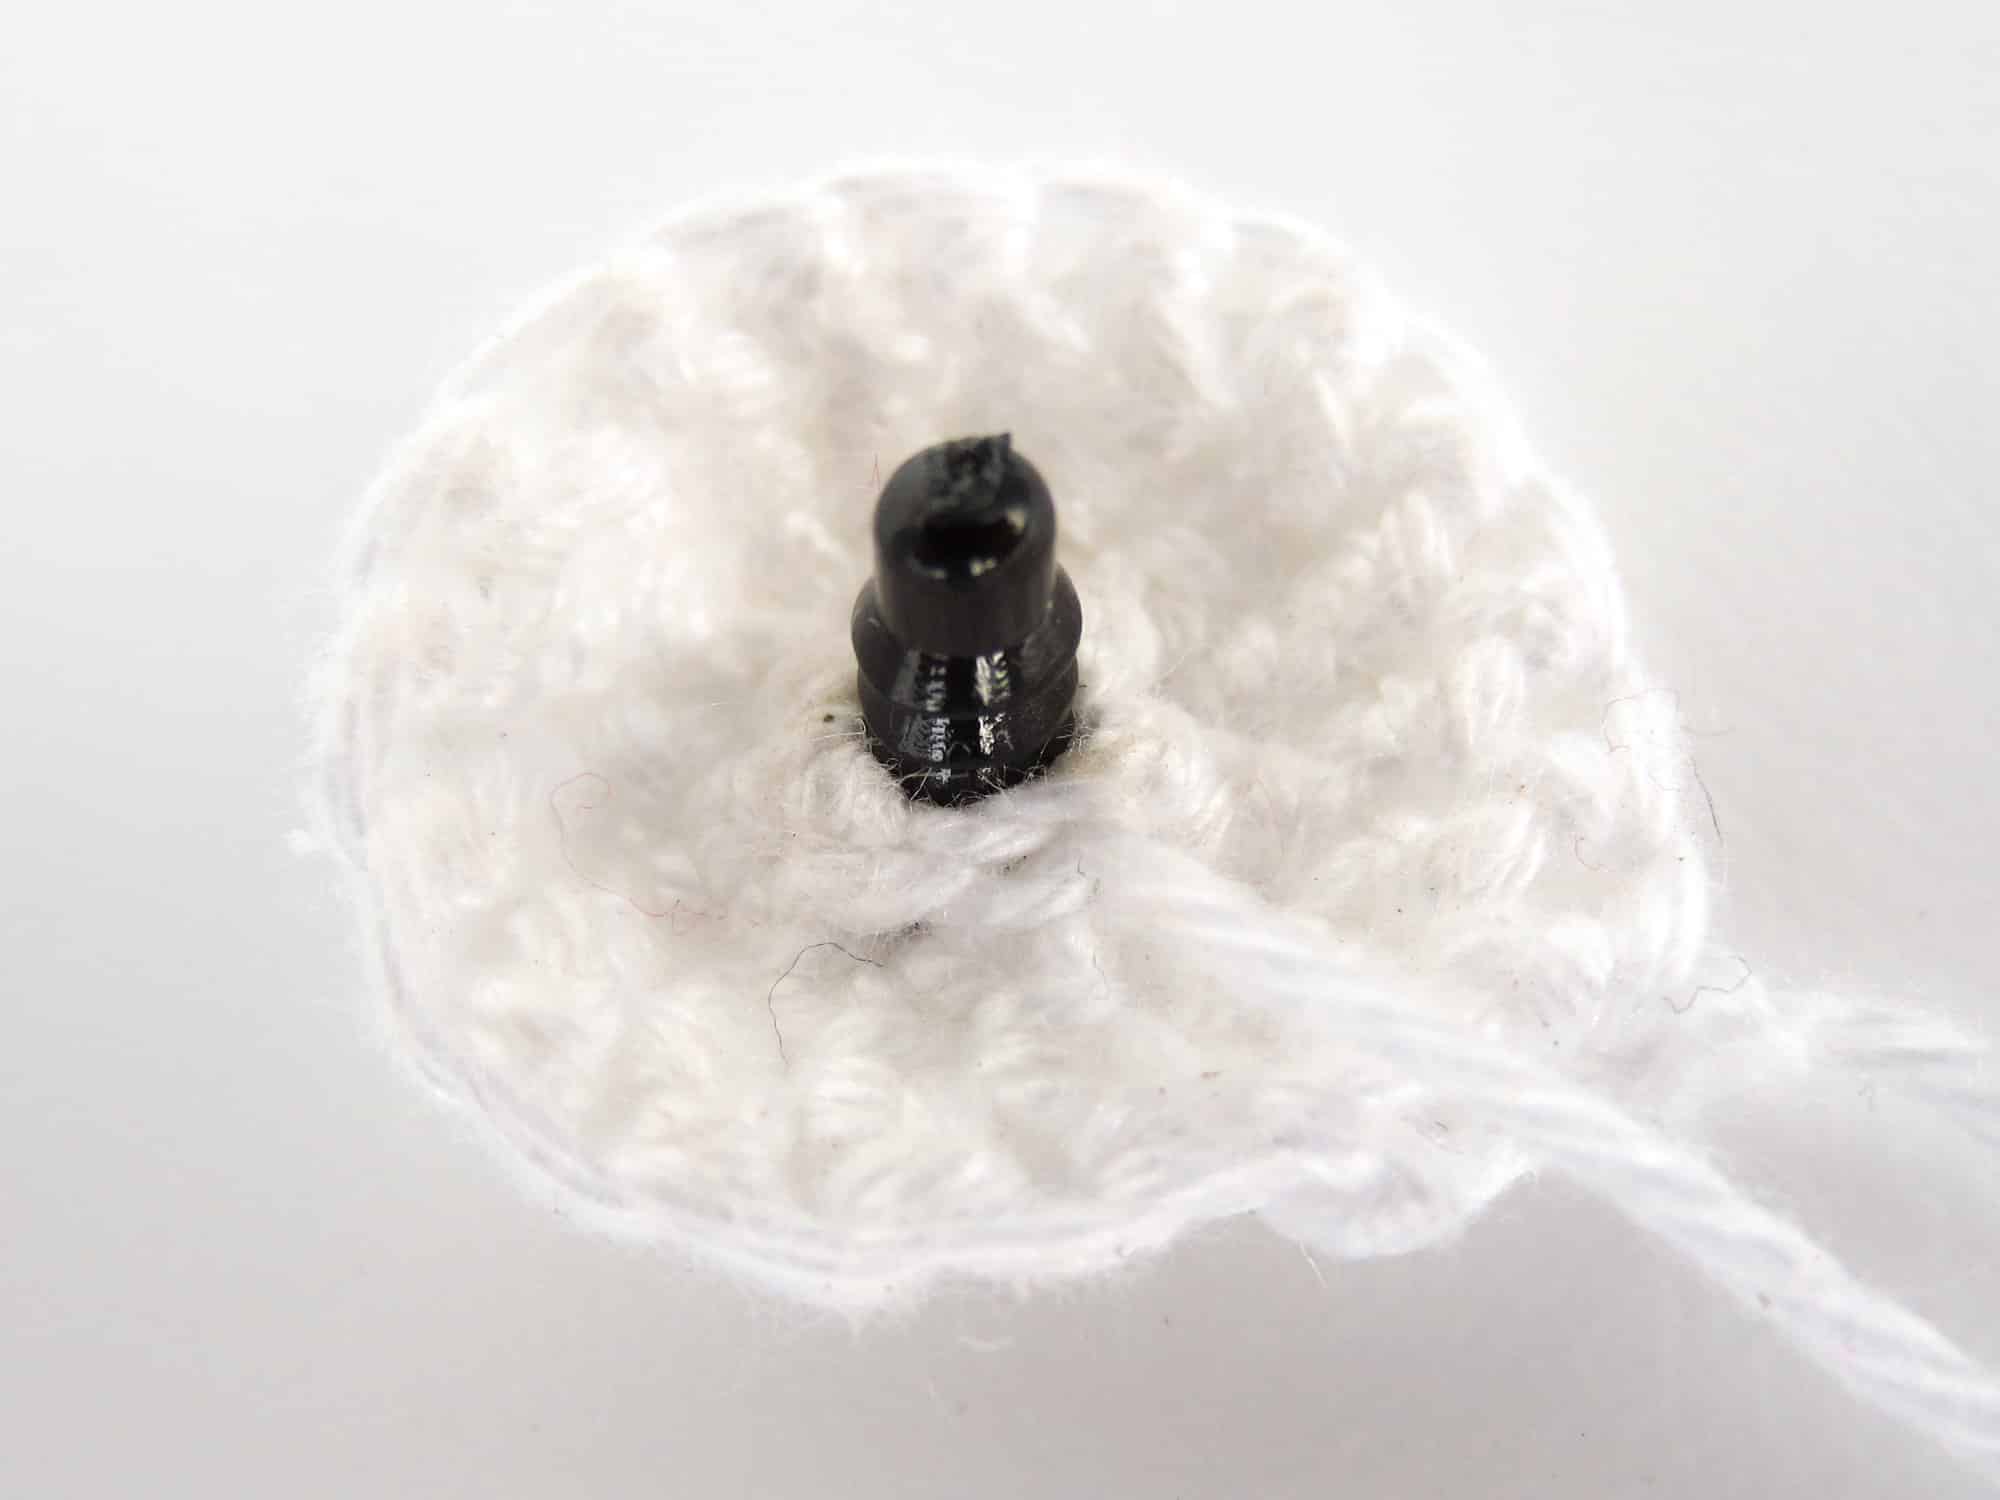
Then attach the washer and cut short the stem of the eye with scissors.

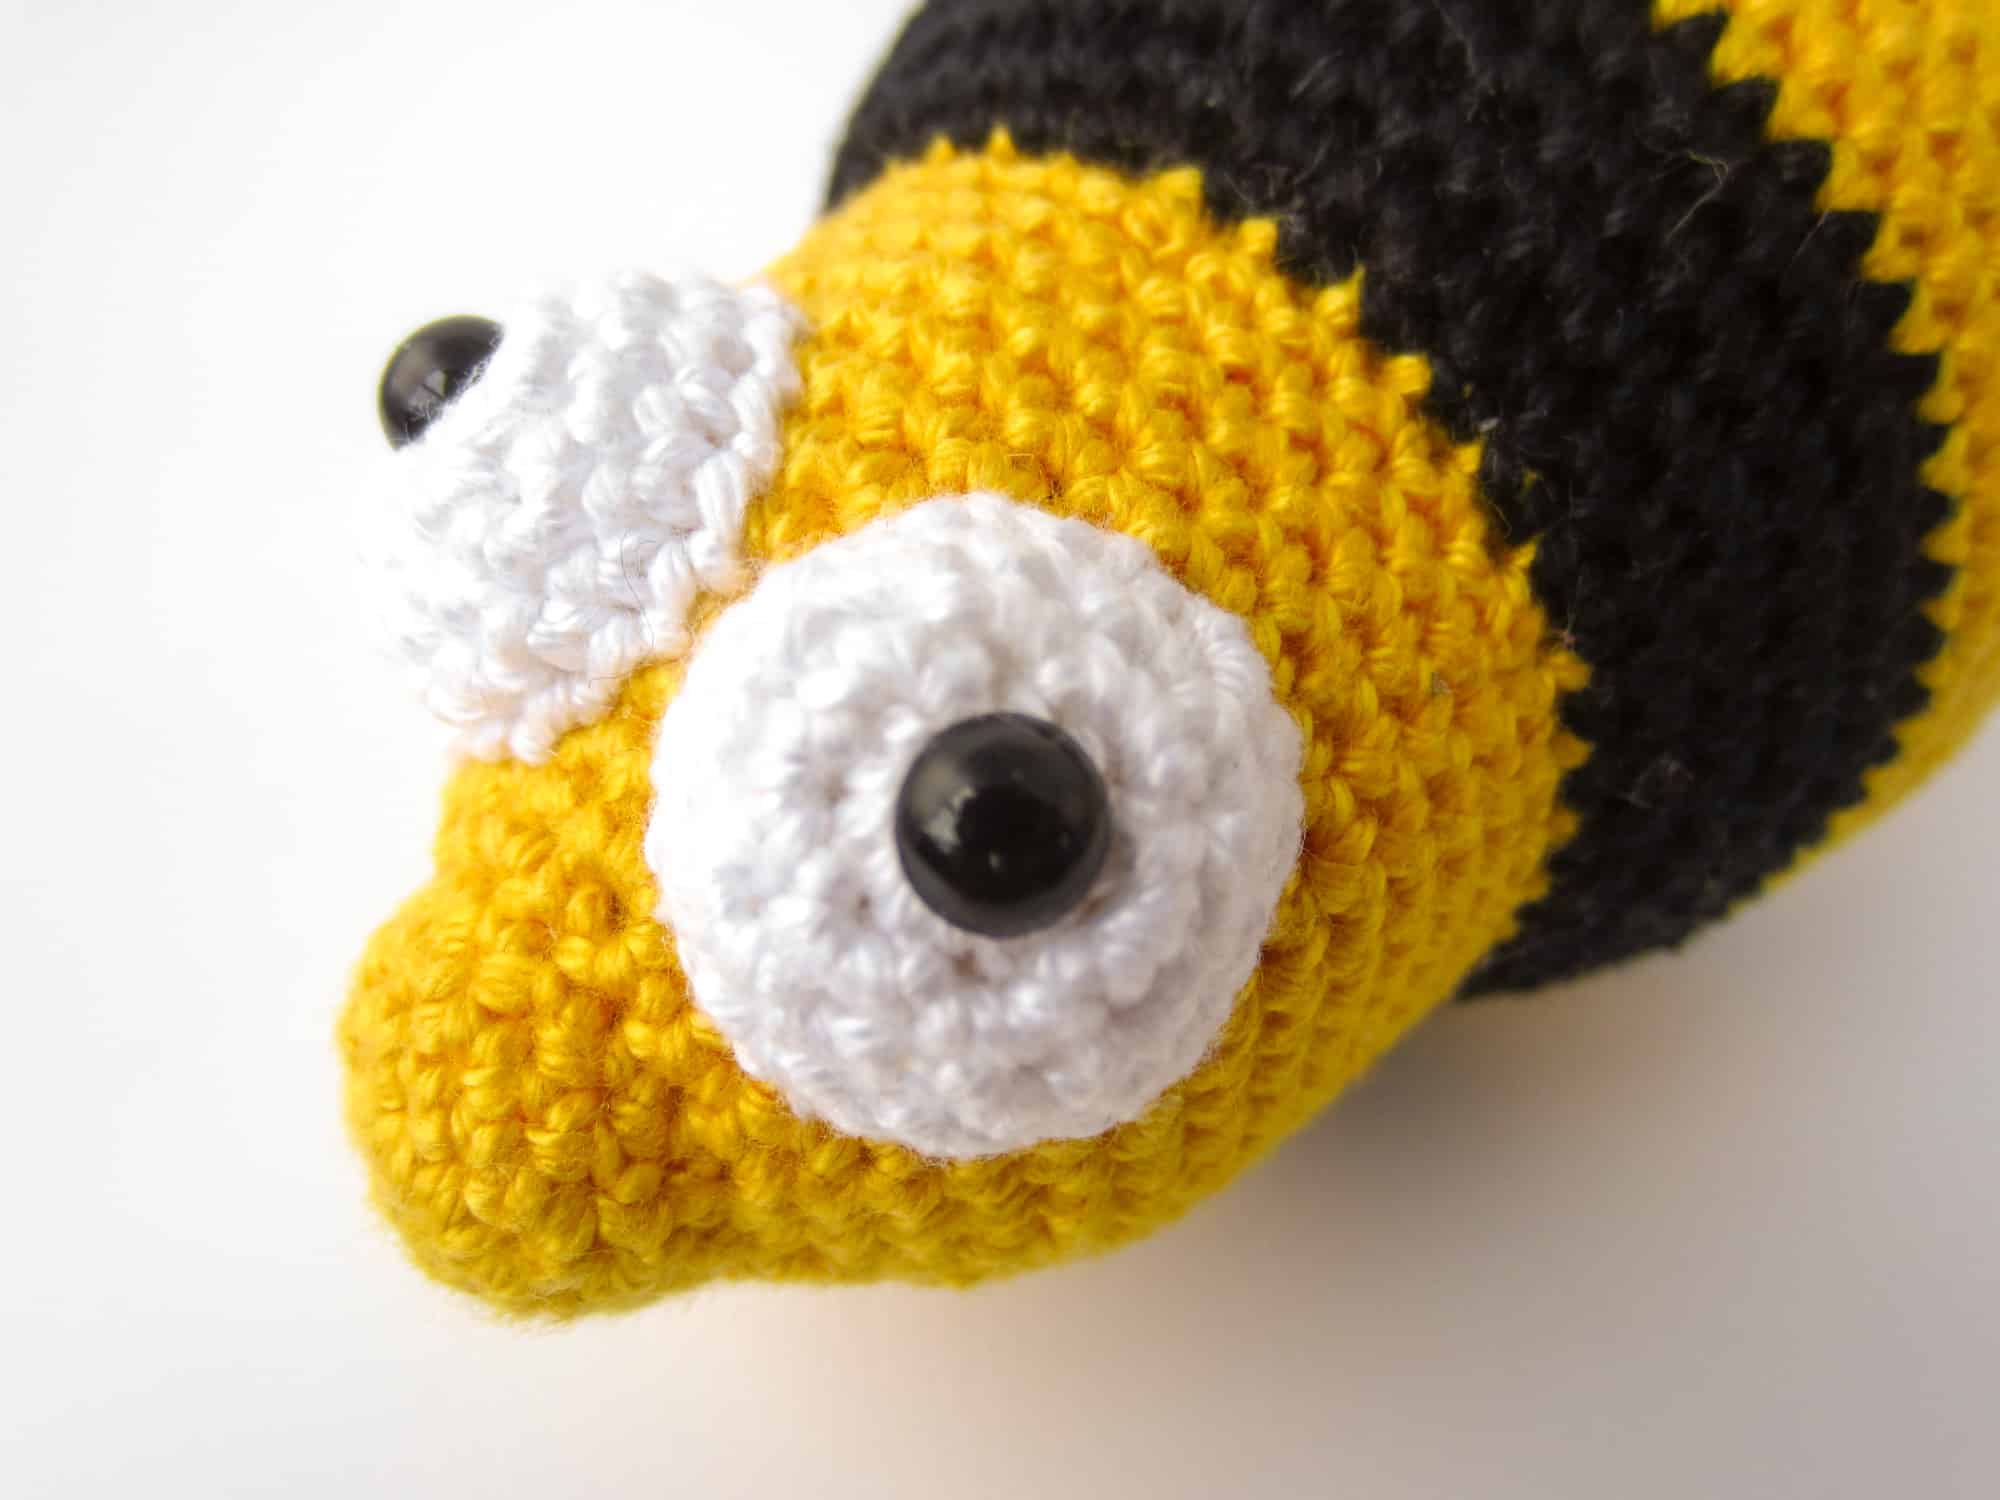
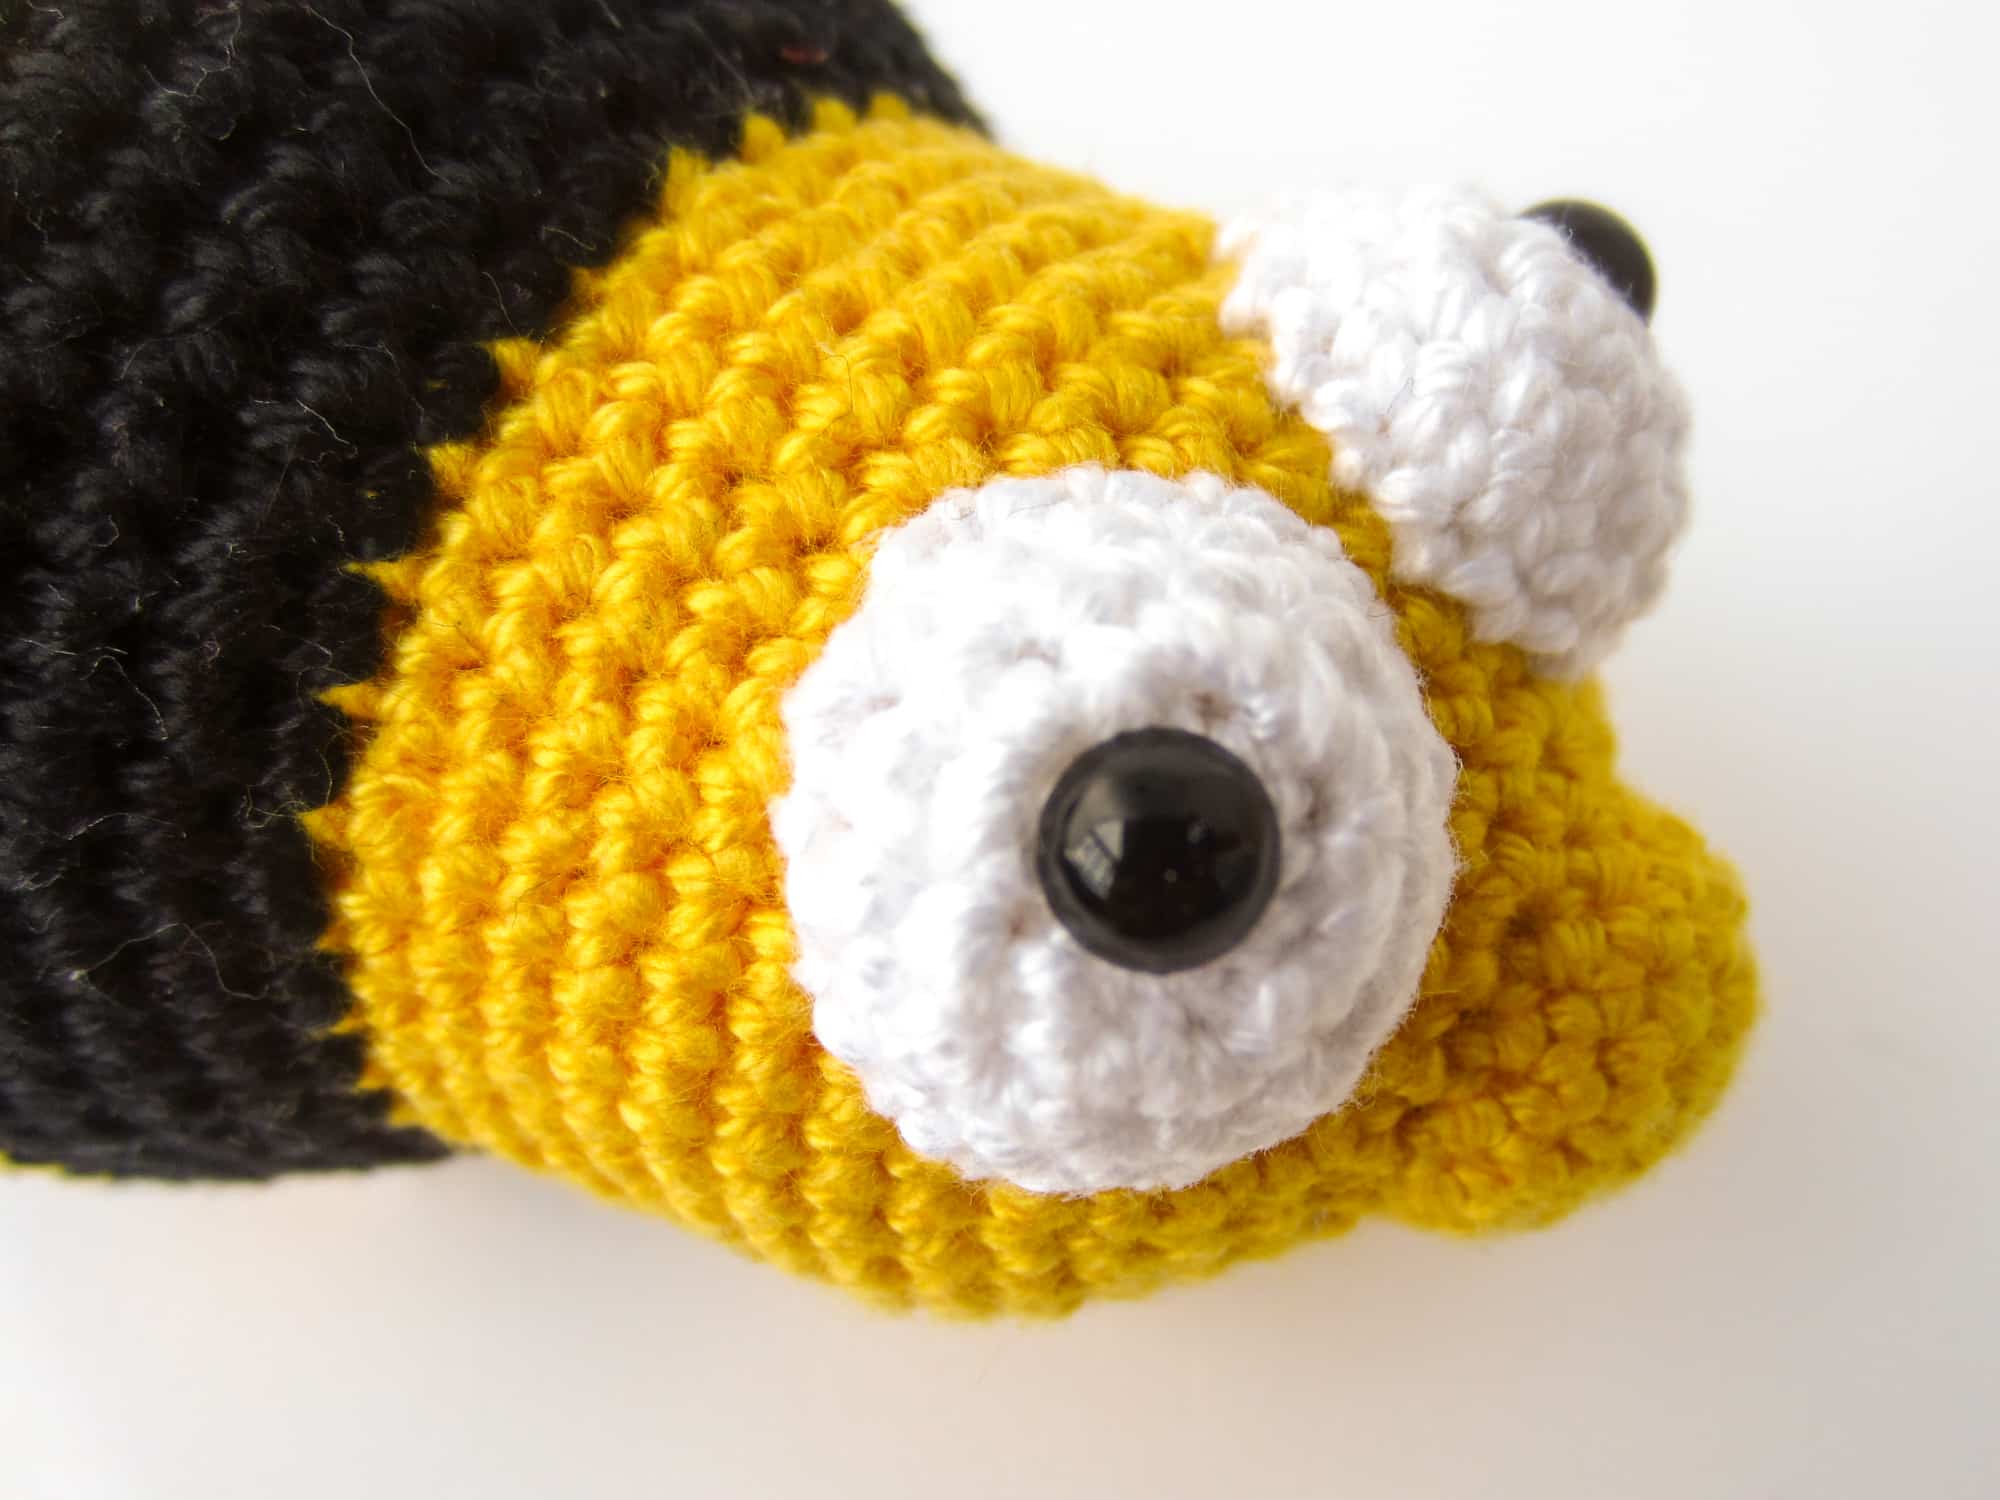
Eyes: Sew on the eyes 2 stitch rows after the nose, the nose ends with the stitch row that was crocheted only into the front loops. The eyes should have at the narrowest point a distance of 1 stitch to each other.

Legs: Sew on one leg each to the left and right on the first and second black stripe and on the second yellow stripe after the head. Sew on the legs so that the “feet” (the round part of the legs) are attached lower than the bottom of the body. Make sure that each sewed on leg is positioned only on one stripe.
Antennae: Sew on the antennae 1 stitch row behind the eyes with a distance of 2 stitches to each other.

Wings: Sew on the wings on the first black stripe after the head, after the 1st stitch row after the color change with a distance of 1 stitch to each other.

DONE!