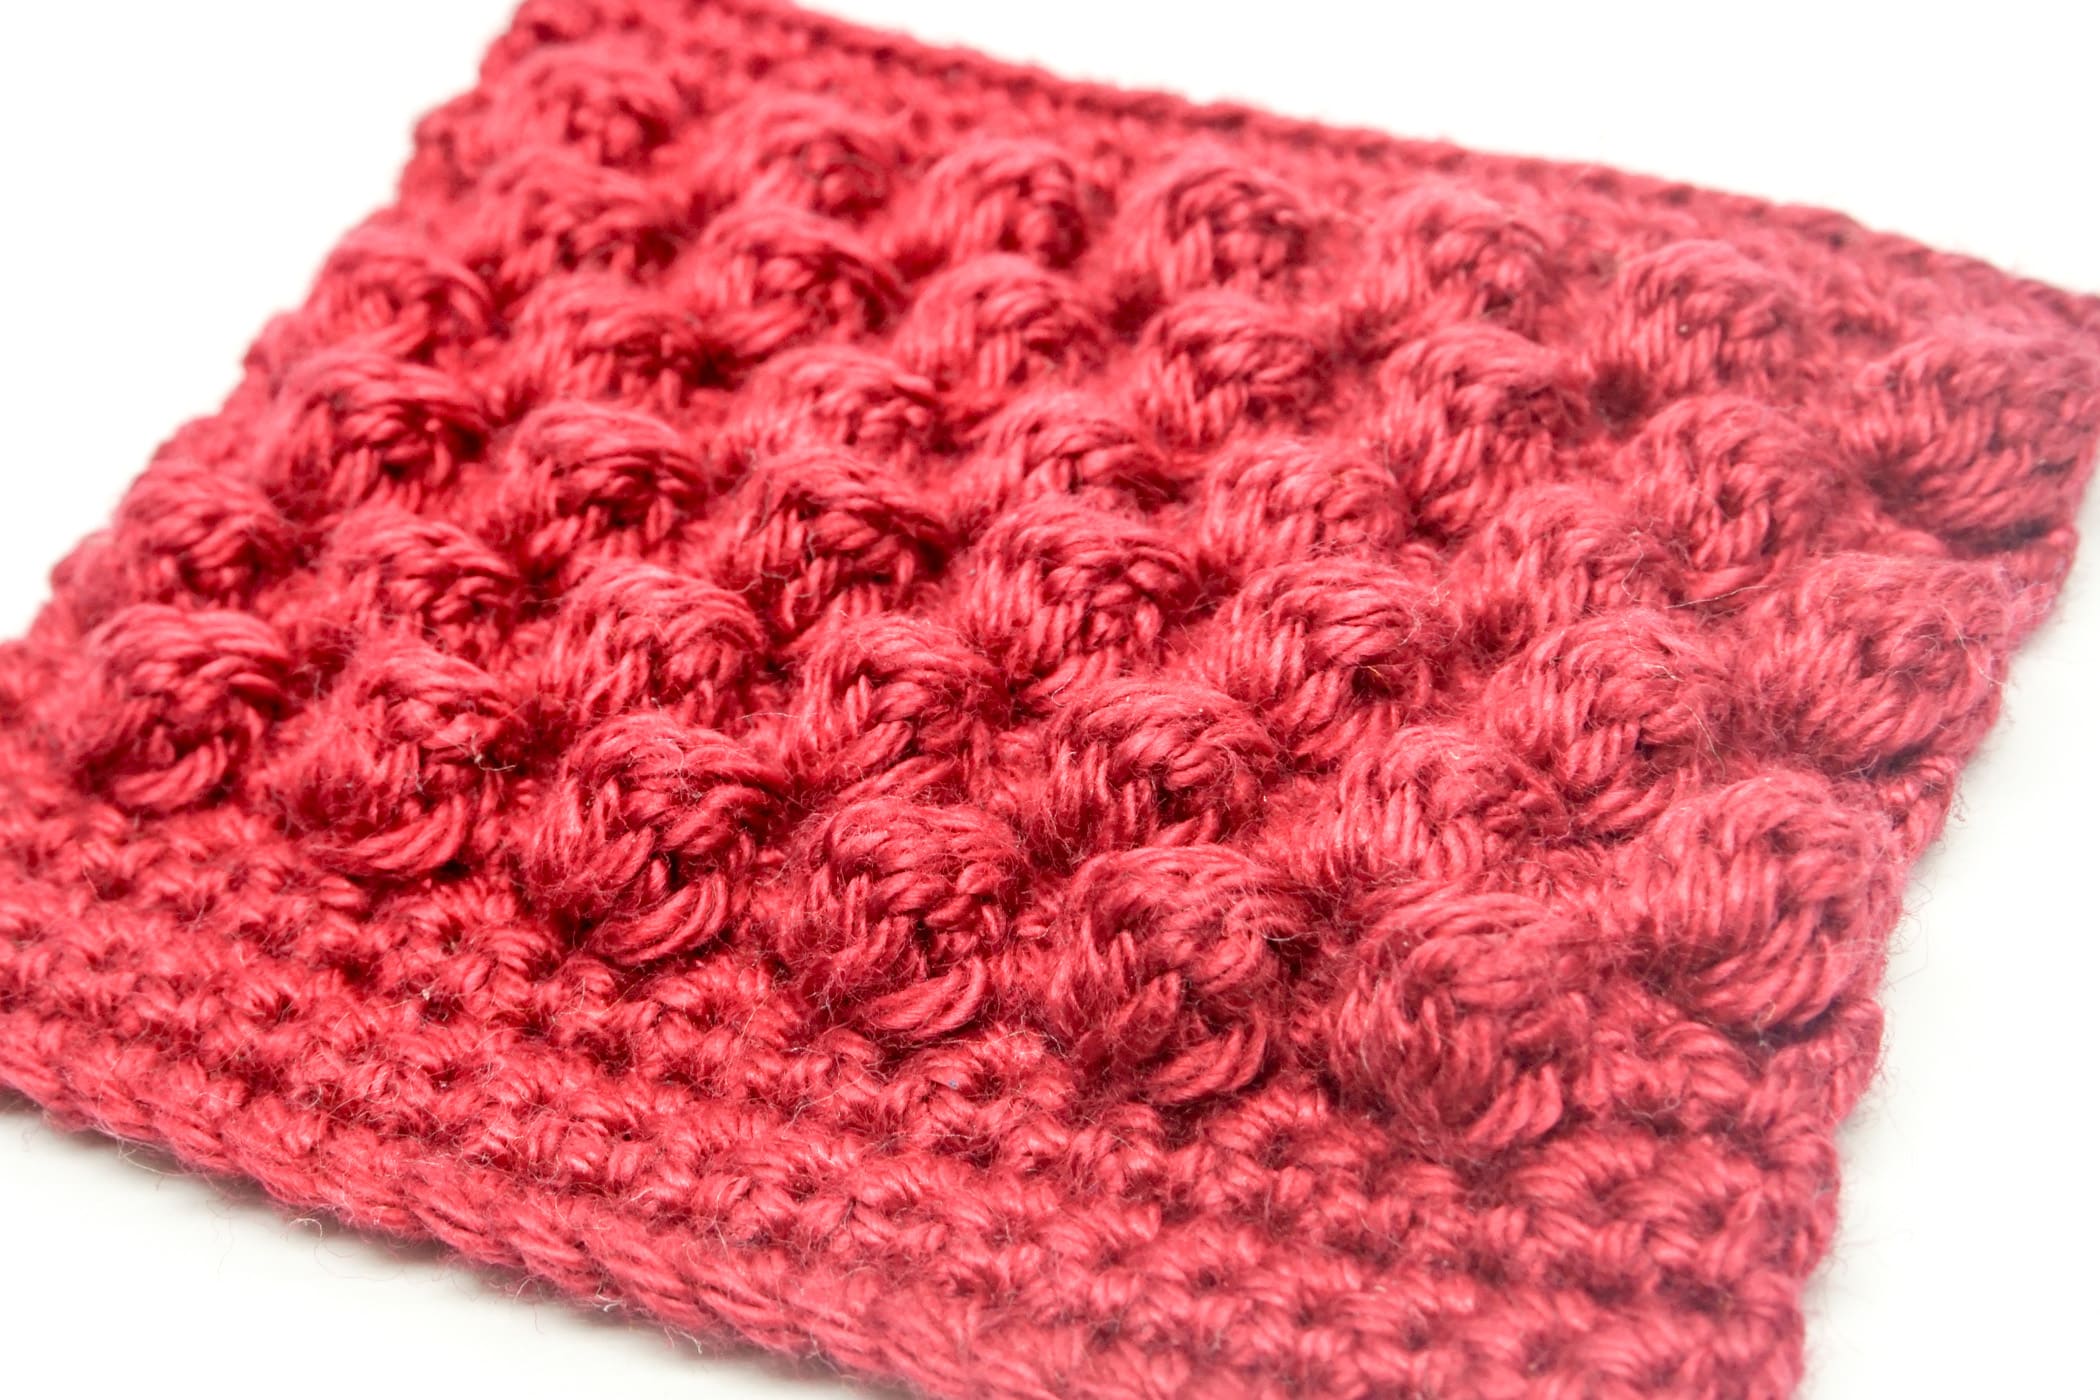
Learn to crochet bobble stitch. You crochet the bobble stitch from 5 half-finished double crochet stitches, which are crocheted into the same stitch and then finished all at once.
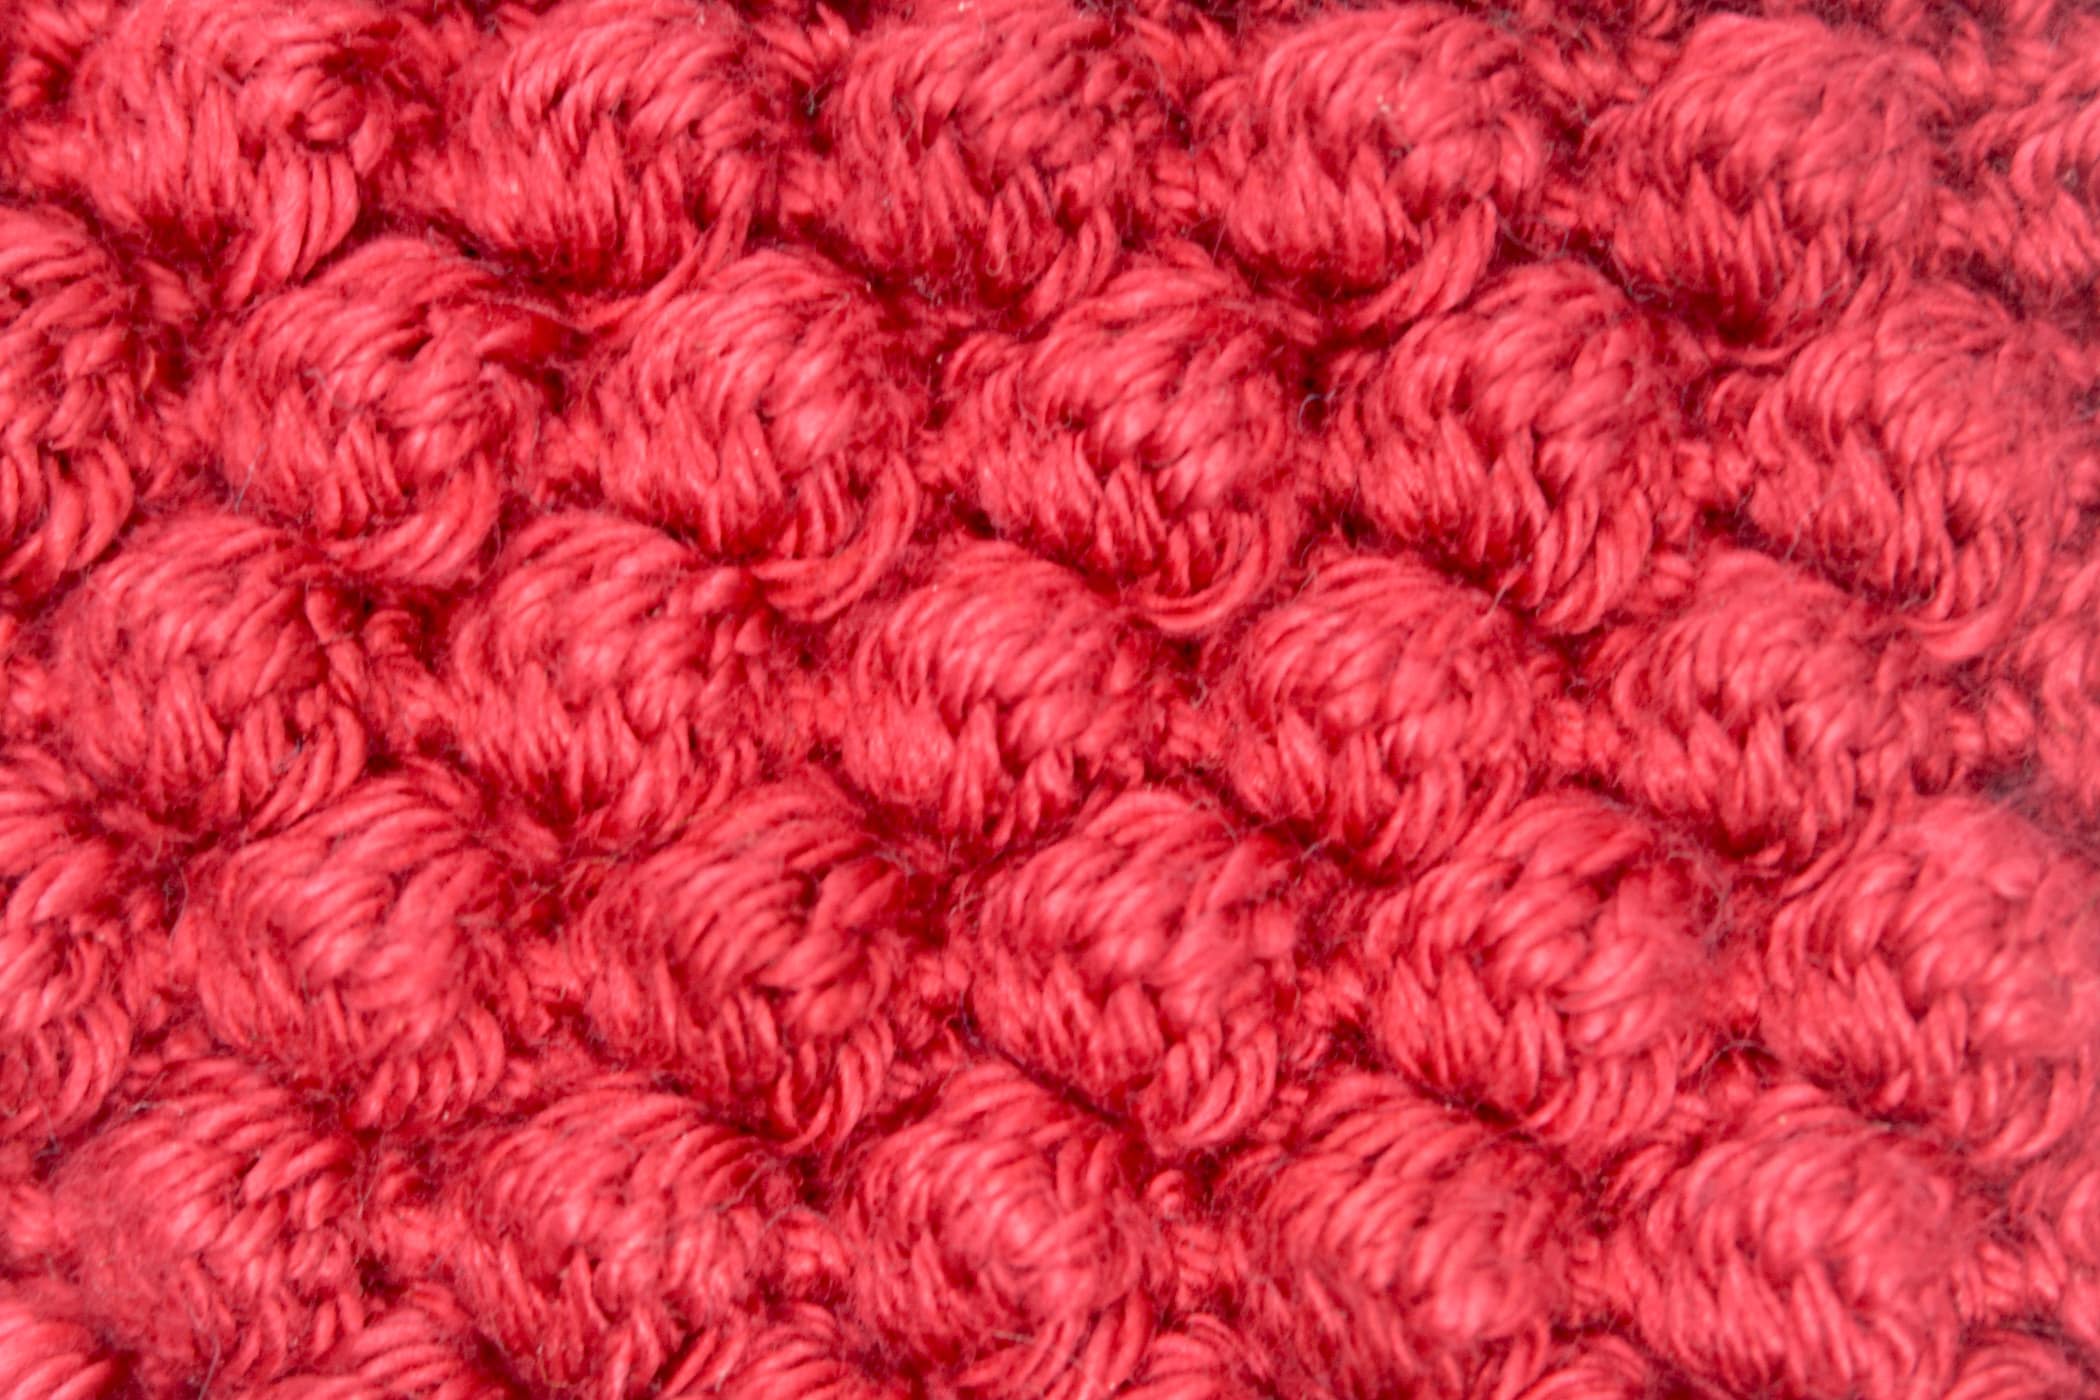
The bobble stitch creates a soft, rounded bulge that will be visible on the back of your crochet piece.
The bobble stitch is great for adding a nice, soft-looking texture to your amigurumi, such as the body of a sheep for example.
But because the bobble stitch is created on the back side of the crochet piece, this stitch is not ideal for all projects. However, if it does not matter which side of your crochet piece is visible, then this is not a problem at all, of course.
Particularly for crochet projects, such as hats and scarves, the bobble stitch can be perfectly used to create beautiful and interesting structures.
You can find more instructions for voluminous crochet stitches here:
The Bobble Stitch
Needed Techniques
Needed Materials and Tools
To order the materials click on the respective link (affiliate link).
- Colors: red
- This pattern was crocheted using the “Schachenmayr Catania” yarn (100% Cotton, Meterage: 125 m, Yarn Ball Weight: 50 g, Yarn Weight: Sport – 5ply / Fine (2)) in the following colors:
- Cherry (Kirsche (424))
- 2.5 mm Crochet Hook
No products found.
Crochet a Bobble Stitch
In this tutorial, the bobble stitch is crocheted “in rows”. Bobble stitches can of course also be crocheted in spiral rounds and joined rounds. The crochet piece was crocheted with single crochet stitches.
Use the check boxes to mark your finished rounds, rows and steps.
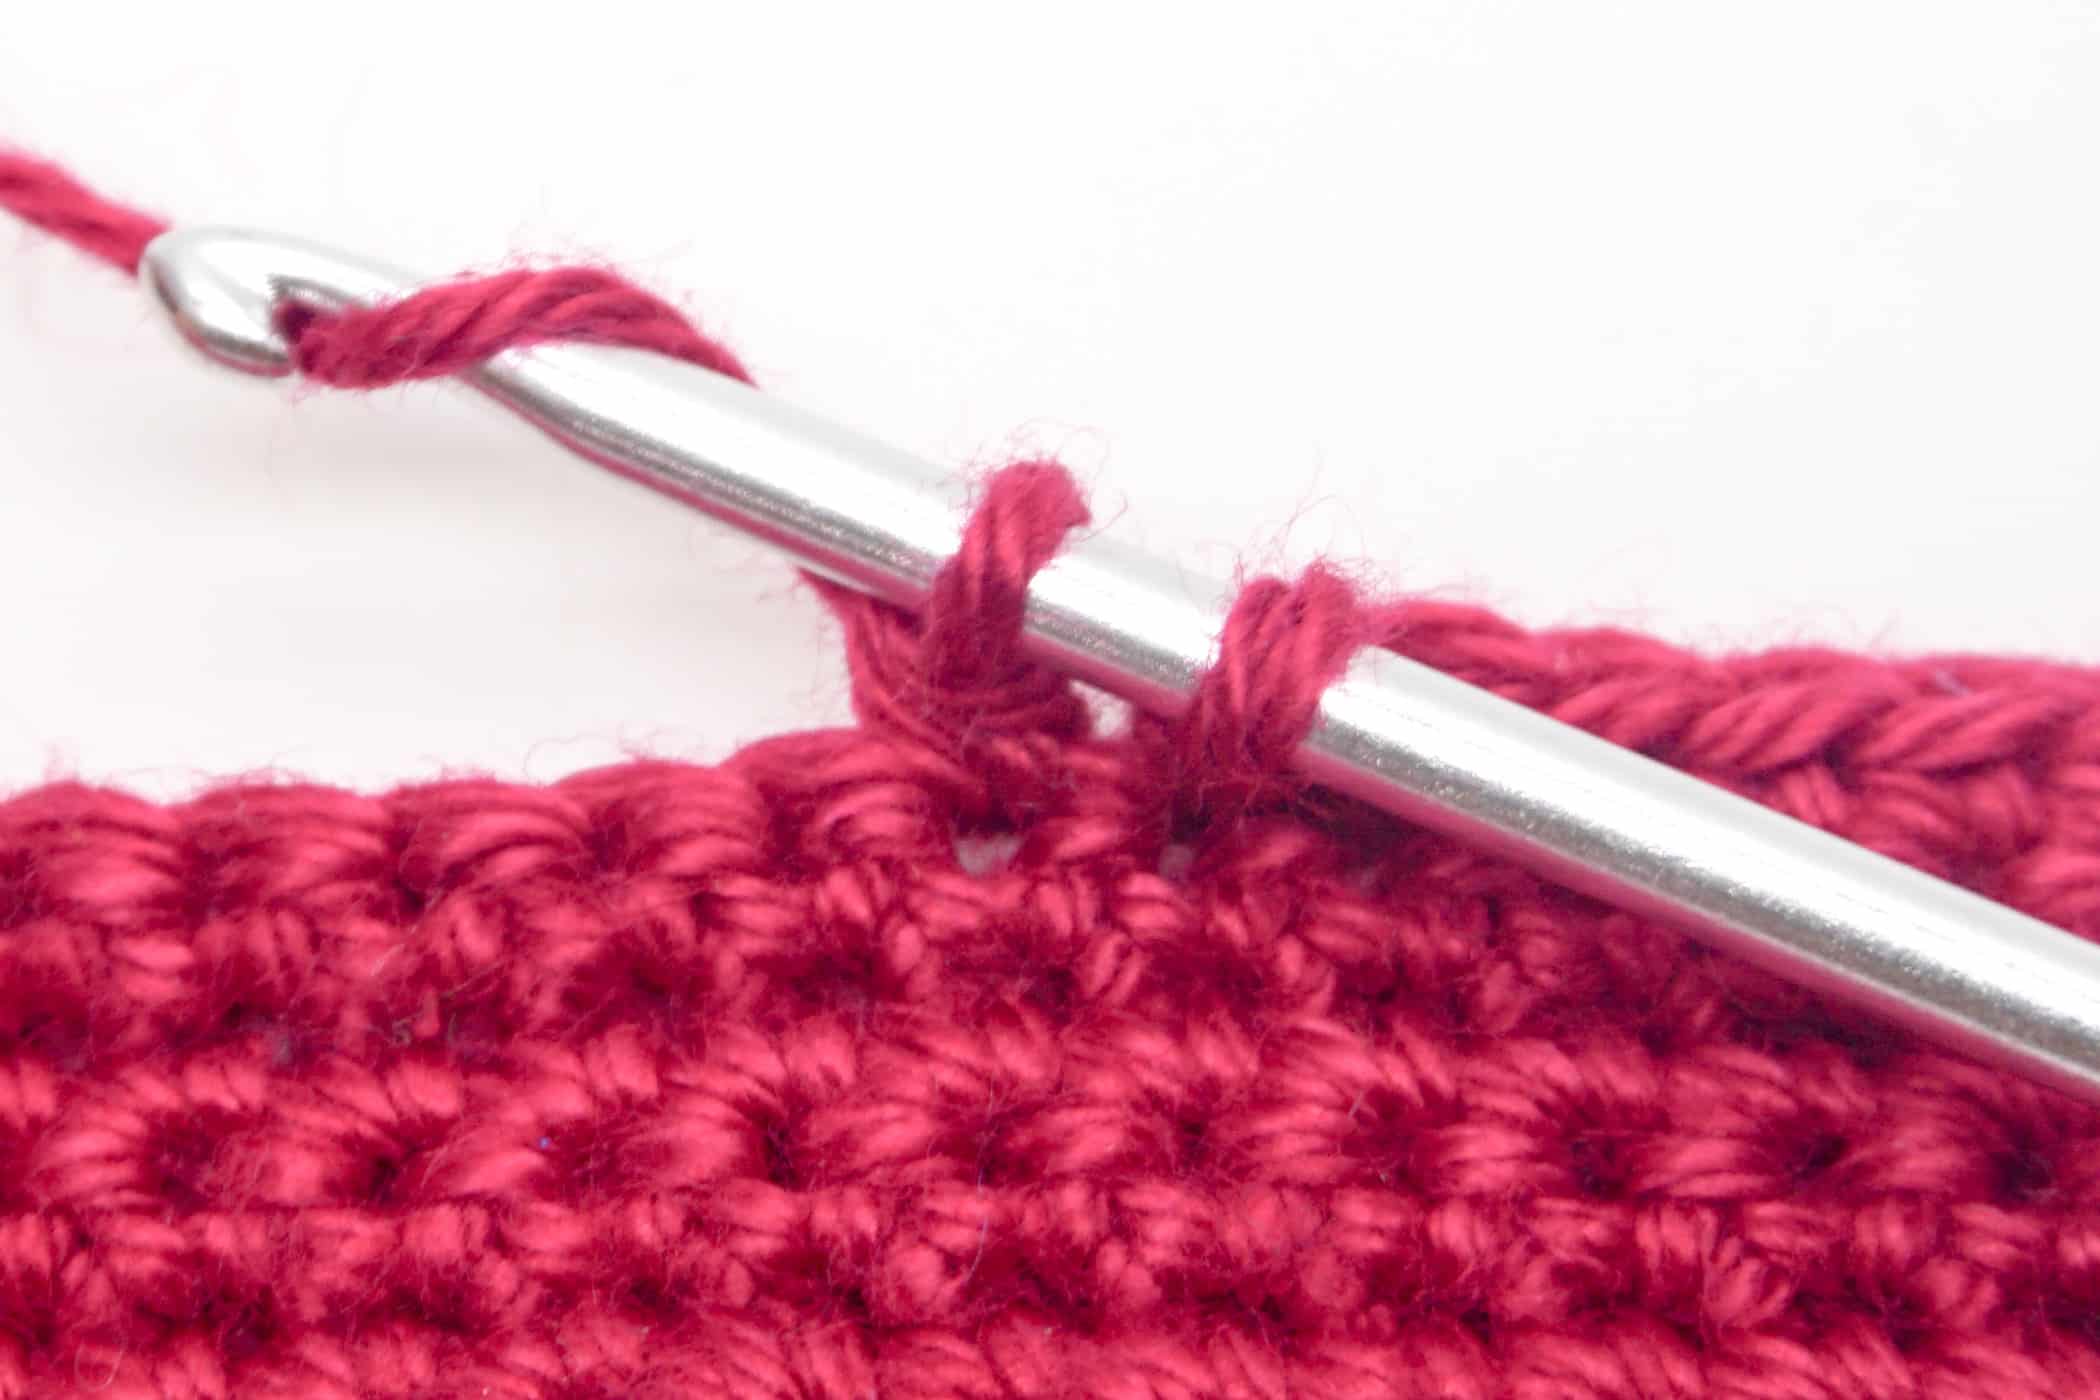
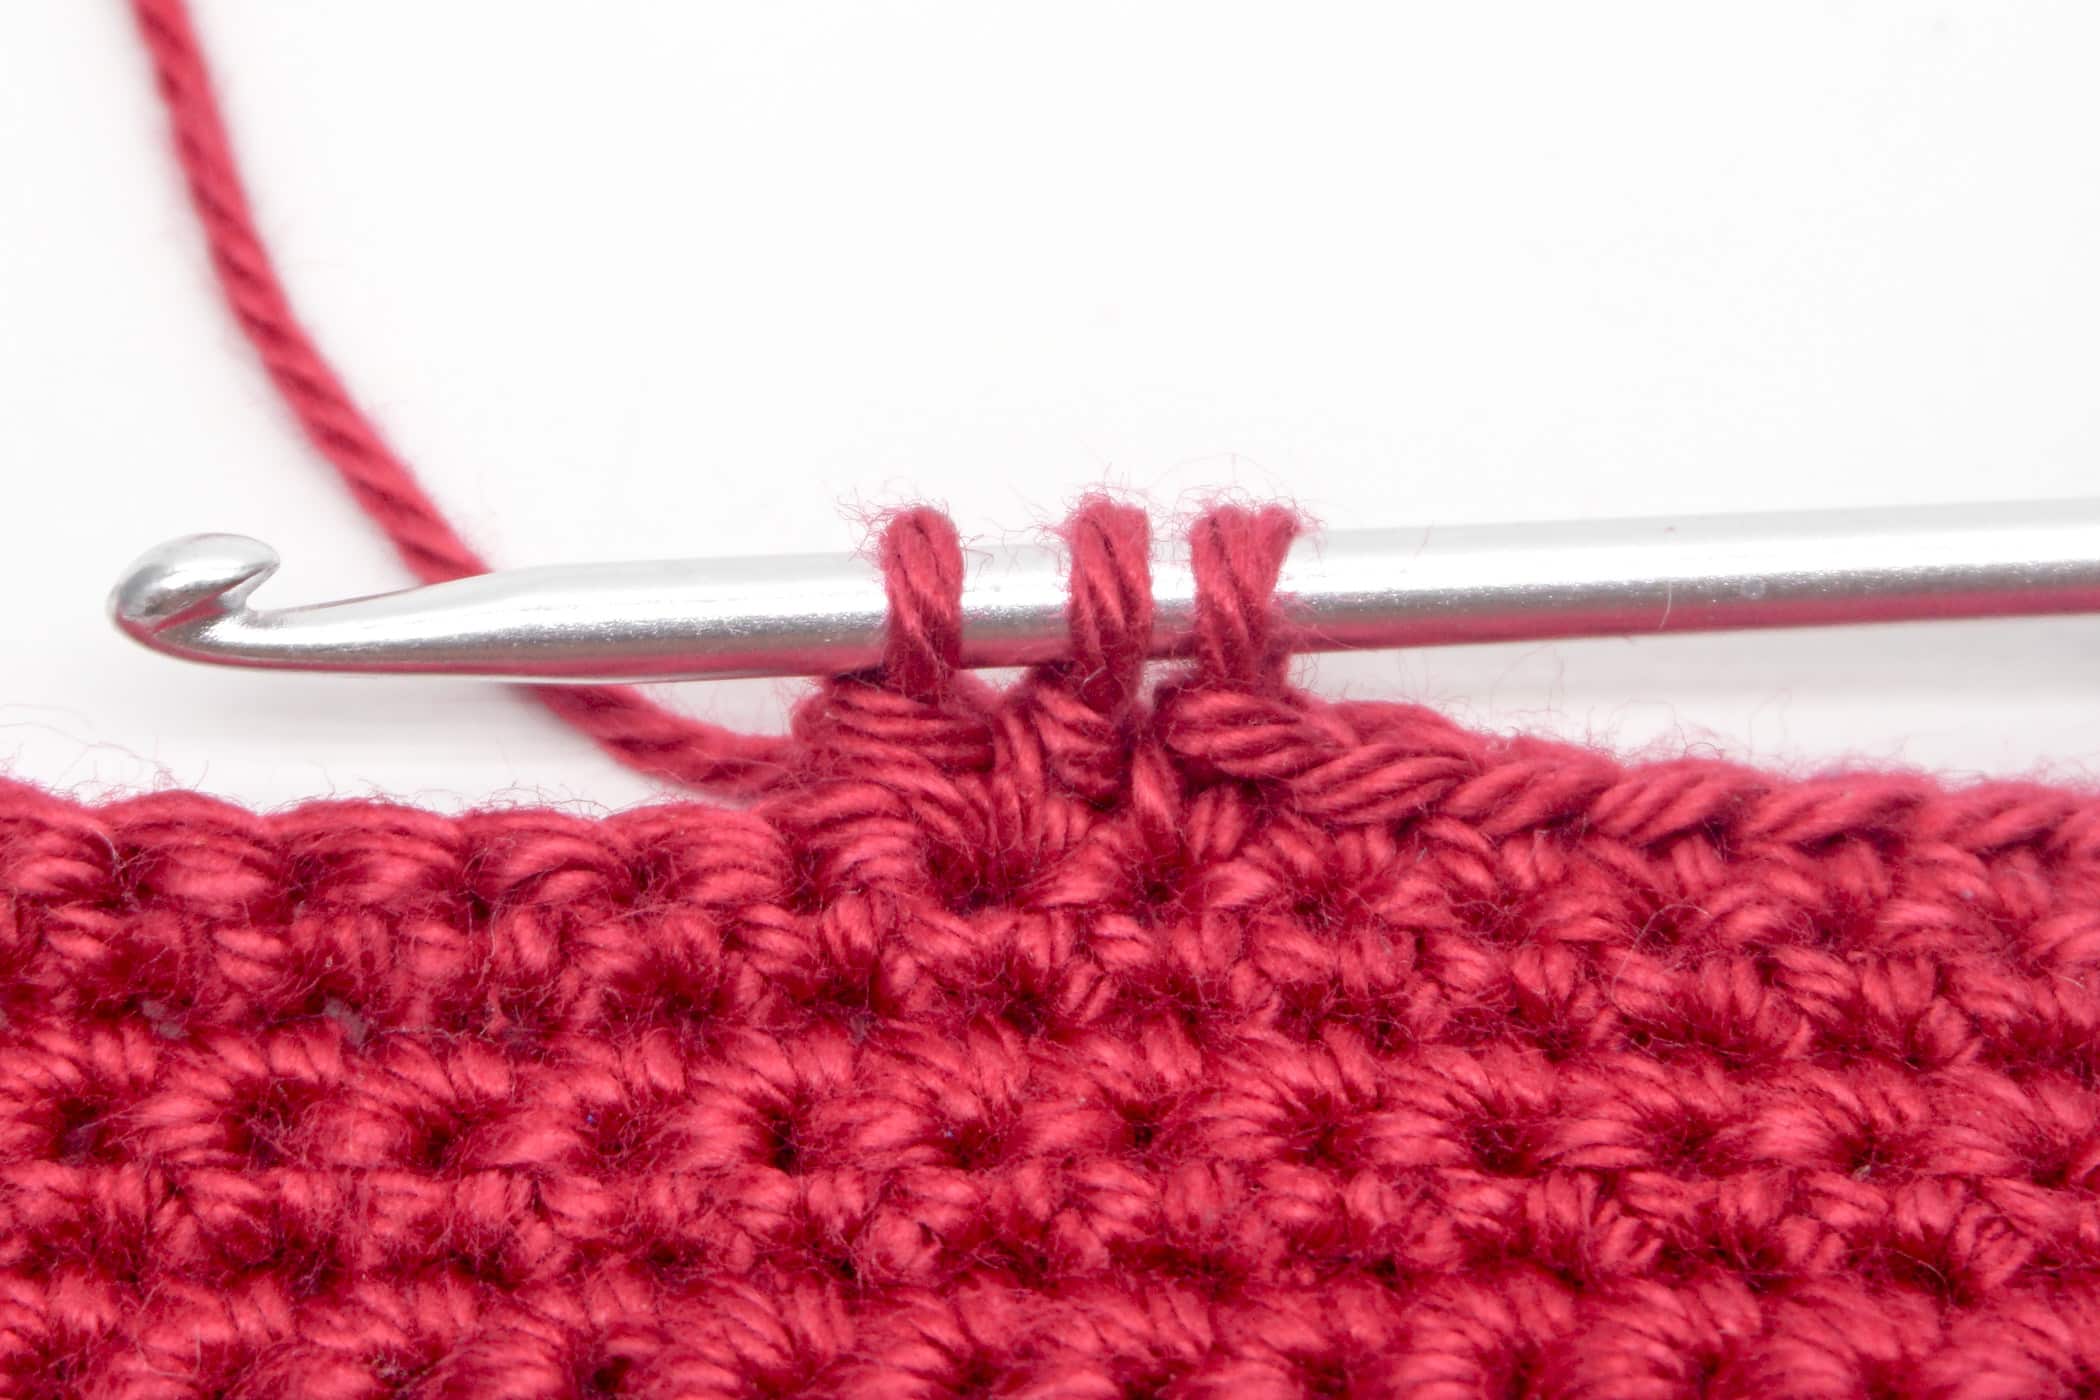
- Step 1: Yarn over once, push the crochet hook through the next stitch, yarn over and pull through the stitch you just pushed through. You have 3 loops on the crochet hook.
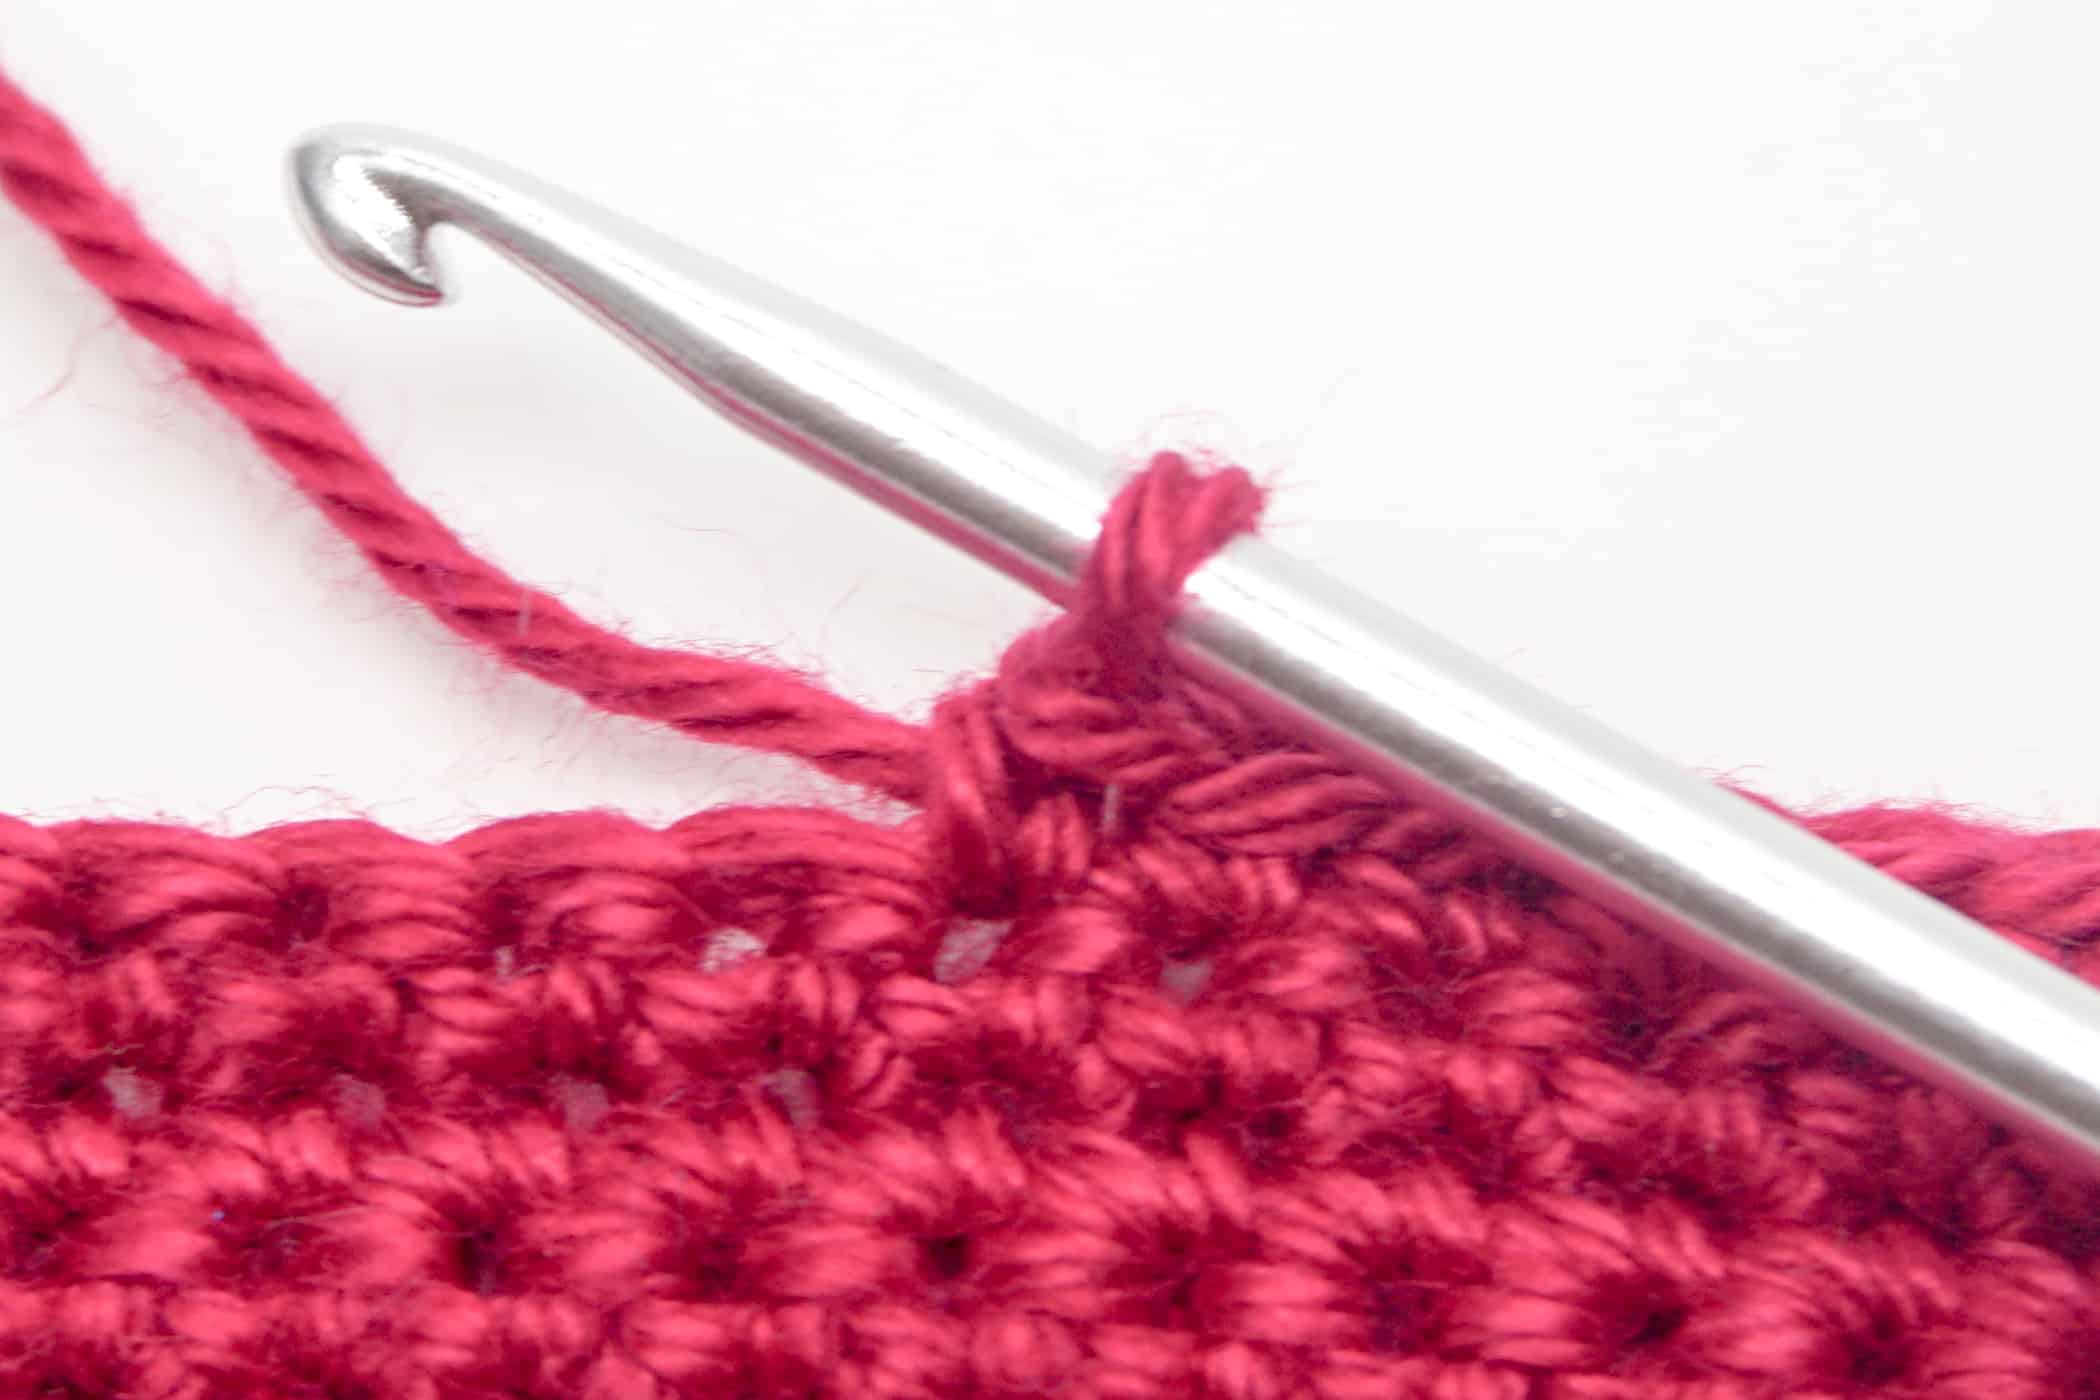
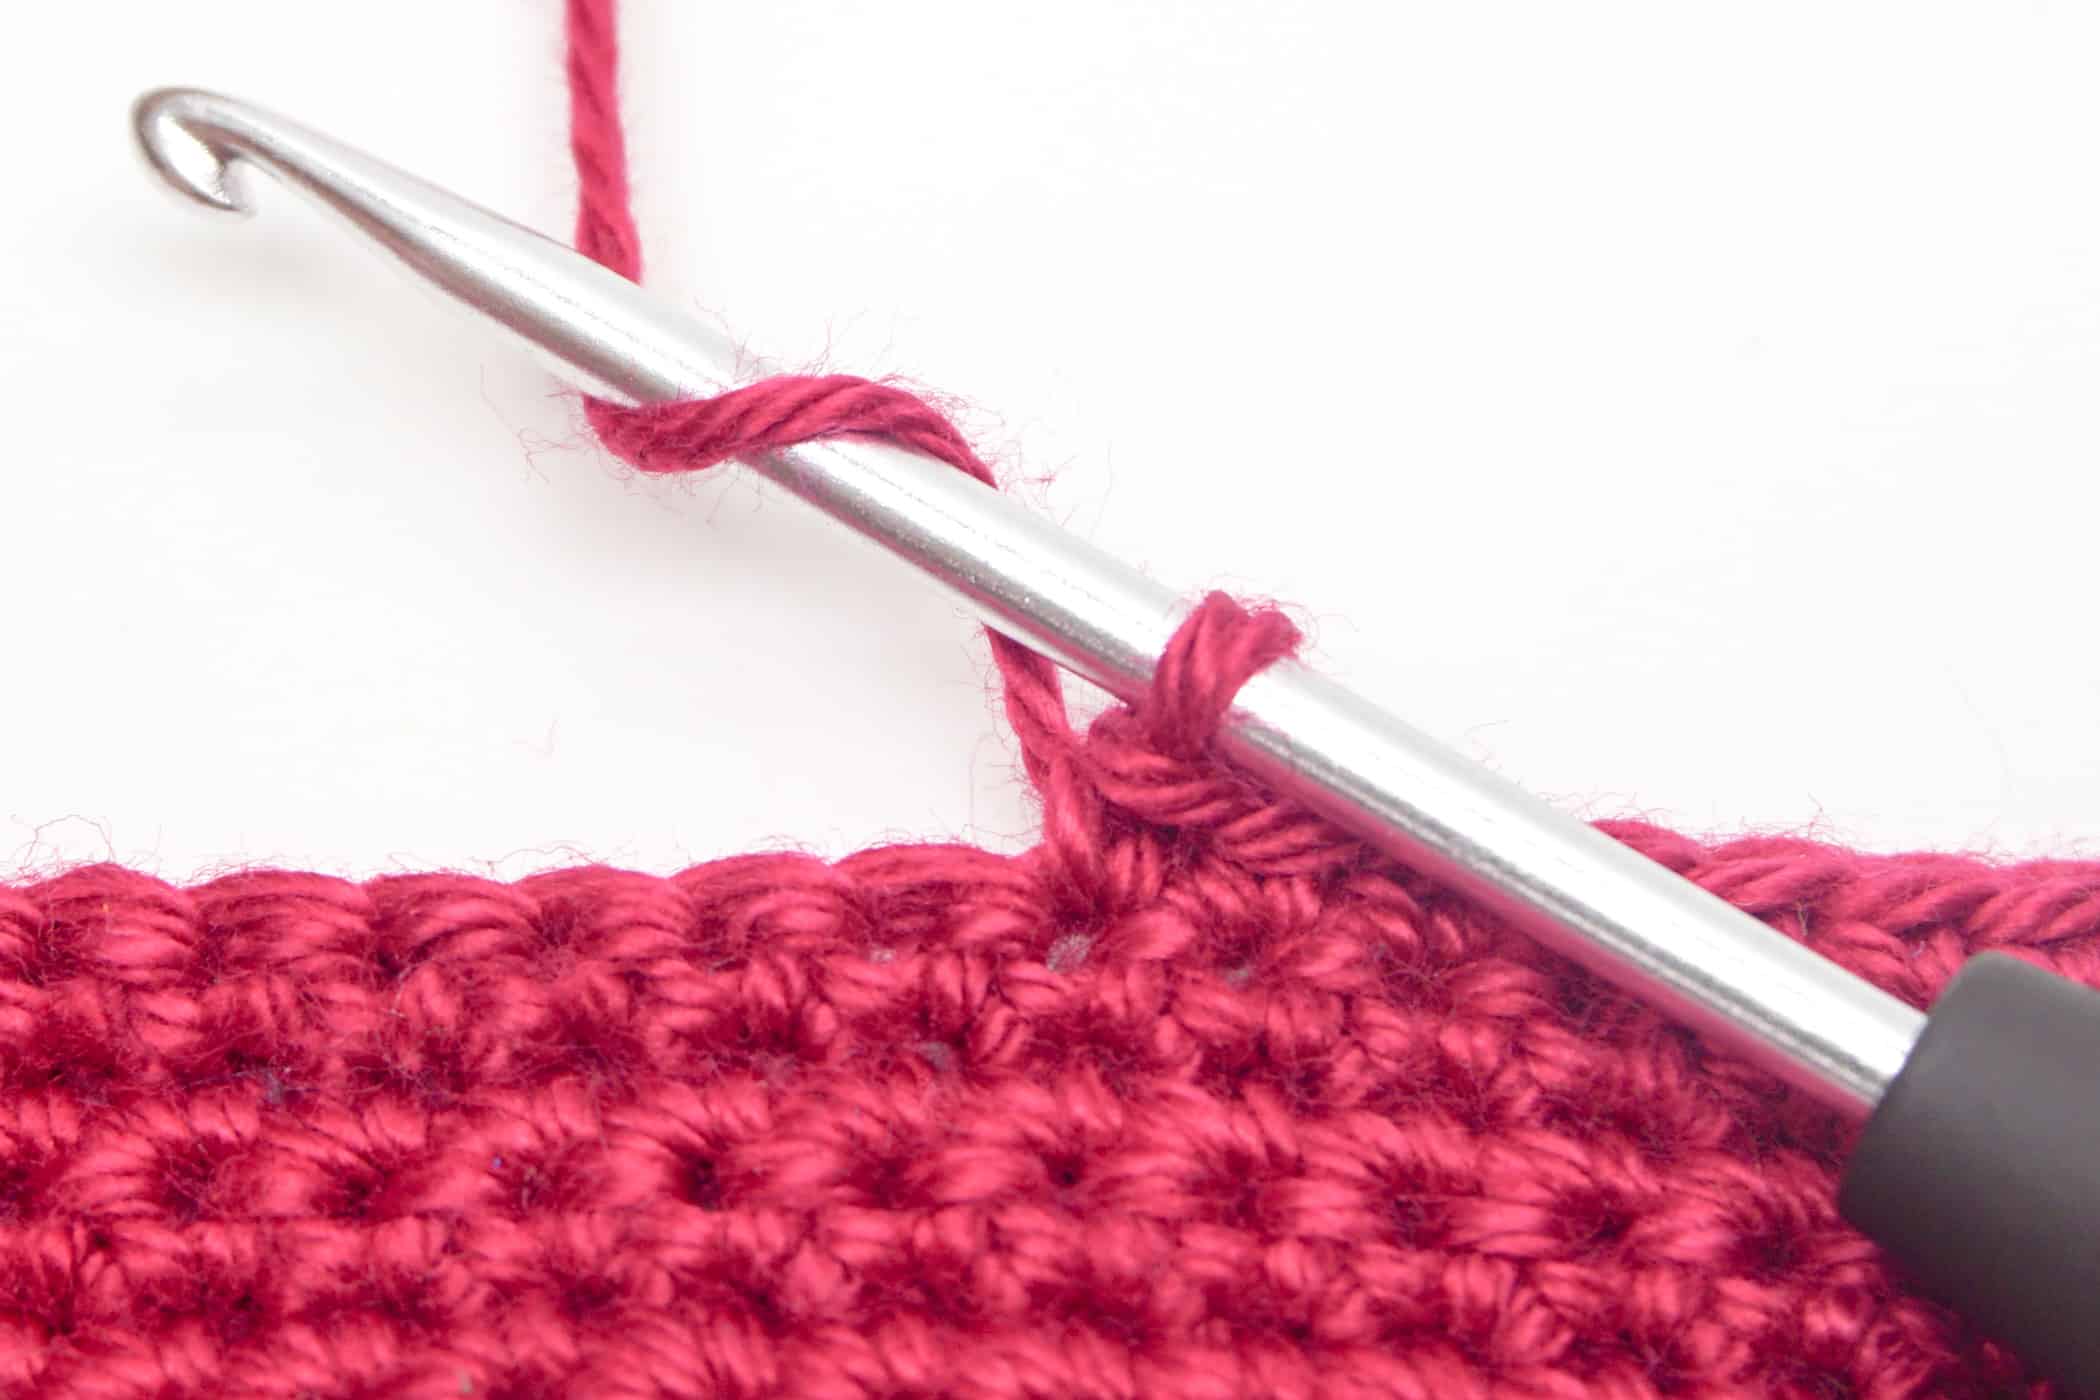

- Step 2: Yarn over again and pull it through the first 2 loops on the crochet hook. You have 2 loops on the crochet hook.

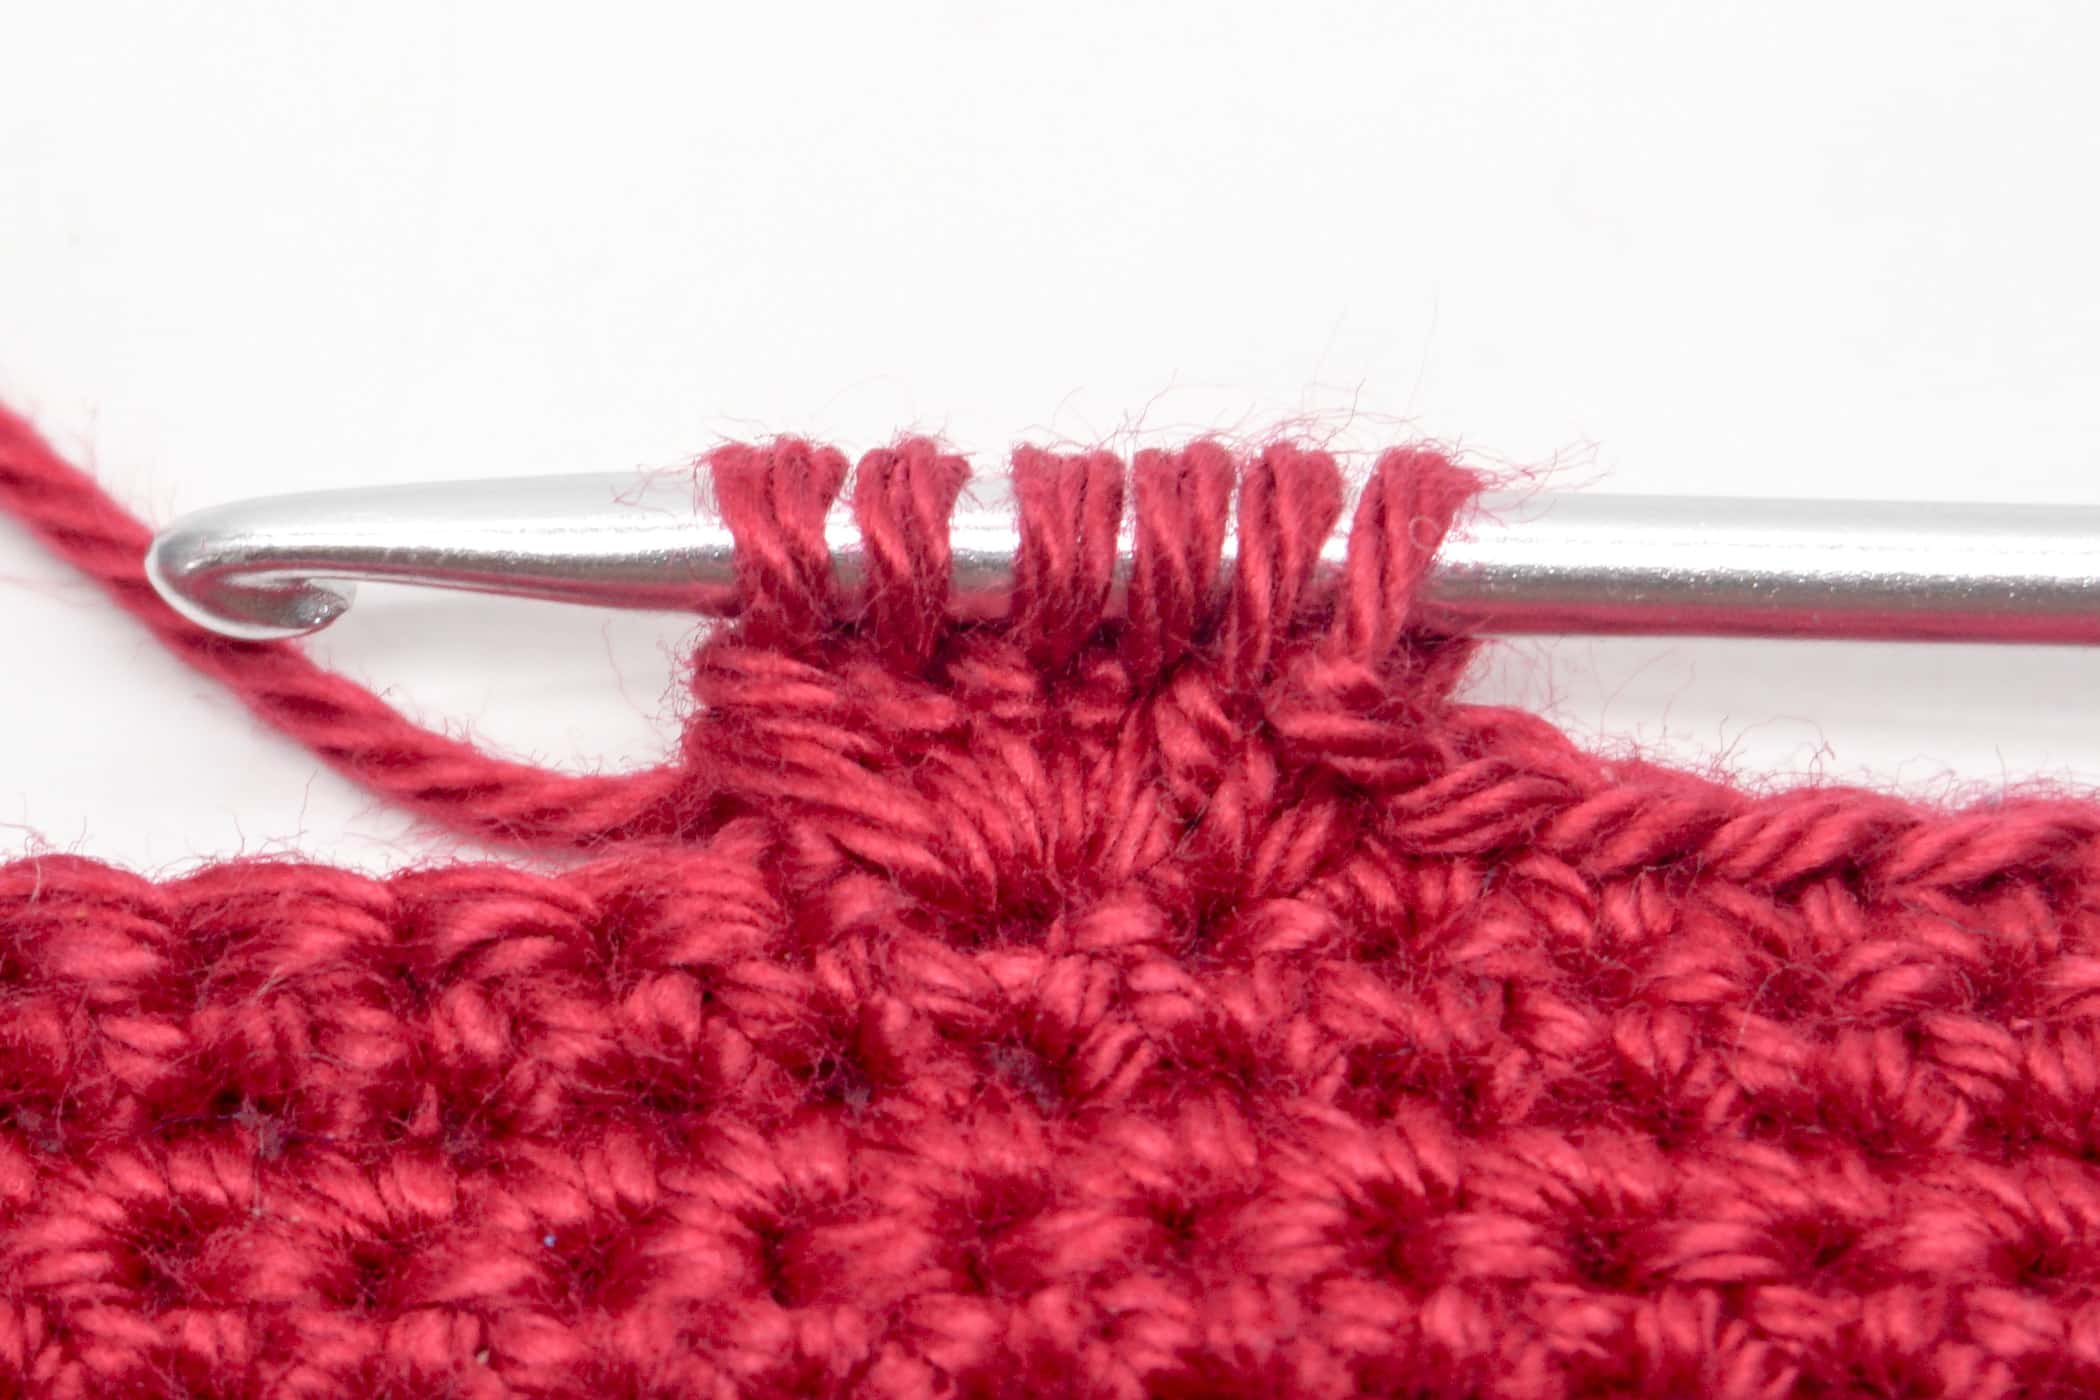
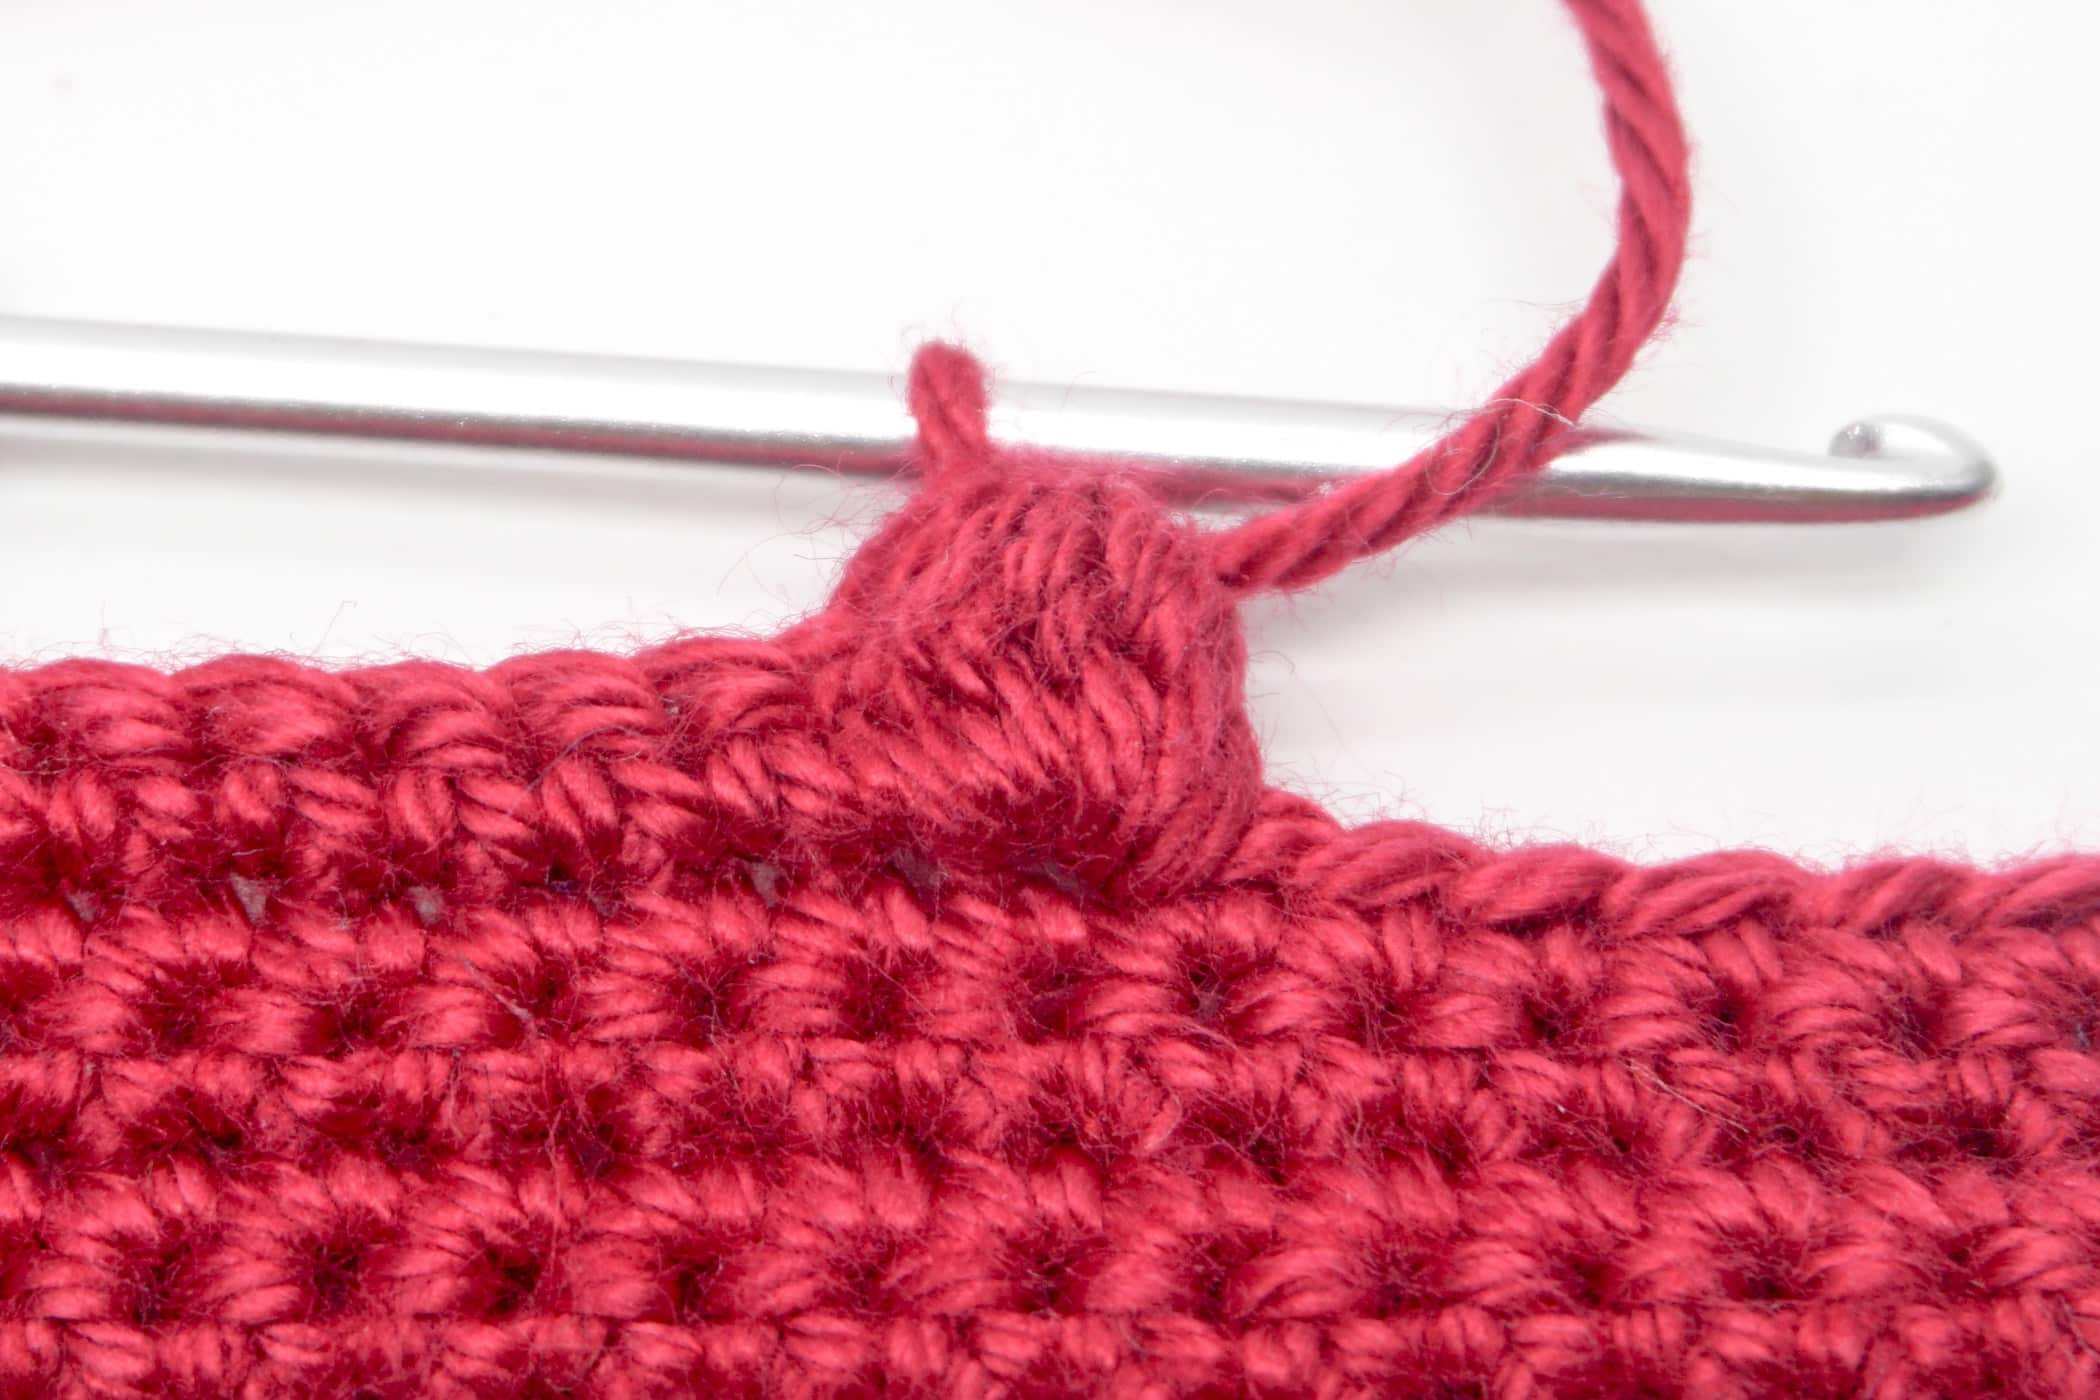
- Step 3: Repeat steps 1 to 2 another 4 times (for a total of 5 times), always pushing through the same stitch. You en up with 6 loops on the crochet hook.
- You can also repeat steps 1 to 2 fewer times to crochet a flatter bobble or repeat the steps more than a total of 5 times to make a more voluminous bobble.
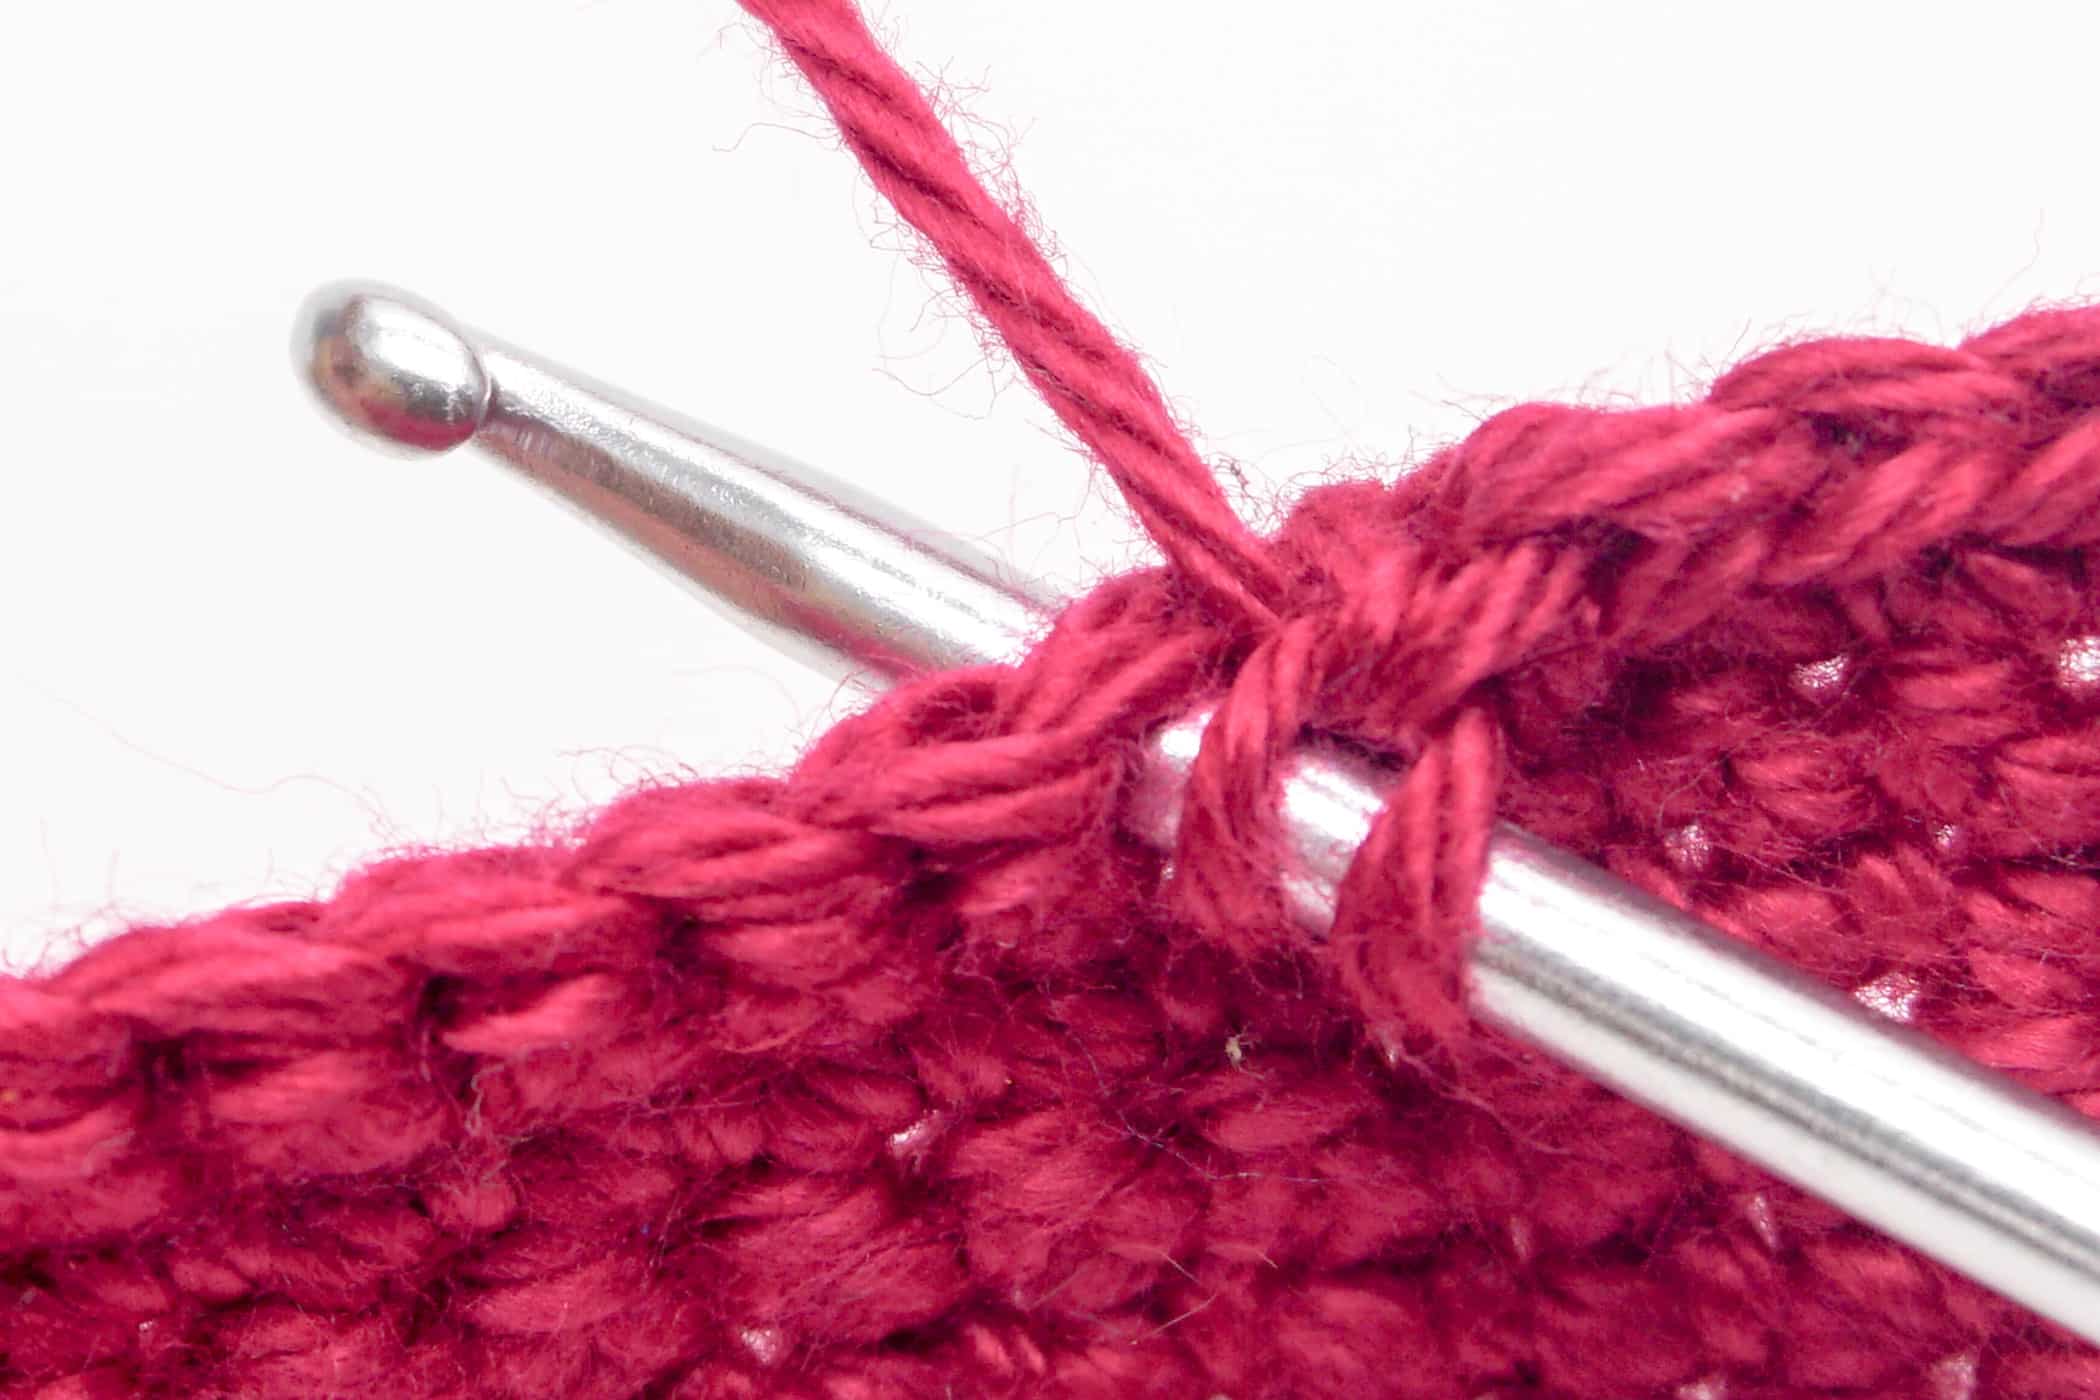
- Next, crochet again step 1 and 2, for the next repetition: Yarn over, push the crochet hook through the same stitch as before, yarn over and pull through the stitch. Yarn over again and pull it through the first 2 loops on the crochet hook.
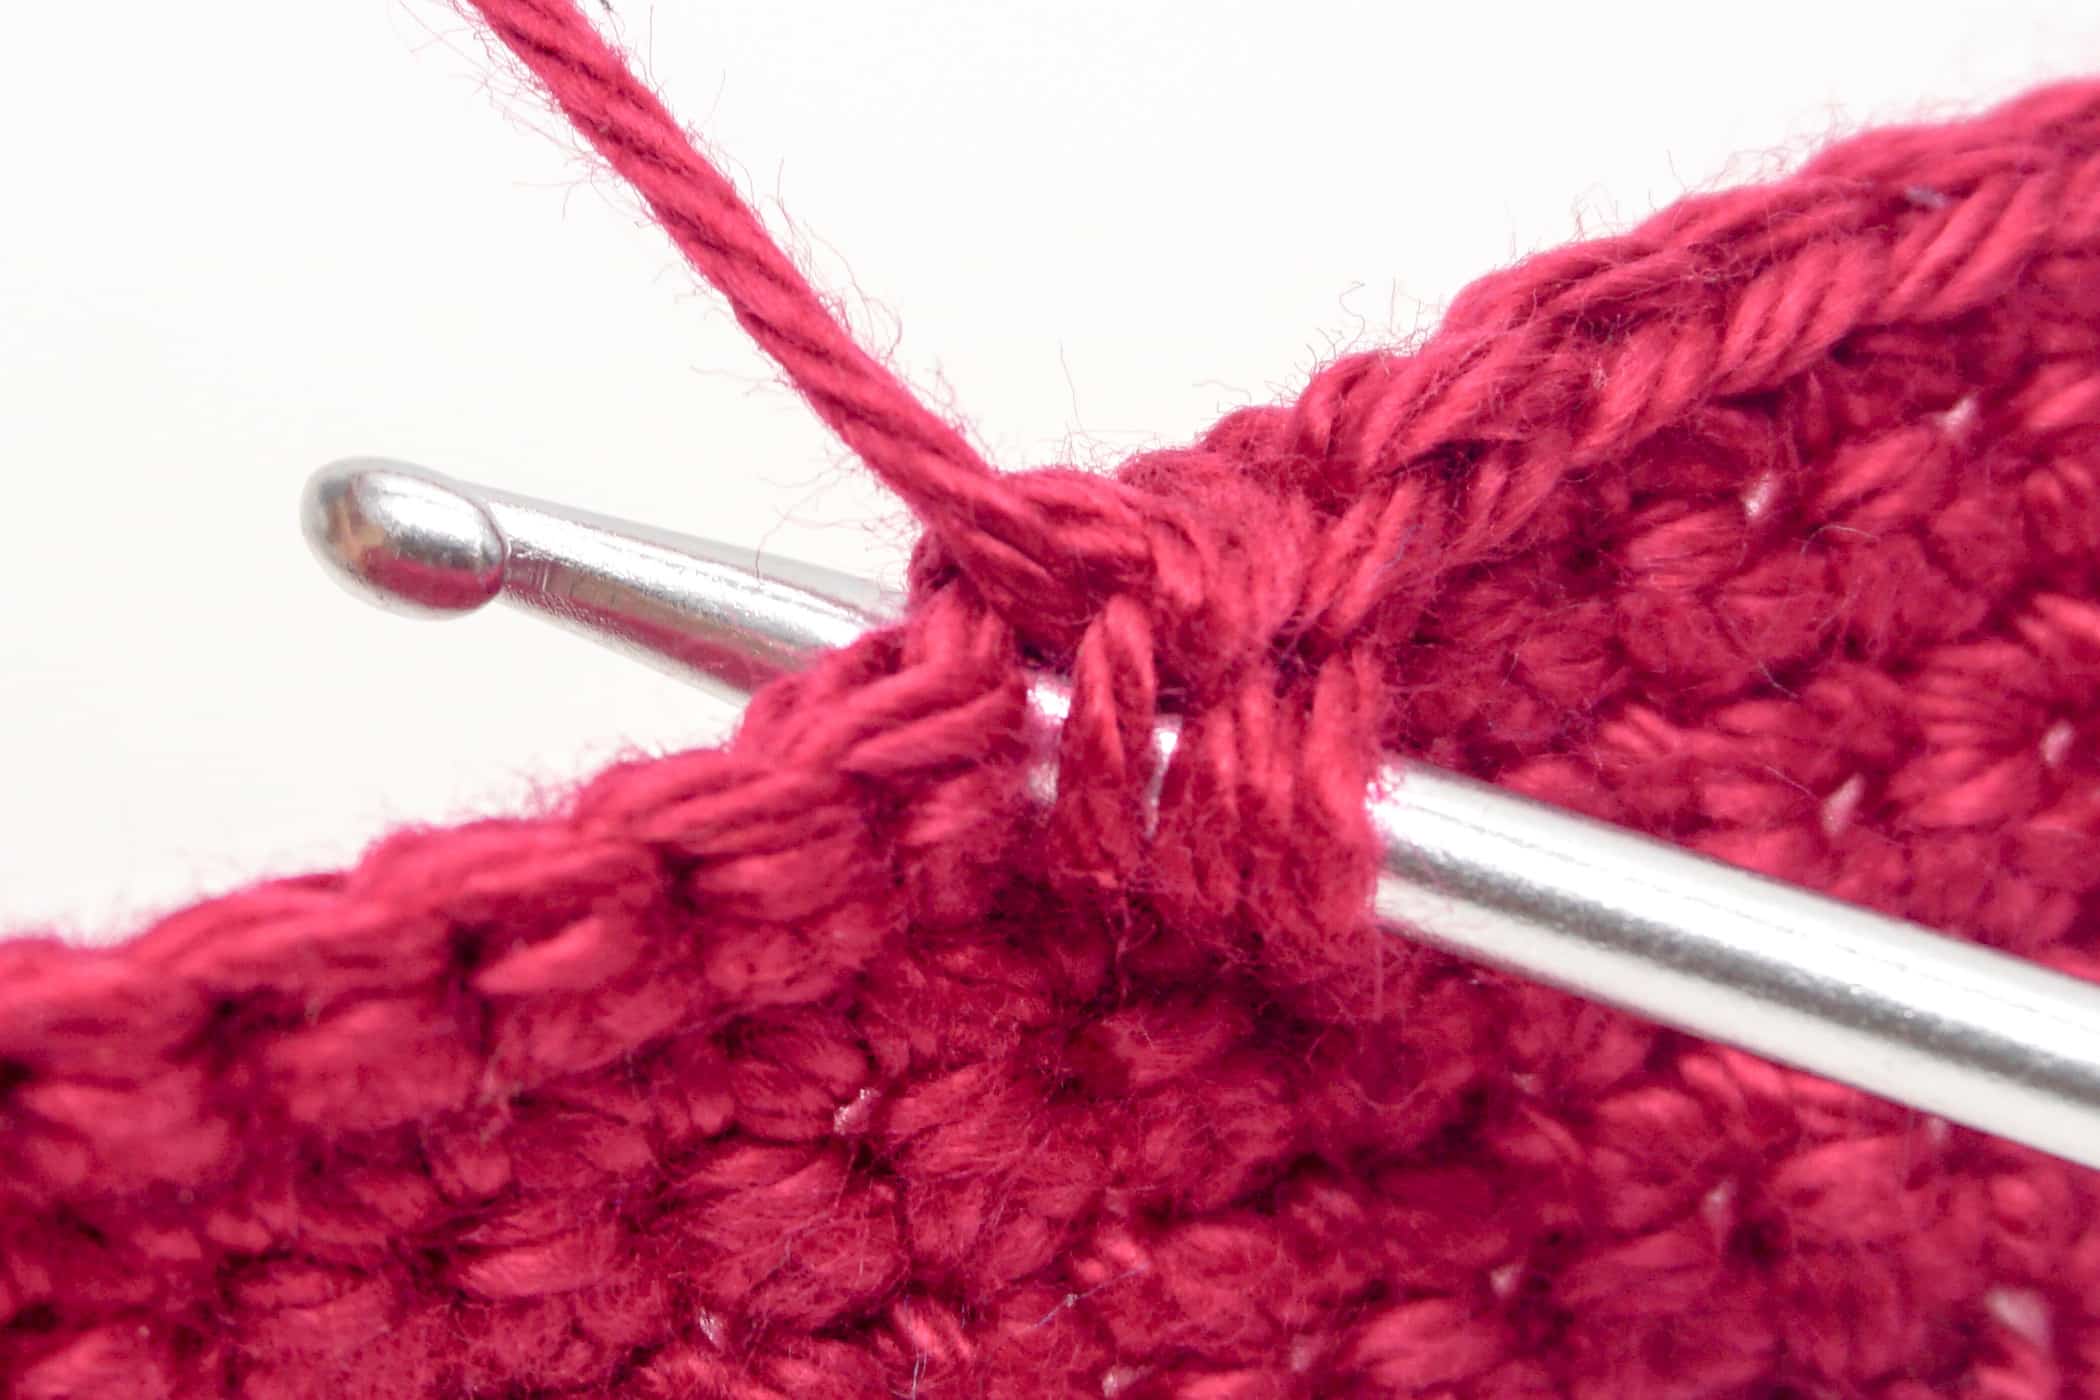
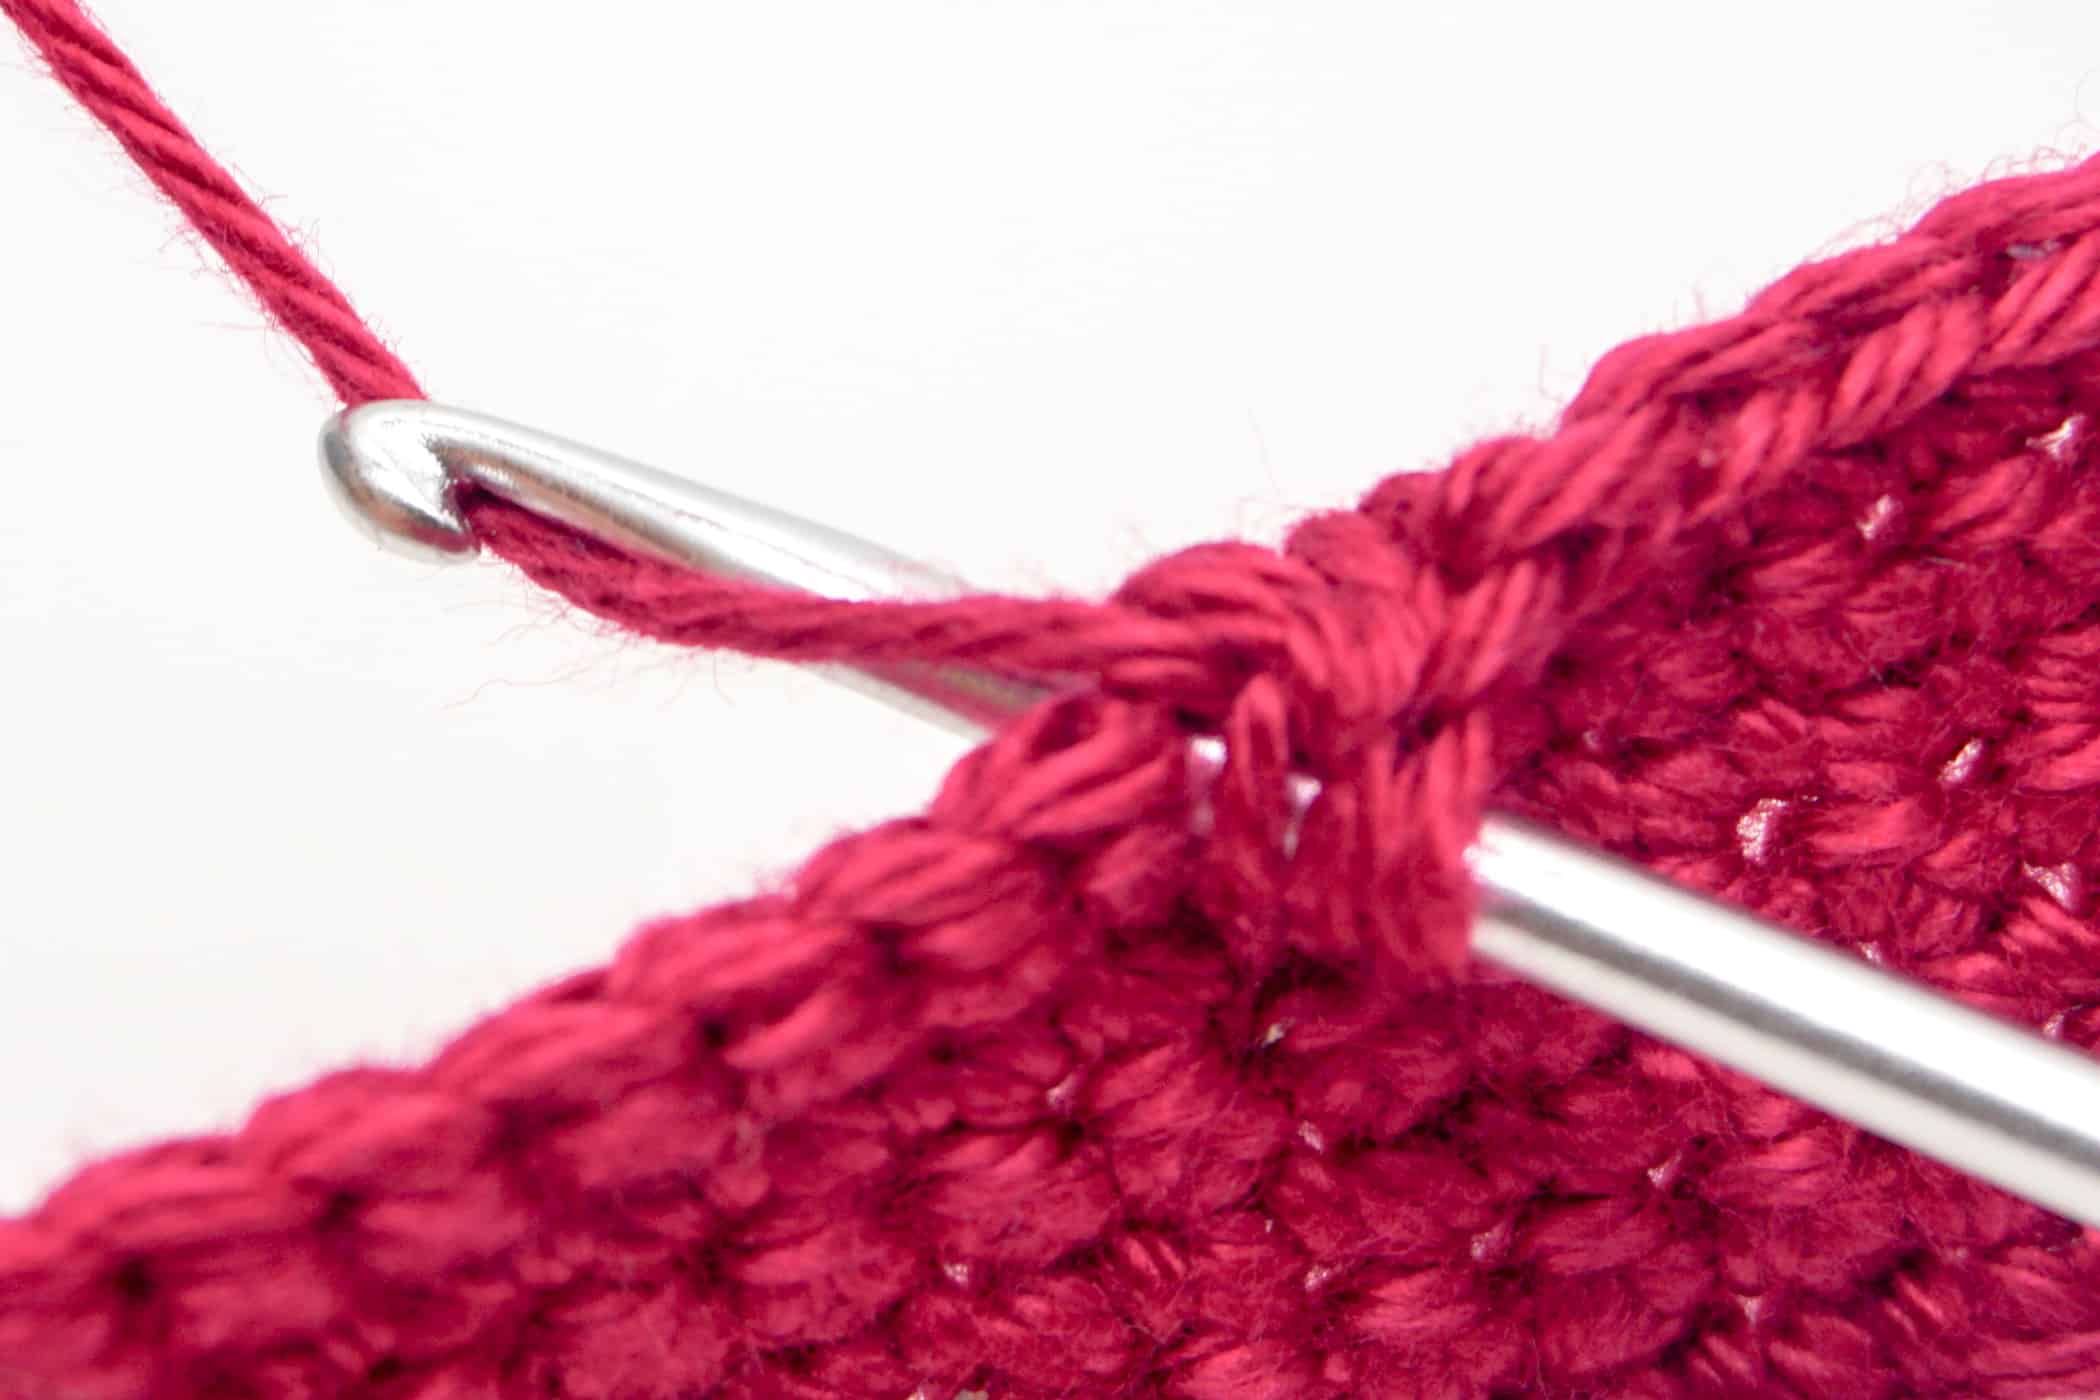

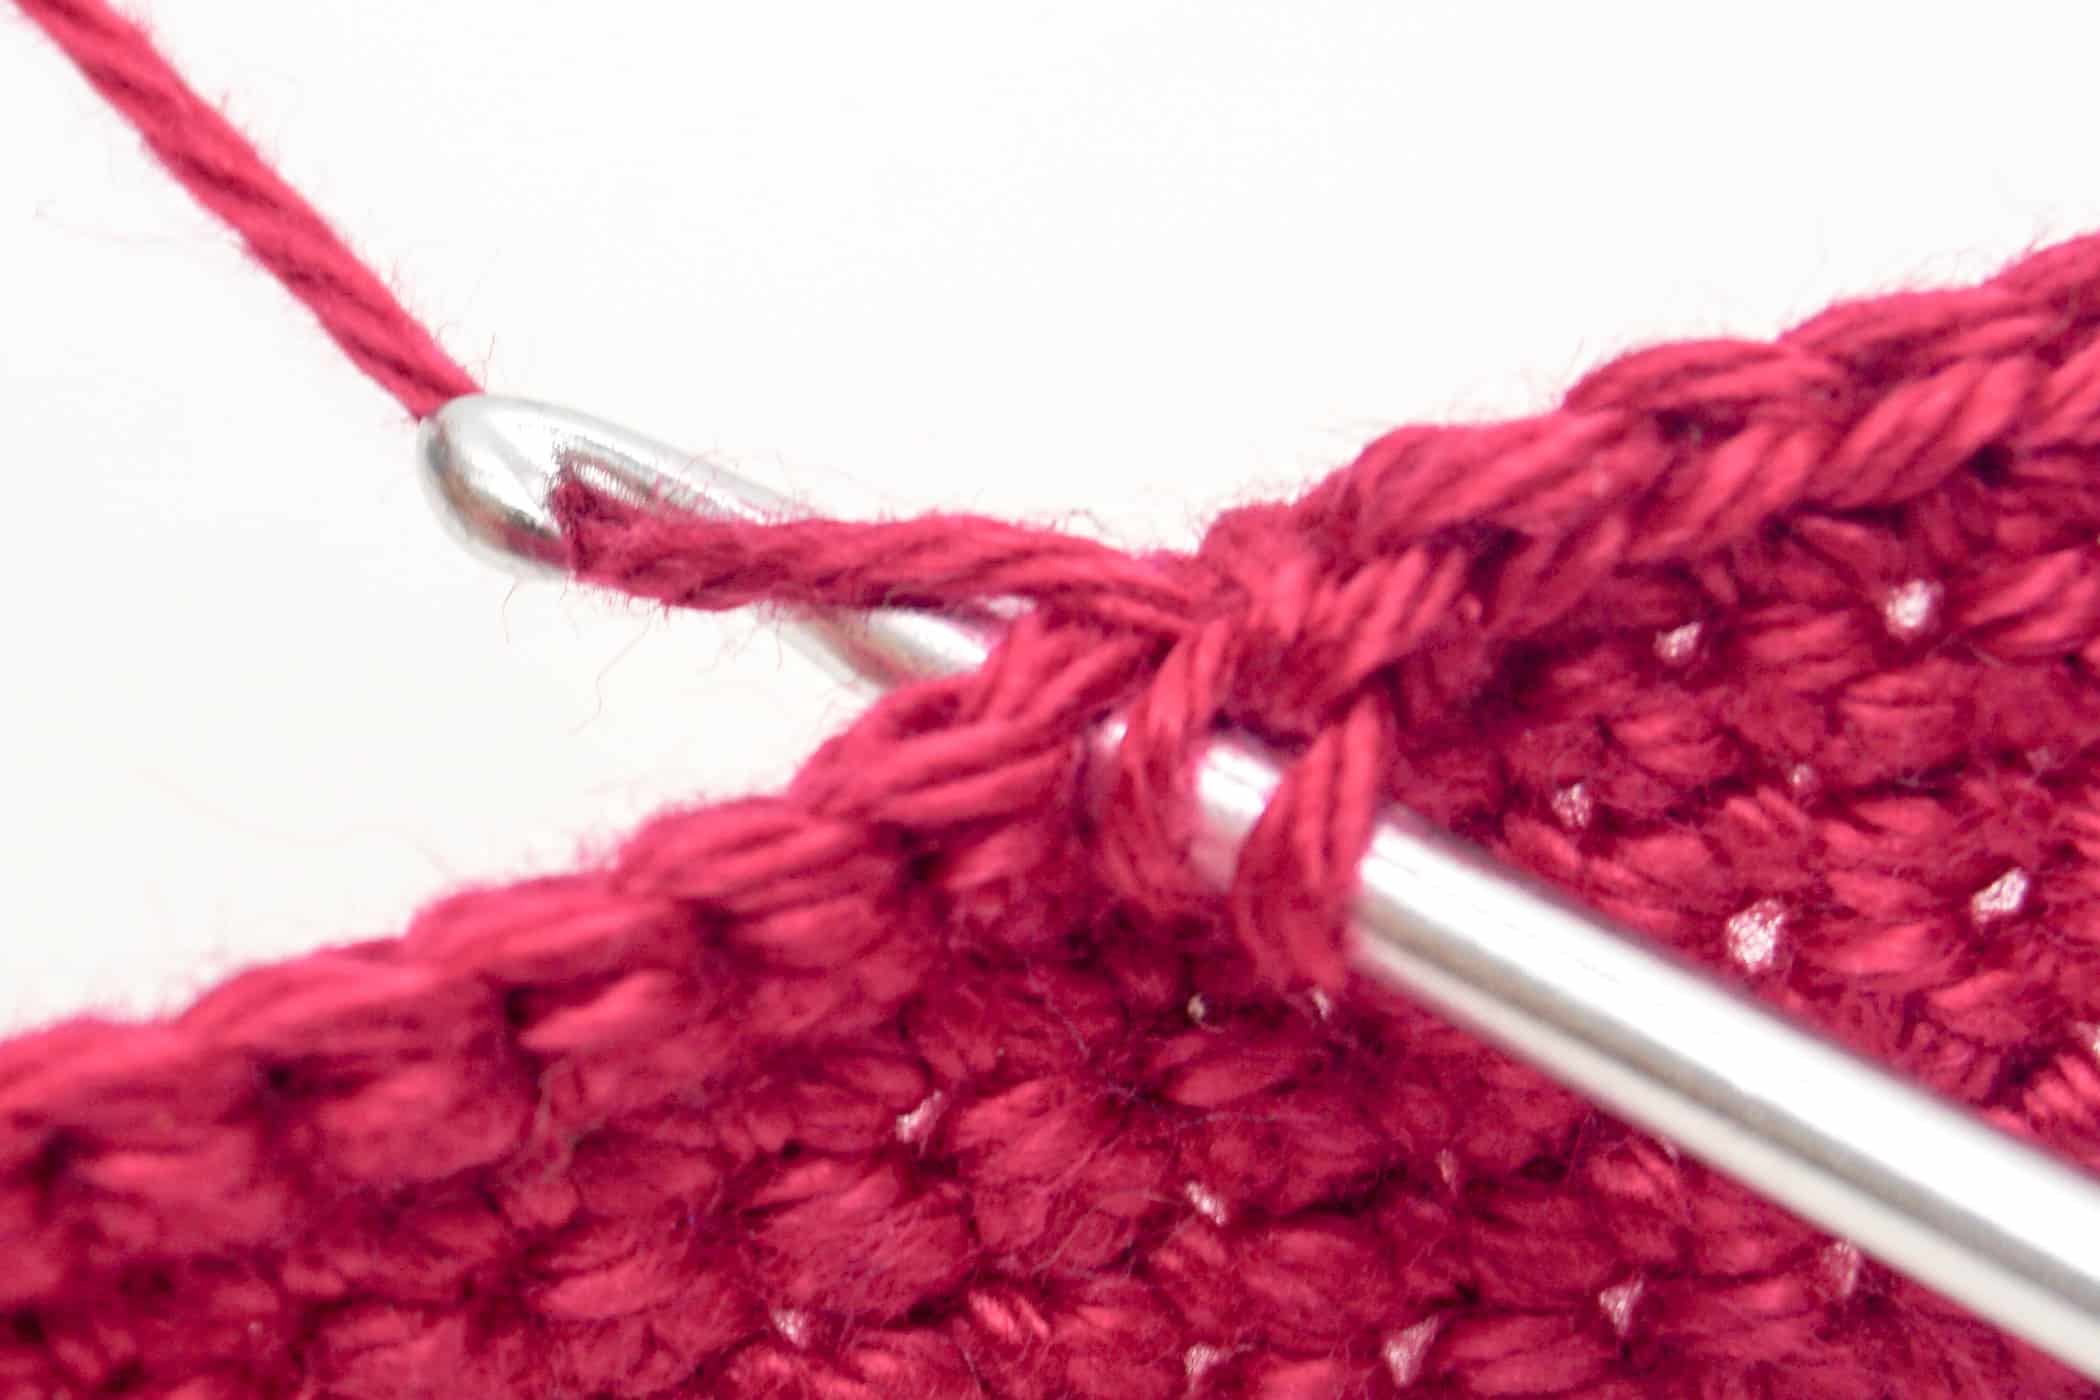
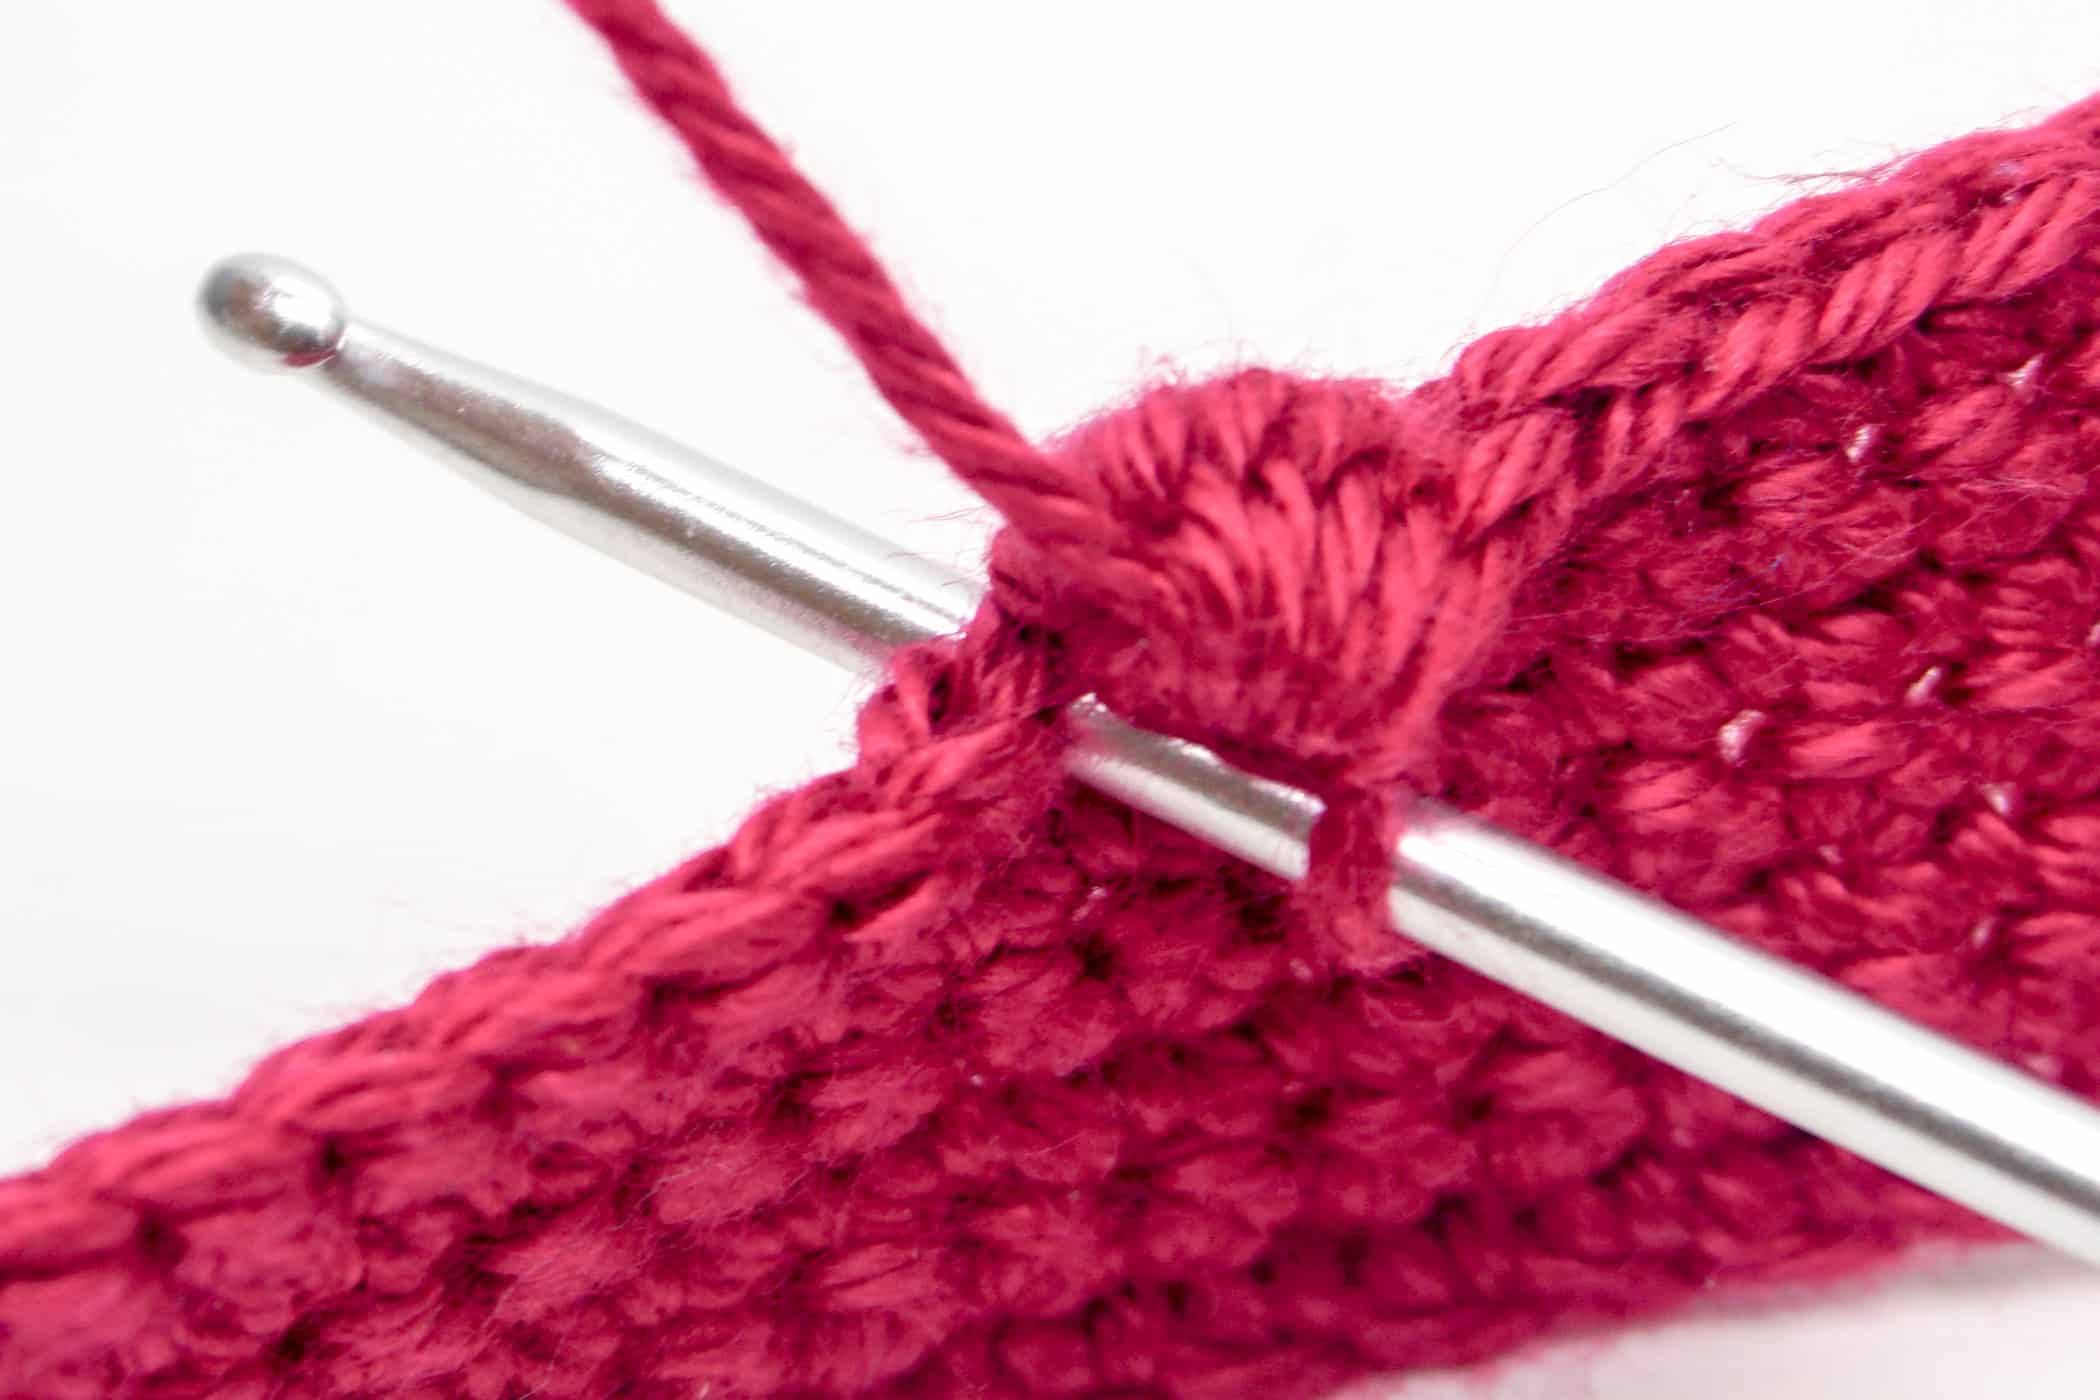
- Step 4: You now have 6 loops on the crochet hook. Yarn over and pull it through all 6 loops on the crochet hook. Theoretically, you have finished crocheting the bobble stitch.
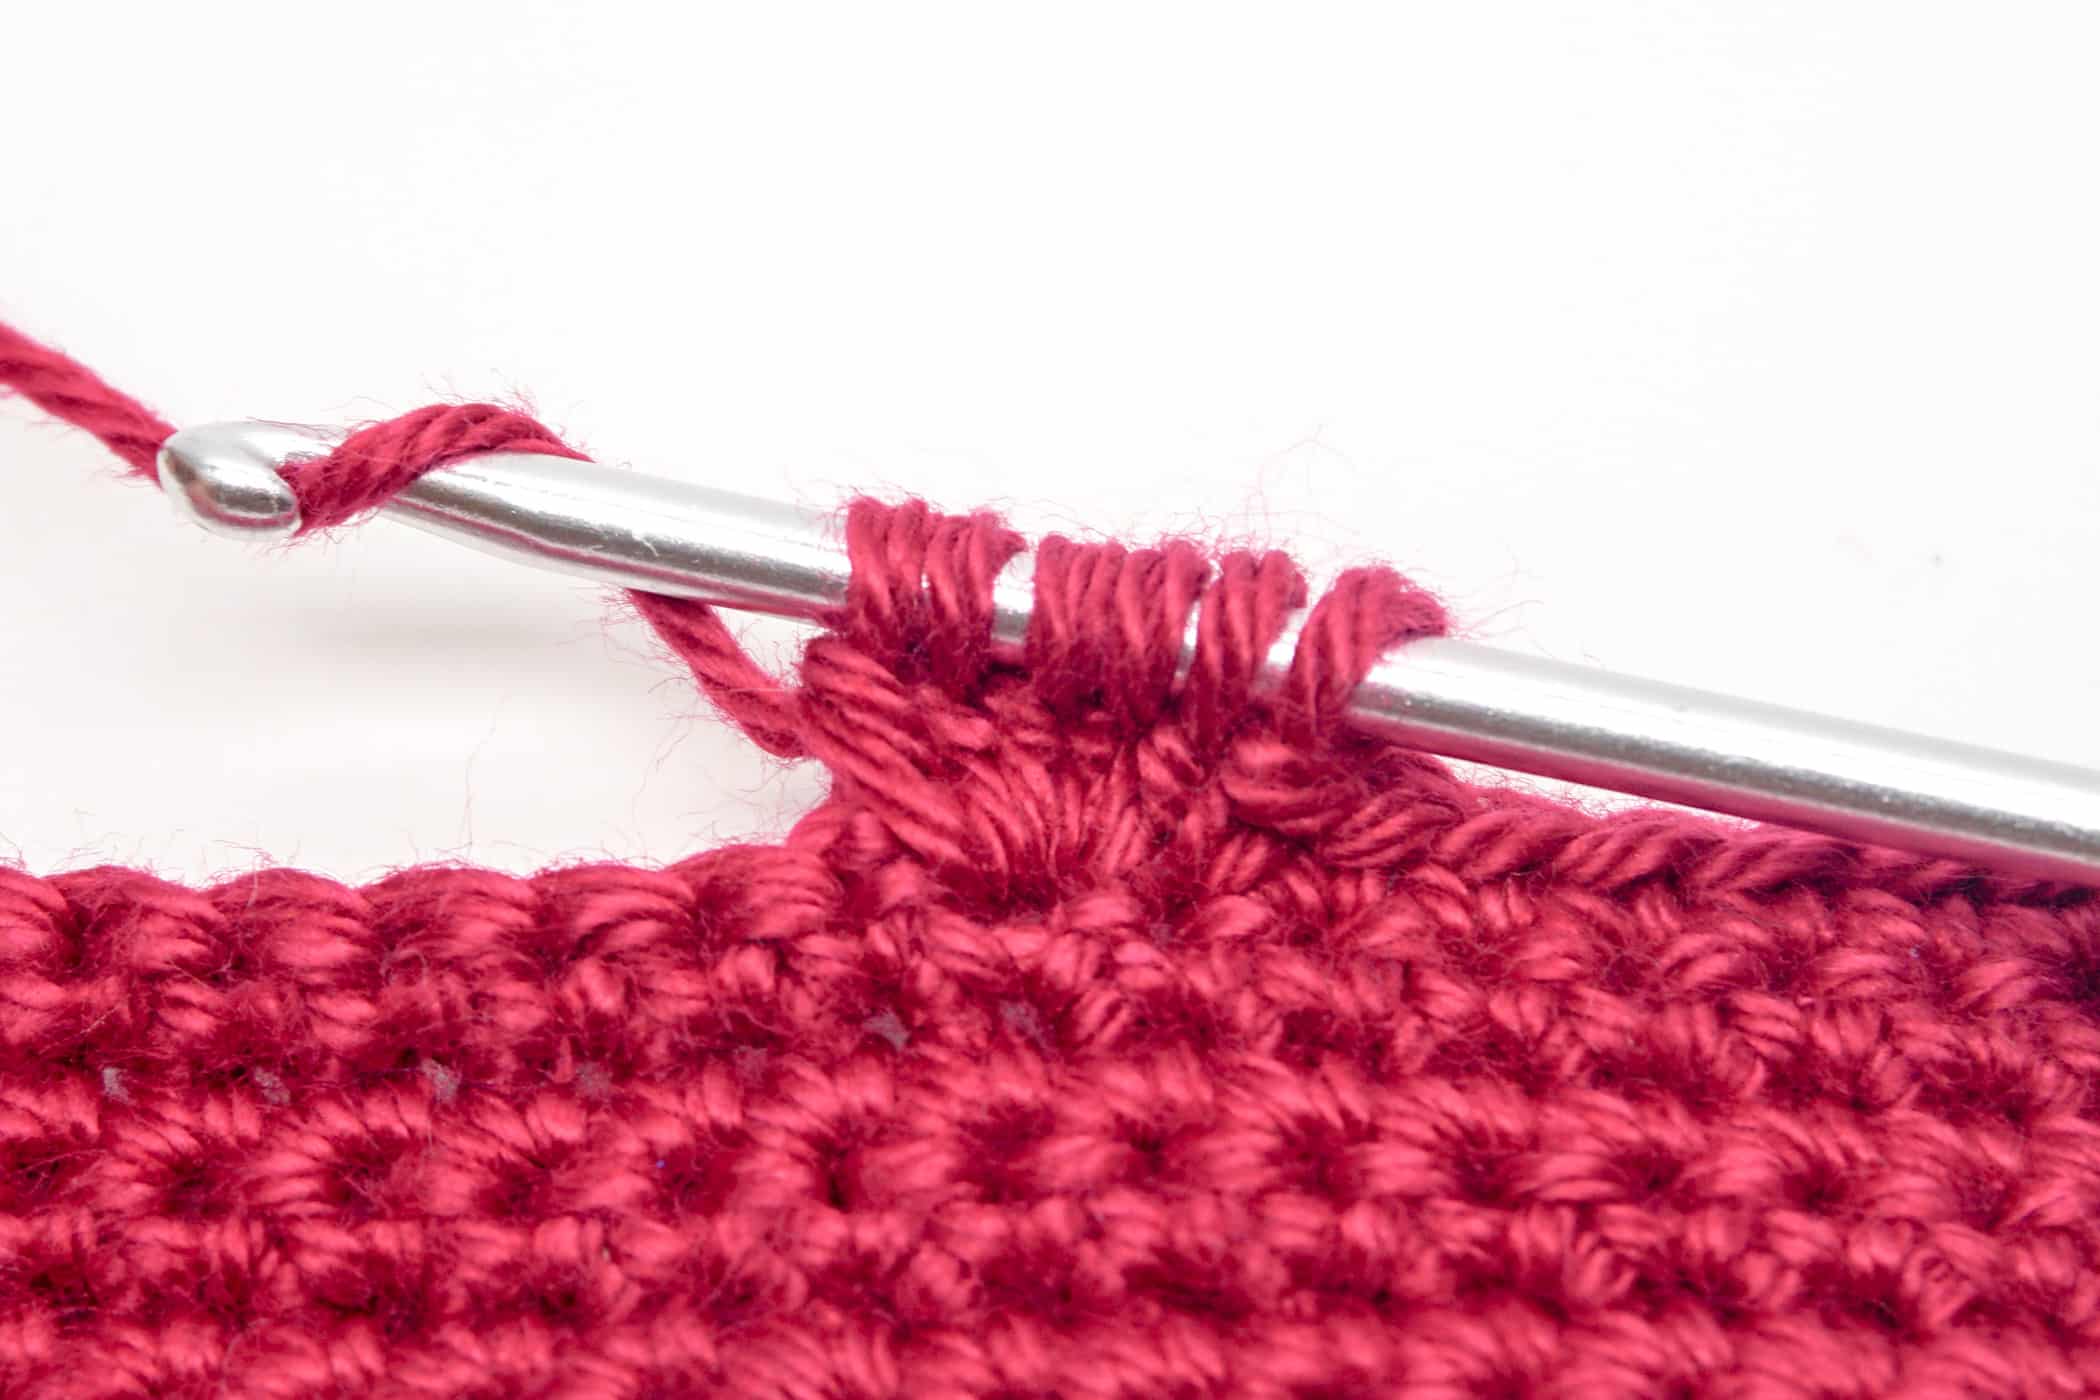
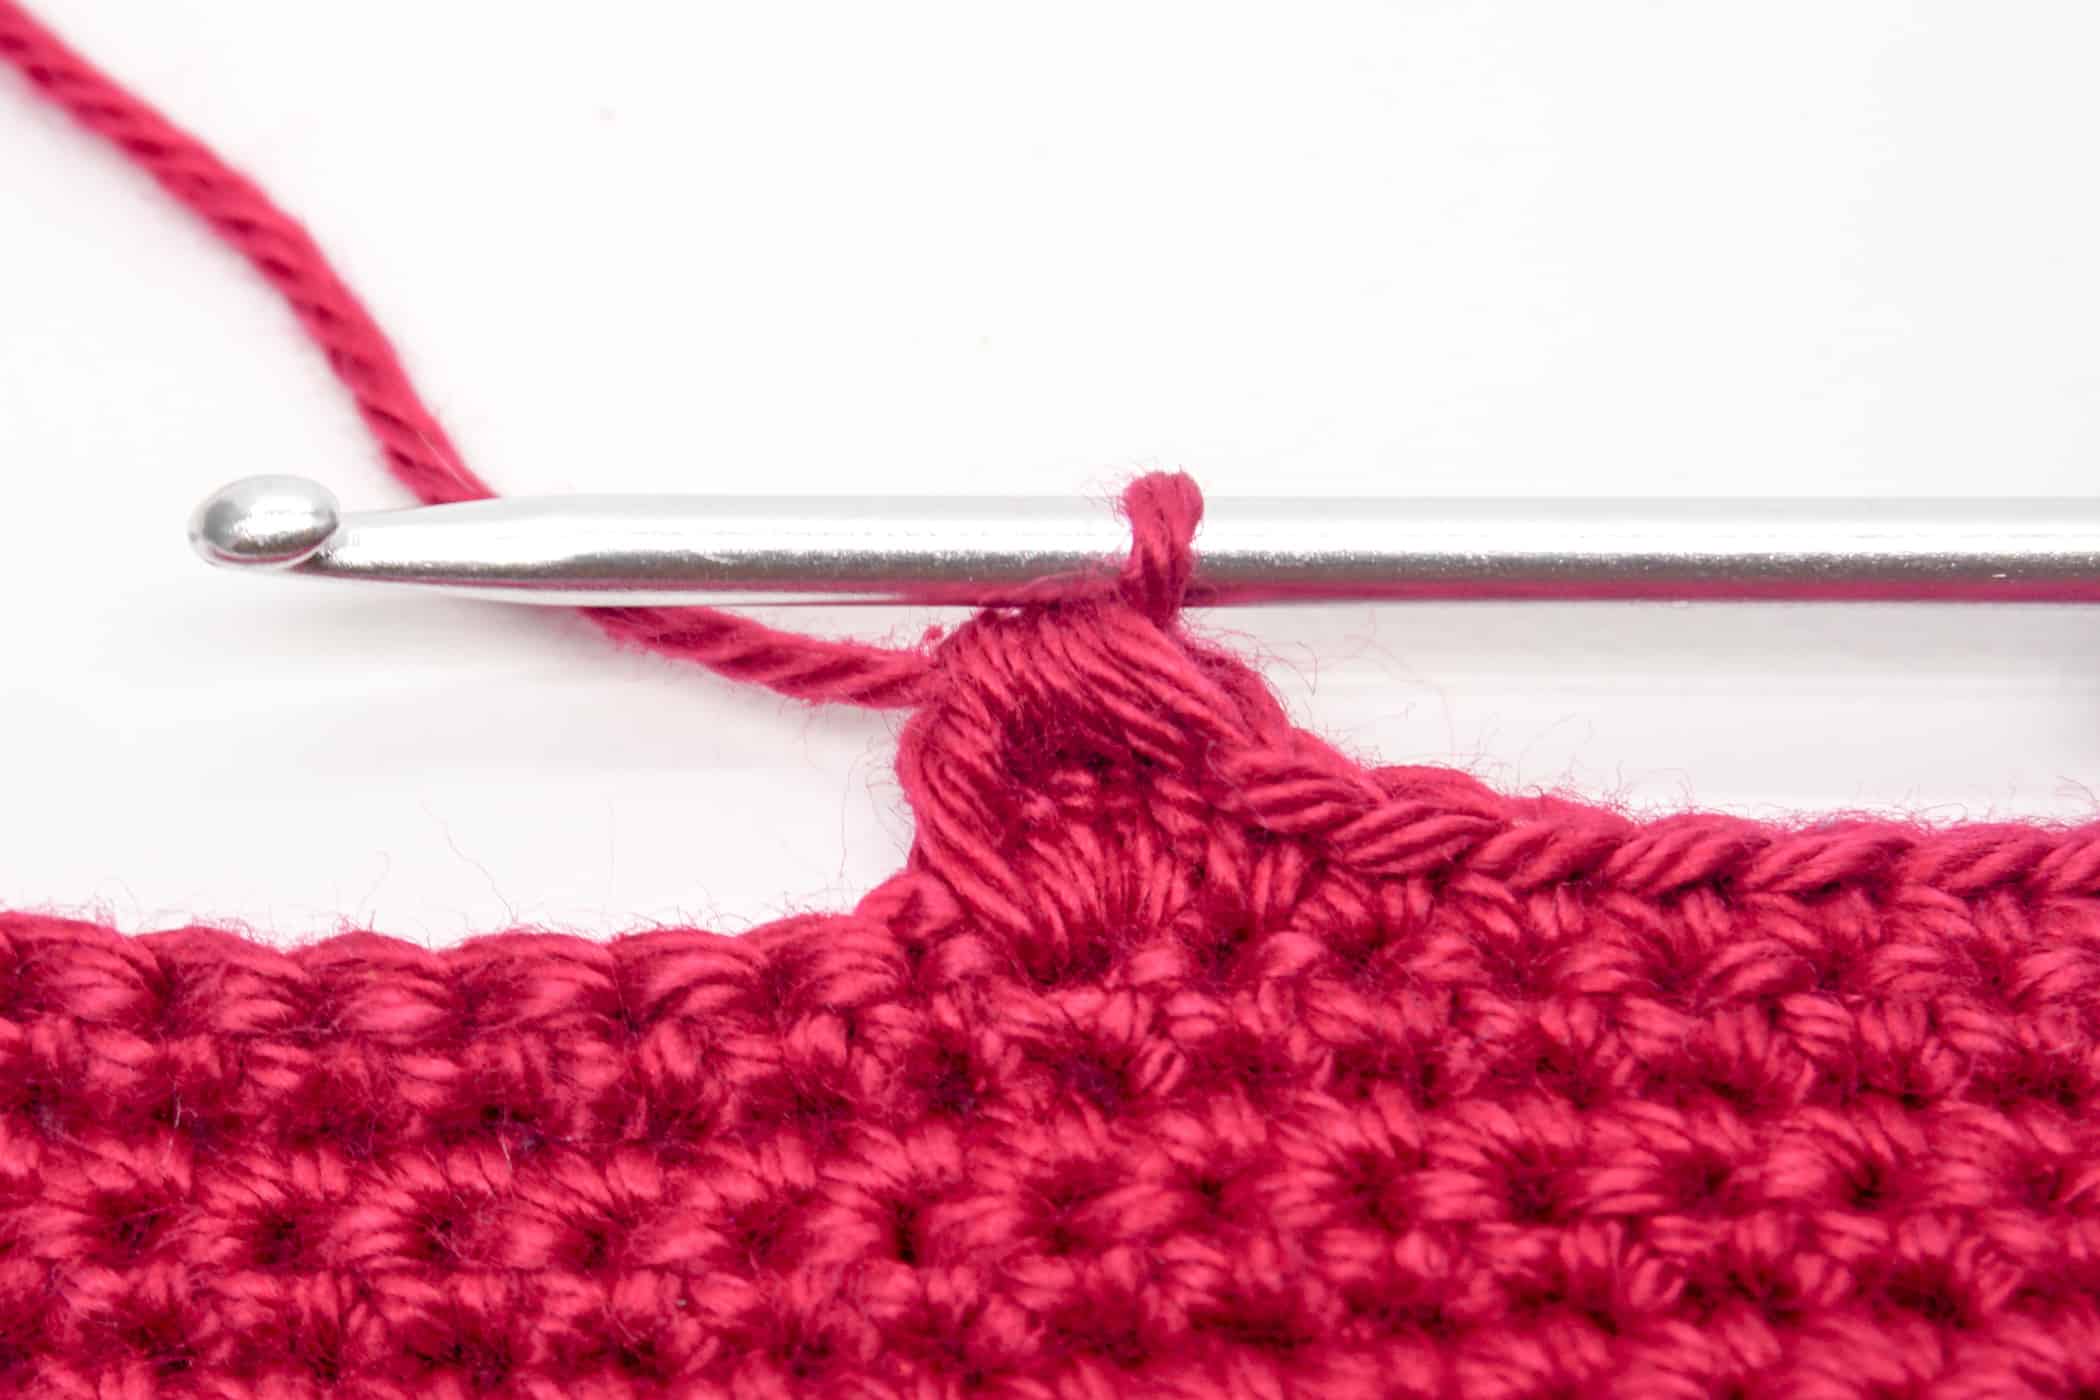
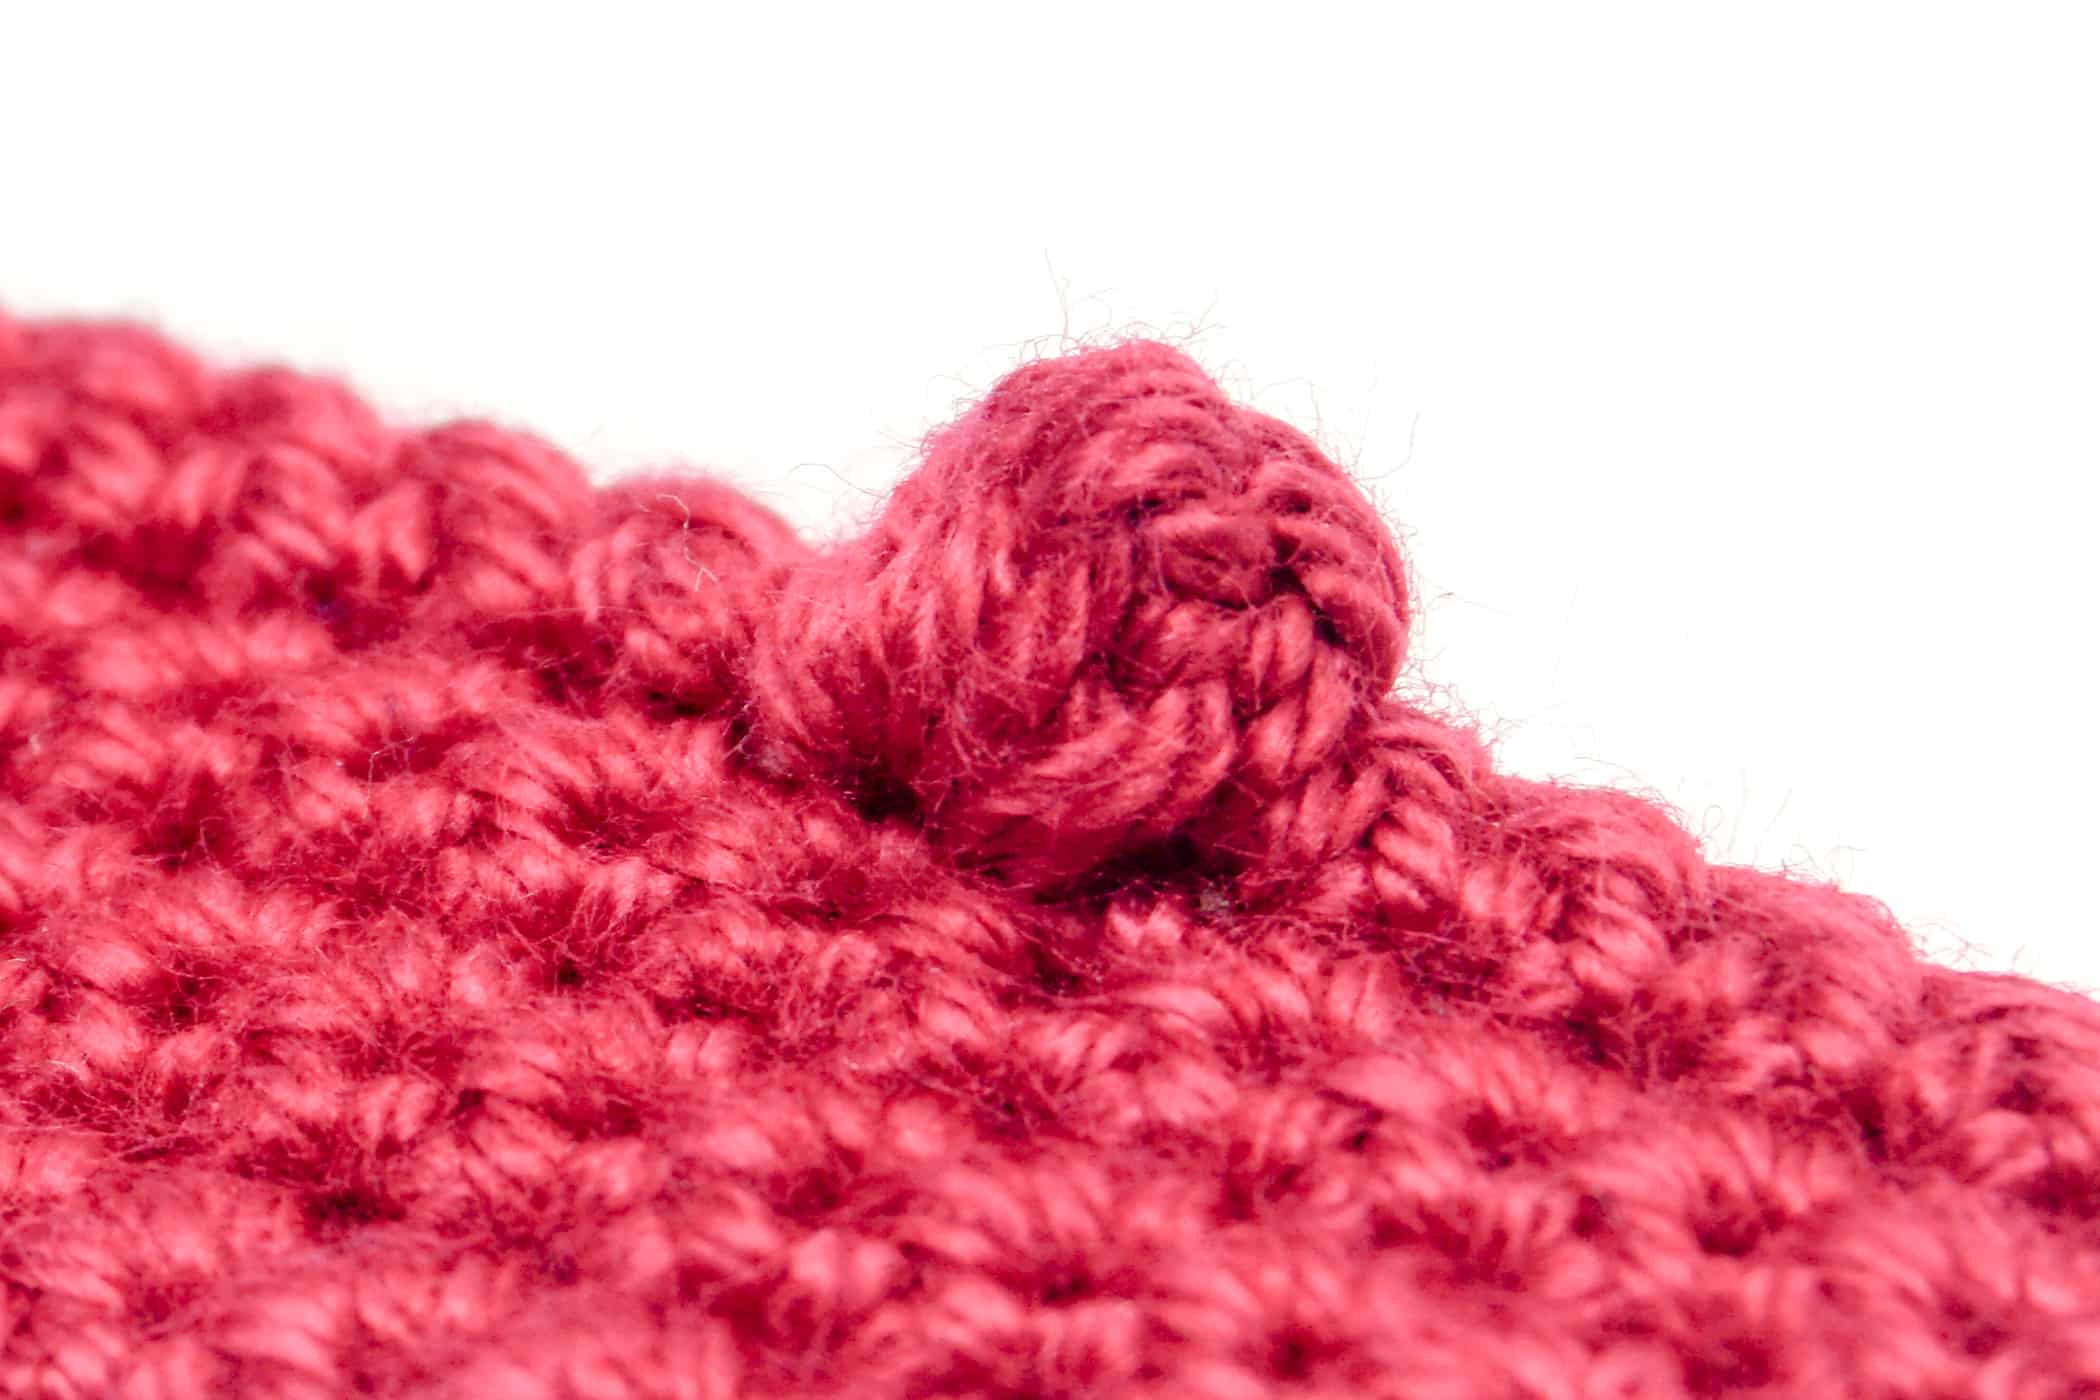
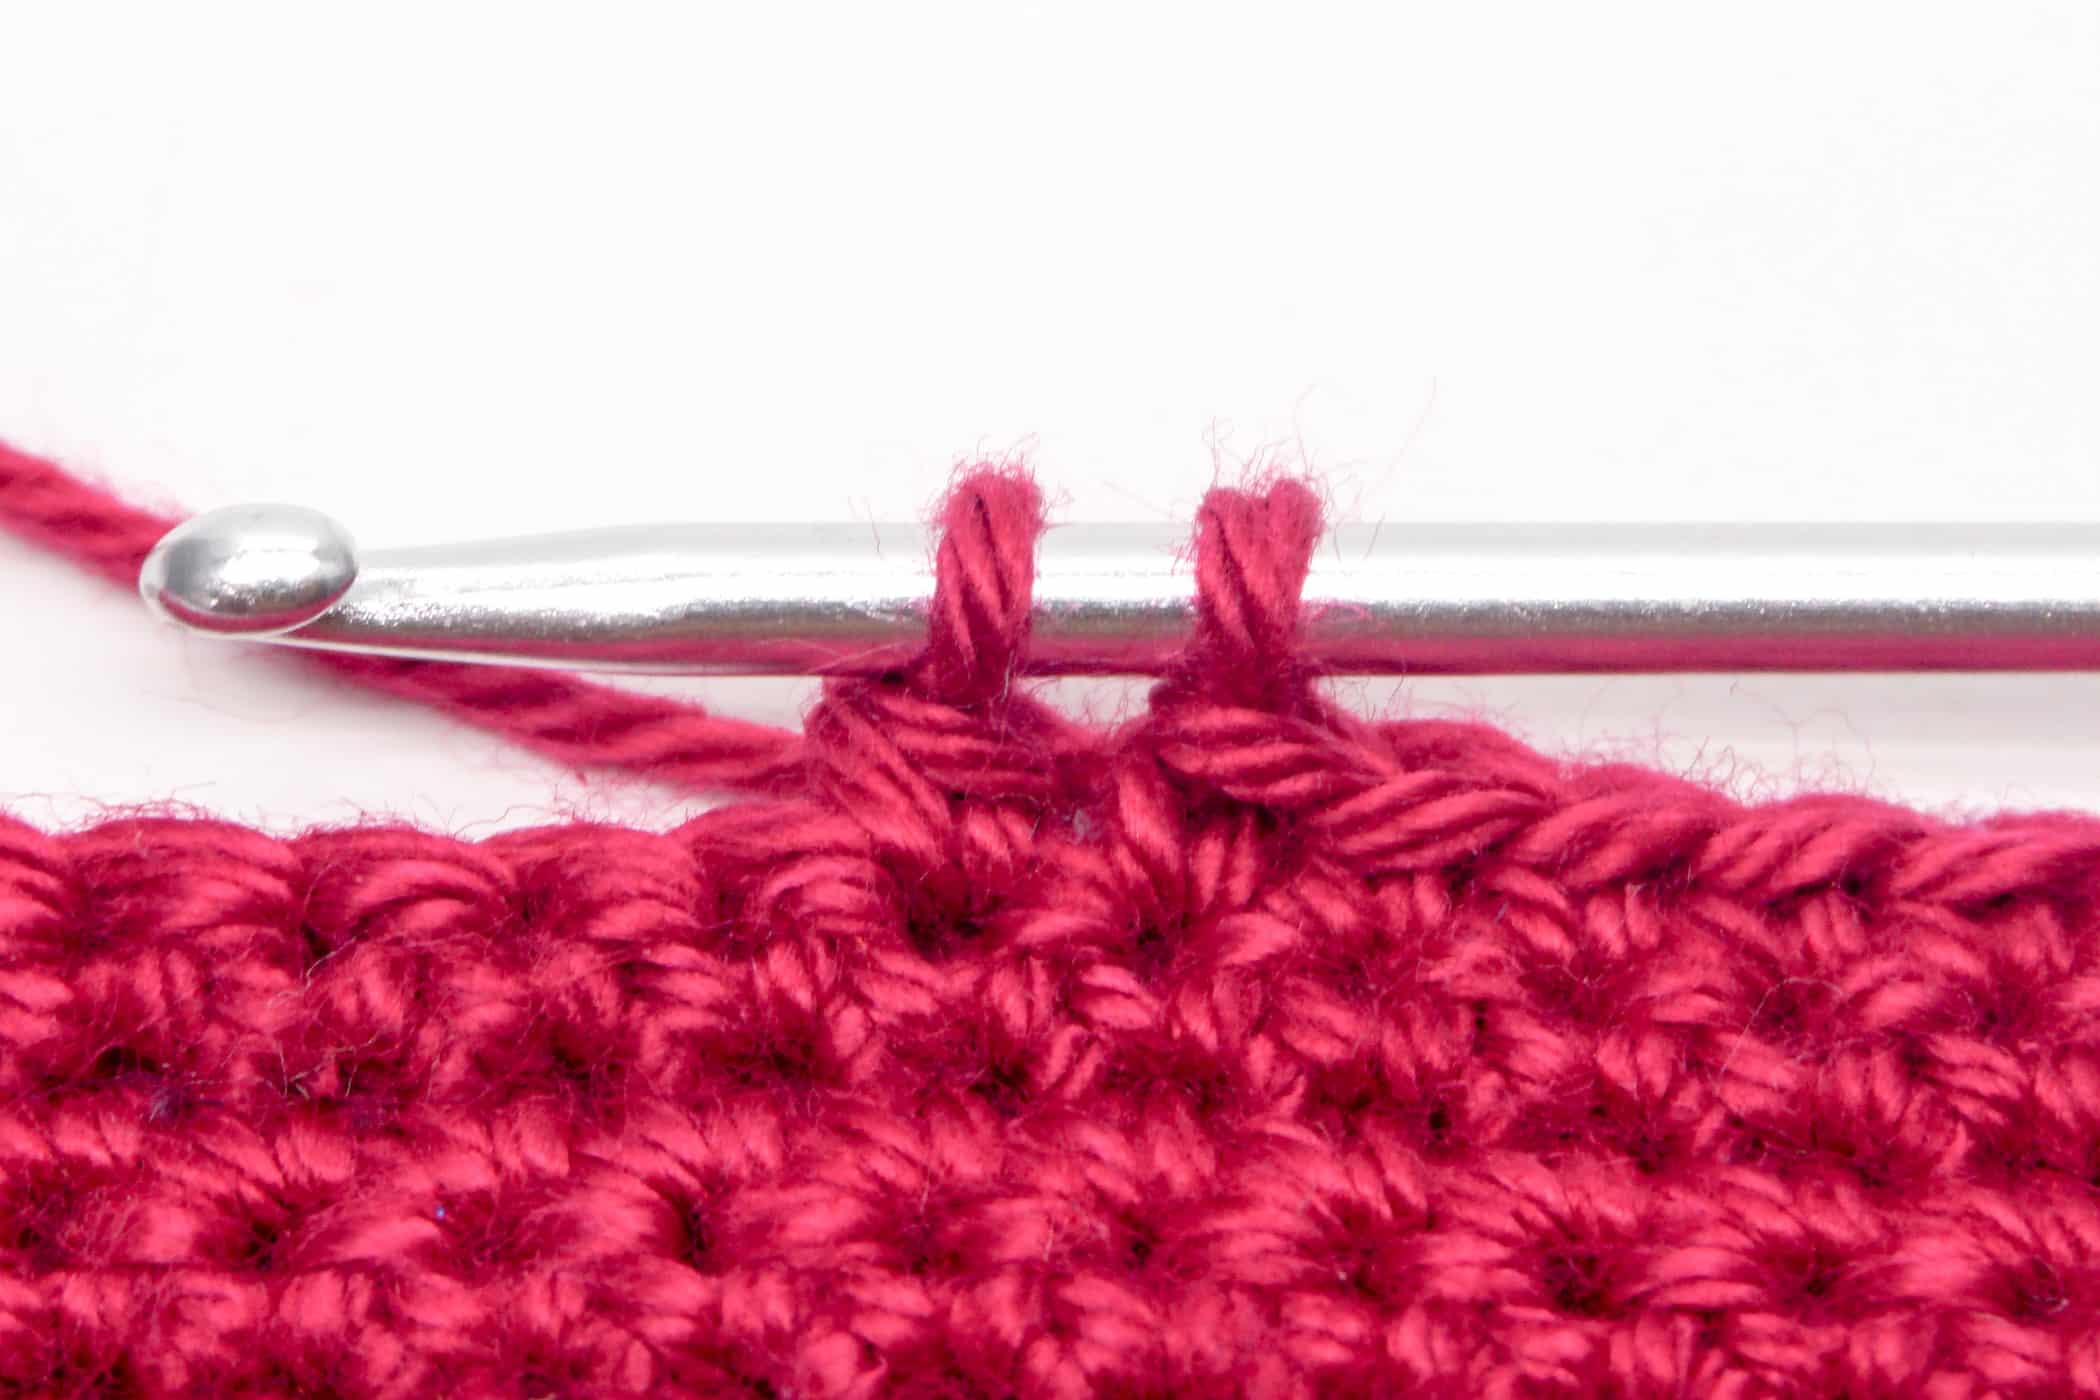
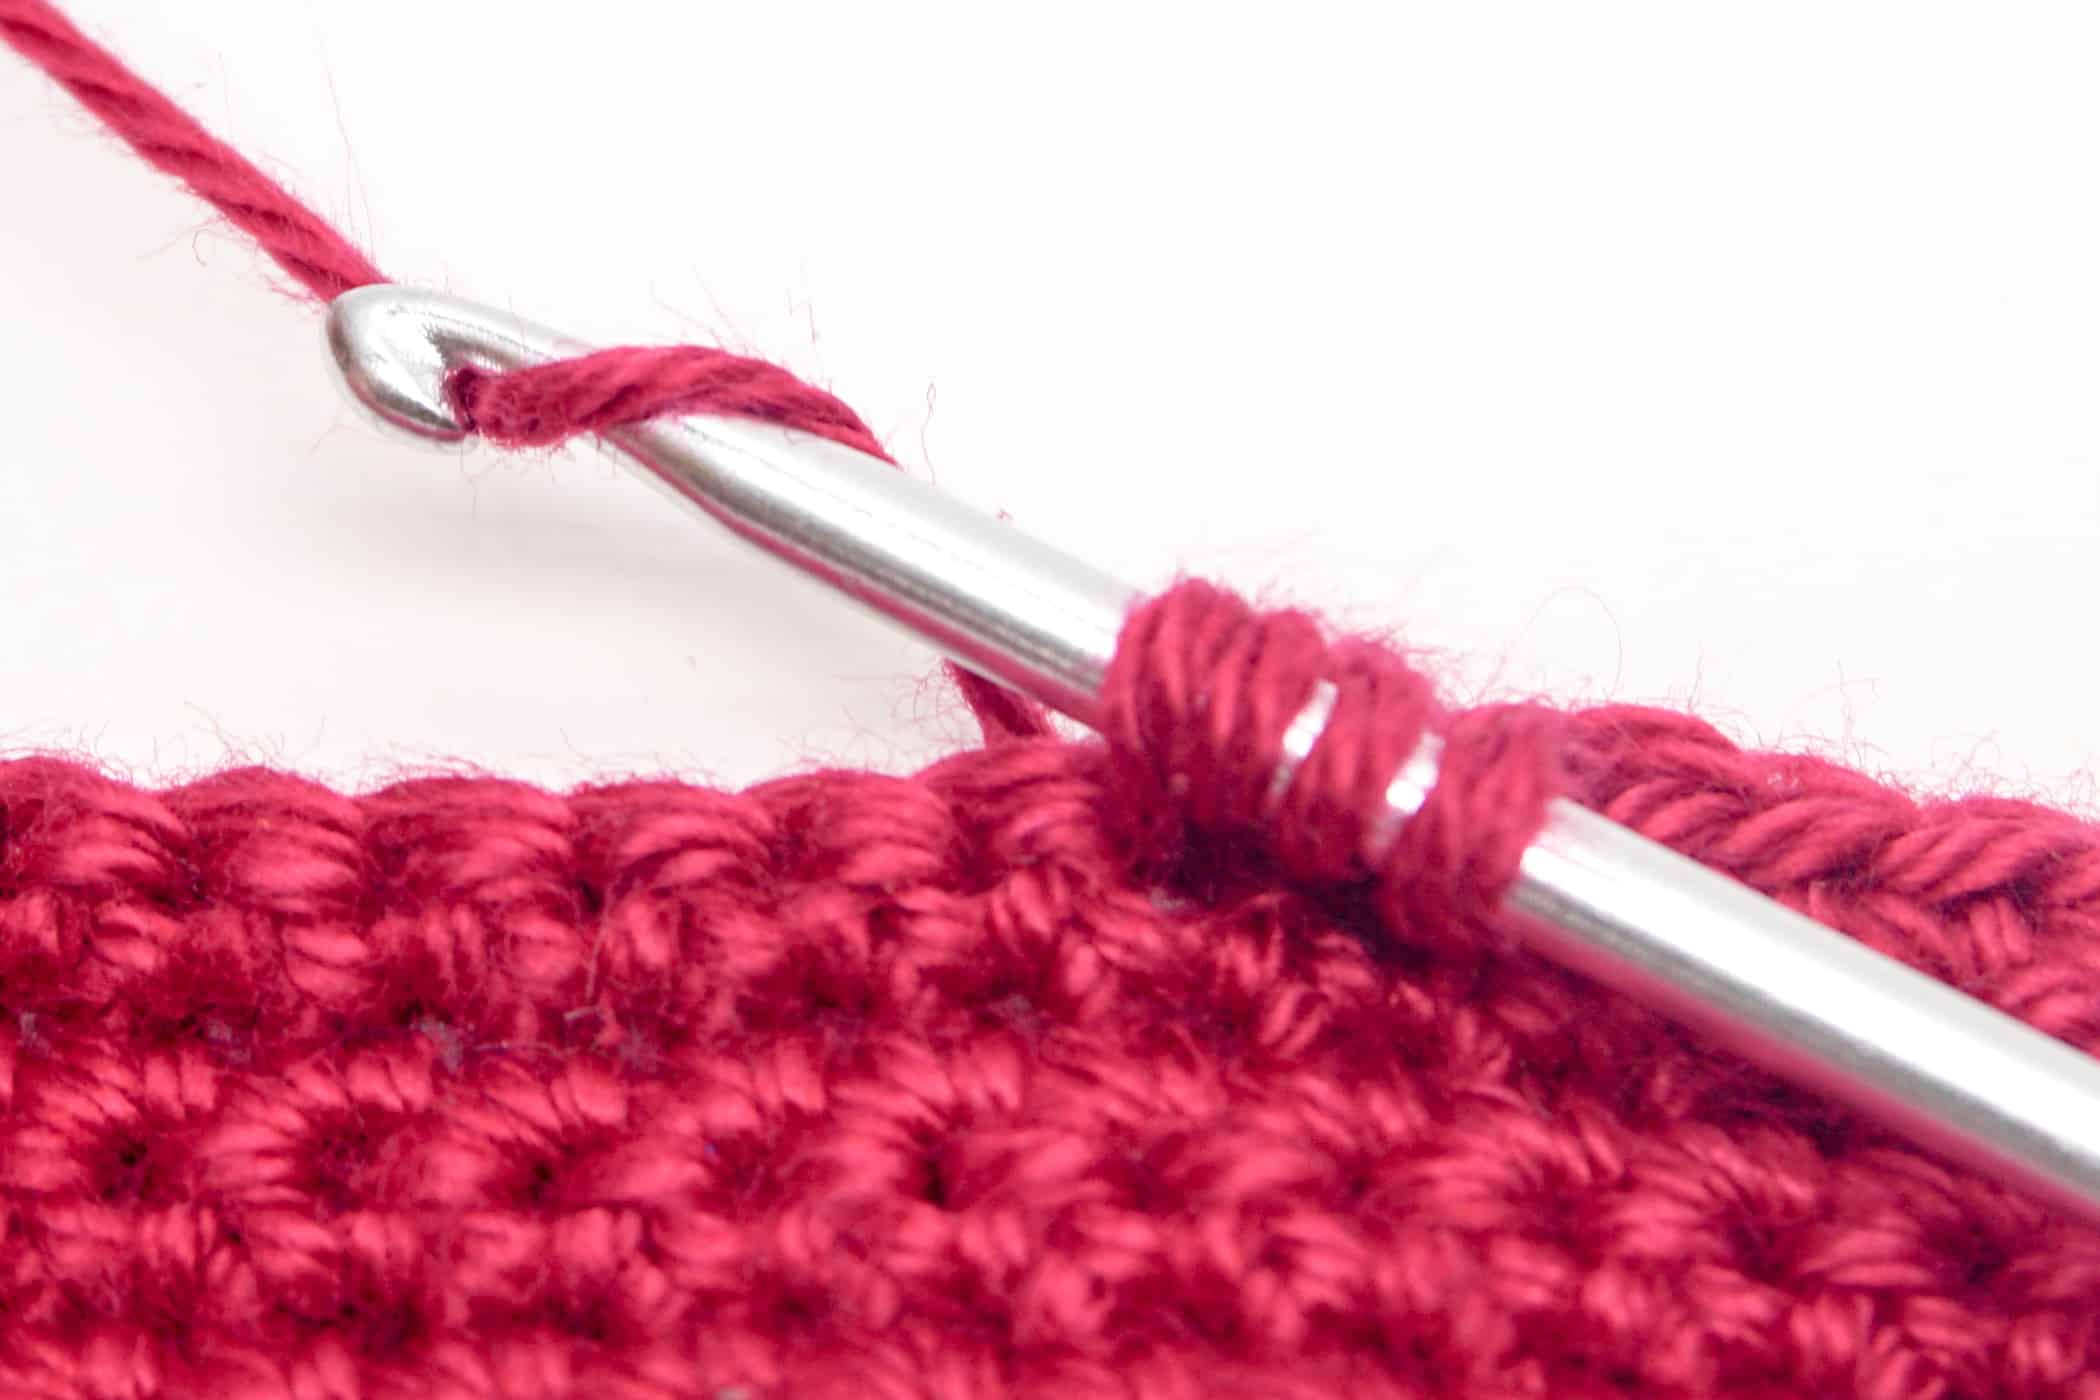
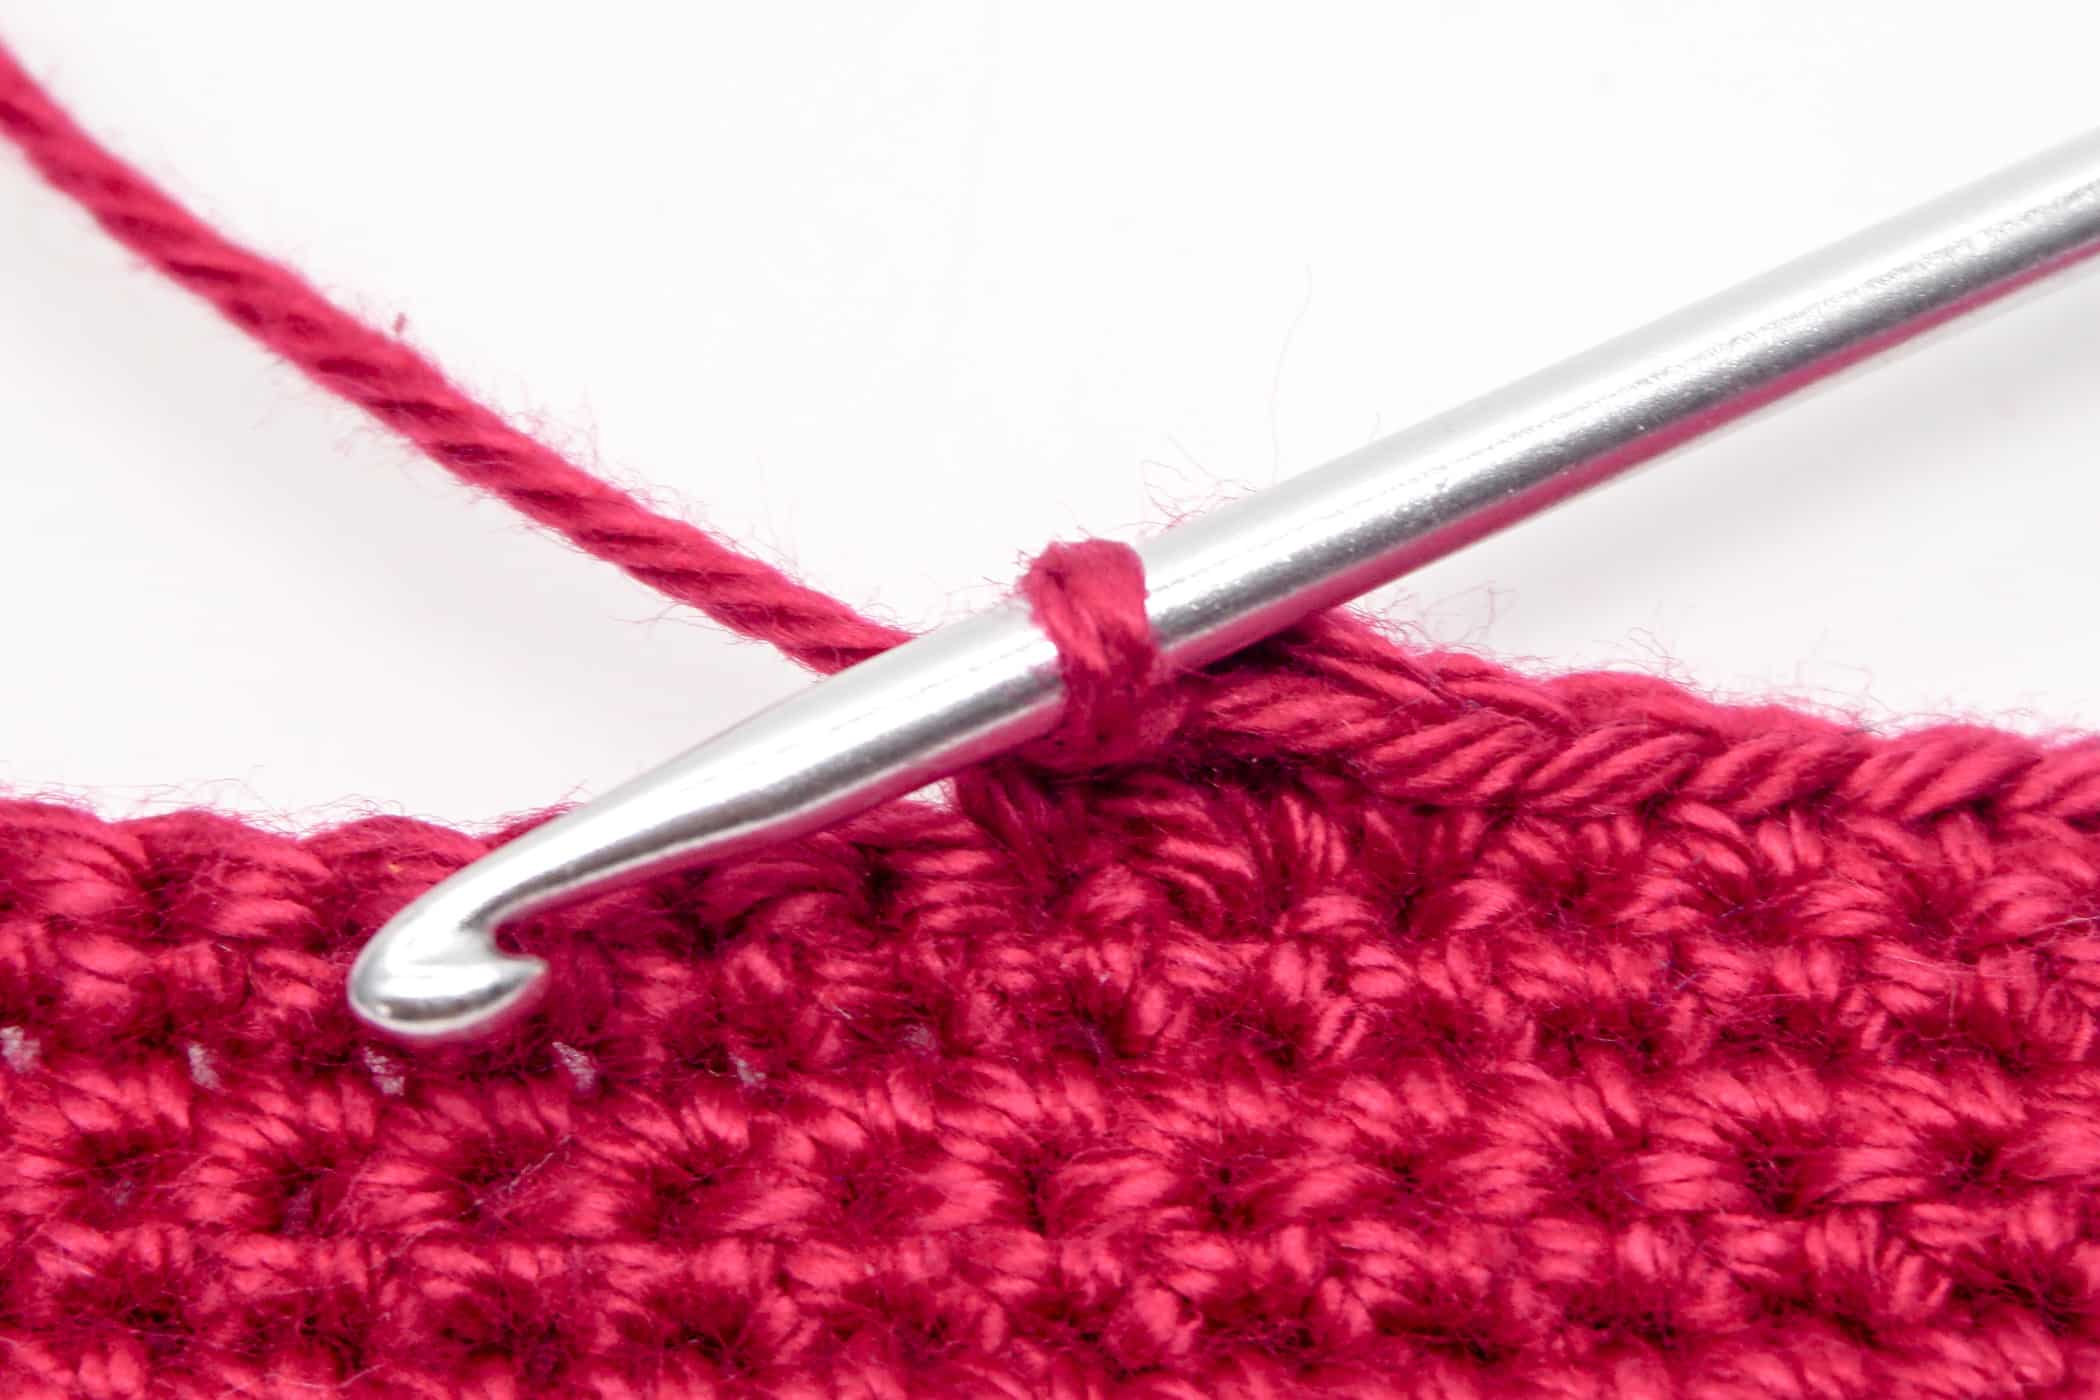
- Step 5: The finished bobble always emerges on the back side of the crochet piece and only becomes really visible after the next single crochet stitch (or another stitch of your choice) is crocheted into the next stitch. Push the crochet hook through the next stitch on the crochet piece and crochet 1 single crochet stitch (or another stitch of your choice).
- The longer the used stitch, the flatter the bobble will be. The shorter the stitch, the more the bobble bulges outward.

Variations of the Bobble Stitch
The example shown here is just one of many ways you can crochet a bobble stitch.
Repeat steps 1 to 2 more than 5x to make a thicker, more voluminous bobble stitch.
Repeat steps 1 to 2 less than 5x to get a flatter, less voluminous bobble stitch.