In this lesson you will learn what a slip knot is, what it is used for and how to make it with and without a crochet hook.
Before you start with the actual crocheting, the yarn must be connected with the crochet hook. Depending on what you are crocheting, this first step can look different.
But if you crochet “in rows”, which means that you crochet a row of stitches onto a previous row of stitches, then you start with a so-called slip knot.
The slip knot is relatively easy to create and represents your start of your crochet work. There are different methods how you create this movable slip knot, either with or without a crochet hook. Try both methods and use the one that works best for you.
This Pattern has been crocheted with the “Schachenmayr Catania” yarn in the color Golf Green with a 2.5 mm crochet hook.
To order the materials click on the respective link (affiliate link).
1st Method: Slip Knot without Crochet Hook
The first method to create a slip knot does not require the use of a crochet hook. Slowly follow the following steps and repeat the sequence several times until you are sure that you can make the slip knot without the help of a crochet hook.
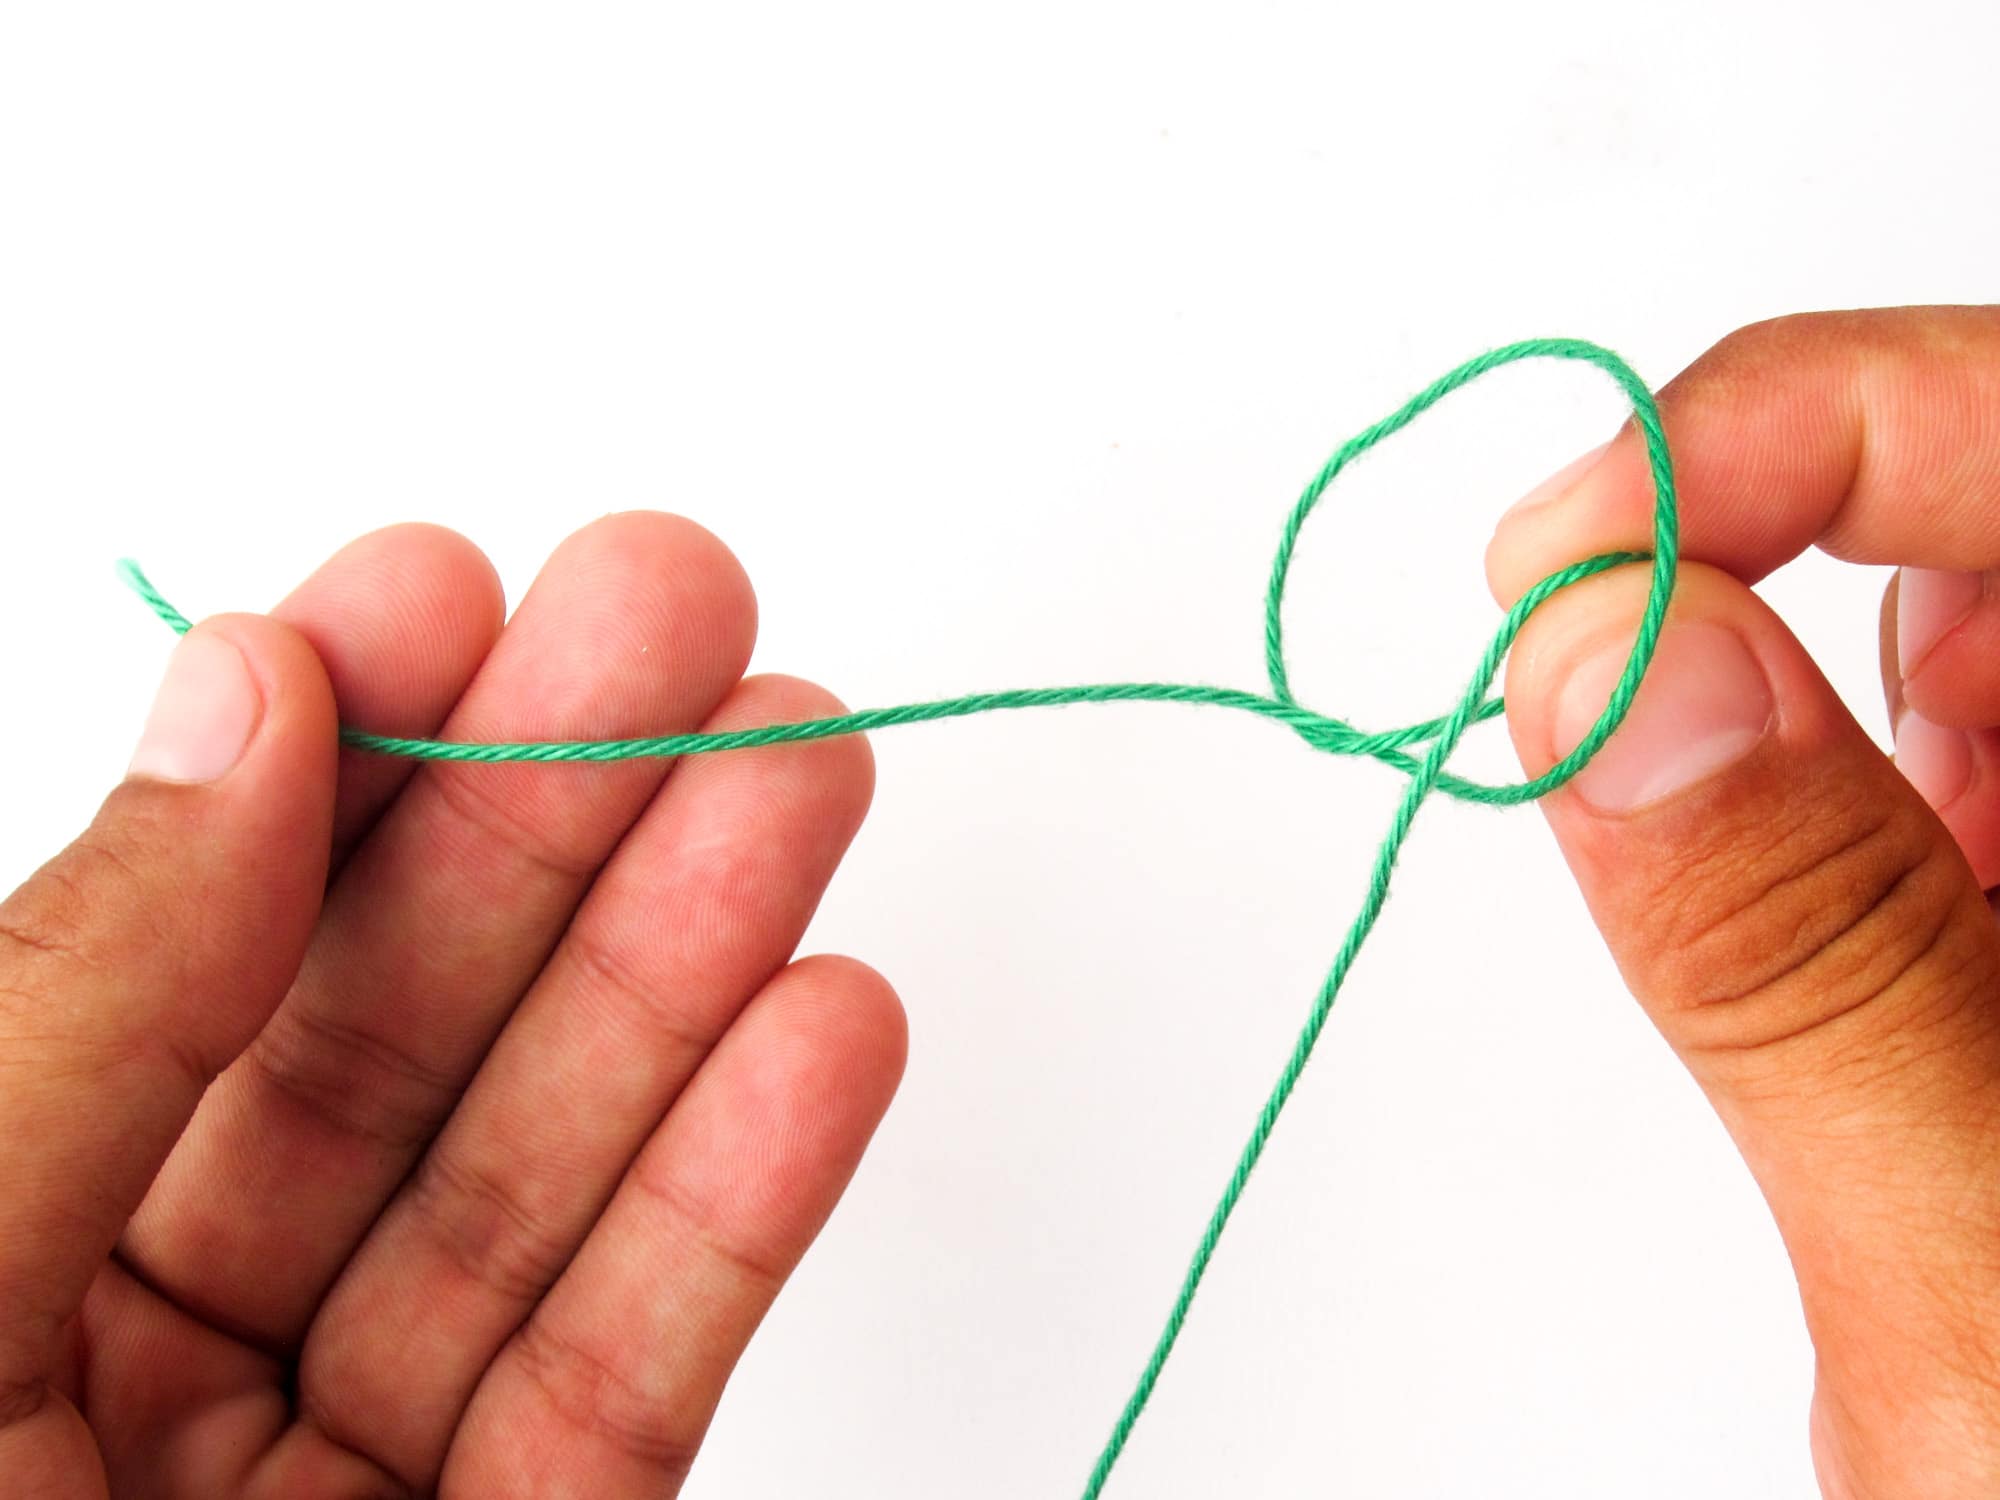
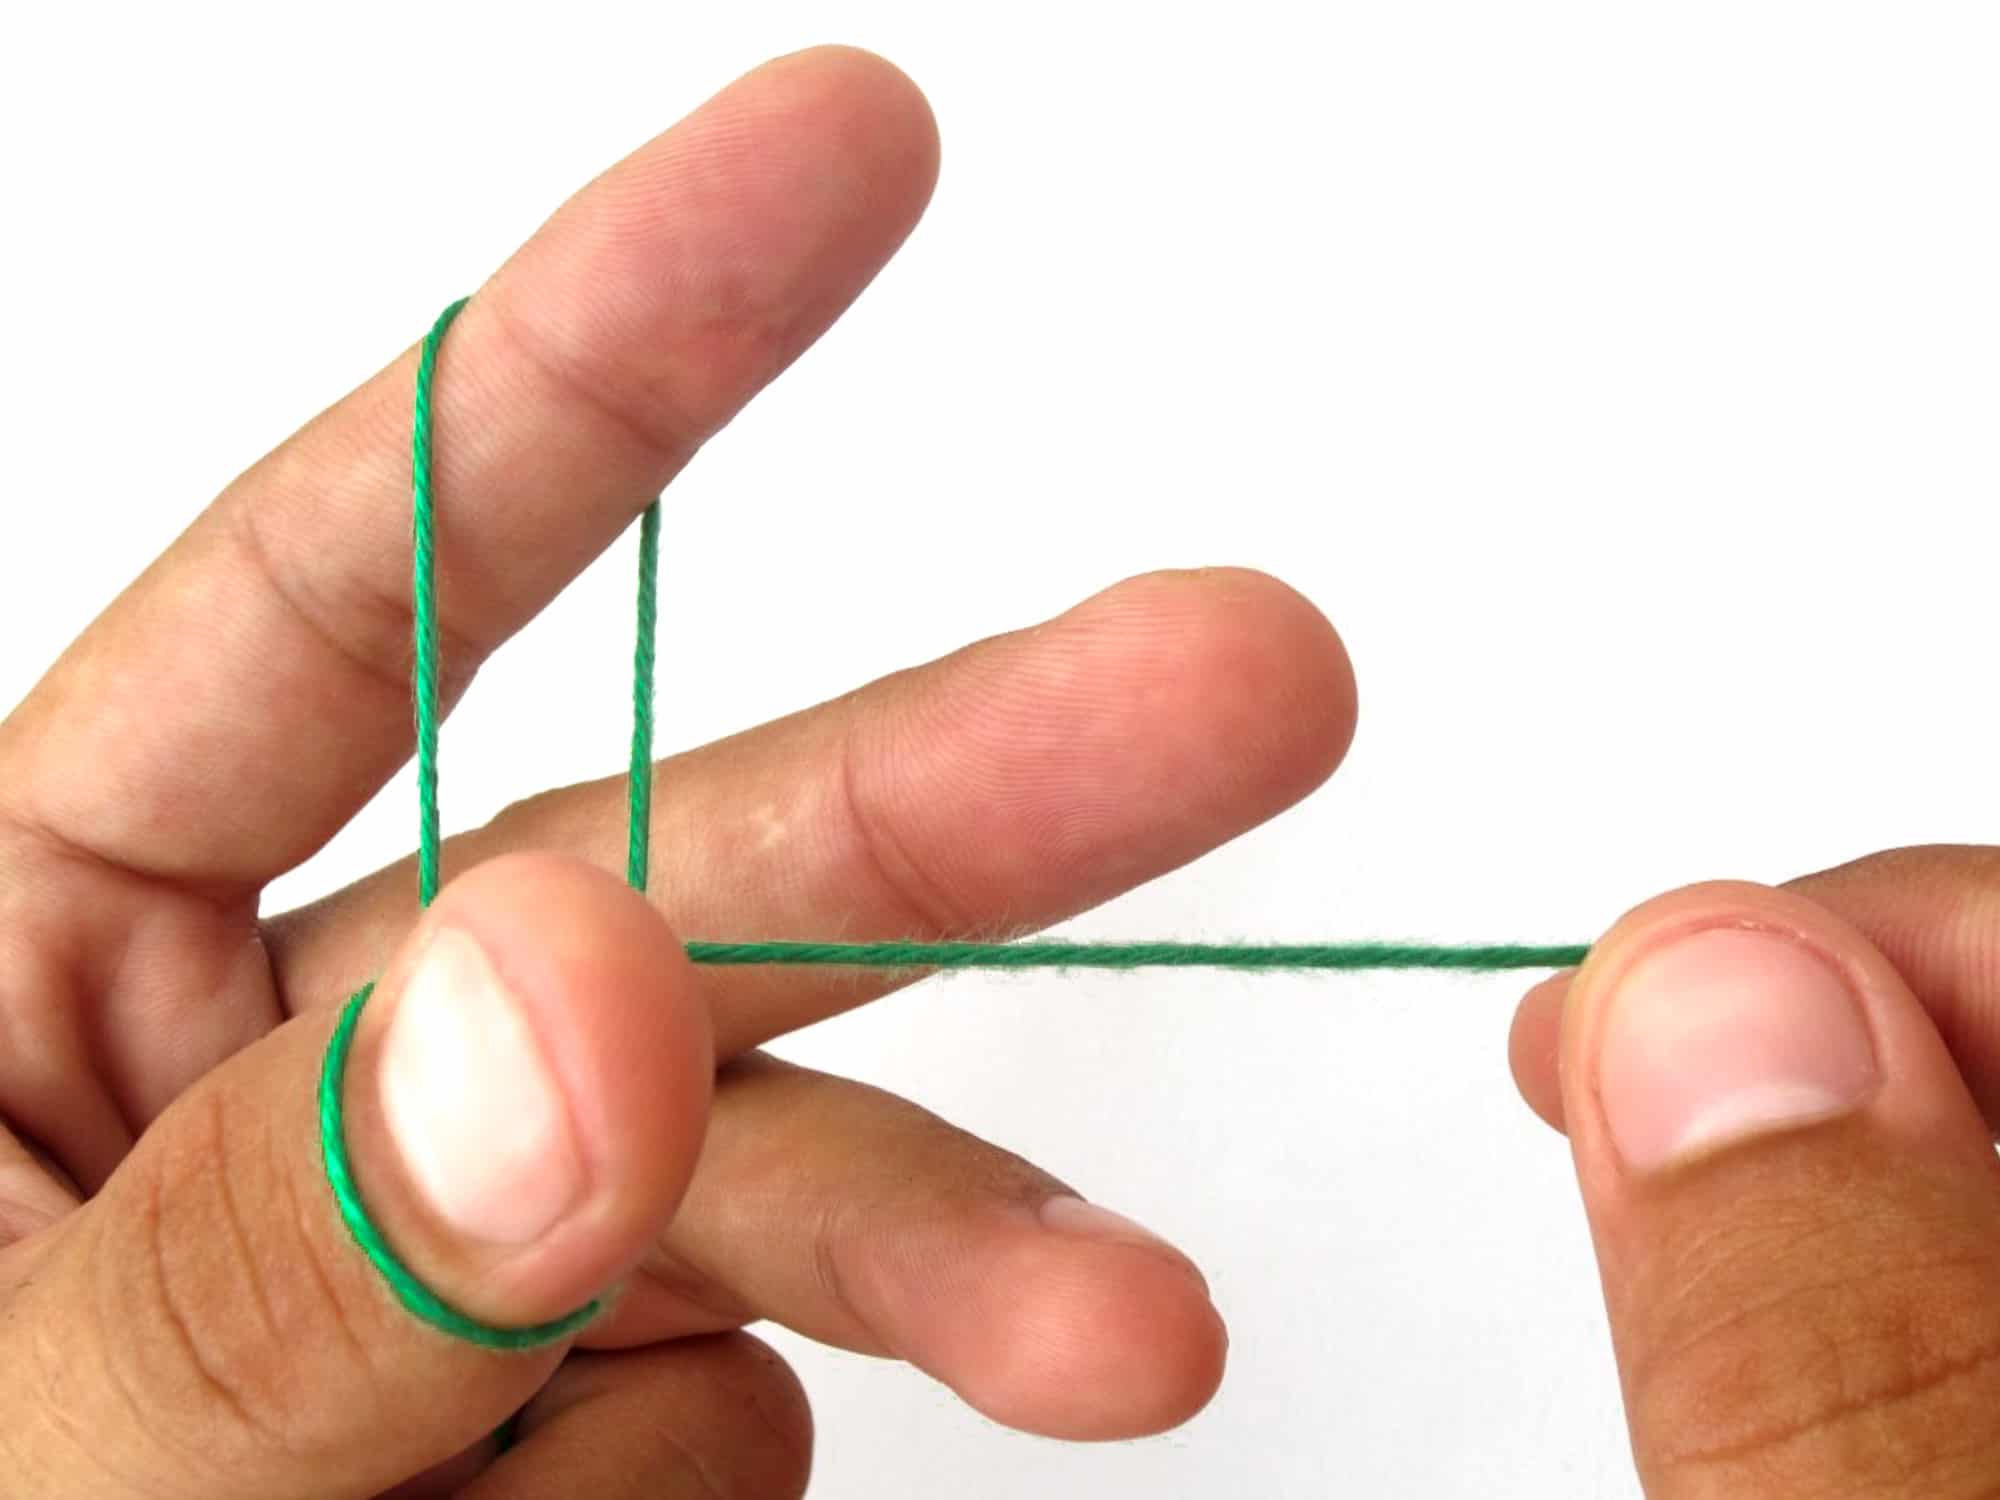
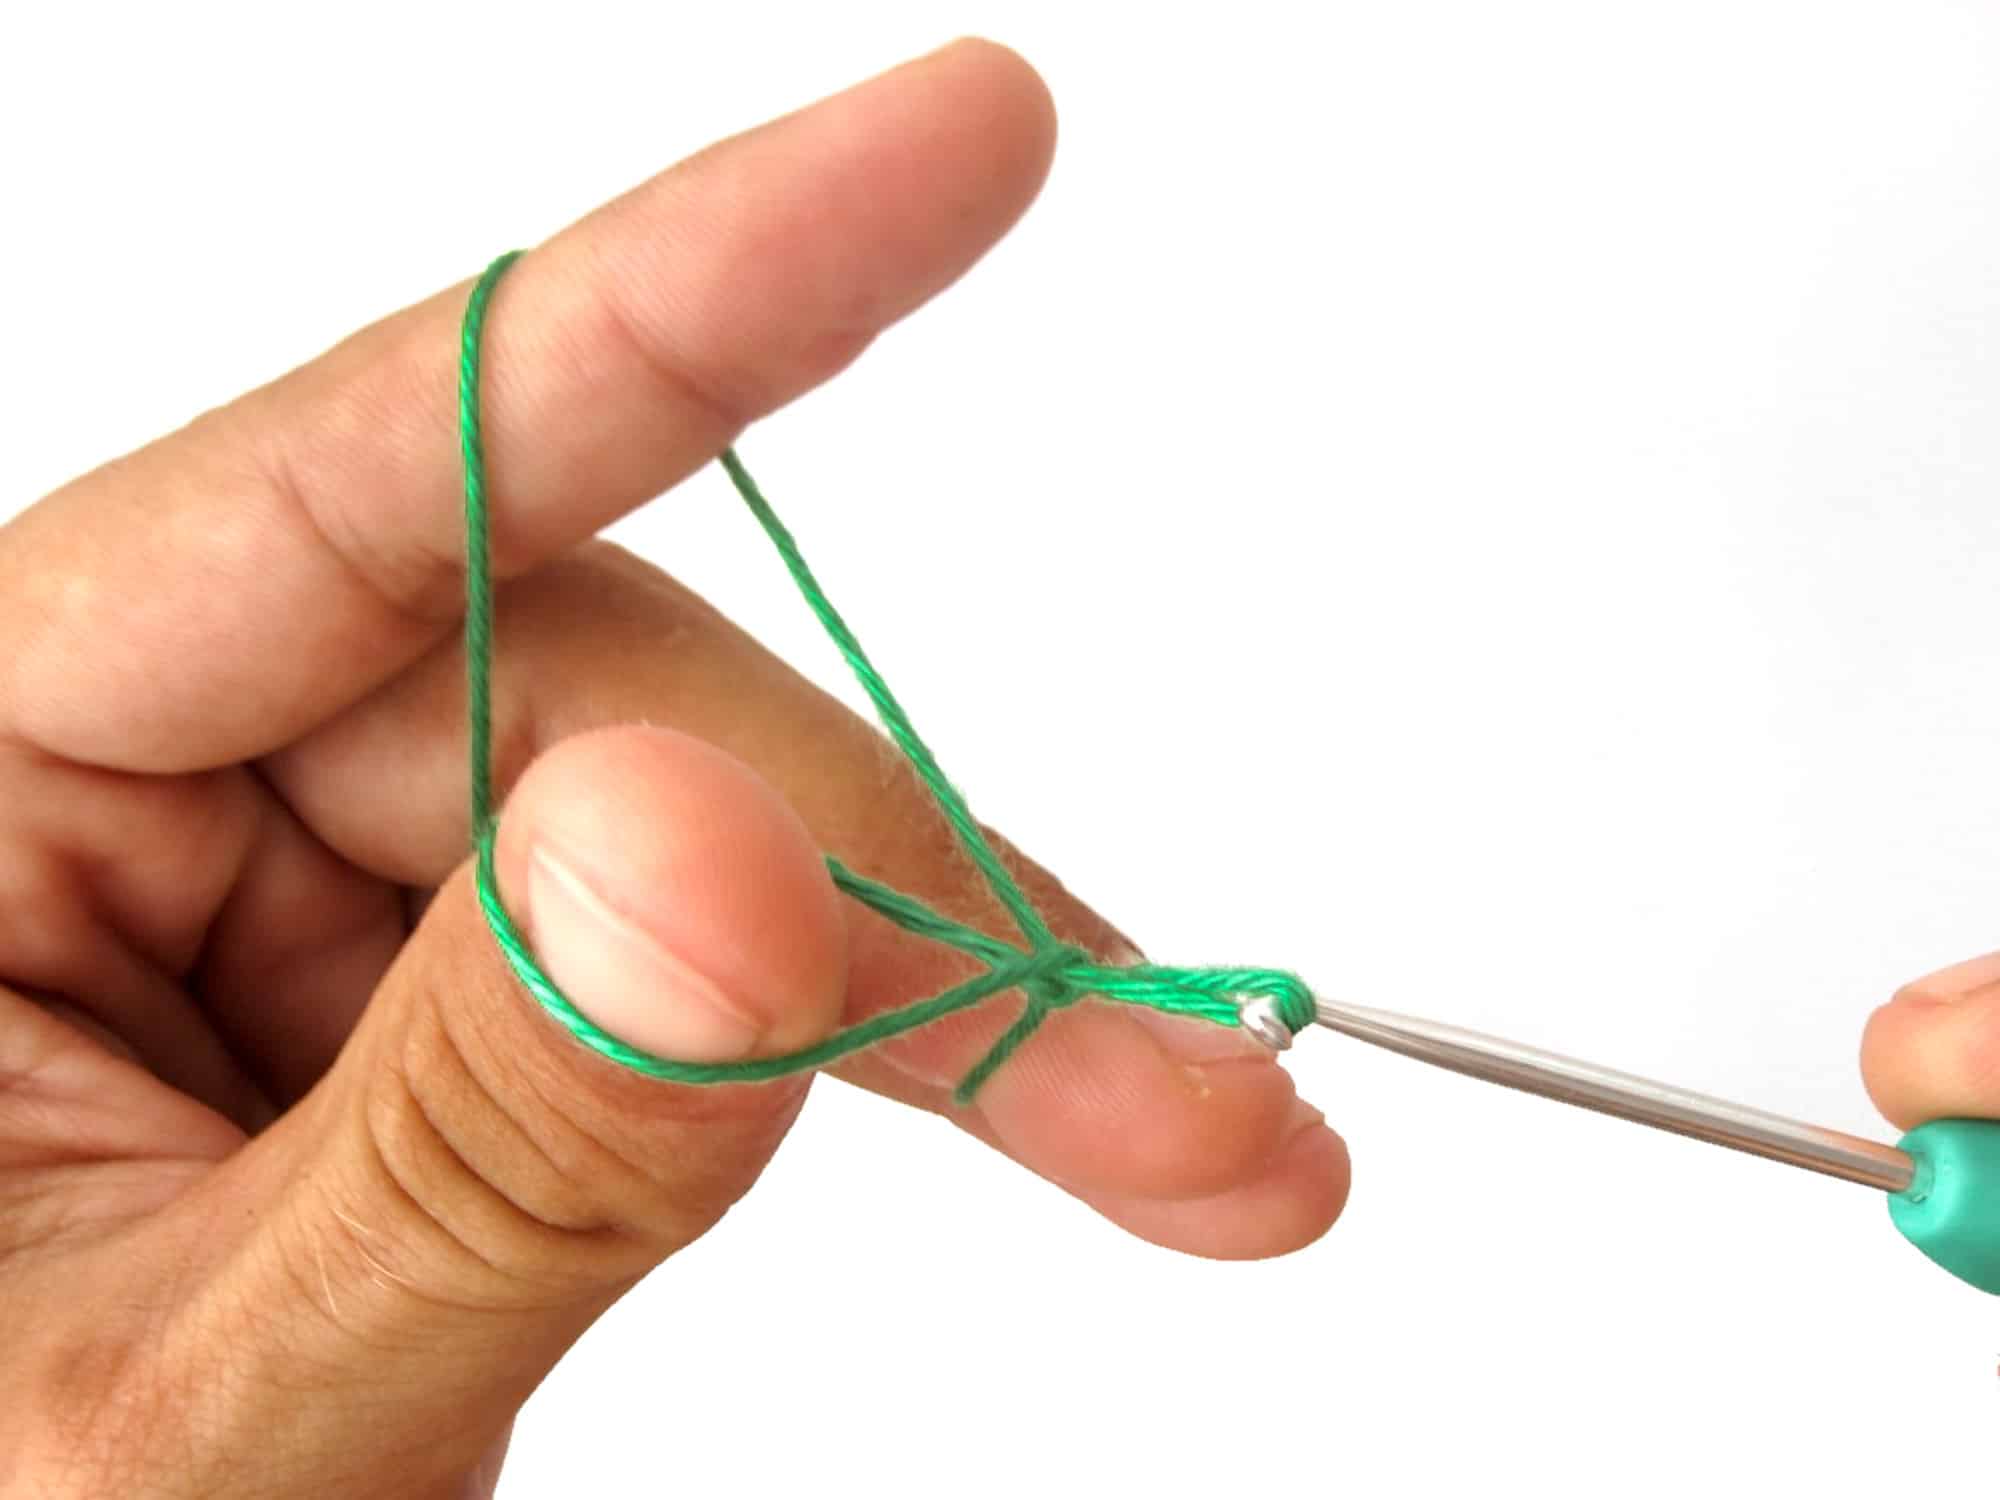
- Step 1: Make a fist with your right hand and spread your thumb and forefinger from it. Place the thread over your index finger and thumb so that the end of the thread is over your thumb.
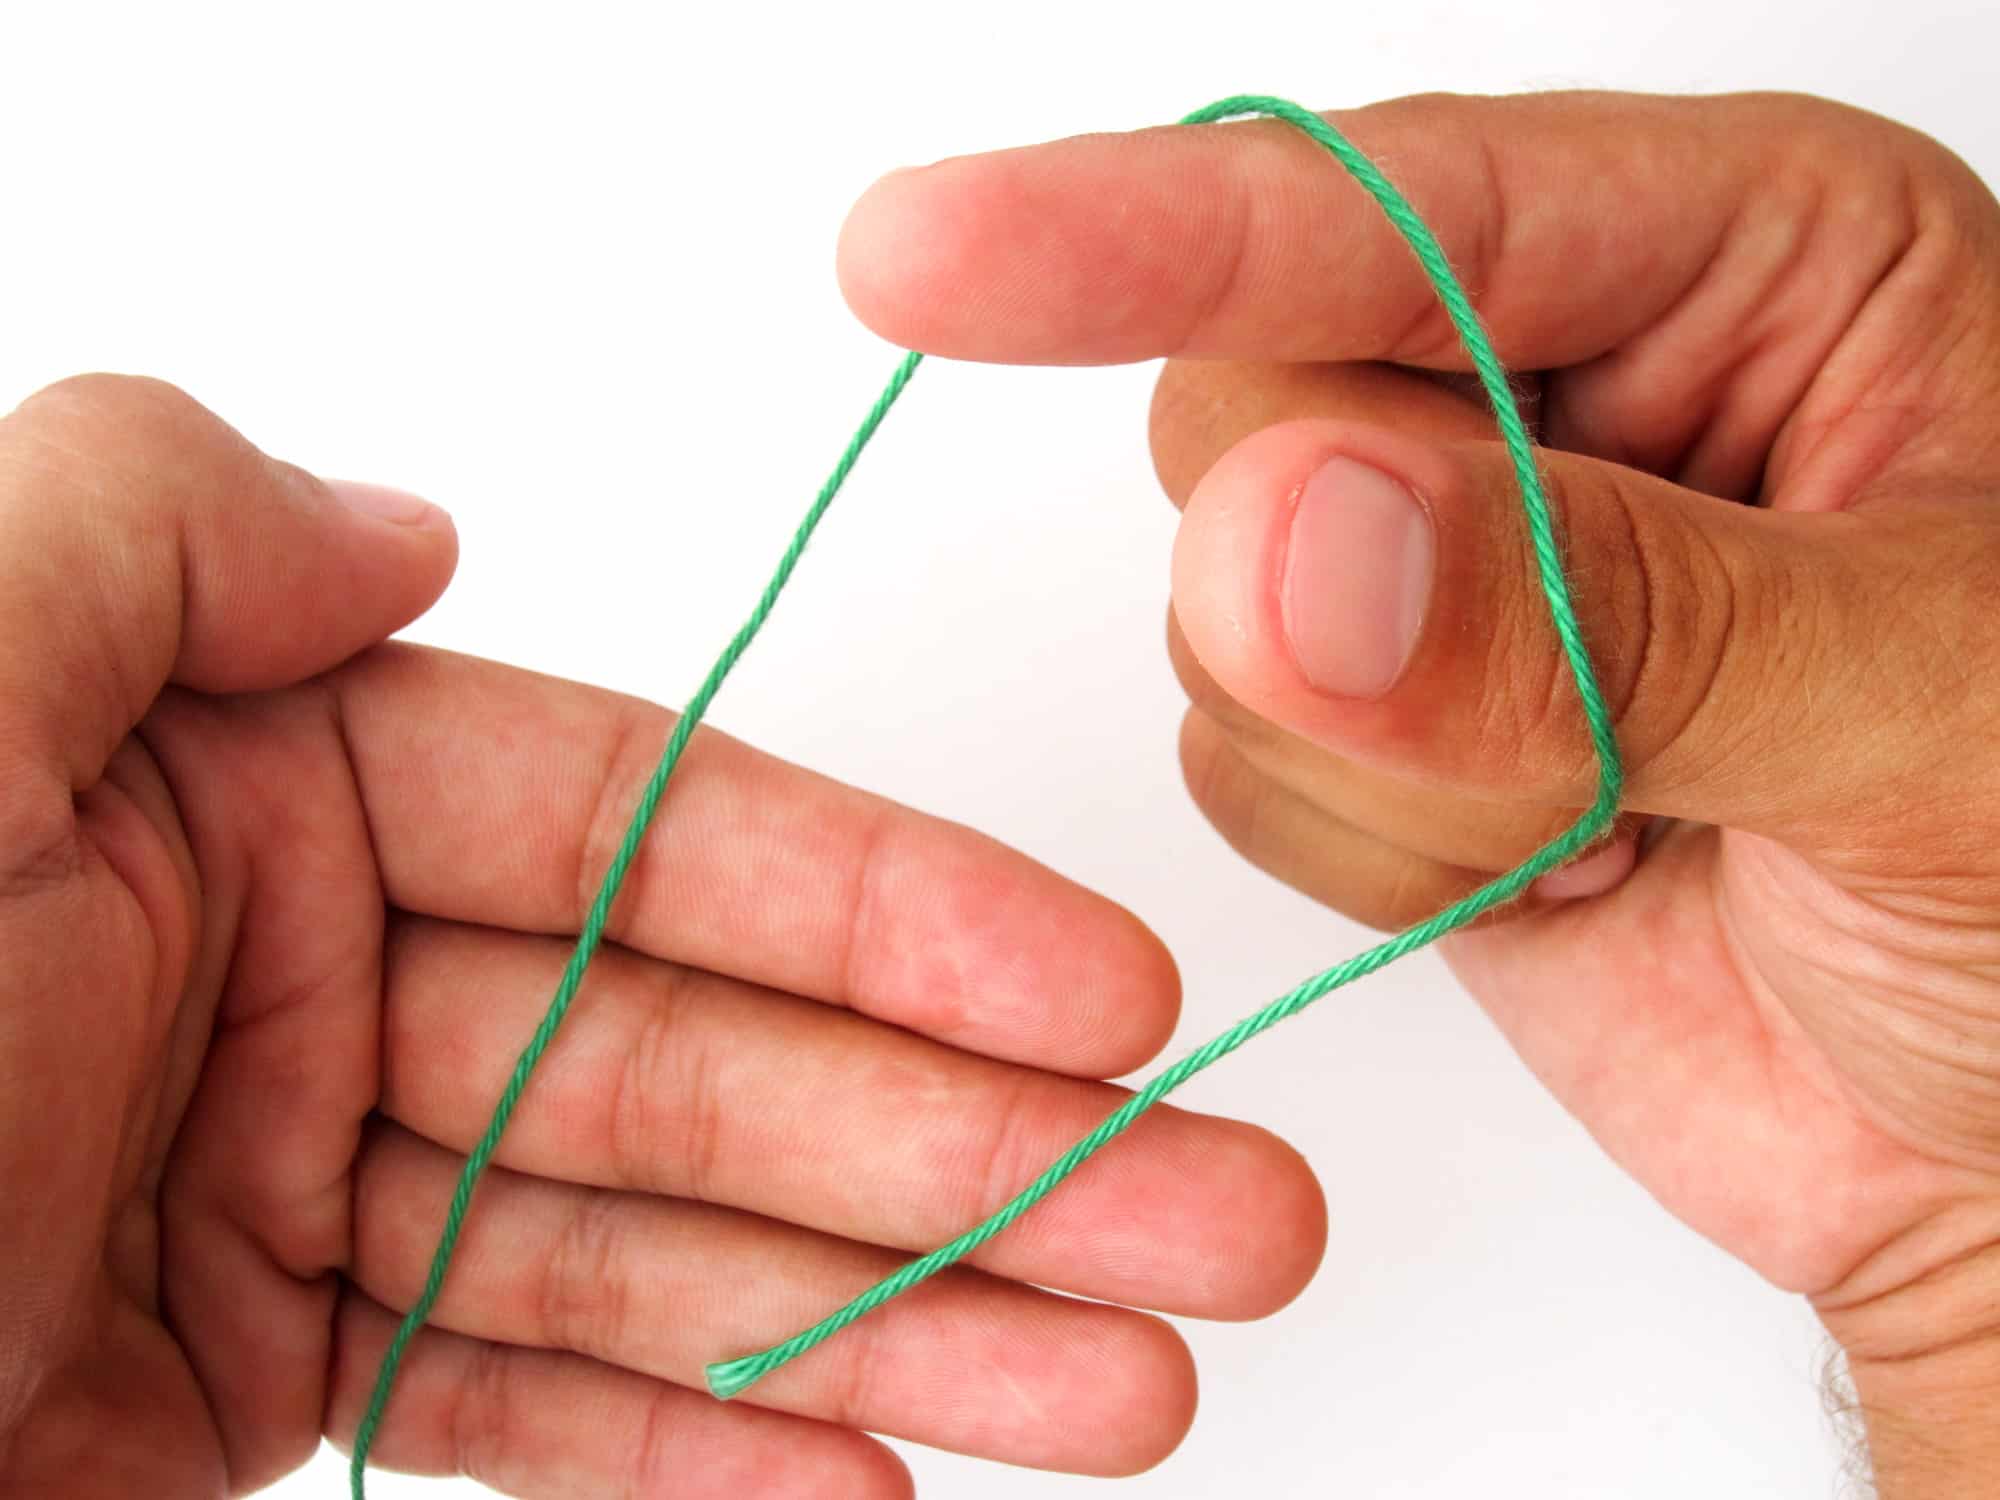
- Step 2: Now lay the end of the thread OVER the other thread and hold the end of the thread with one finger.
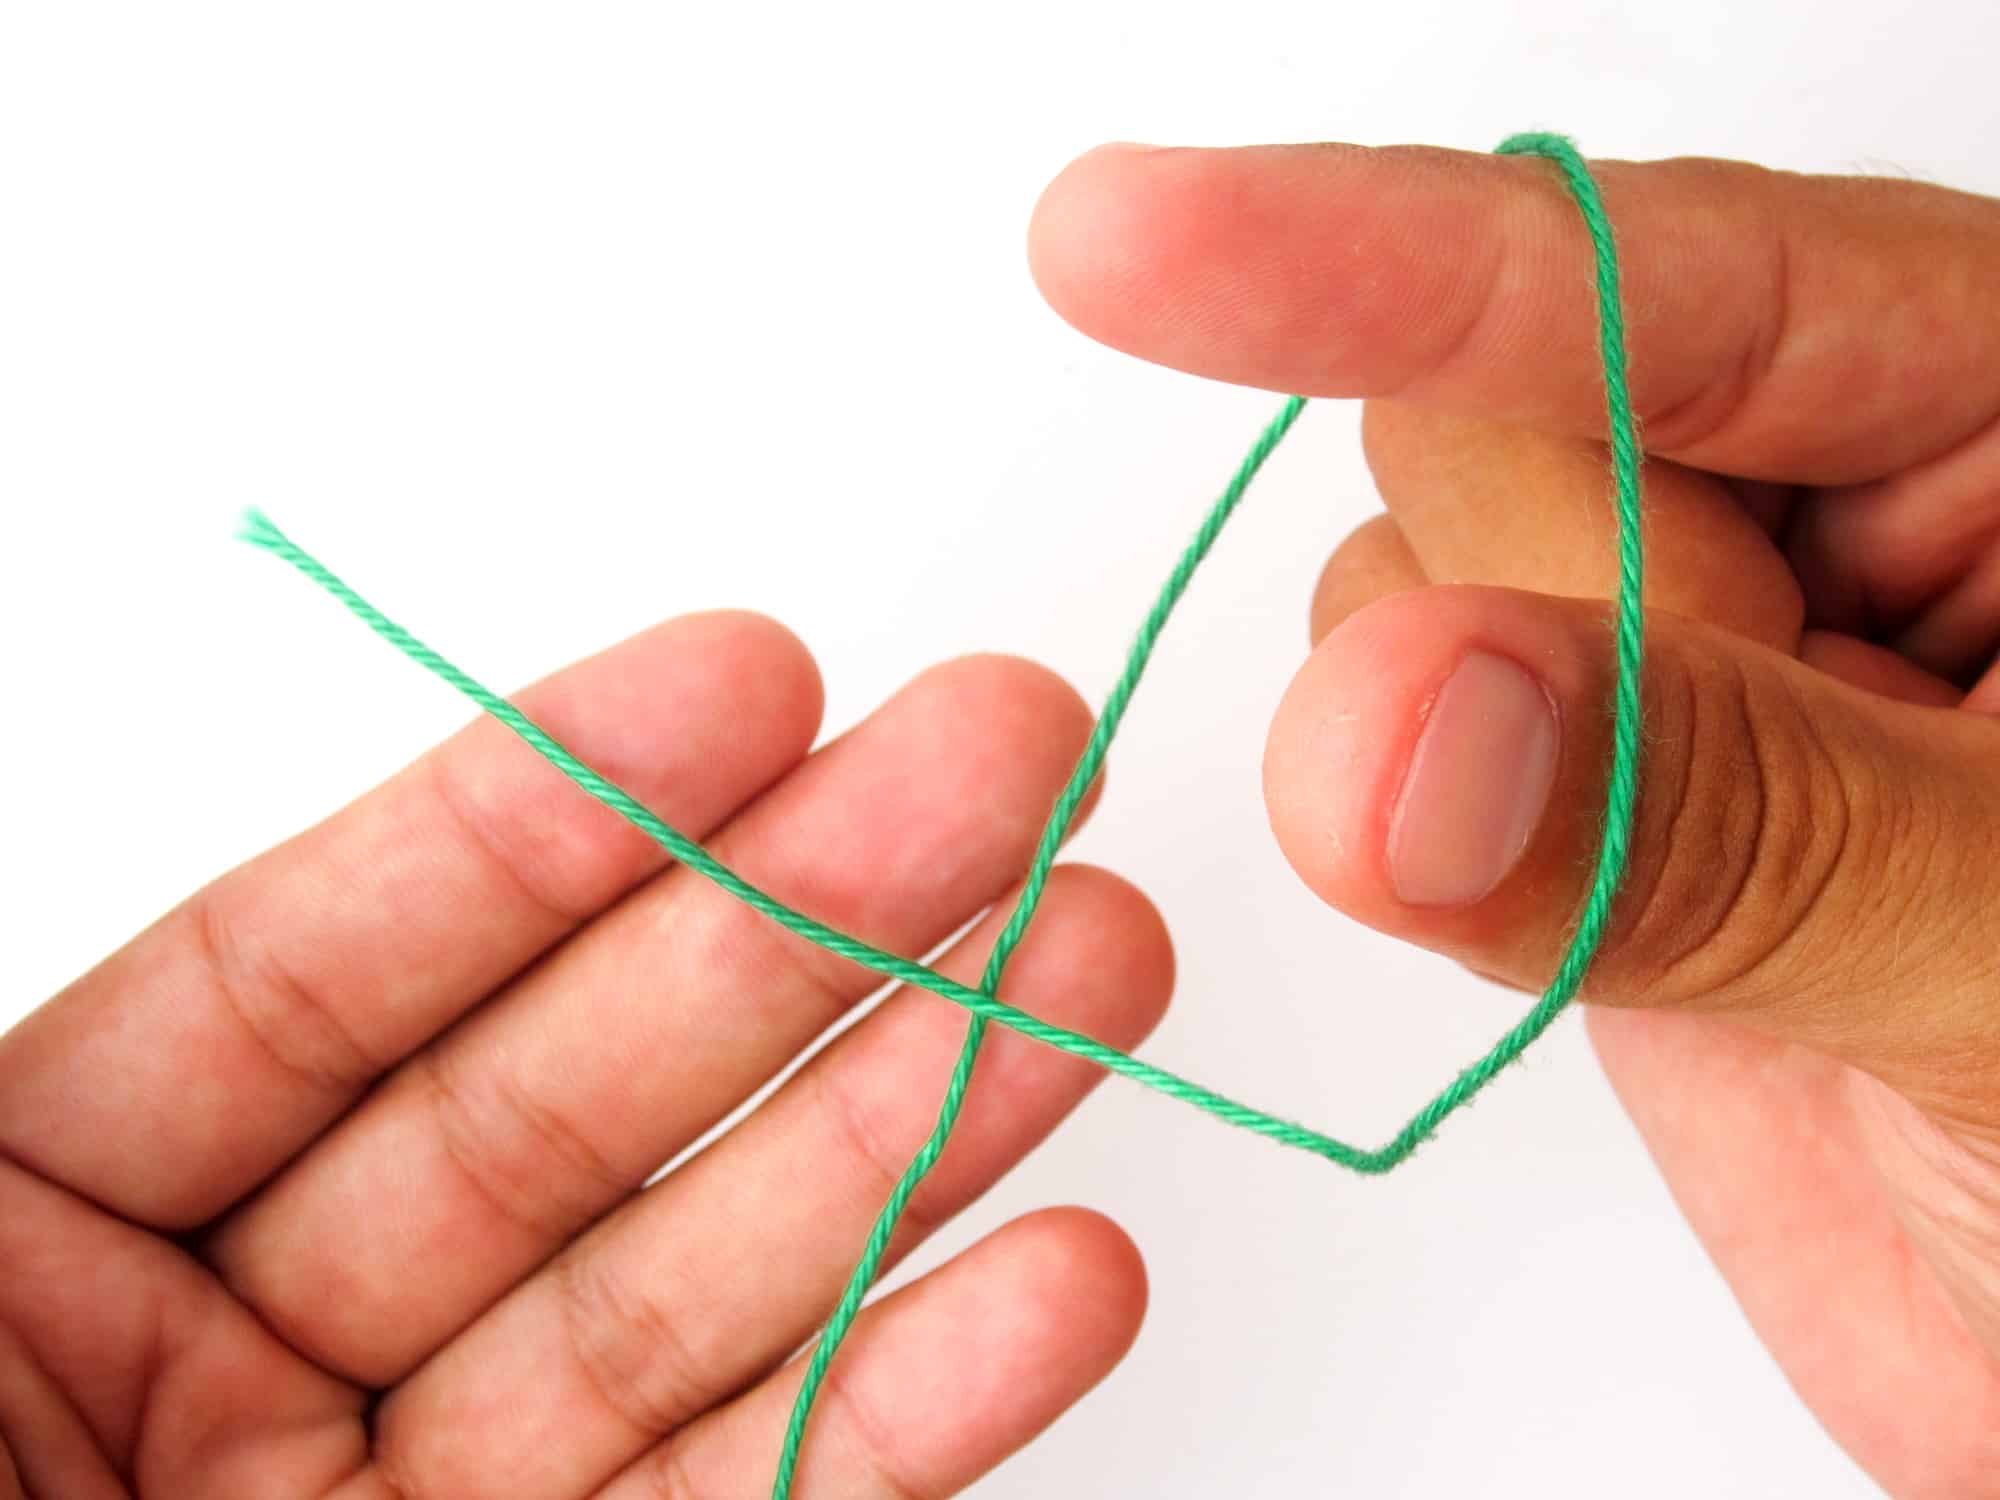

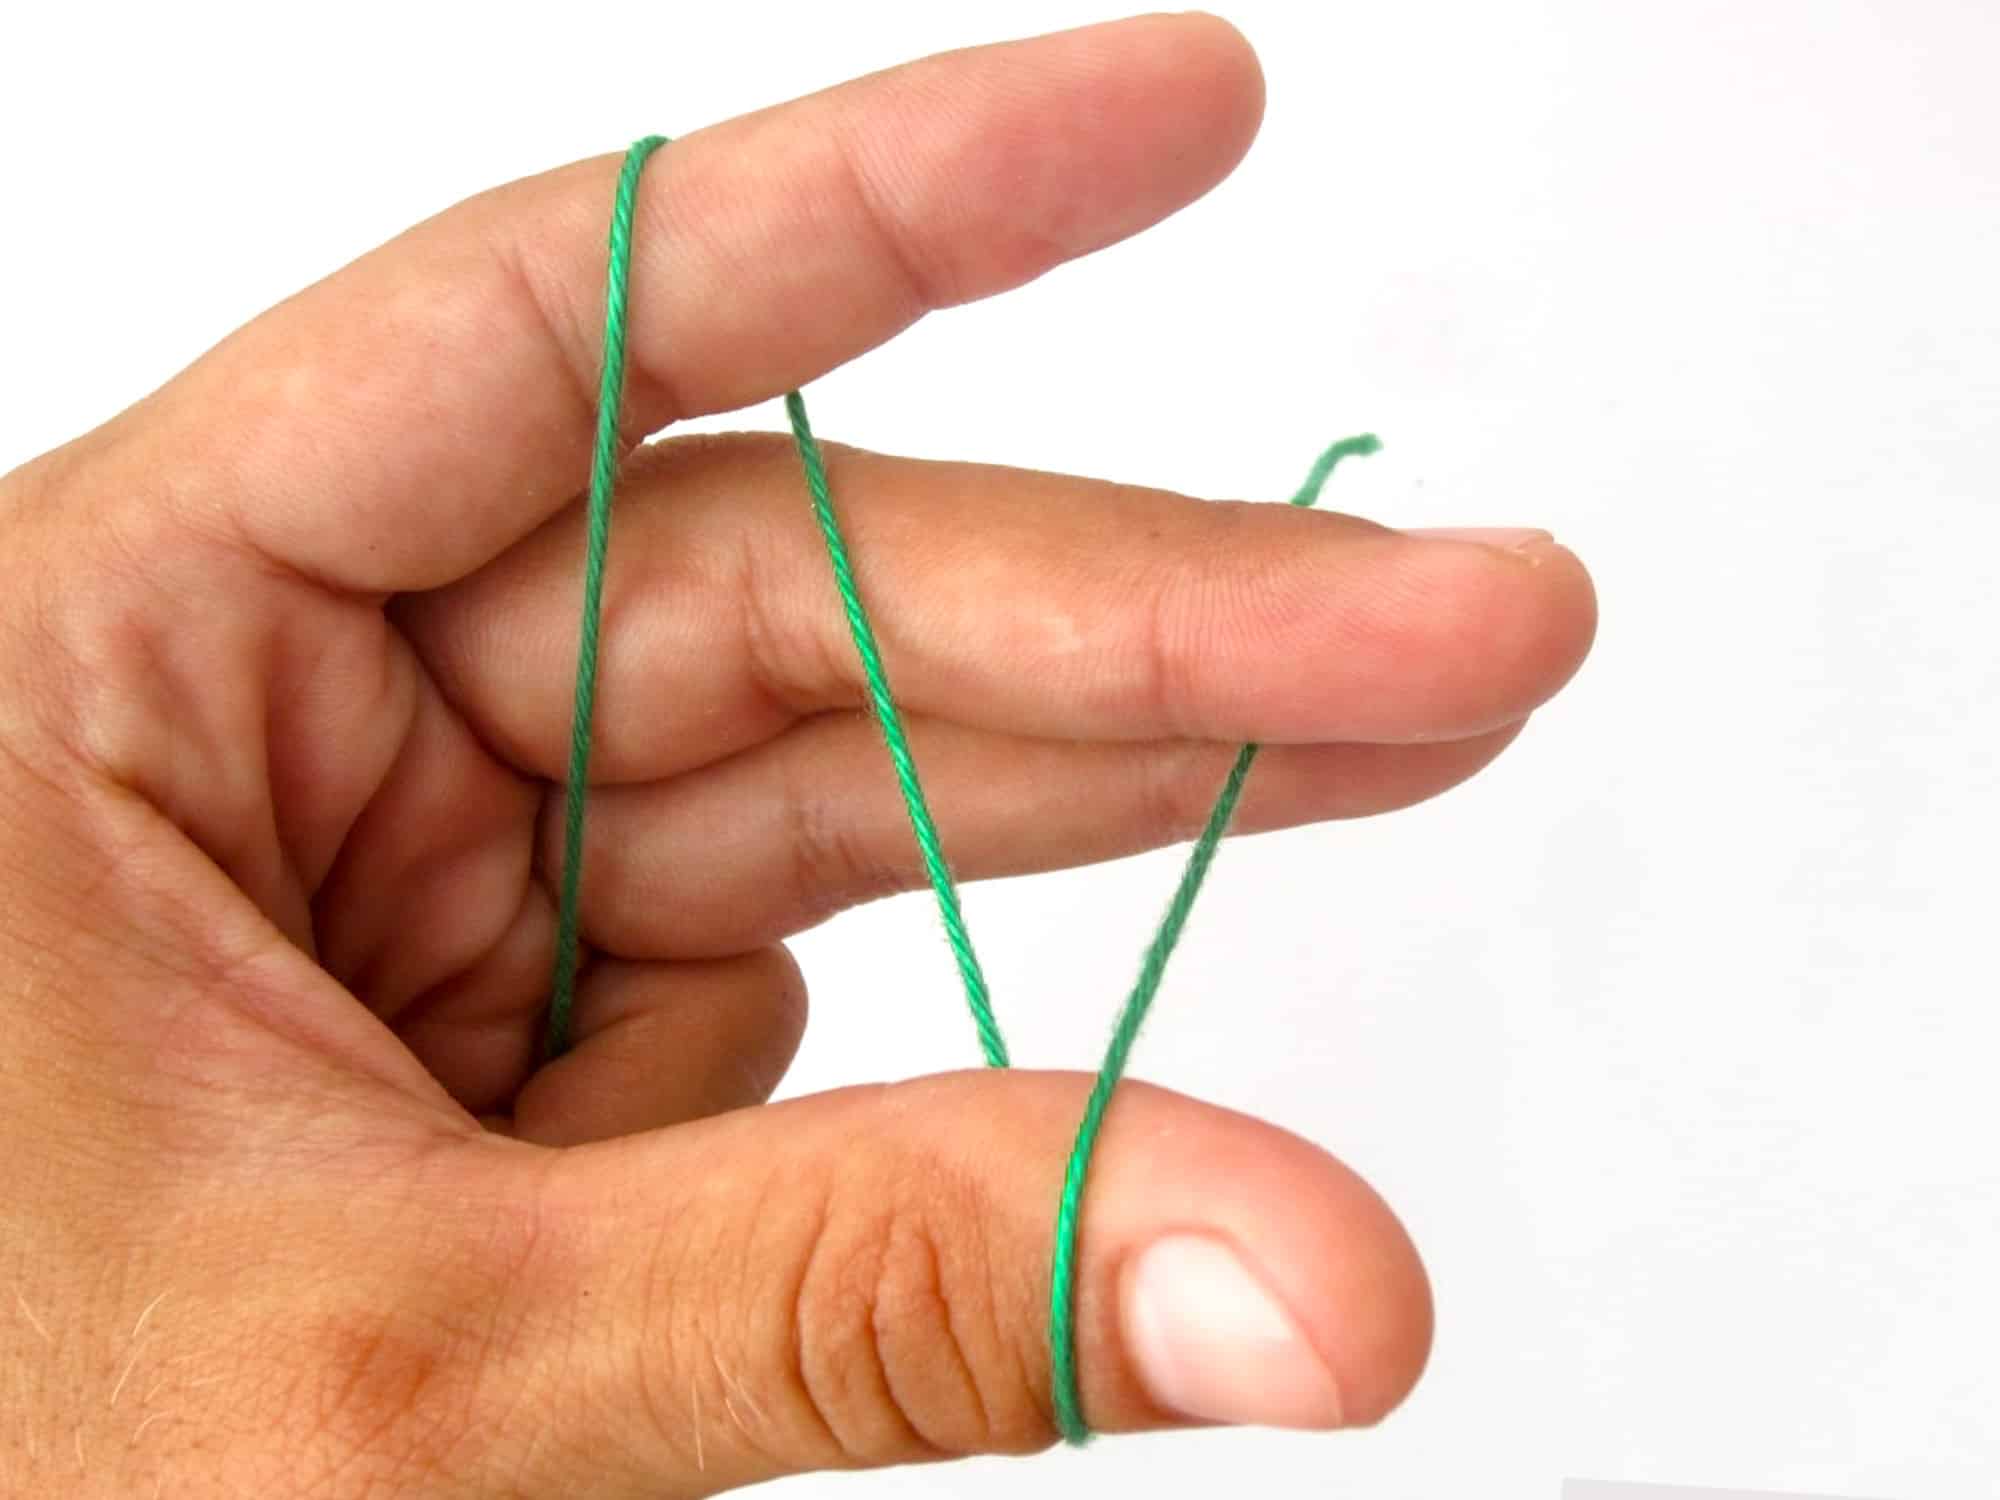
- Step 3: With thumb and forefinger of the right hand grasp the thread that runs under the end of the thread.

- Step 4: Pull this grasped thread through the loop that has formed around your index finger and thumb and pull the loop until a knot is formed. You should now have a loop that ends in a knot.

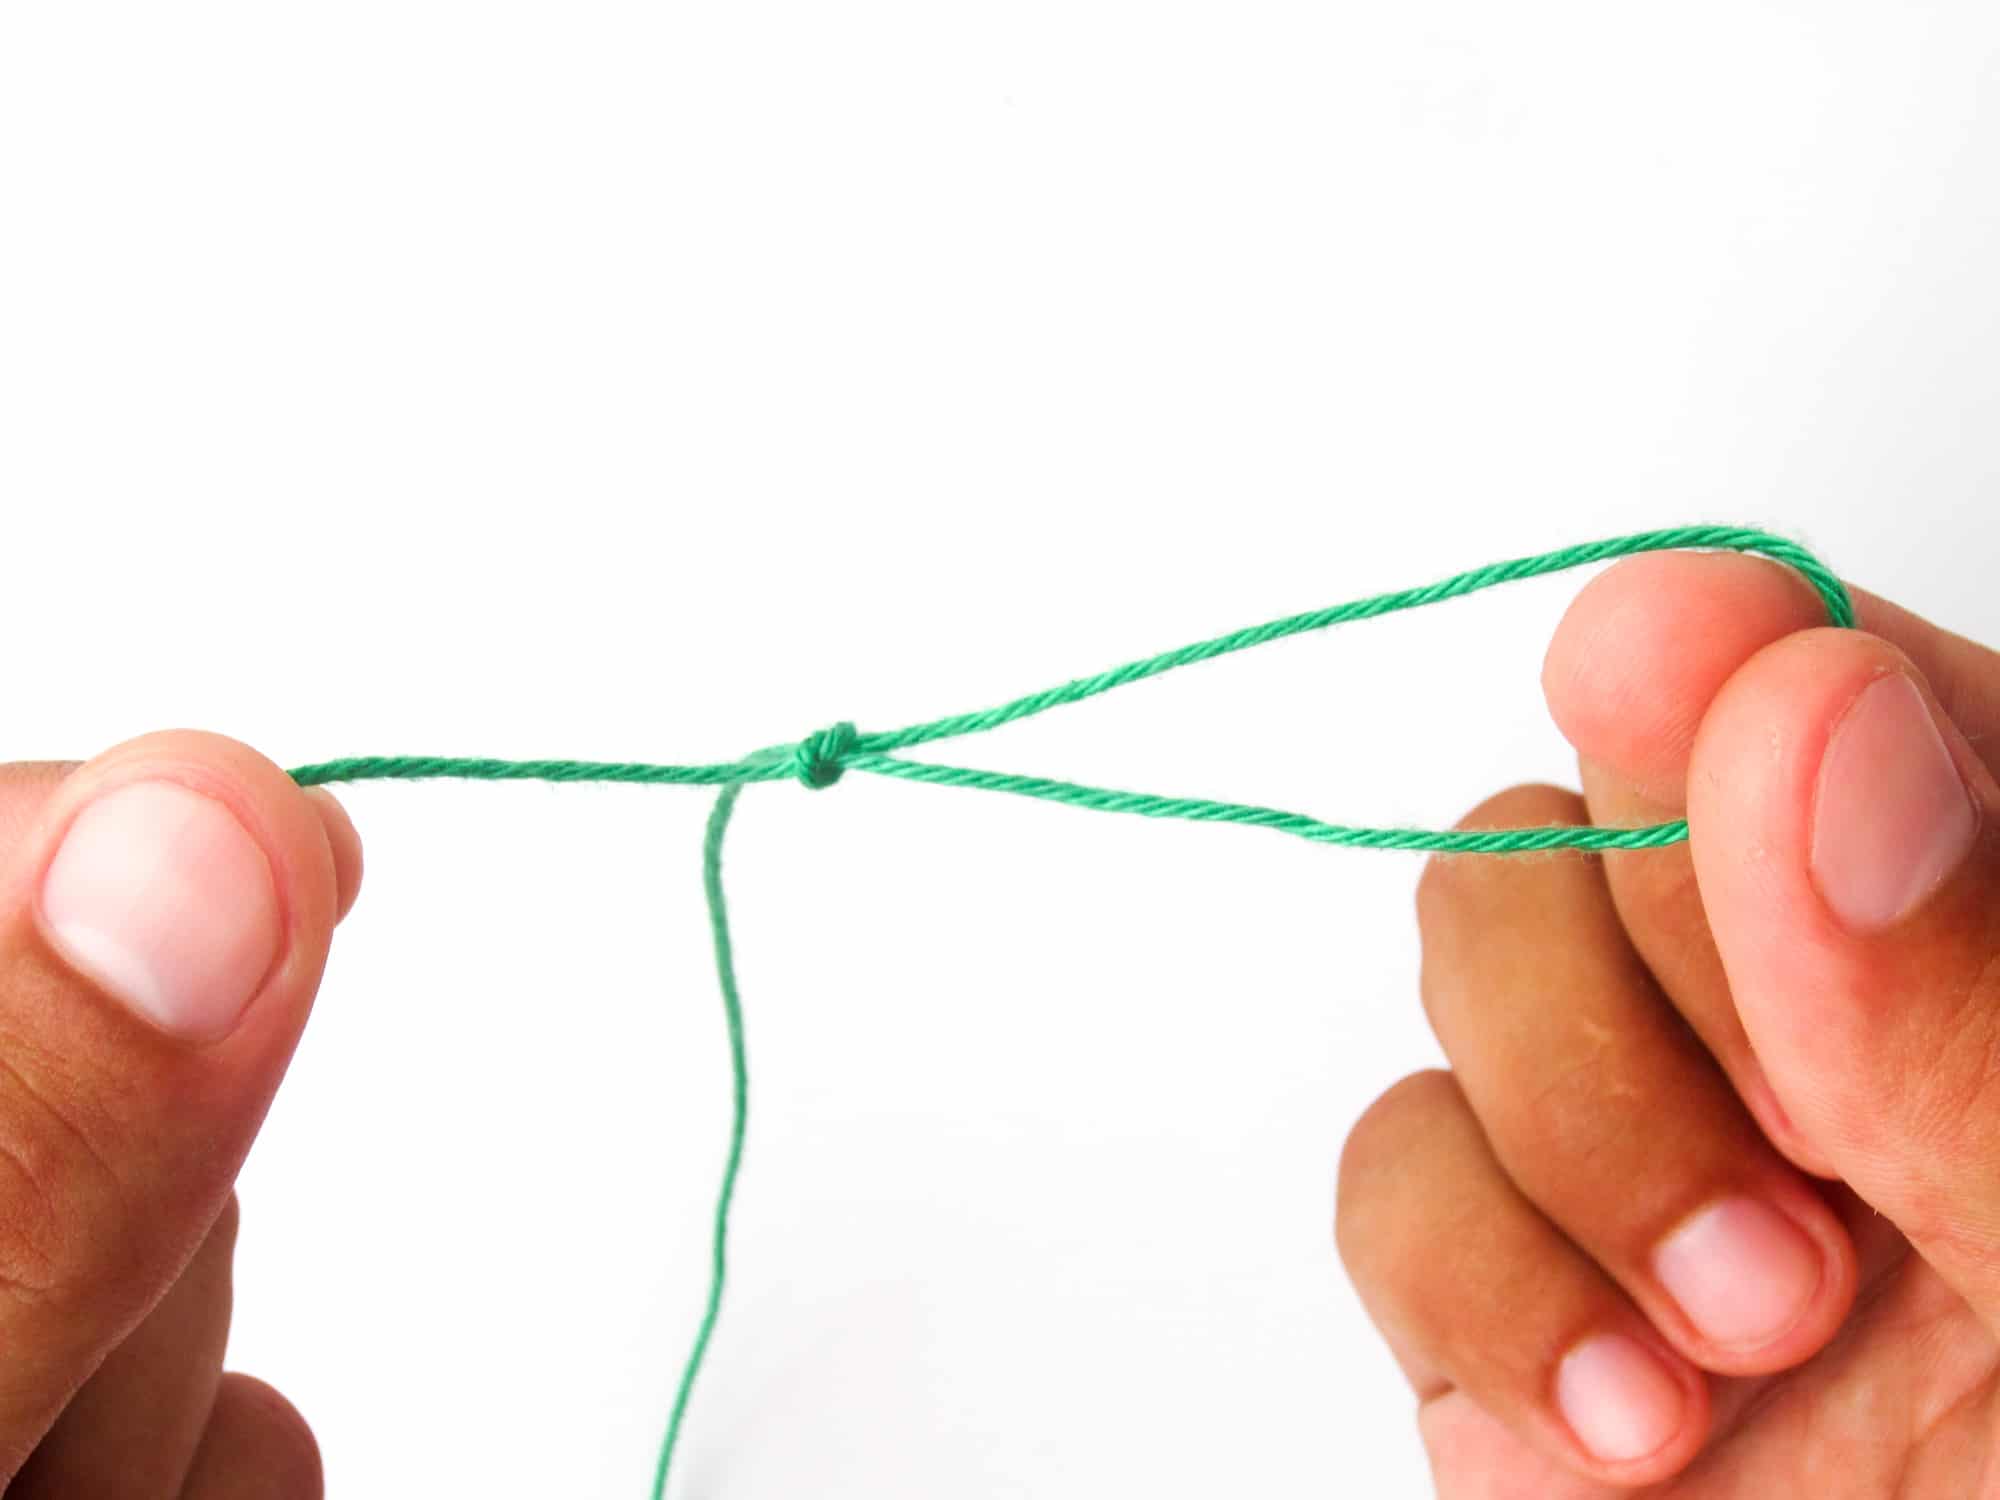
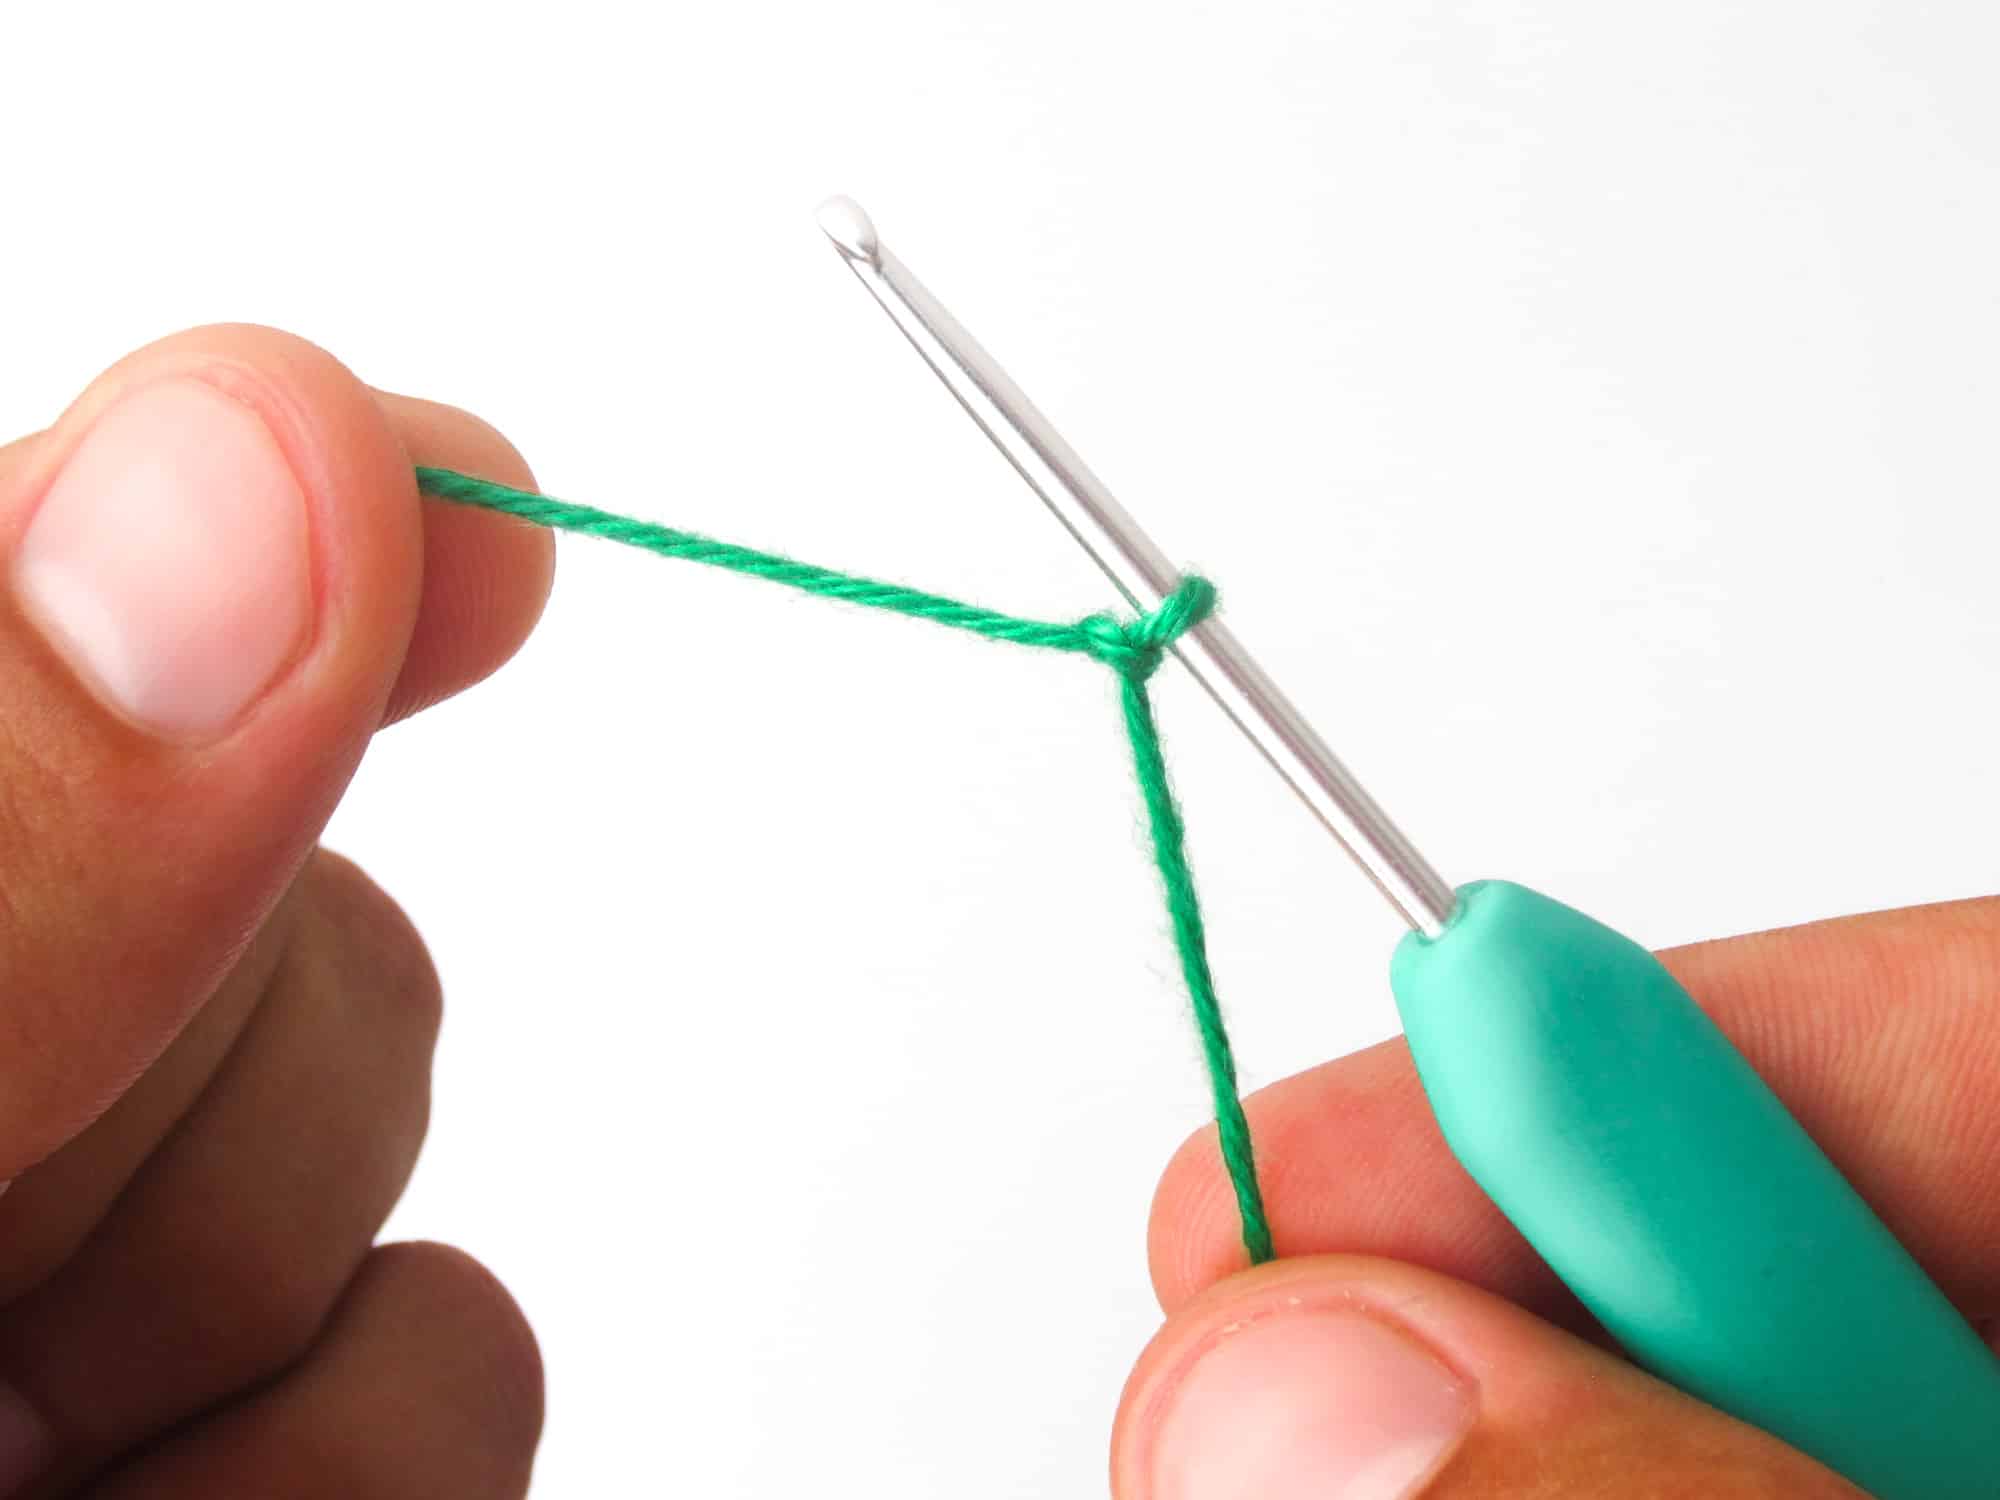
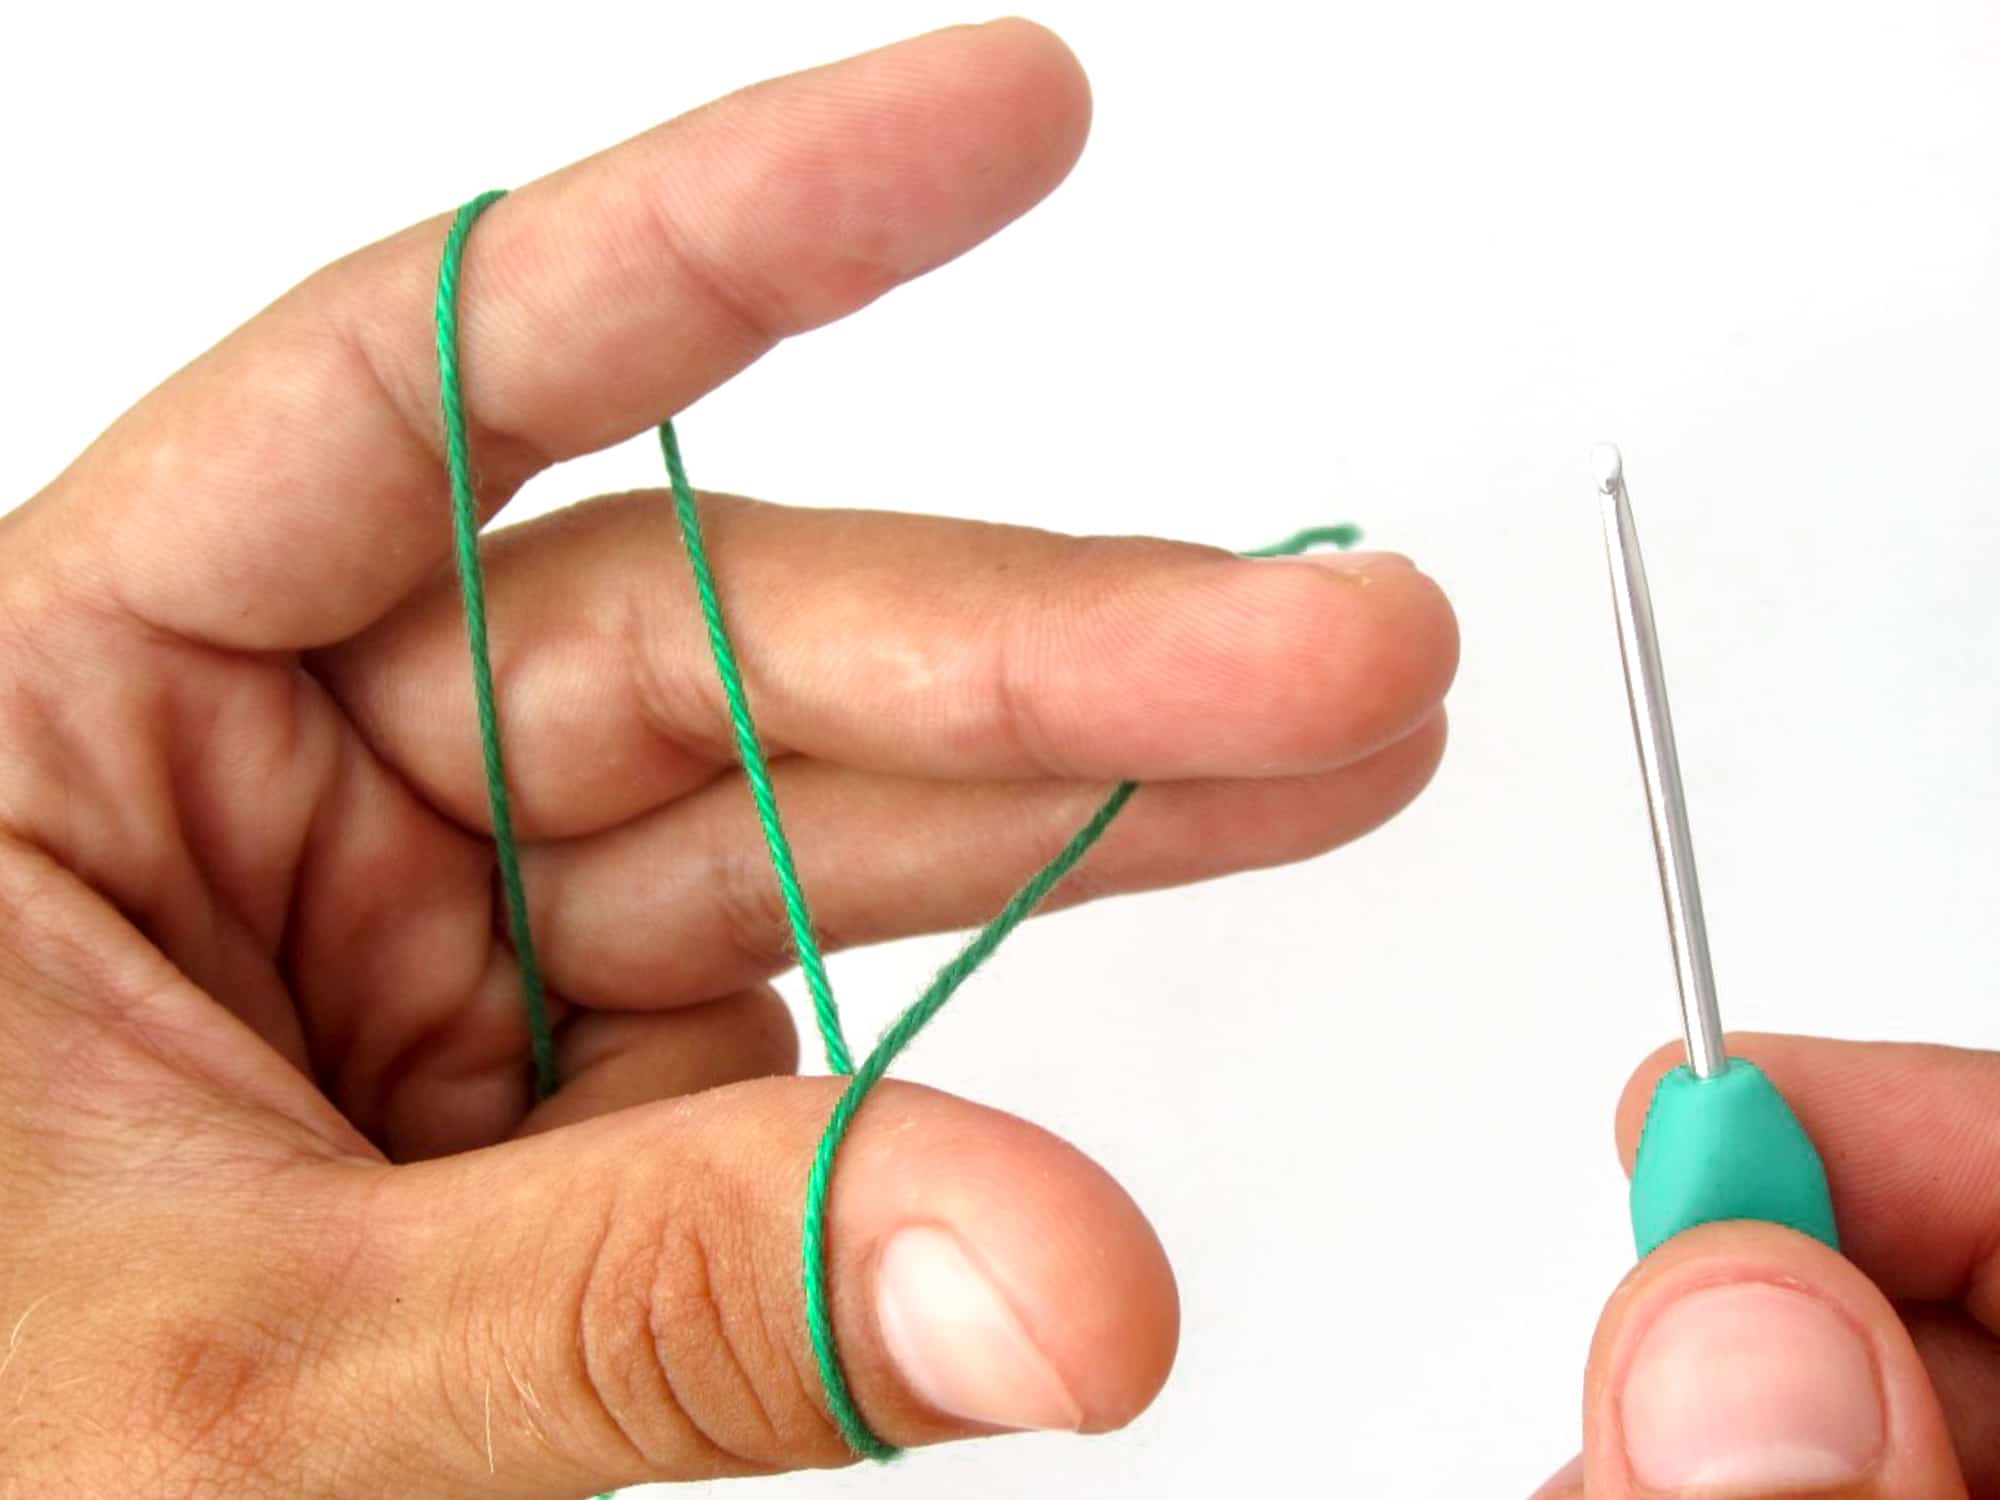
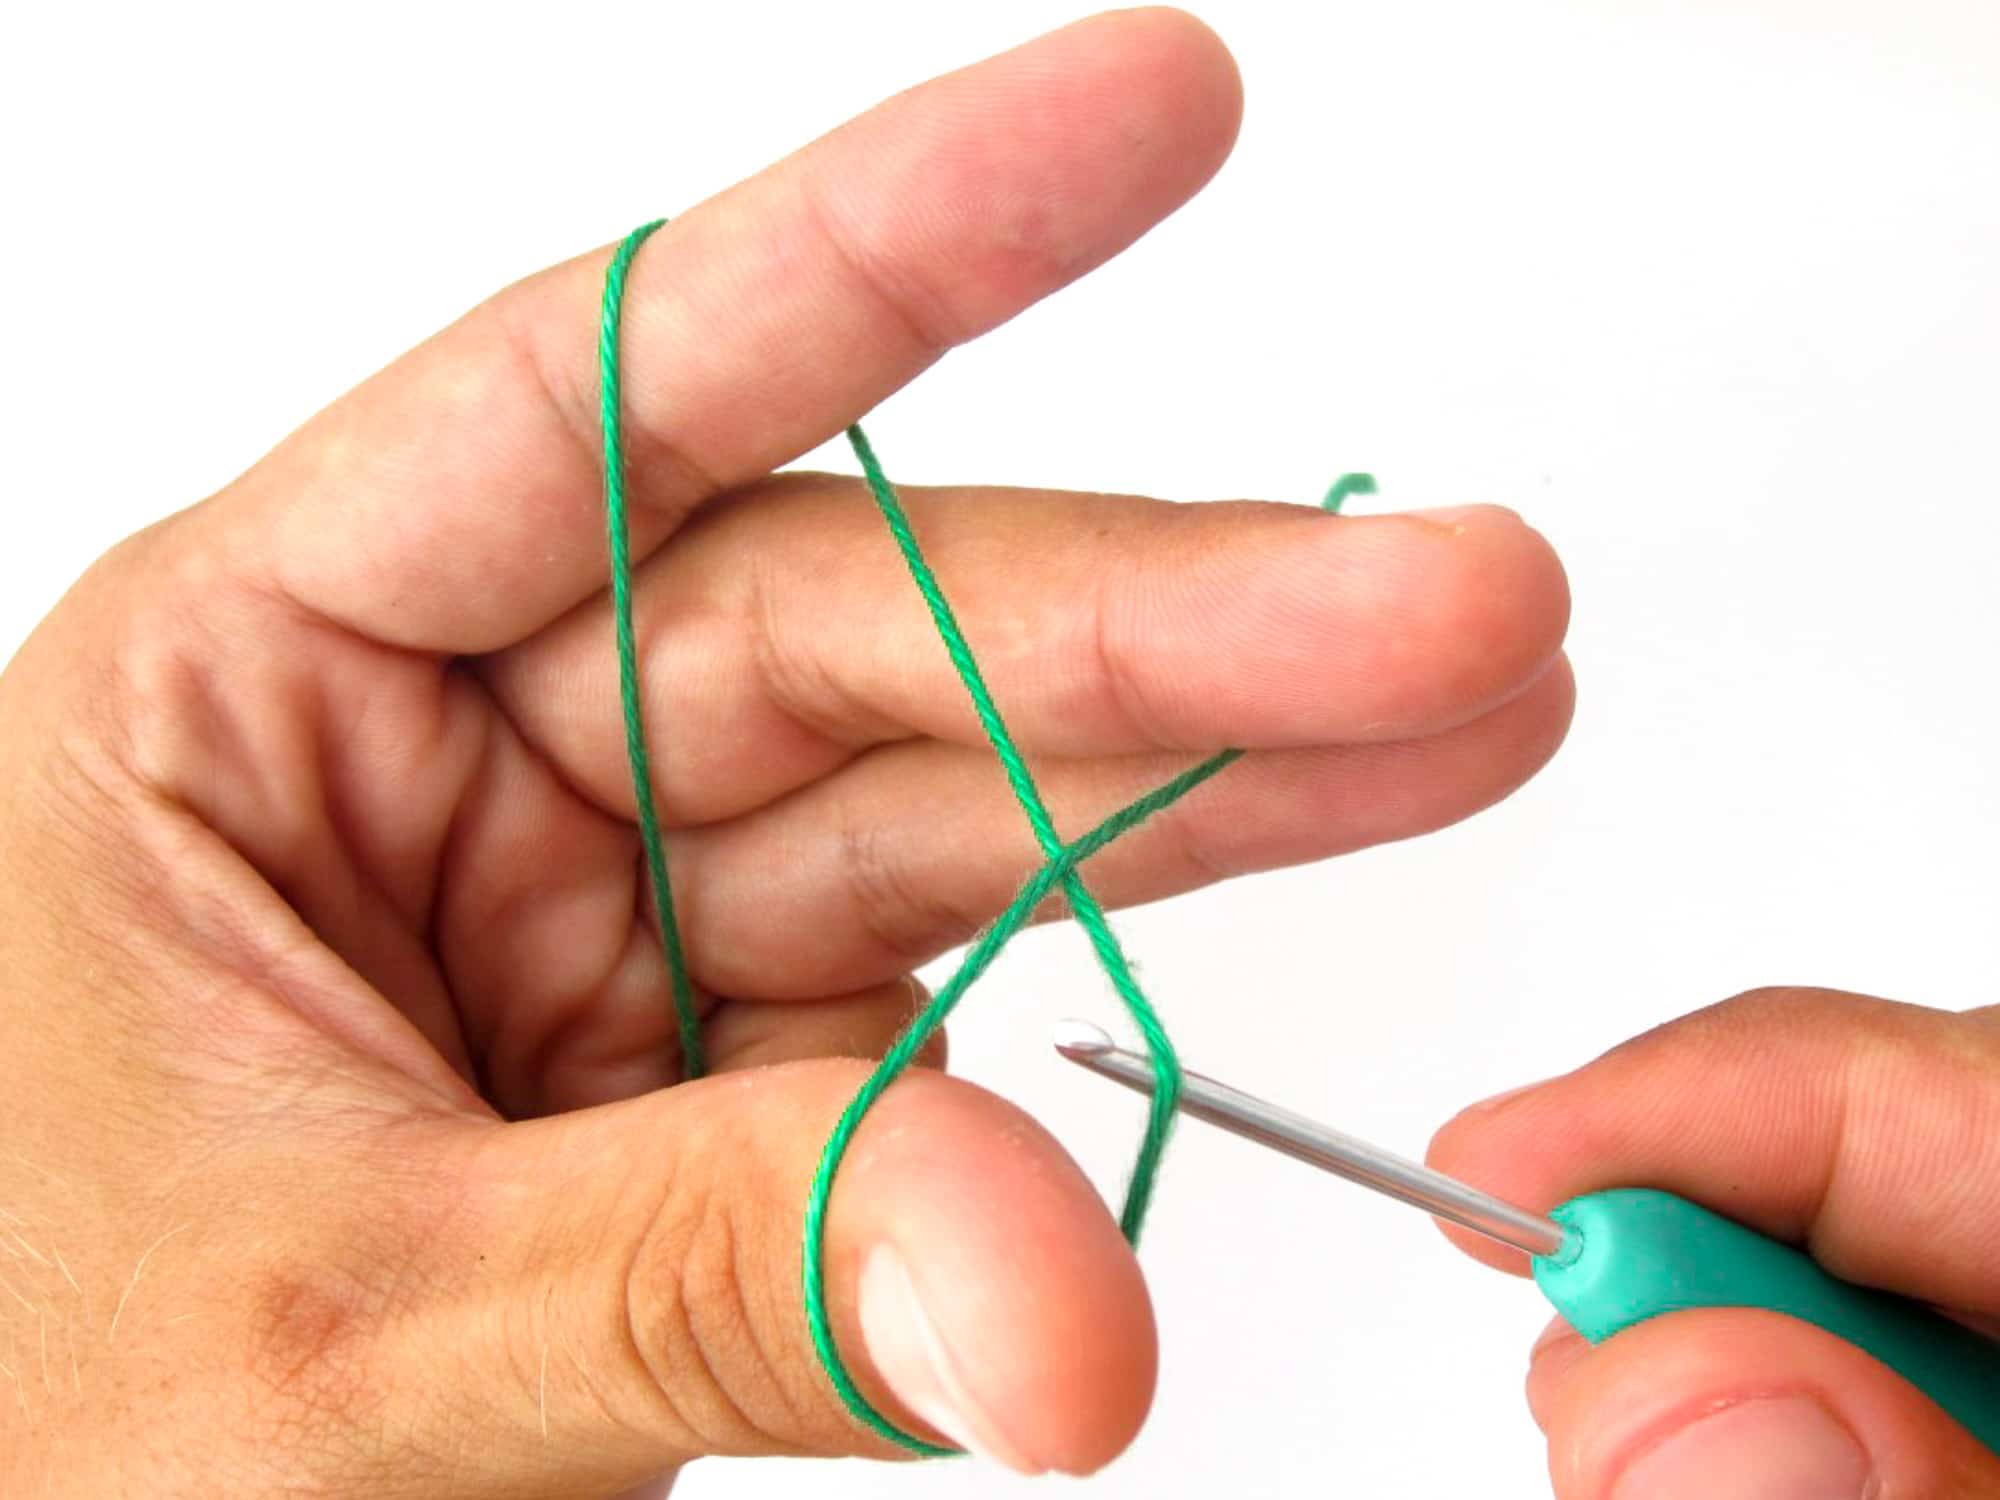
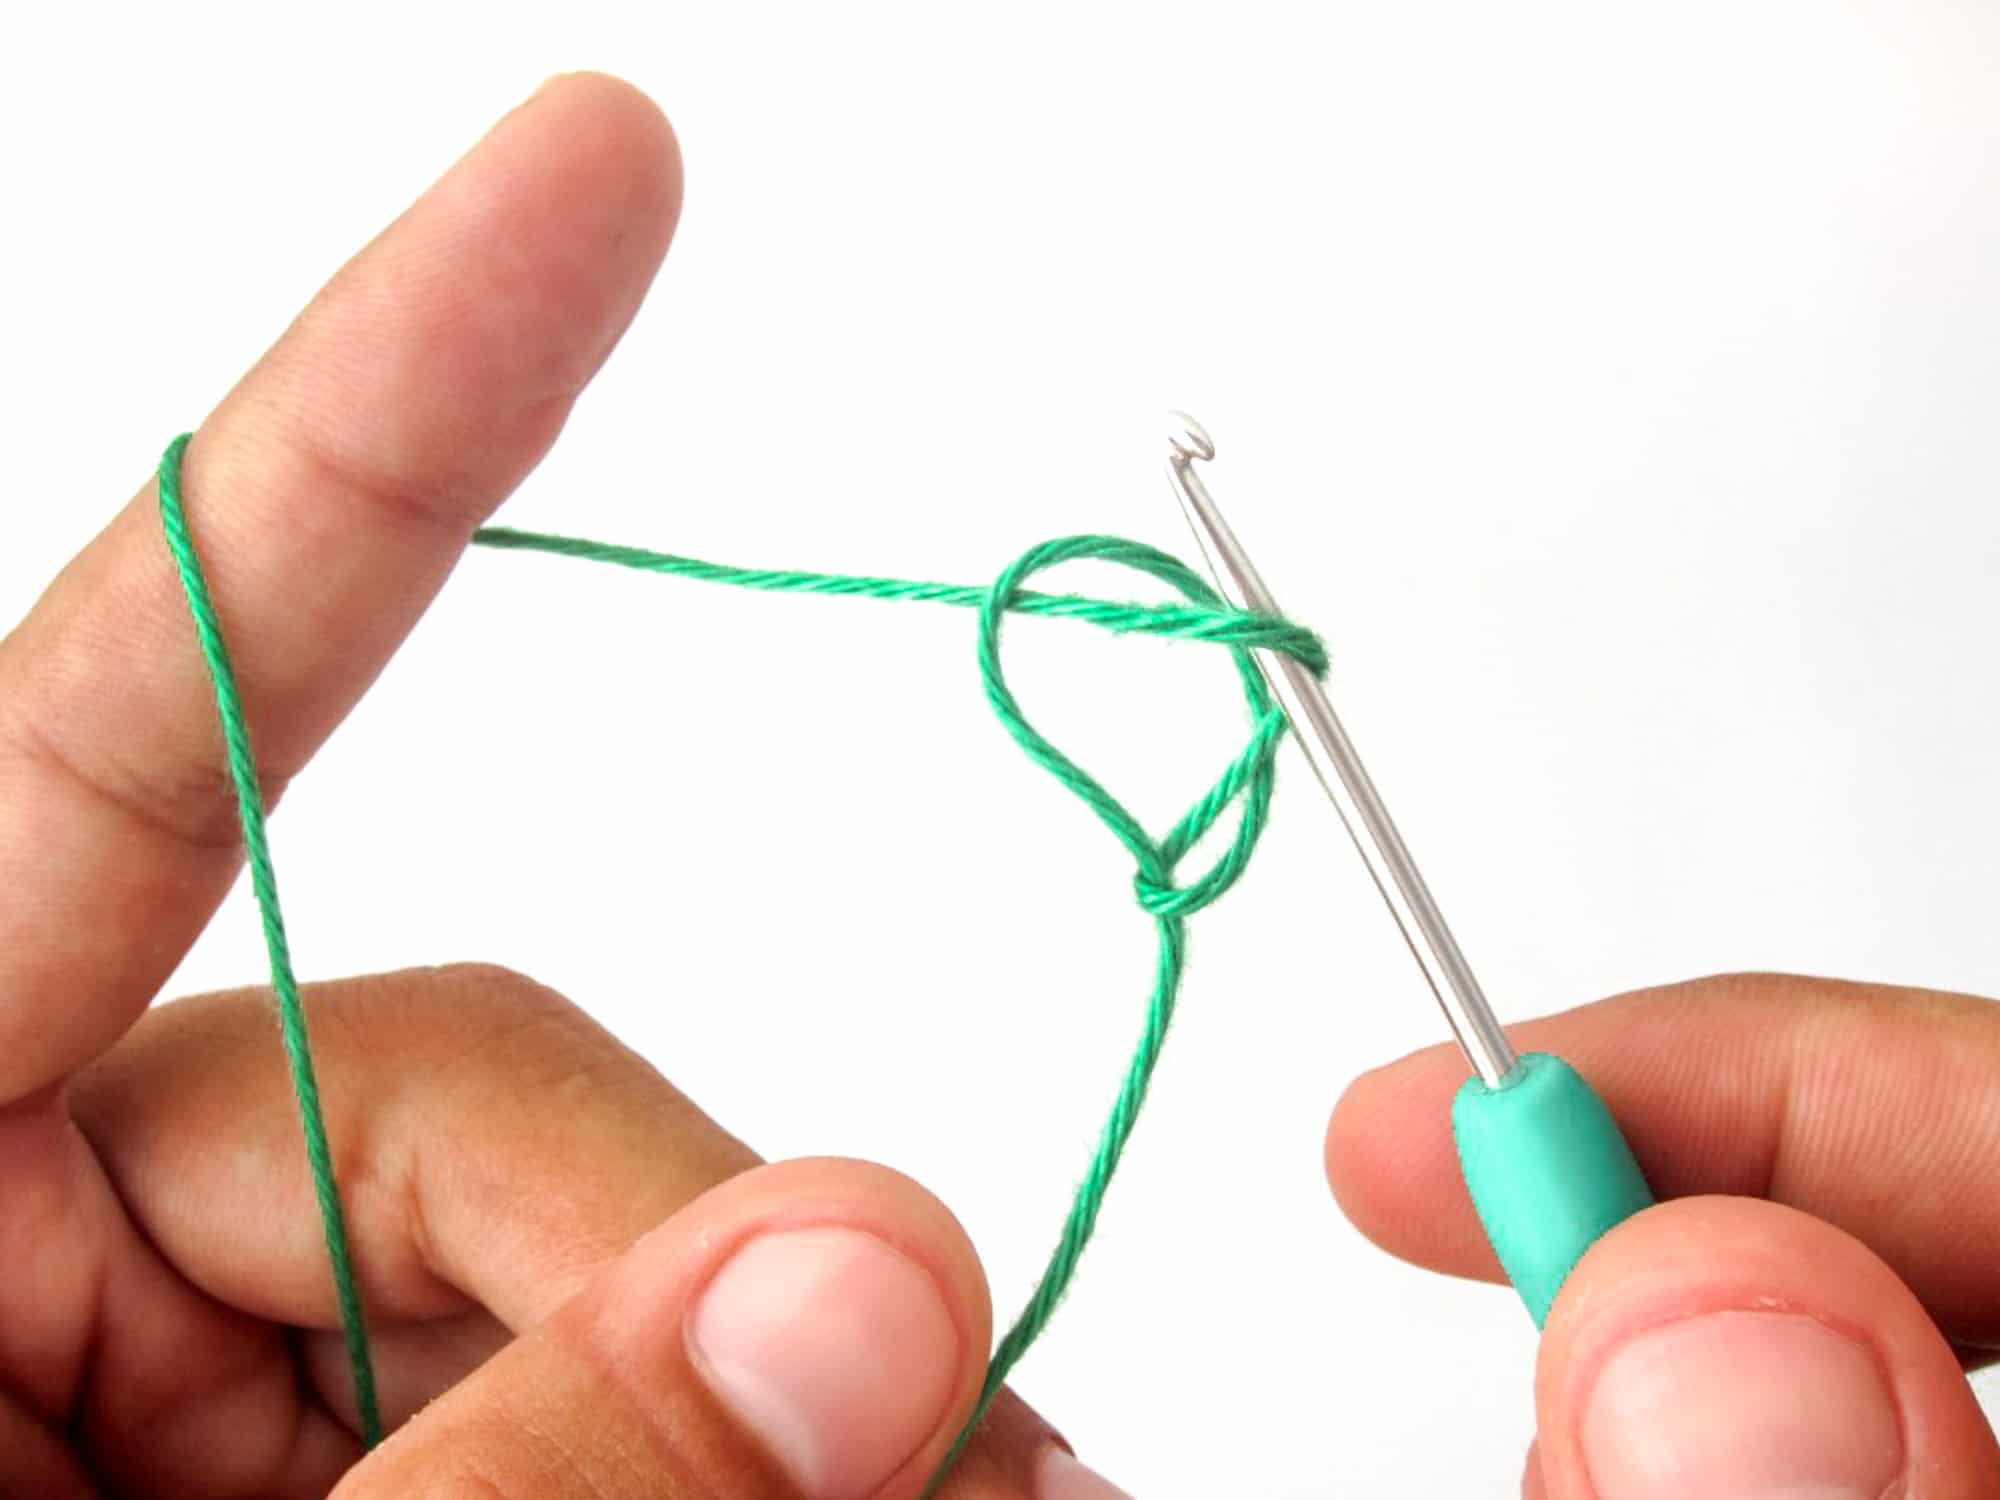
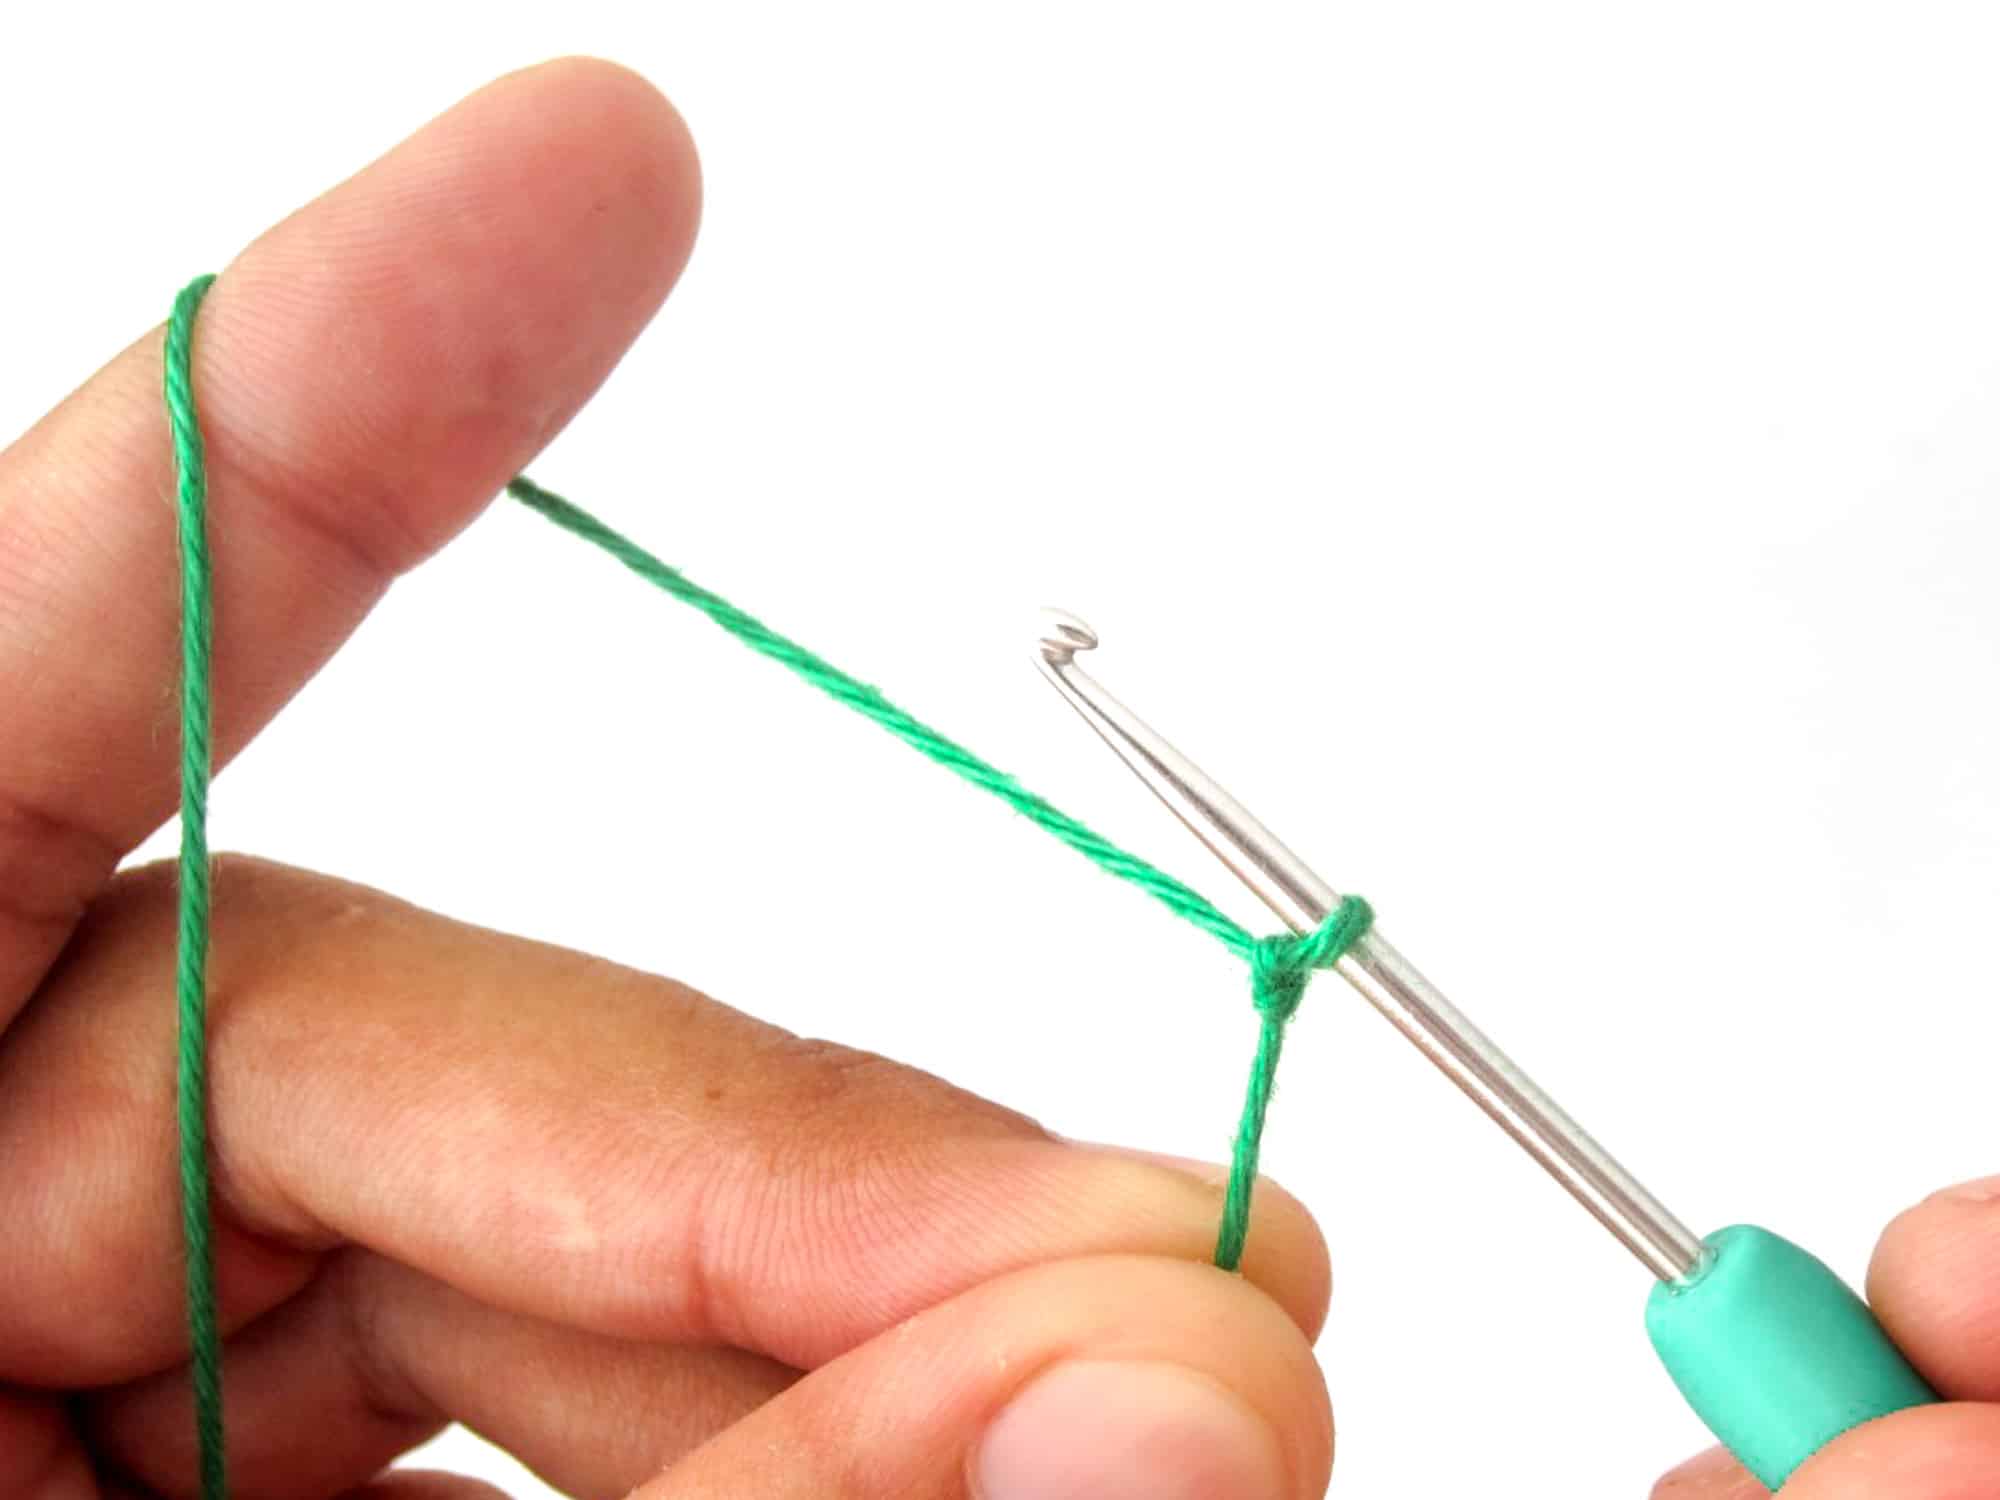
- Step 5: Place your crochet hook in the loop and pull it closed by pulling on both threads after the knot. The loop should tighten around the crochet hook. Pull on both threads until the loop is close around the crochet hook. Done is the slip knot. As you will notice the loop is movable and can be moved freely up and down over the crochet hook.
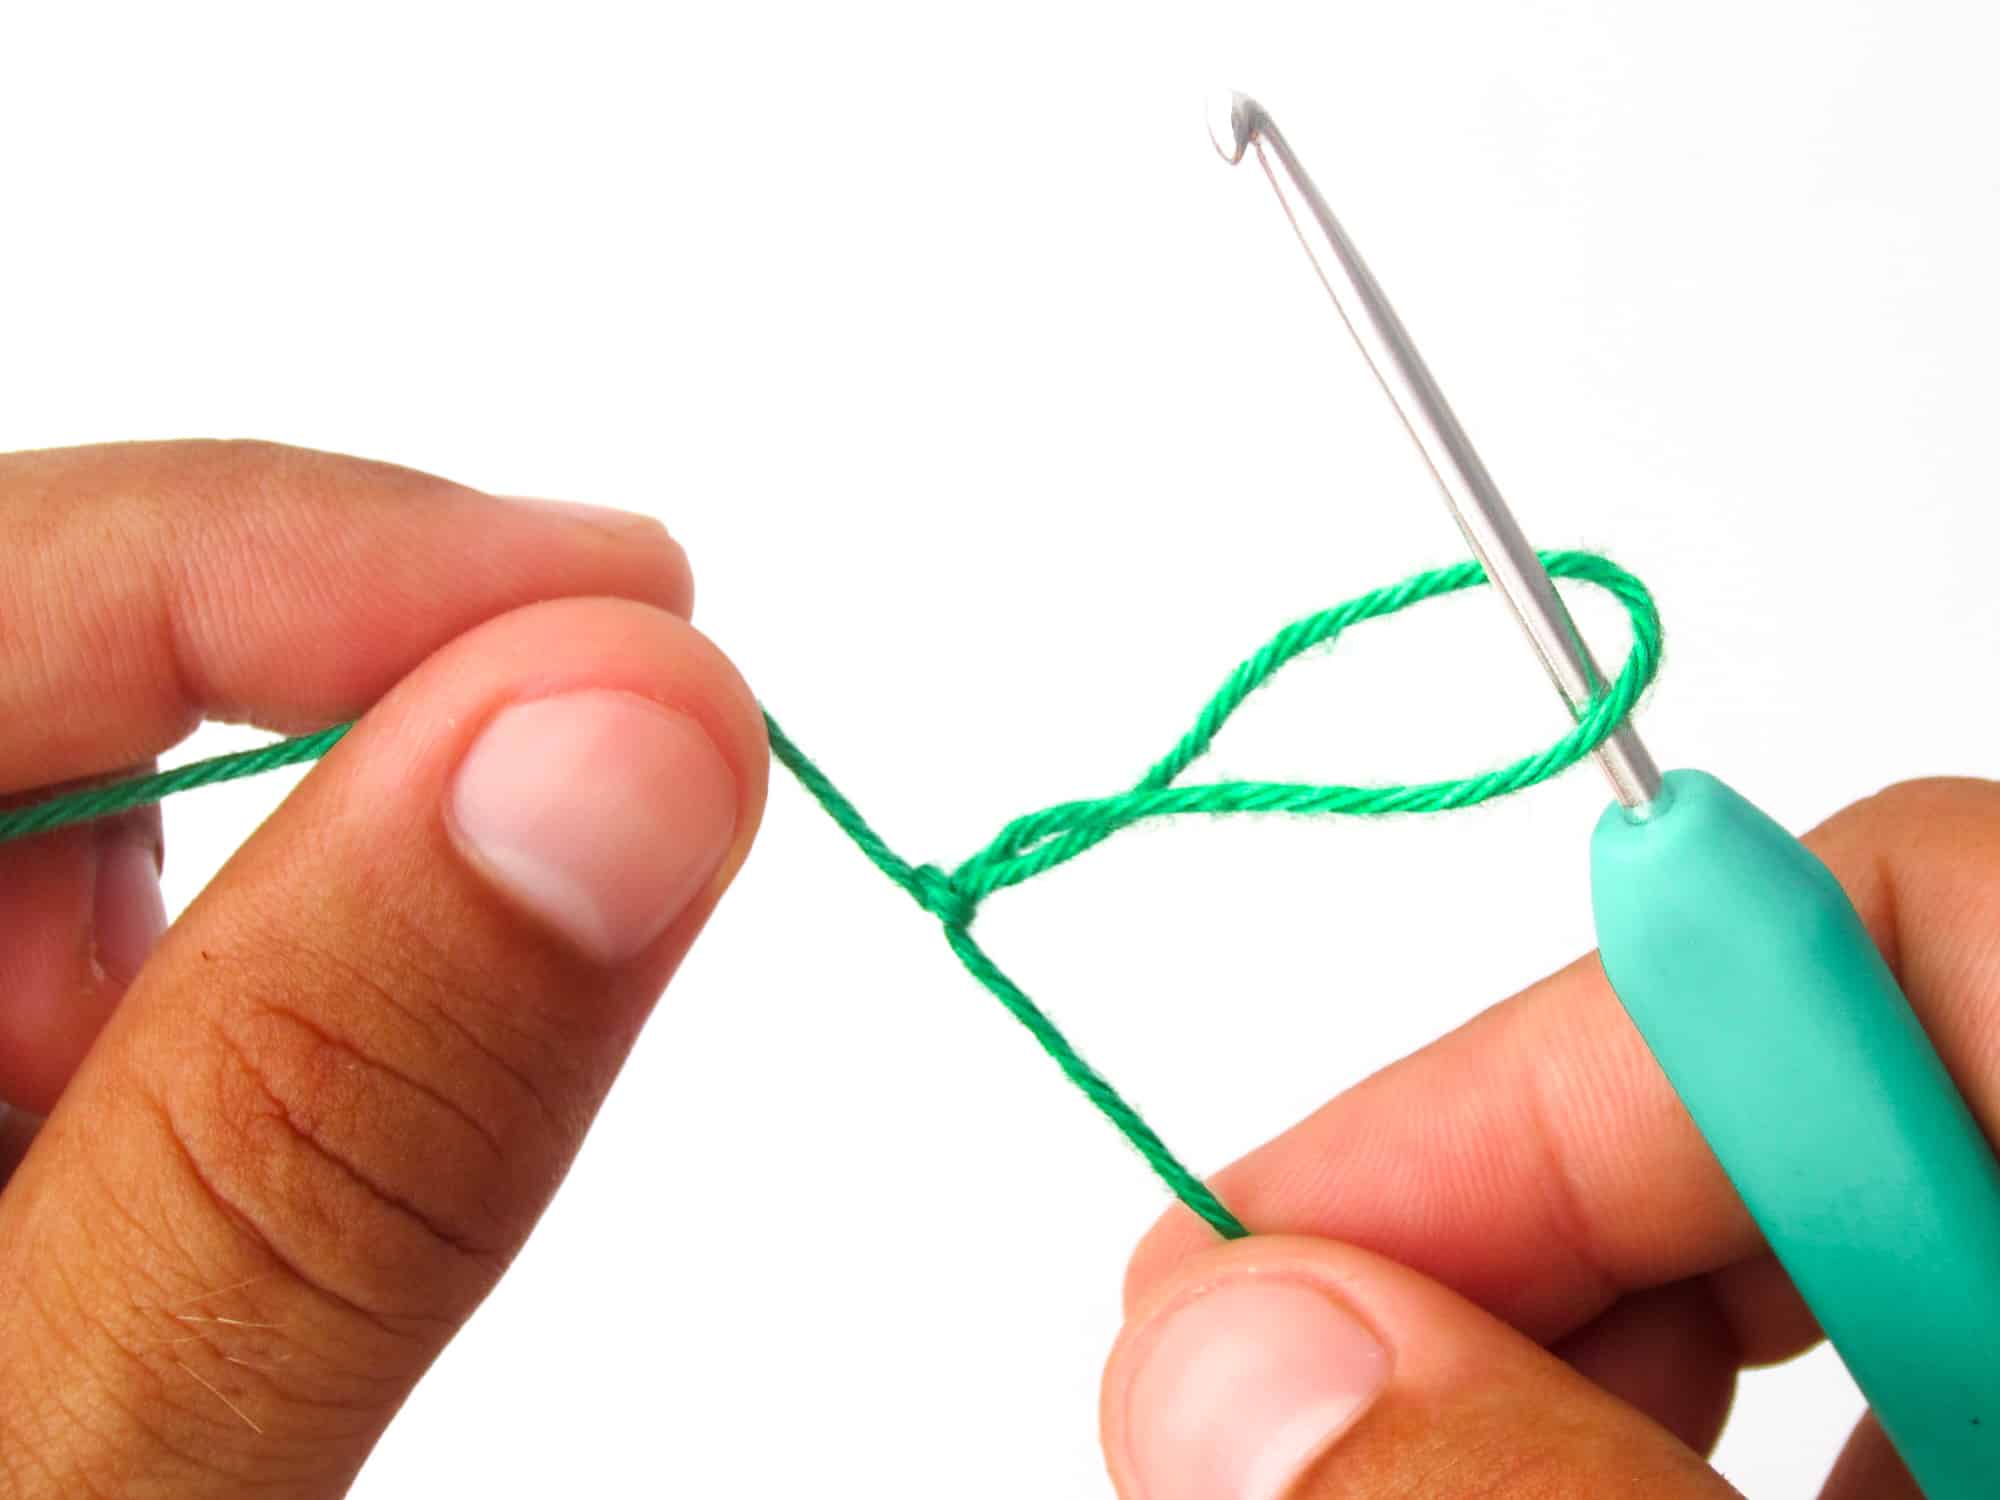

2nd Method: Slip Knot with Crochet Hook
Method 2 may look much more complicated than method 1, but in my opinion it is much faster to produce once you get the hang of it. Give this technique a chance and try it out several times.
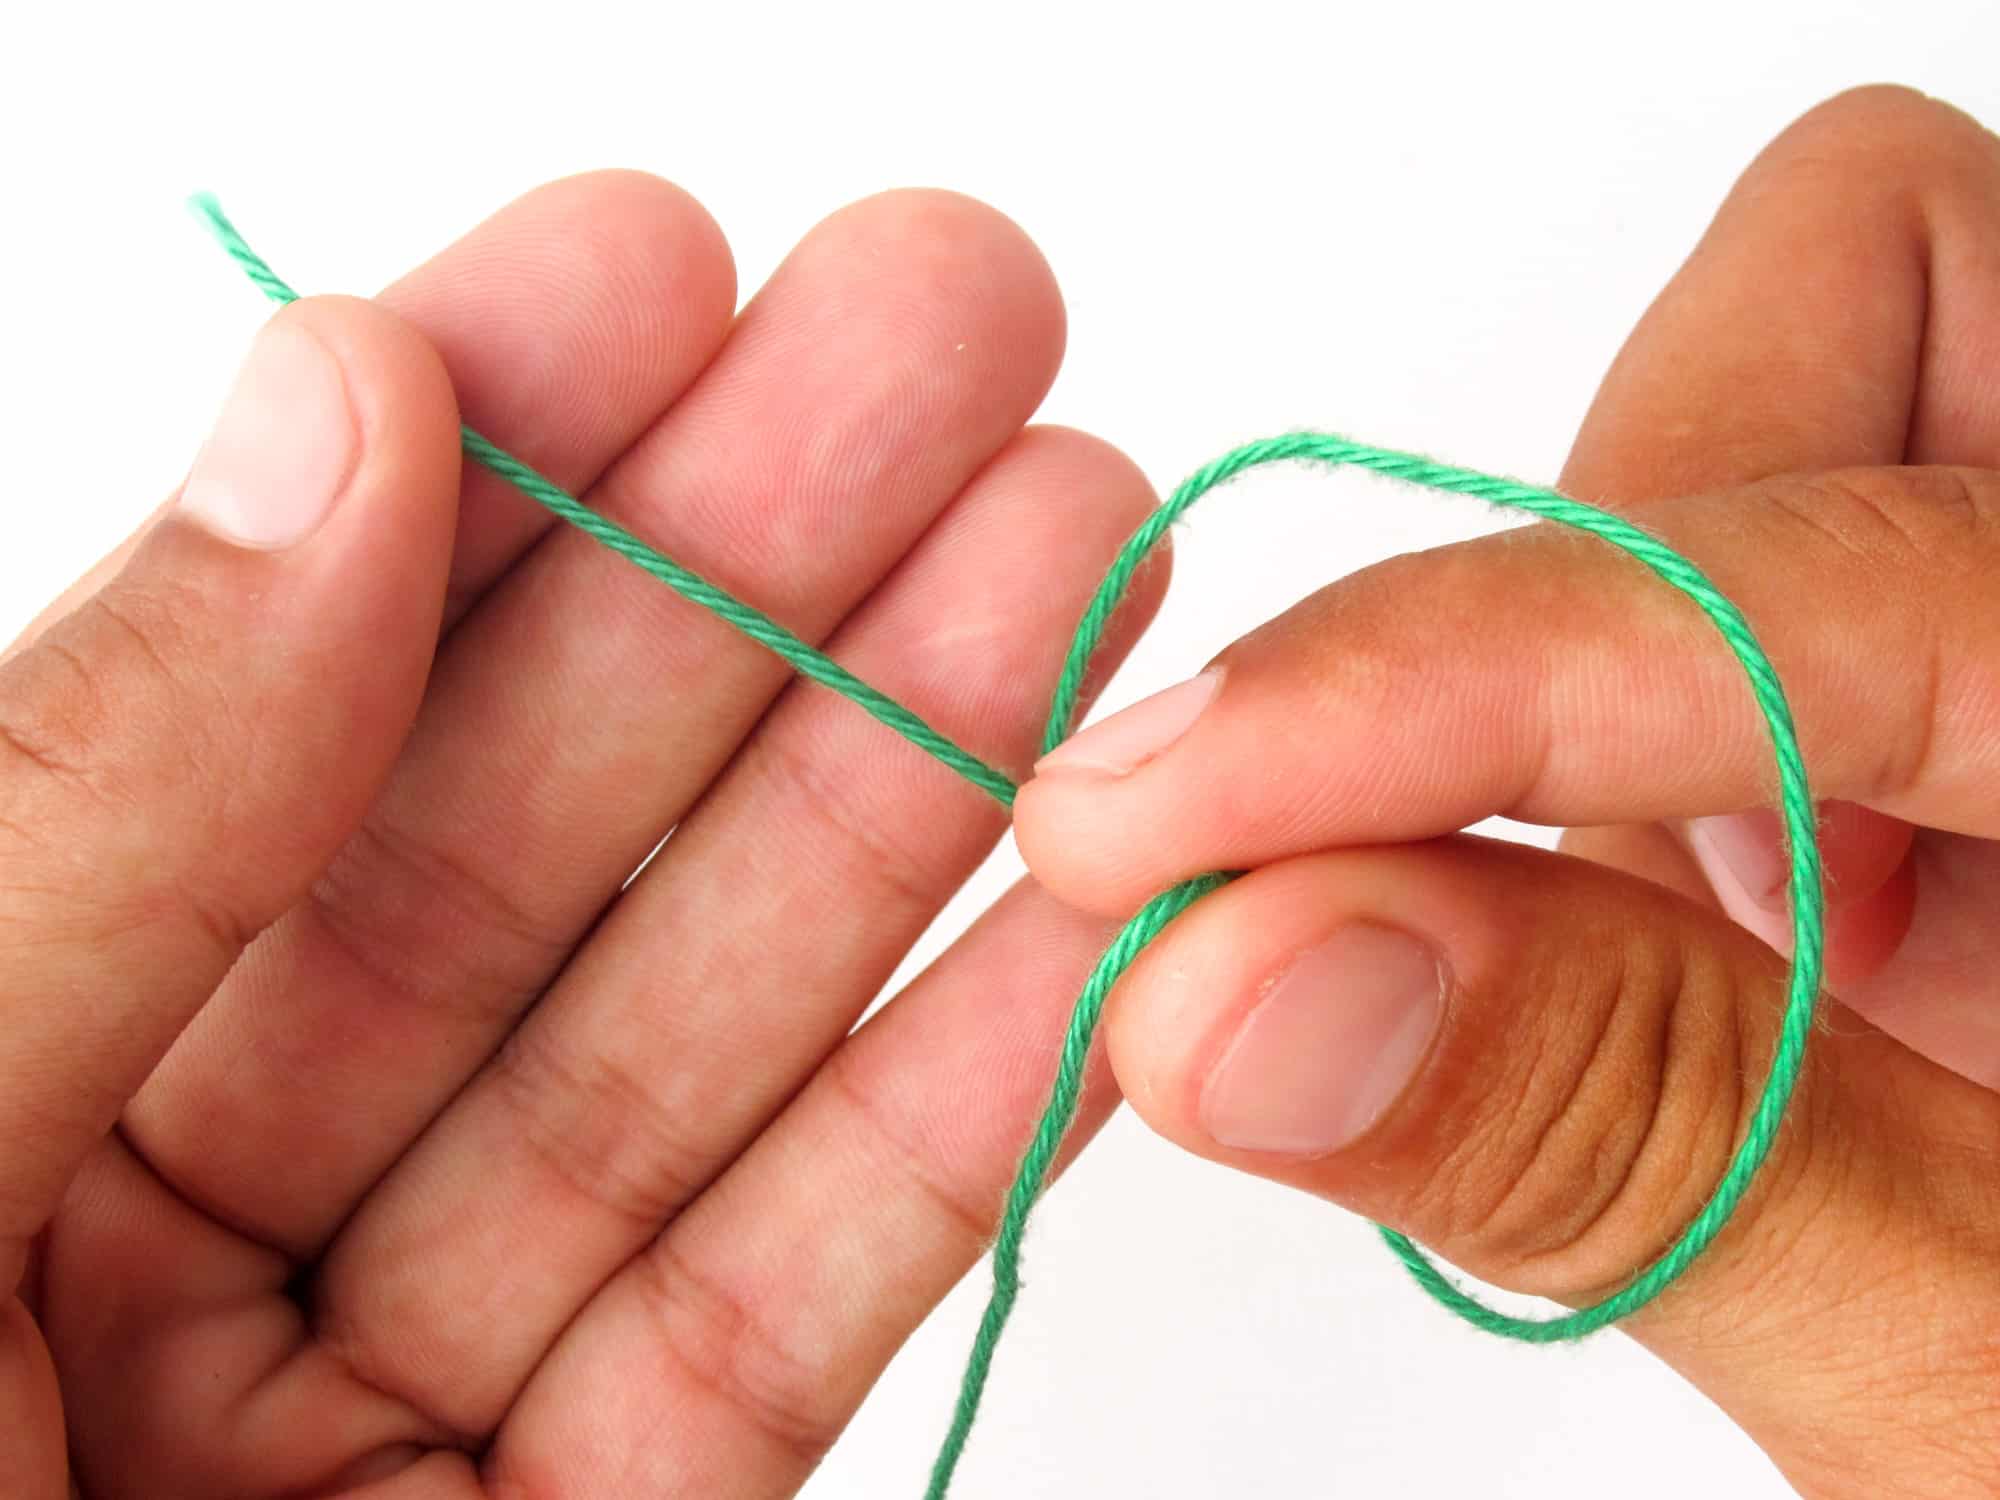
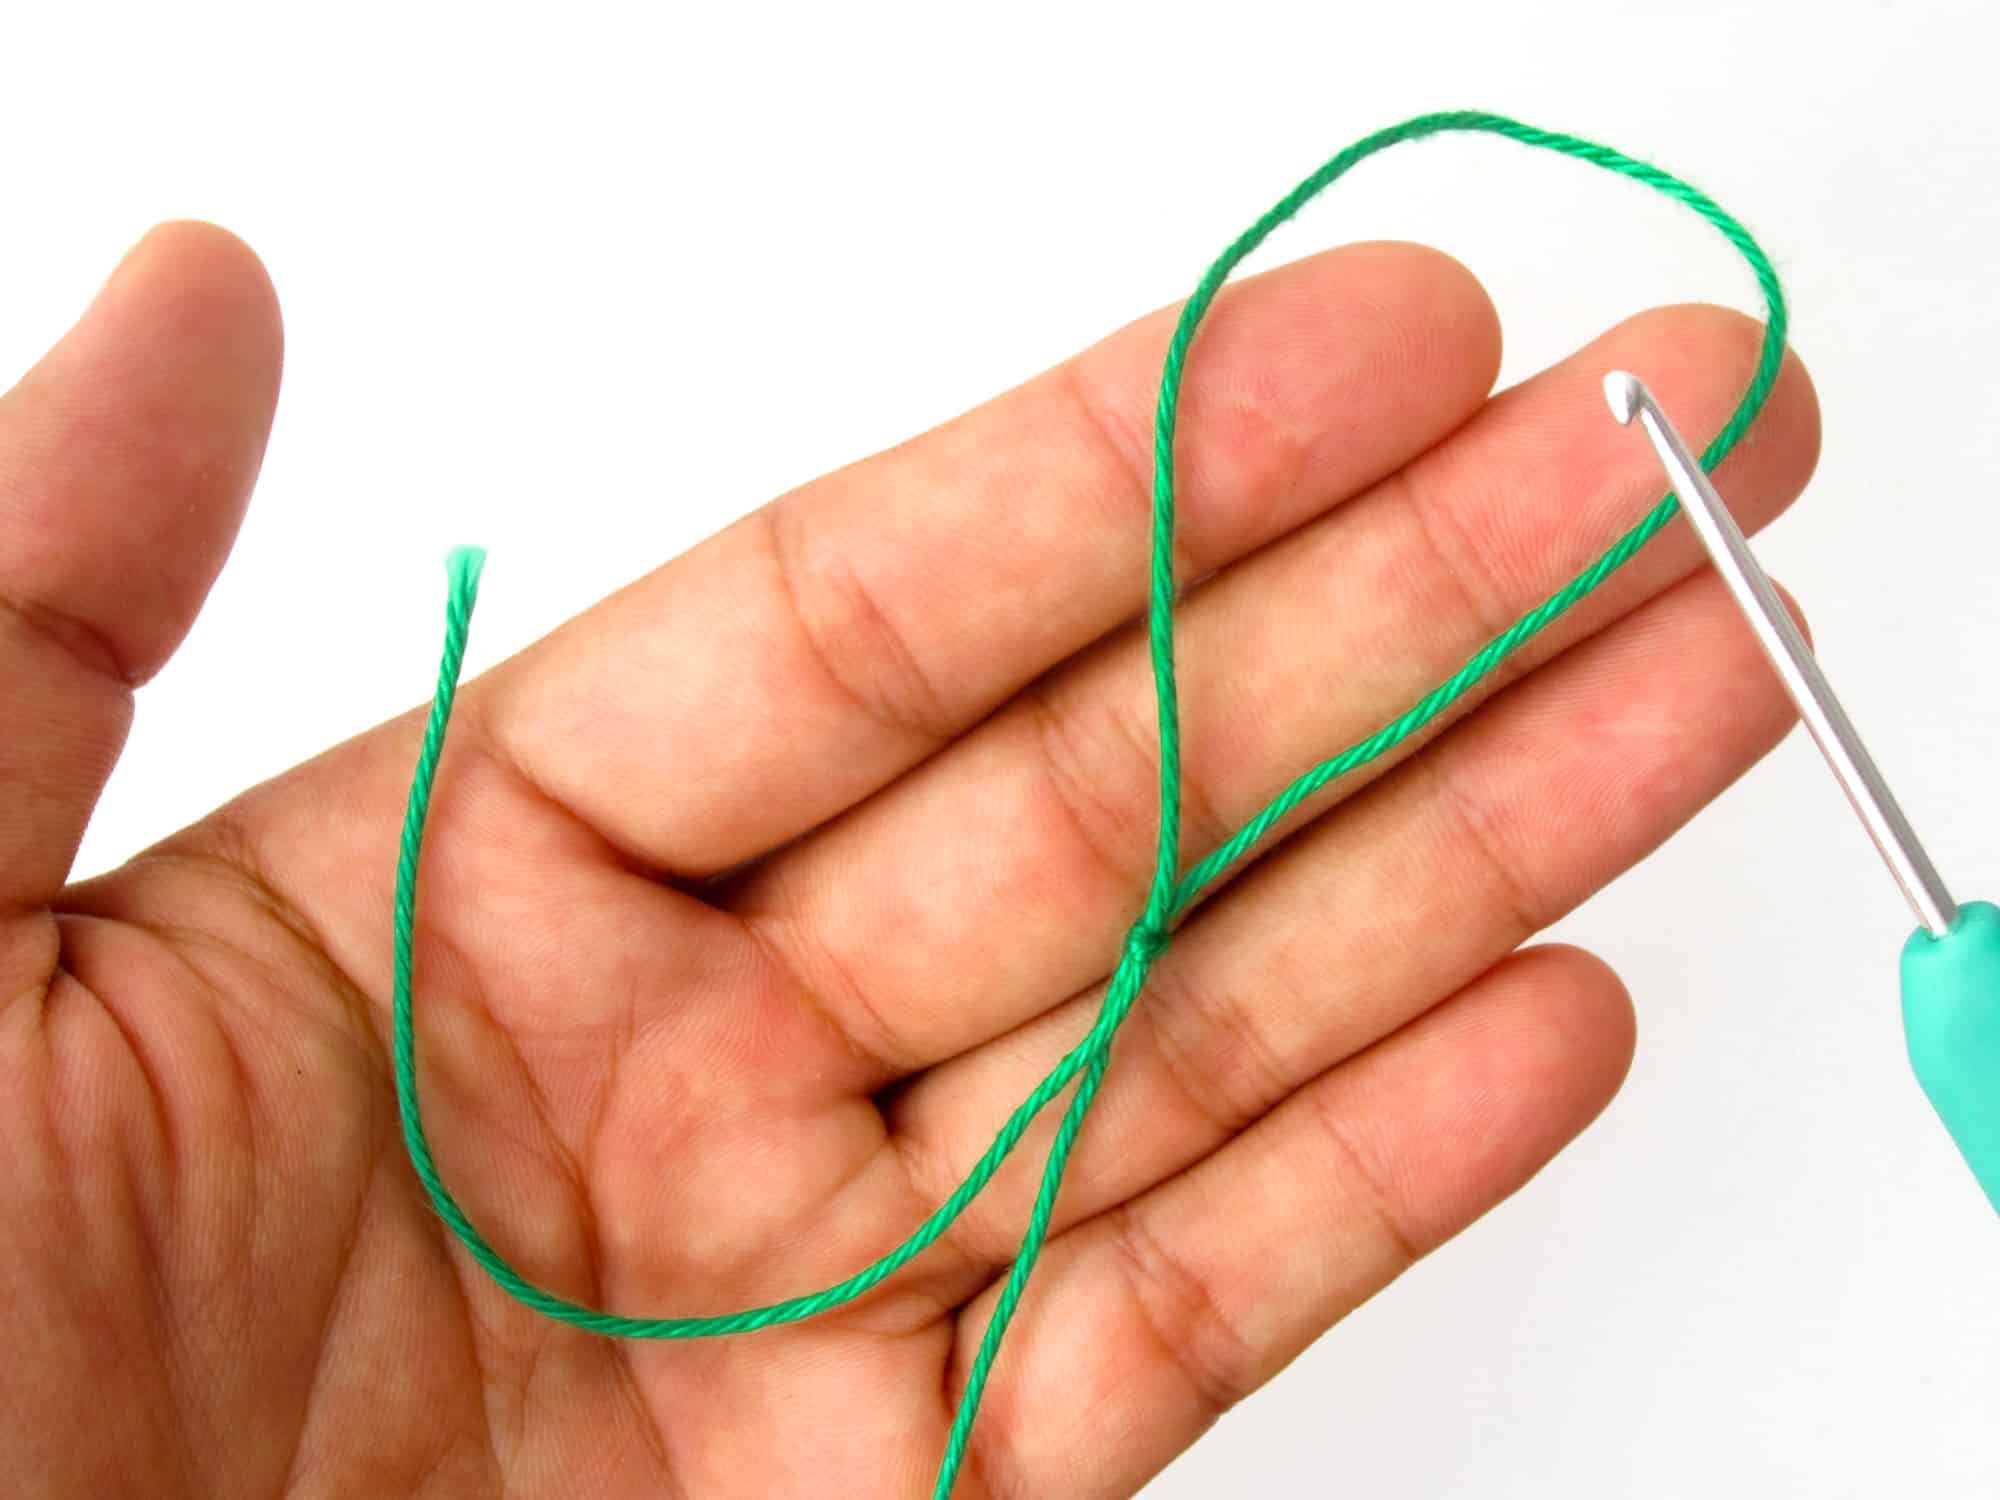
- Step 1: Place the thread on the inside of your left hand and take the end of the thread with your right hand.
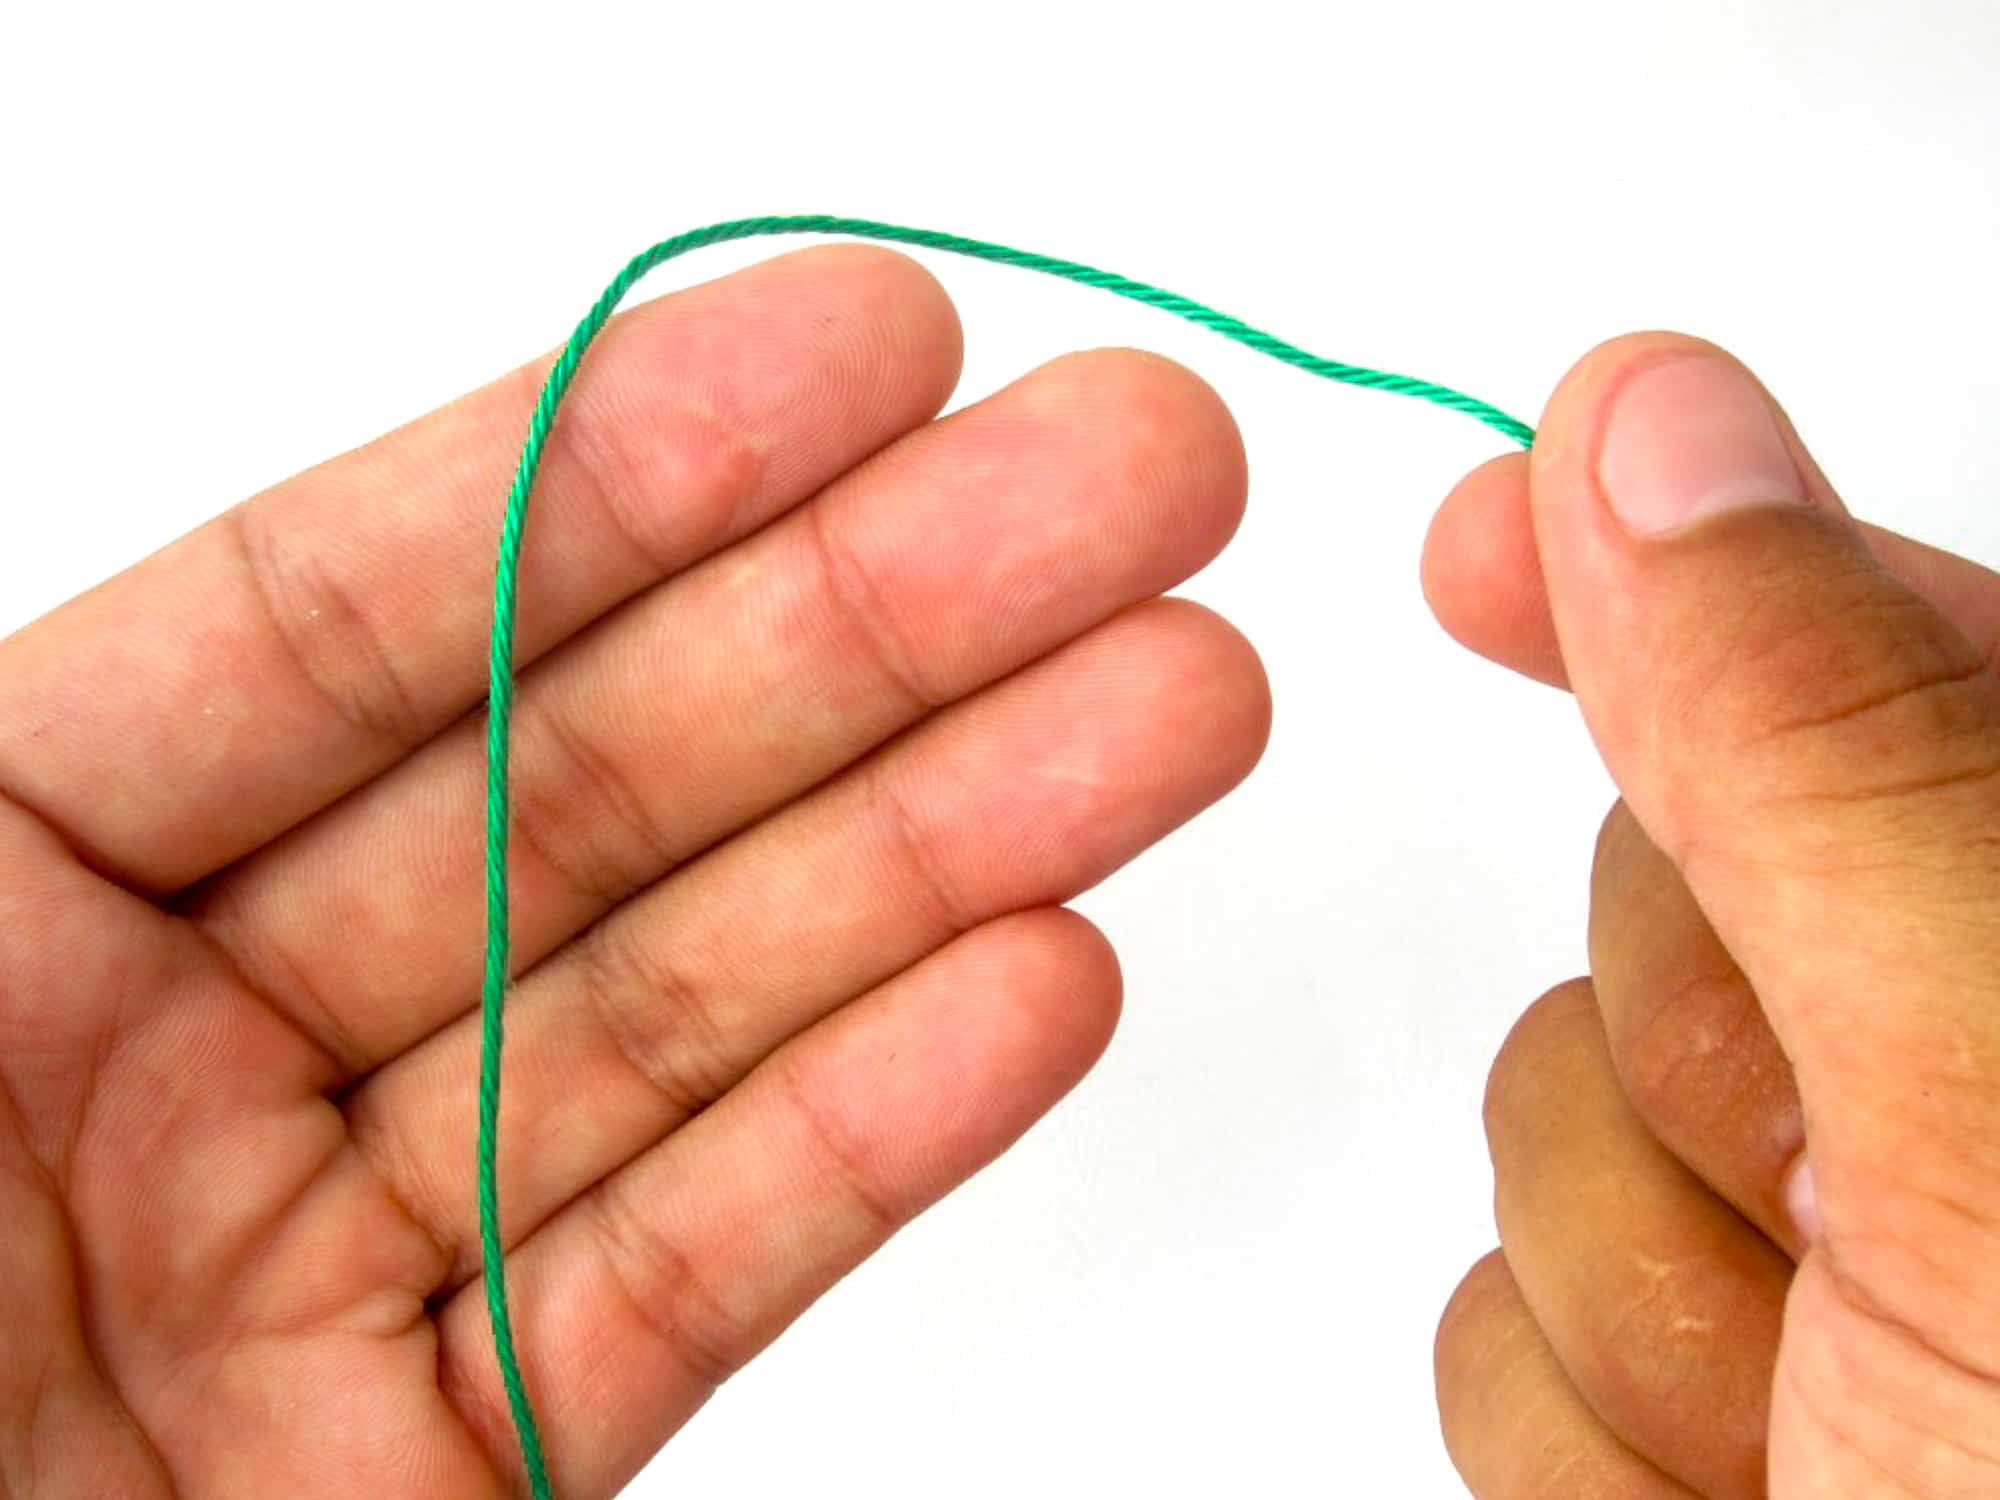
- Step 2: Close the little finger, ring finger and middle finger of the left hand and thus hold the thread lying on the palm of the hand. The thread is pulled OVER the index finger of the left hand.
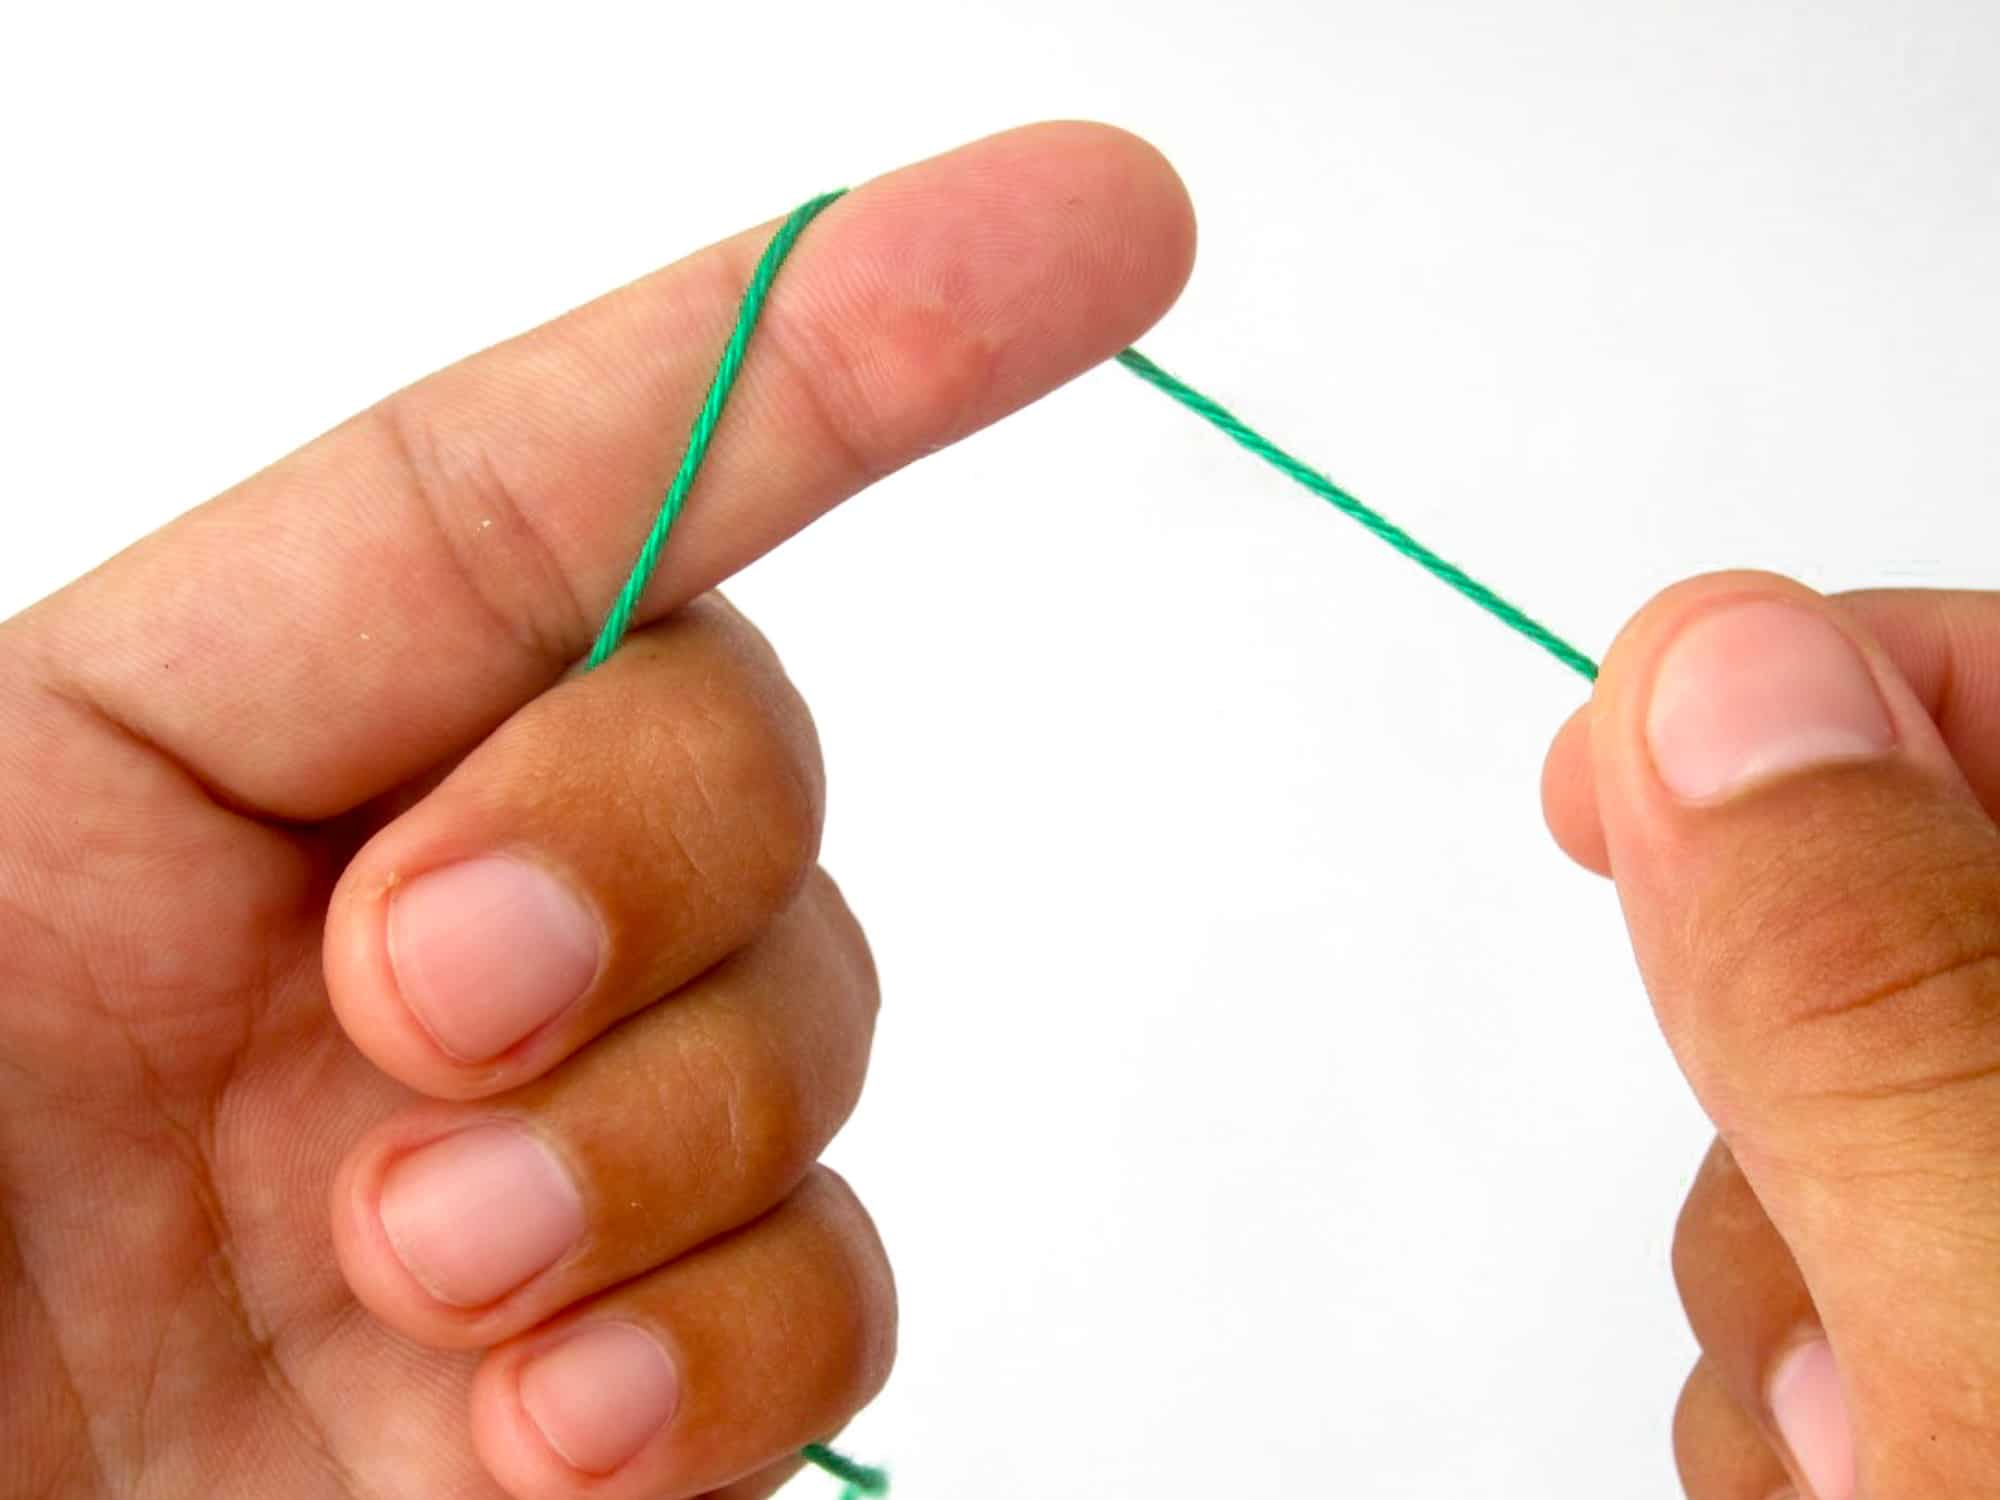
- Step 3: Continue holding the thread with the closed fingers of your left hand. Now pull the thread UNDER the thumb of your left hand.
- Step 4: Wrap the thread once around the thumb of the left hand as shown in the picture.

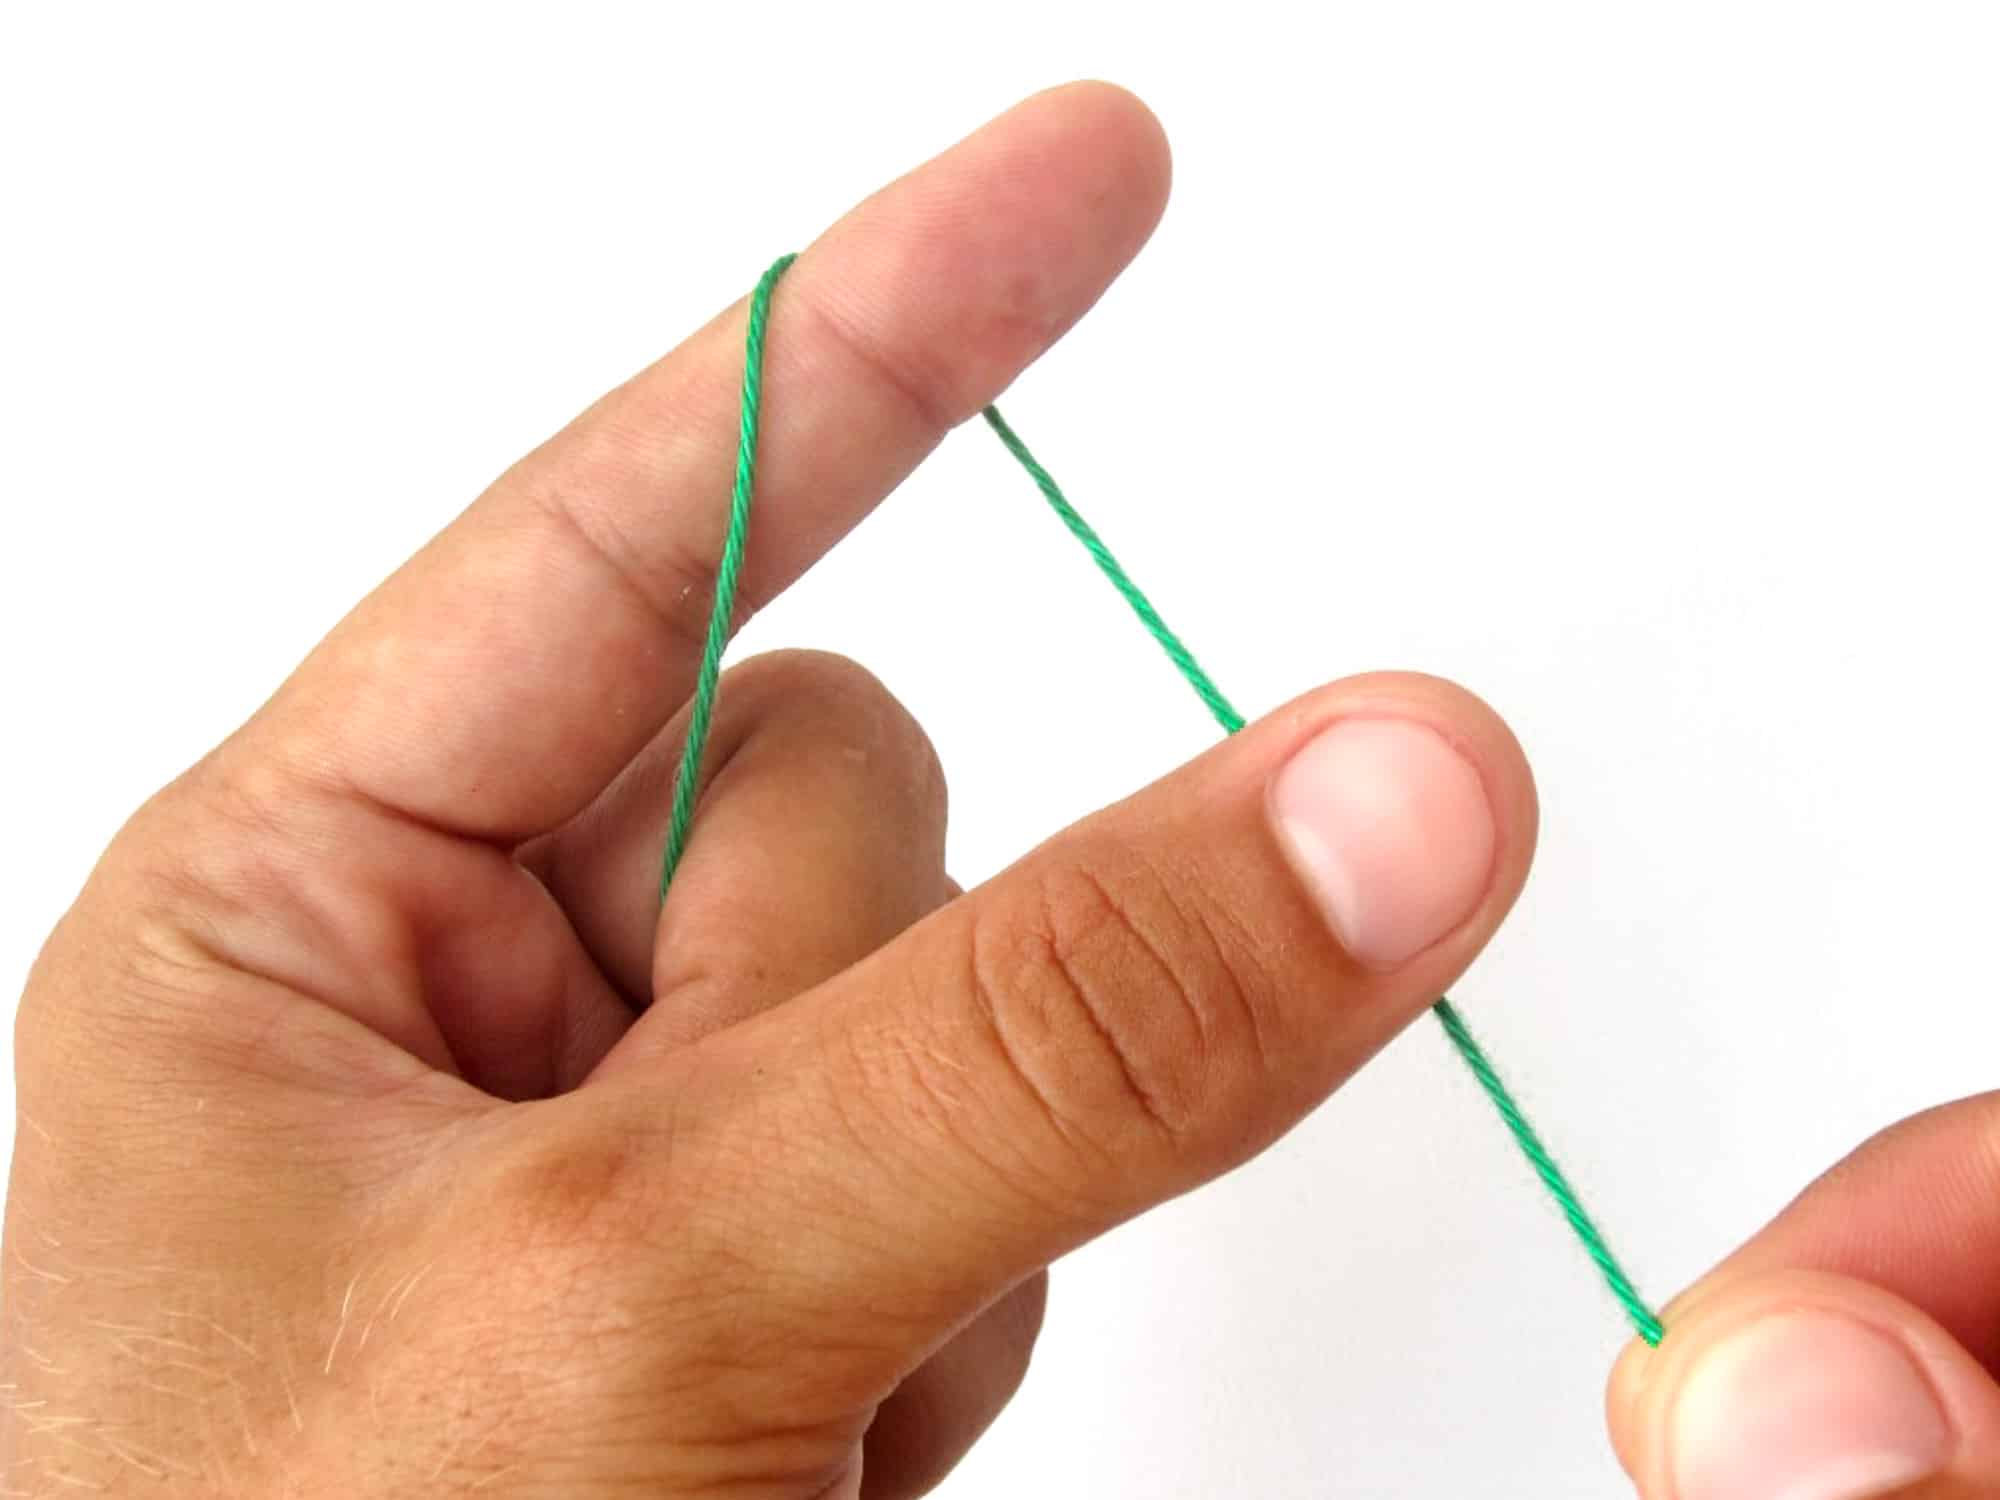
- Step 5: Hold the thread with the little finger of the left hand only. Open the left ring and middle finger and spread them apart.
- Step 6: Place the end of the thread between the spread left ring and middle finger and close them. The ring and middle finger should now hold the end of the thread securely.

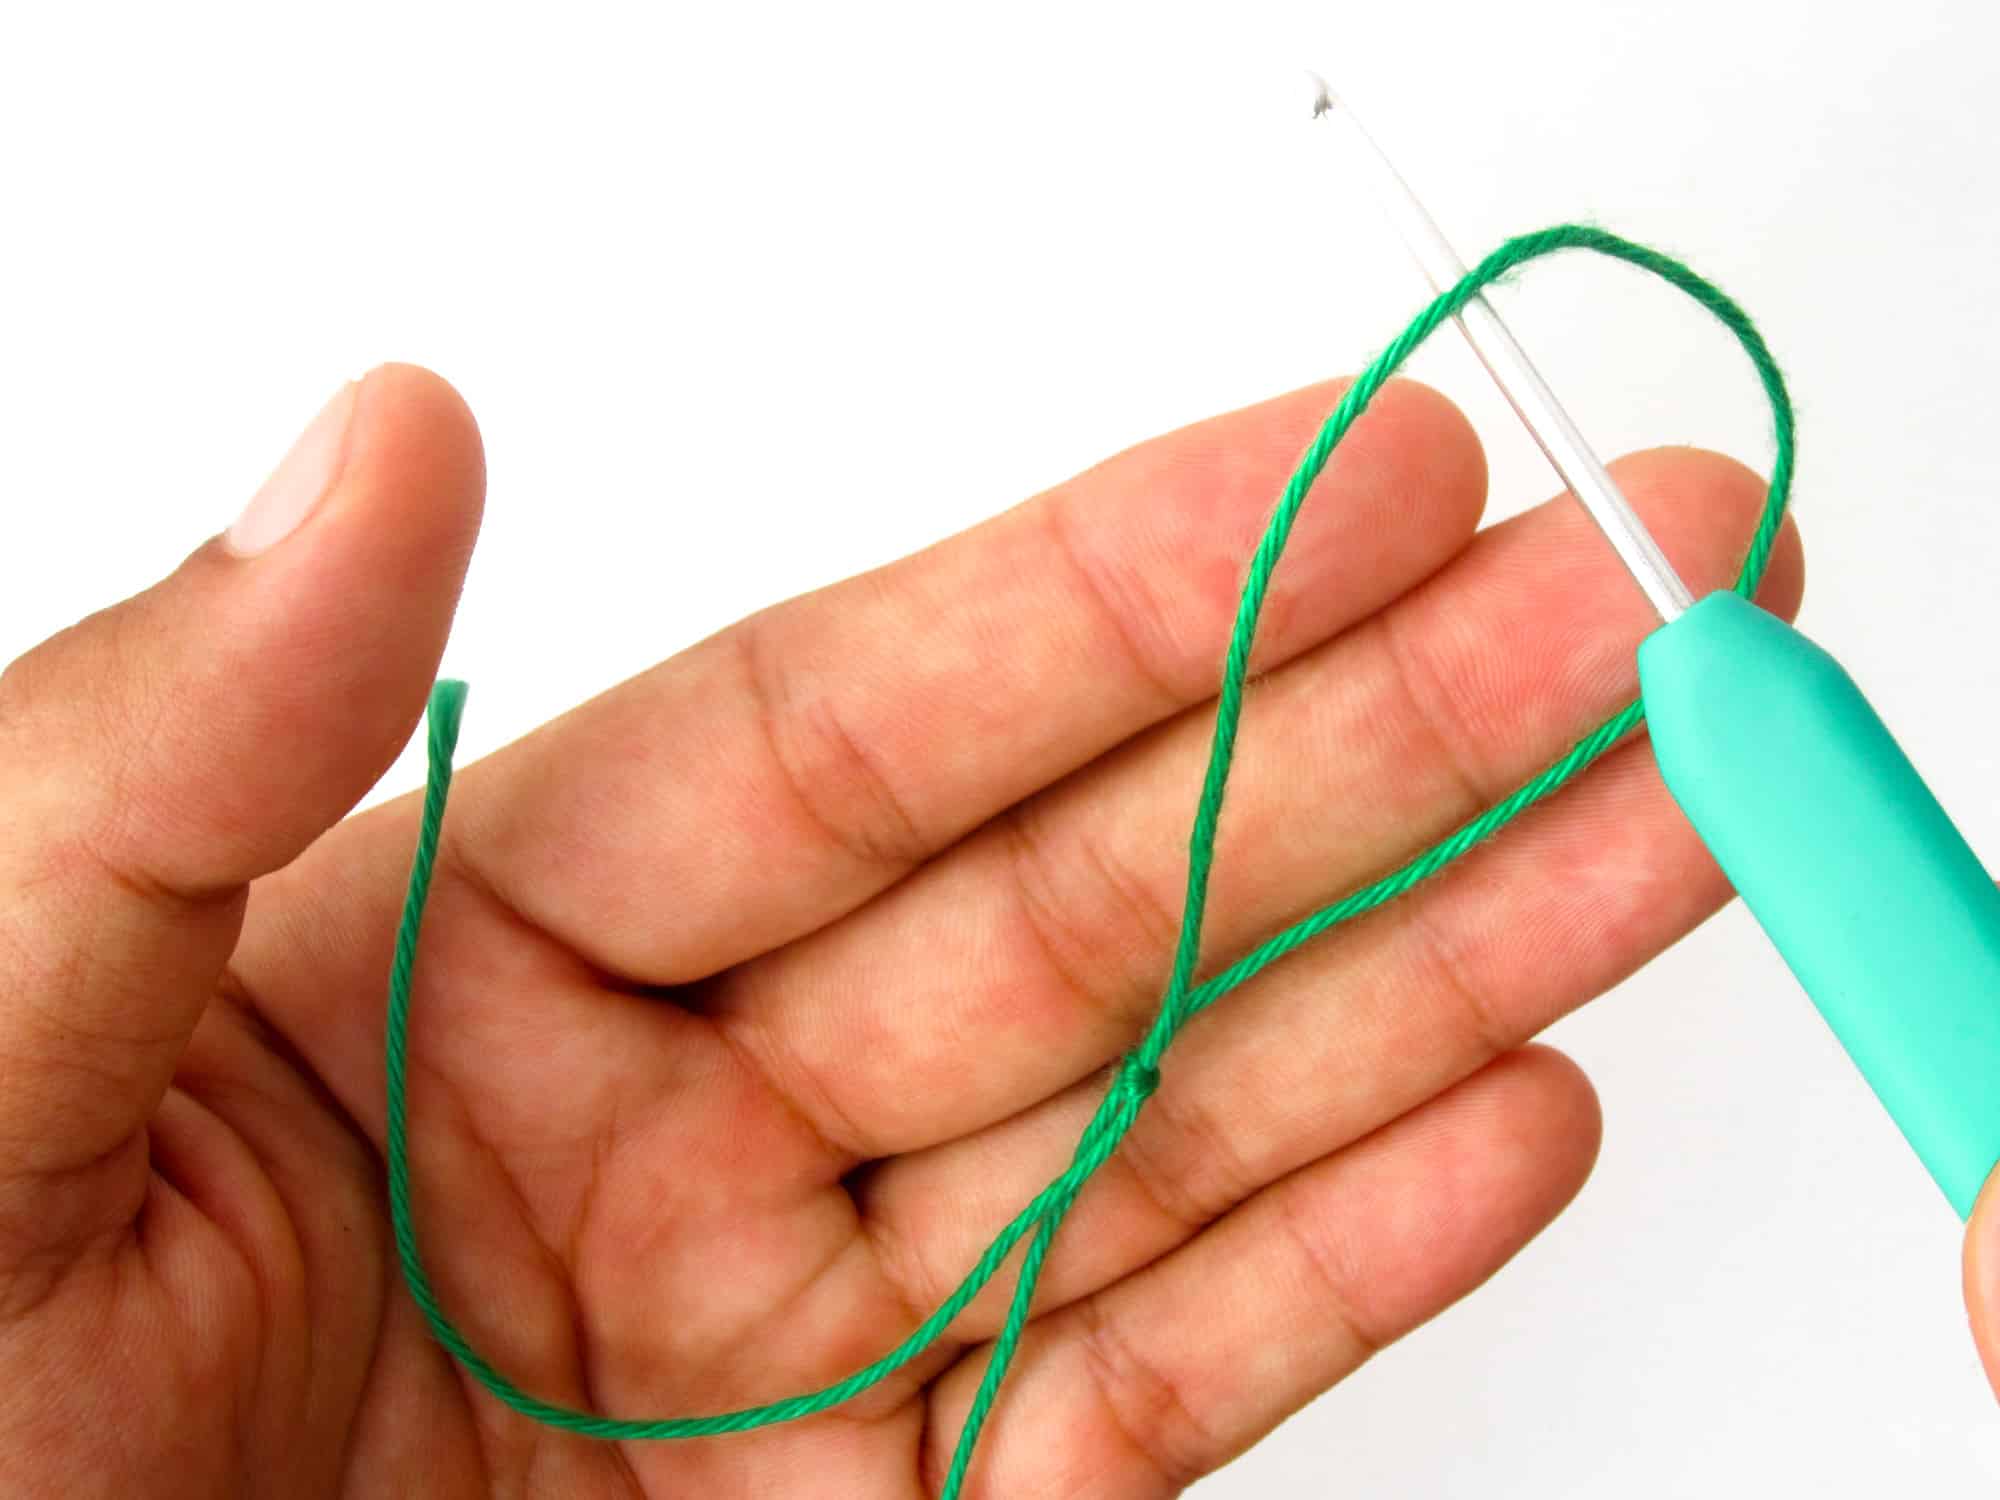
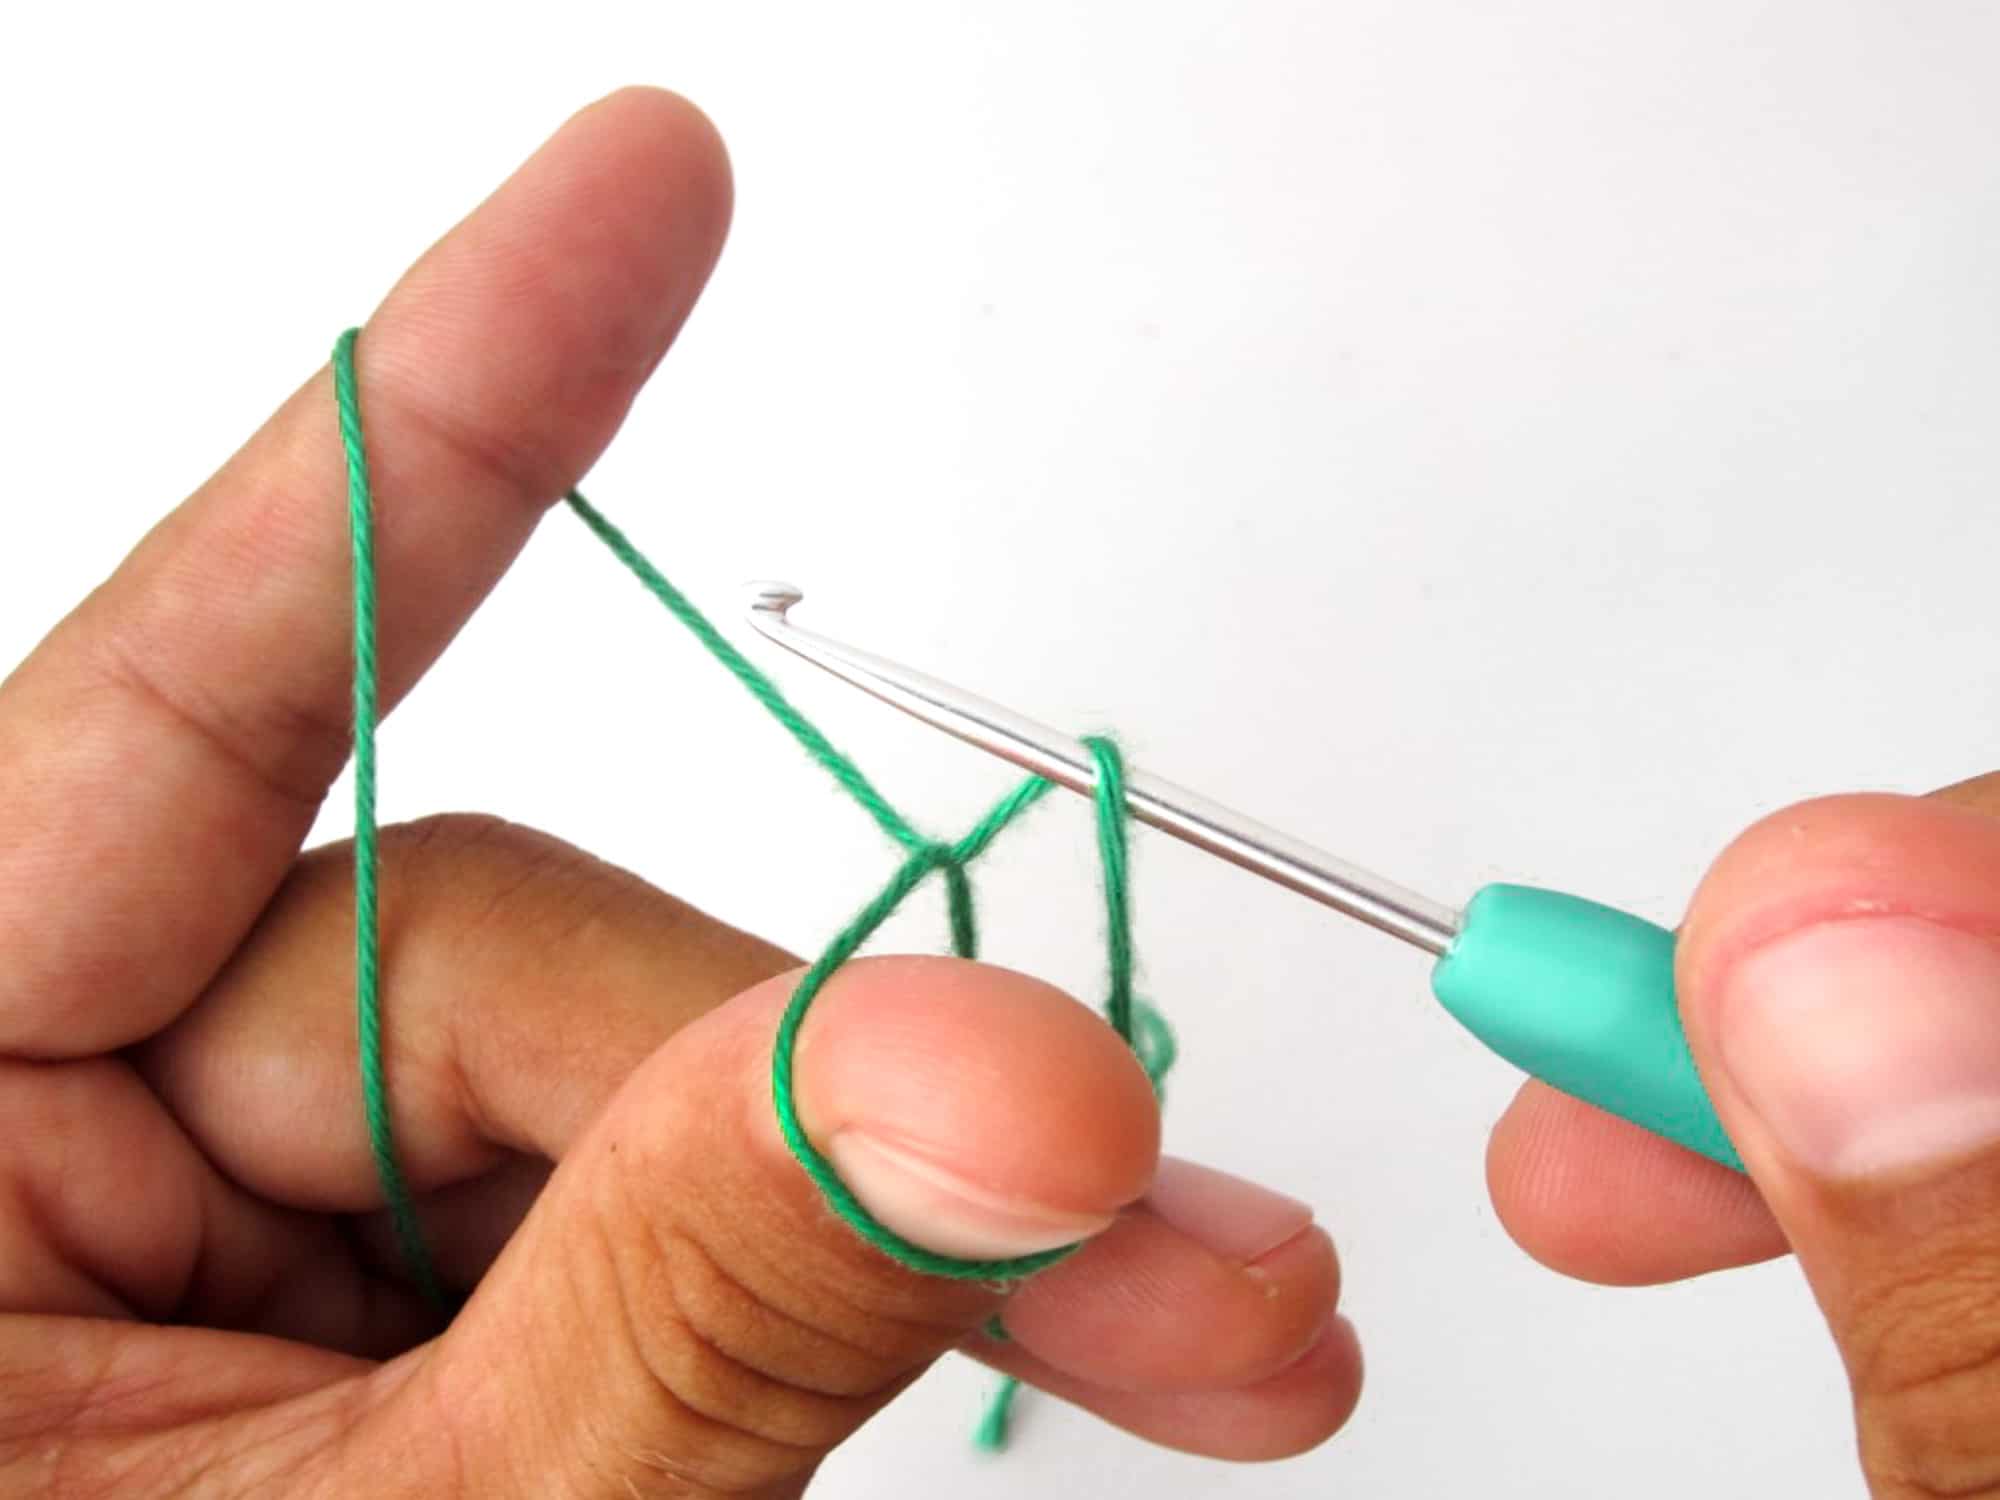
- Step 7: Take your crochet hook and push it UNDER the thread that runs from your index finger to your thumb.
- Step 8: Pull up the crochet hook slightly with the thread lying on it.
- Step 9: Push the crochet hook now UNDER the thread on the left hand which runs from the index finger to the thumb.
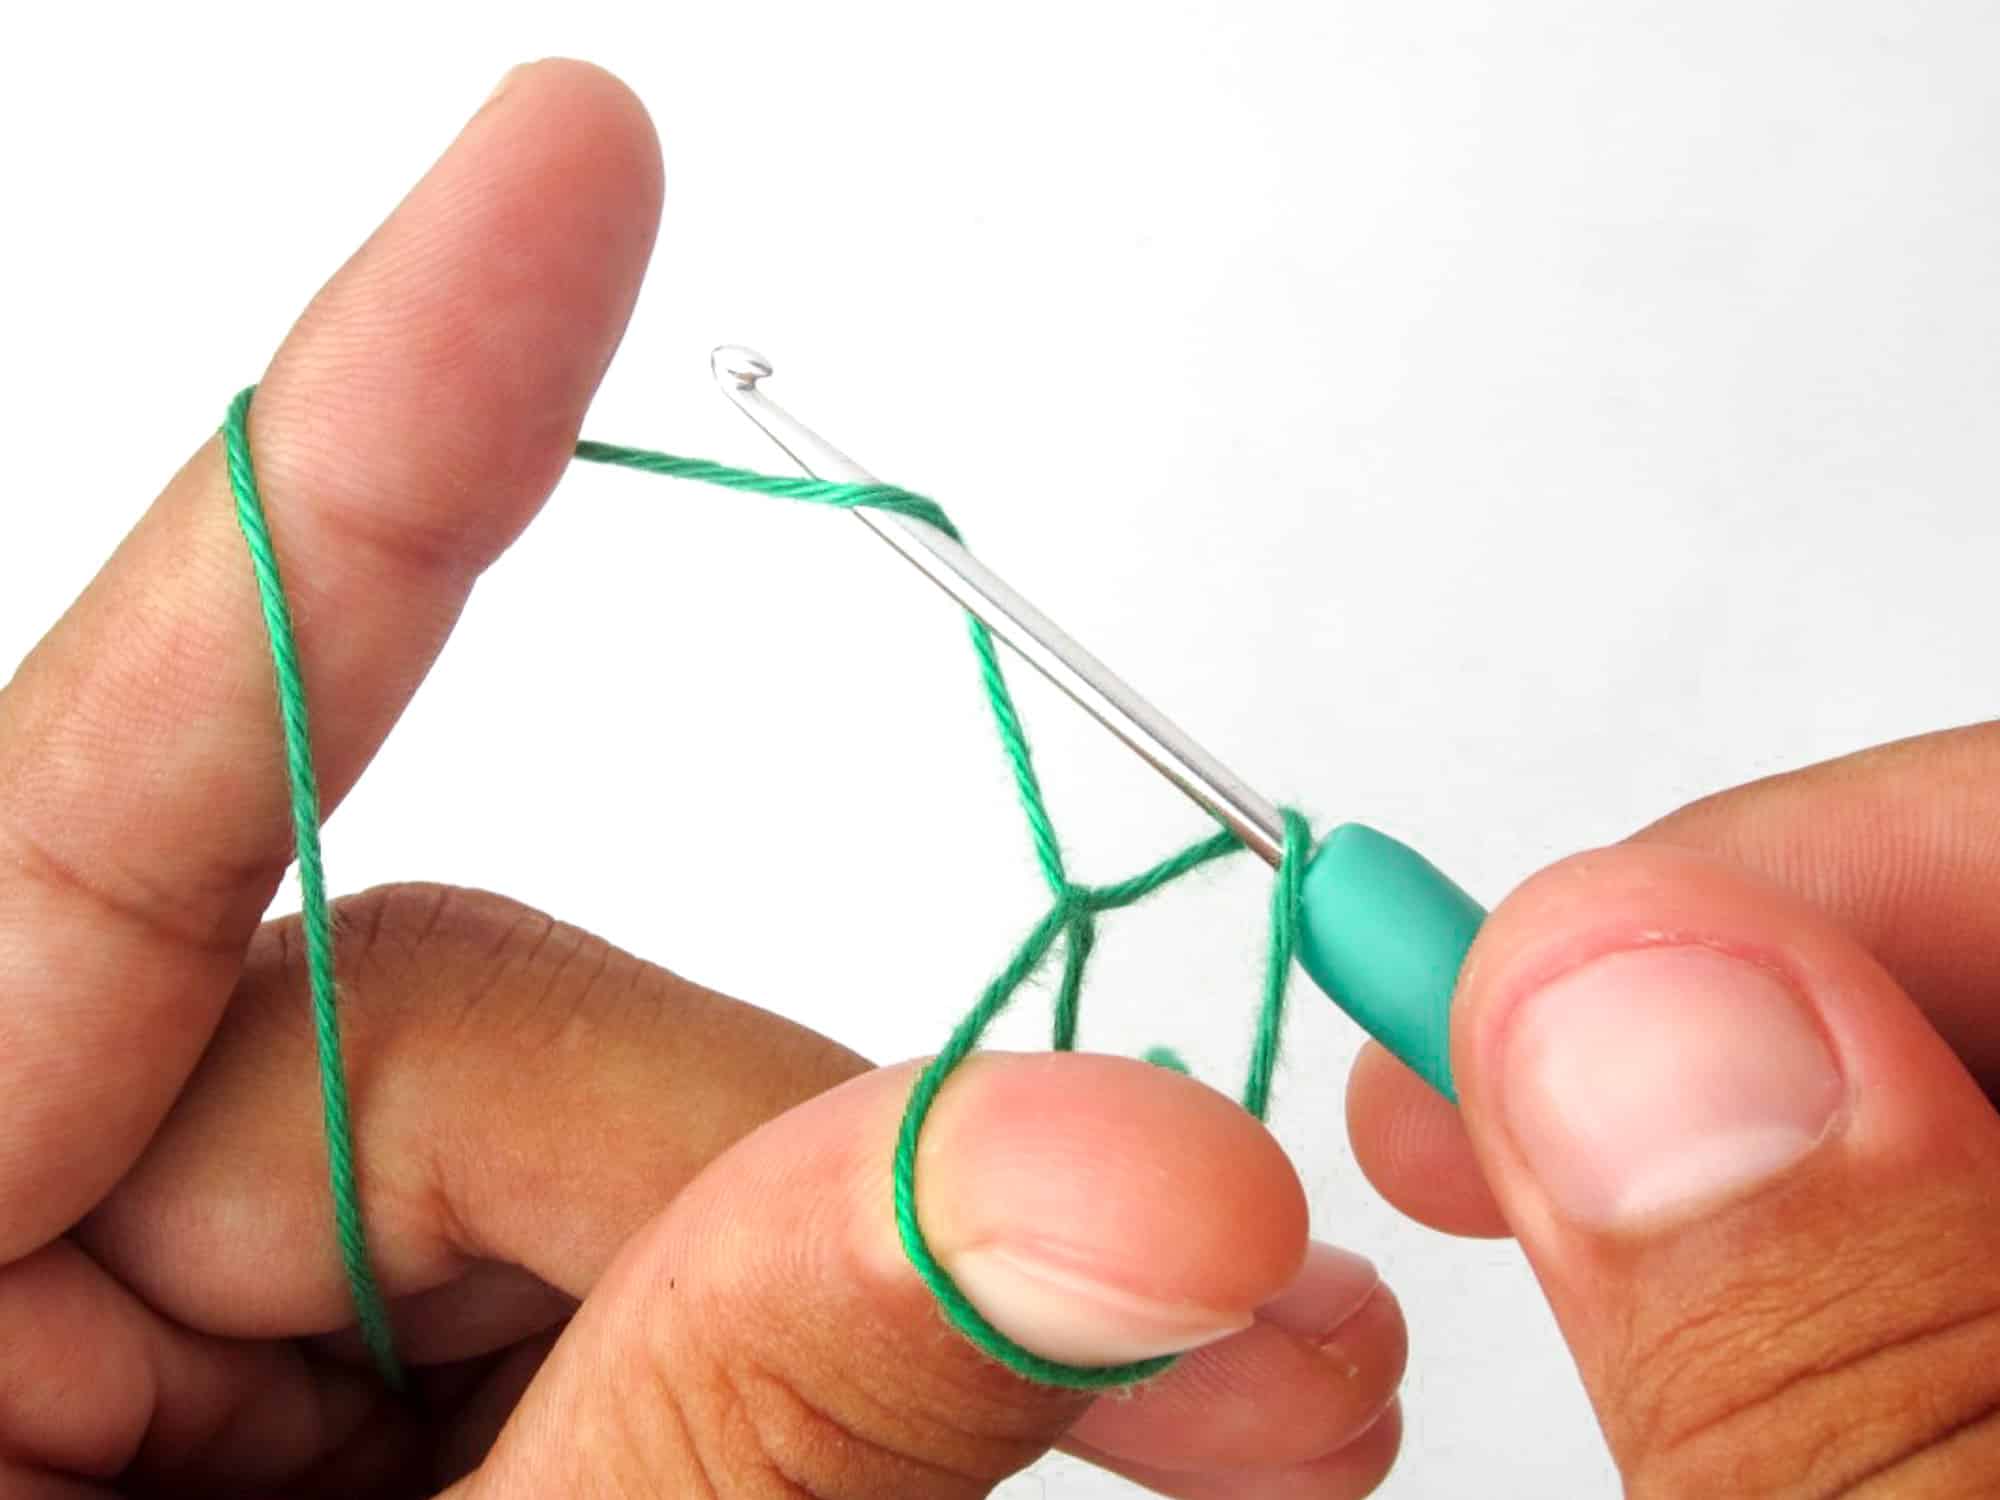
- Step 10: Turn the crochet hook counter-clockwise until the hook holds the thread.
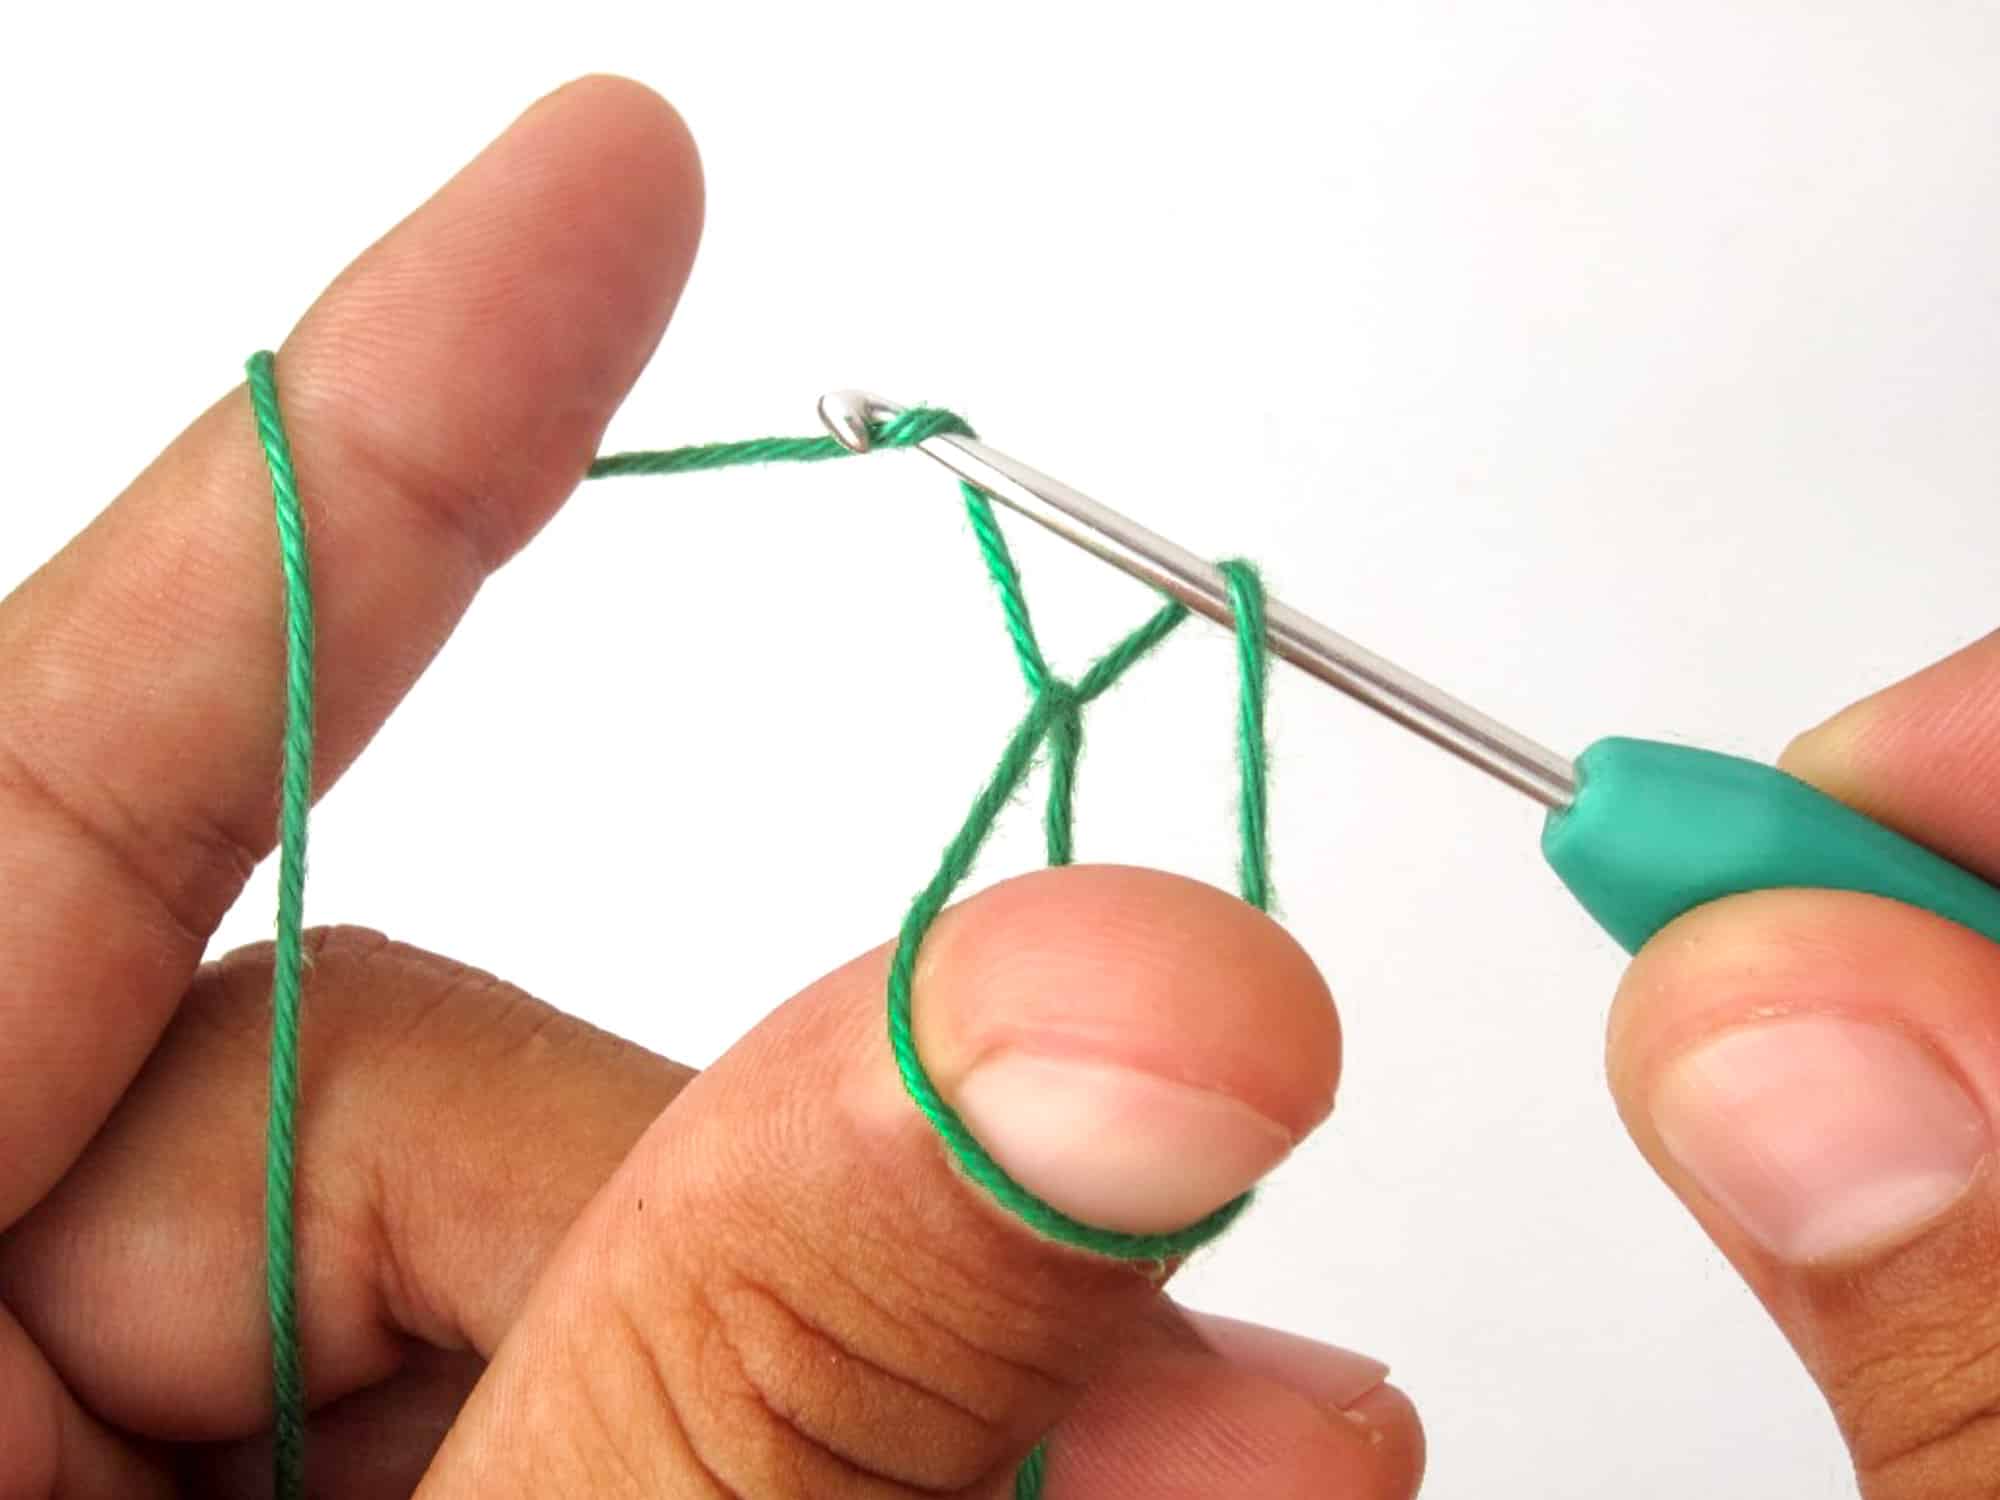
- Step 11: Now pull the picked up thread slowly in the direction of the thread that lies above the crochet hook and pull the picked up thread finally under this thread.
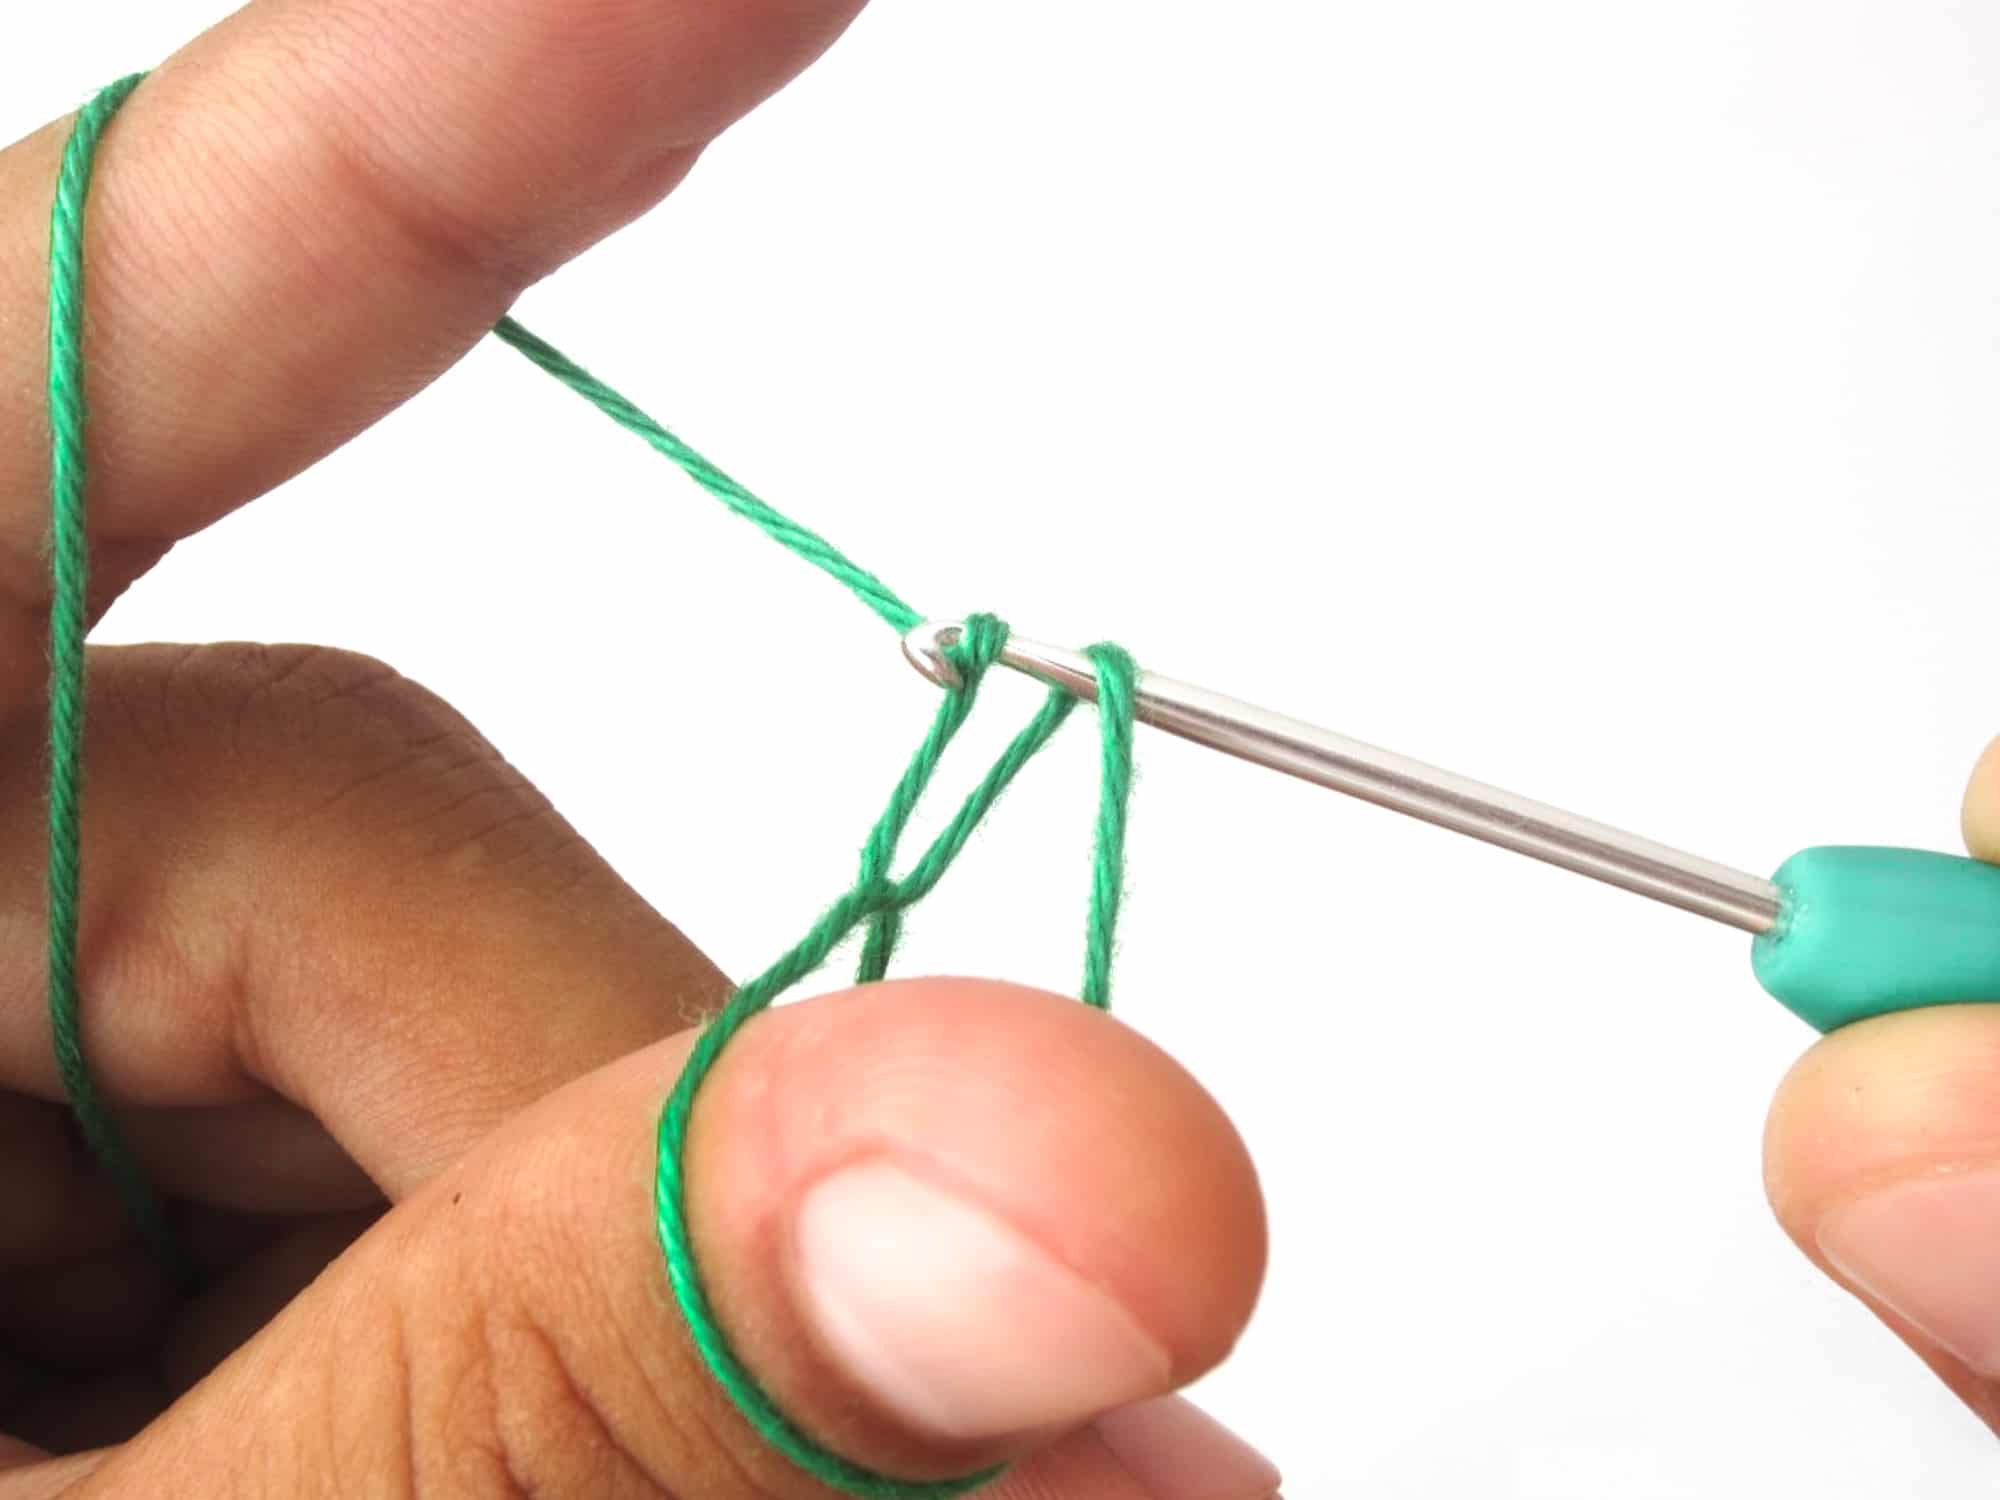
- Step 12: Let go of the thread that is stretched over your left thumb. You should have only one thread over the crochet hook. Hold the end of the thread with thumb and middle finger of the left hand and pull the resulting loop tight. There is a small knot under the crochet hook and the loop lies firmly around the crochet hook. Done is the slip knot which can be moved freely along the crochet hook.
Since the yarn is now connected with the crochet hook, you can start with the actual crocheting.