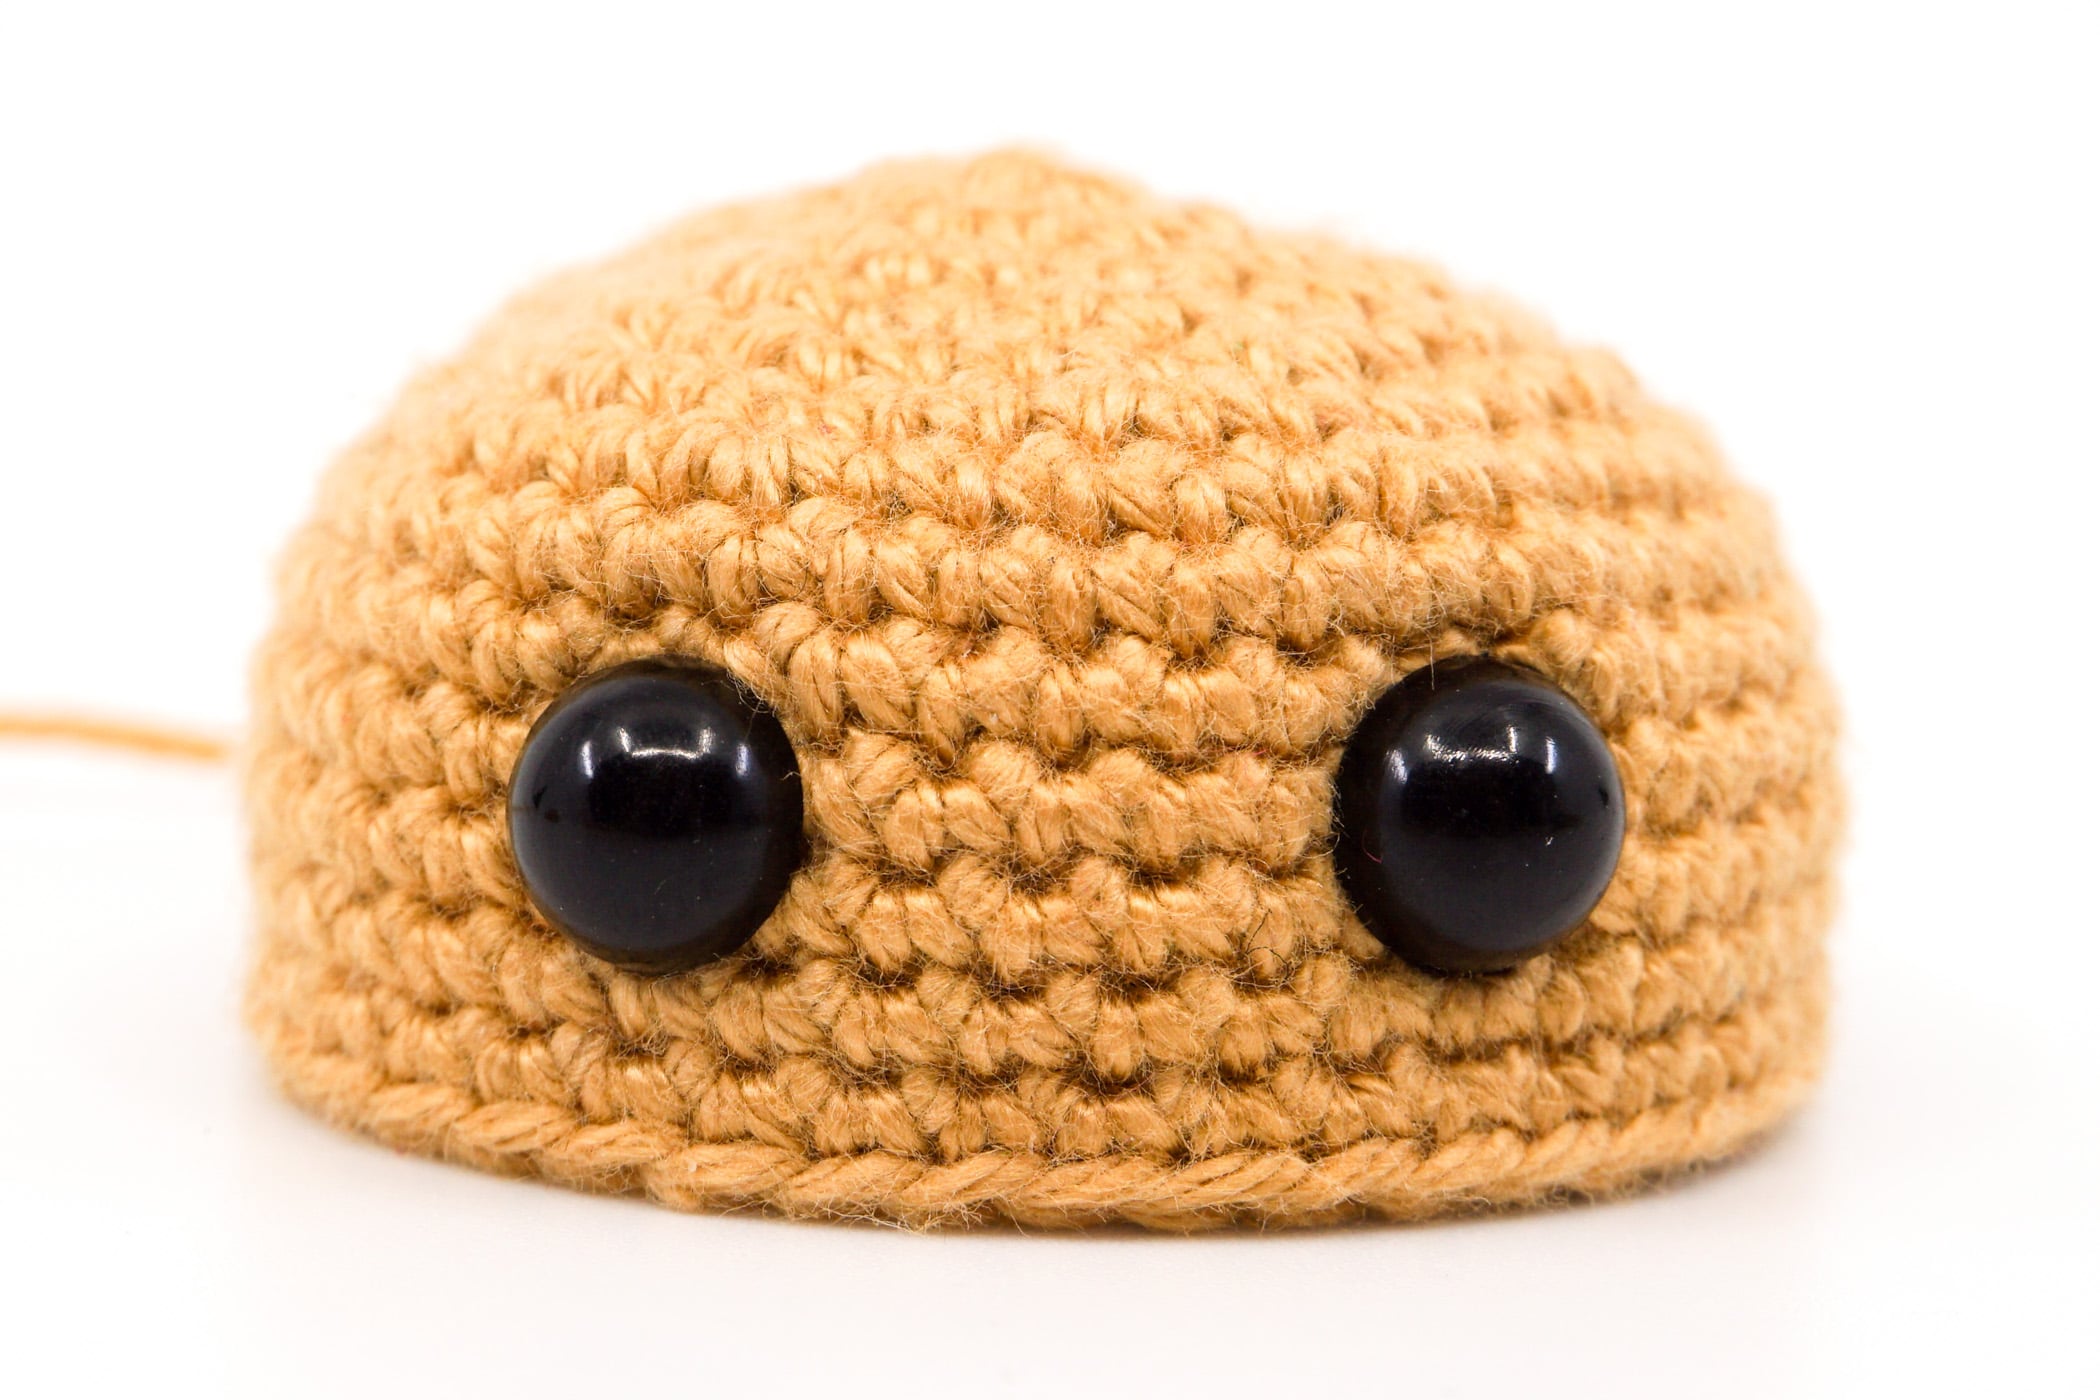
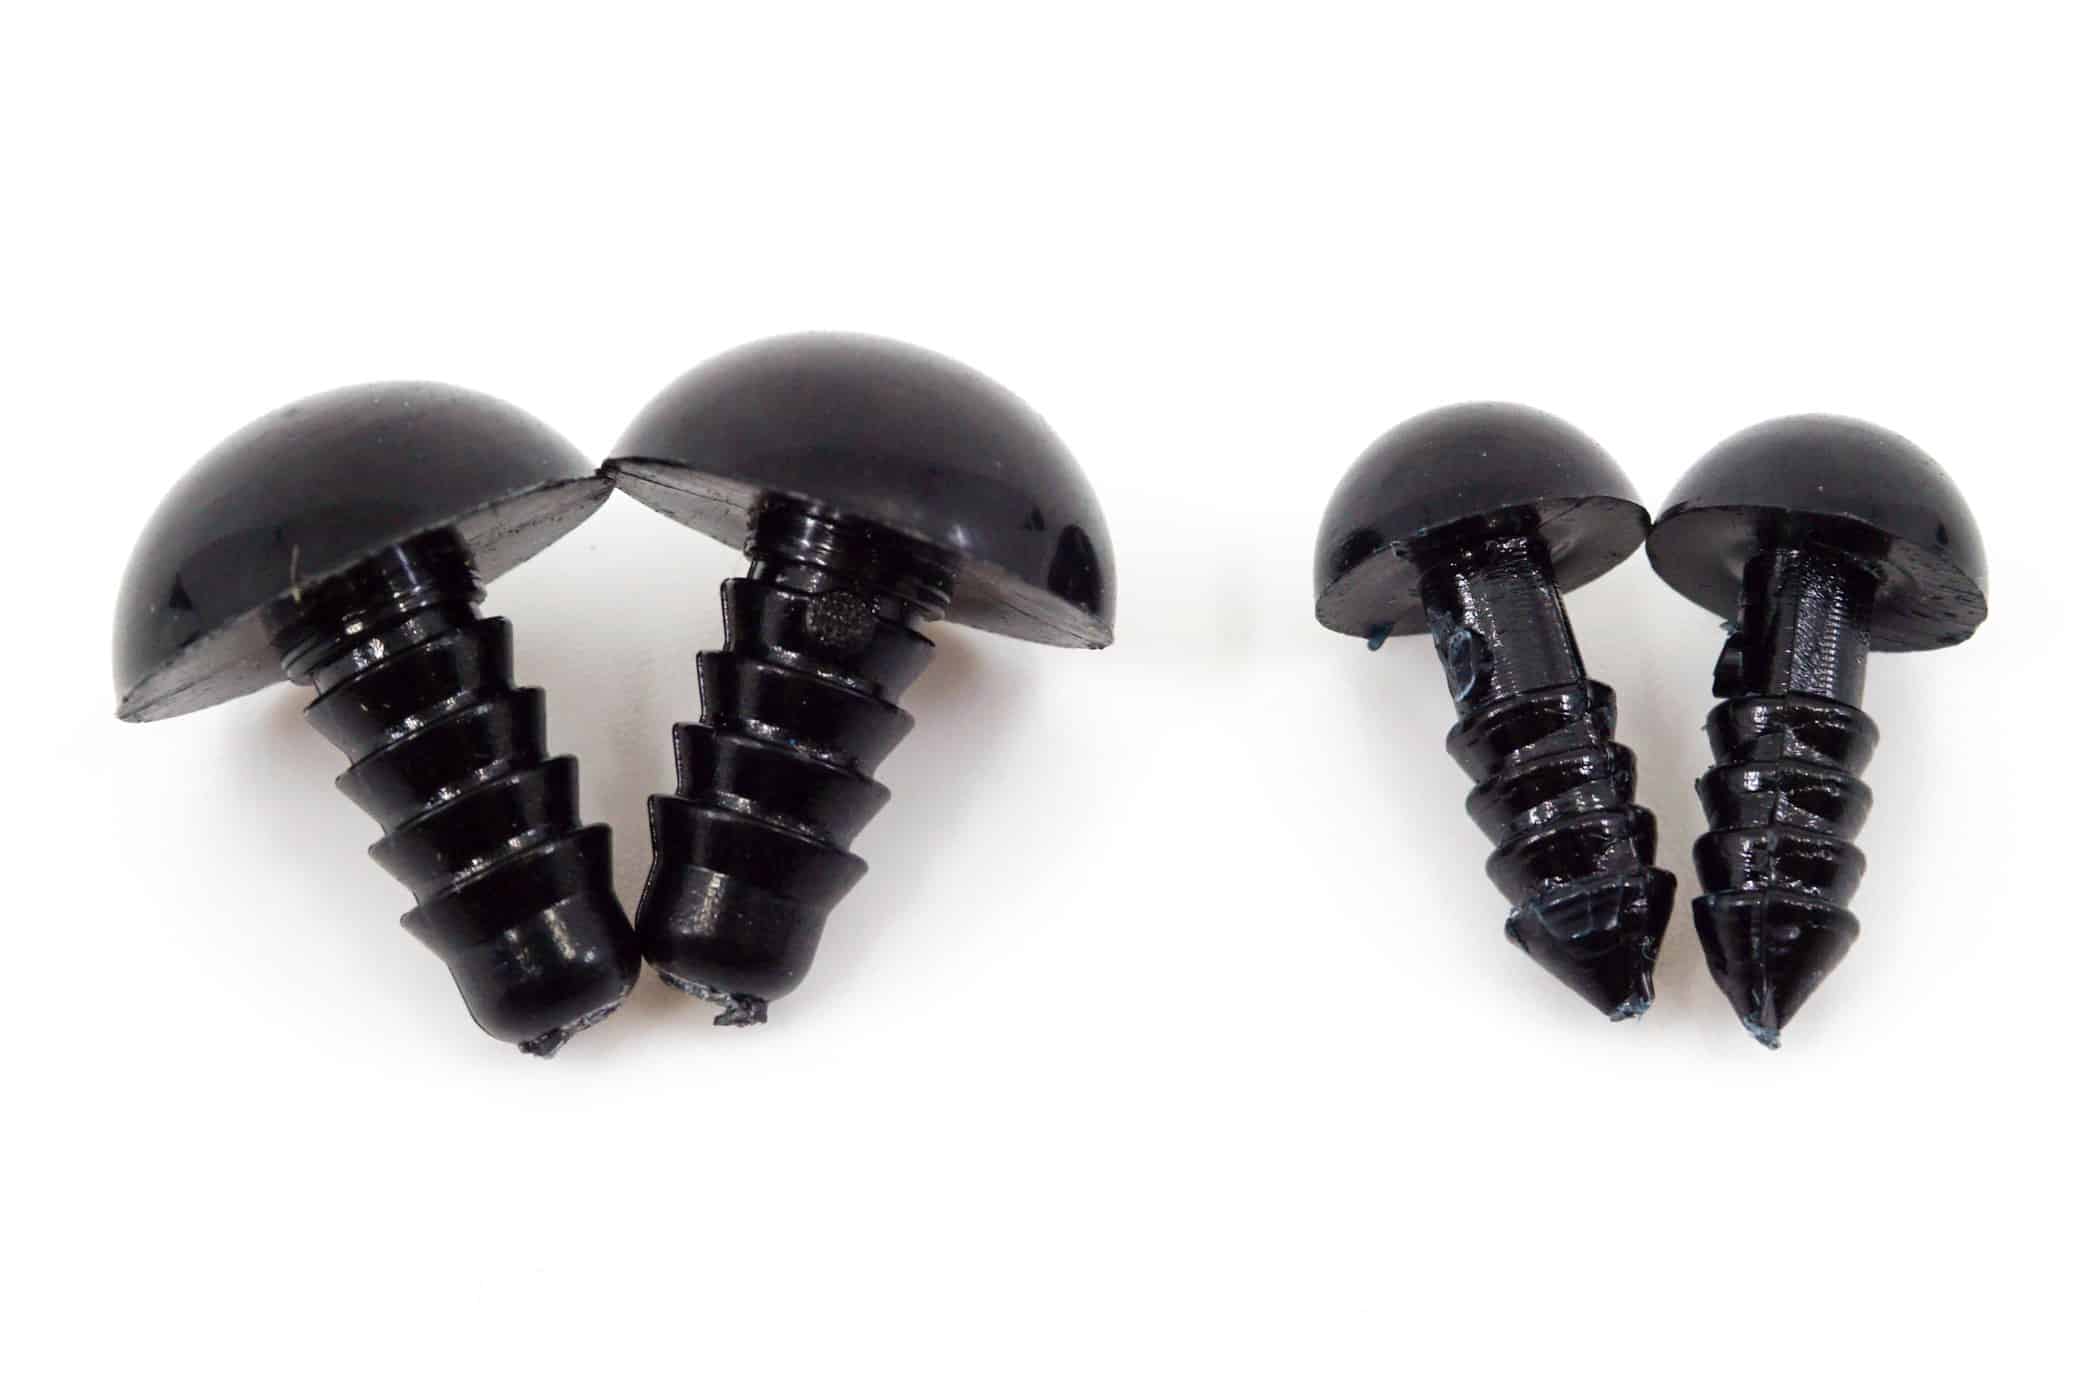
Safety eyes are usually plastic hemispheres or plastic disks with a stem that you push through the stitch pattern and then secure on the inside of your crochet piece with a safety disk, hence the name safety eyes.
If you use safety eyes for your finished amigurumi or other crochet projects, the following article explains how to place and secure them correctly.
Below you will also learn how to best proceed when adding large eyes (with a thick stem) to tightly crocheted pieces without damaging them.
Determine the Position of the Eyes
The first thing to do is to determine the position to where the eyes should be attached. Either your instructions give you the position or you determine the position yourself.
If you know exactly where the safety eyes should be attached later, then crochet a marker thread in the appropriate place.
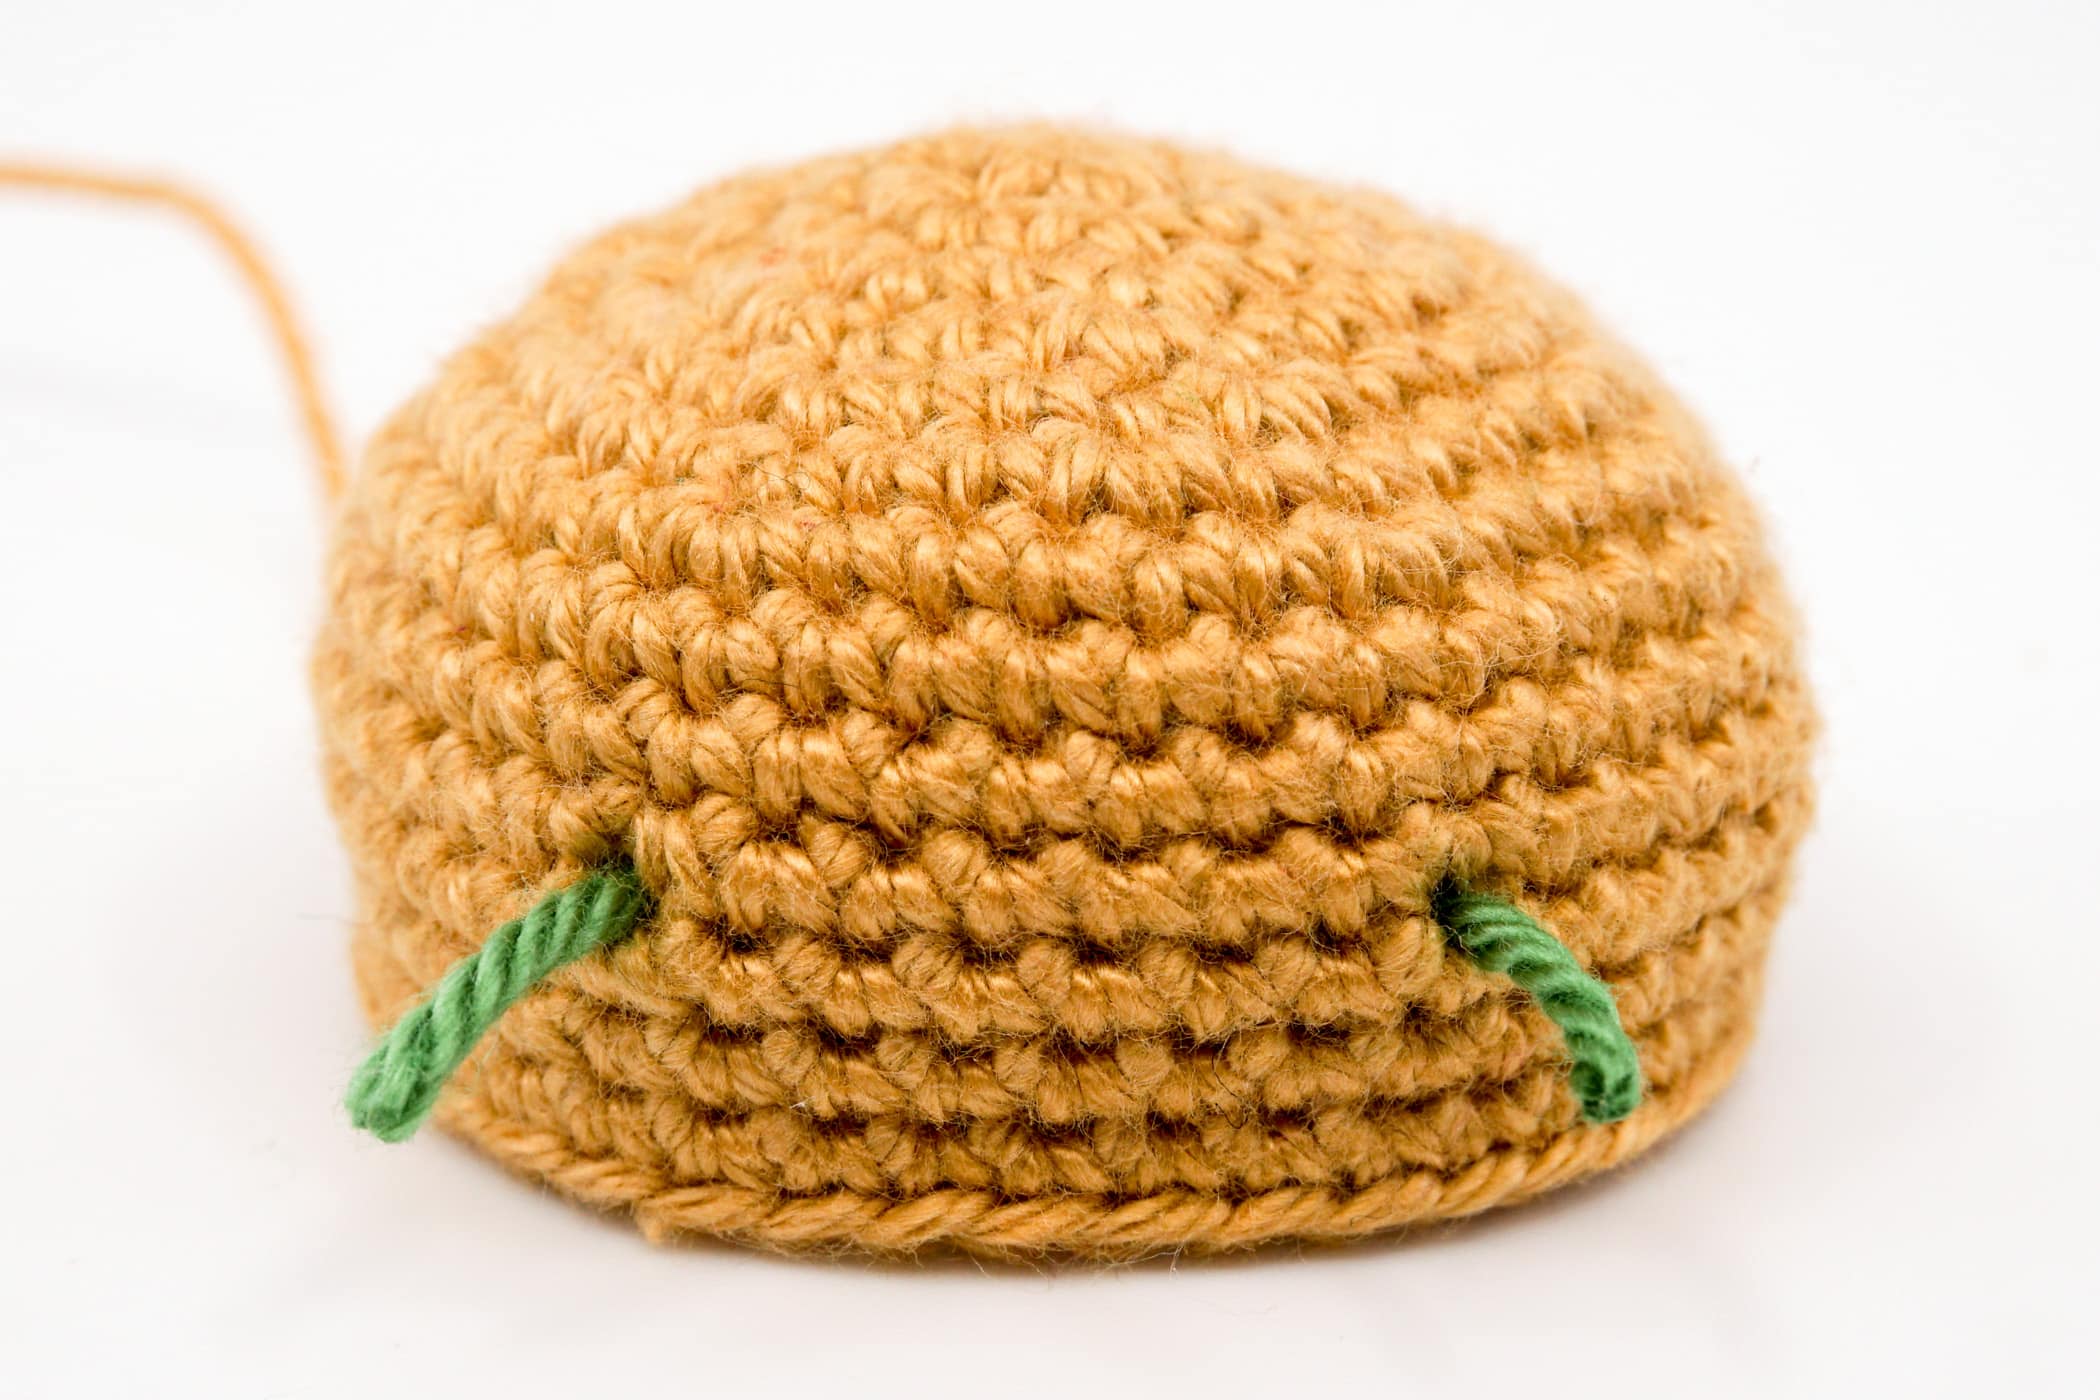
Always crochet a few more rounds after the round in which the eyes are to be attached, otherwise the attached eyes could cover the stitches in which you have to crochet.
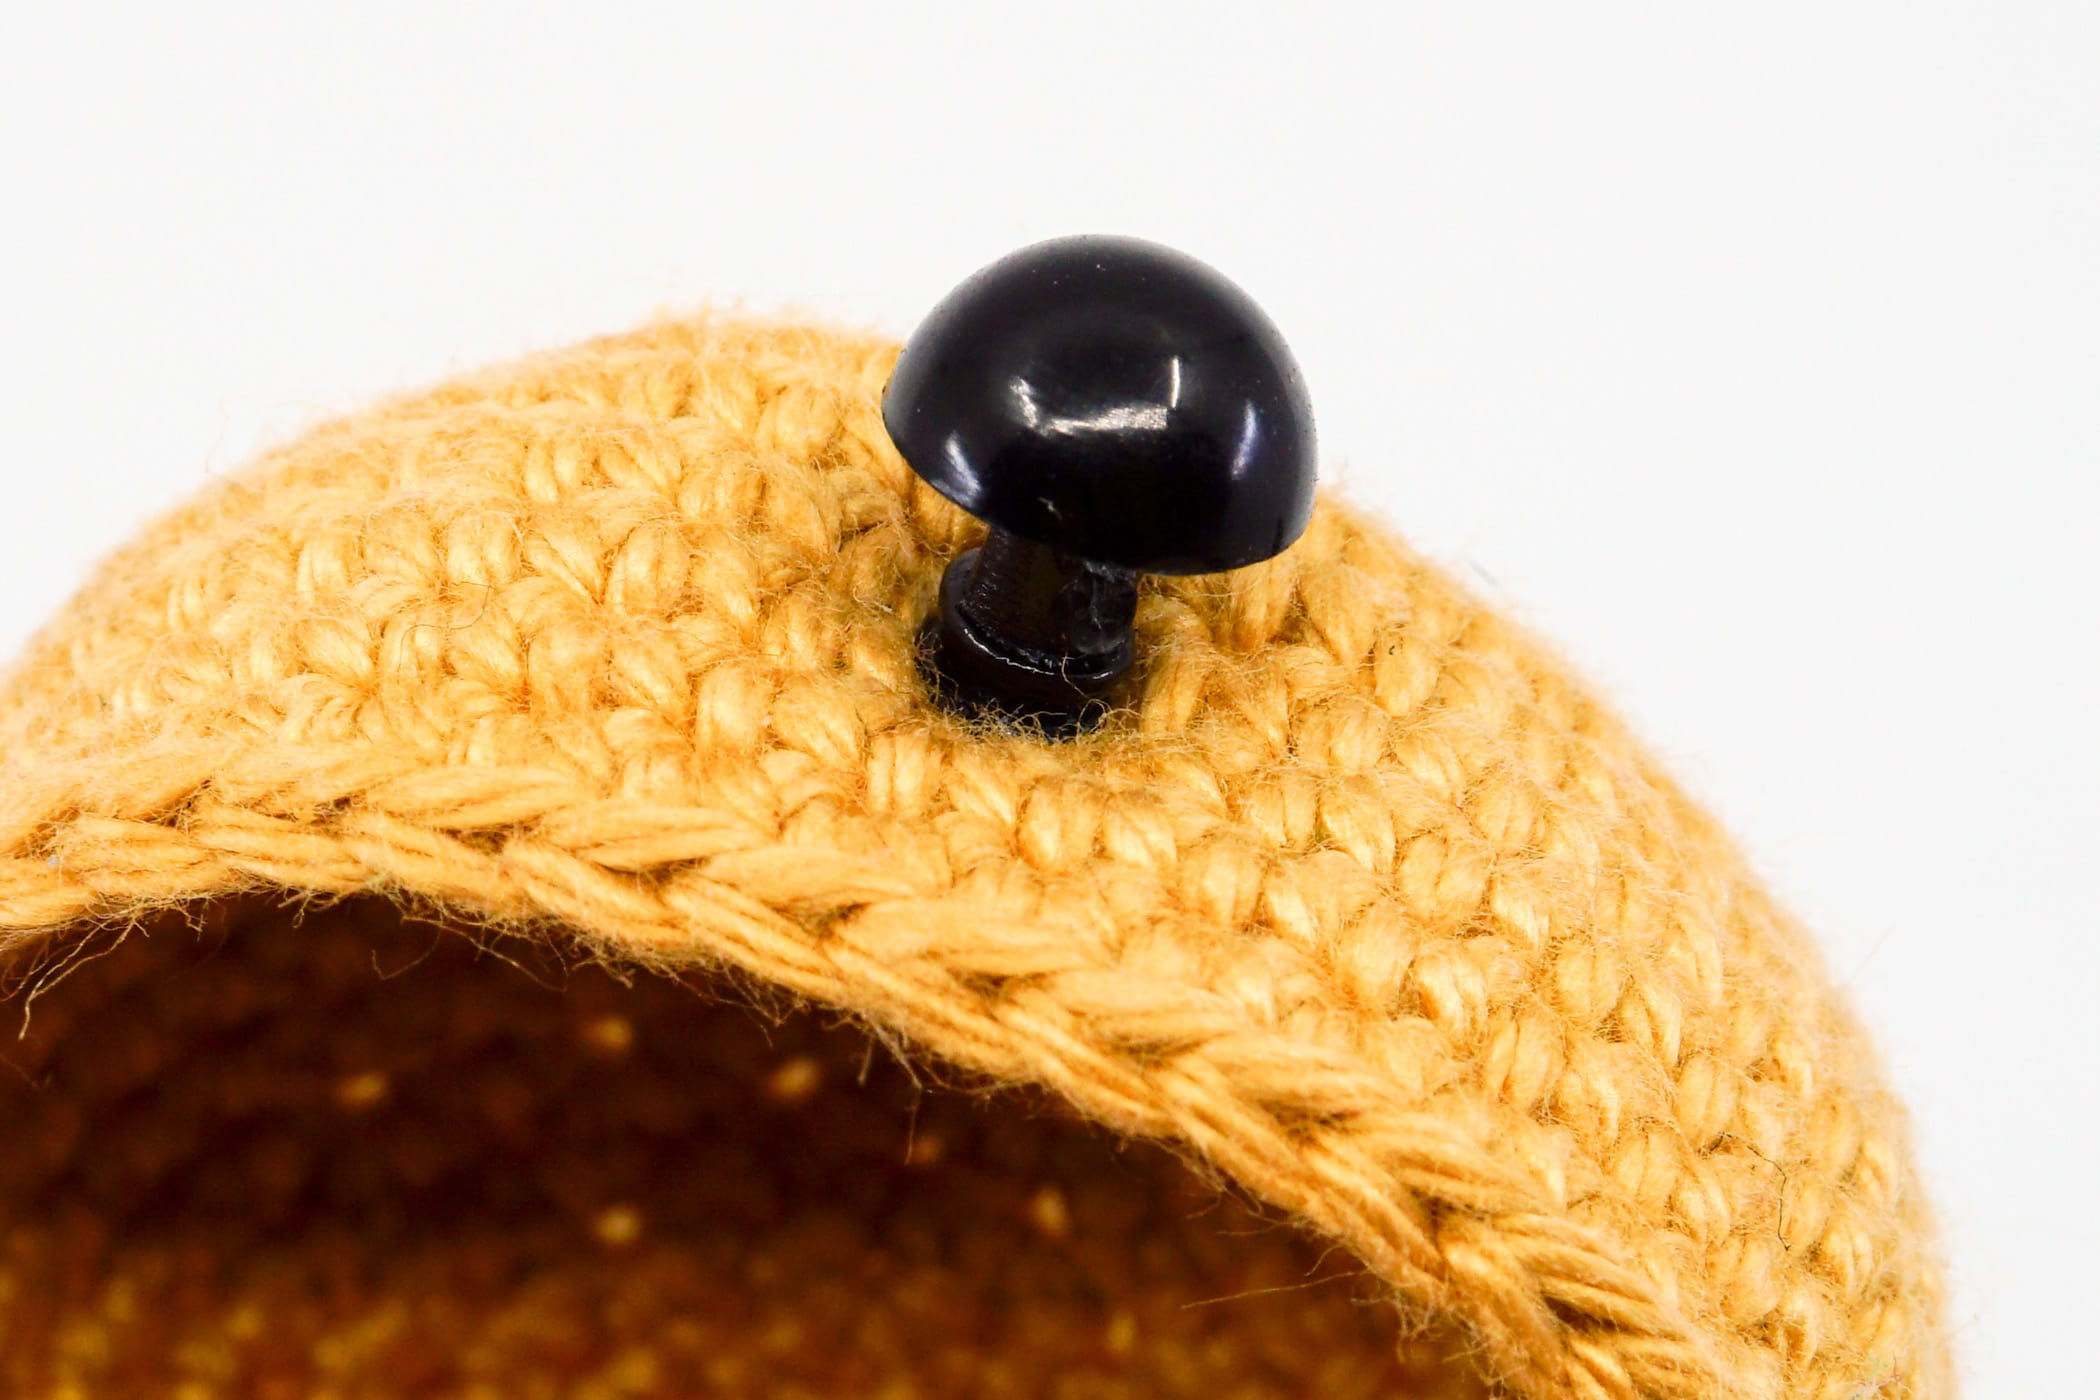
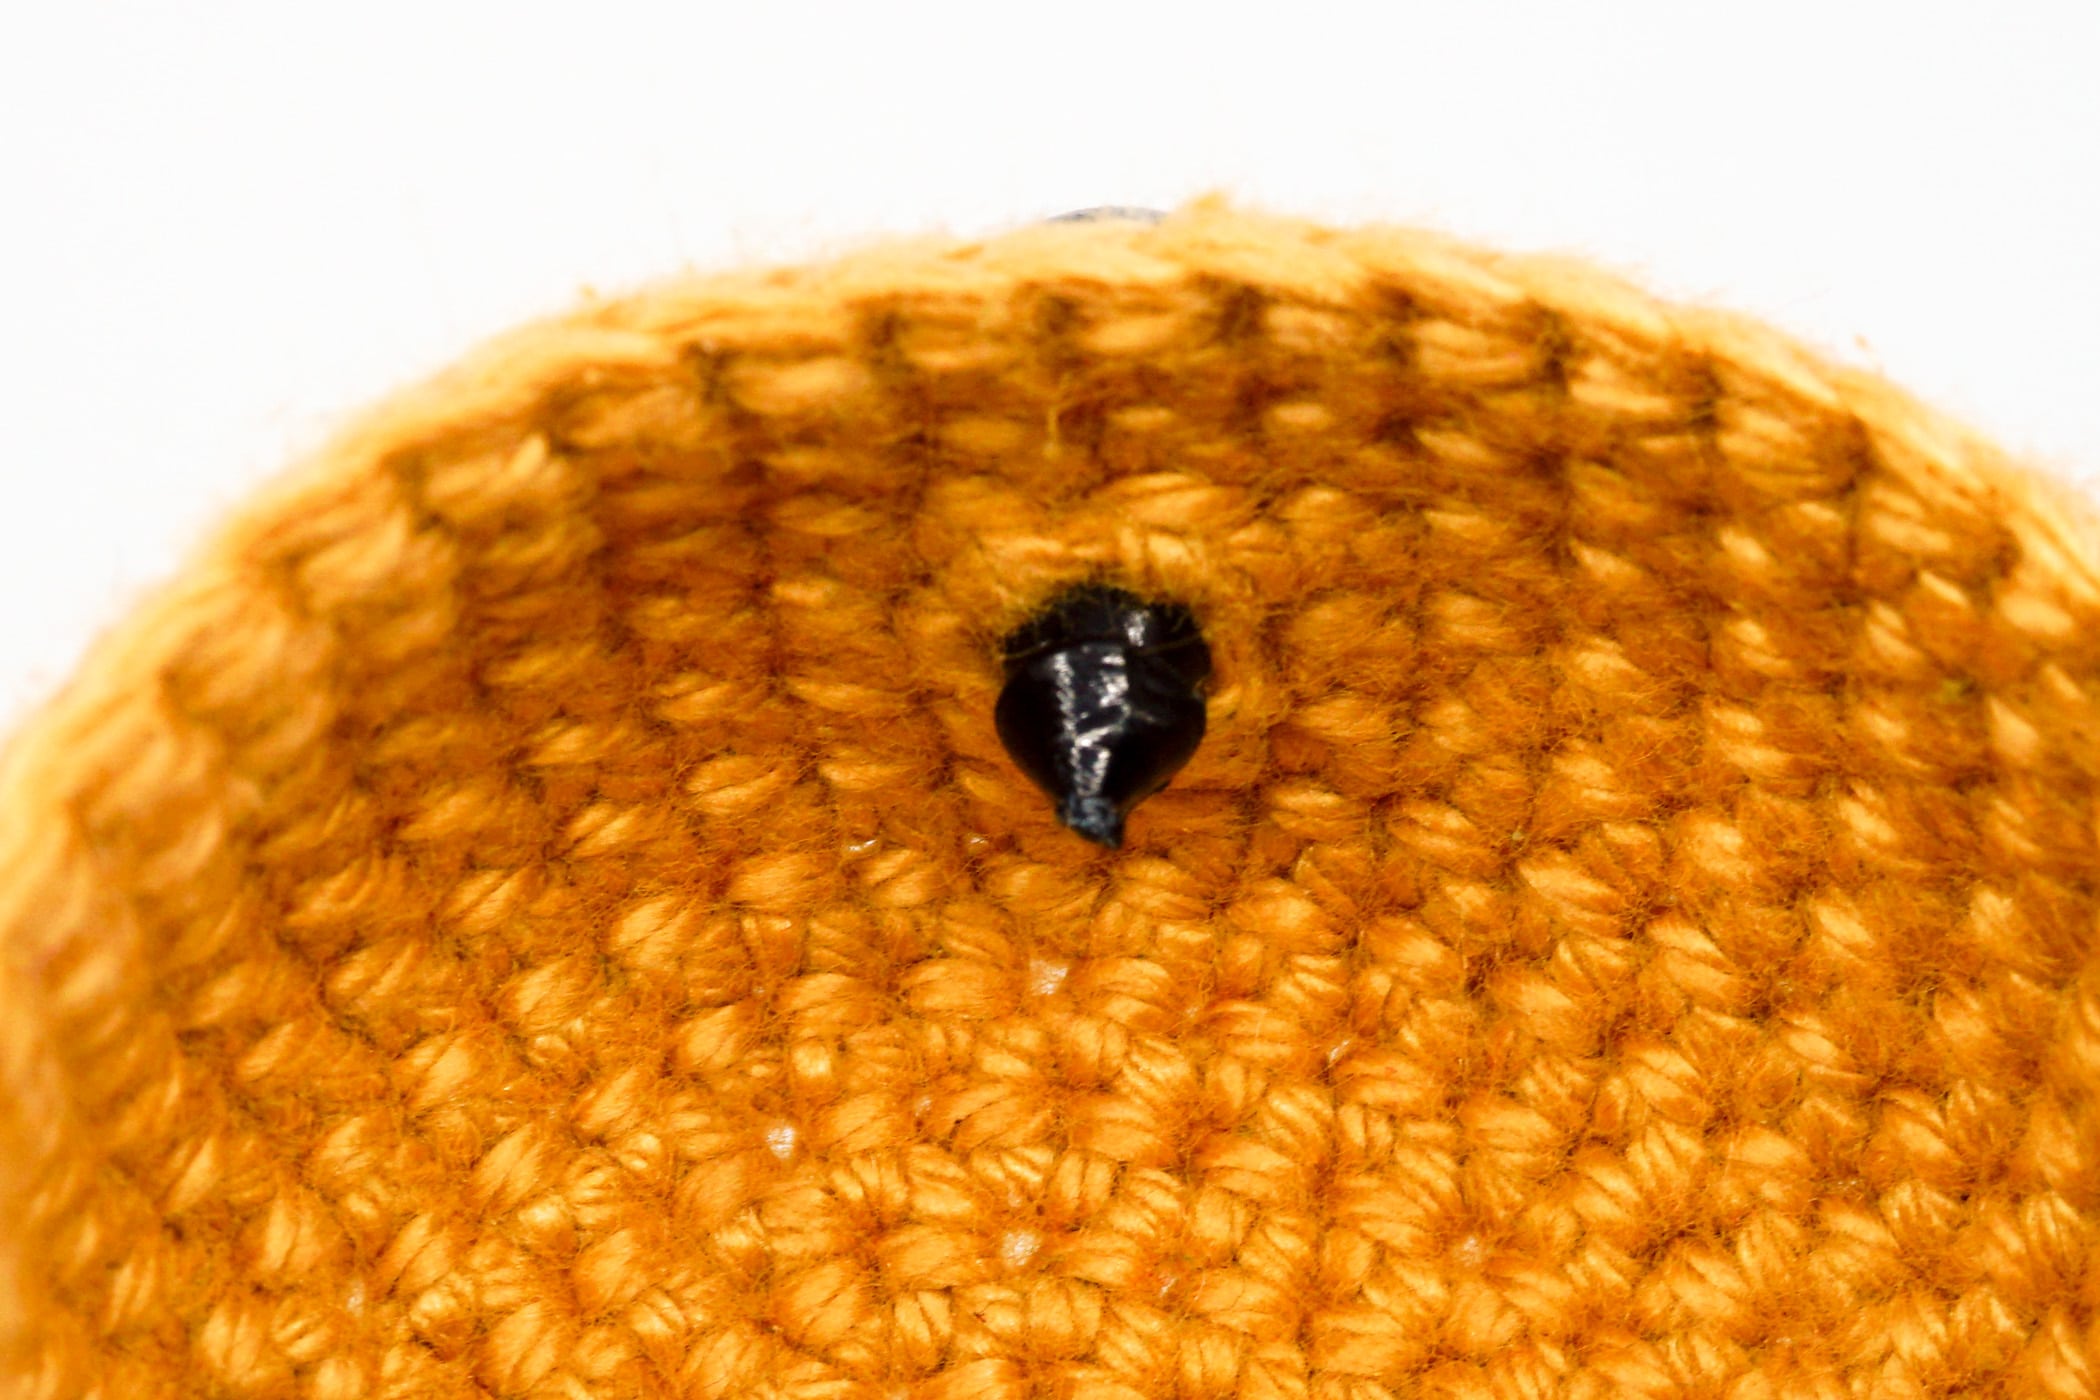
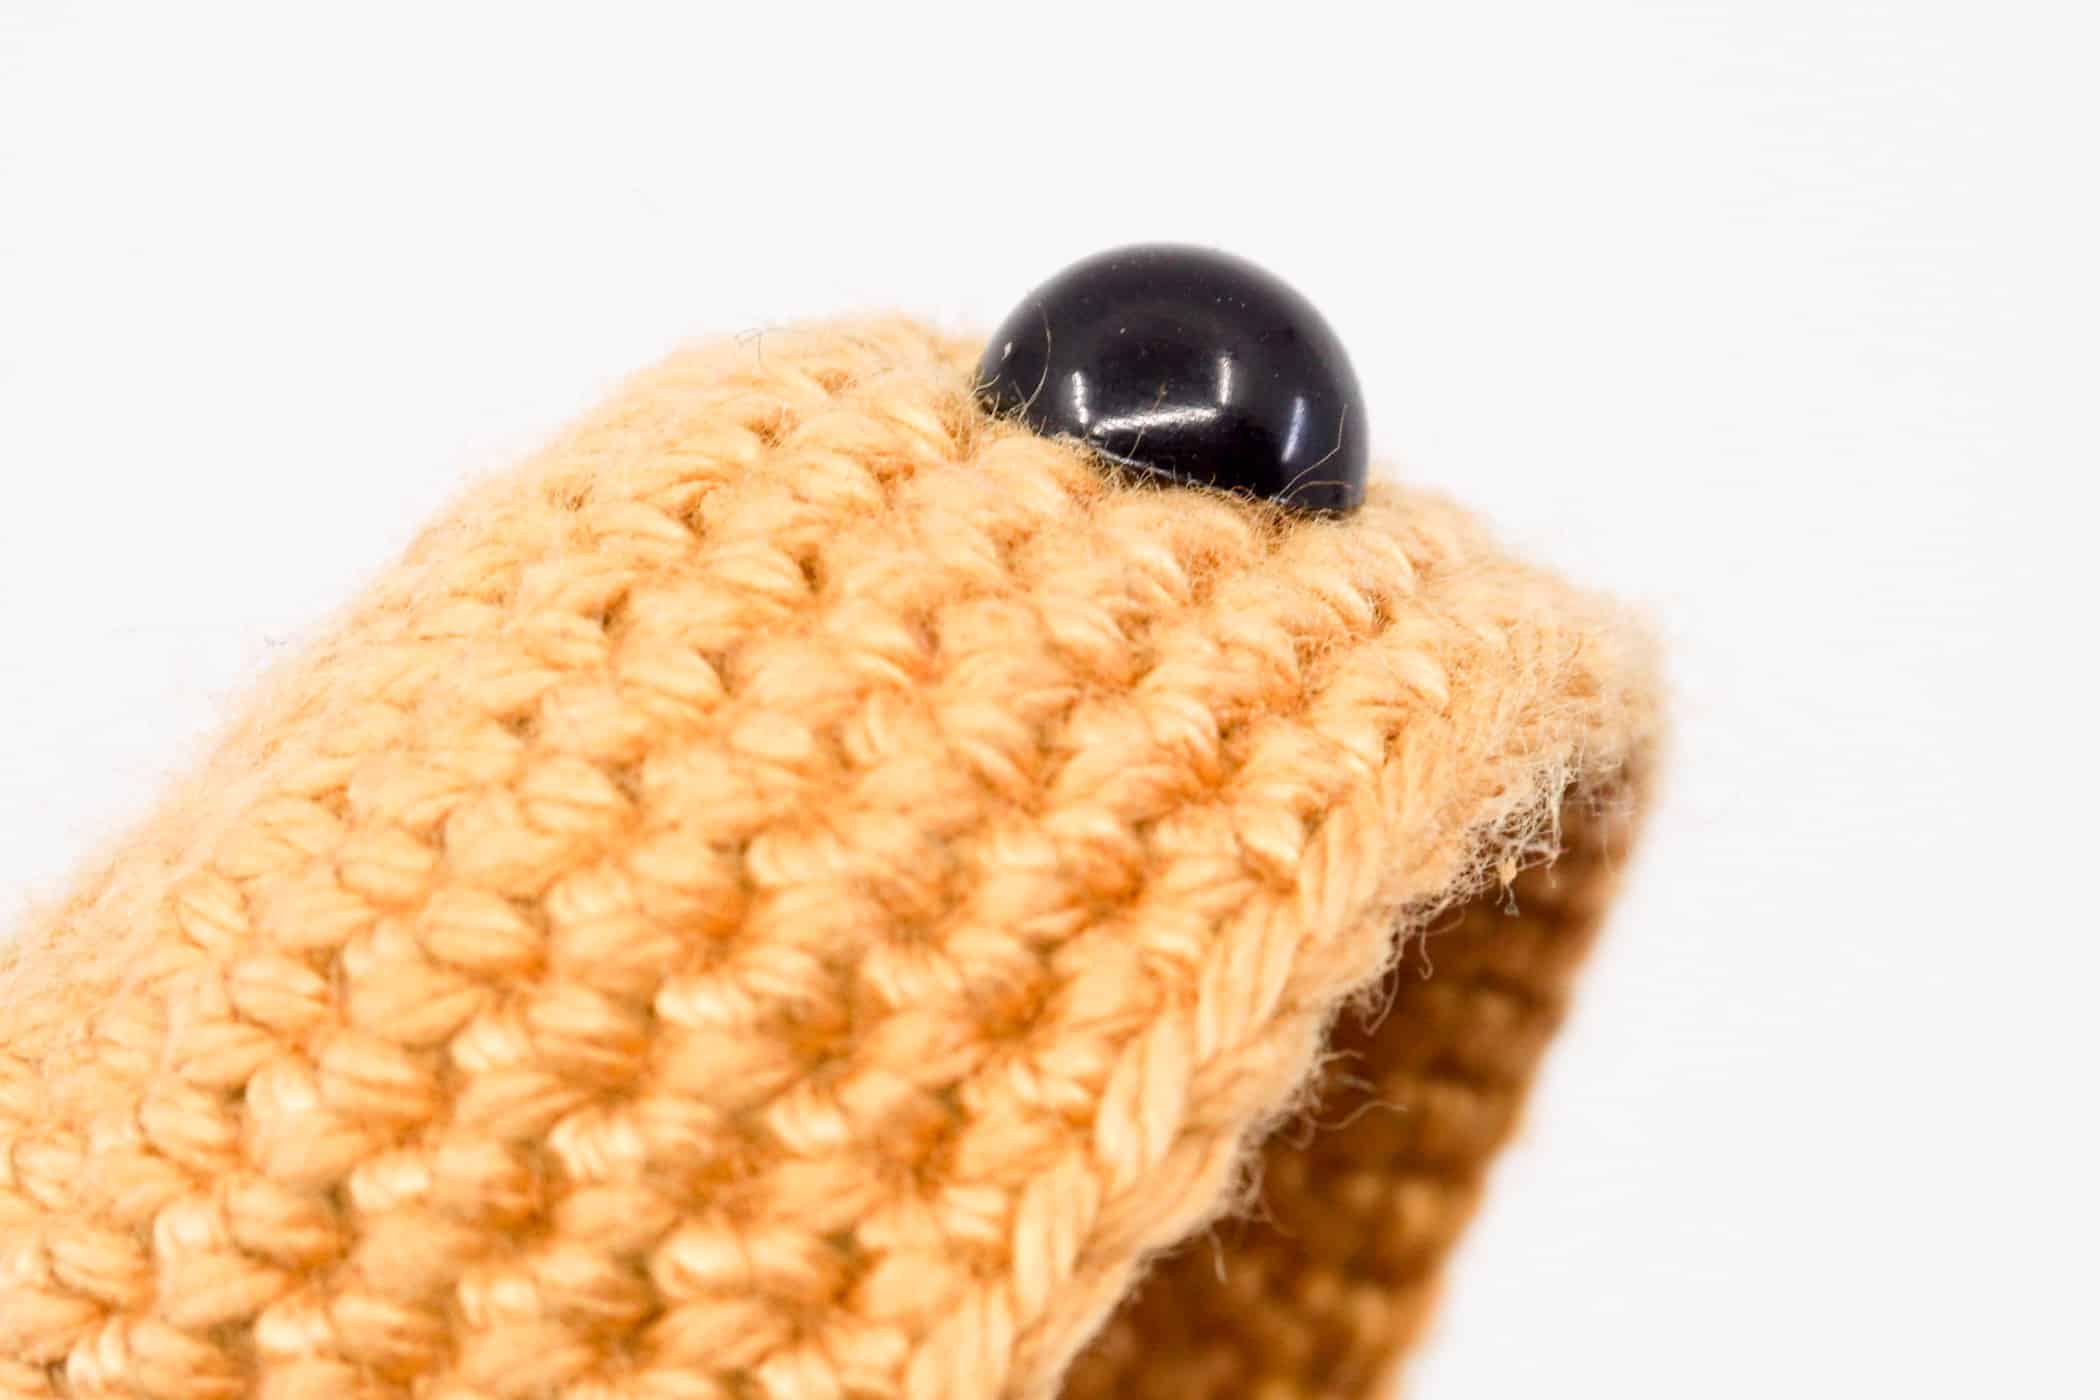
Attach the Safety Eyes
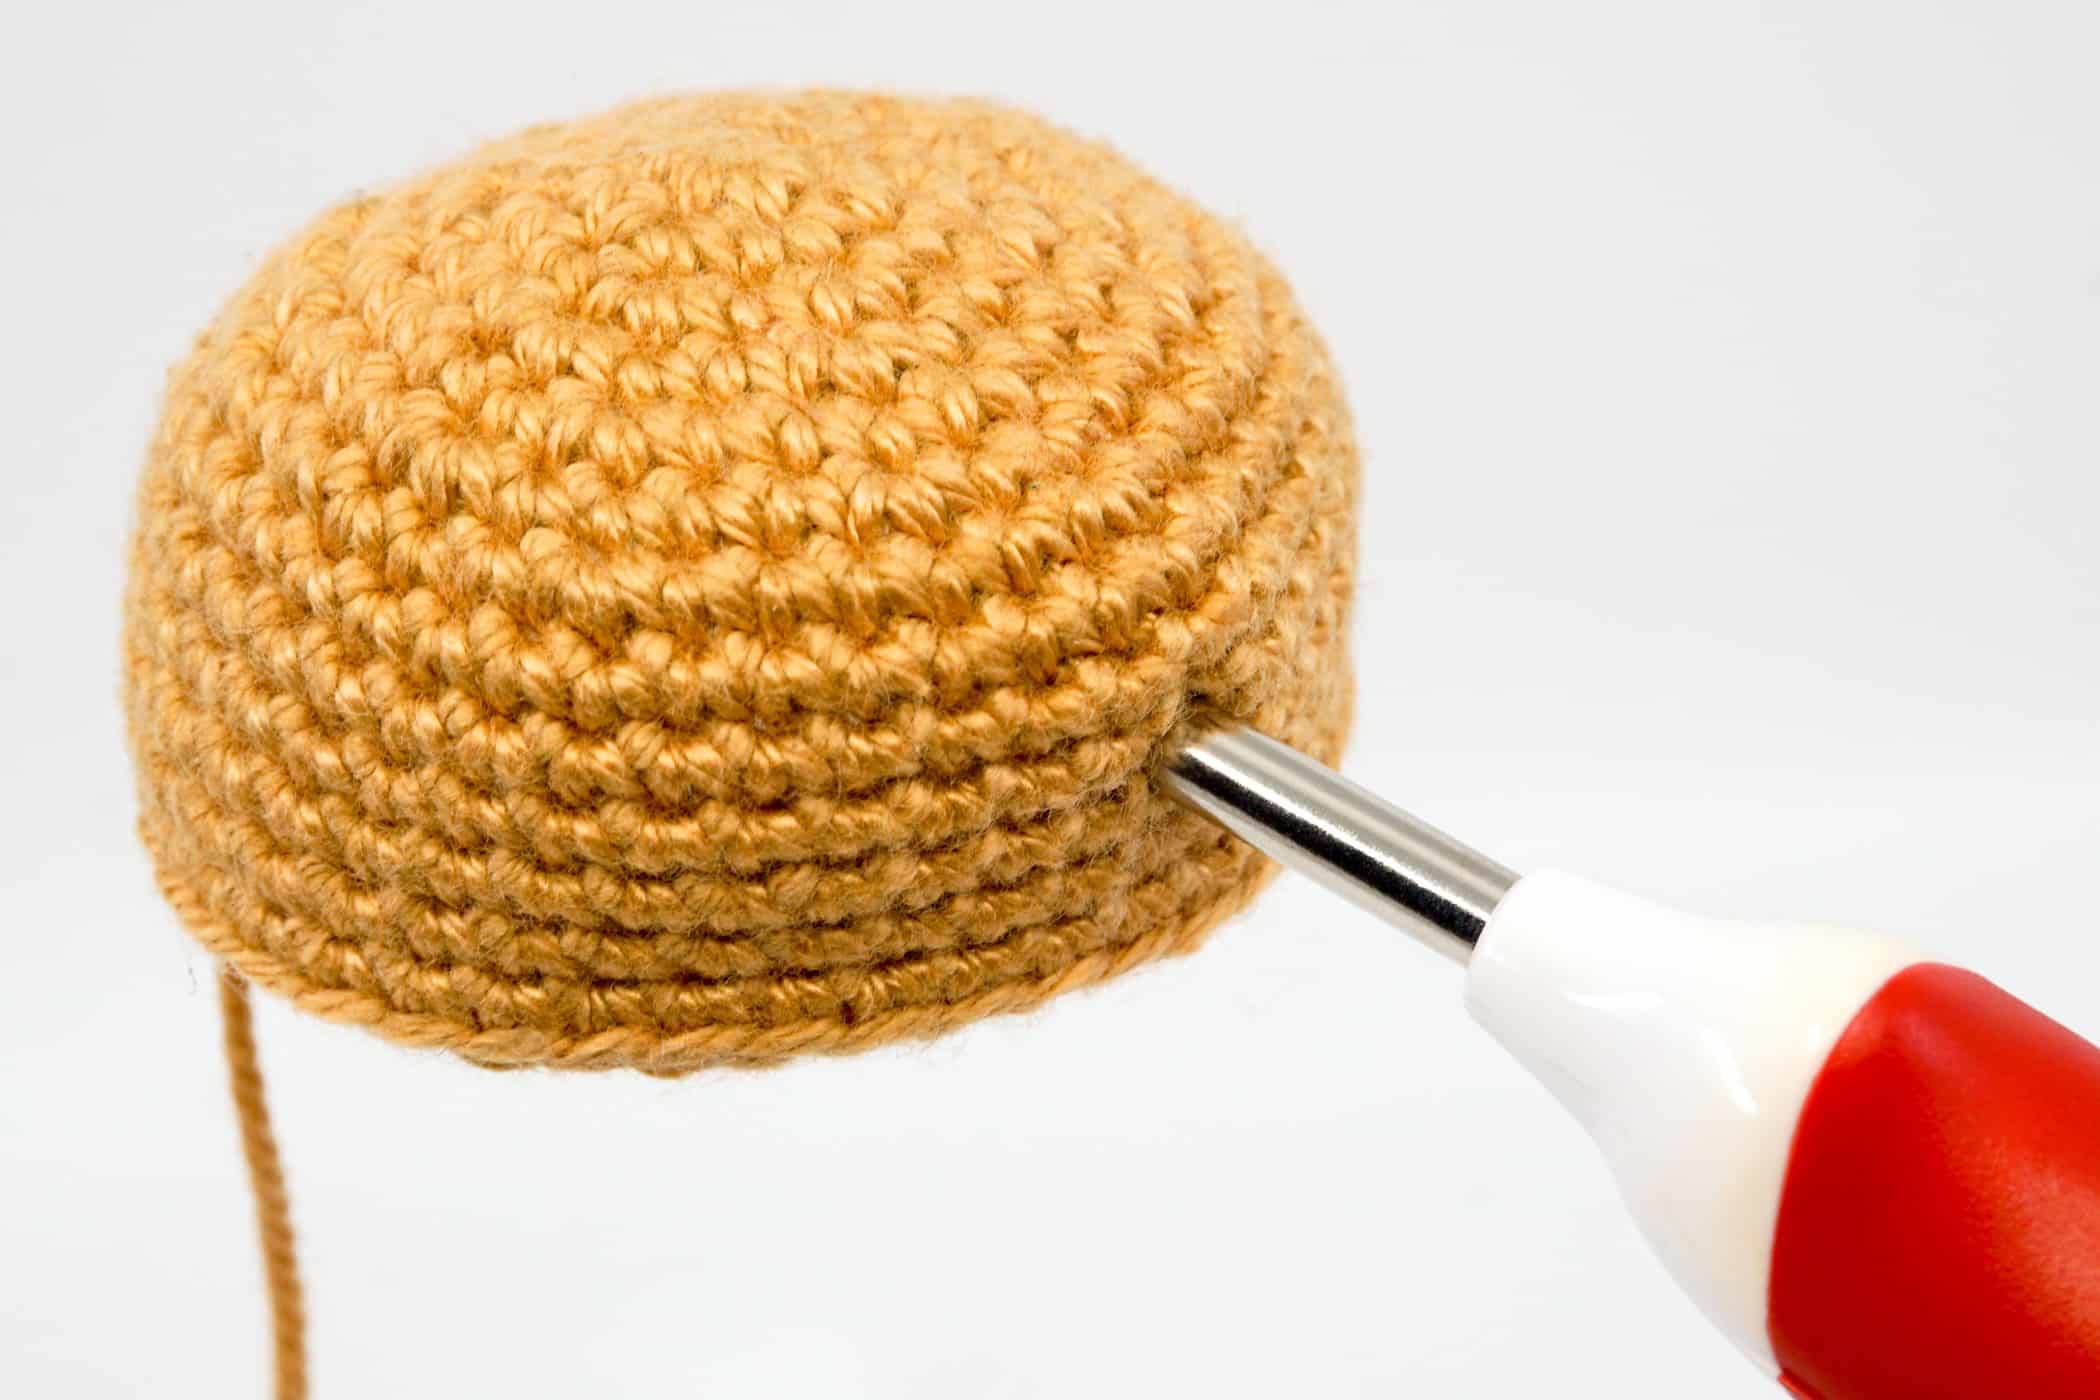
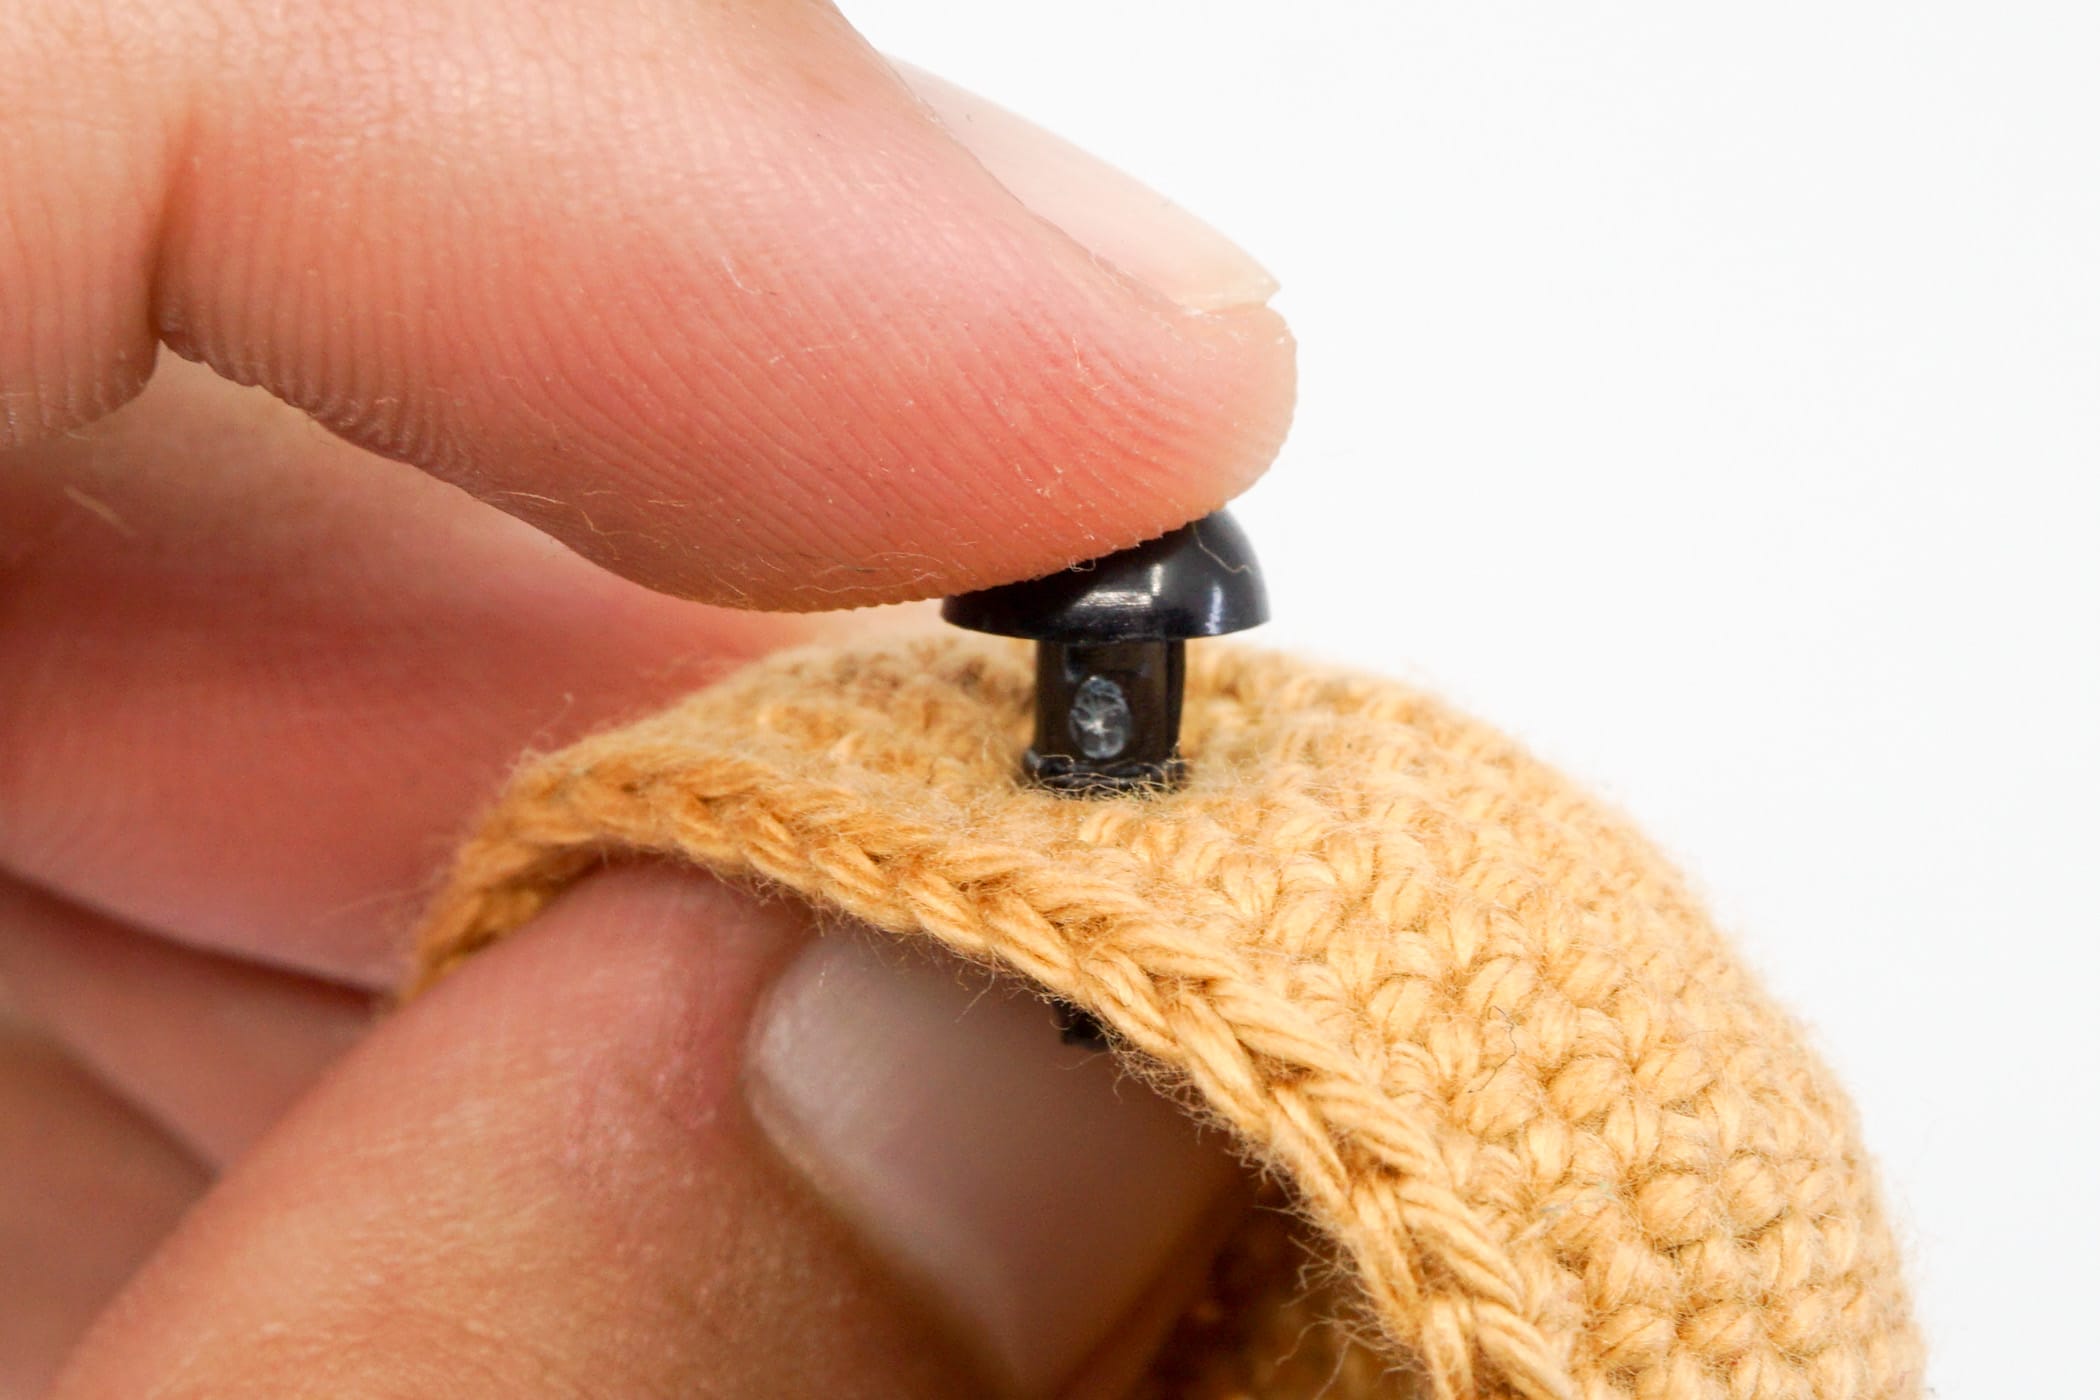
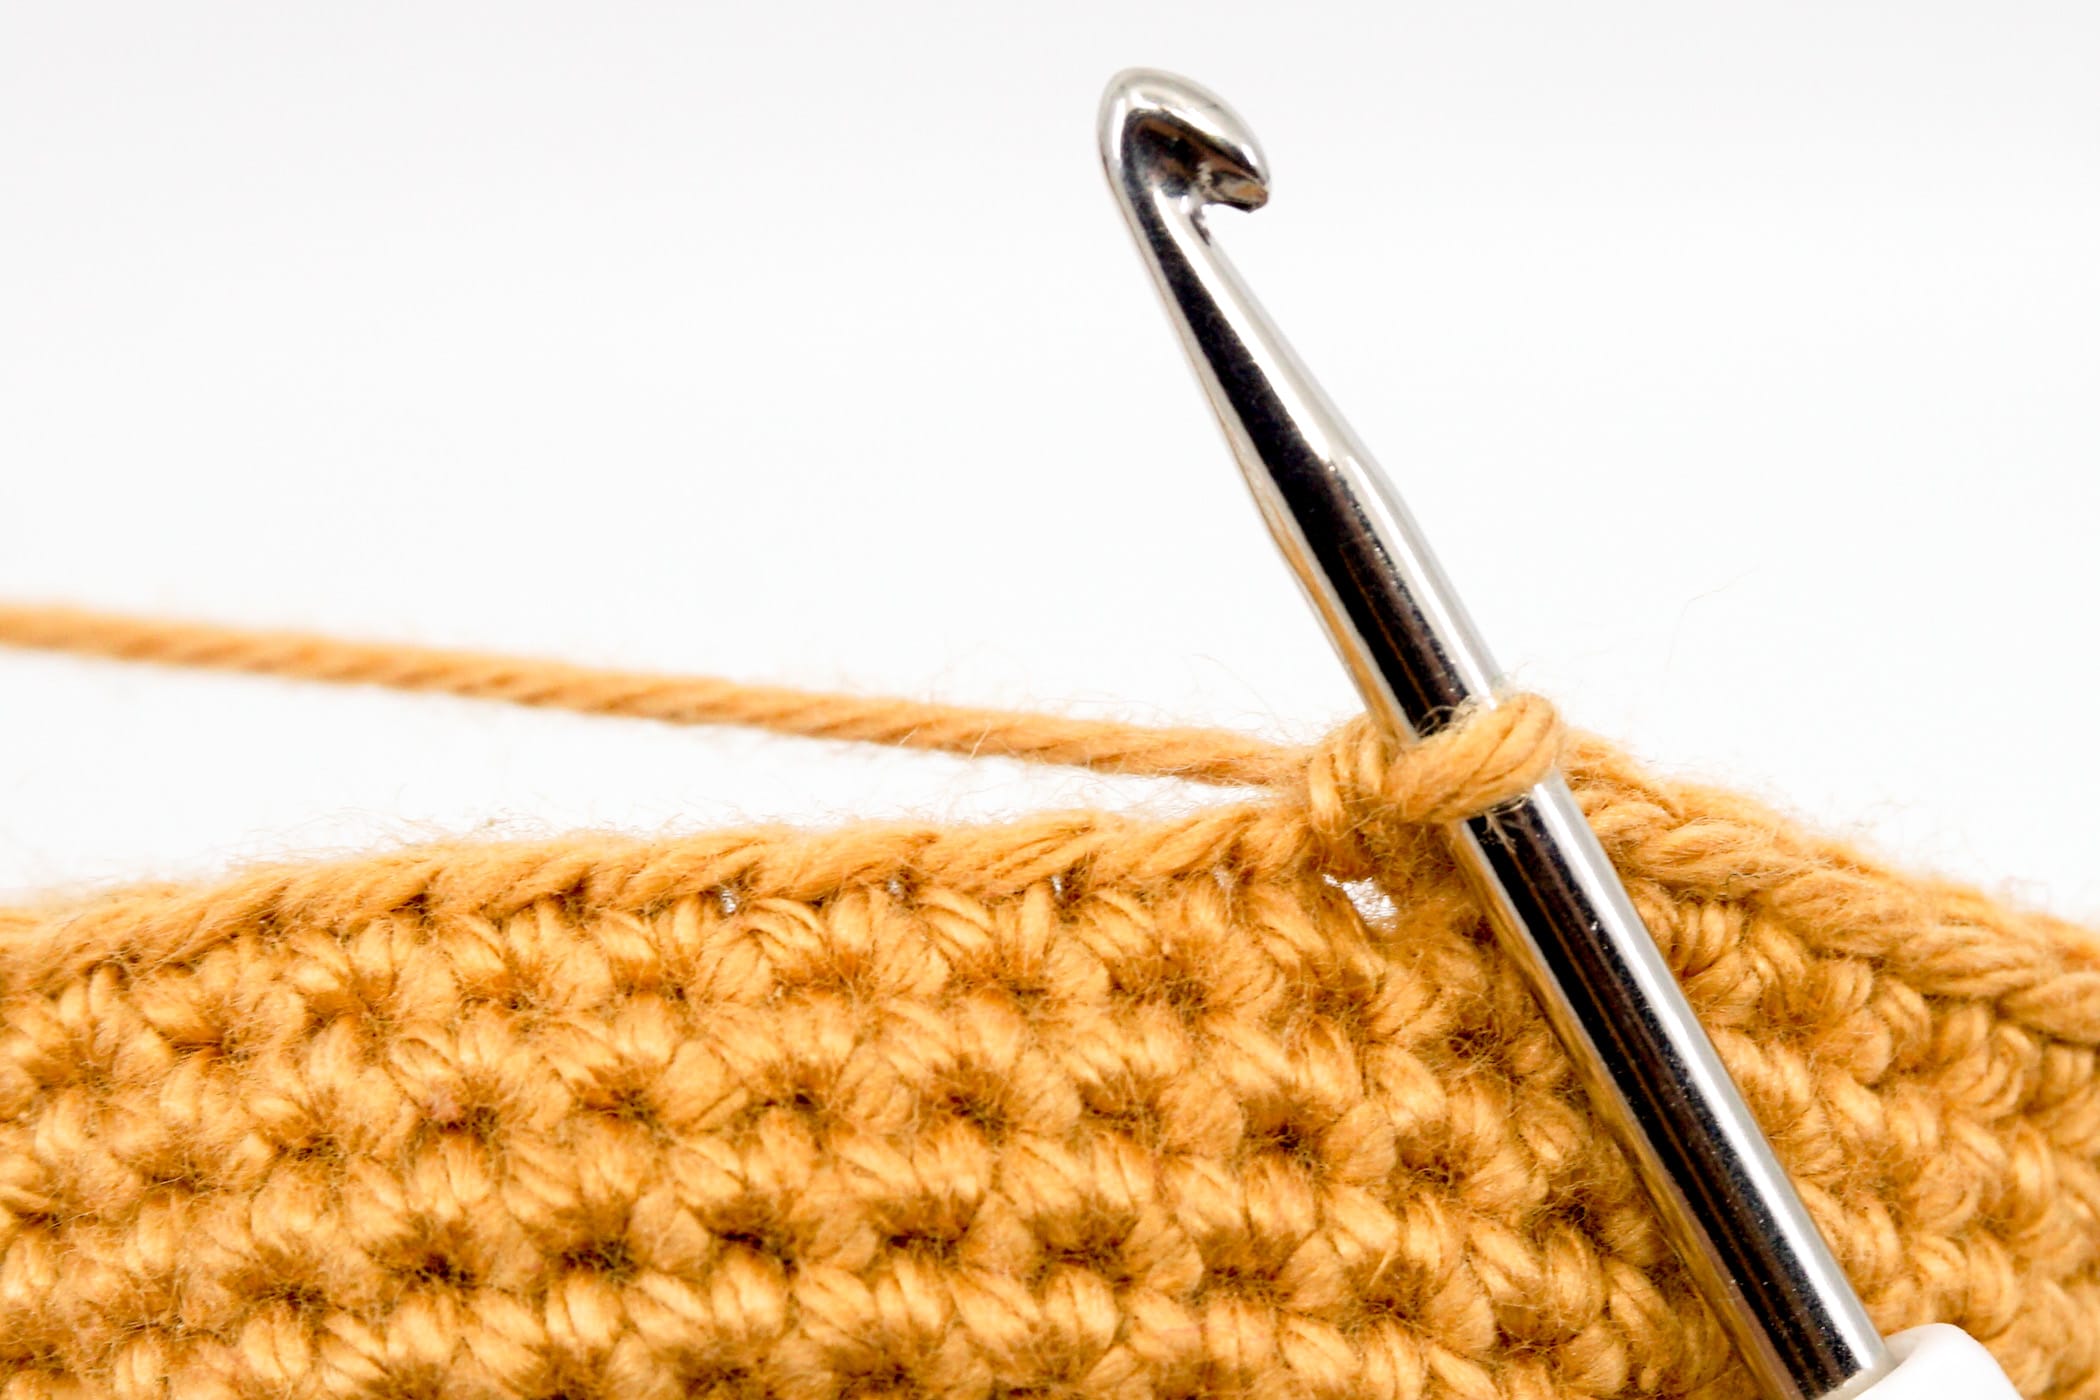
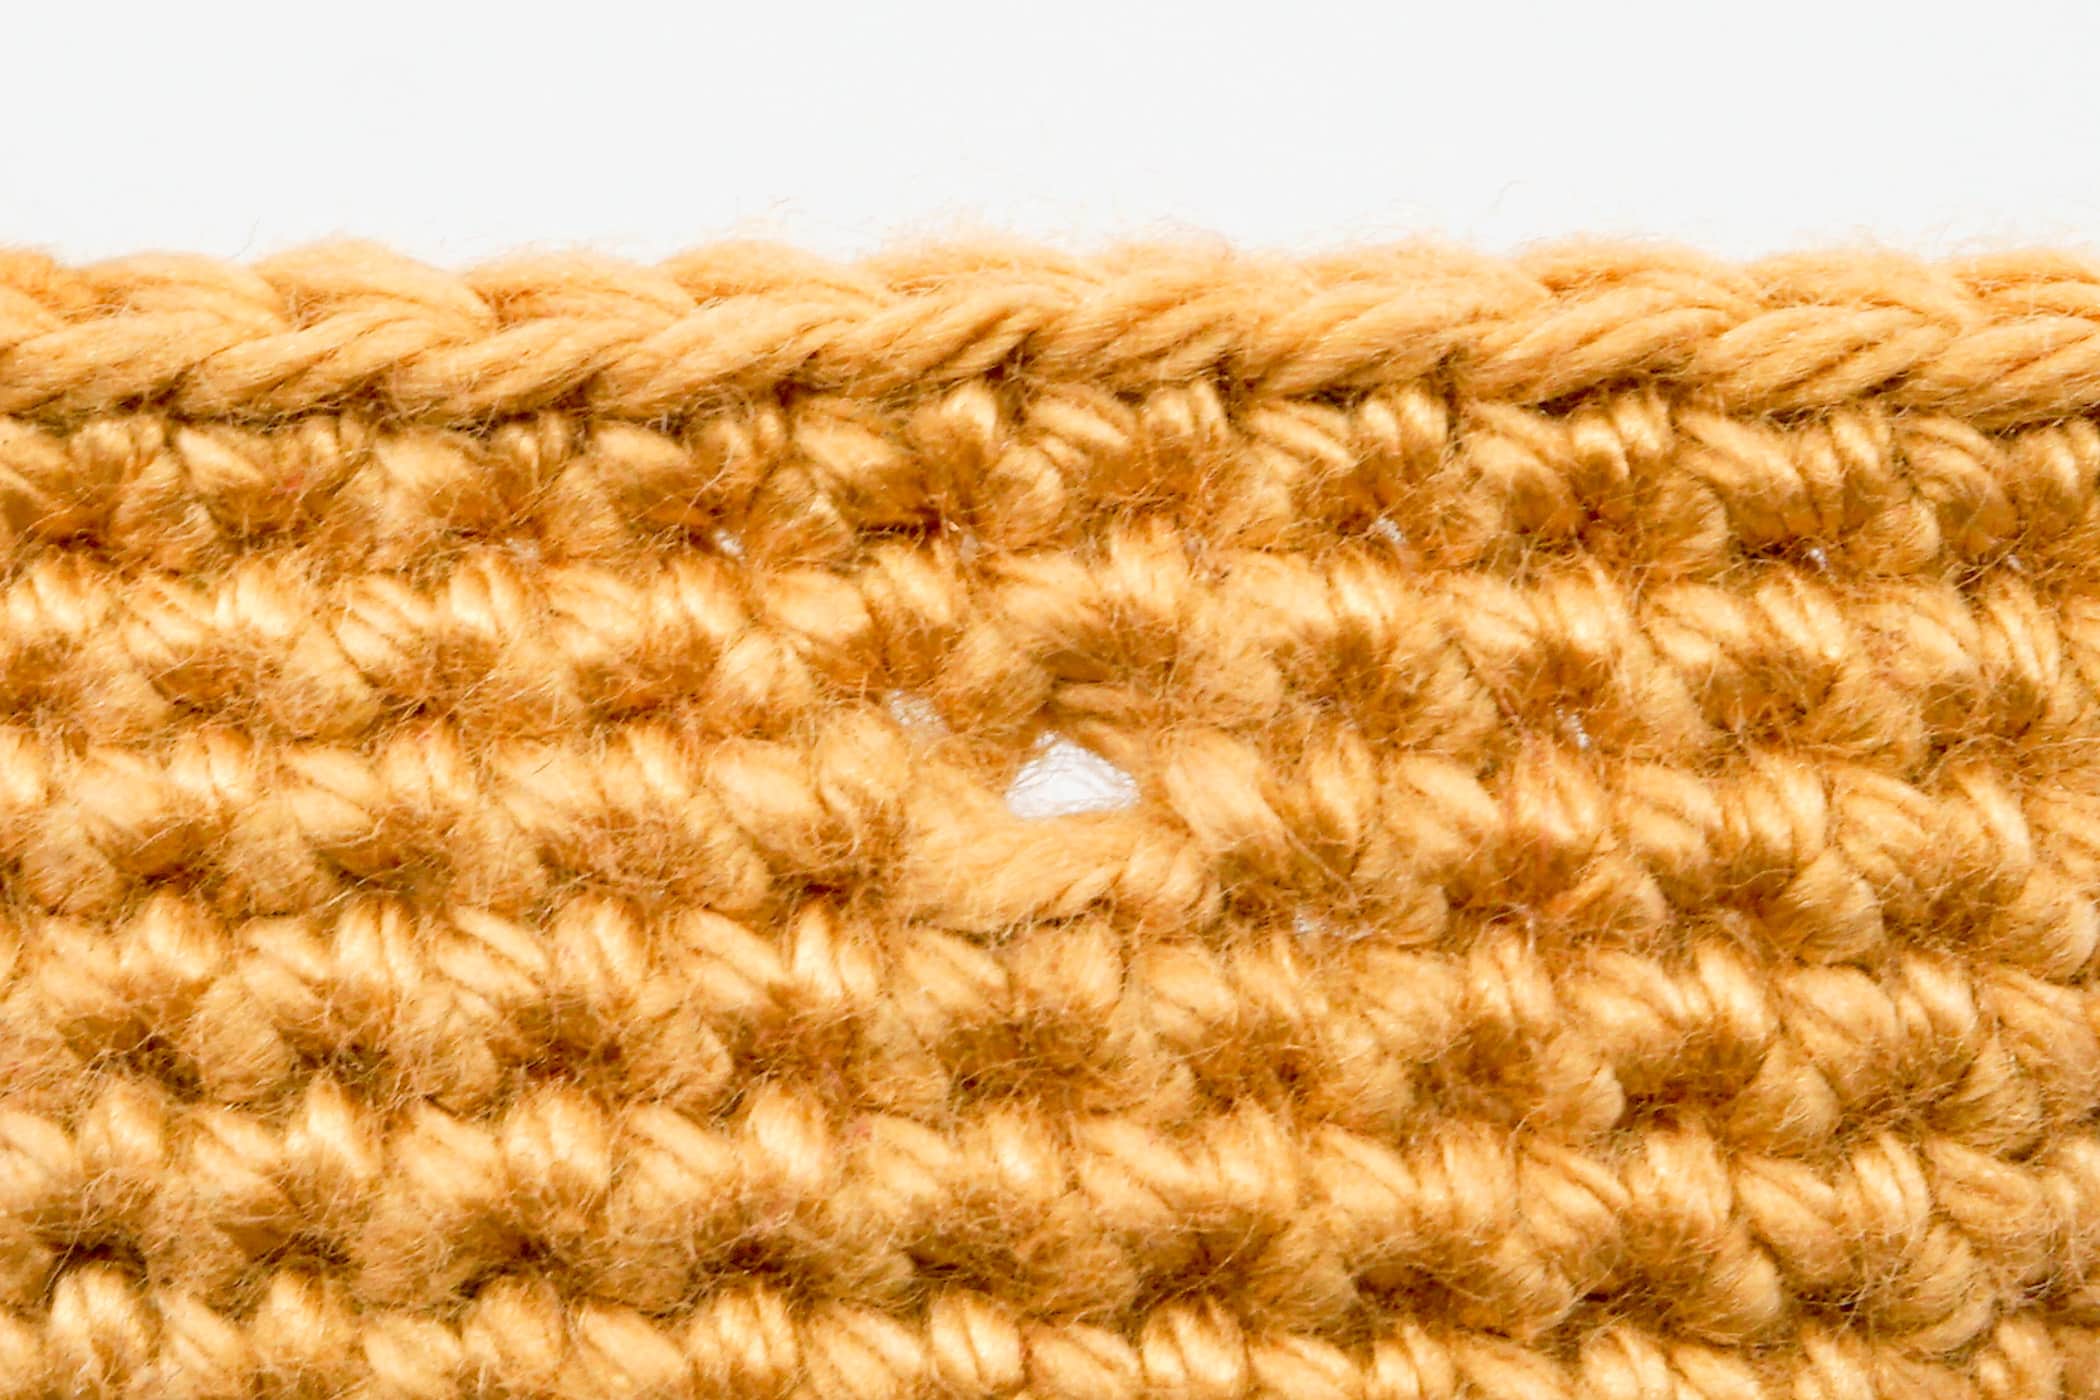
If you crochet relatively tightly, you will need to enlarge the stitches a little before attaching the eyes so that you are able to push the stem of the safety eye through the stitch pattern.
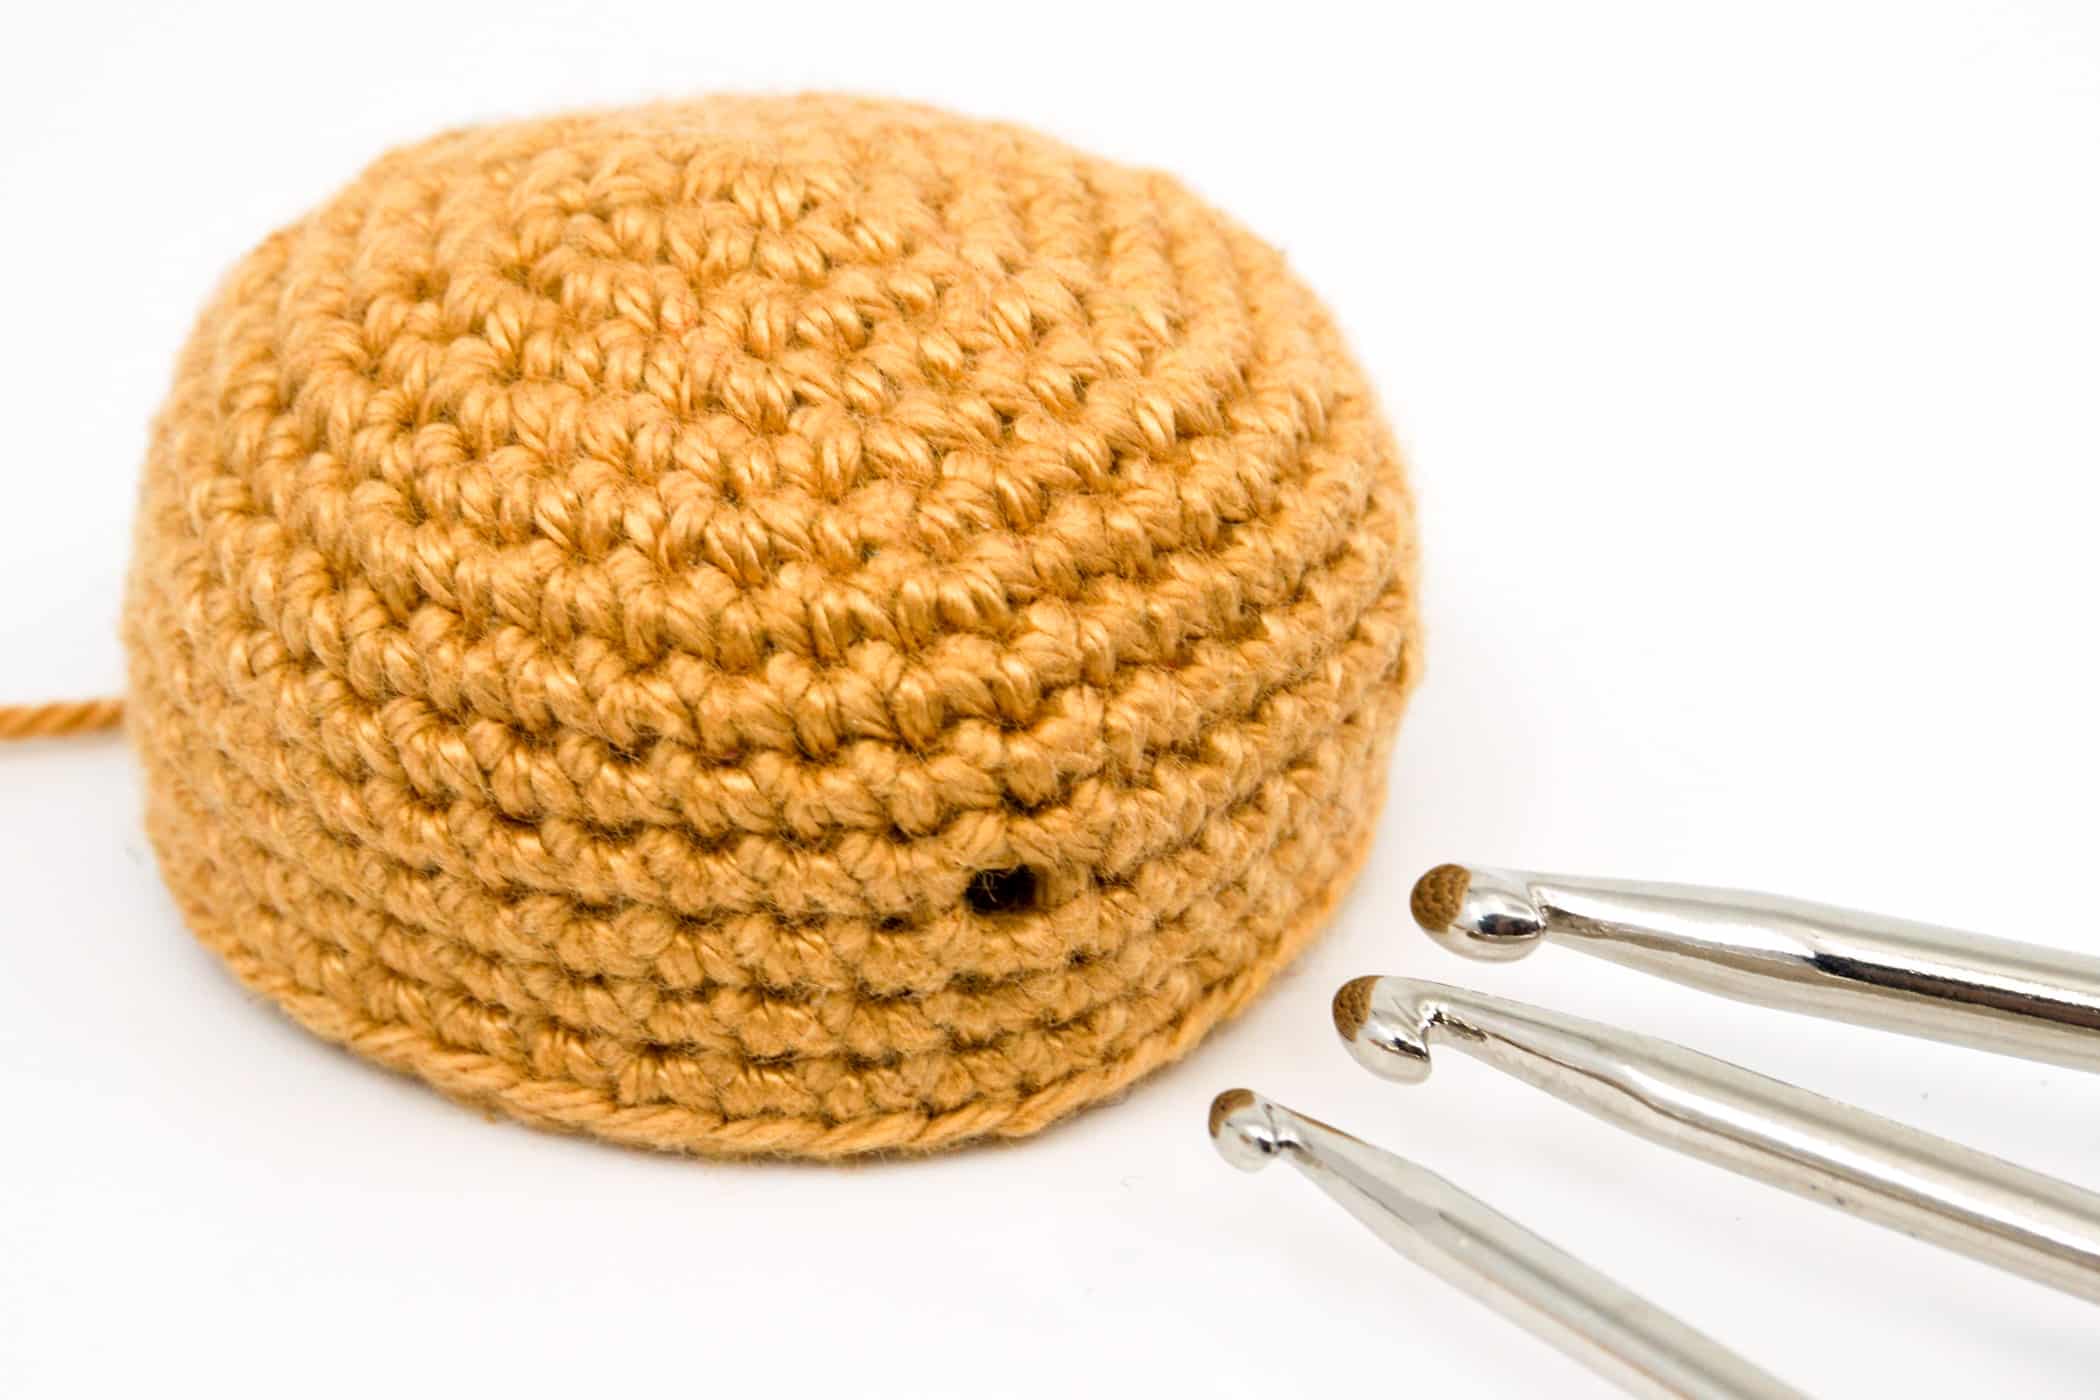
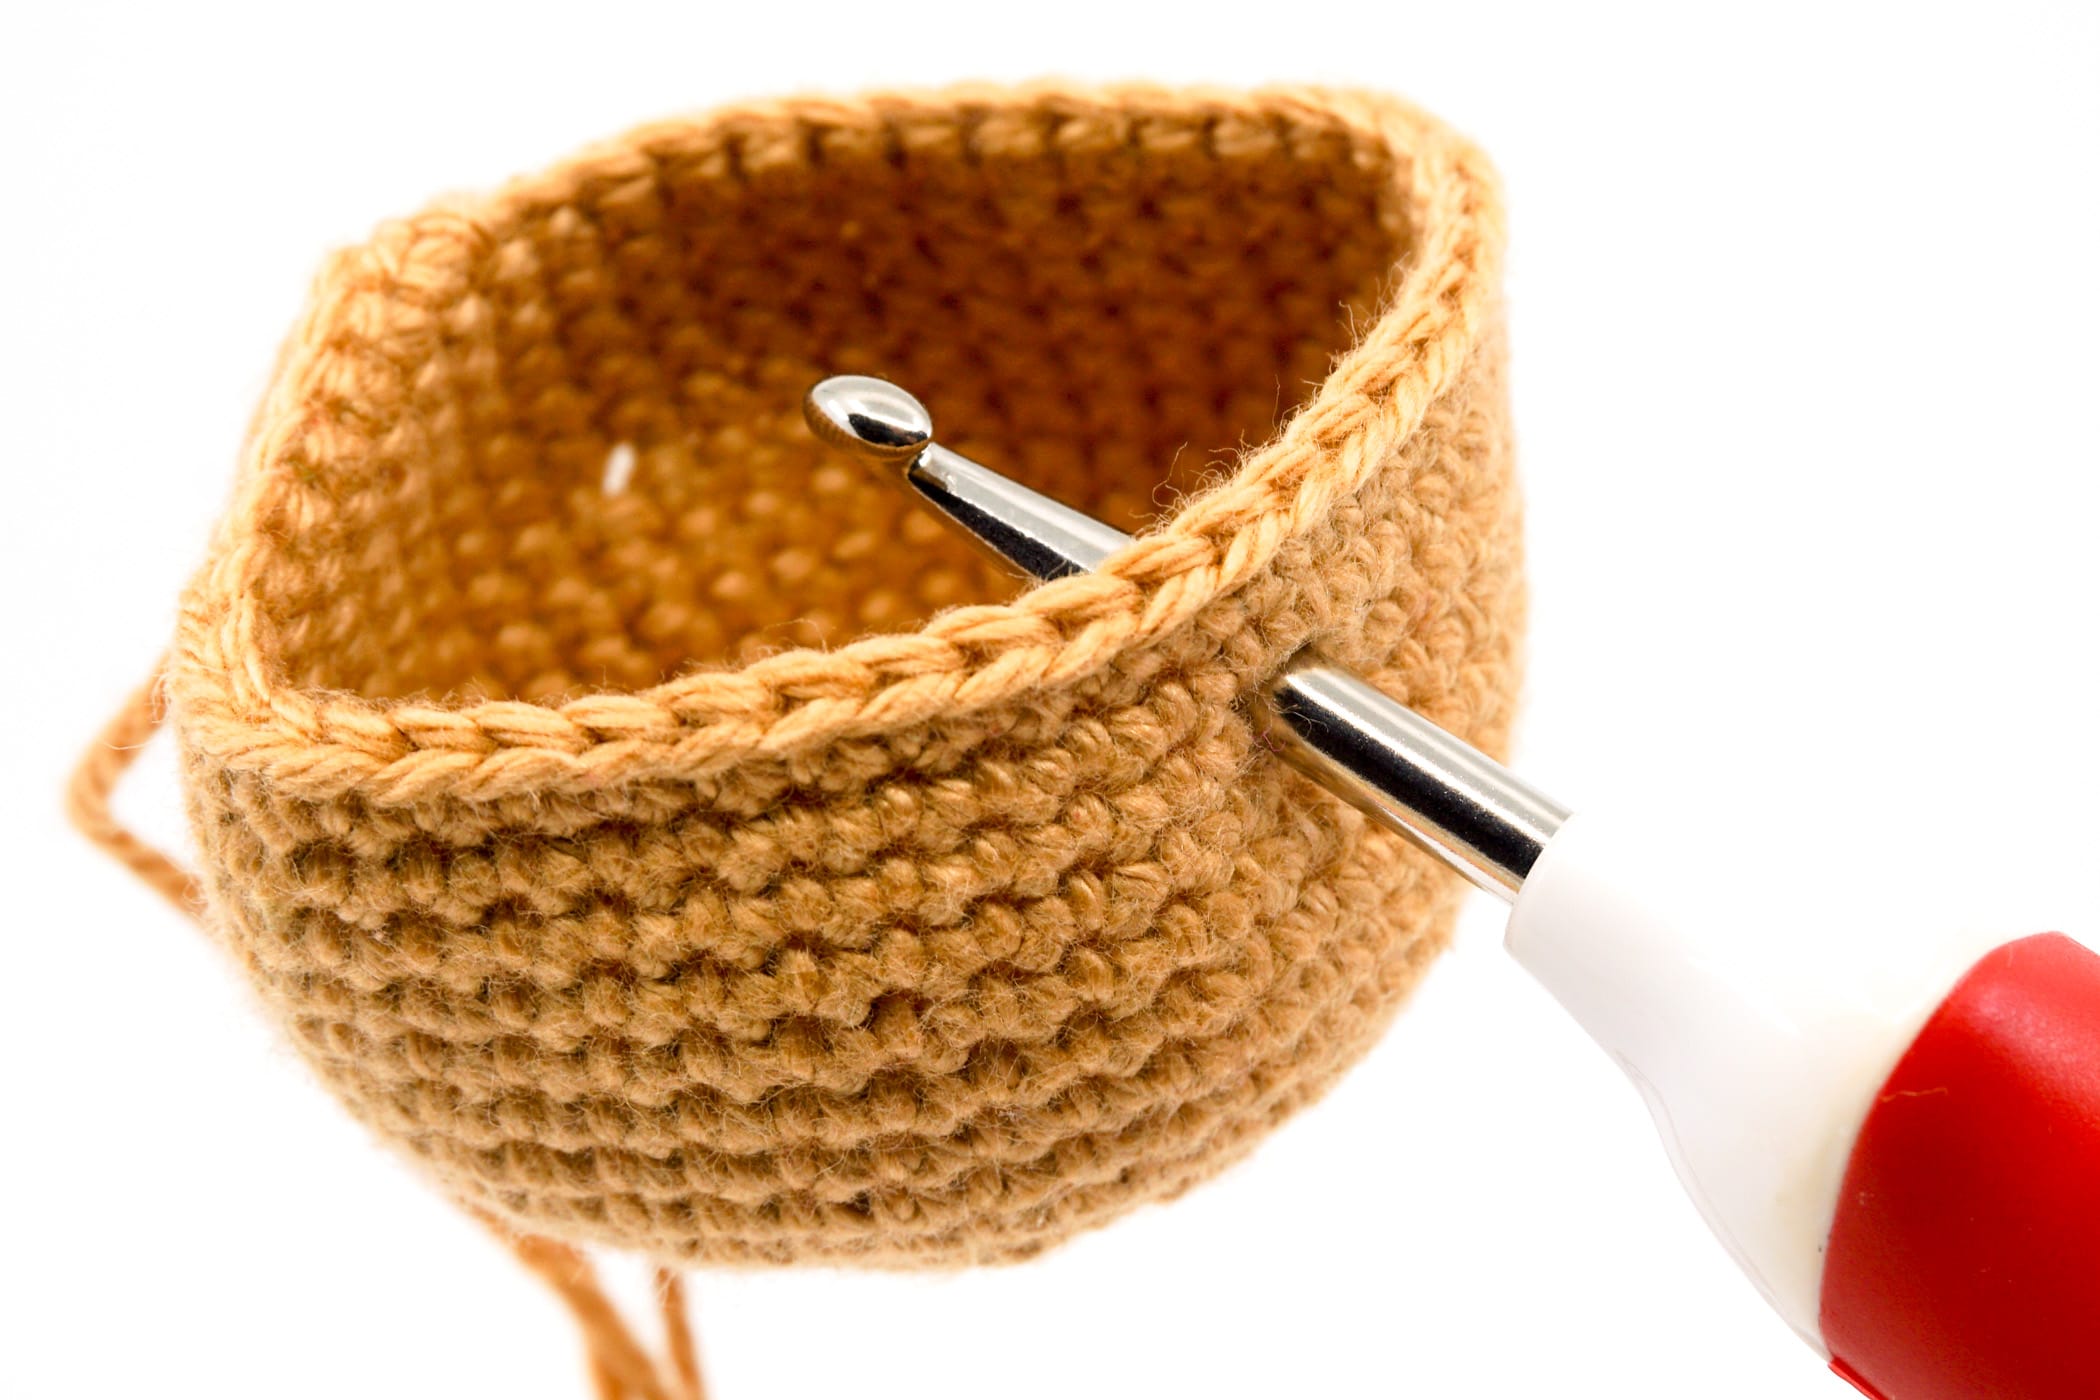
To do that, use crochet hooks that are getting thicker and thicker. First insert the crochet hook with which you also crocheted the crochet piece through the place where the eye is to be attached.
Then use larger and larger crochet hooks in the same place until the hole is big enough that you can push the stem through.
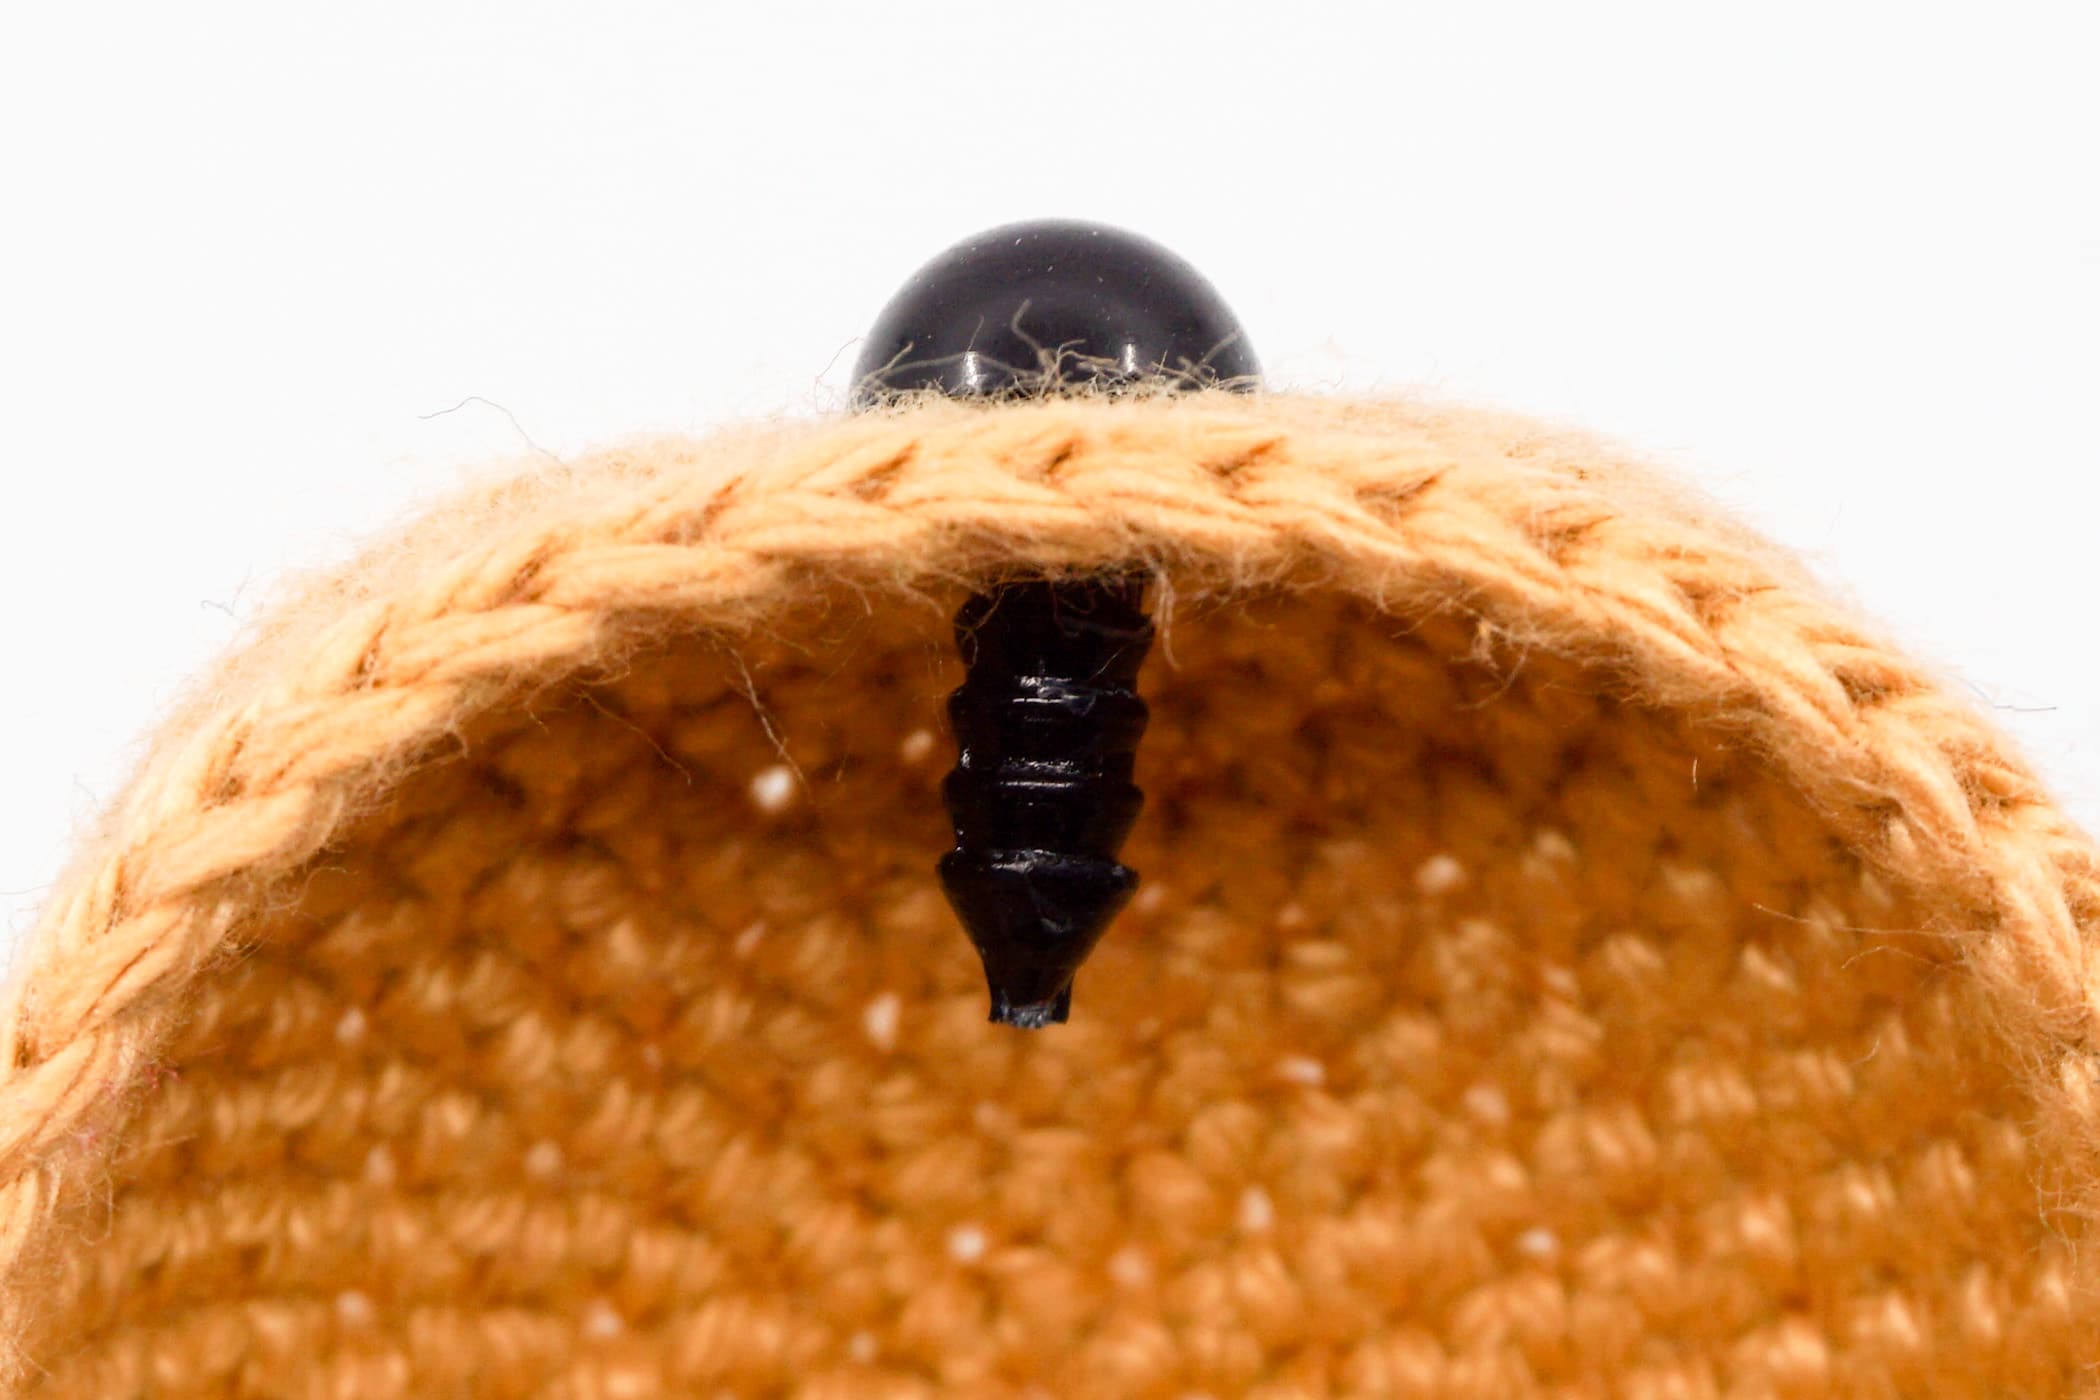
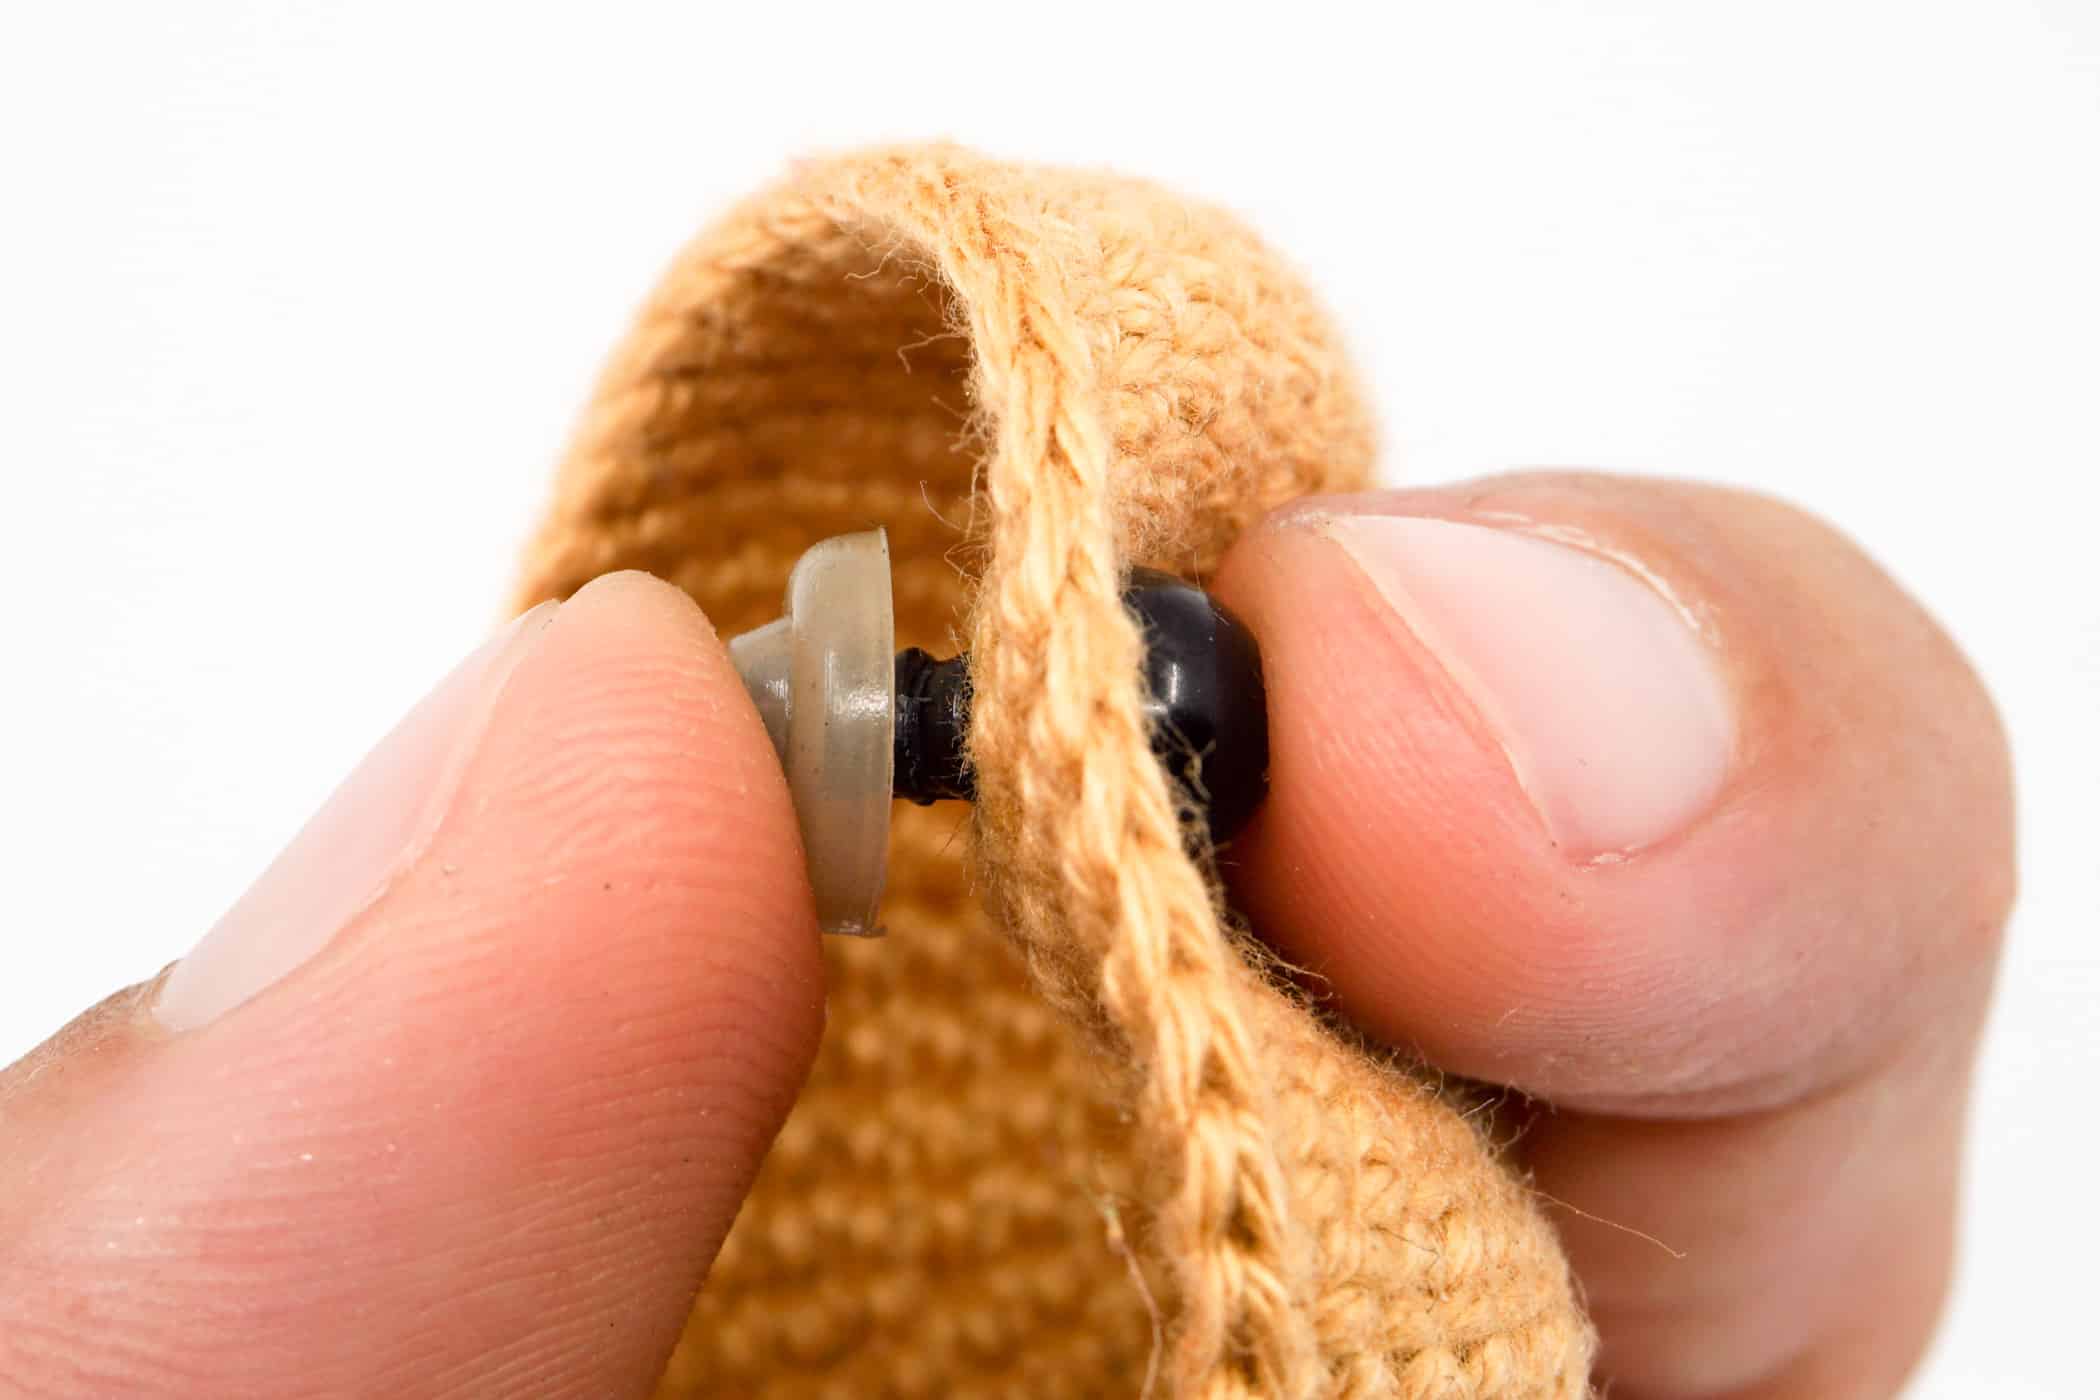
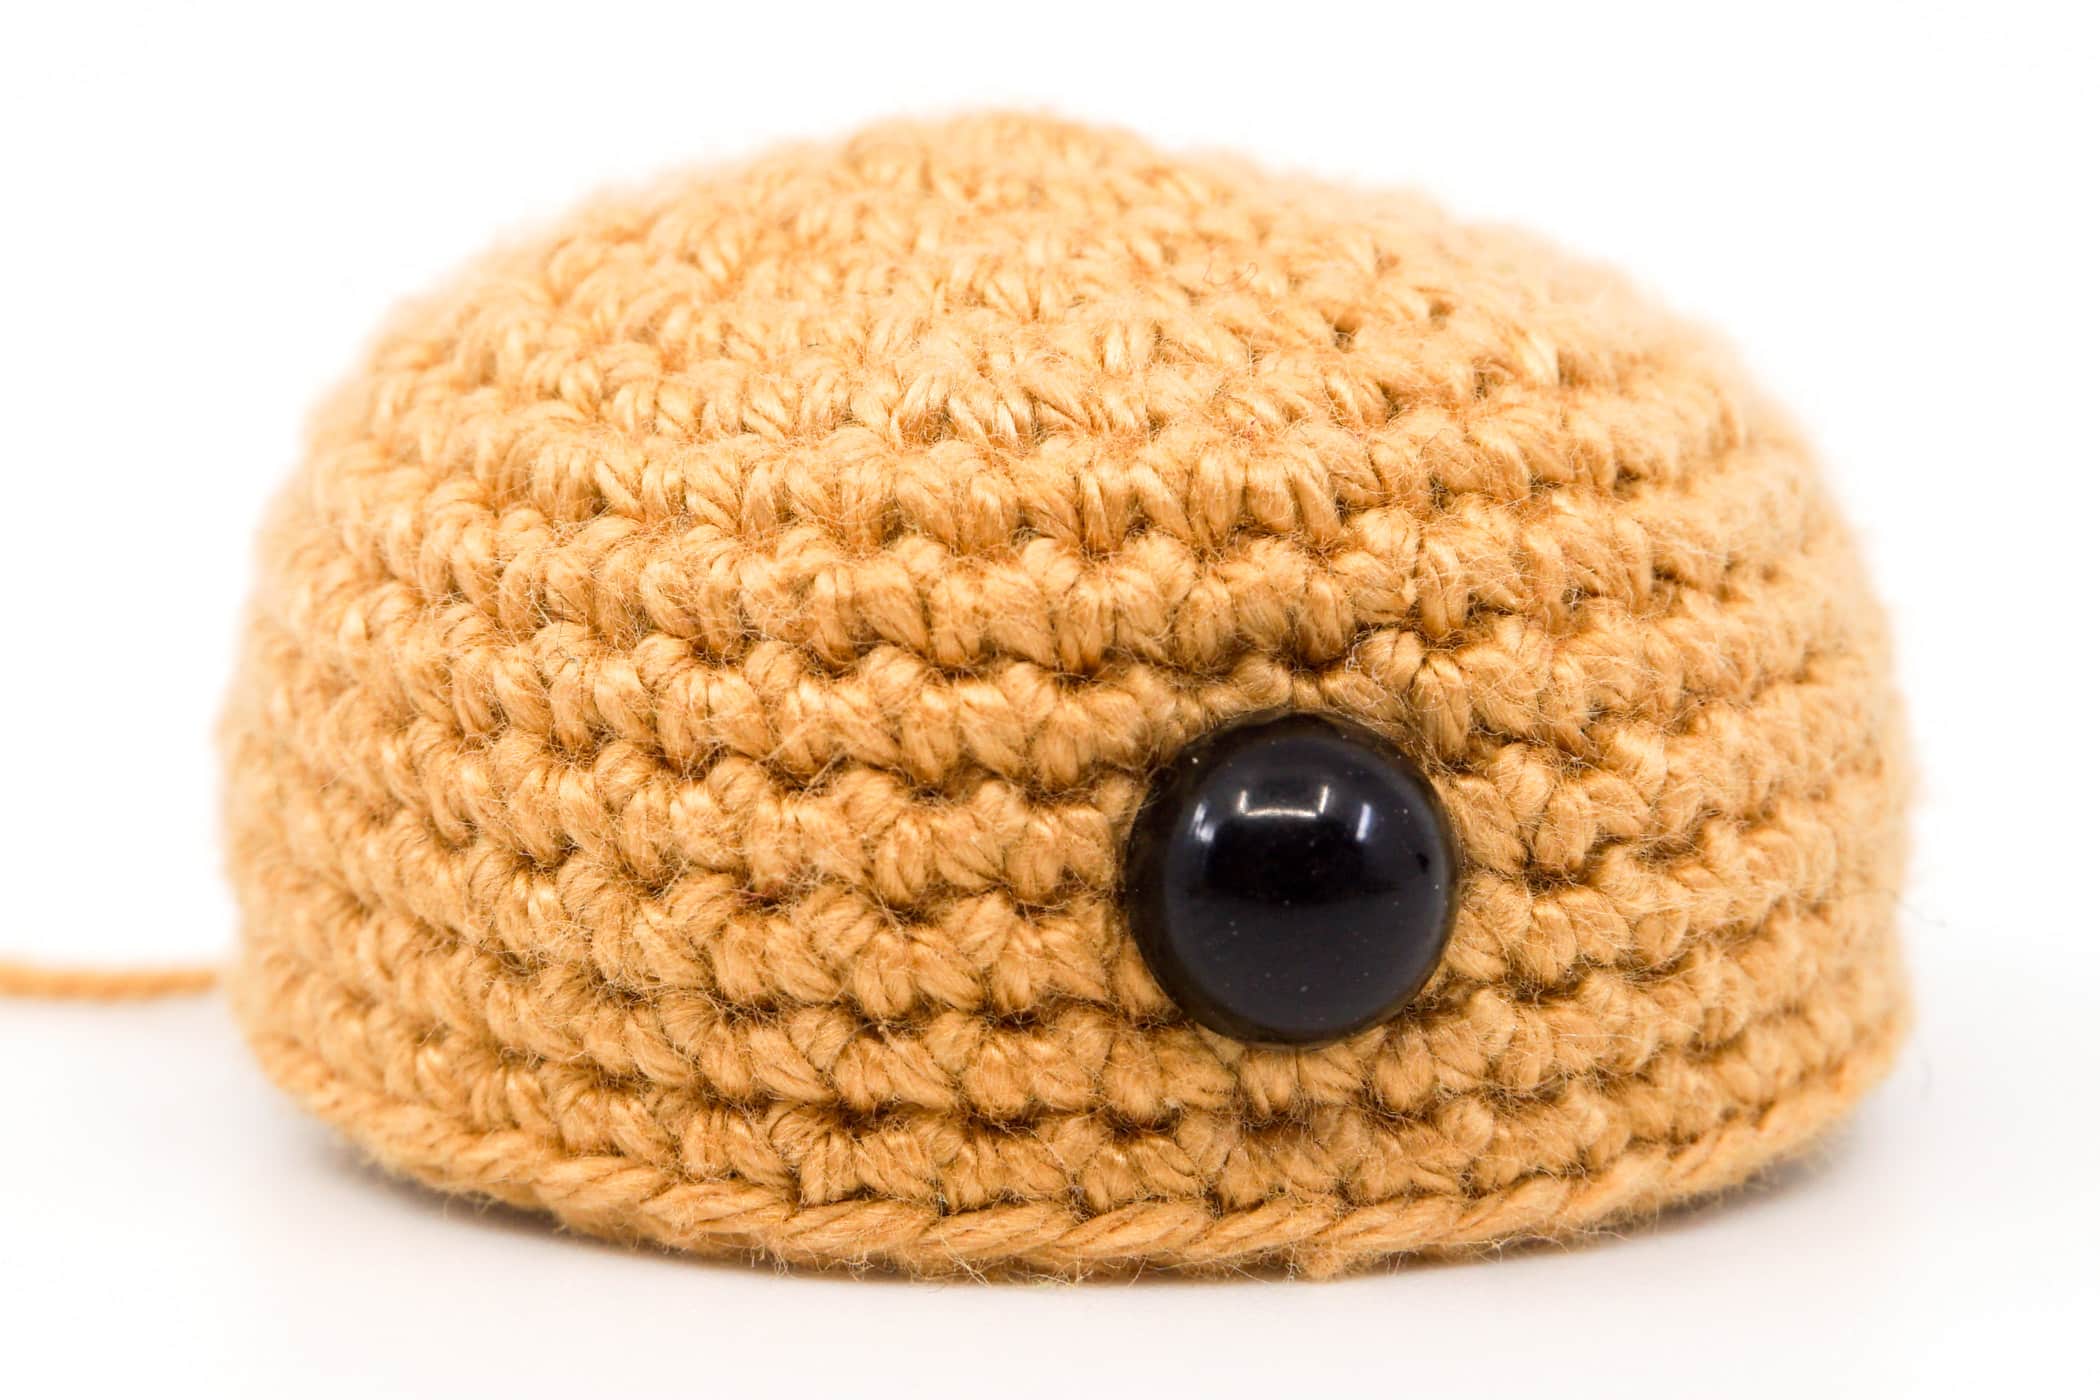
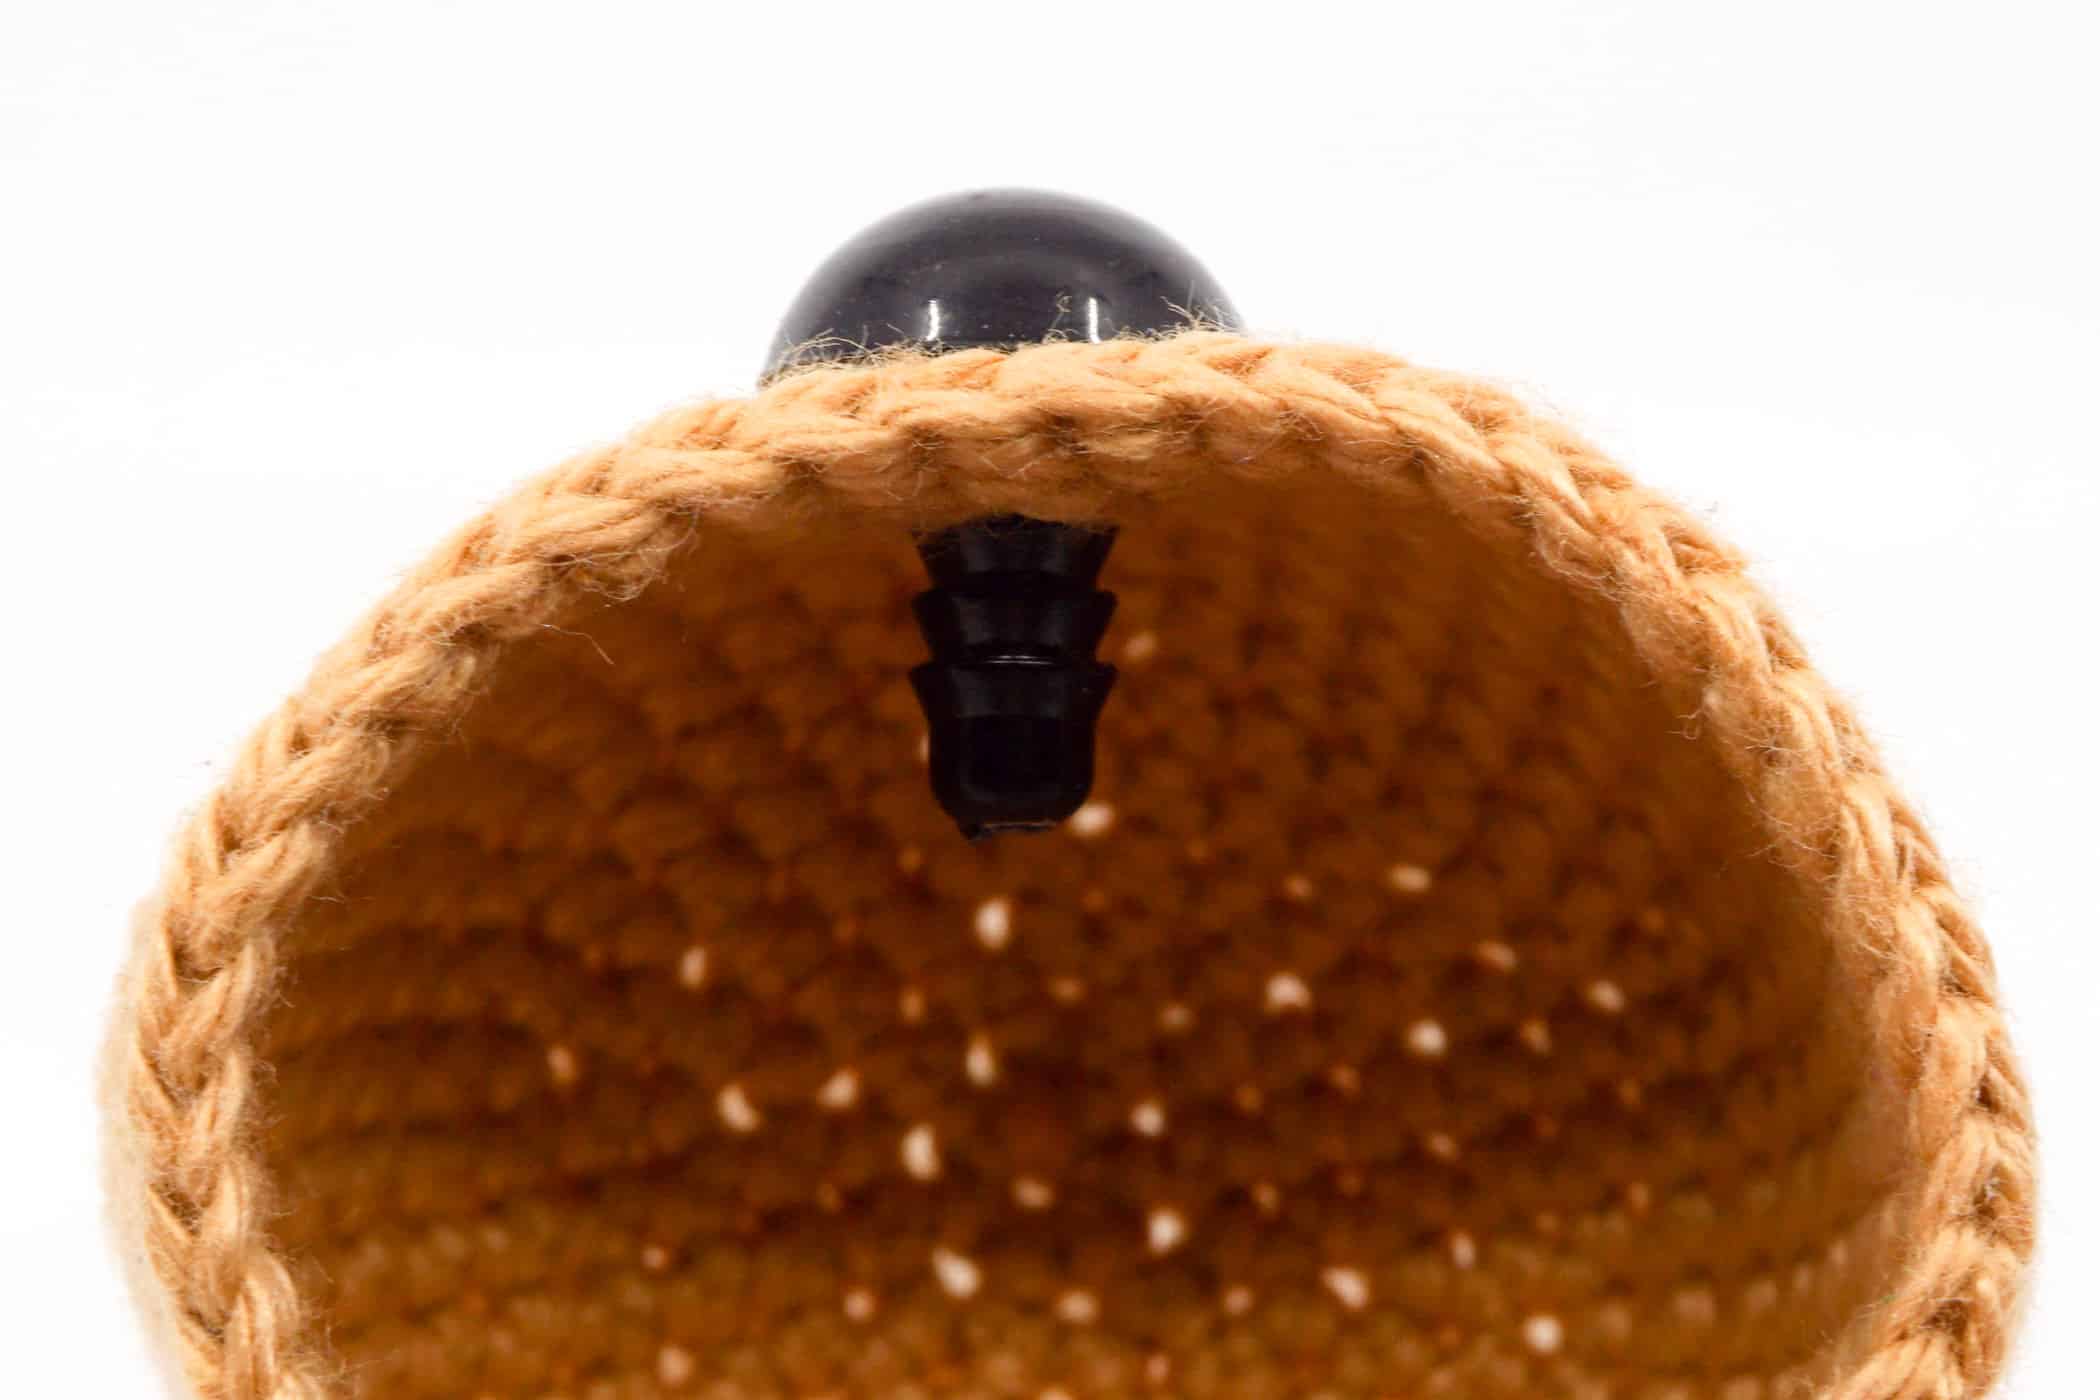
Push the eyes through the hole until the eye is flat on the crochet piece. Then slide the safety washer onto the stem on the inside. Push the washer tightly onto the stem until it touches the crochet piece. You have now safely attached the safety eye.


Attach Large Safety Eyes in Small Stitches
Large safety eyes usually have a much thicker stem to which the safety washer is attached. As a result, if you crochet very tightly, you simply won’t be able to make a big enough hole to push the stem through.
So that you don’t damage your crochet piece when trying to create a sufficiently large opening, there is the following possibility, provided you already know where you want to attach the safety eyes.
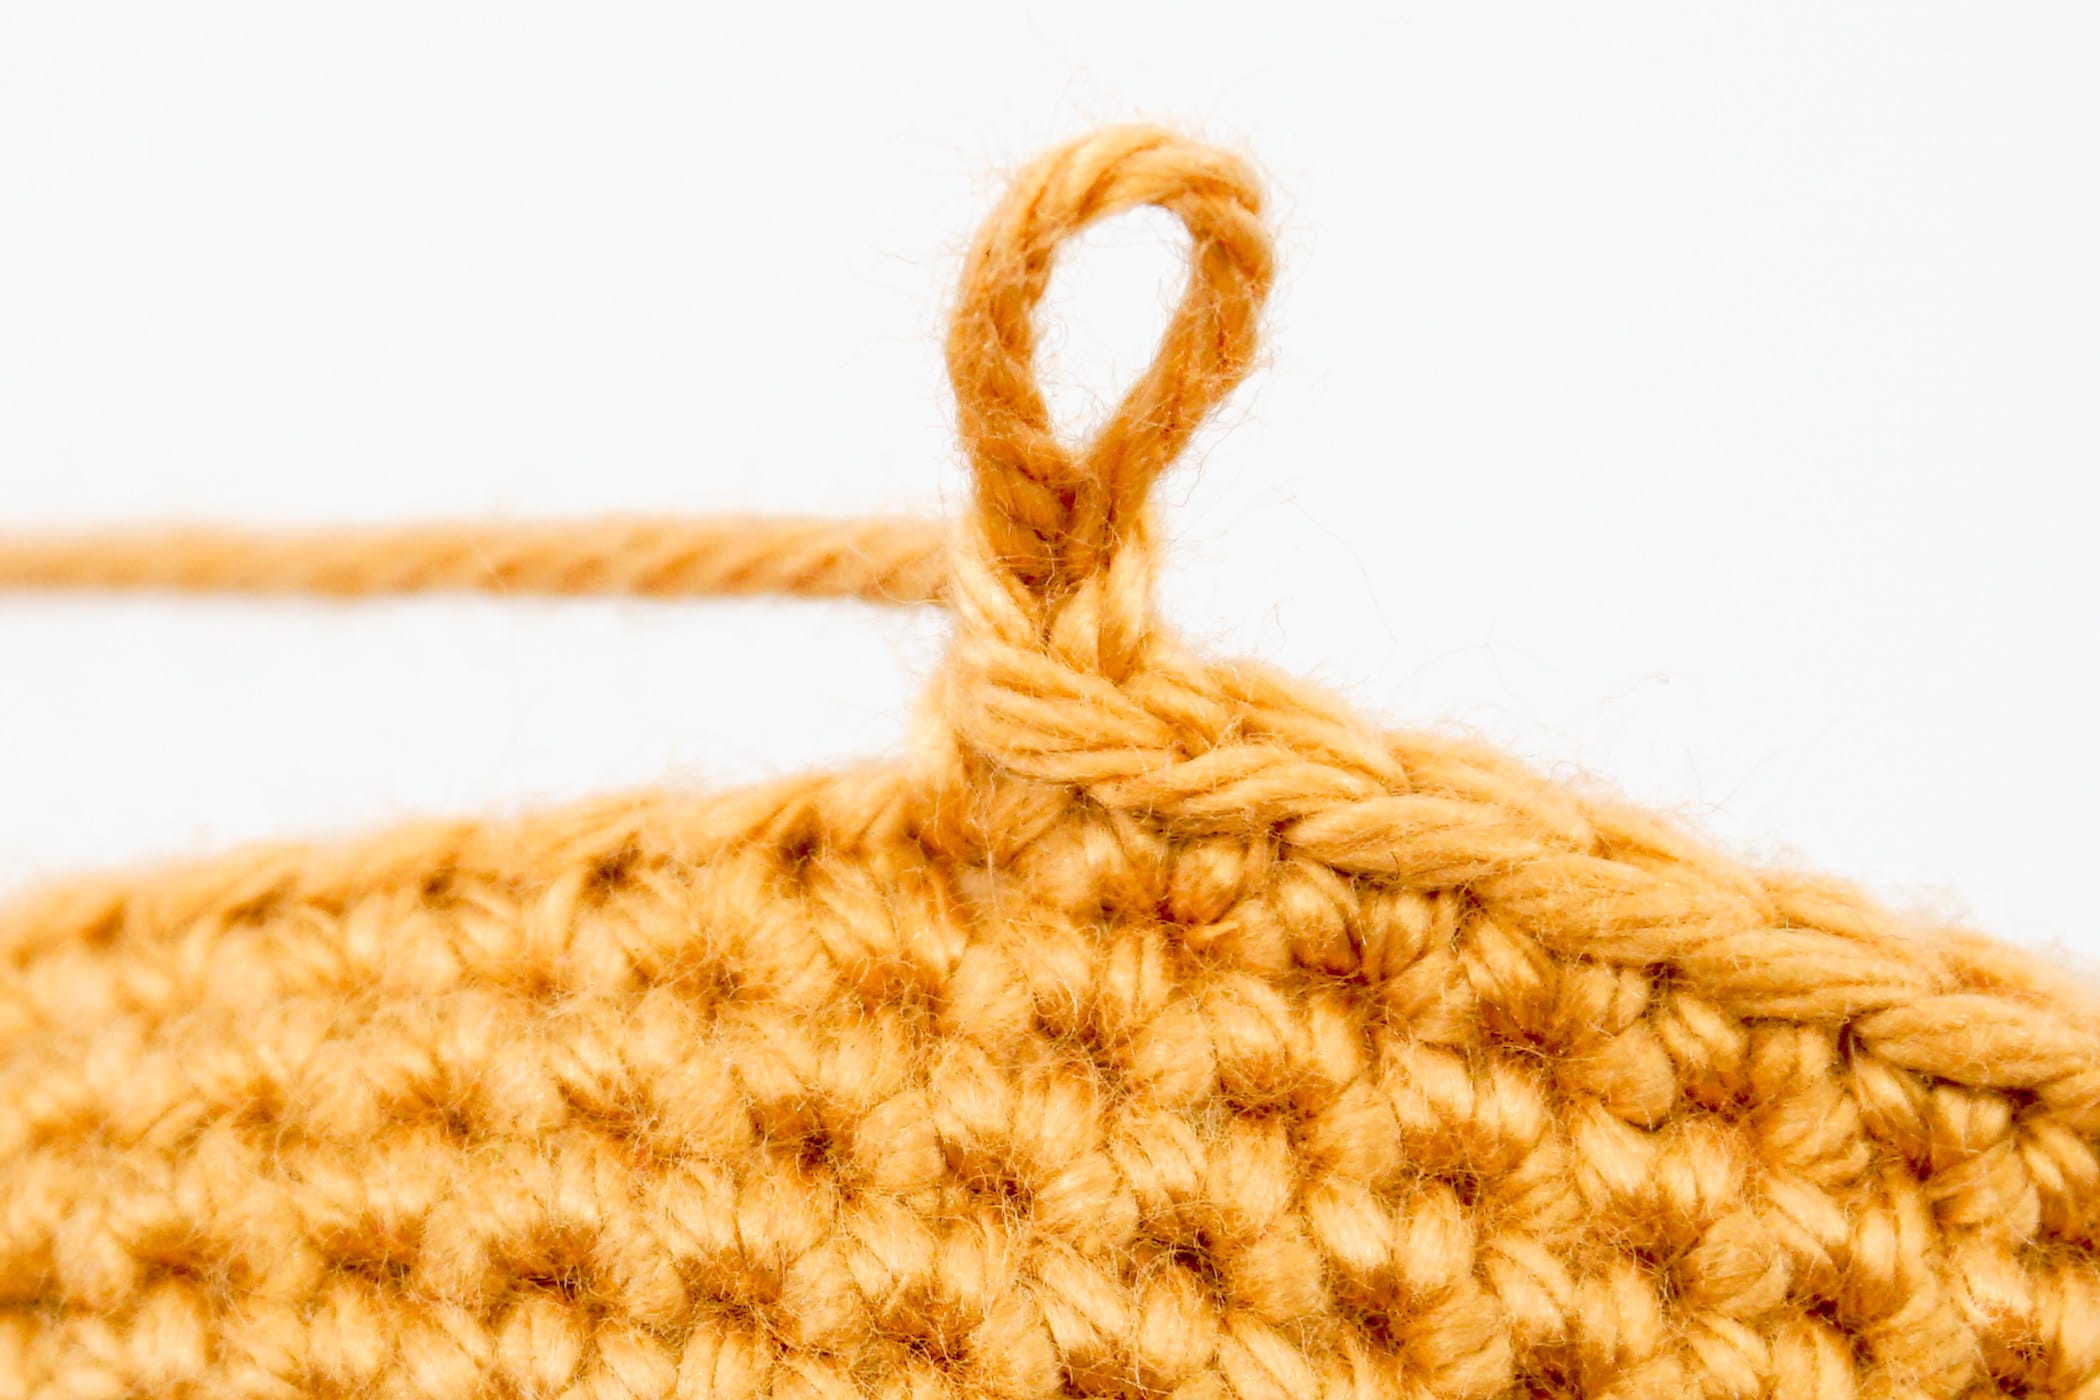
If you reach the point where you want to attach the large safety eye later, instead of crocheting the next stitch, crochet 1 chain stitch and crochet the next regular stitch to be crocheted in the 2nd stitch on the crochet piece, i.e. you skip one stitch.
The chain stitch bridges the unused stitch and you already have a much larger opening to later attach your big safety eye using the usual method.
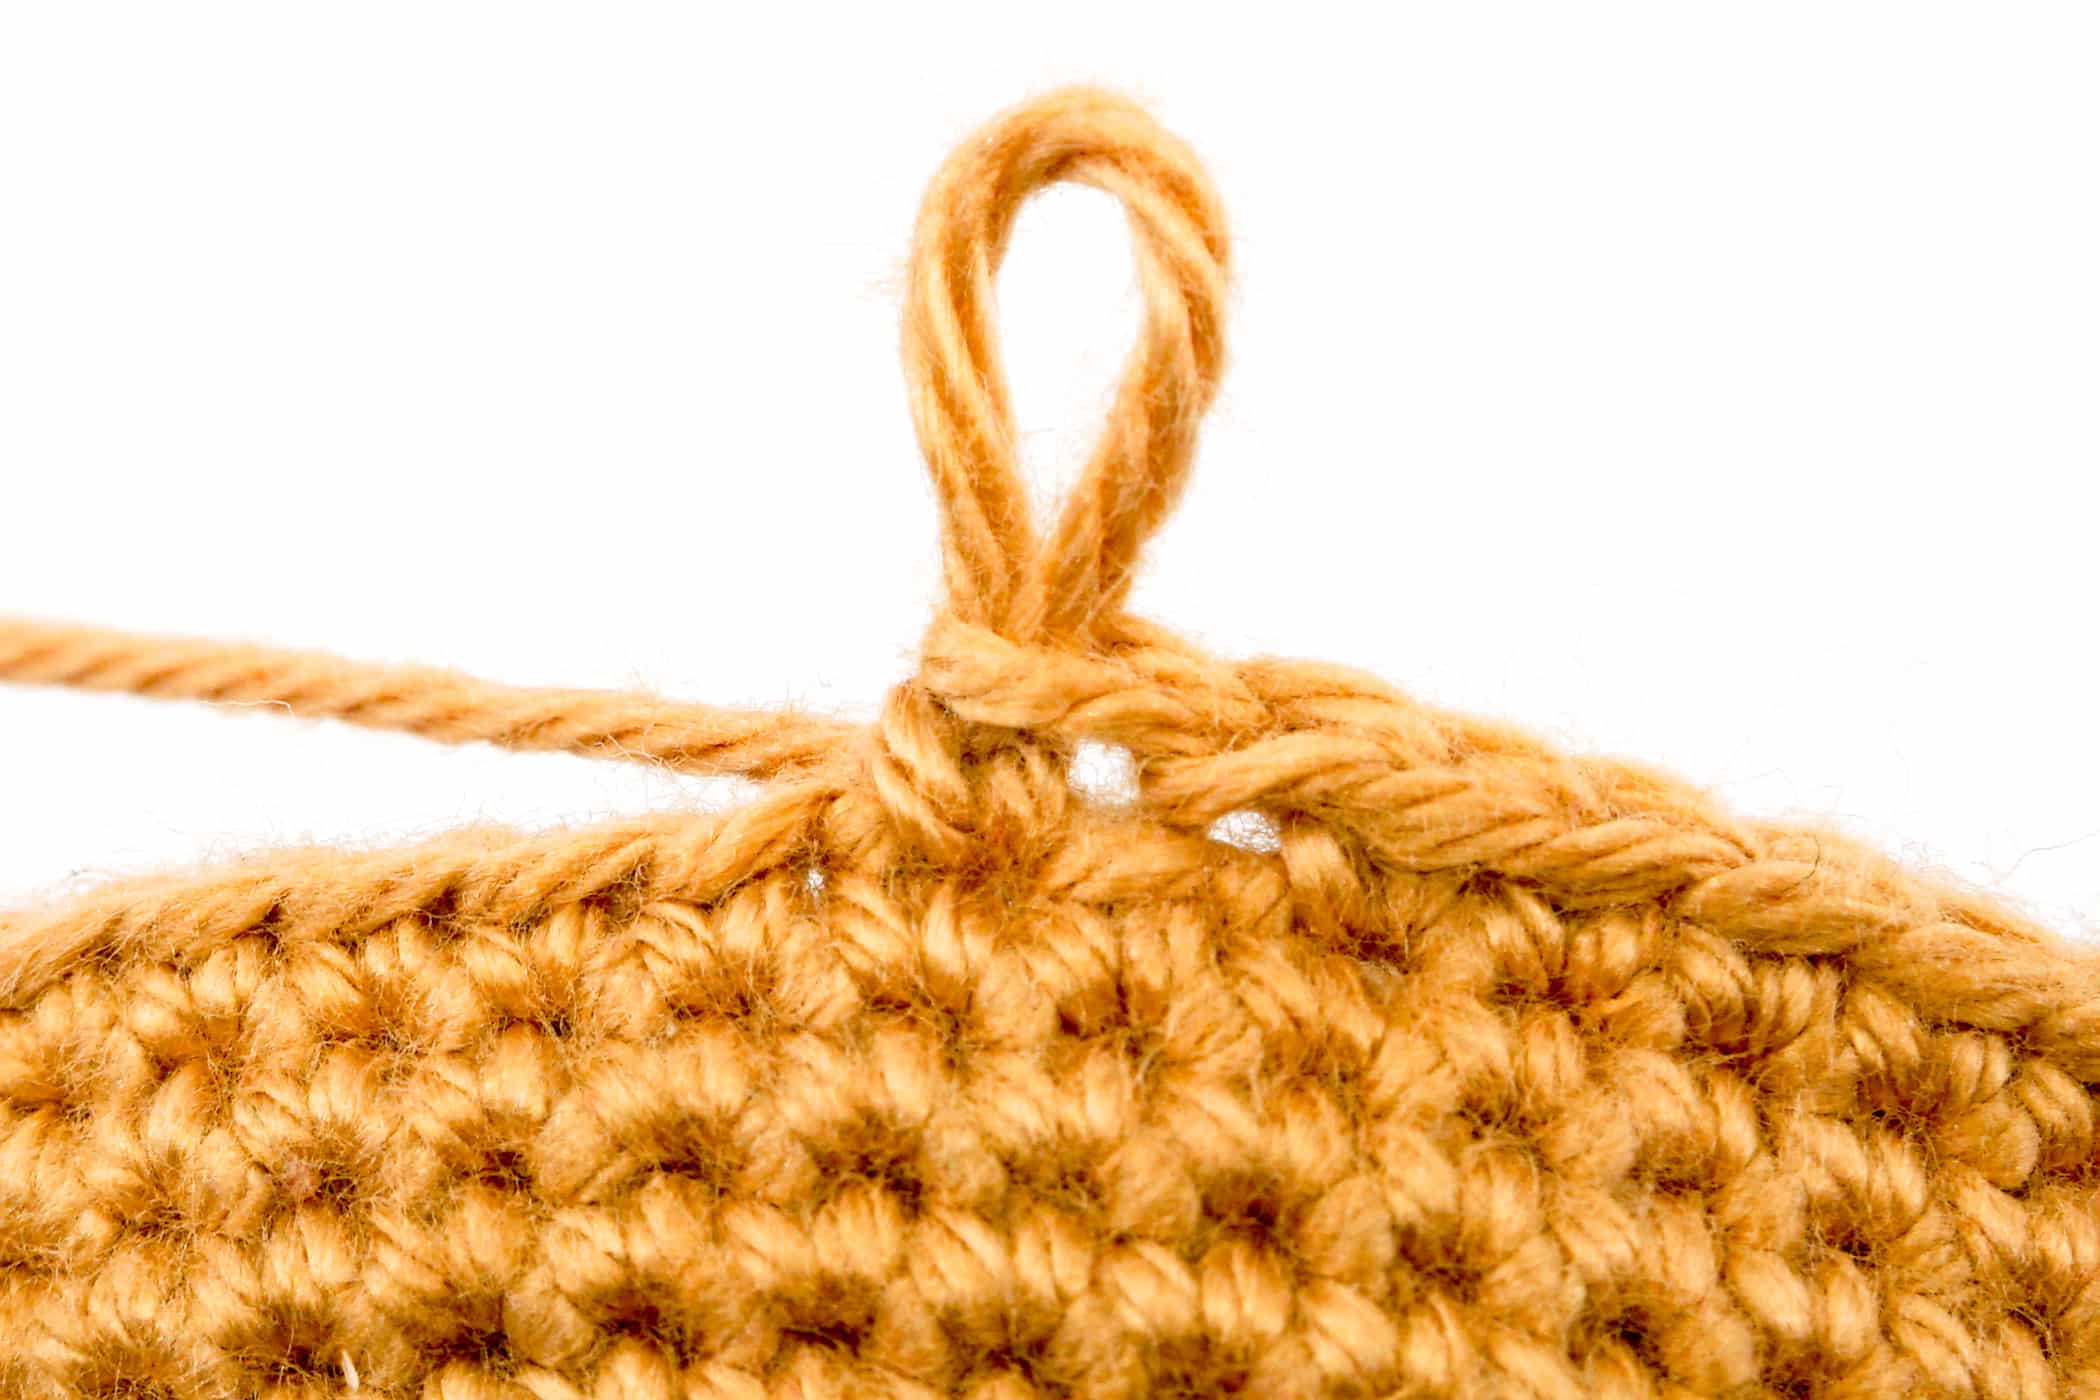
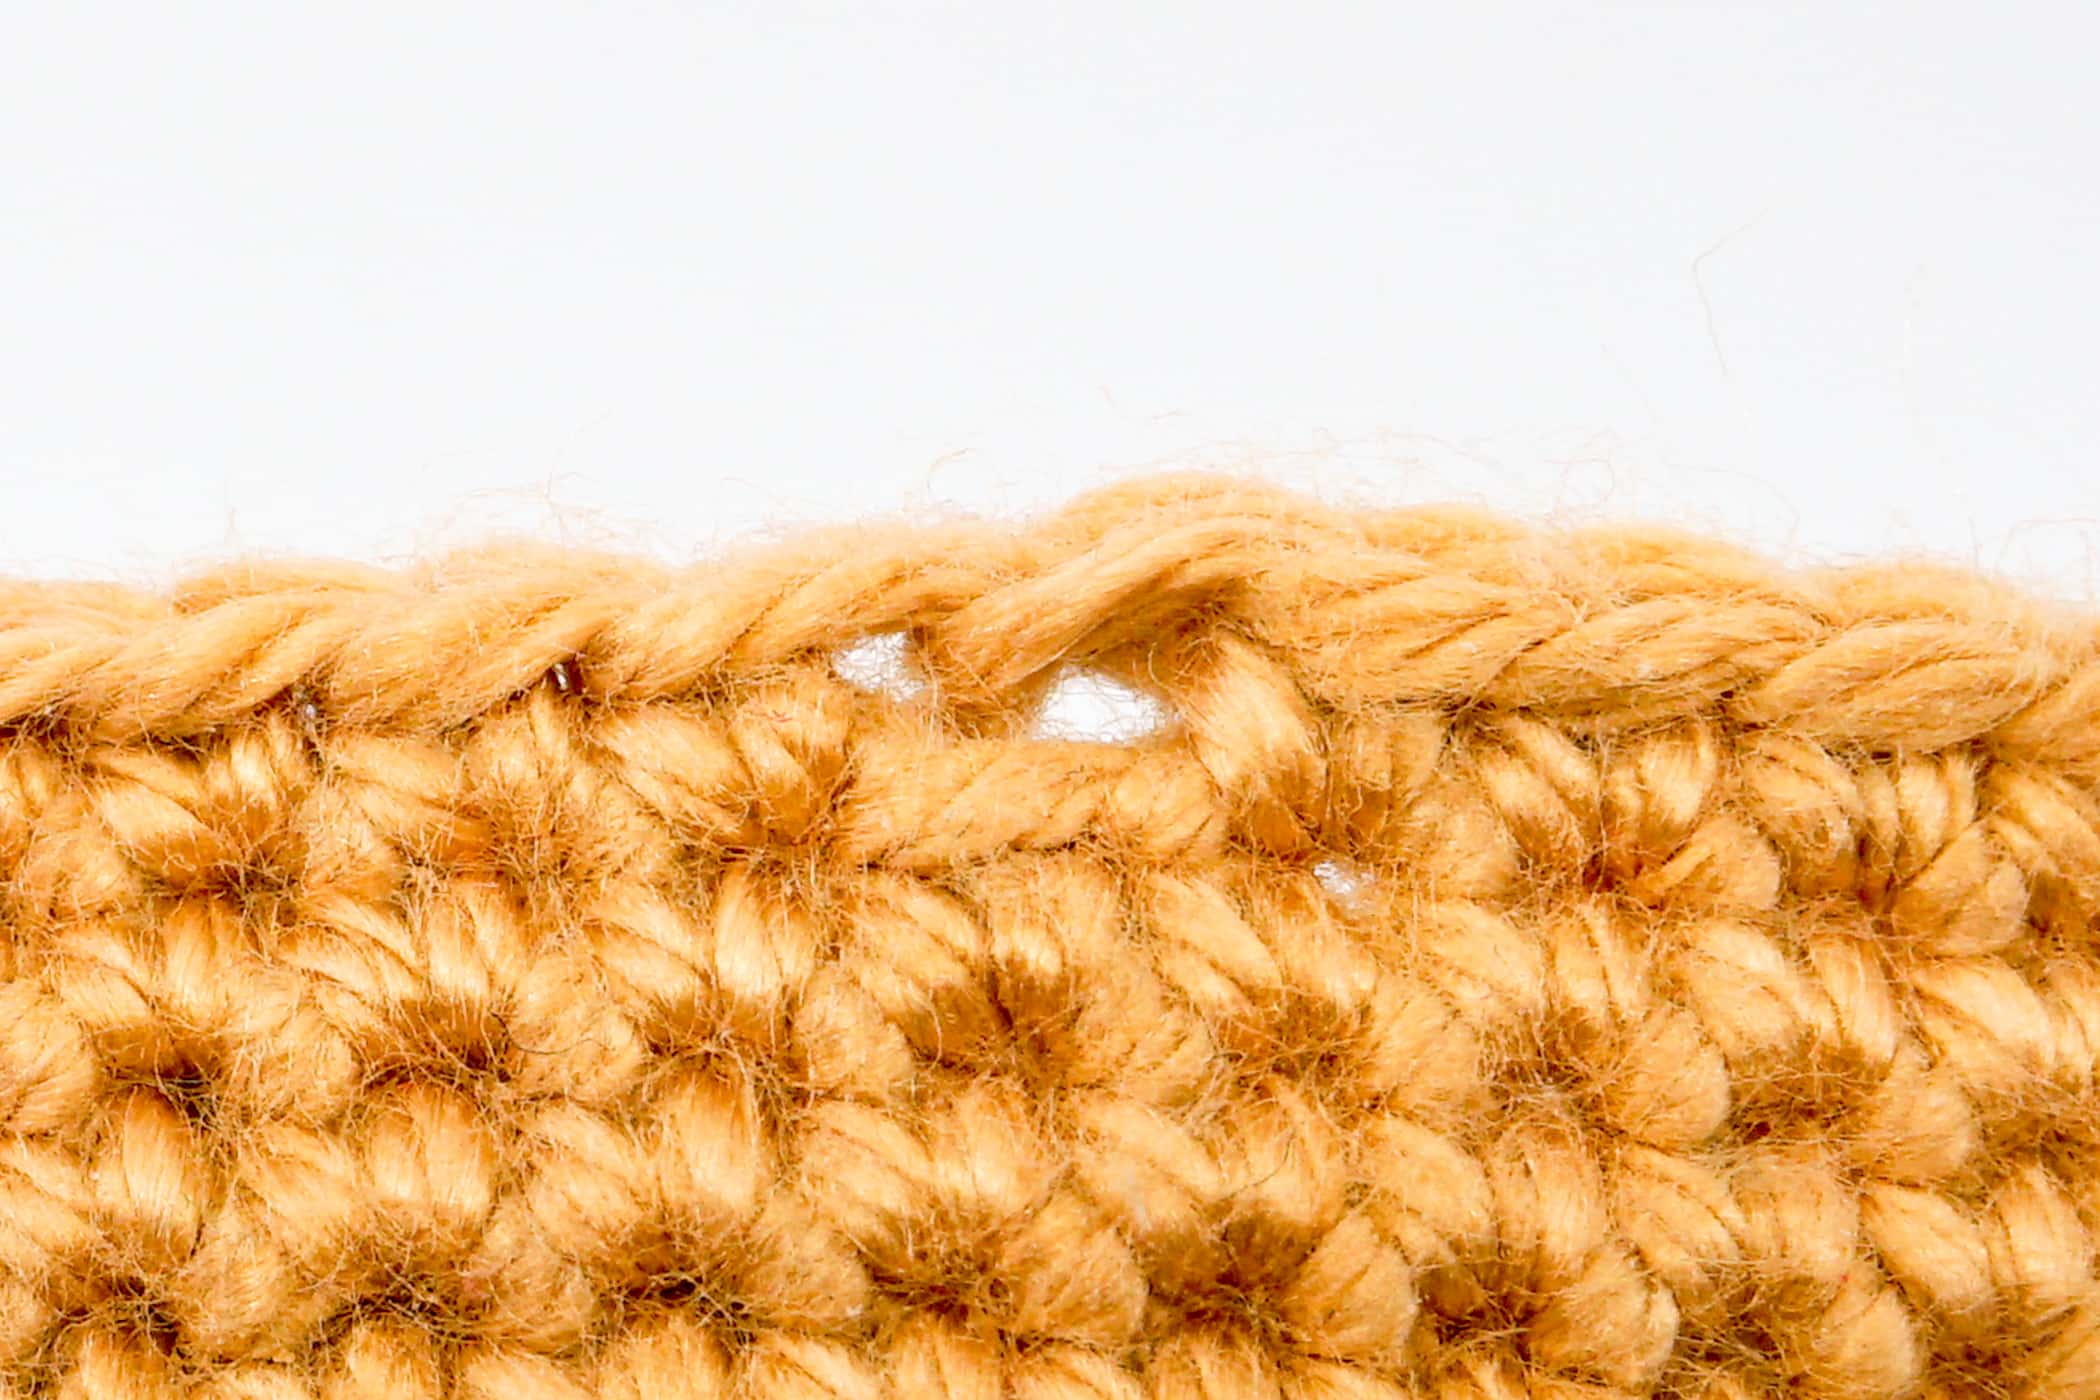

If the eyes to be used are particularly large, you can of course crochet several chain stitches and accordingly skip many stitches on the crochet piece to create an even larger opening.
Always crochet as many chain stitches as you skip stitches so that you still get the same number of stitches at the end of the round.
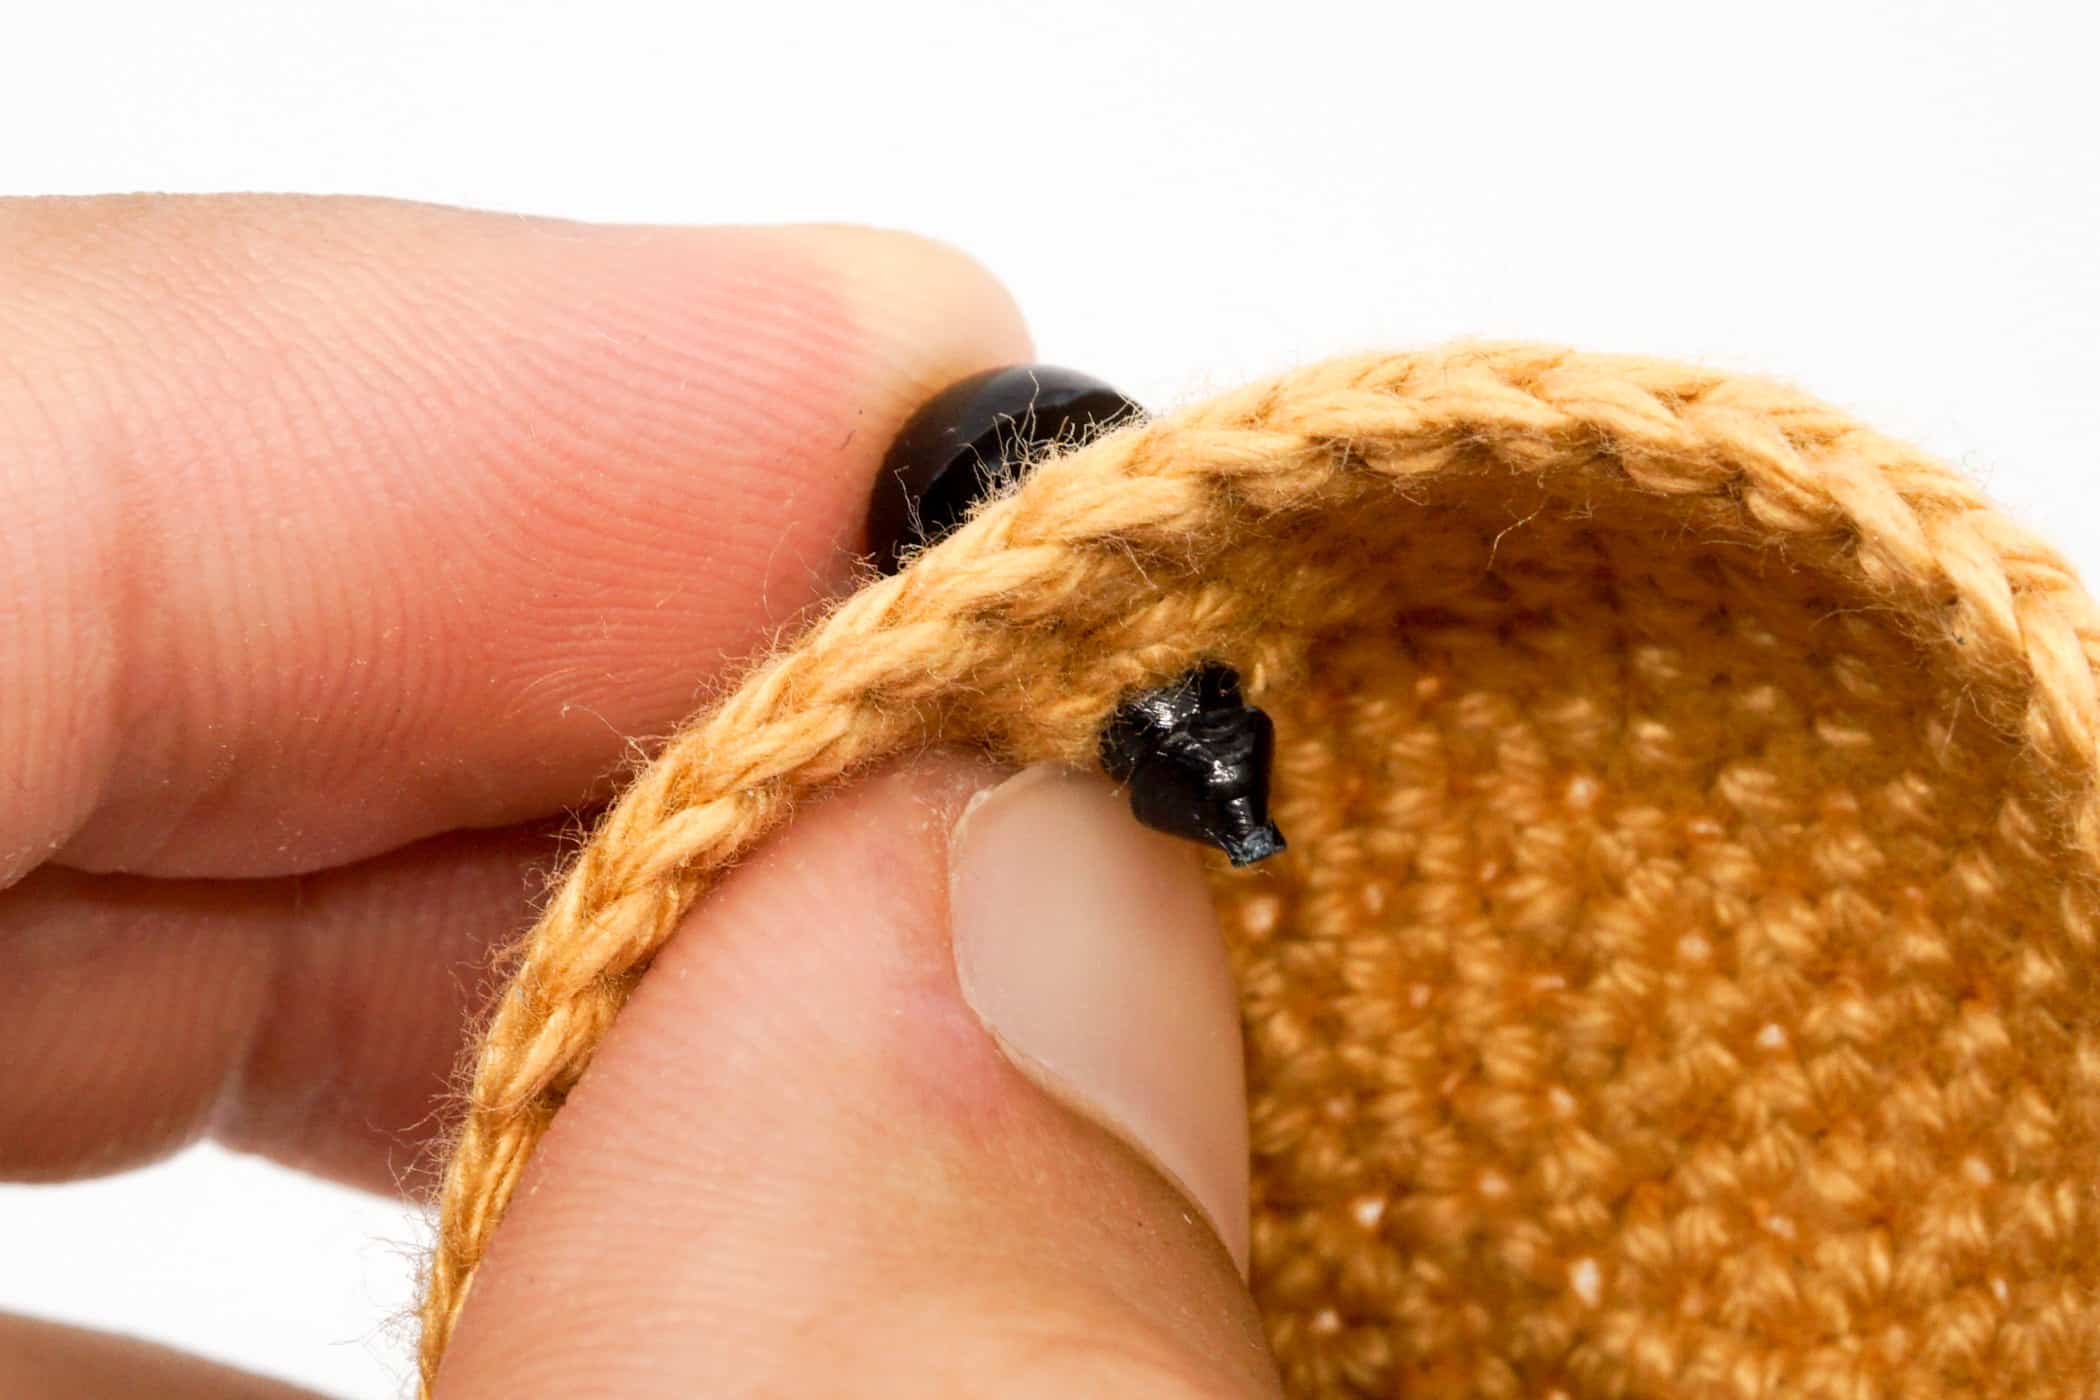
Remove Safety Eyes
If you are not satisfied with the position of the eyes and you have already fastened your eyes and not yet closed your crochet piece, then there are a few ways to remove them.
The simplest method is to first cut open the safety washer and remove it, peeling it off is usually difficult as it is intended to remain firmly on the eye. As soon as this is cut open and removed you can try to pull the eye out of the crochet piece.
However, if the eye is too tight, you have almost no choice but to cut the stem on the inside as close as possible to the crochet piece and then pull out the rest.
If you have already filled and closed your crochet piece, then you can try to crush the eye with pliers from the outside and then pull it out.
You can then push a new eye through a new stitch, but fastening it with a safety washer from the inside will be impossible until you open your crochet piece again.