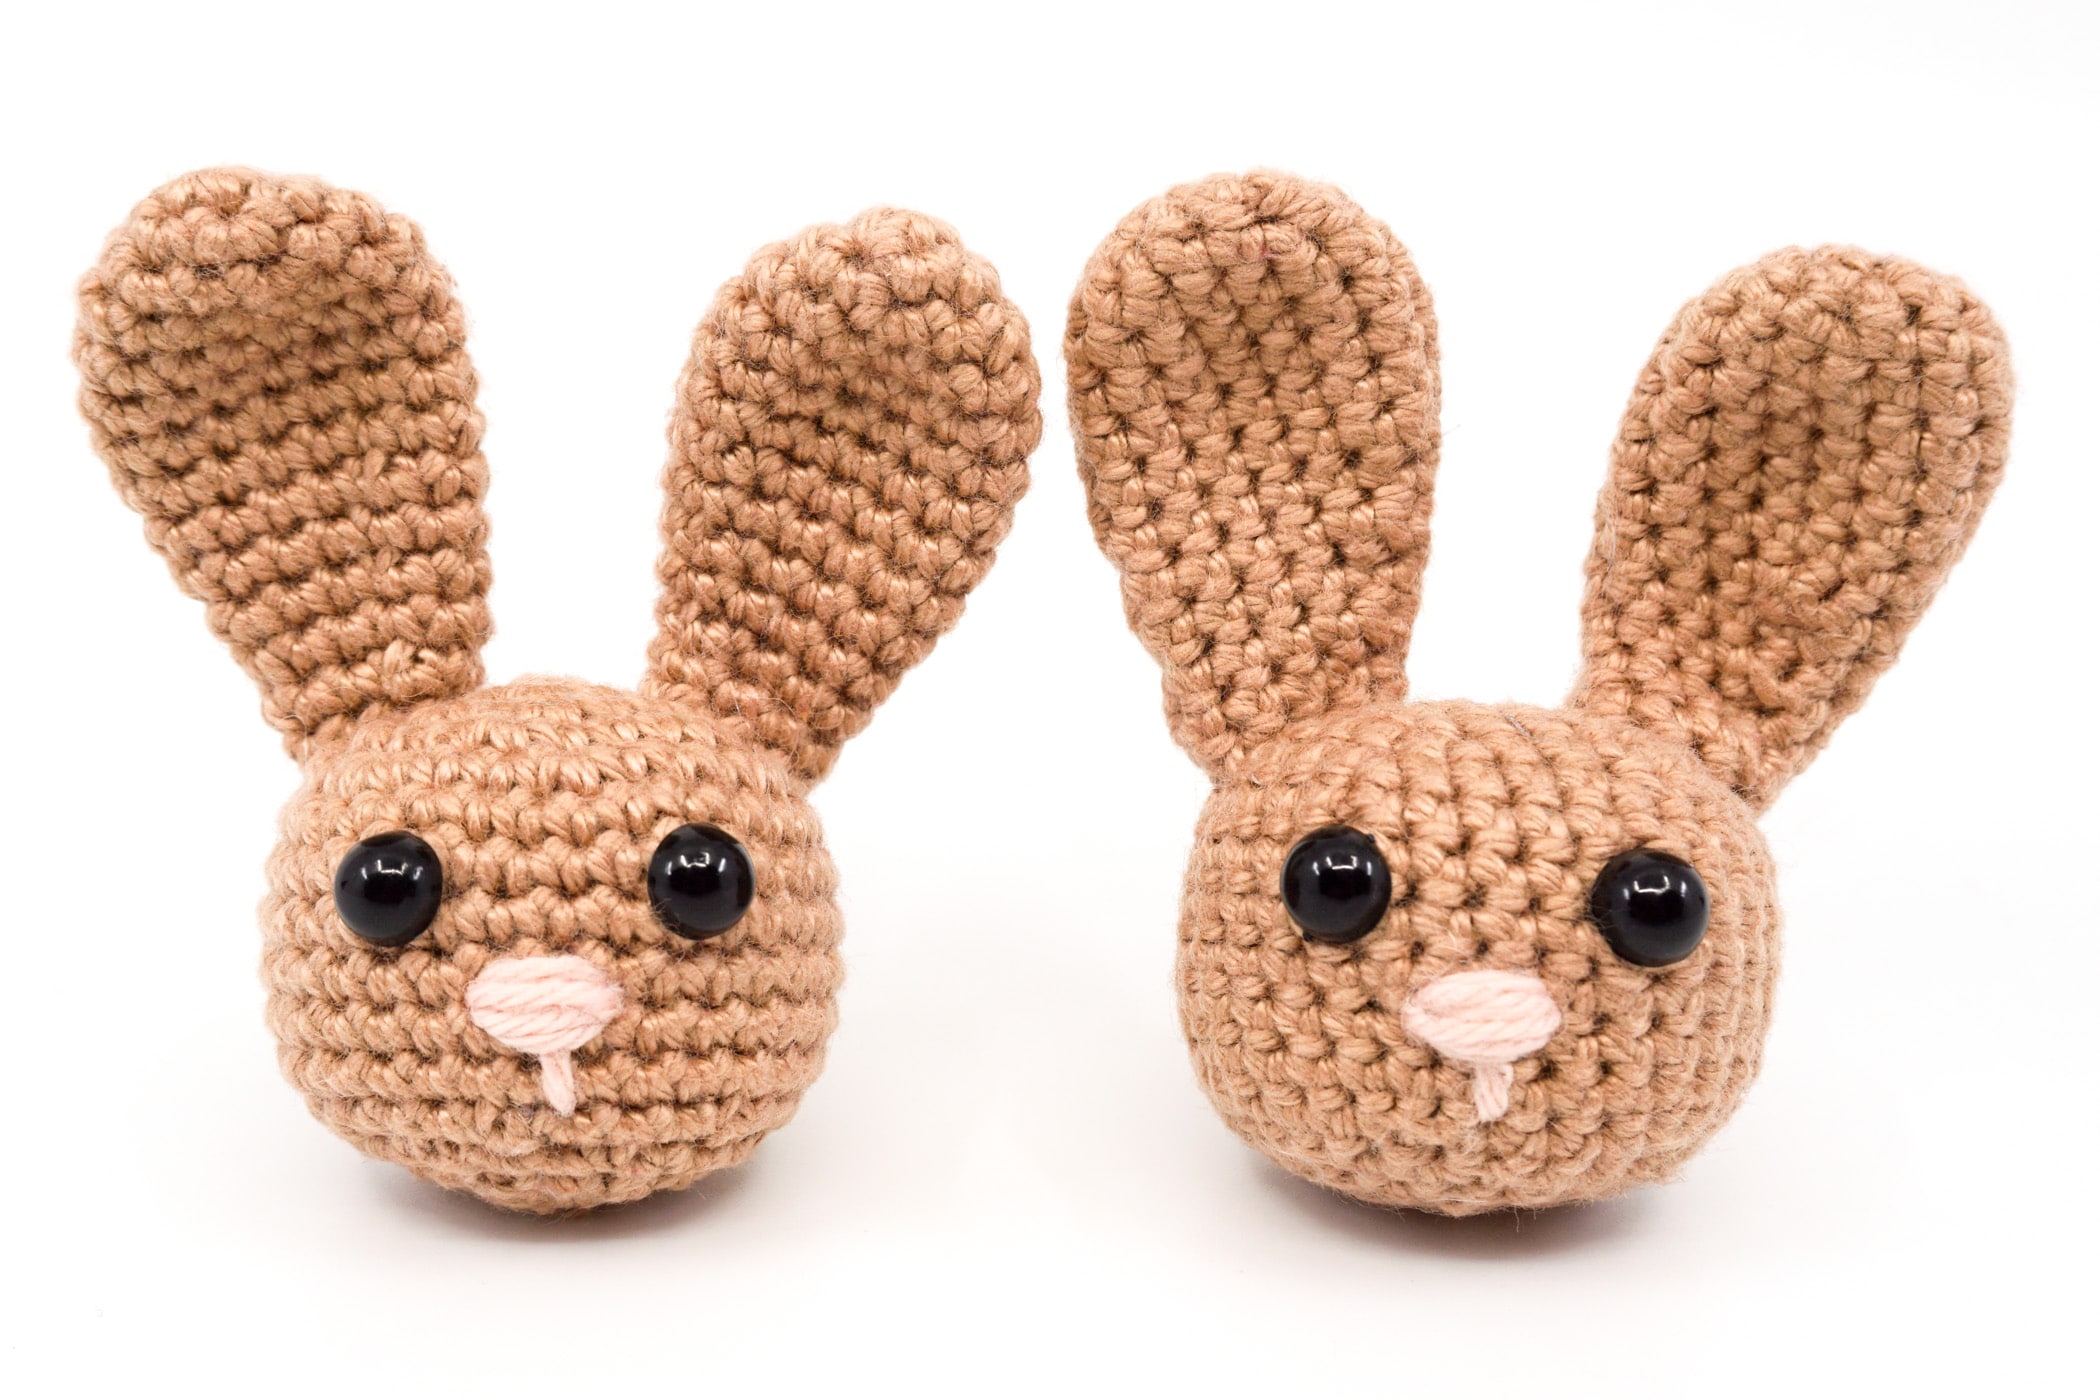
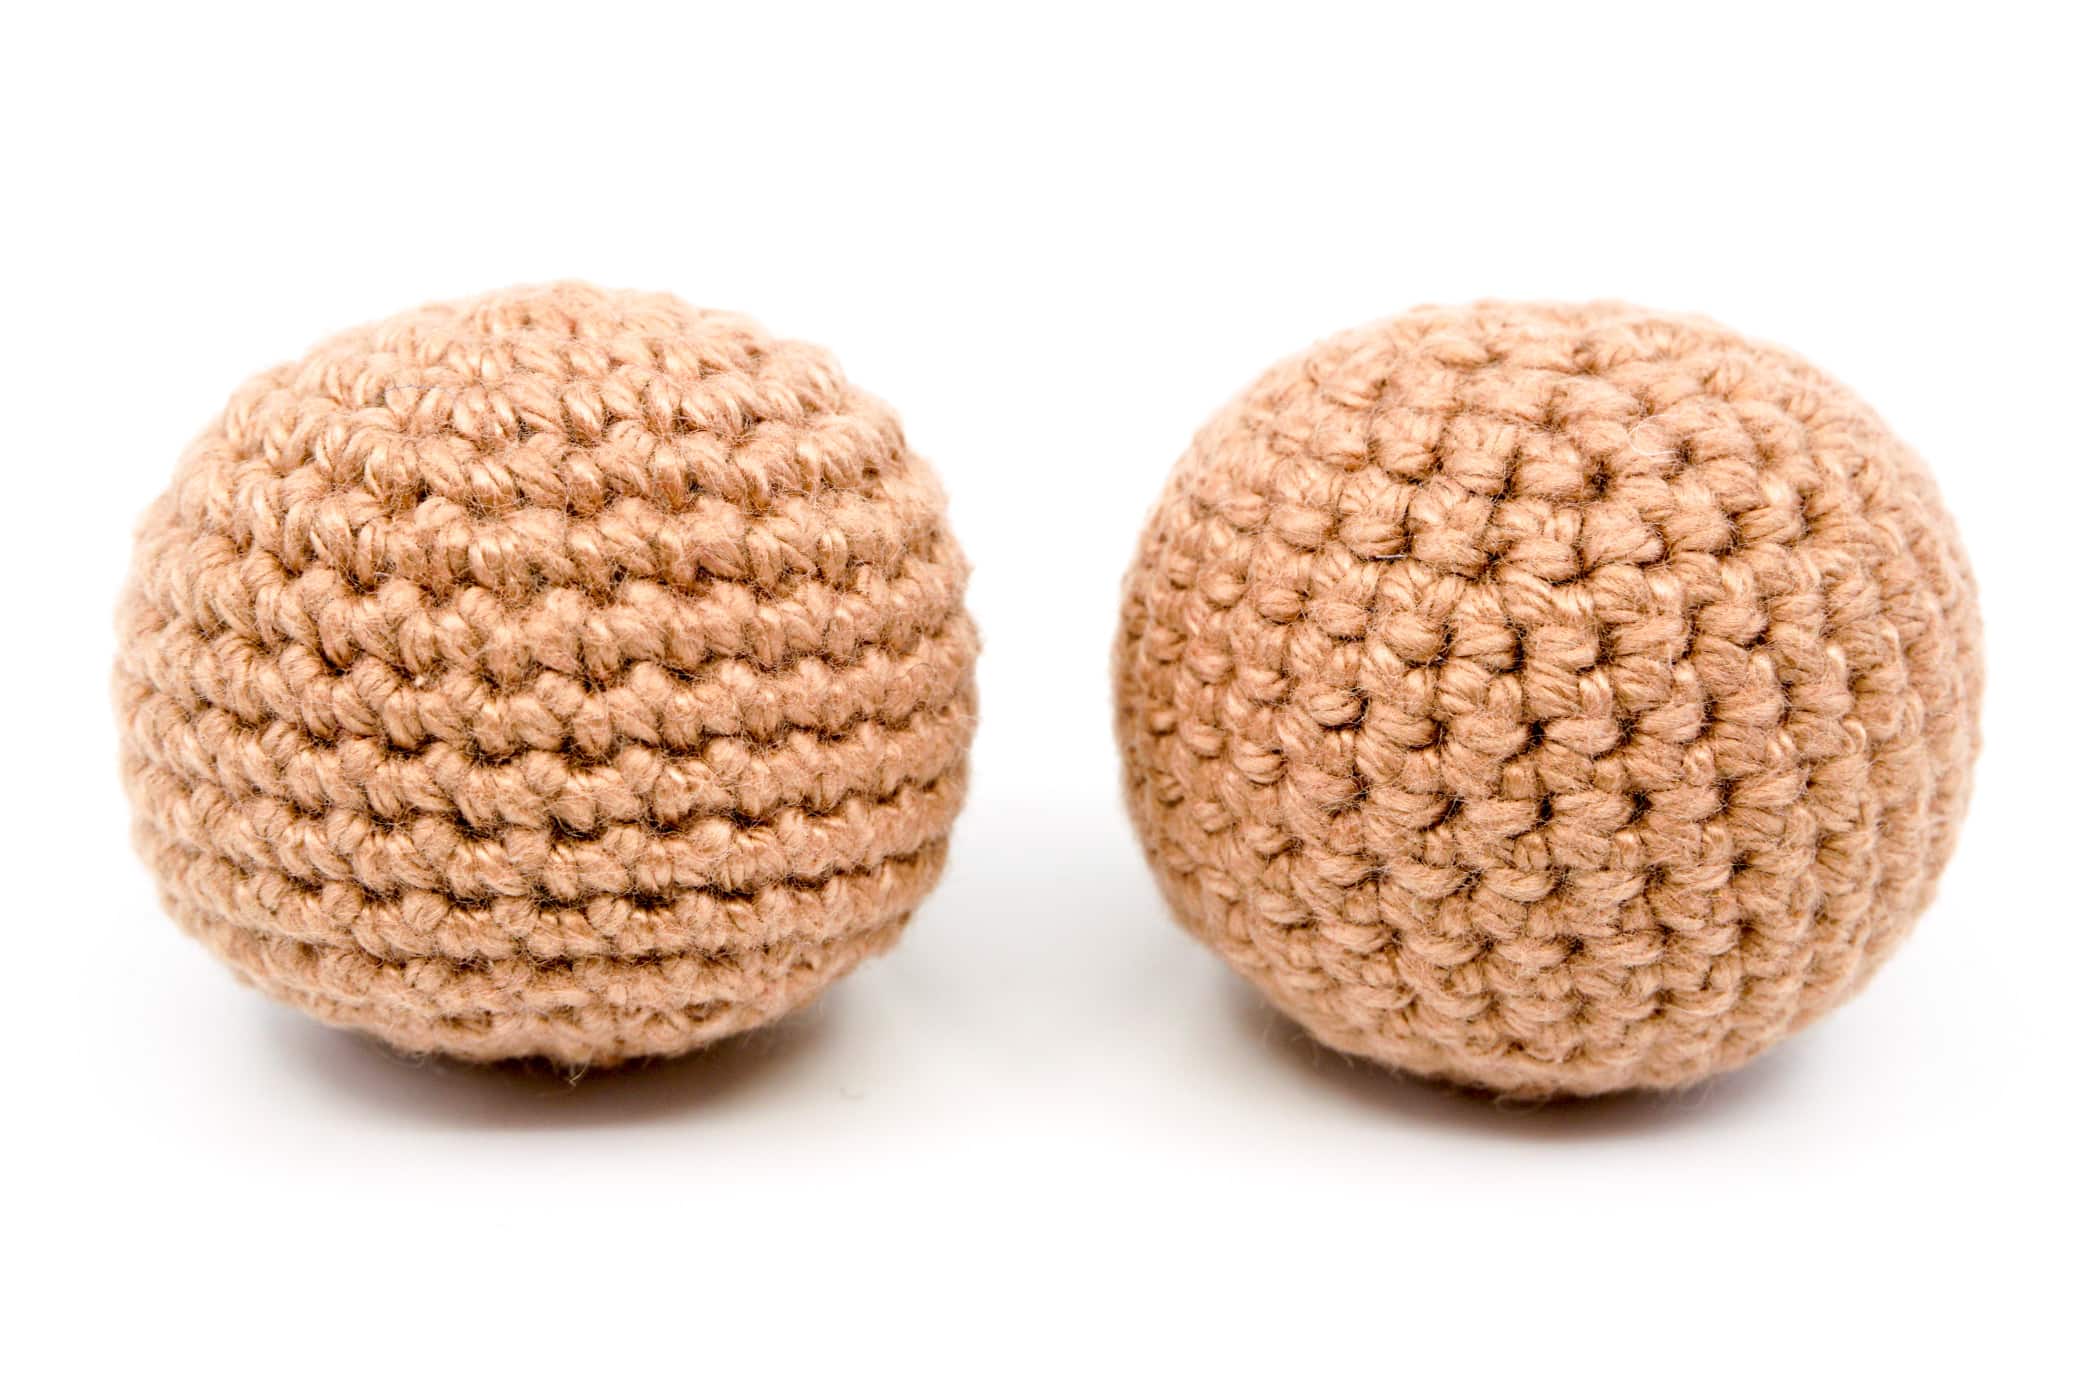
Have you ever wondered why your stitch pattern on your crochet piece, especially amigurumi, might look different than the pattern you are using? Do you see a difference between those two crochet balls?
This is most likely due to the fact that you are crocheting on the “wrong” side, meaning, you have the backside out. Which side you use in the end and which you personally find more beautiful, is, of course, a matter of taste, but there are some differences between the “wrong” and “right” side or the back side and front side.
How to Recognize the Back Side and Front Side
While crocheting in rows you alternate between the back and front side, but when crocheting in spiral rounds you always stay on one side, which is why you will end up seeing only the back of the stitches on one side and the front side on the other.
On the left, you see the front side or “right” side and on the right the back side or the “wrong” side. A simple distinguishing feature is that the front side consists of small “V”s while the inside has regular horizontal lines.

The decisive moment with which side you end up comes when you crochet from a two-dimensional crochet piece (circle for example) into a body, i.e. when your circle becomes a ball.
If the stitch pattern on the “wrong” side is now inside the ball, you will end up with the “right” side of your amigurumi. Conversely, if you have the “right” side on the inside of the body, you end up with the “wrong” side on the outside.
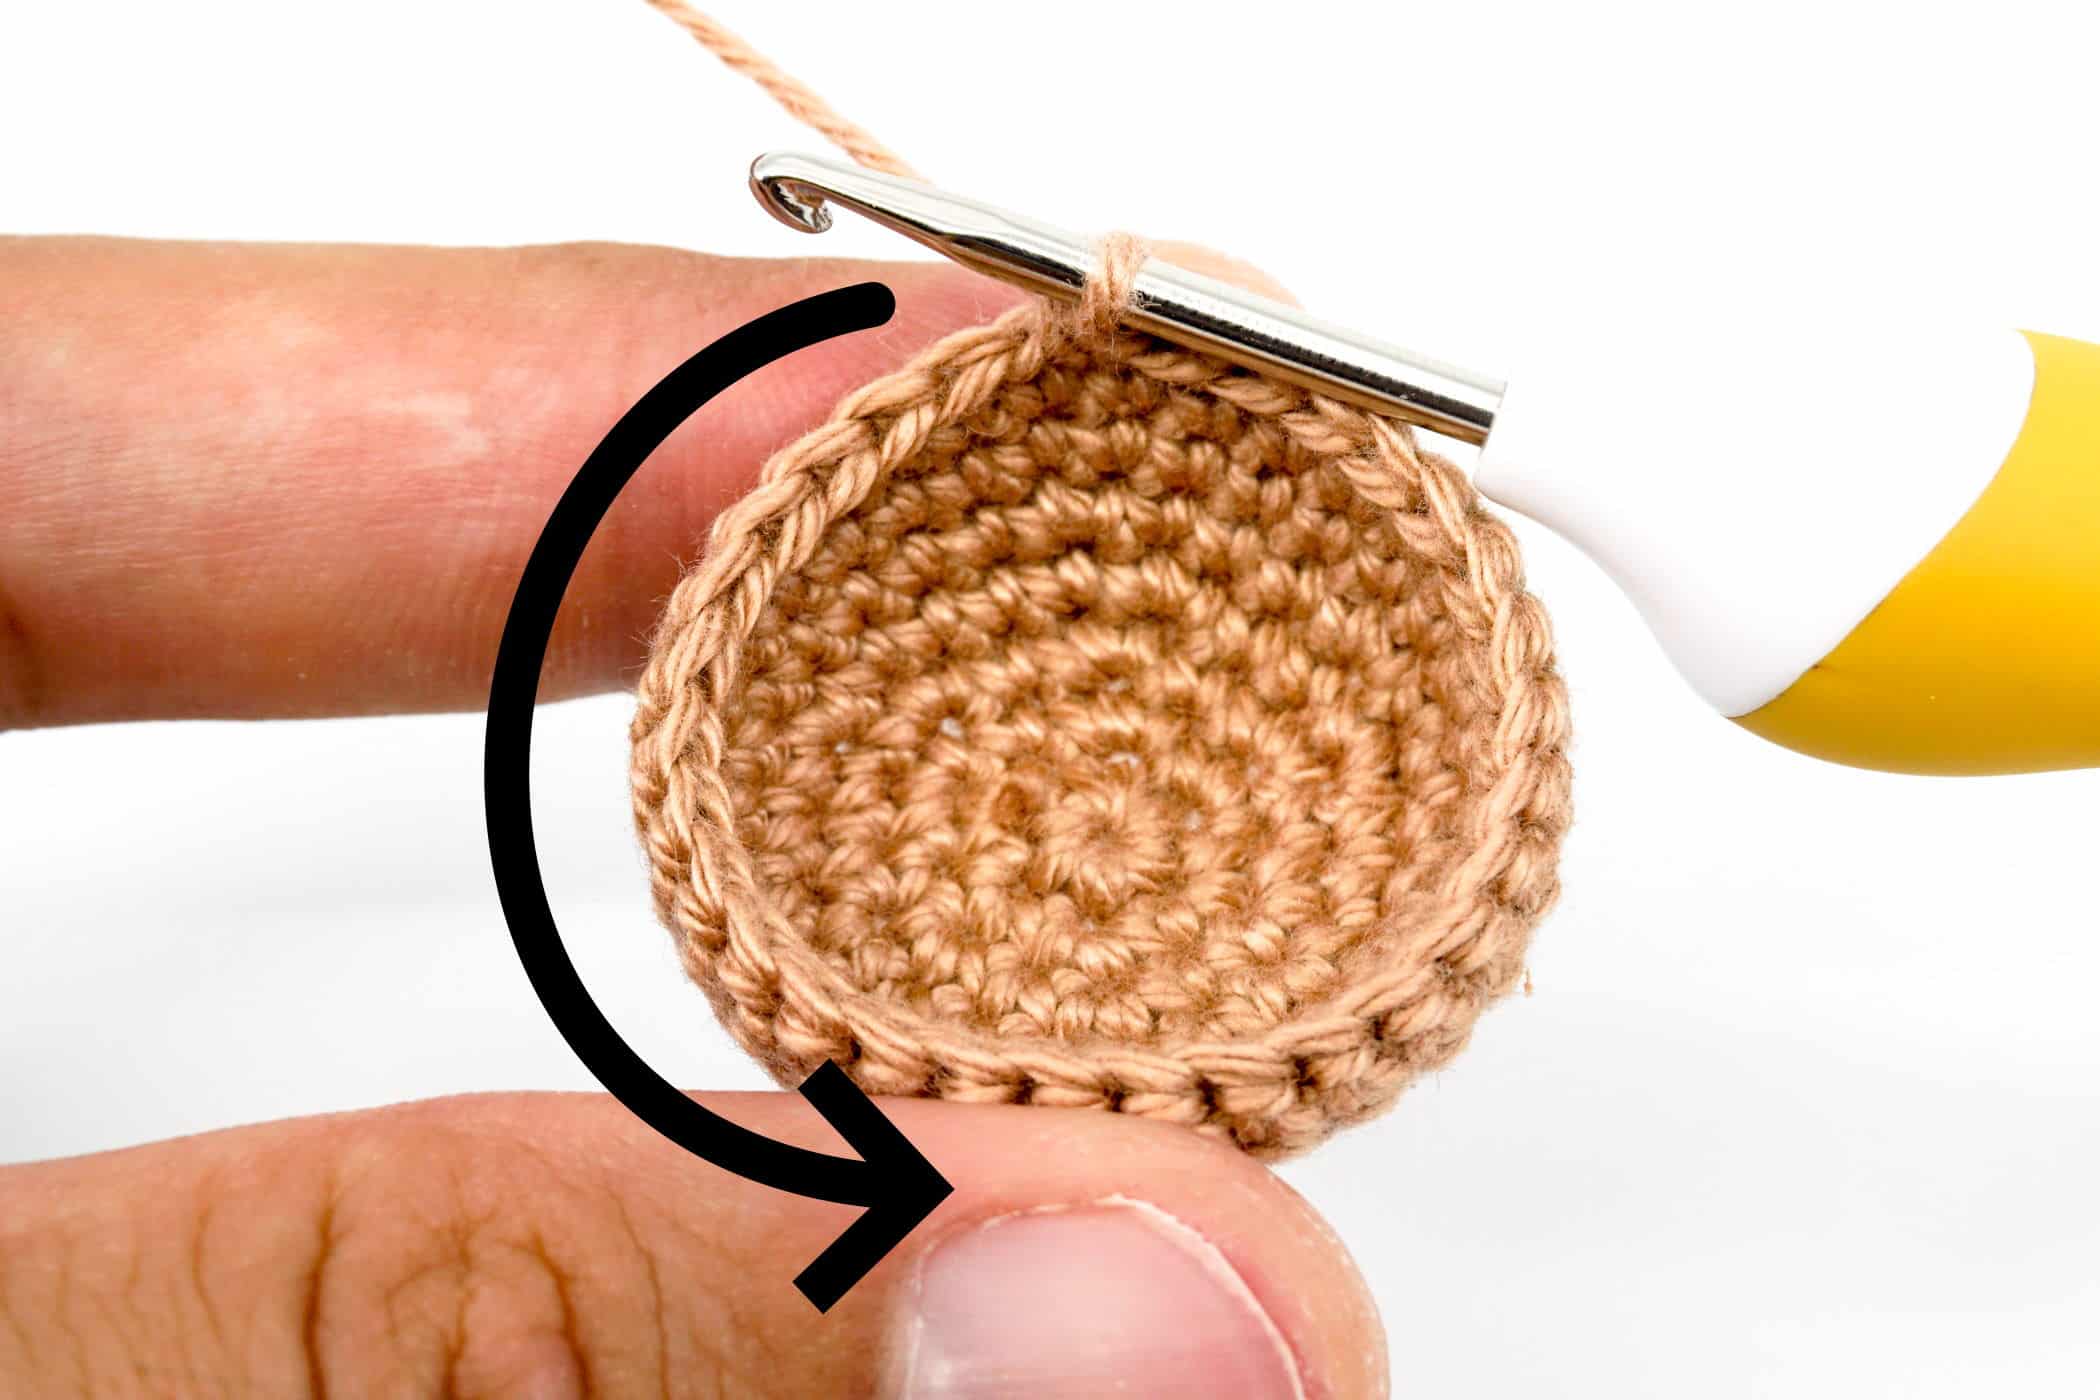
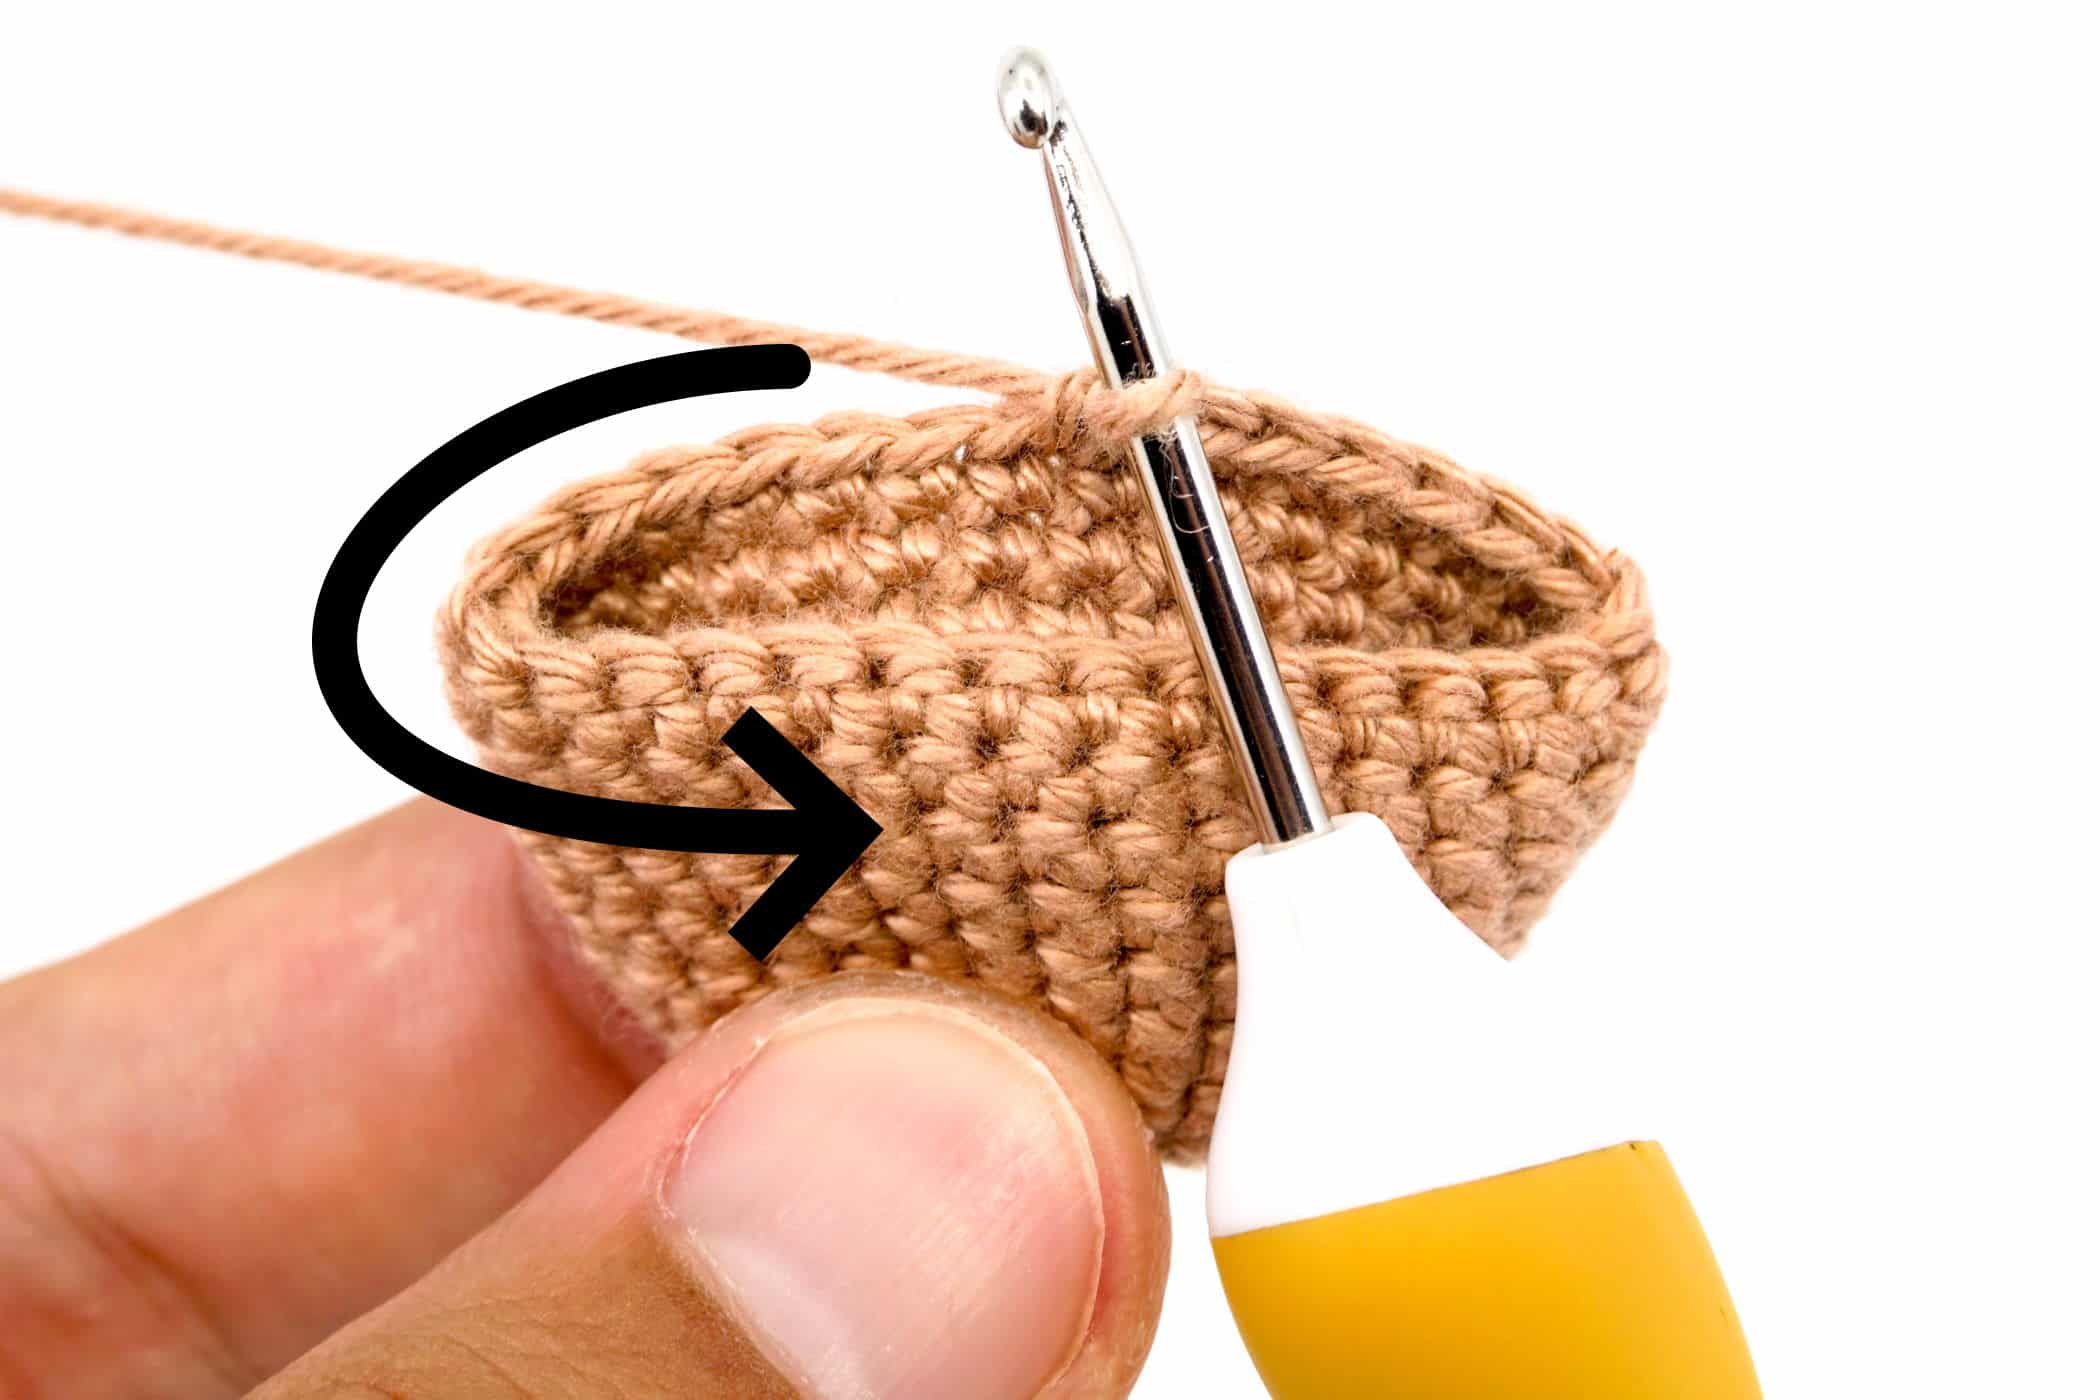
If you have difficulty distinguishing the stitch patterns, look in which direction you are crocheting, counterclockwise or clockwise.
Here is a very simple aid to always crochet with the “right” side.
RIGHT SIDE: You are crocheting in a clockwise direction.

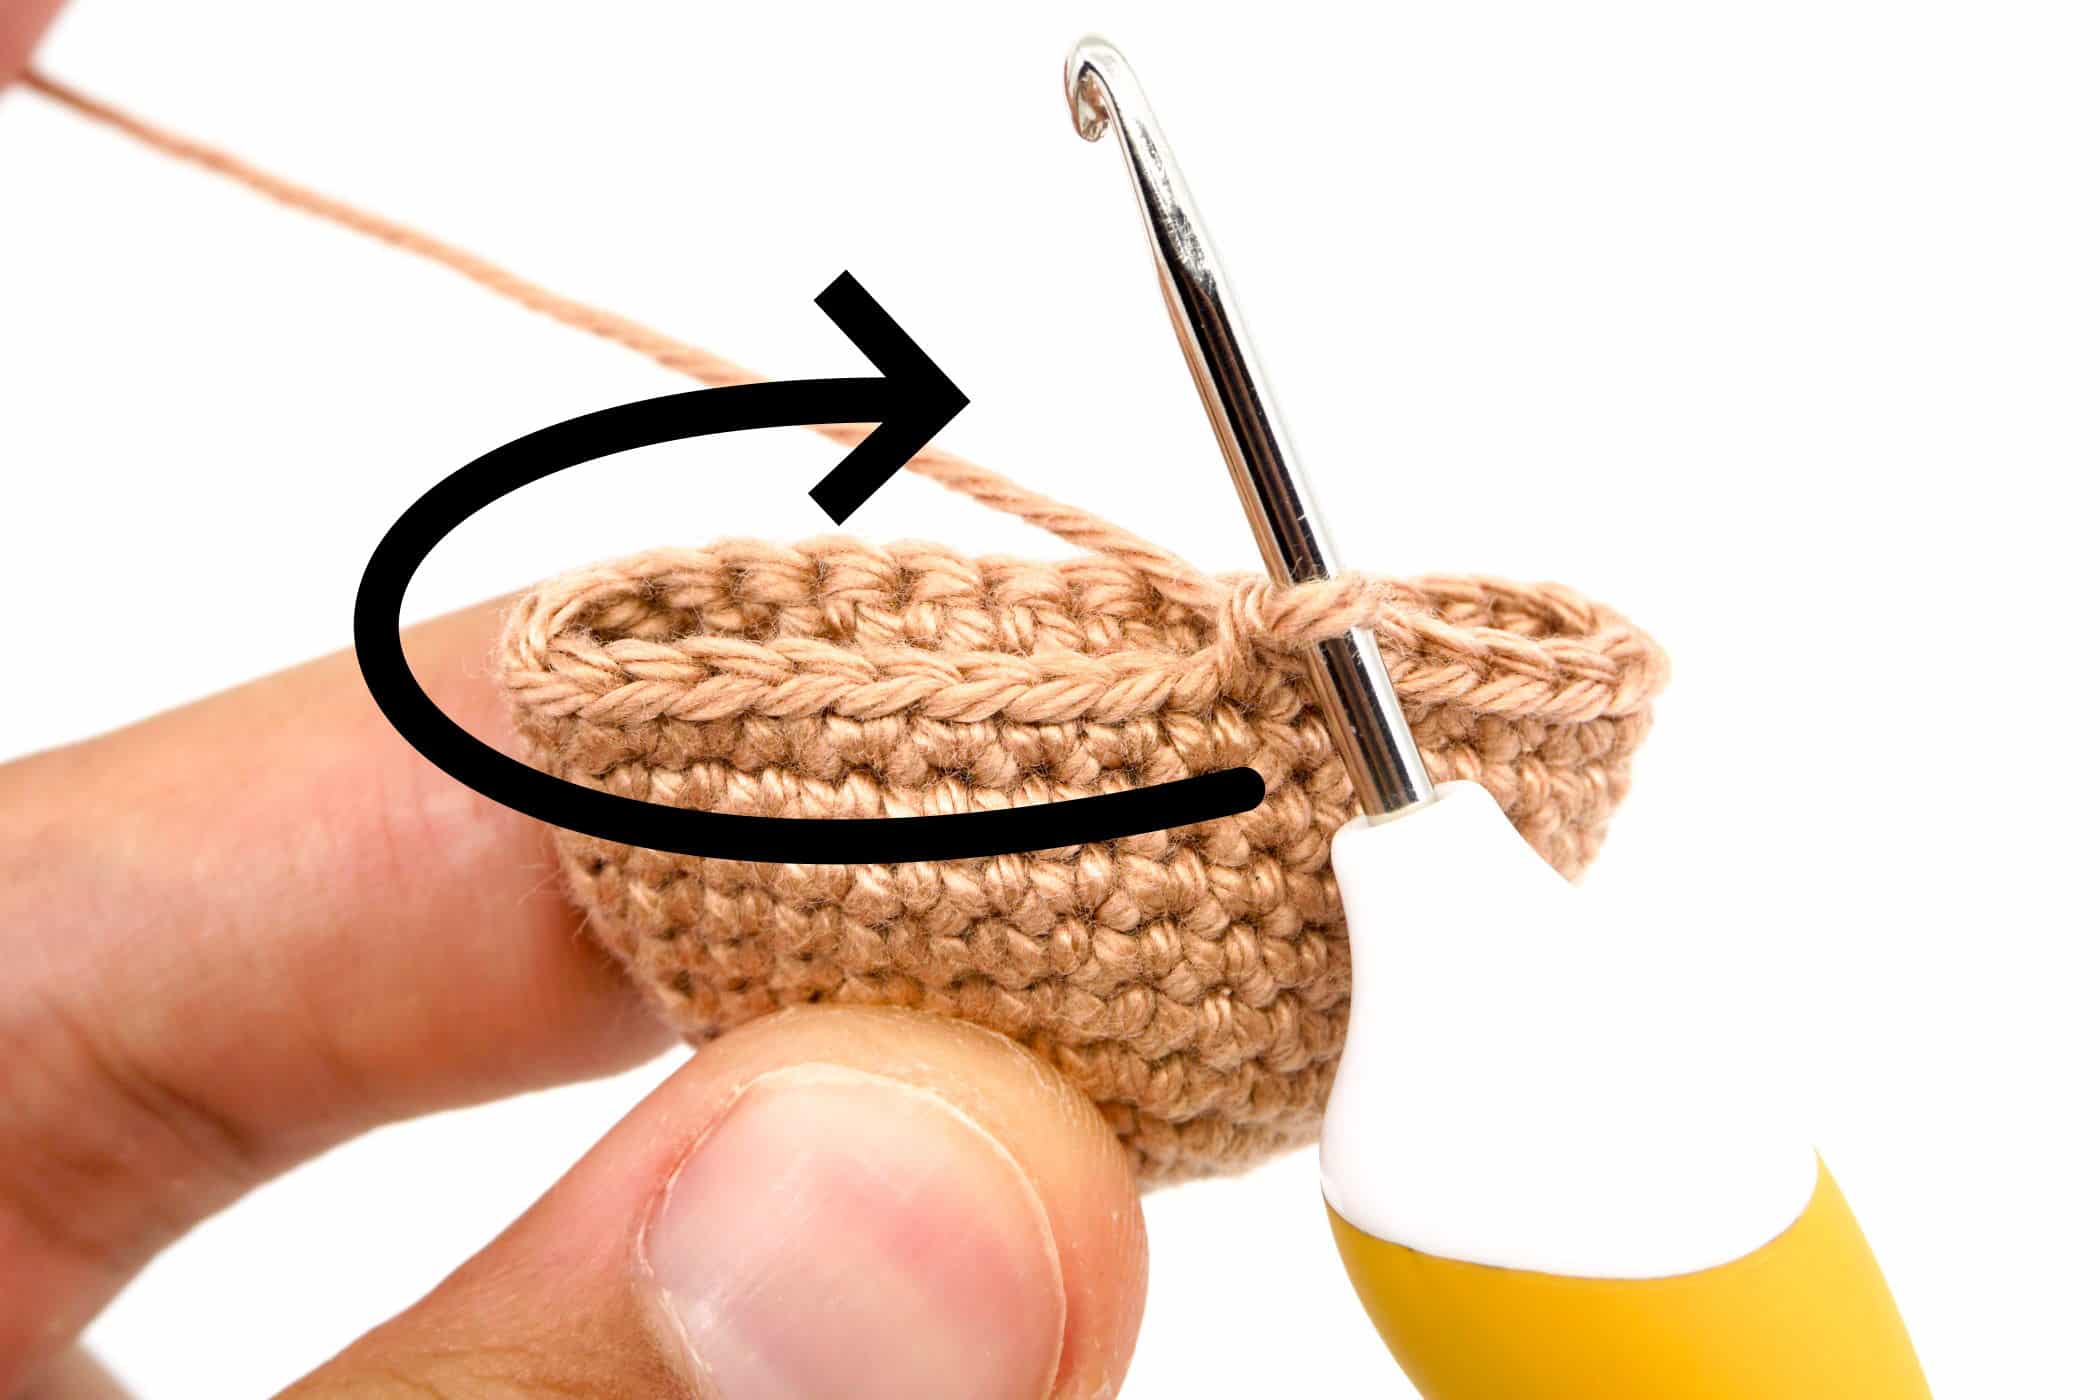
WRONG SIDE: You are crocheting counterclockwise.
Reasons to Crochet on the “Right” Side
Of course it is up to you which side you find more beautiful and which one you end your amigurumi with. However, there are several reasons why you should crochet with the “right” side.
If the “wrong” side or the back side is on the outside, it creates a much more misshapen crochet piece, as this pulls the crochet piece inward.
In addition, you then always have to push your crochet hook through the stitches from the inside out, i.e. it can be more difficult to get to the stitches that you have to crochet in. This gets especially fiddly when you only have only a small opening left.
According to this, crocheting on the “right” side is usually easier, because instead of working from the inside to the outside, you push your crochet hook from the outside to the inside through the stitches and thus have no other stitches in front of you that would block the respective stitches.
The use of decreases like the “invisible” decrease, the preferred decrease when crocheting amigurumi, creates an unsightly mark on the stitch pattern when crocheted with the “wrong” side on the outside and is therefore no longer so invisible, as it is when crocheting on the “right” side.
And for sure the most important point would be that most of the Amigurumi patterns are crocheted with the “right” side. So if you want to get the same result as in the pattern you are using, then use the same side outside as used in the pattern, it will most likely be the “right” side.