The magic ring (or magic circle) represents the beginning of a crochet work which is crocheted “in spiral rounds” or “in joined rounds”.
The special thing about the magic ring is the fact that you can crochet the stitches of your first round into it and then pull it tight.
This gives you a clean first round without a visible opening. Of course this depends on how many stitches you crochet into the magic ring. With many stitches an opening can be visible.
There are different methods to make a magic ring and also the method shown here can be adapted to your personal handling.
Even if the whole thing may look a bit complicated at the beginning, you will soon notice that the actual procedure is done in a few steps and rather simple with a bit of practise.
In this lesson you will learn how to create a magic ring and how to crochet the first stitches into a magic ring.
Magic Ring
Needed Techniques
Needed Materials and Tools
To order the materials click on the respective link (affiliate link).
- Colors: green
- This pattern was crocheted using the “Schachenmayr Catania” yarn (100% Cotton, Meterage: 125 m, Yarn Ball Weight: 50 g, Yarn Weight: Sport – 5ply / Fine (2)) in the following colors:
- Golf Green (Golfgrün (241))
- 2.5 mm Crochet Hook
No products found.
How to Make a Magic Ring
The following example shows how to create a magic ring in just a few steps.
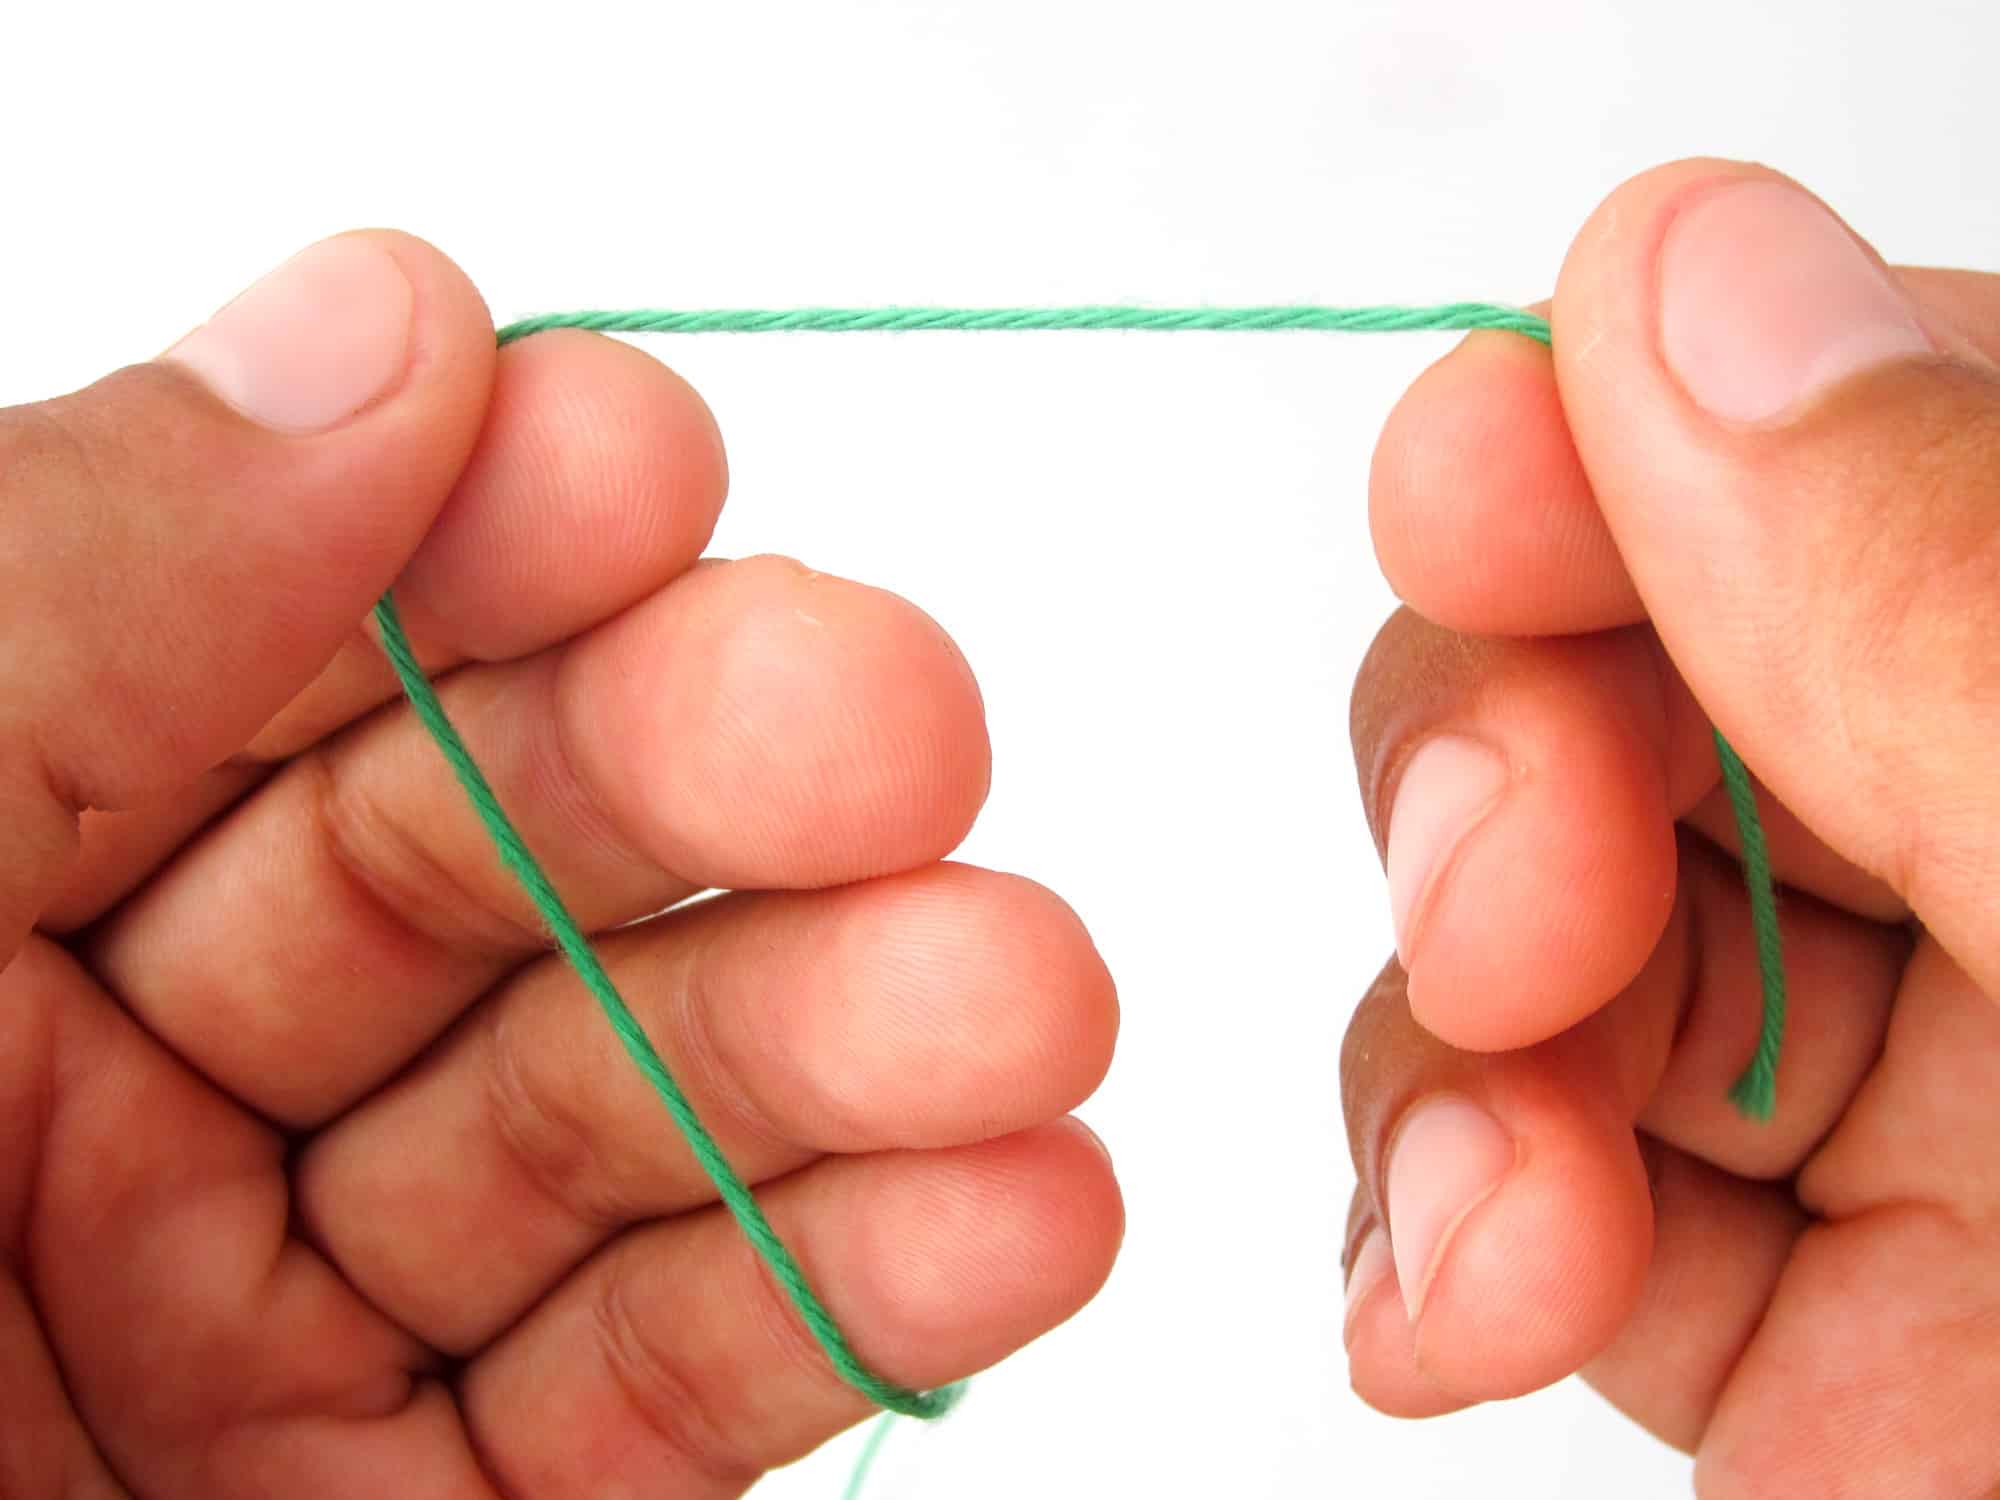
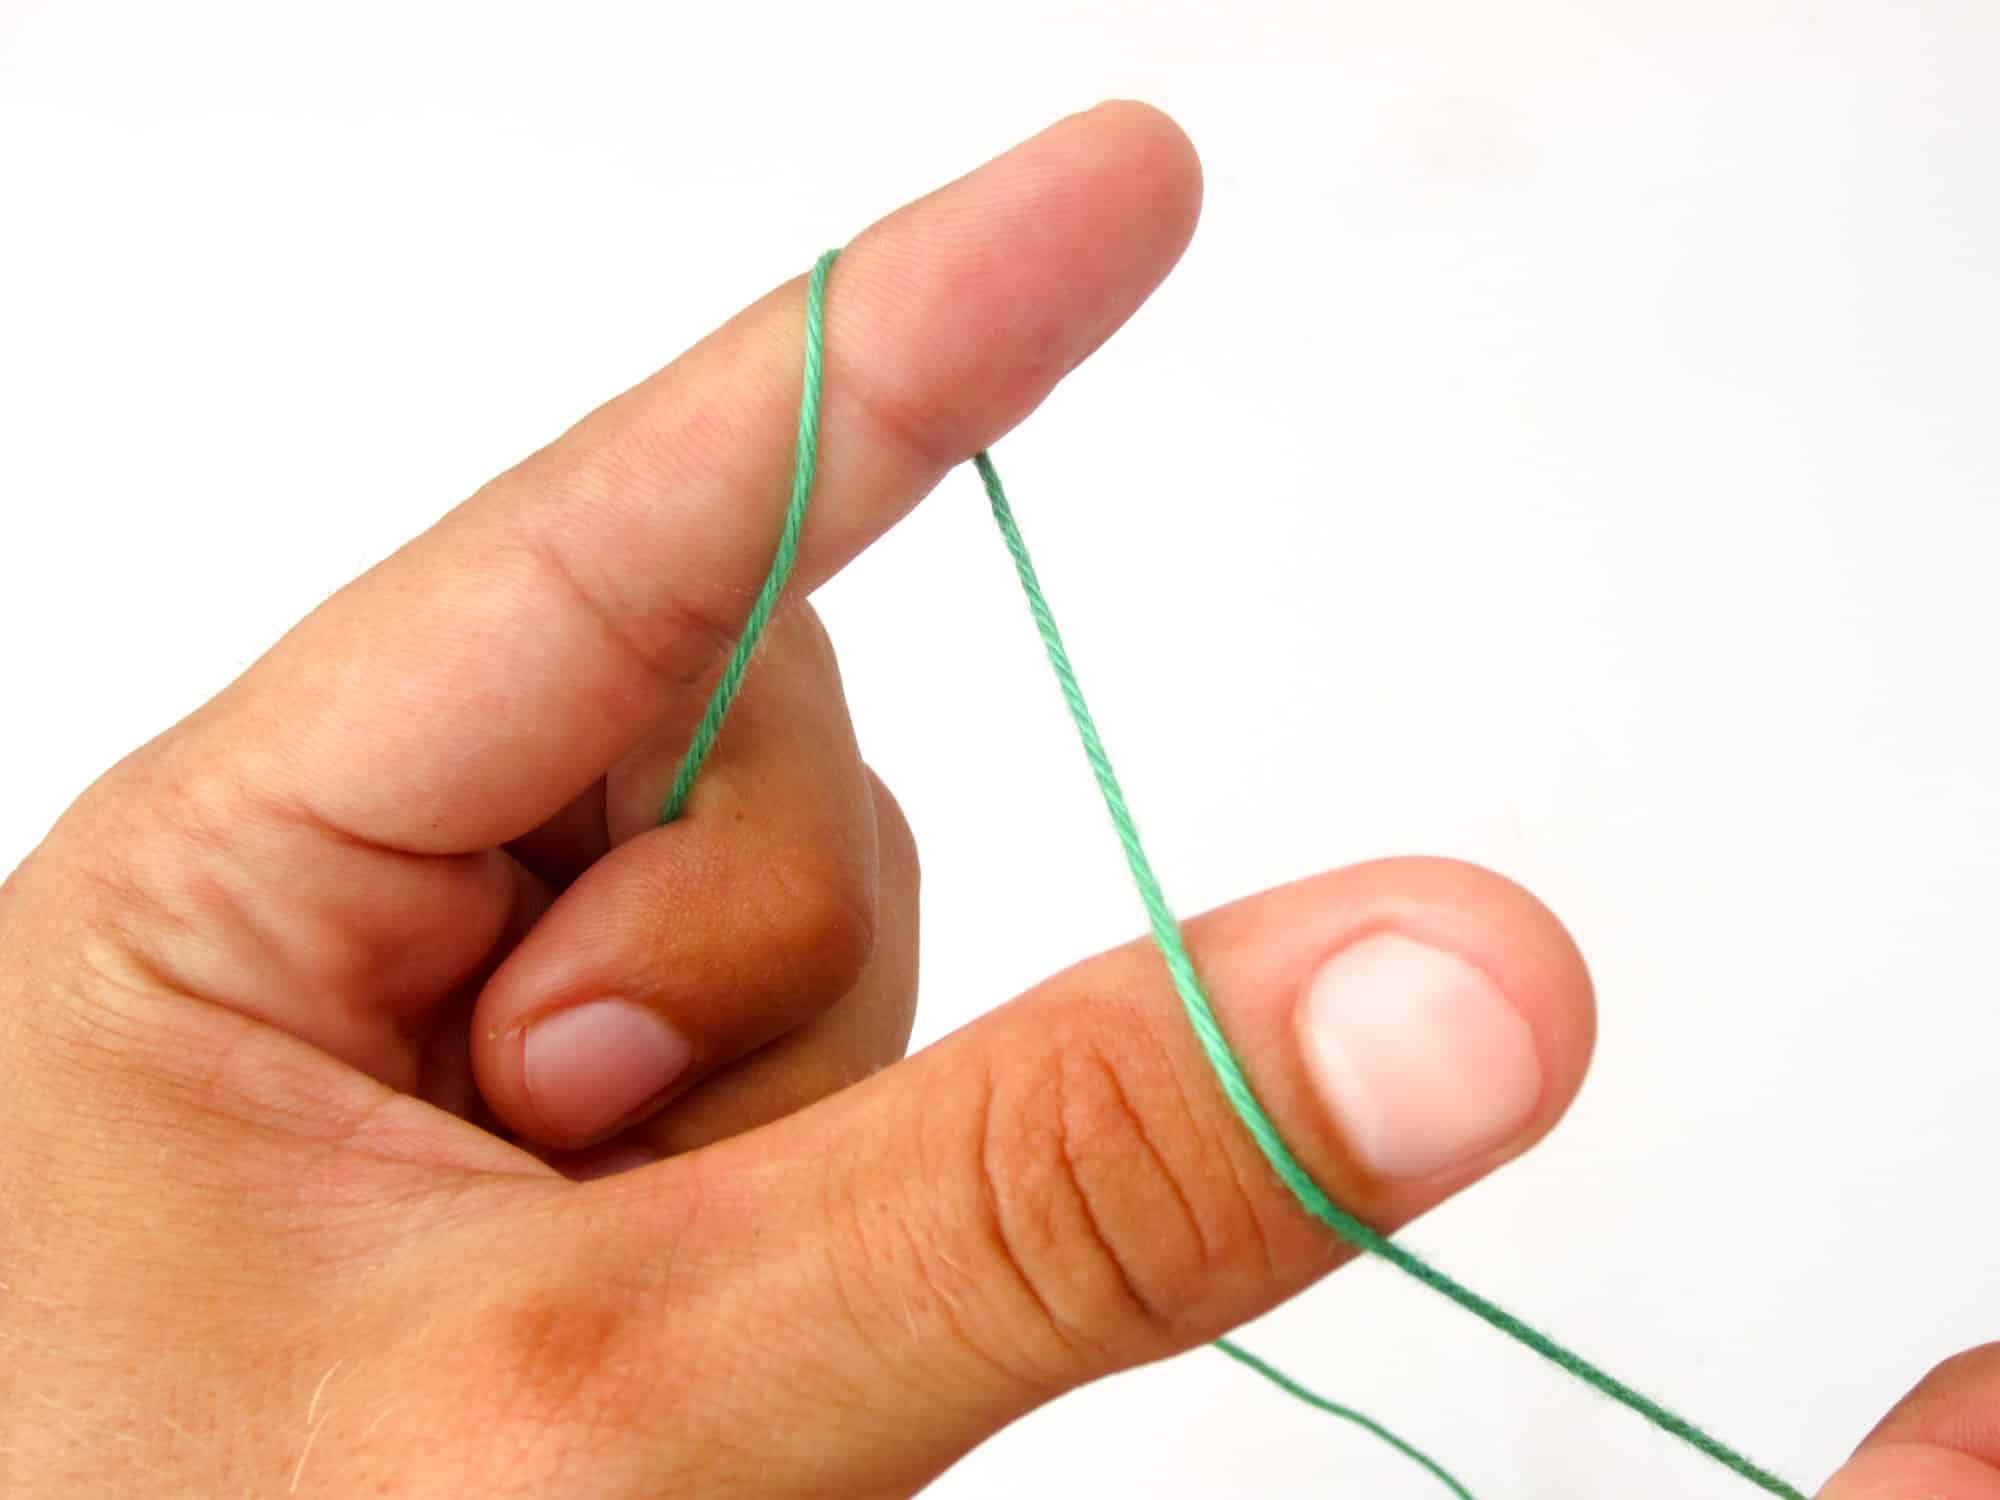
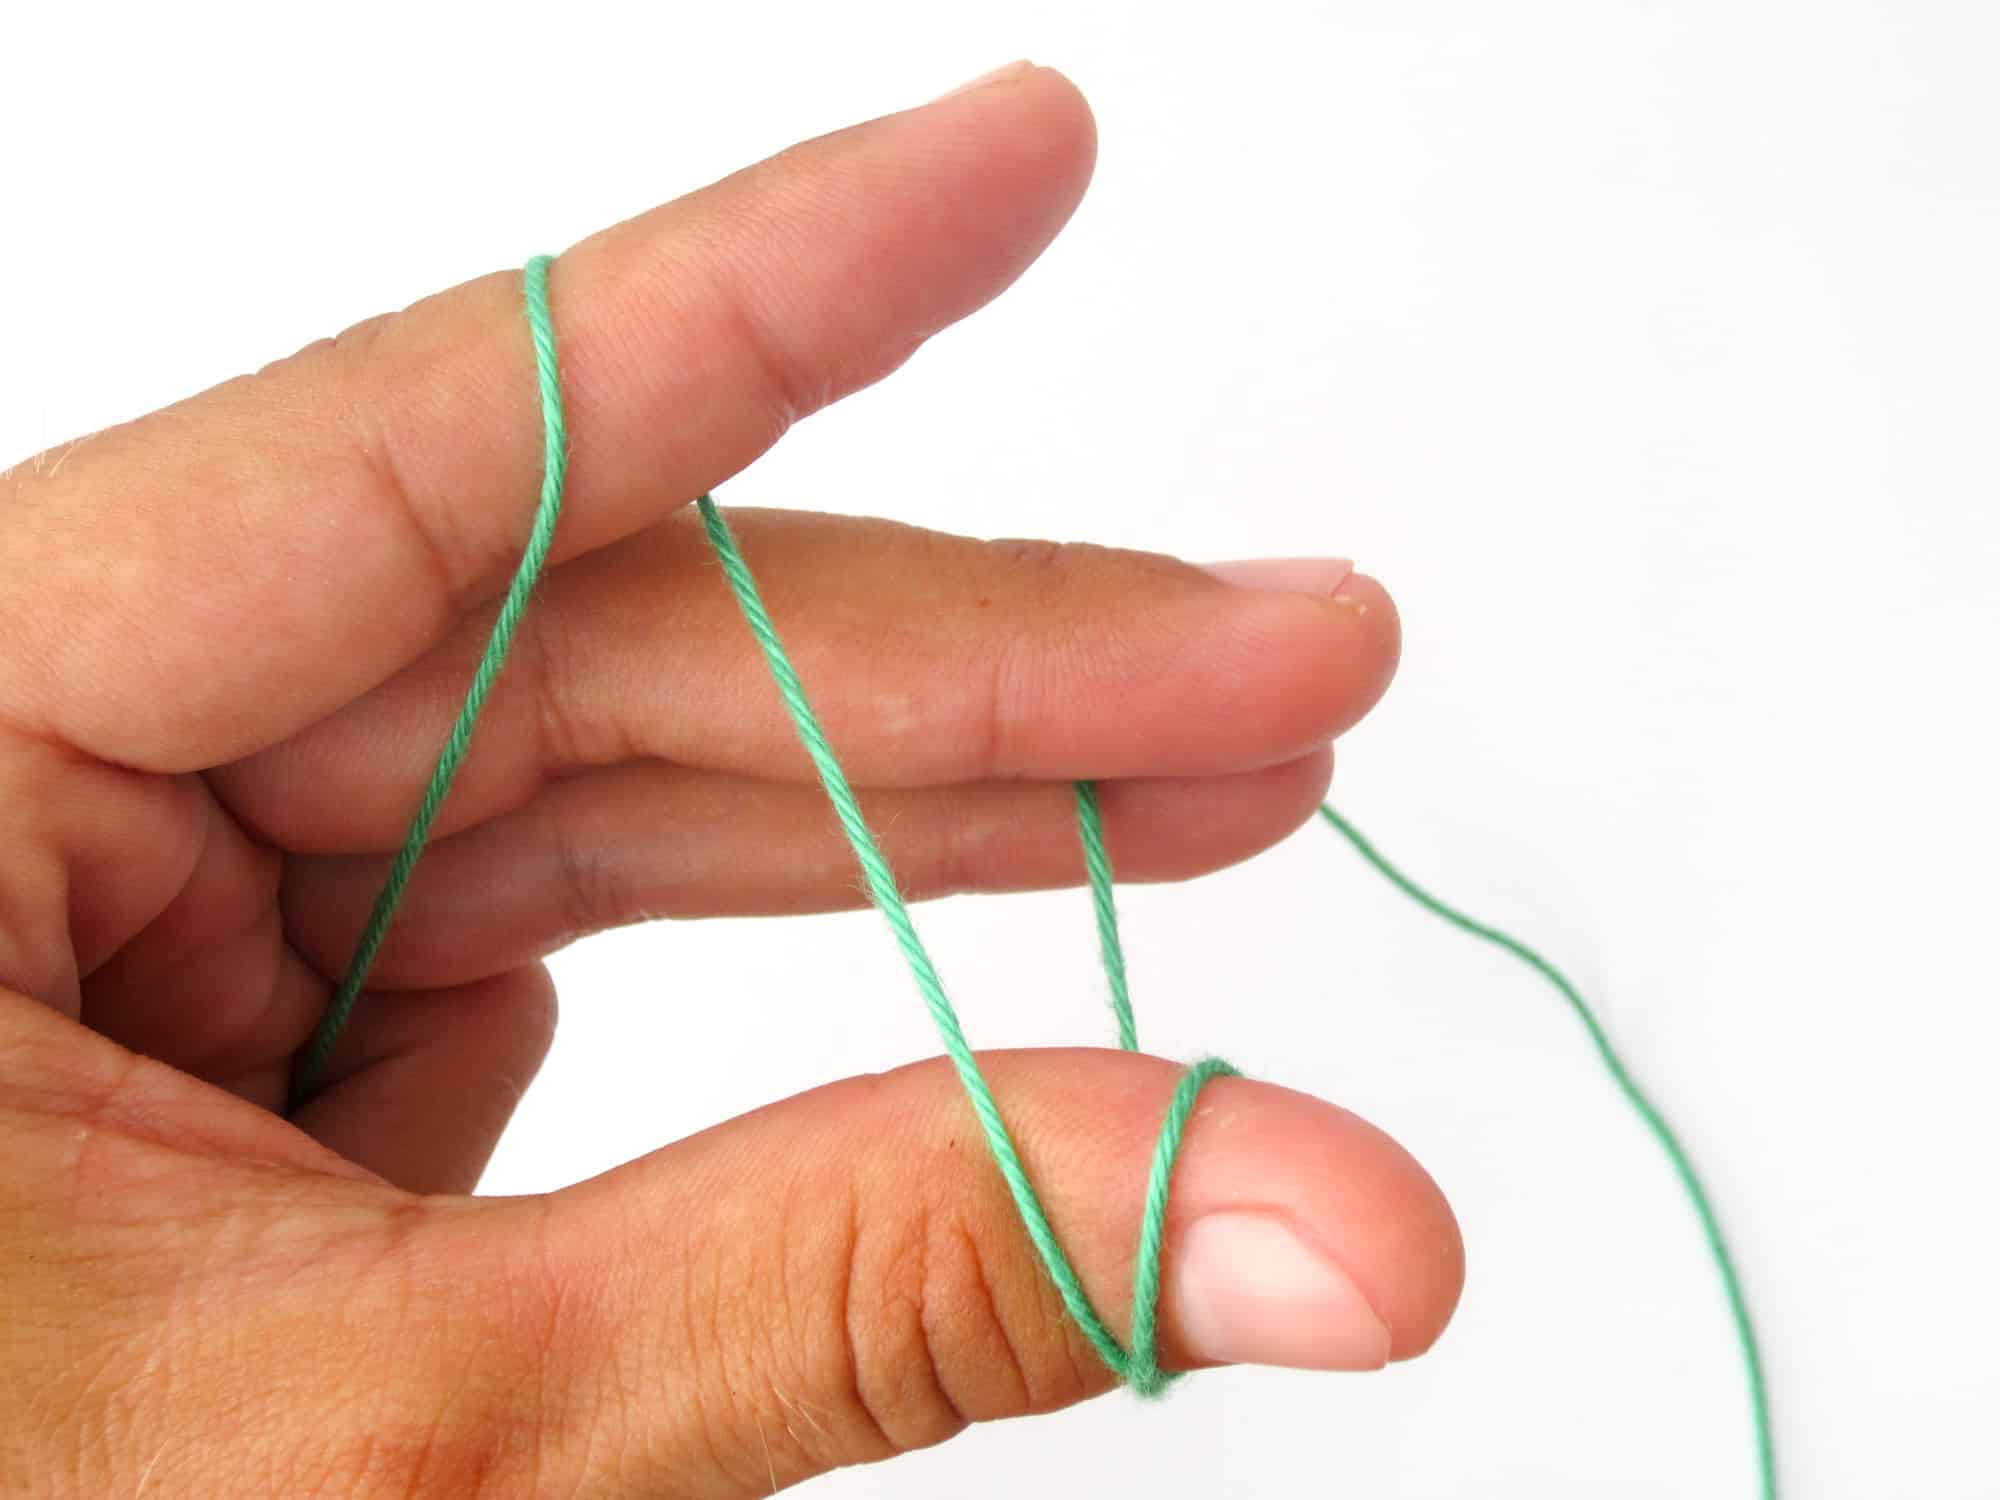
- Step 1: Hold the end of the thread with your right hand and place the remaining thread over the inside of your left hand. Close the little finger, ring finger and middle finger of the left hand to hold the thread in place. The thread now lies over the left index finger.

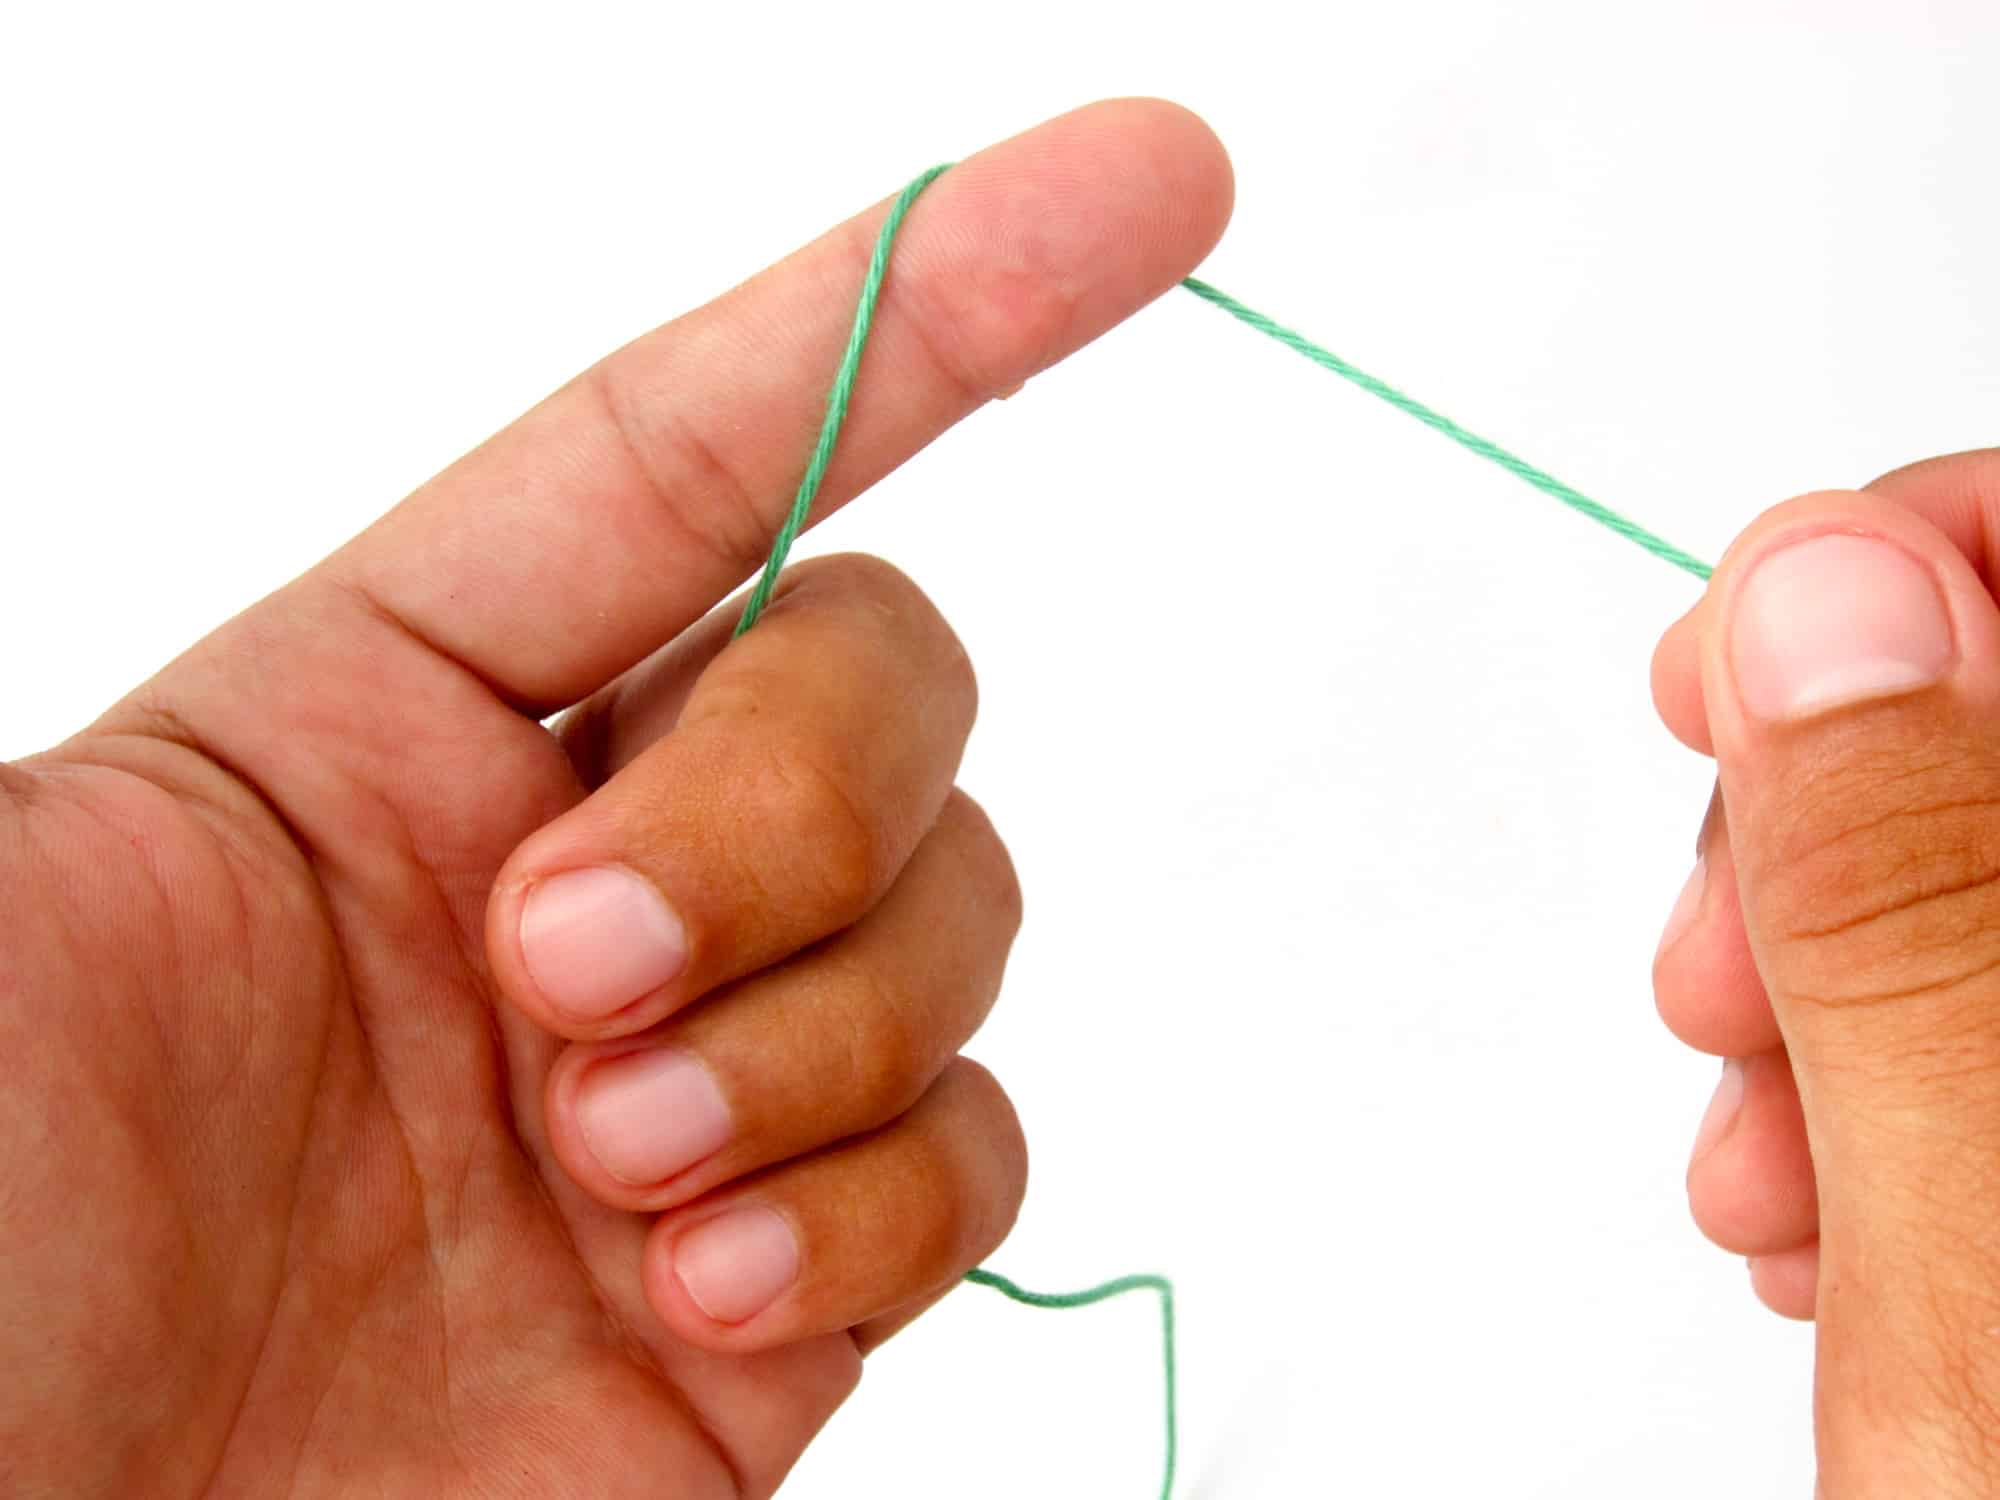
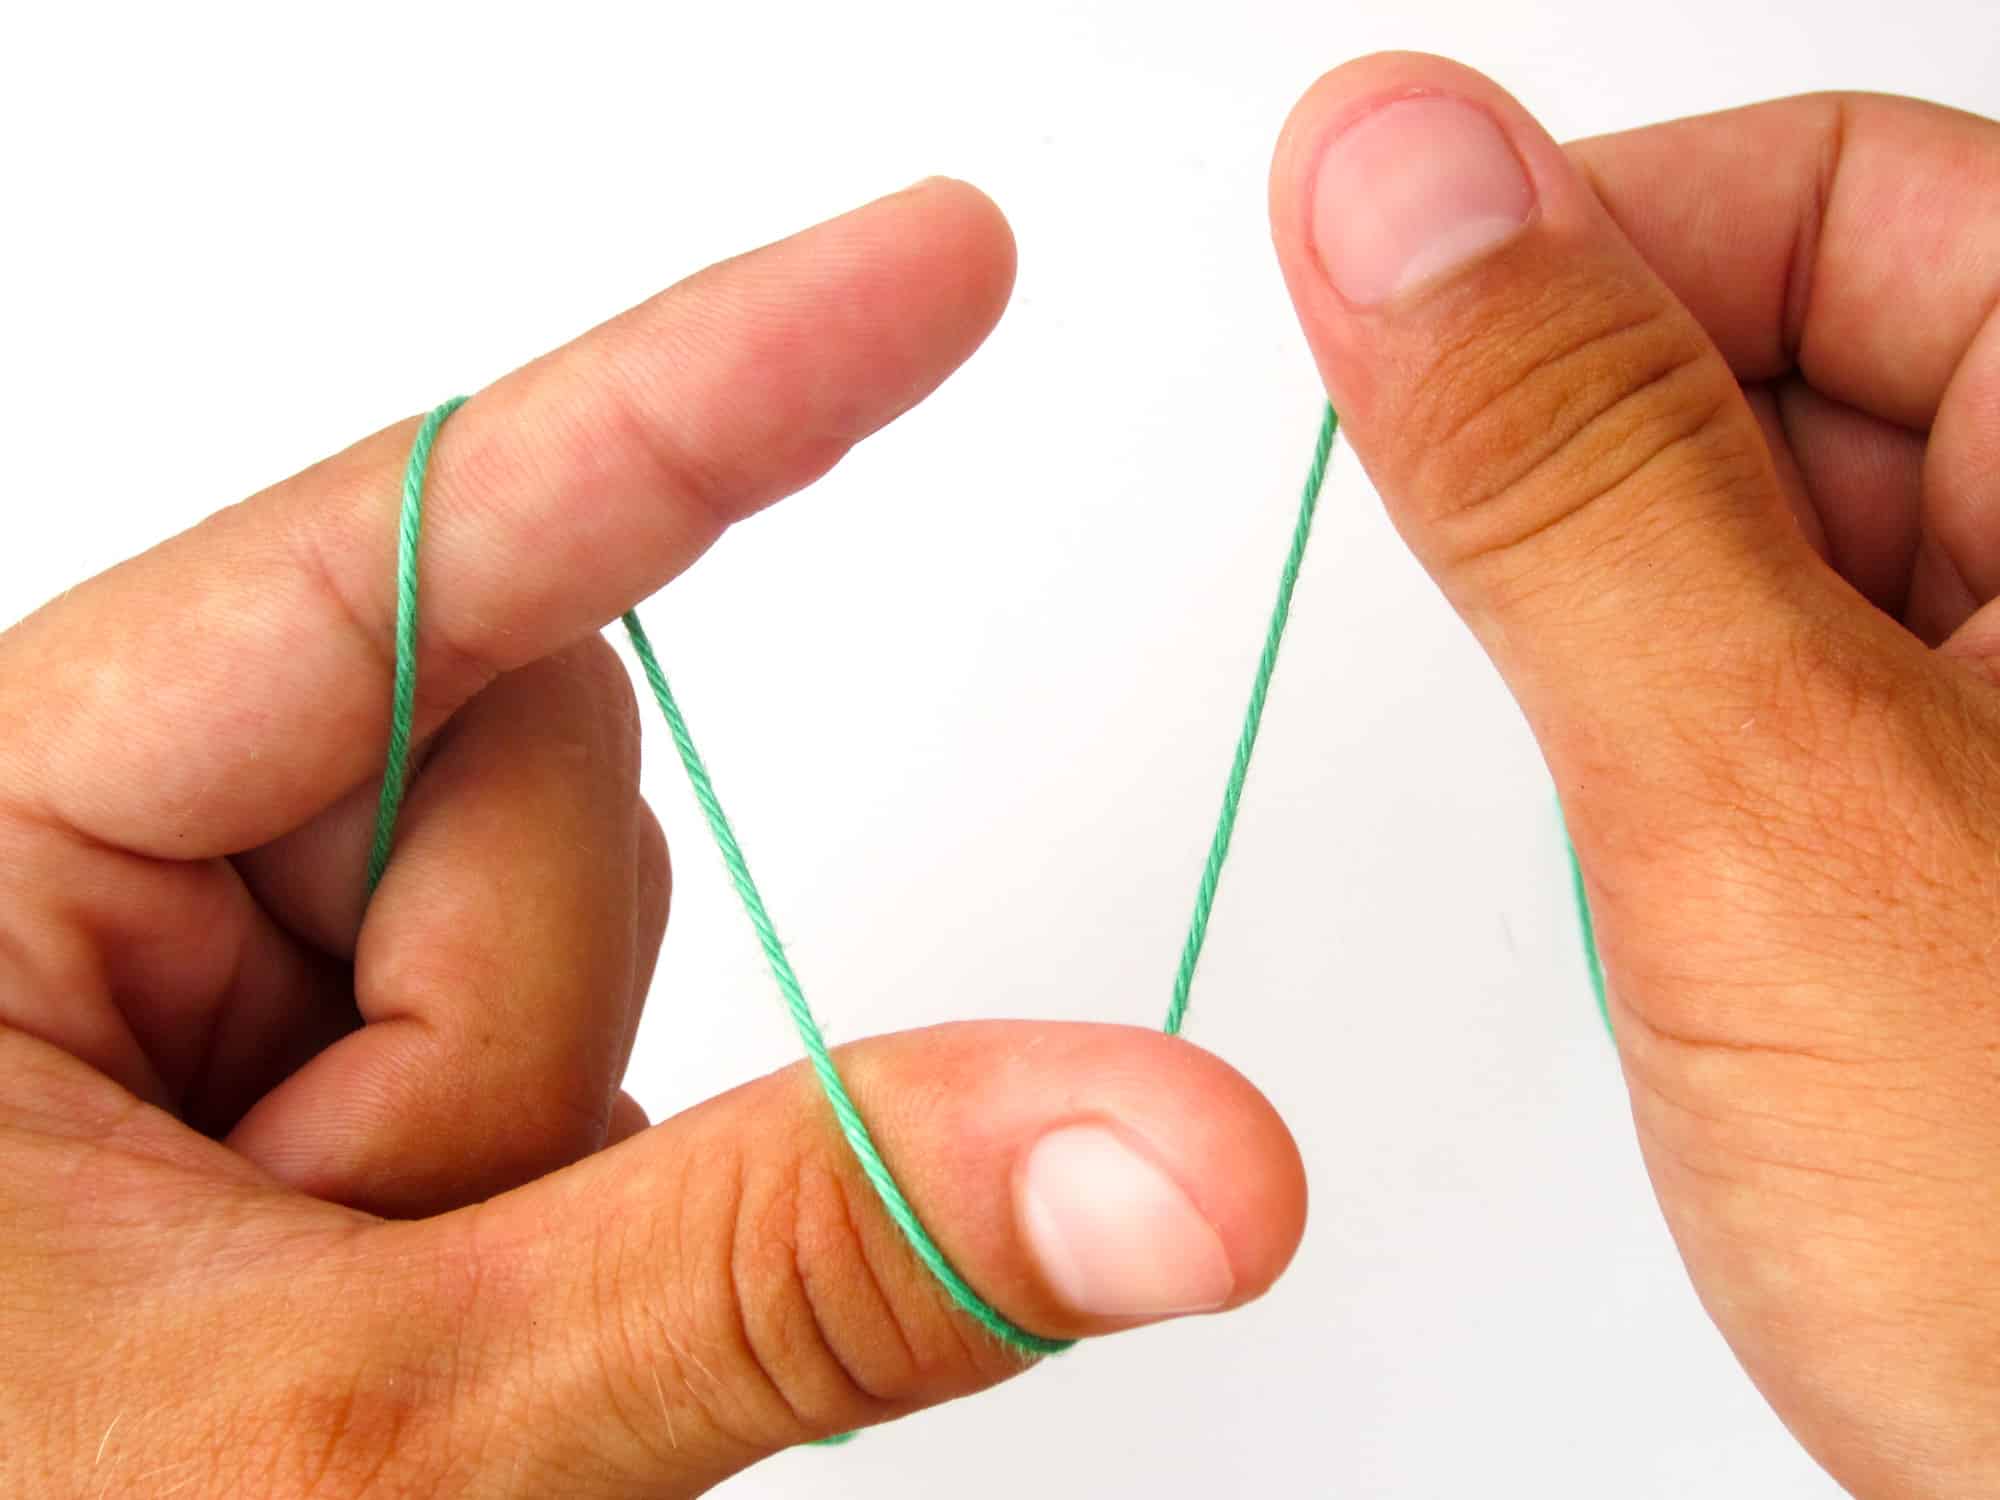
- Step 2: Spread the thumb of the left hand and pull the thread OVER the thumb and wrap the thread once around it.
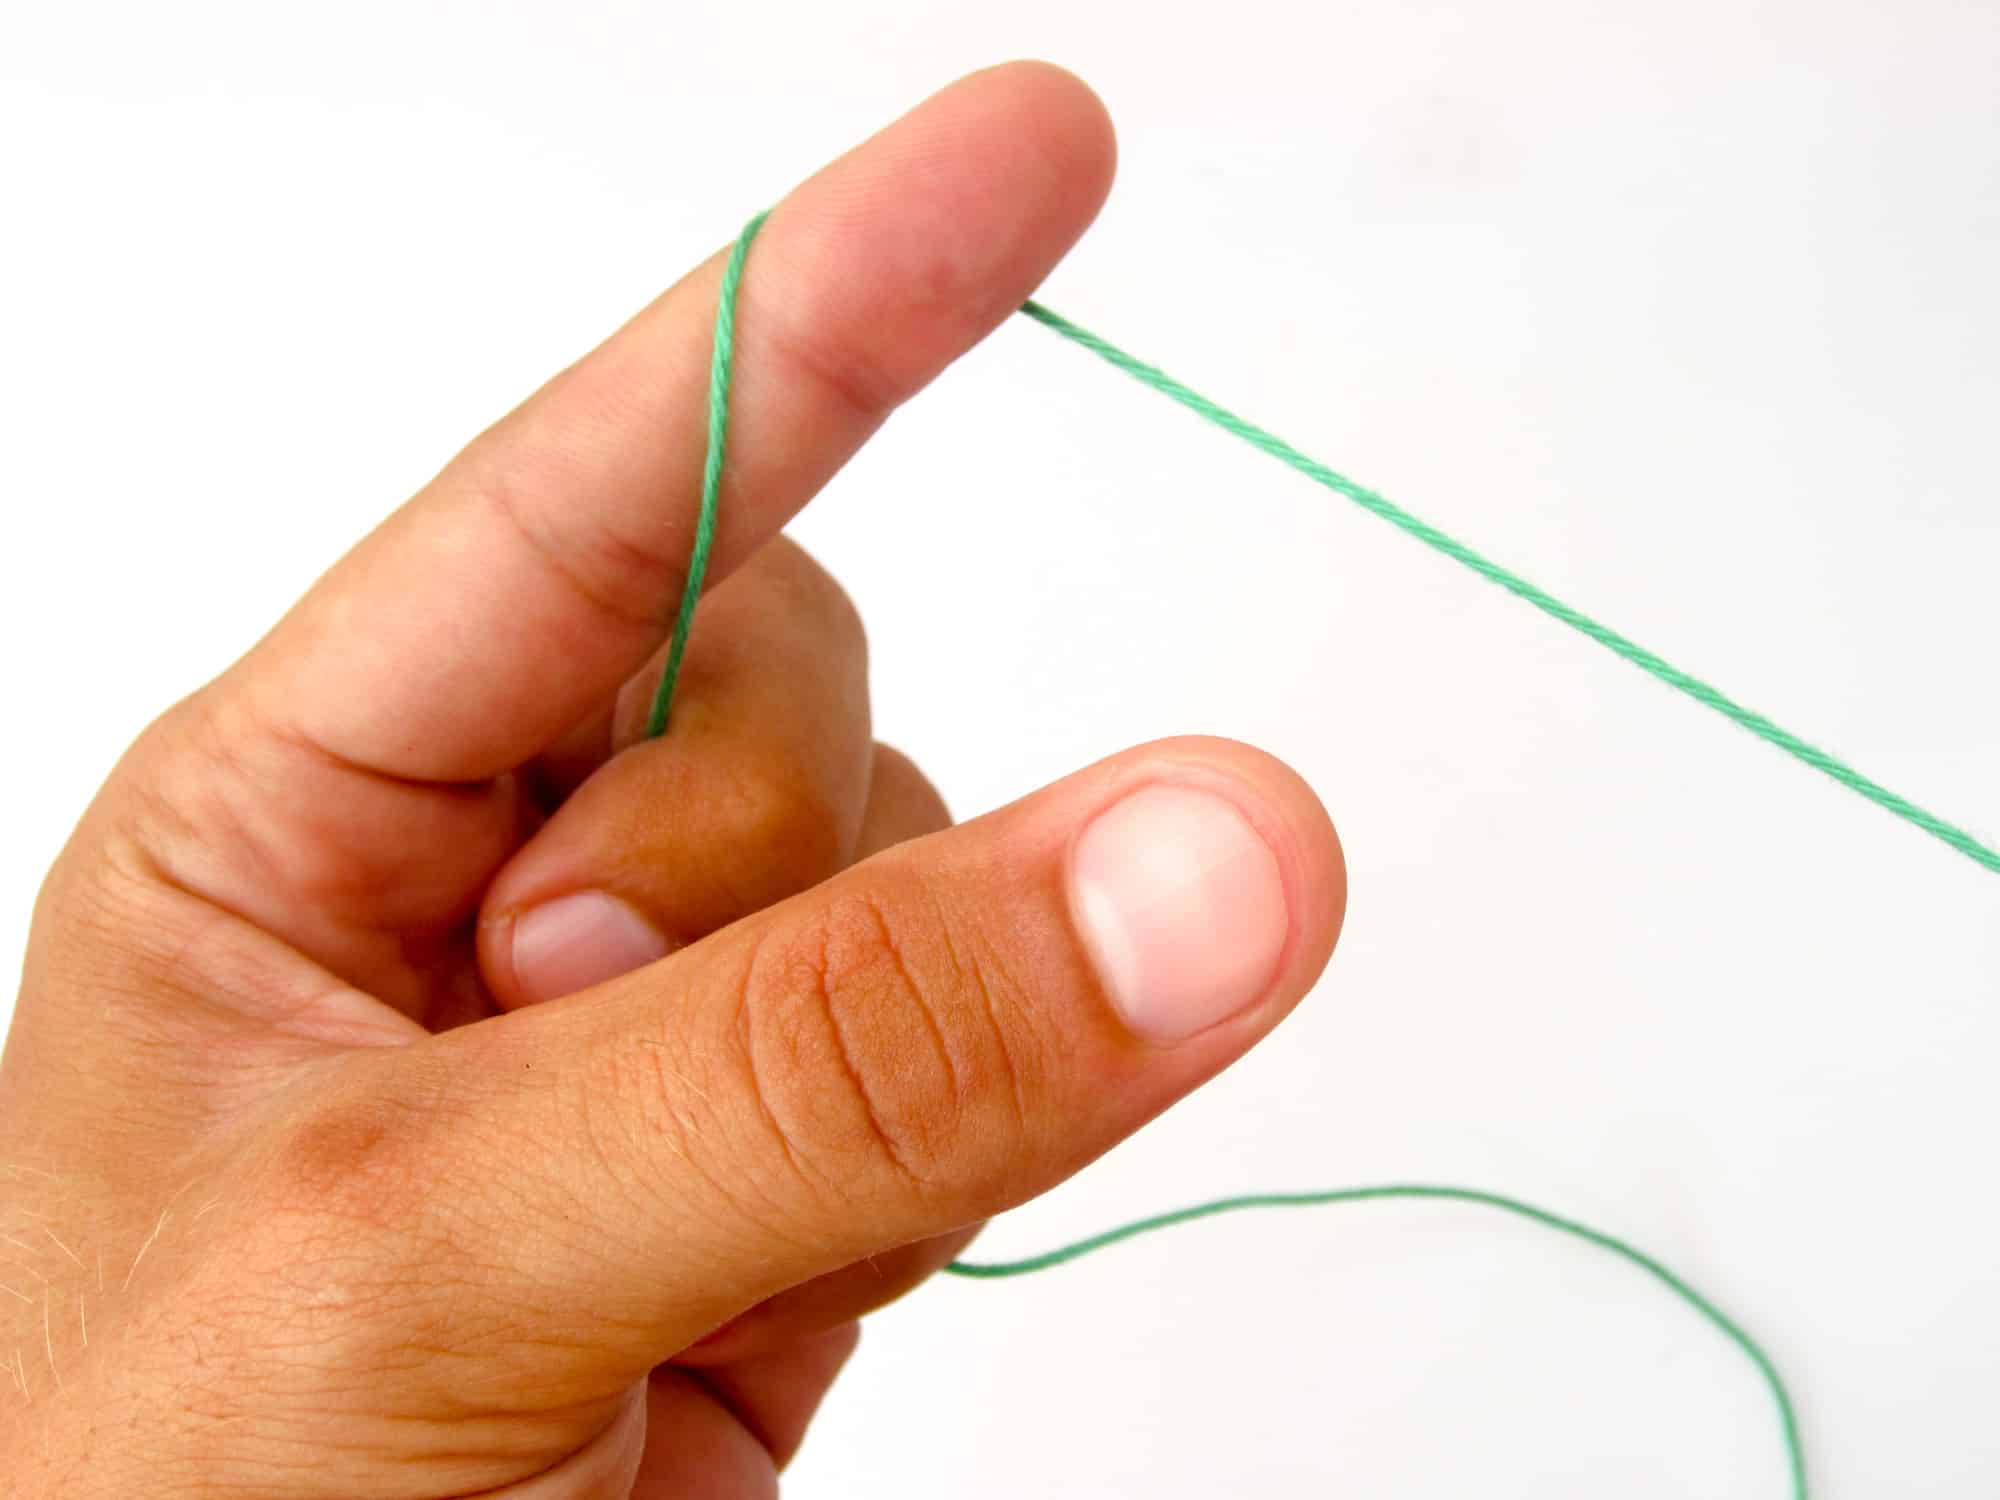
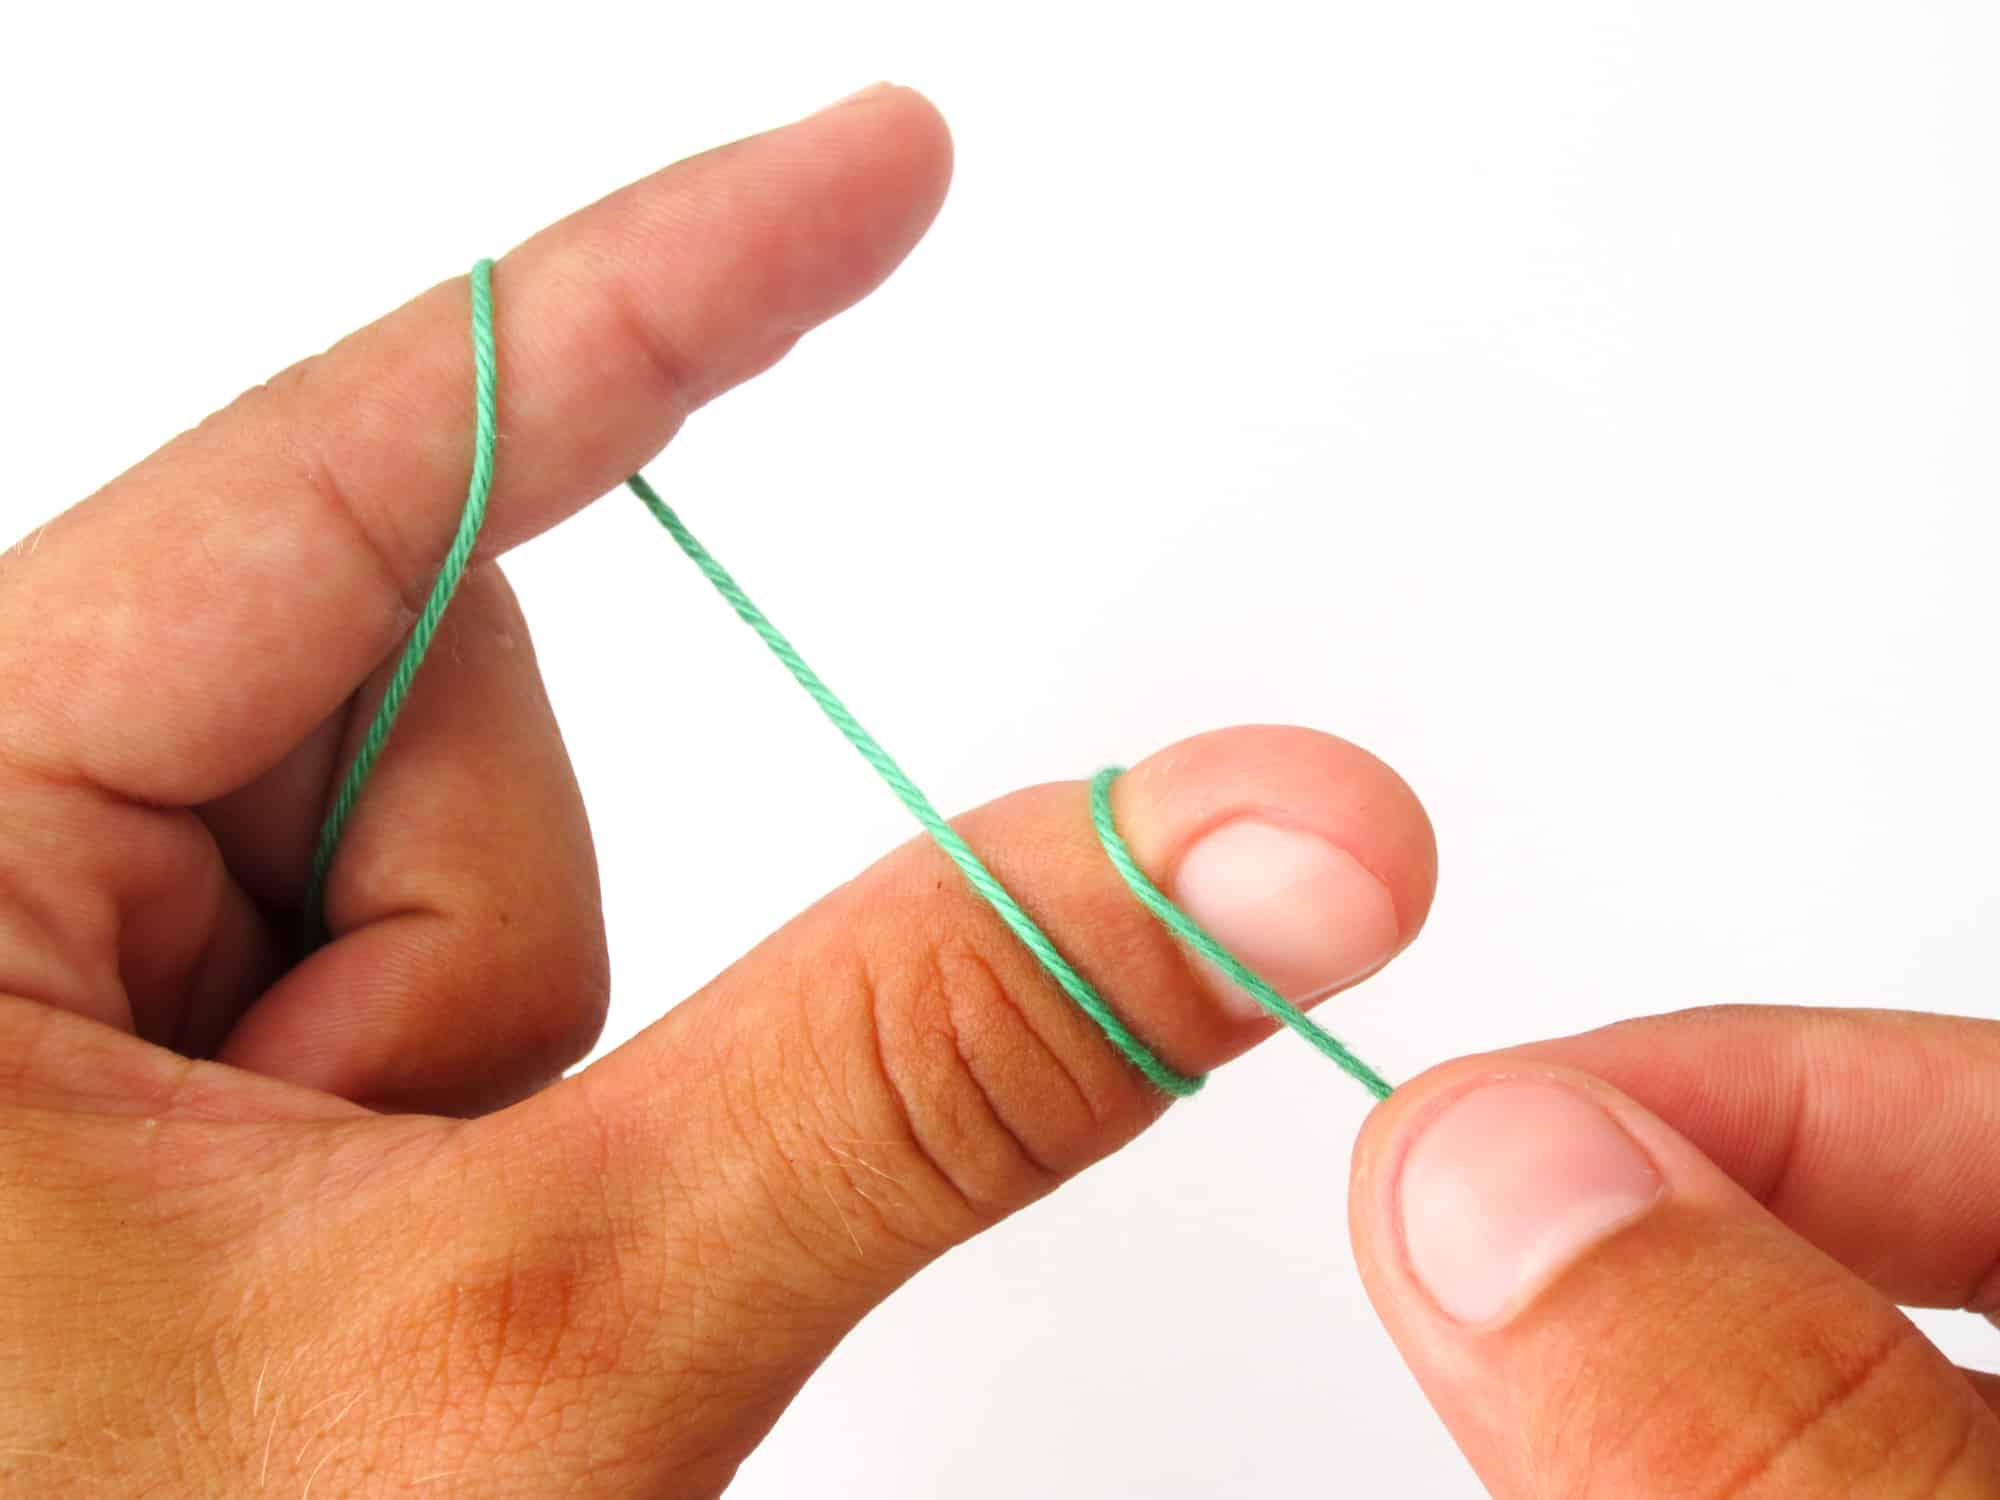
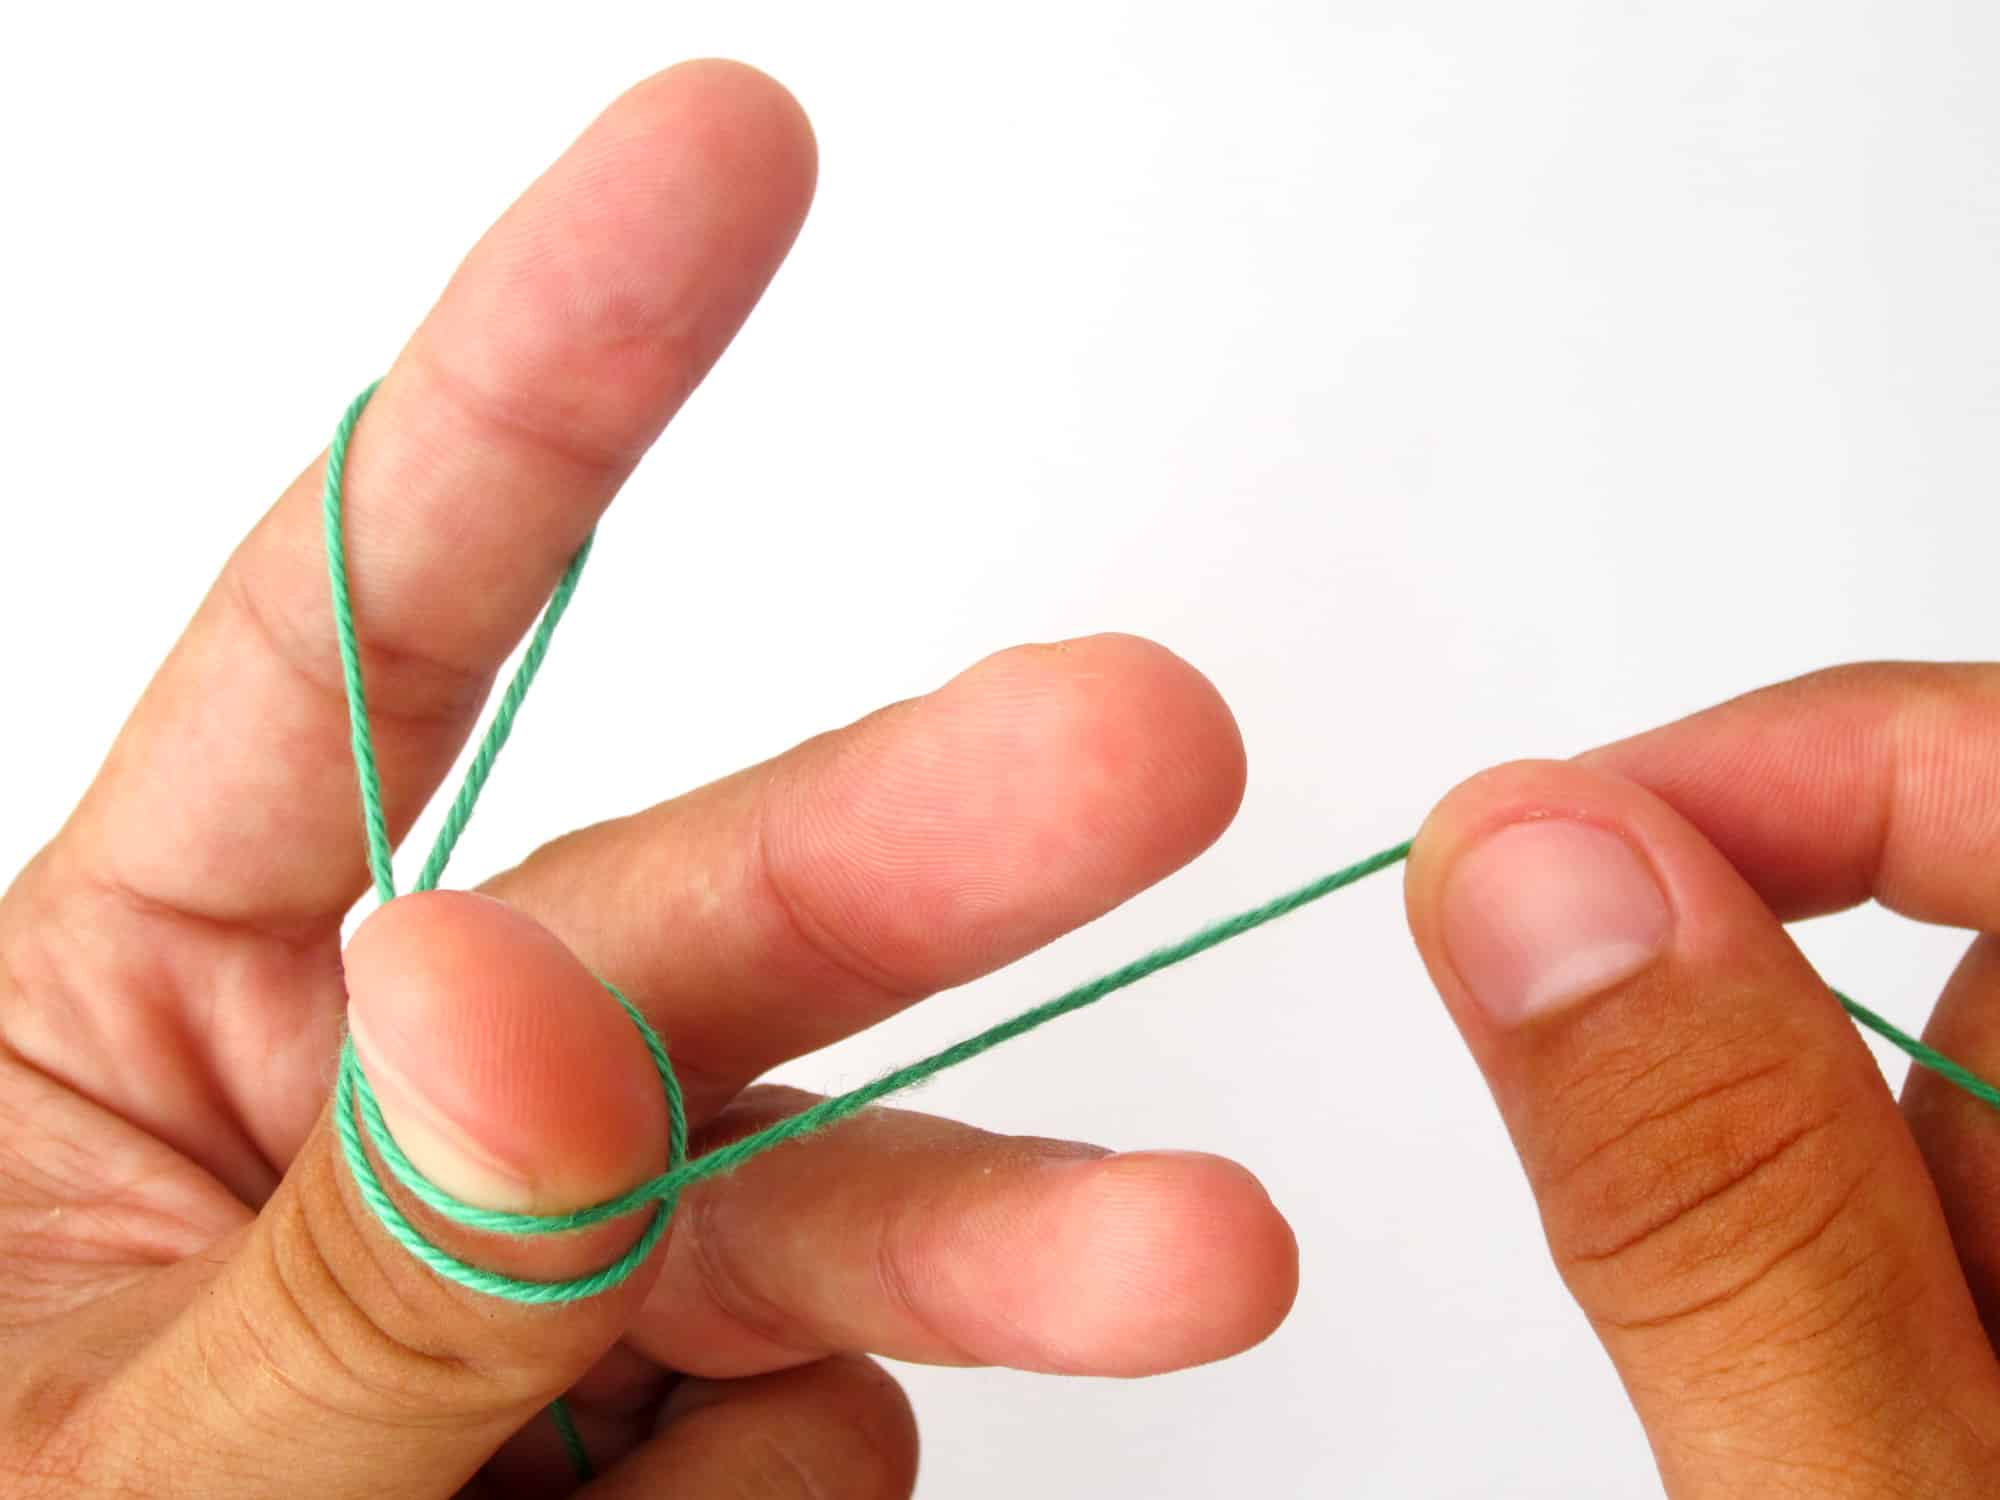
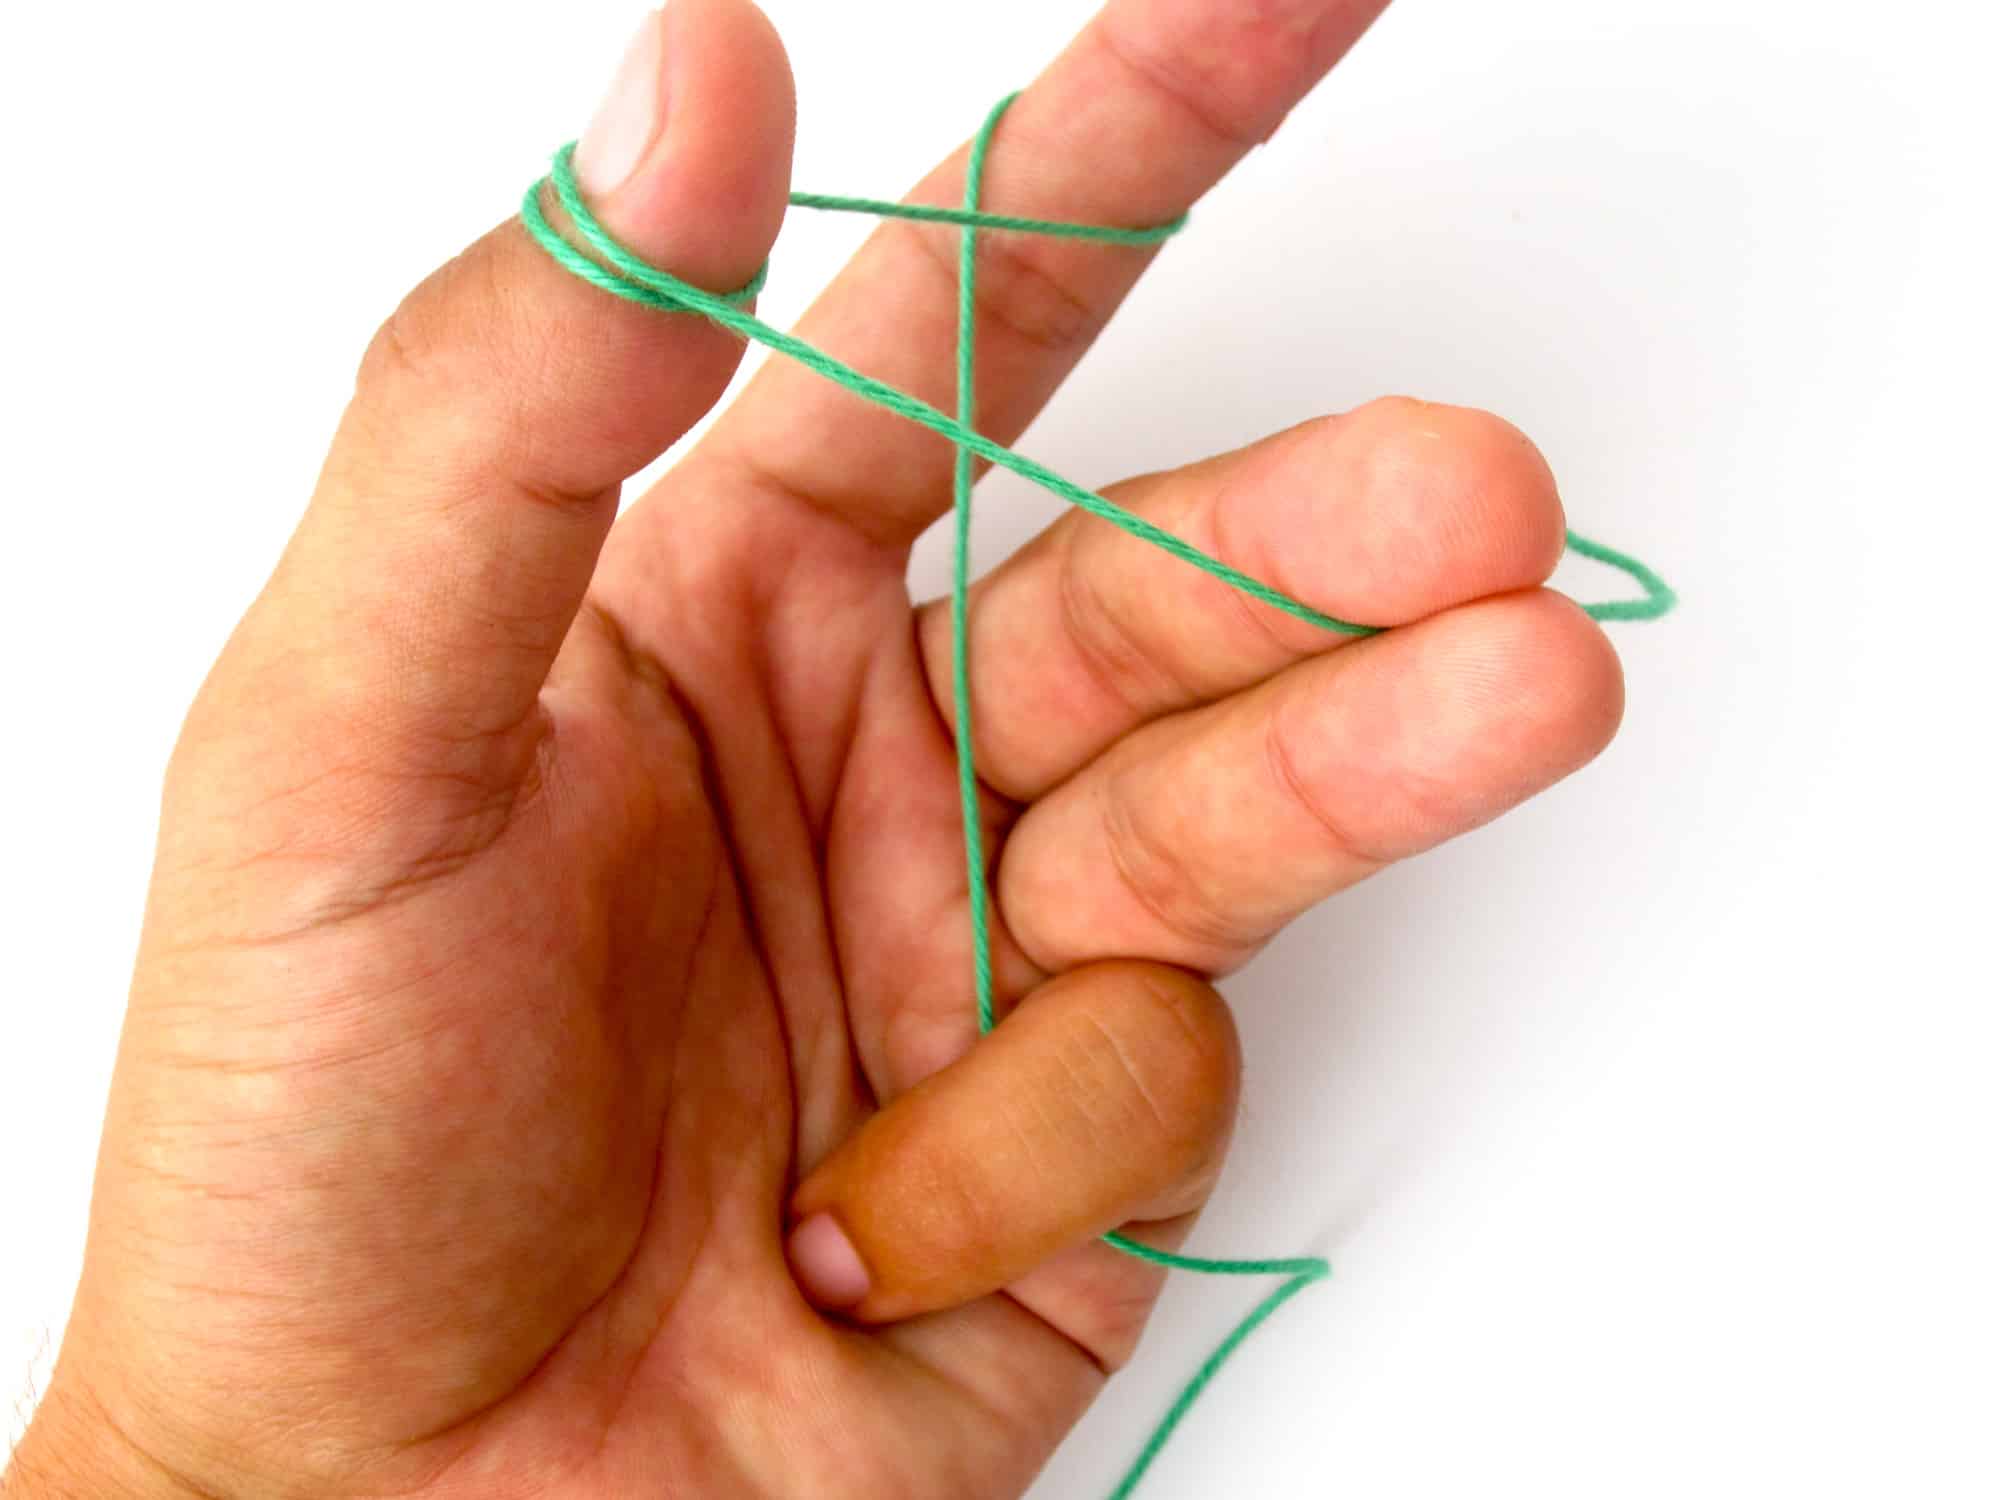
- Step 3: Open the left middle finger and ring finger and spread both fingers apart. Then pull the end of the thread between both fingers. Hold the thread that runs to the ball of yarn with your little finger. Close your left middle finger and ring finger and hold the end of the thread between these two fingers.

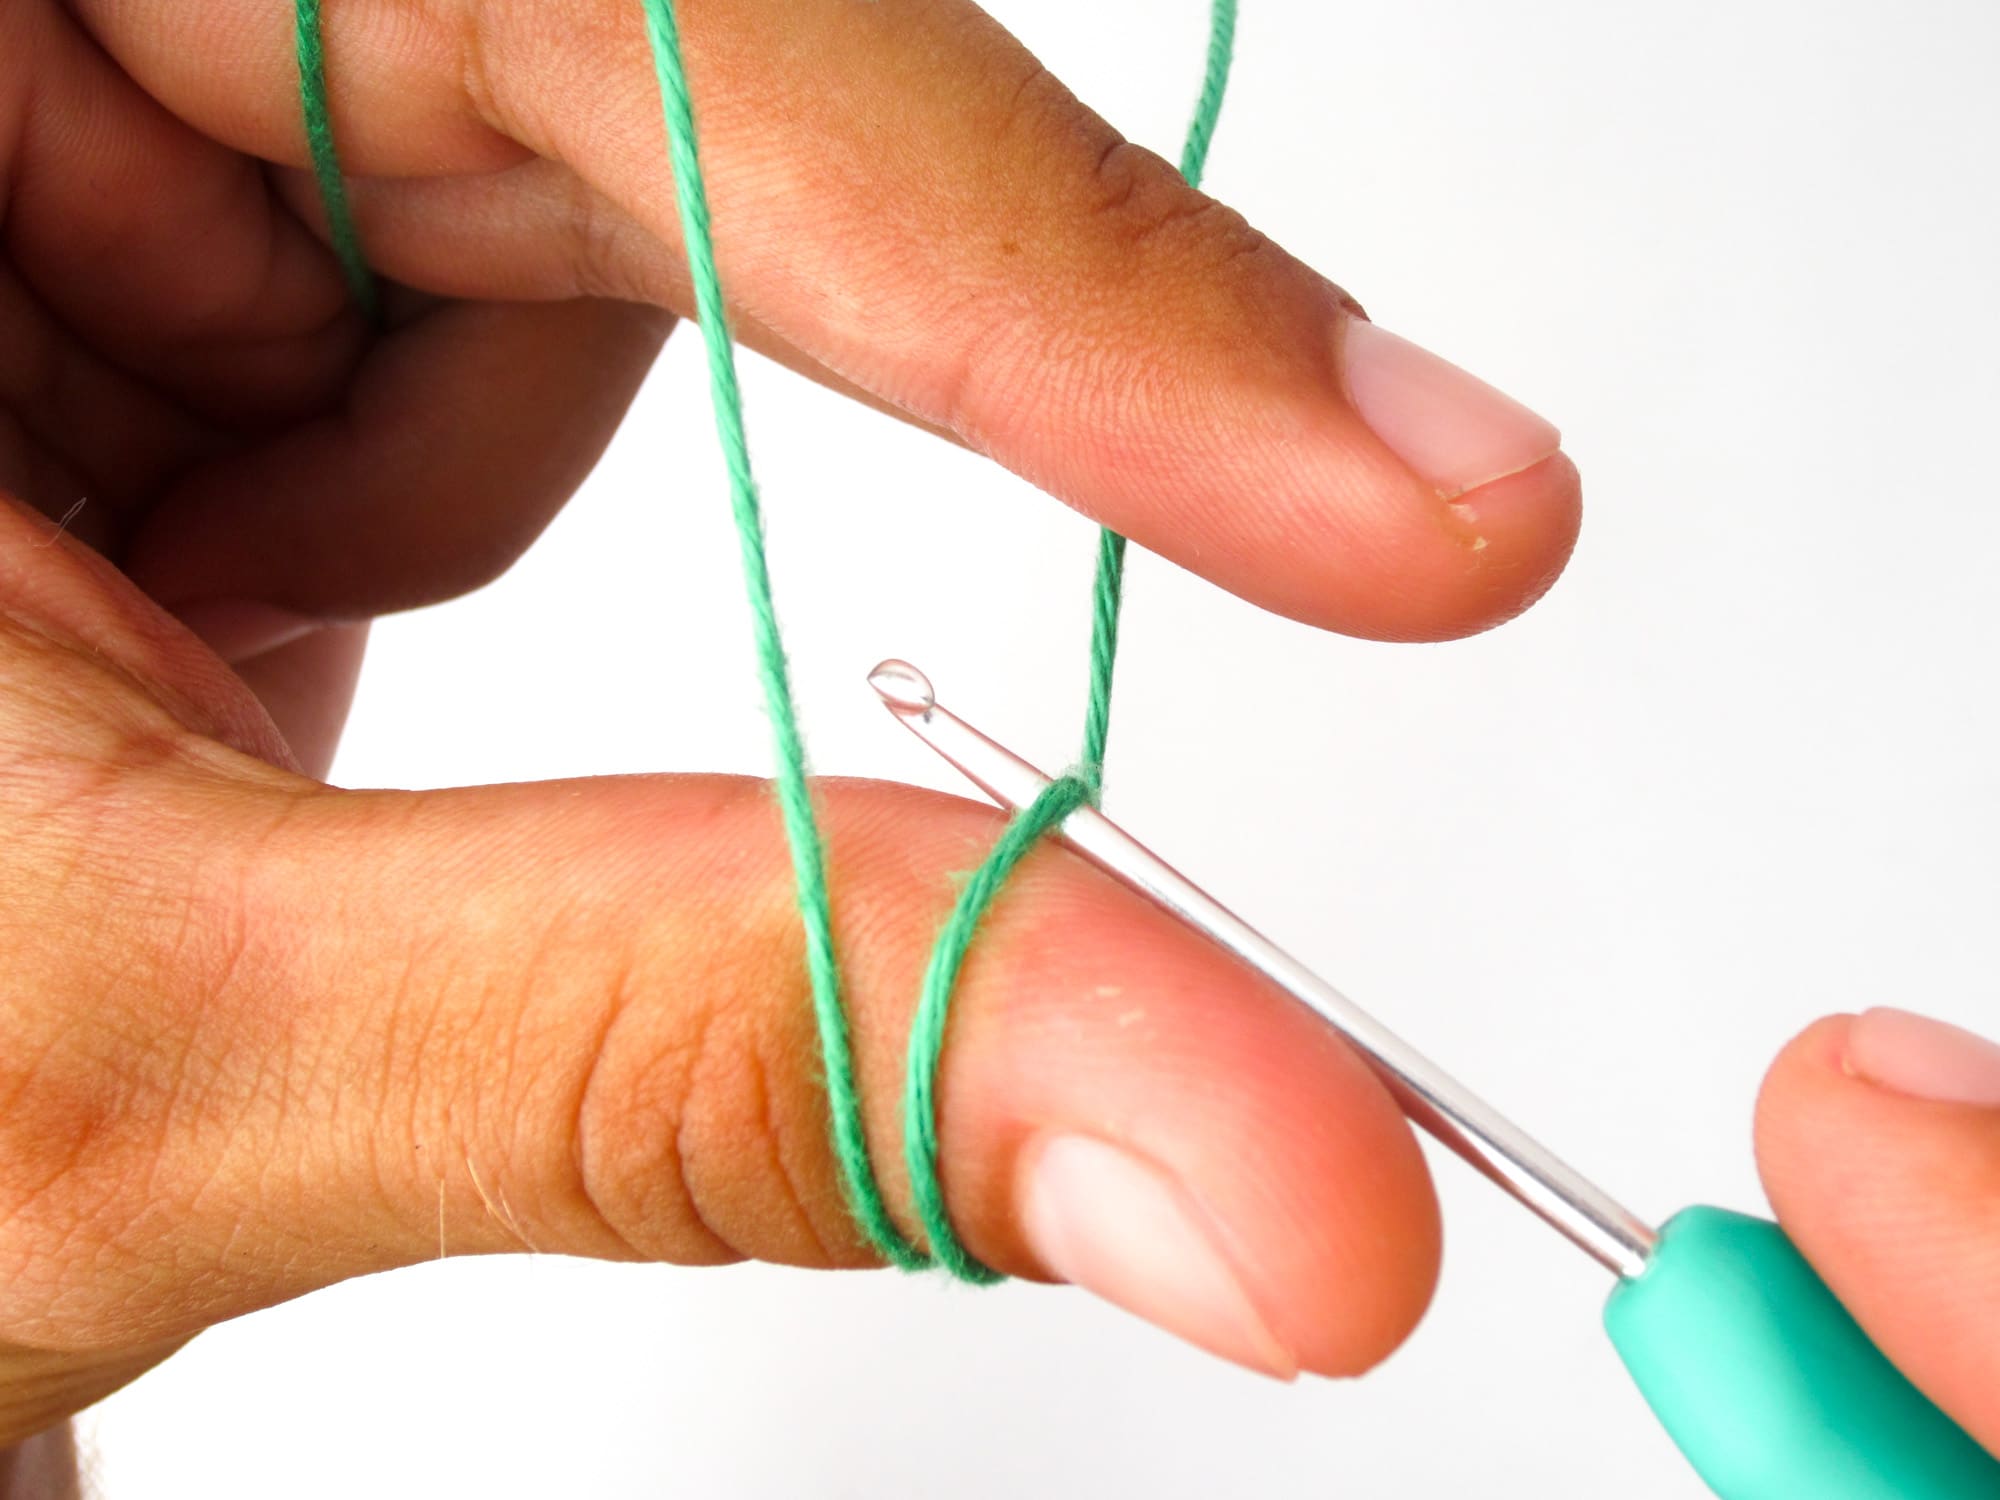
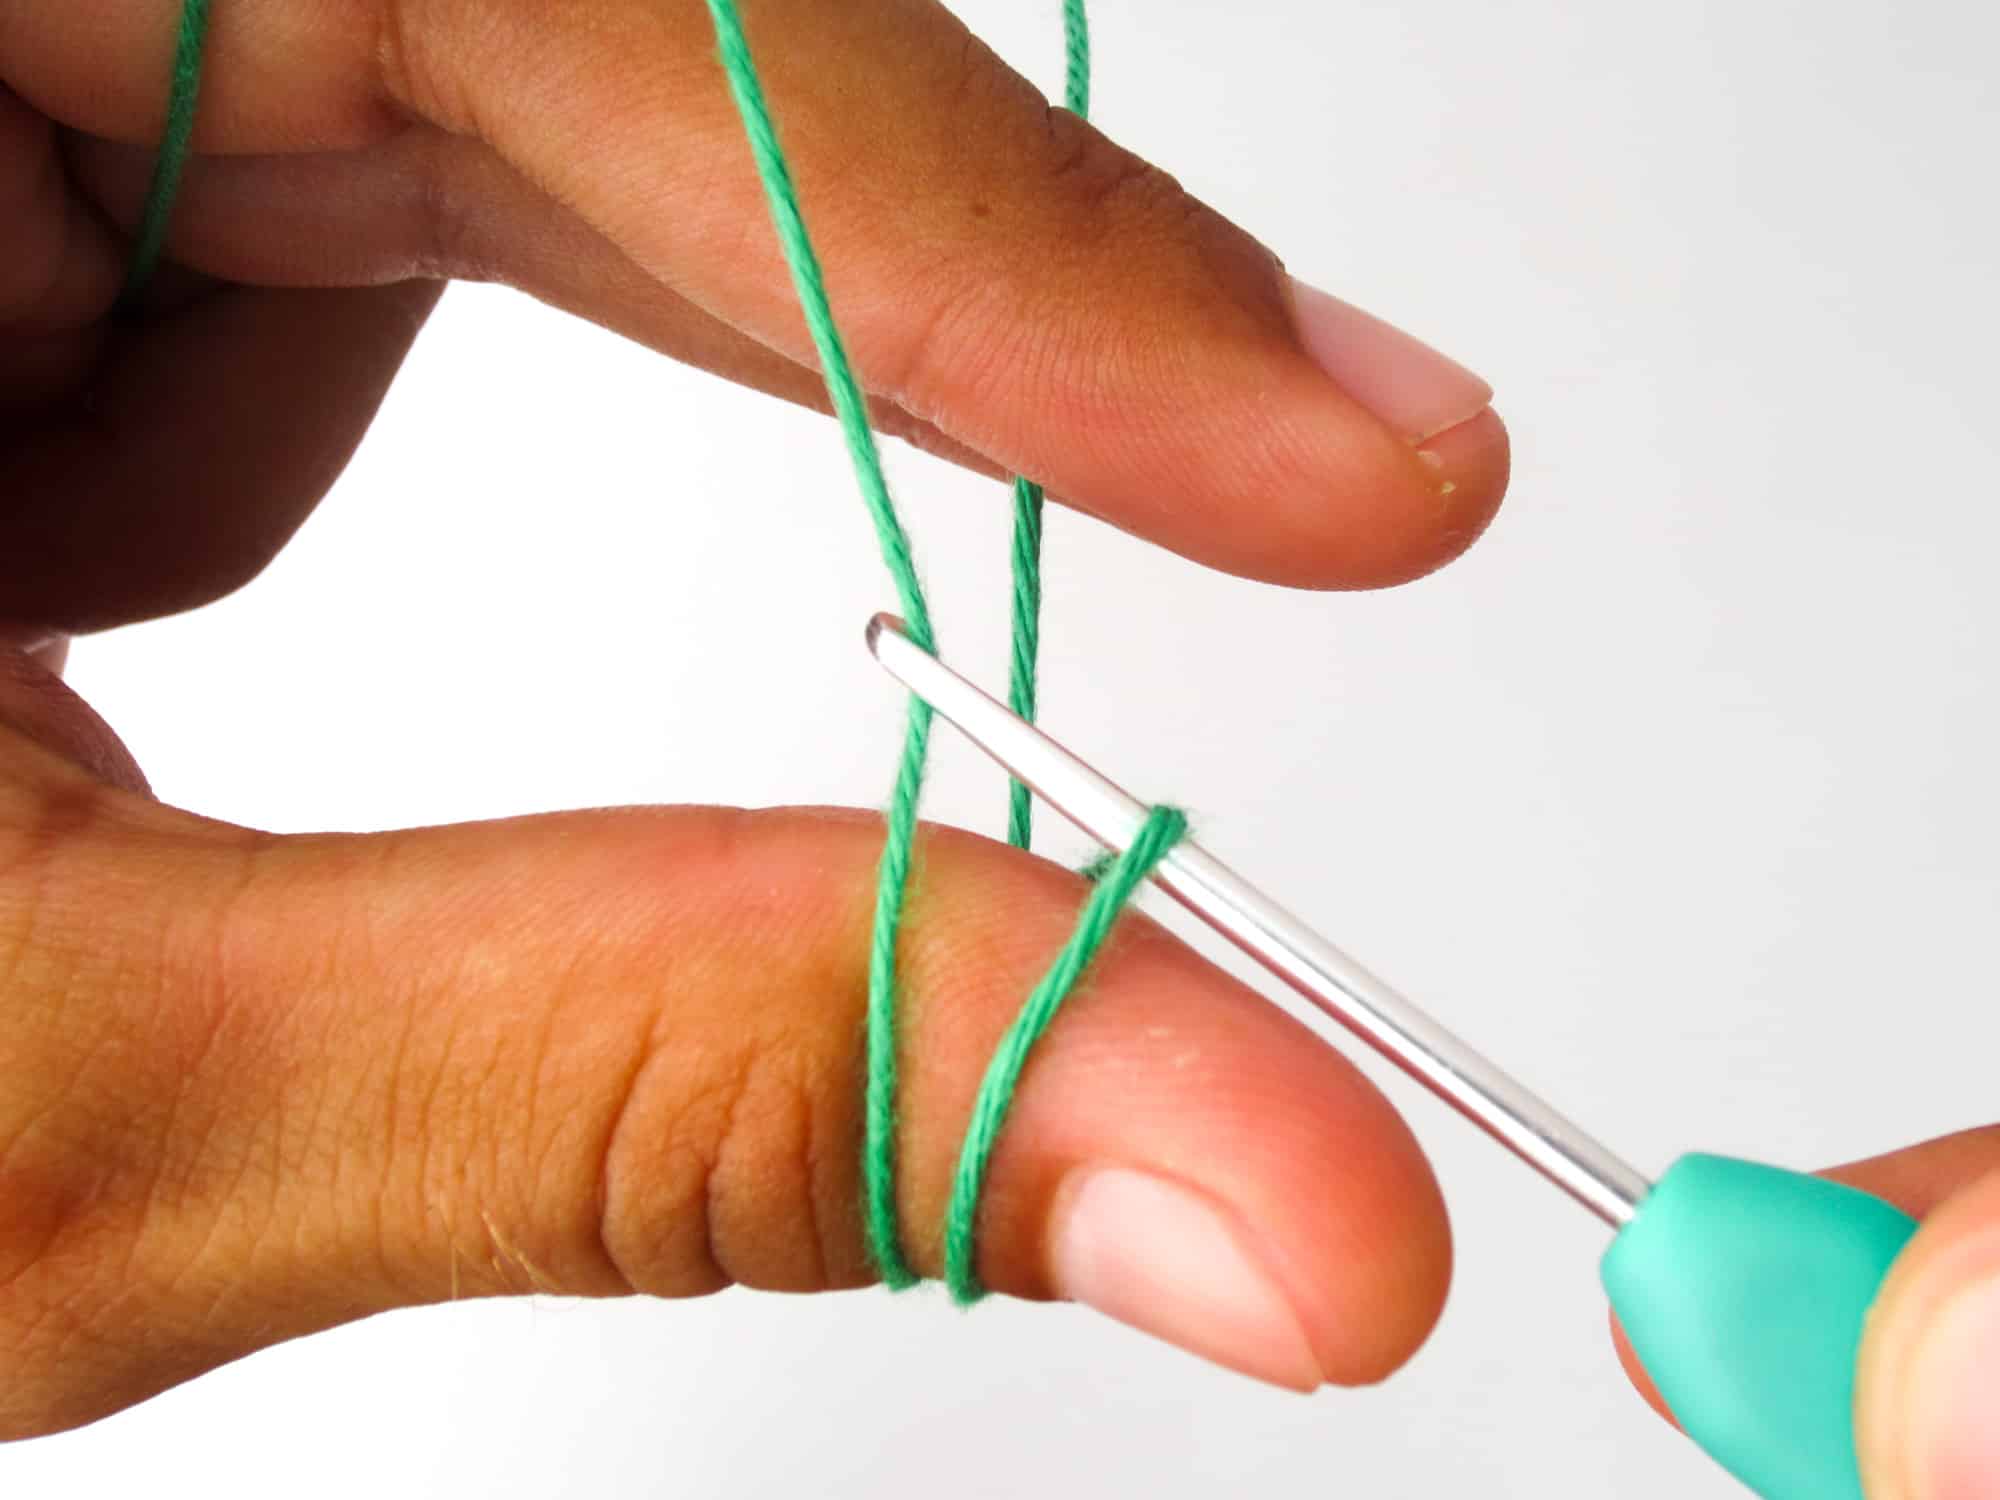
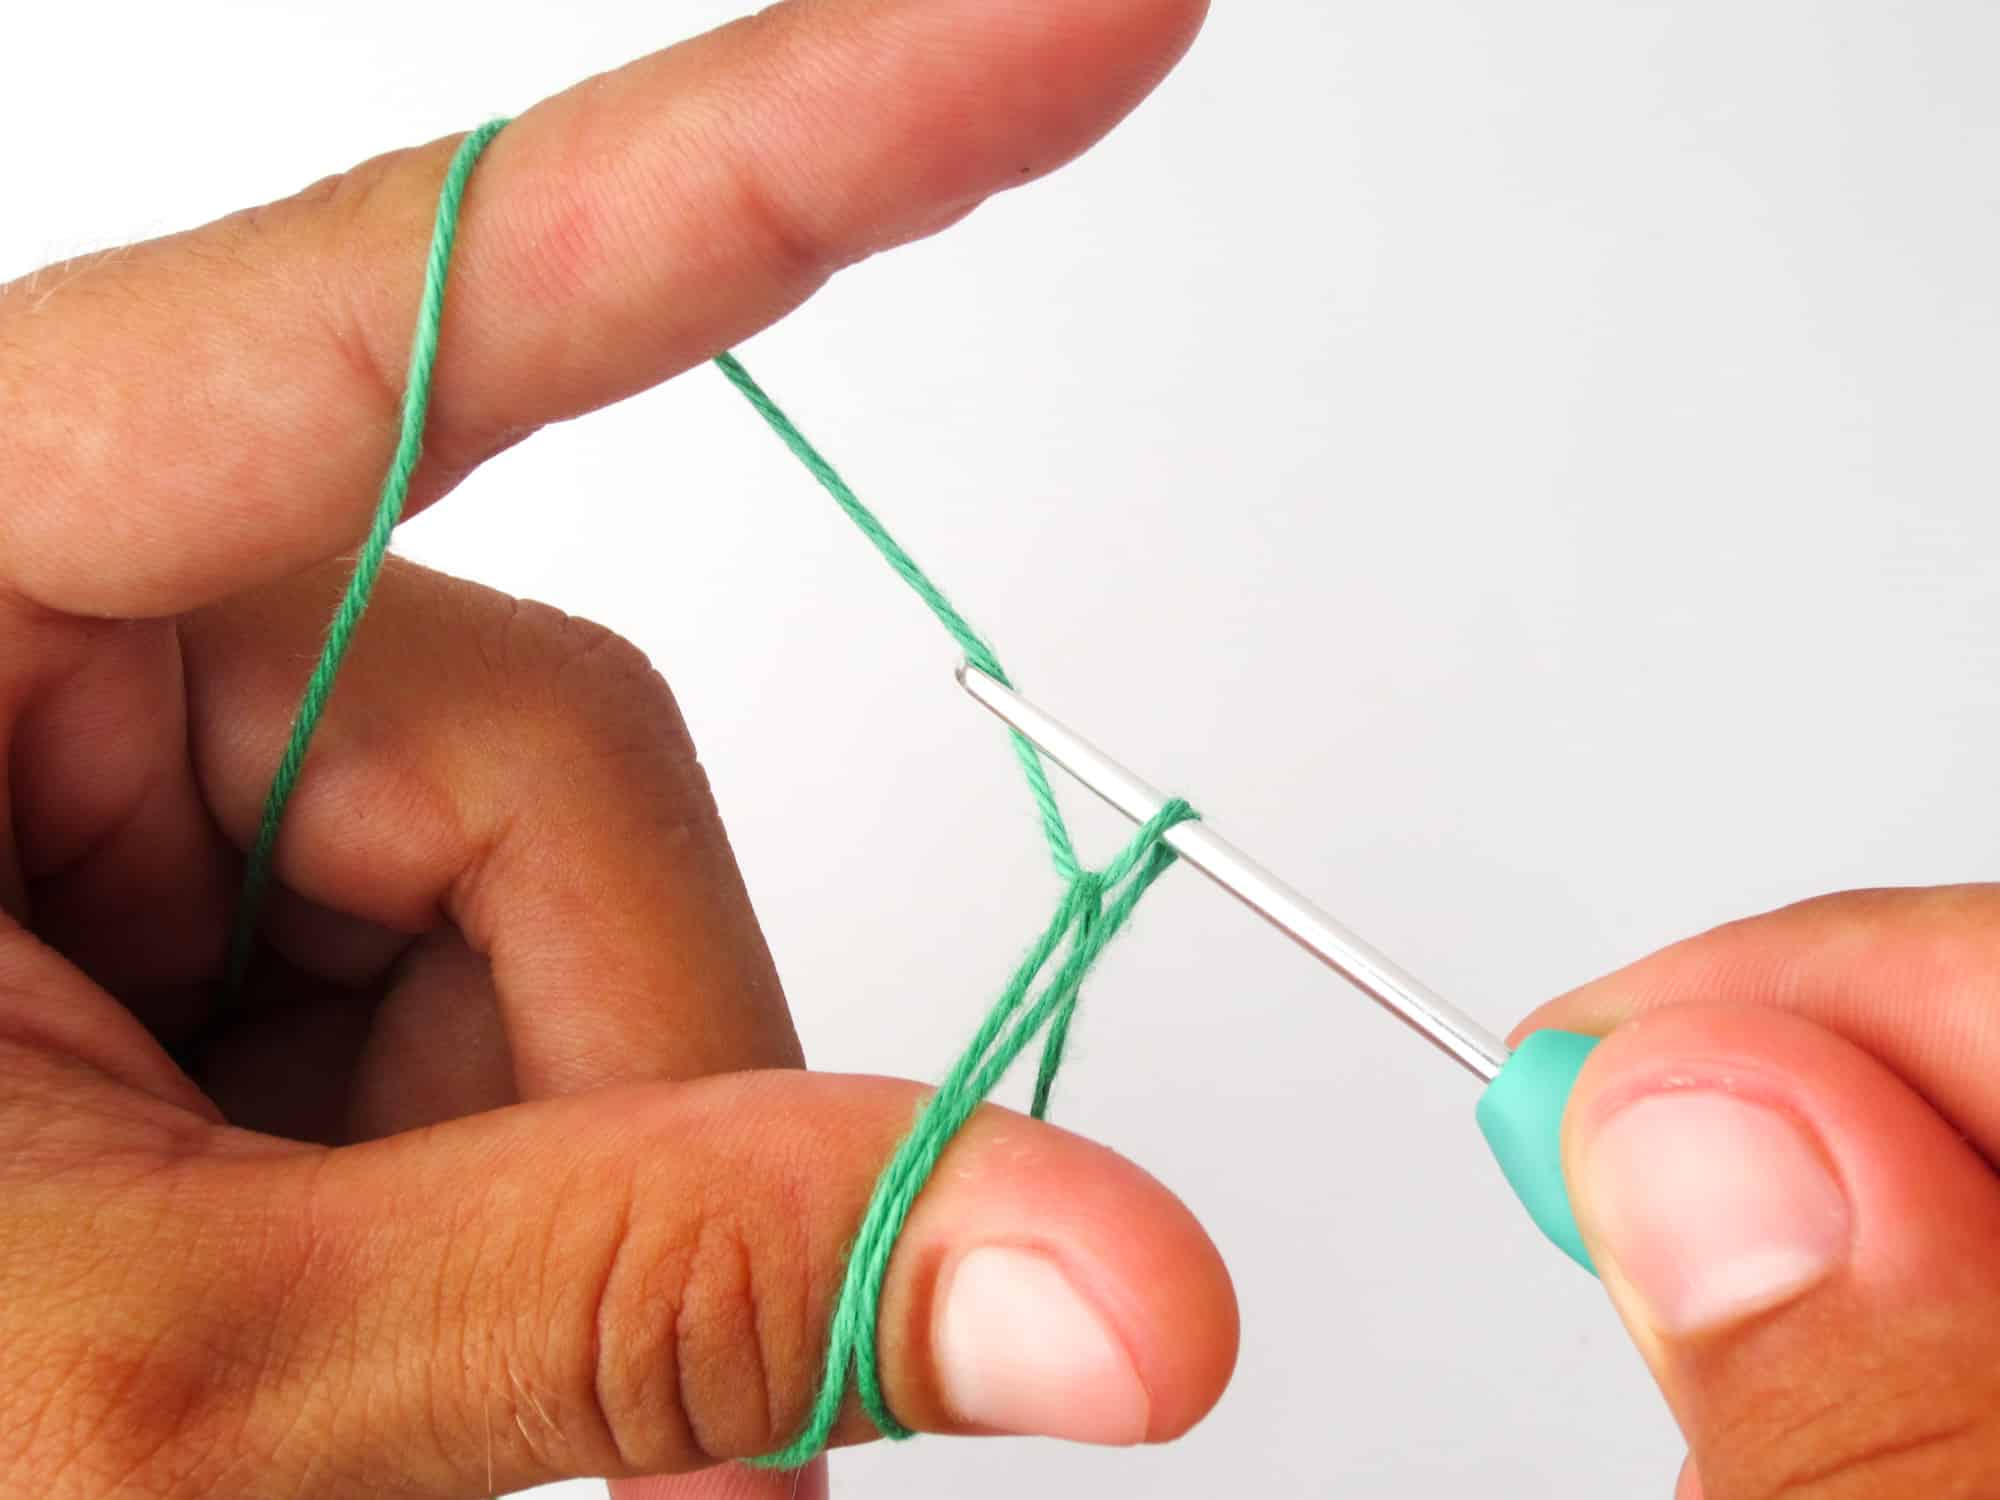
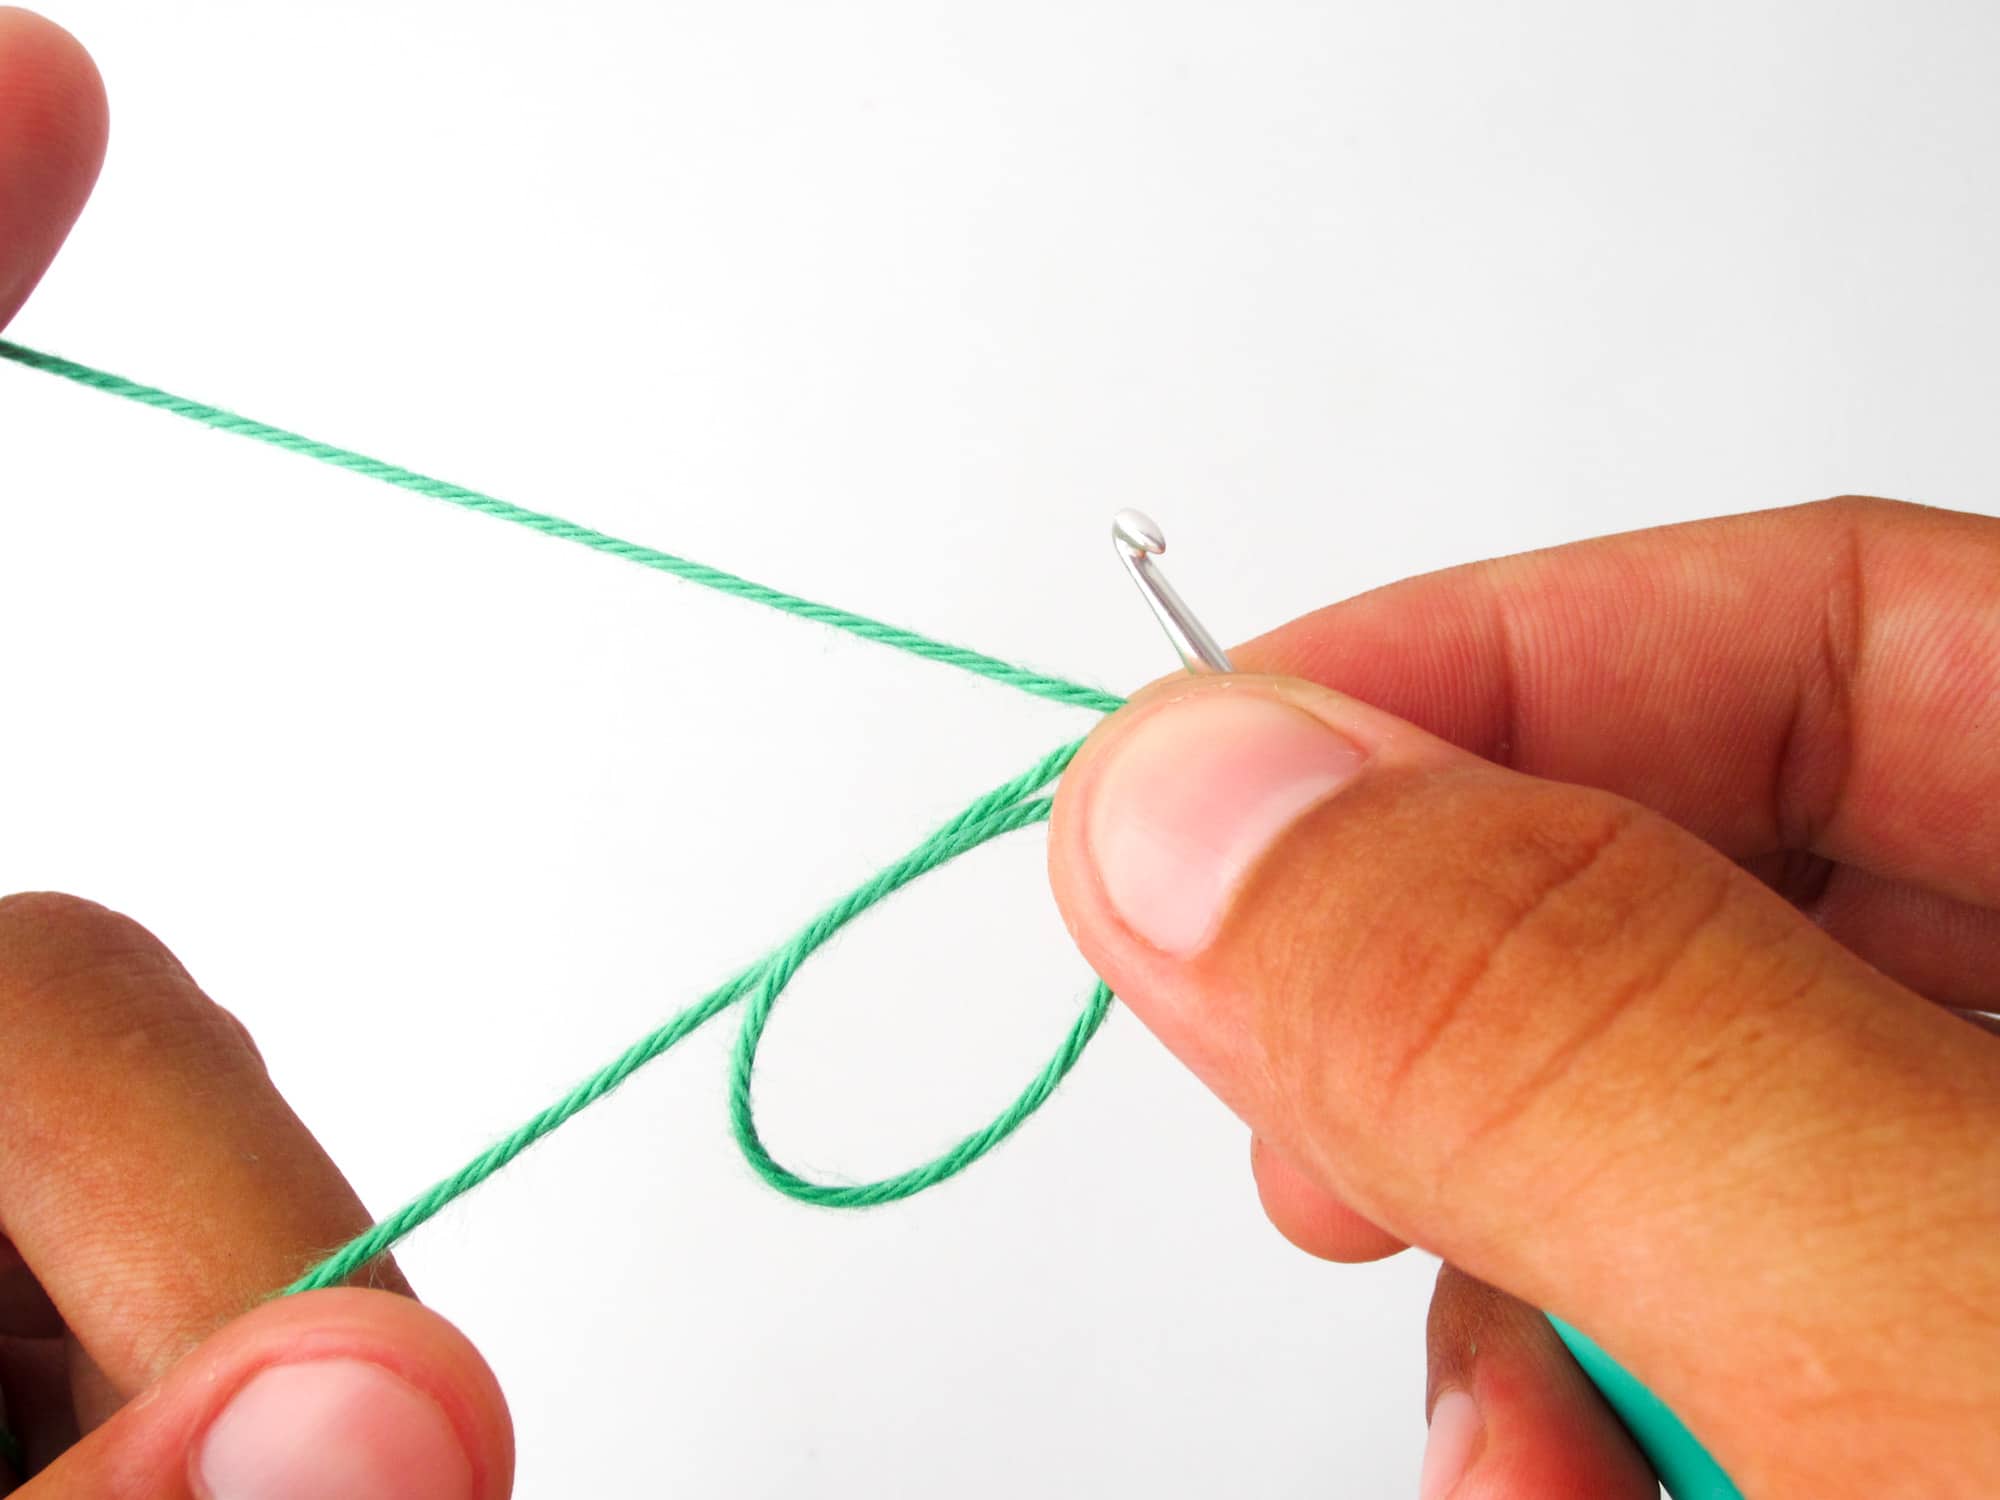
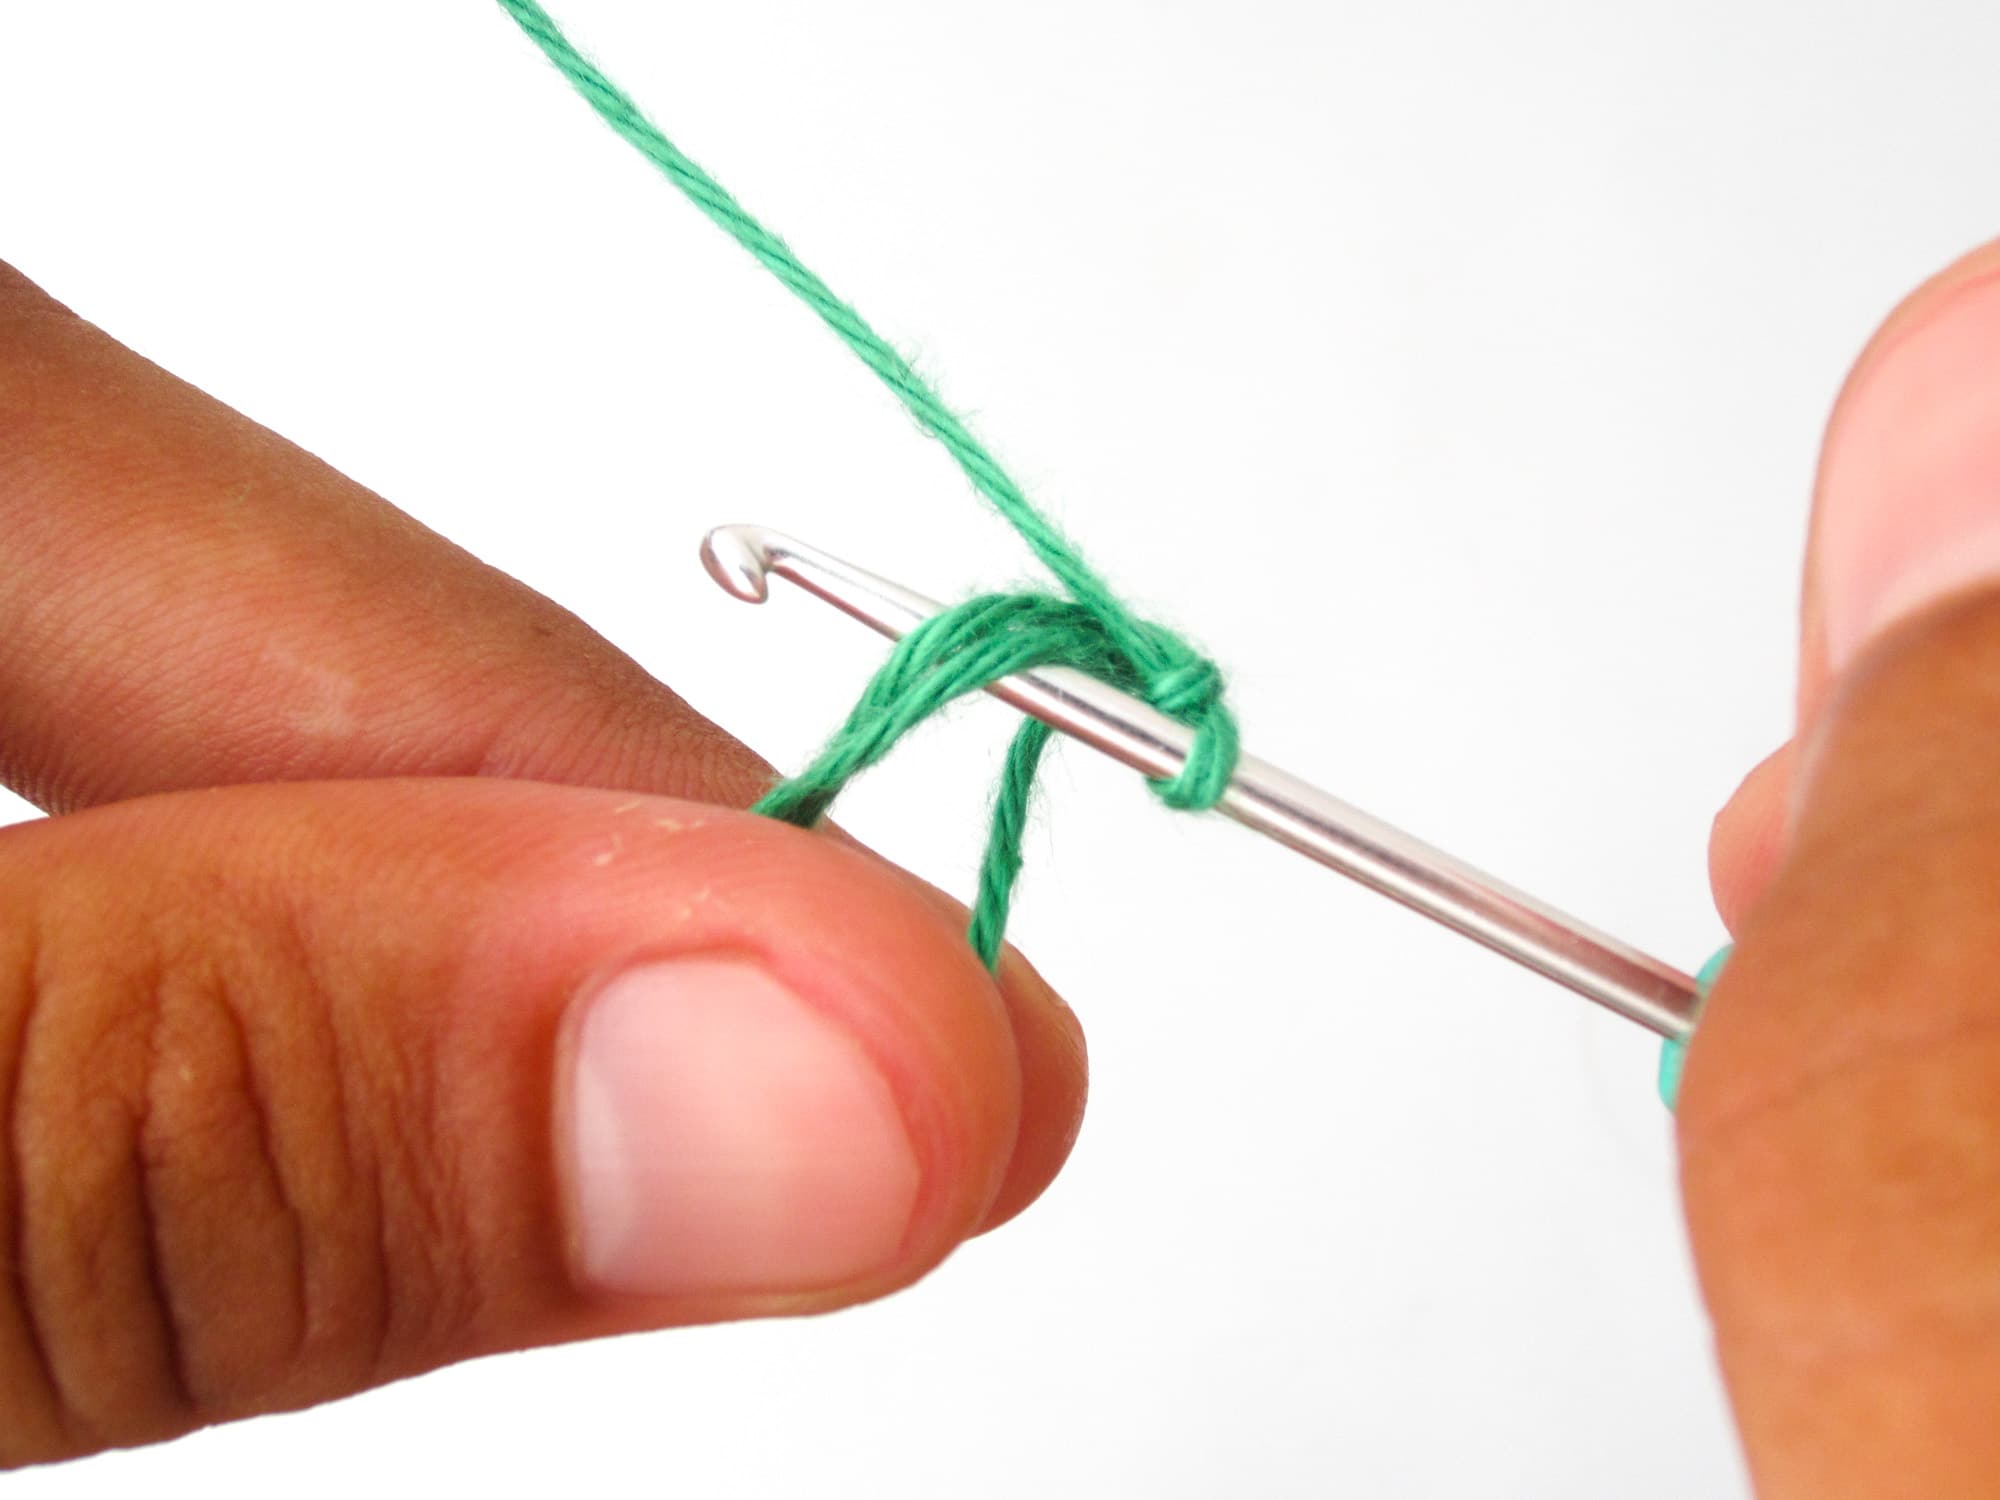
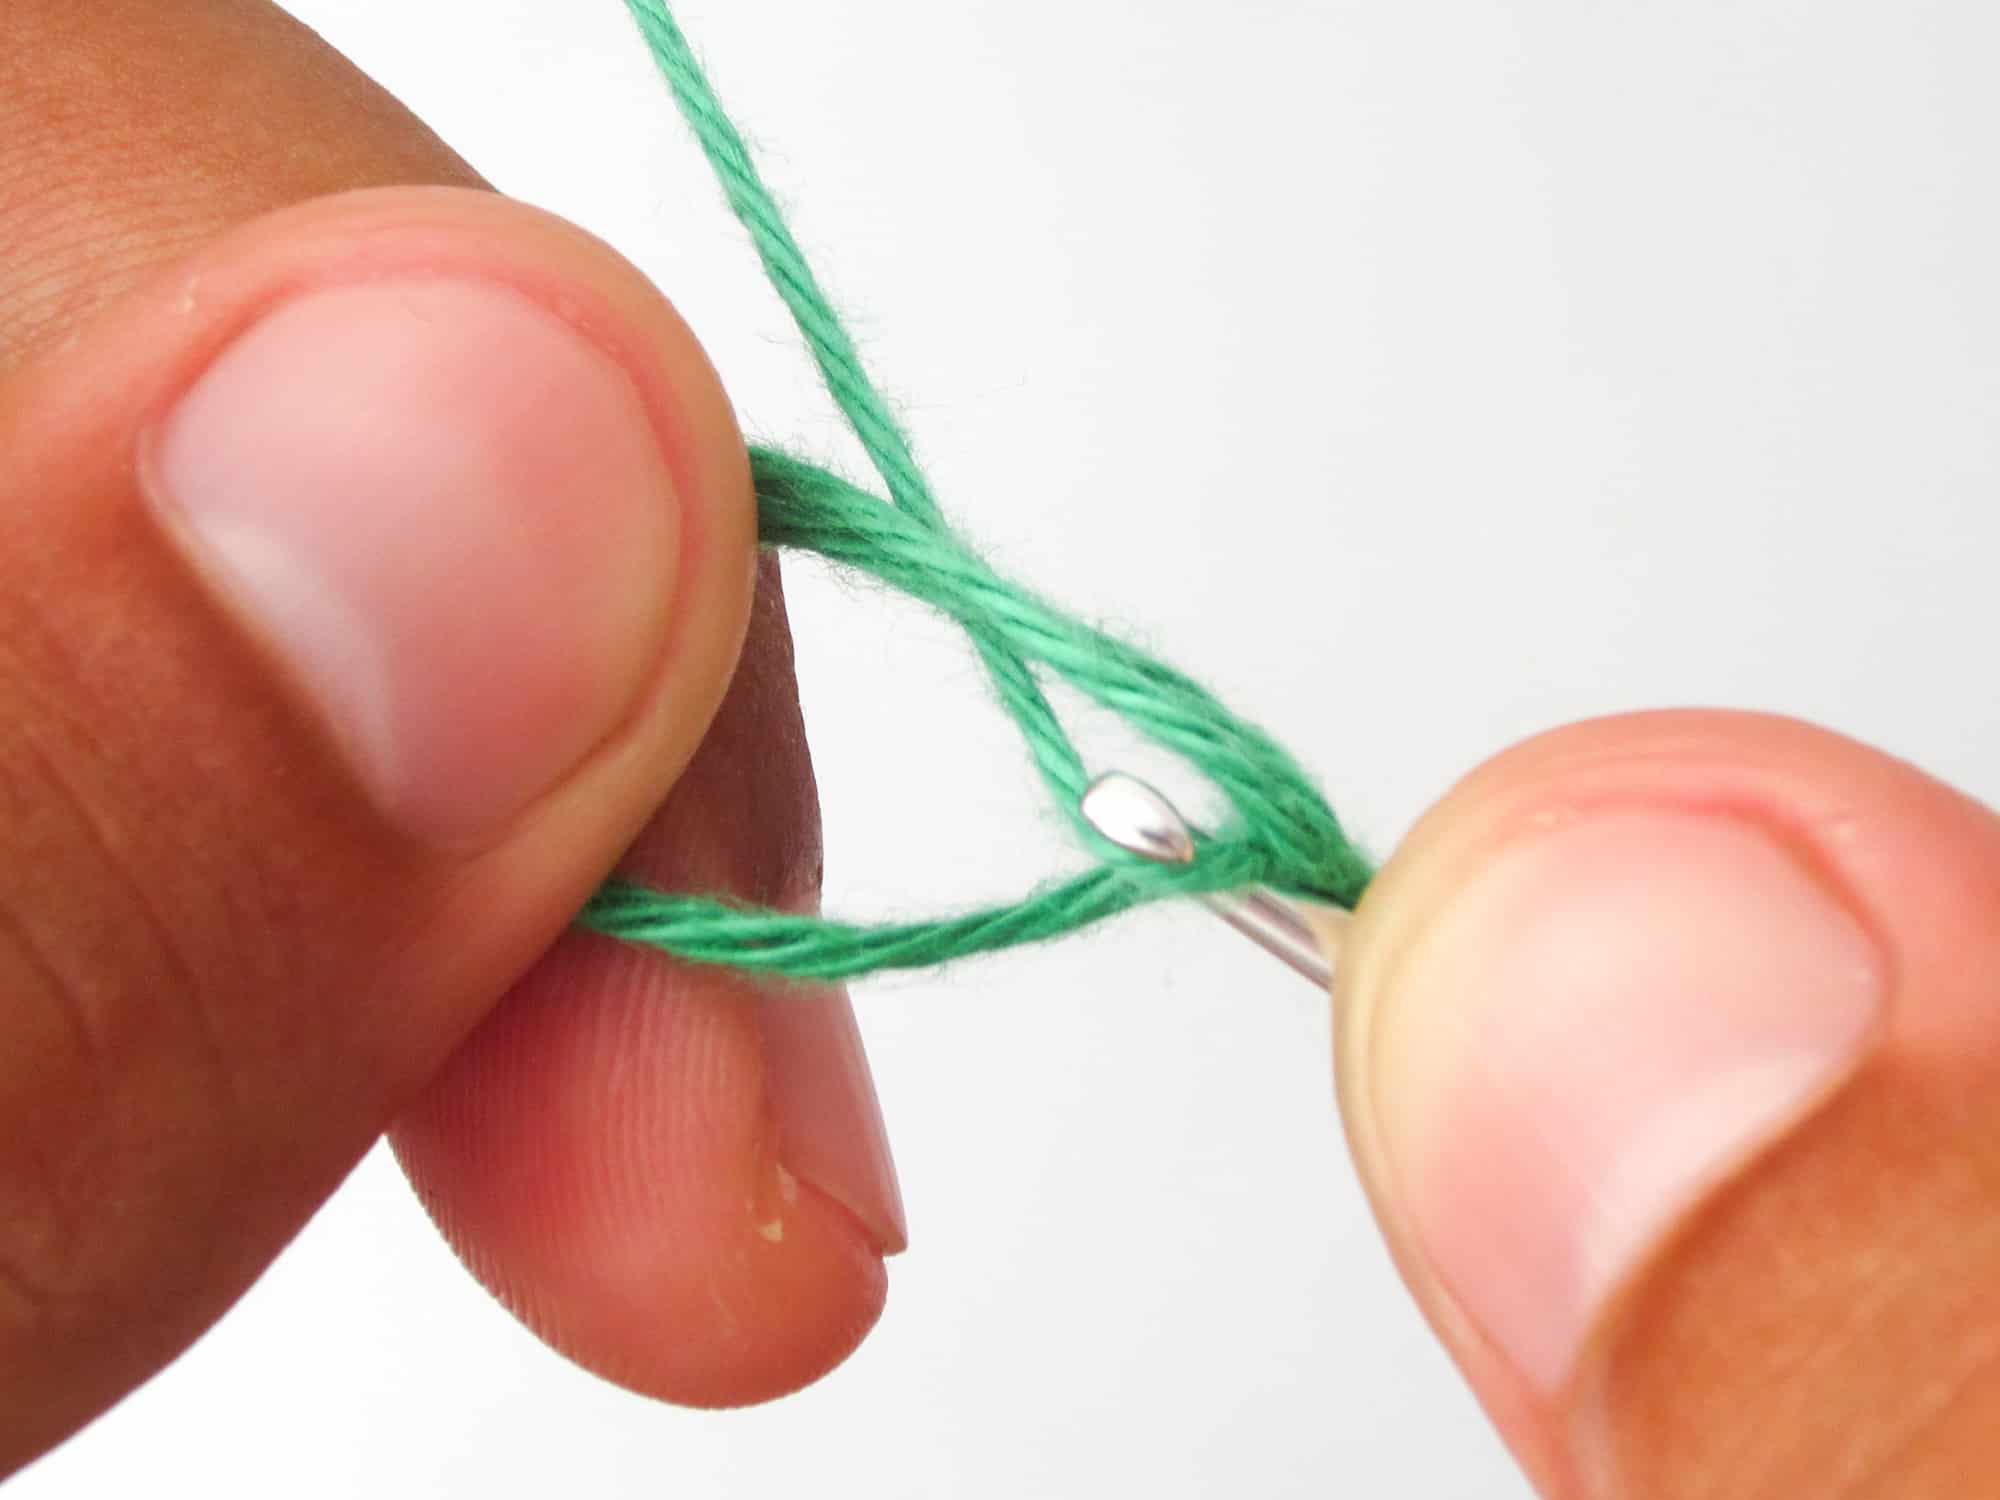
- Step 4: Take your crochet hook and guide it UNDER the thread that is wrapped around your thumb. Push the crochet hook further through until it is ABOVE the thread that runs from the index finger to the thumb.
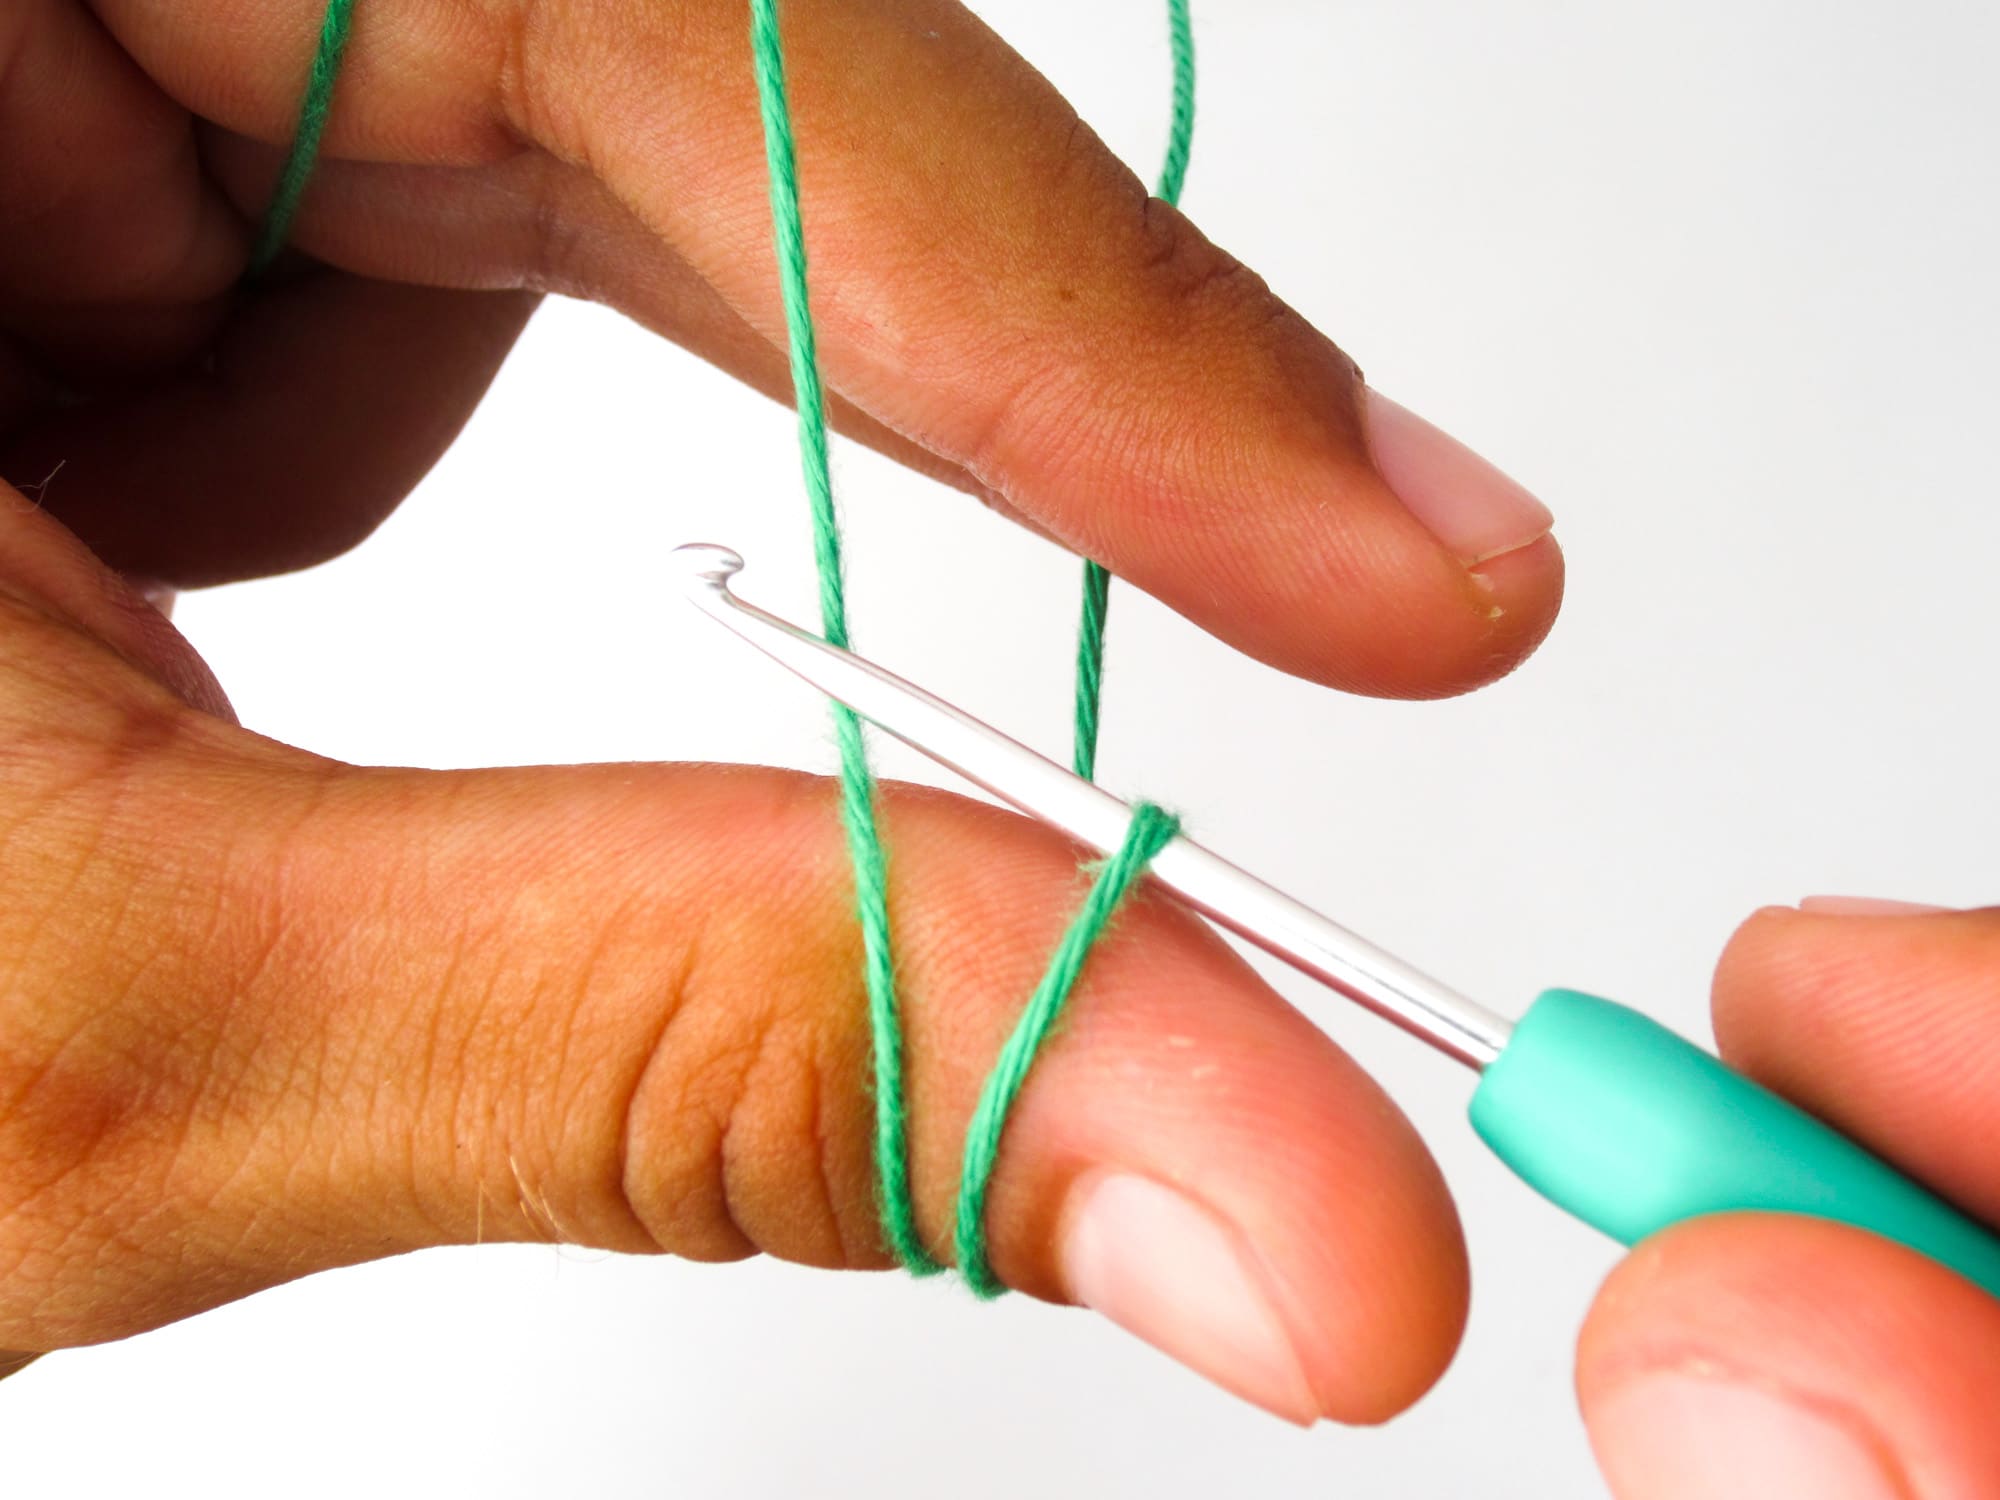
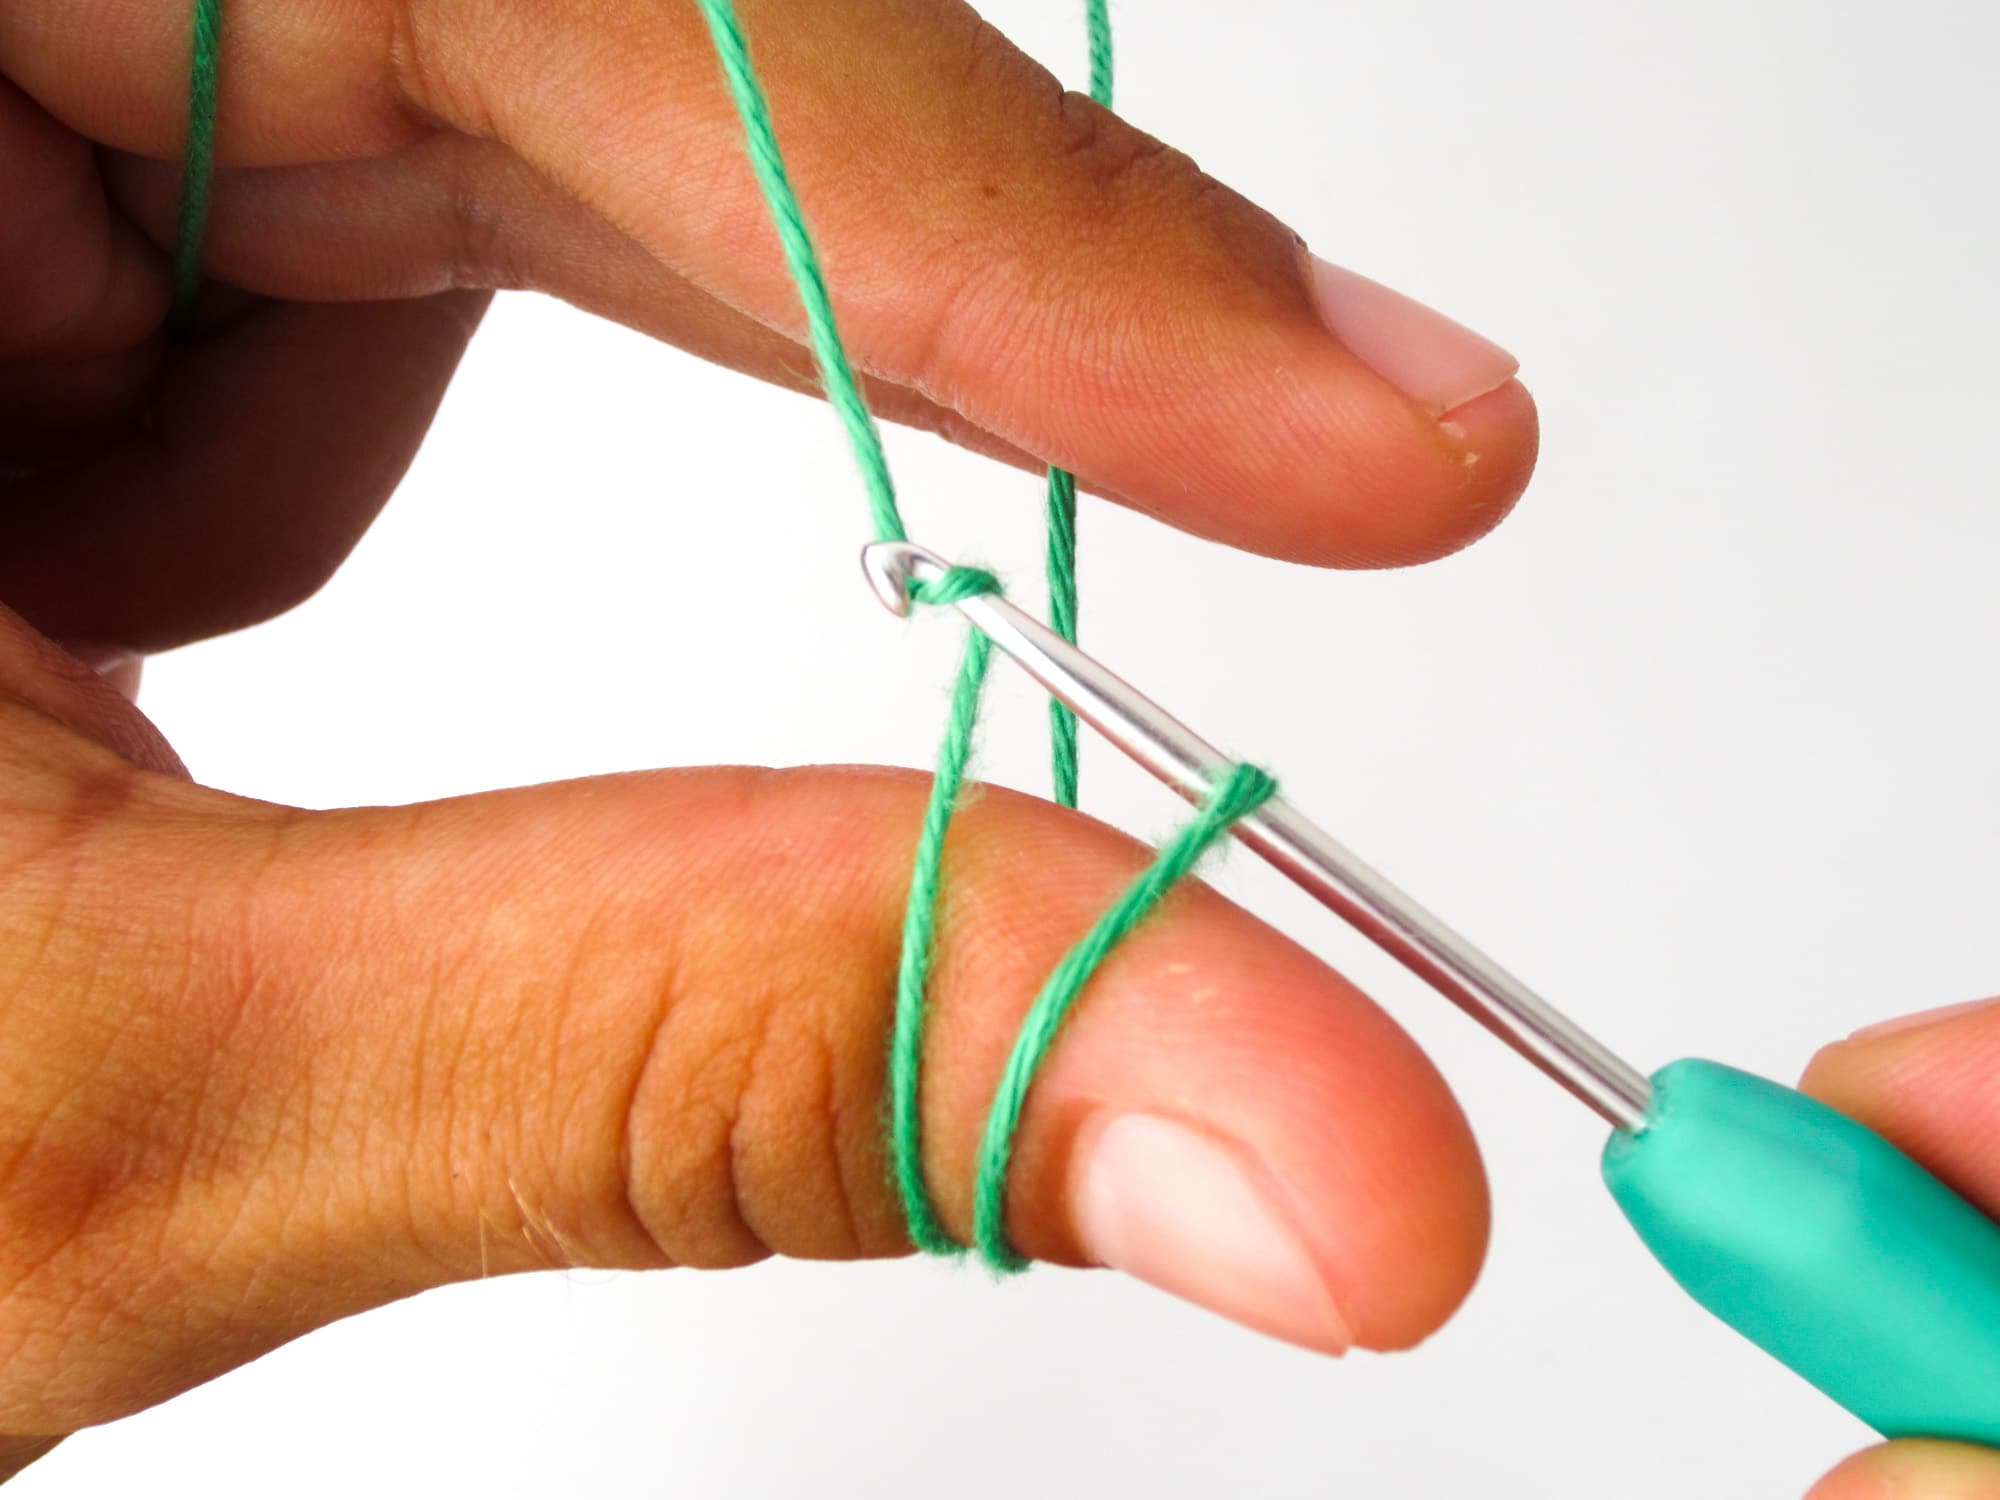
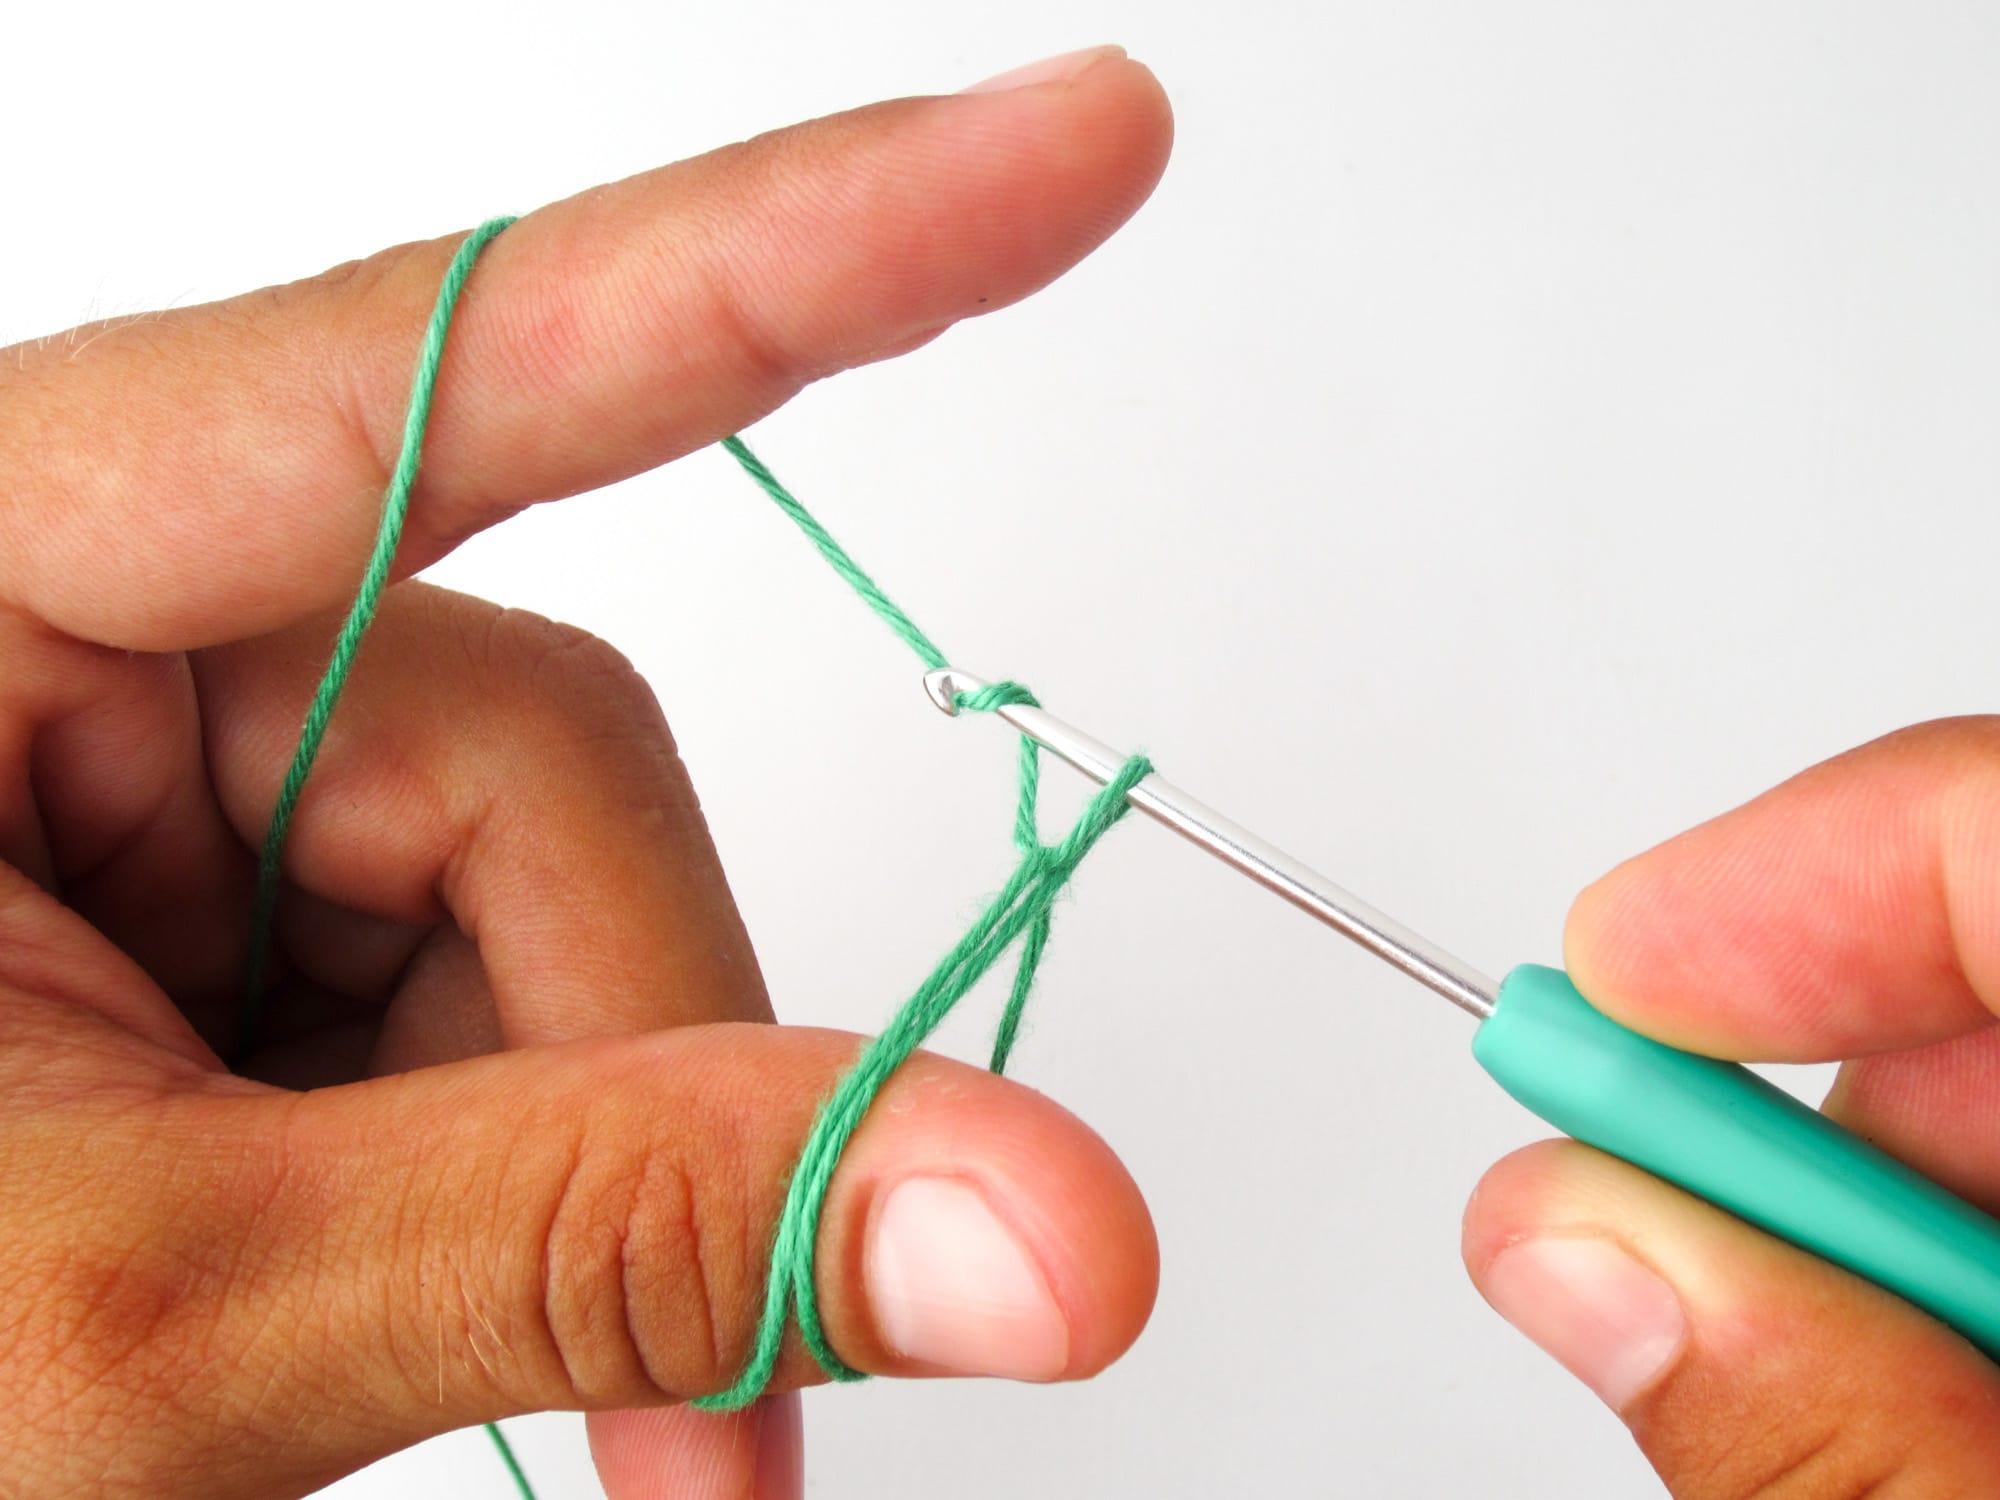
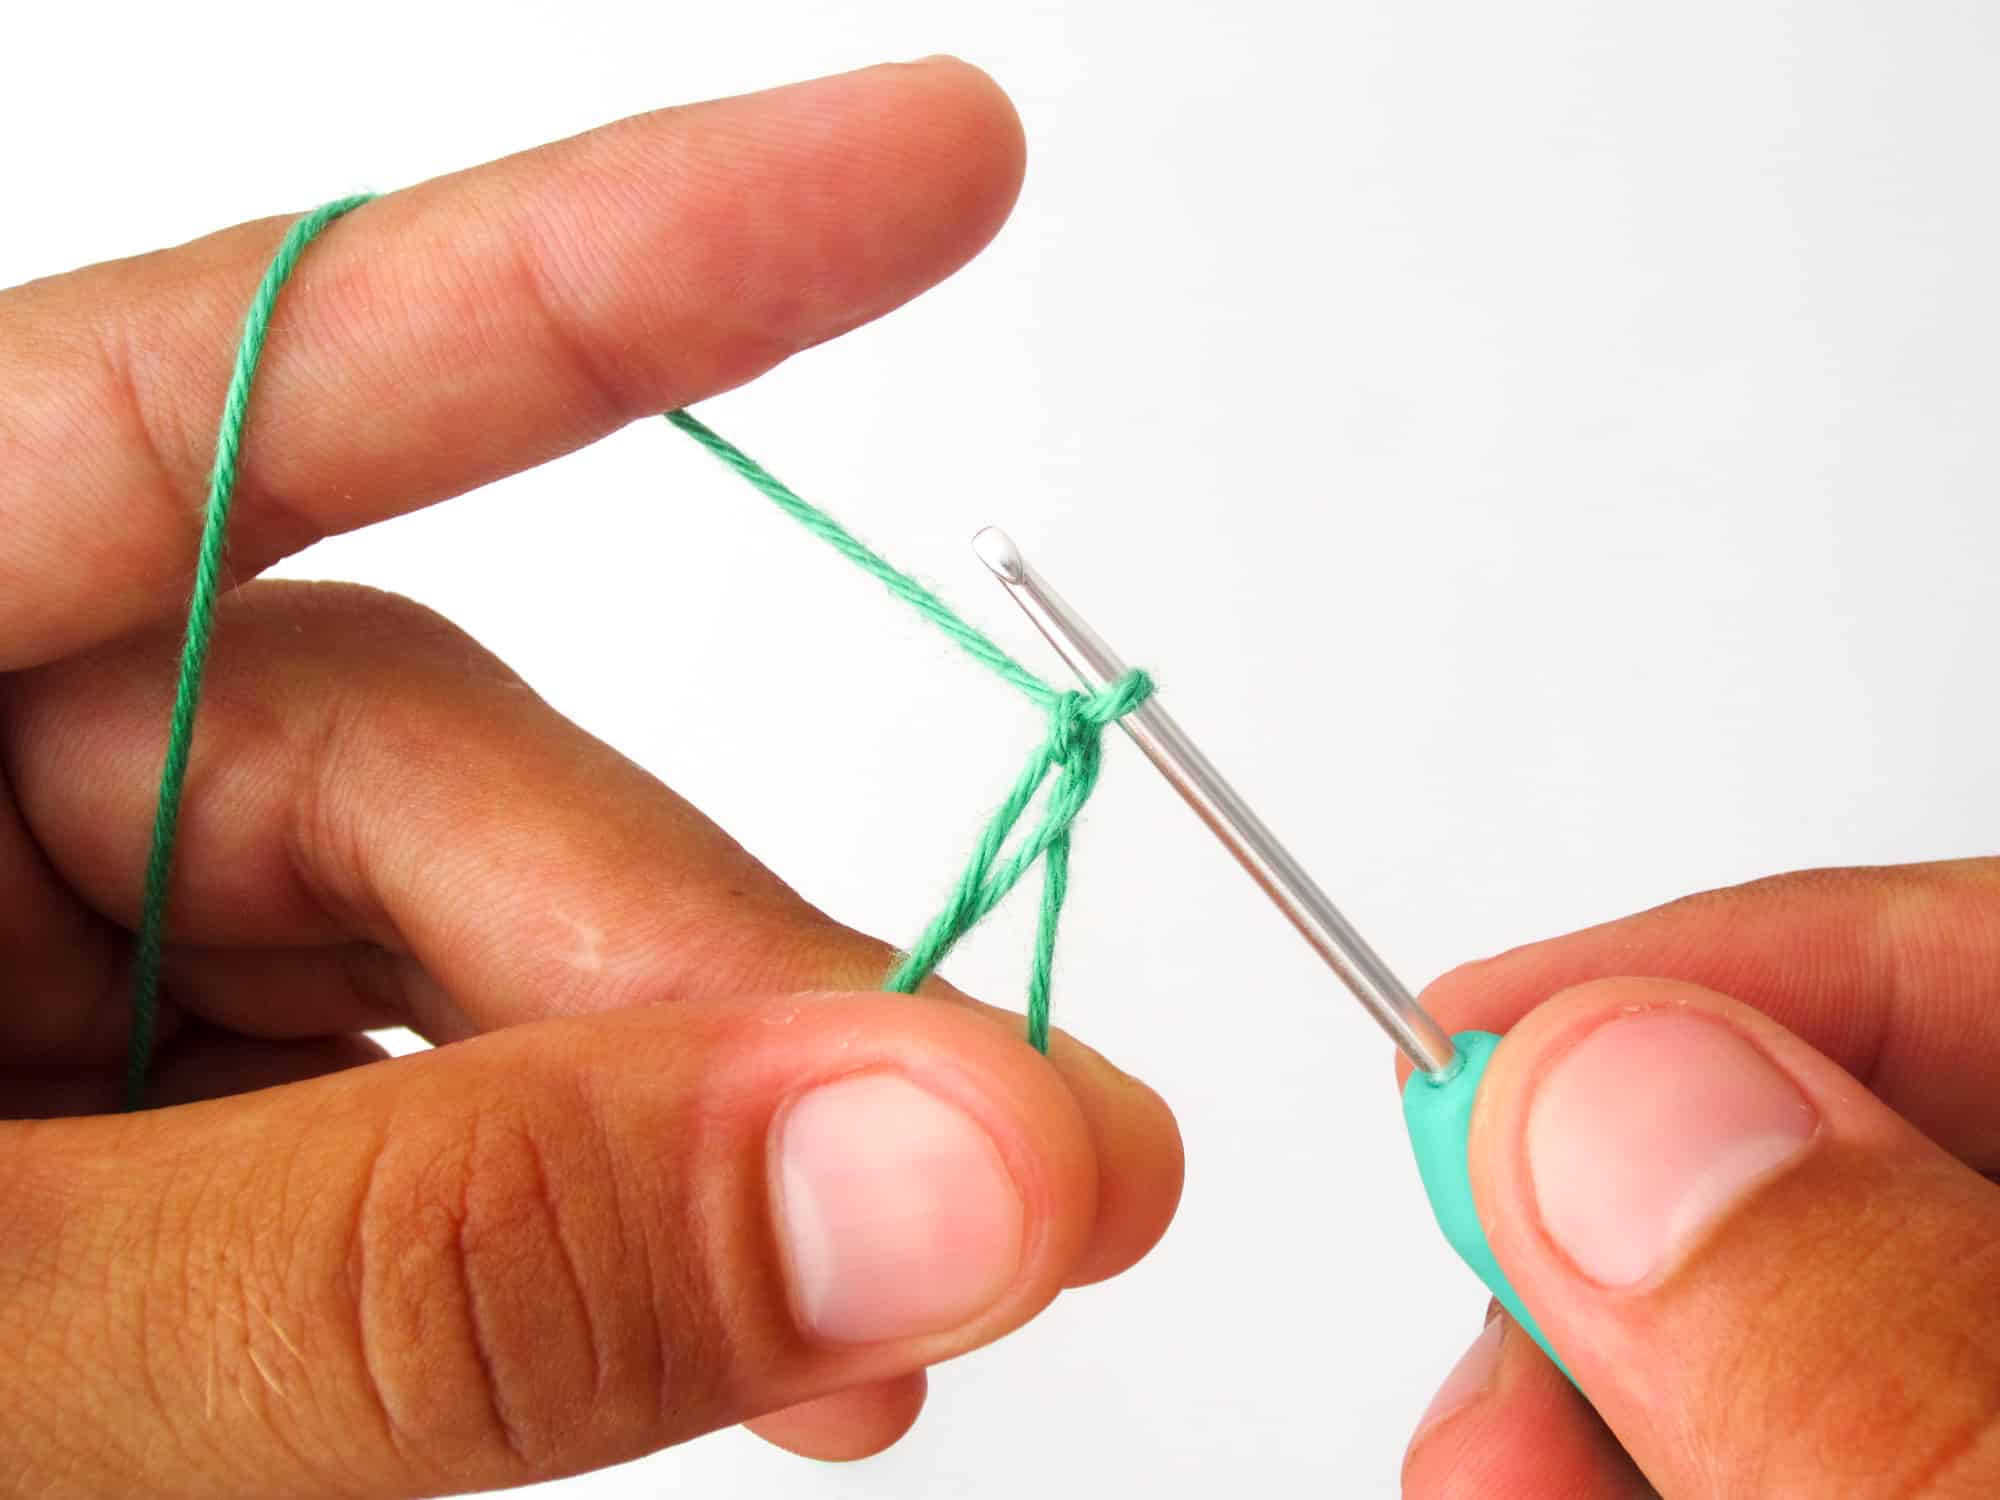
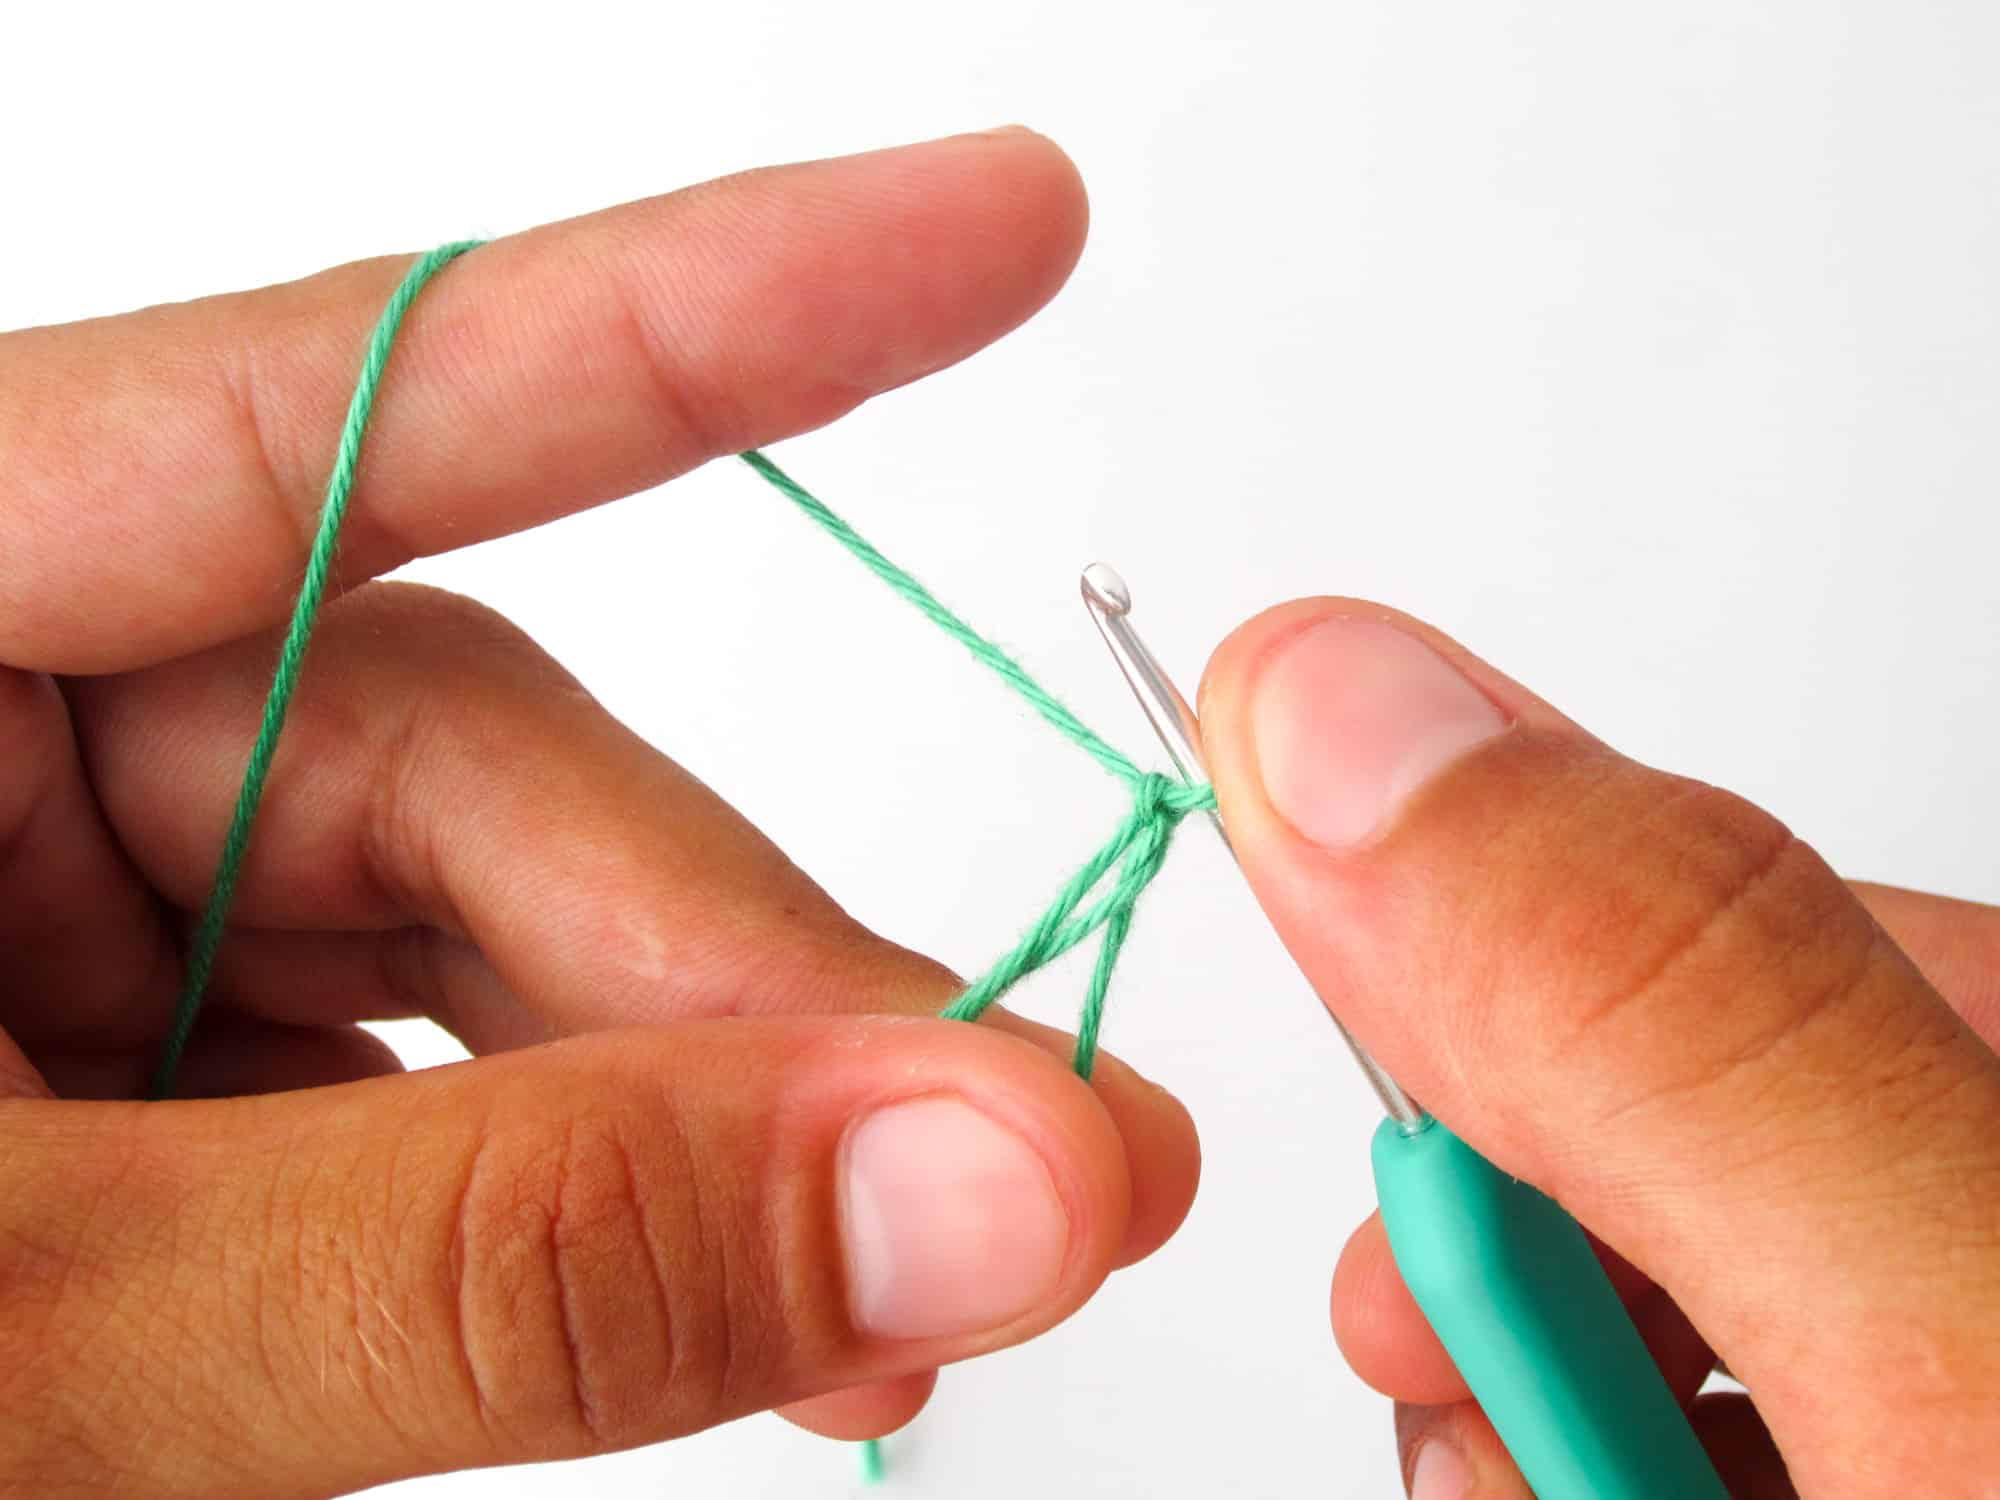
- Step 5: Now take the thread that runs from the index finger to the thumb and pull it UNDER the thread that lies on the crochet hook. You have now 1 loop on the crochet hook.
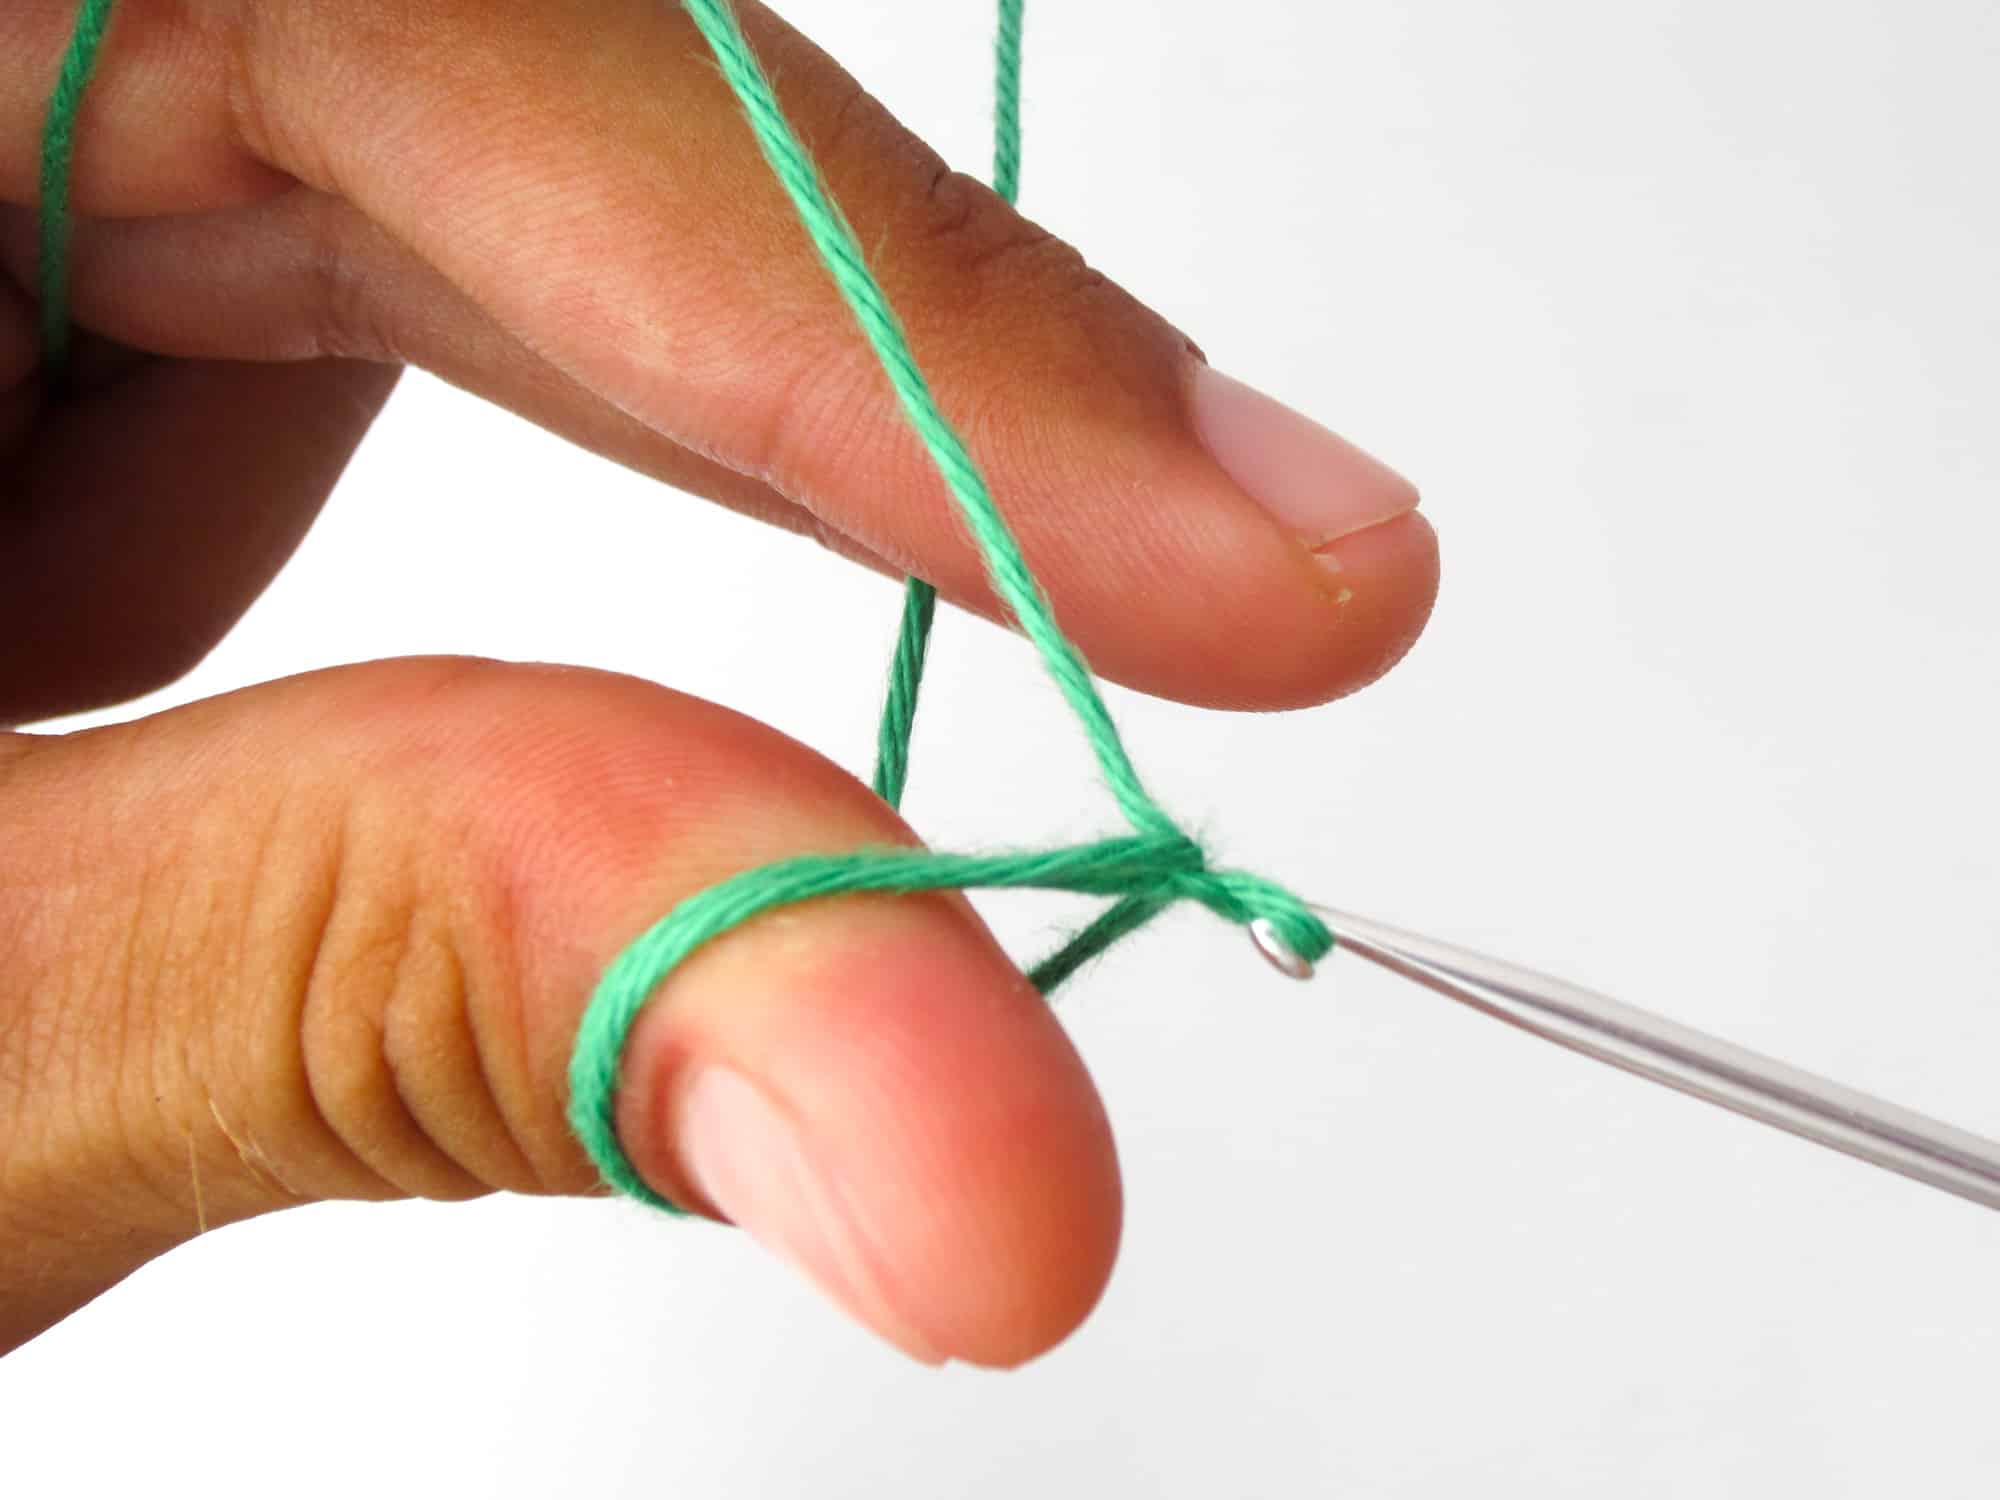
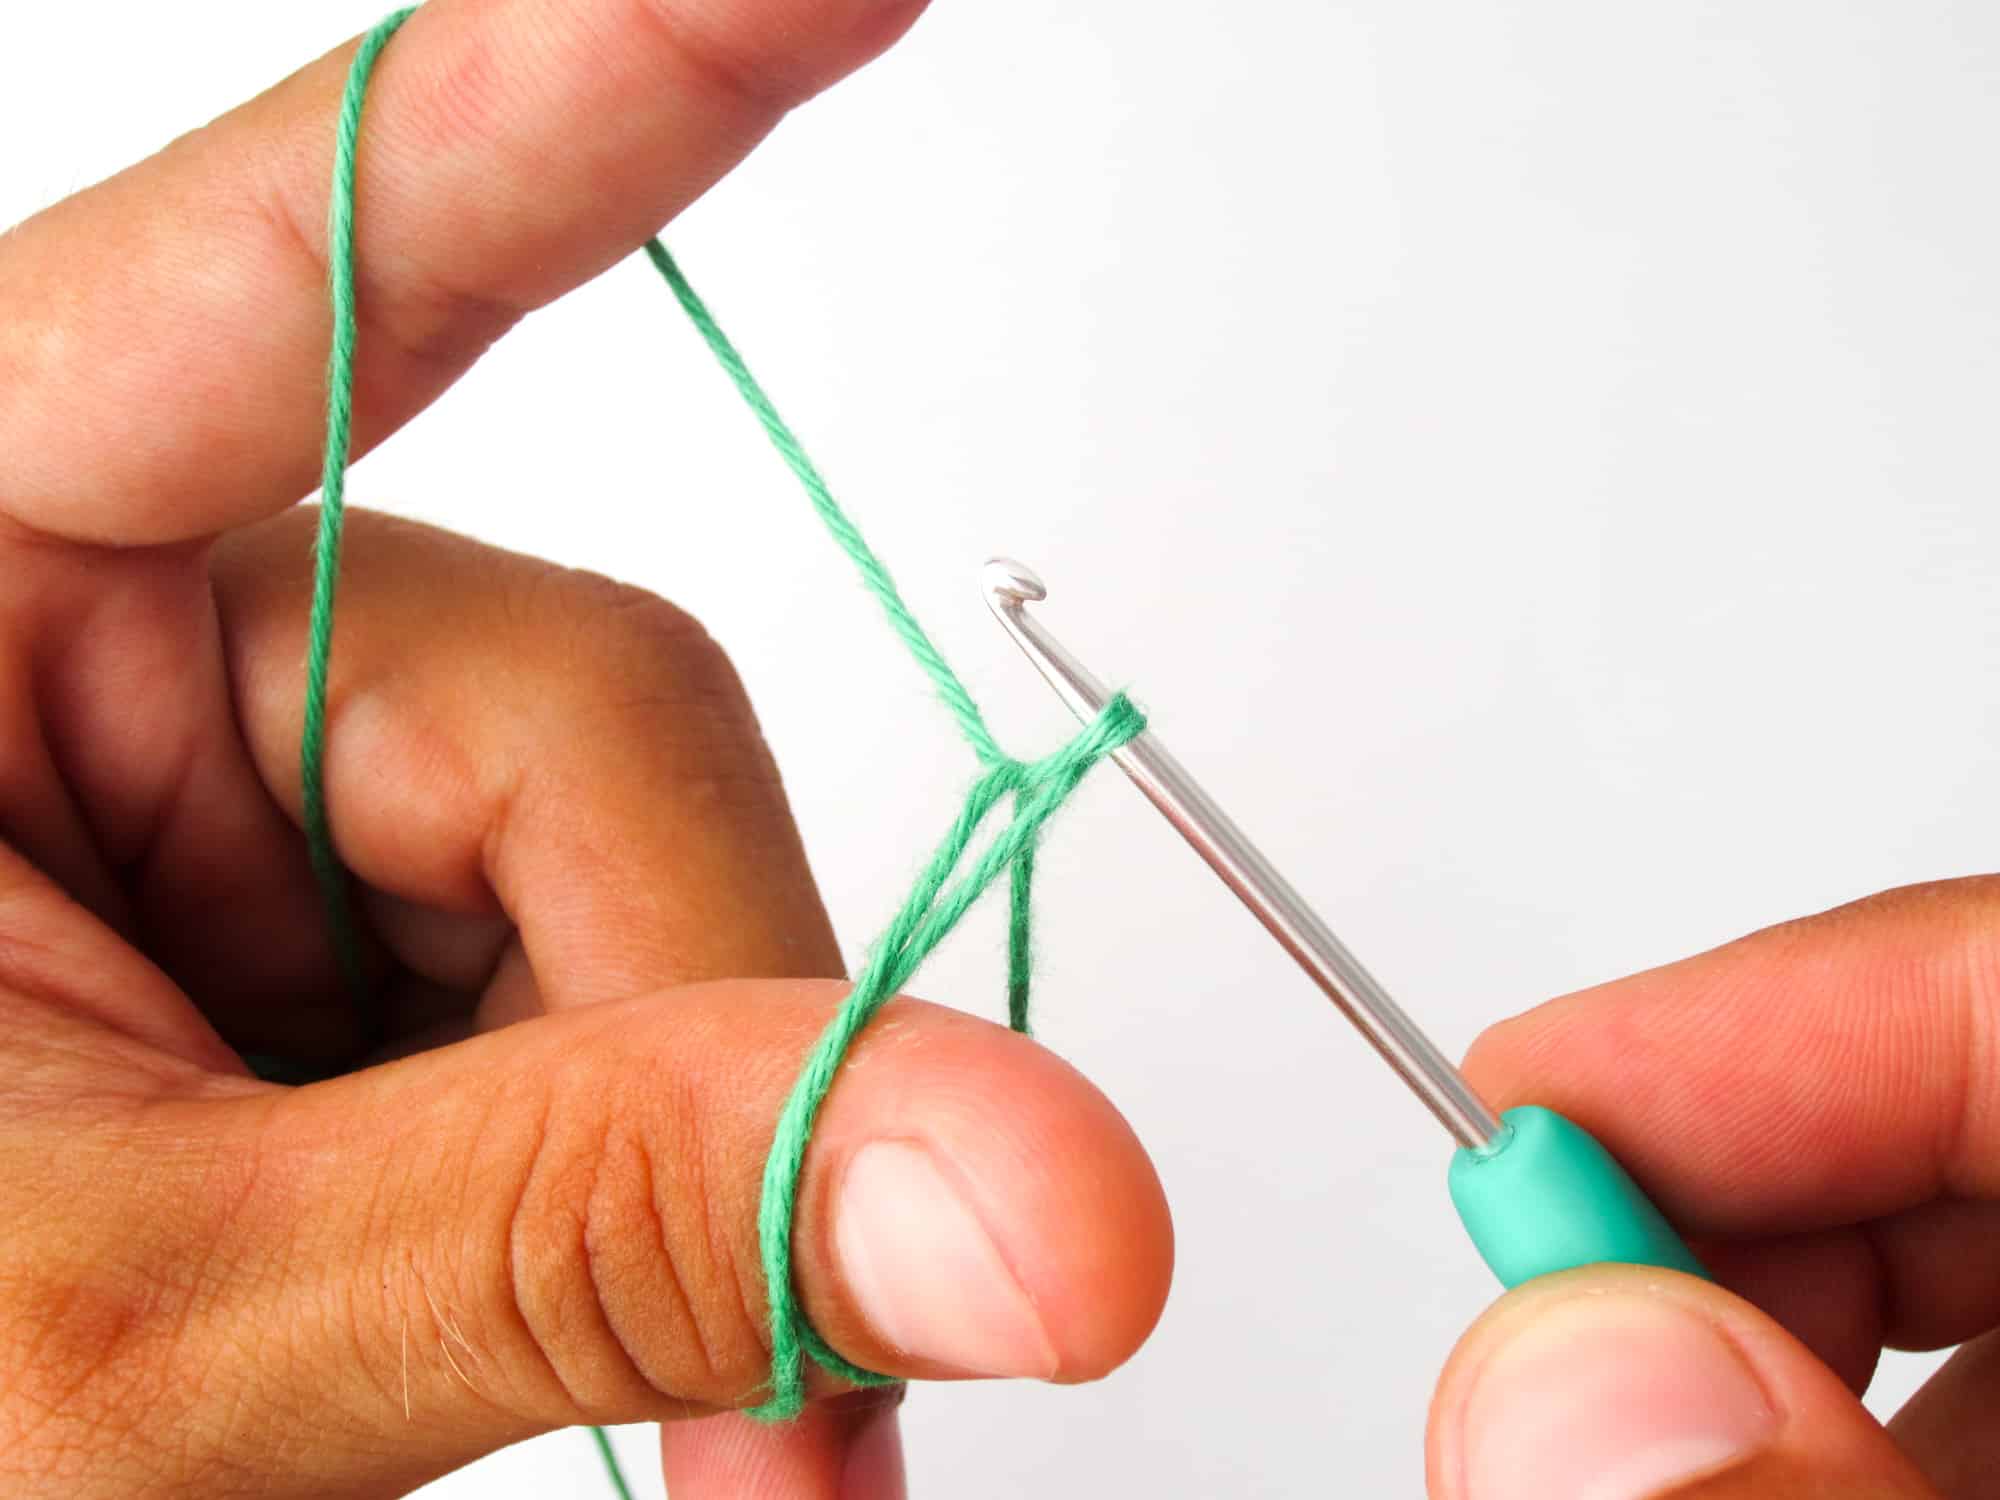
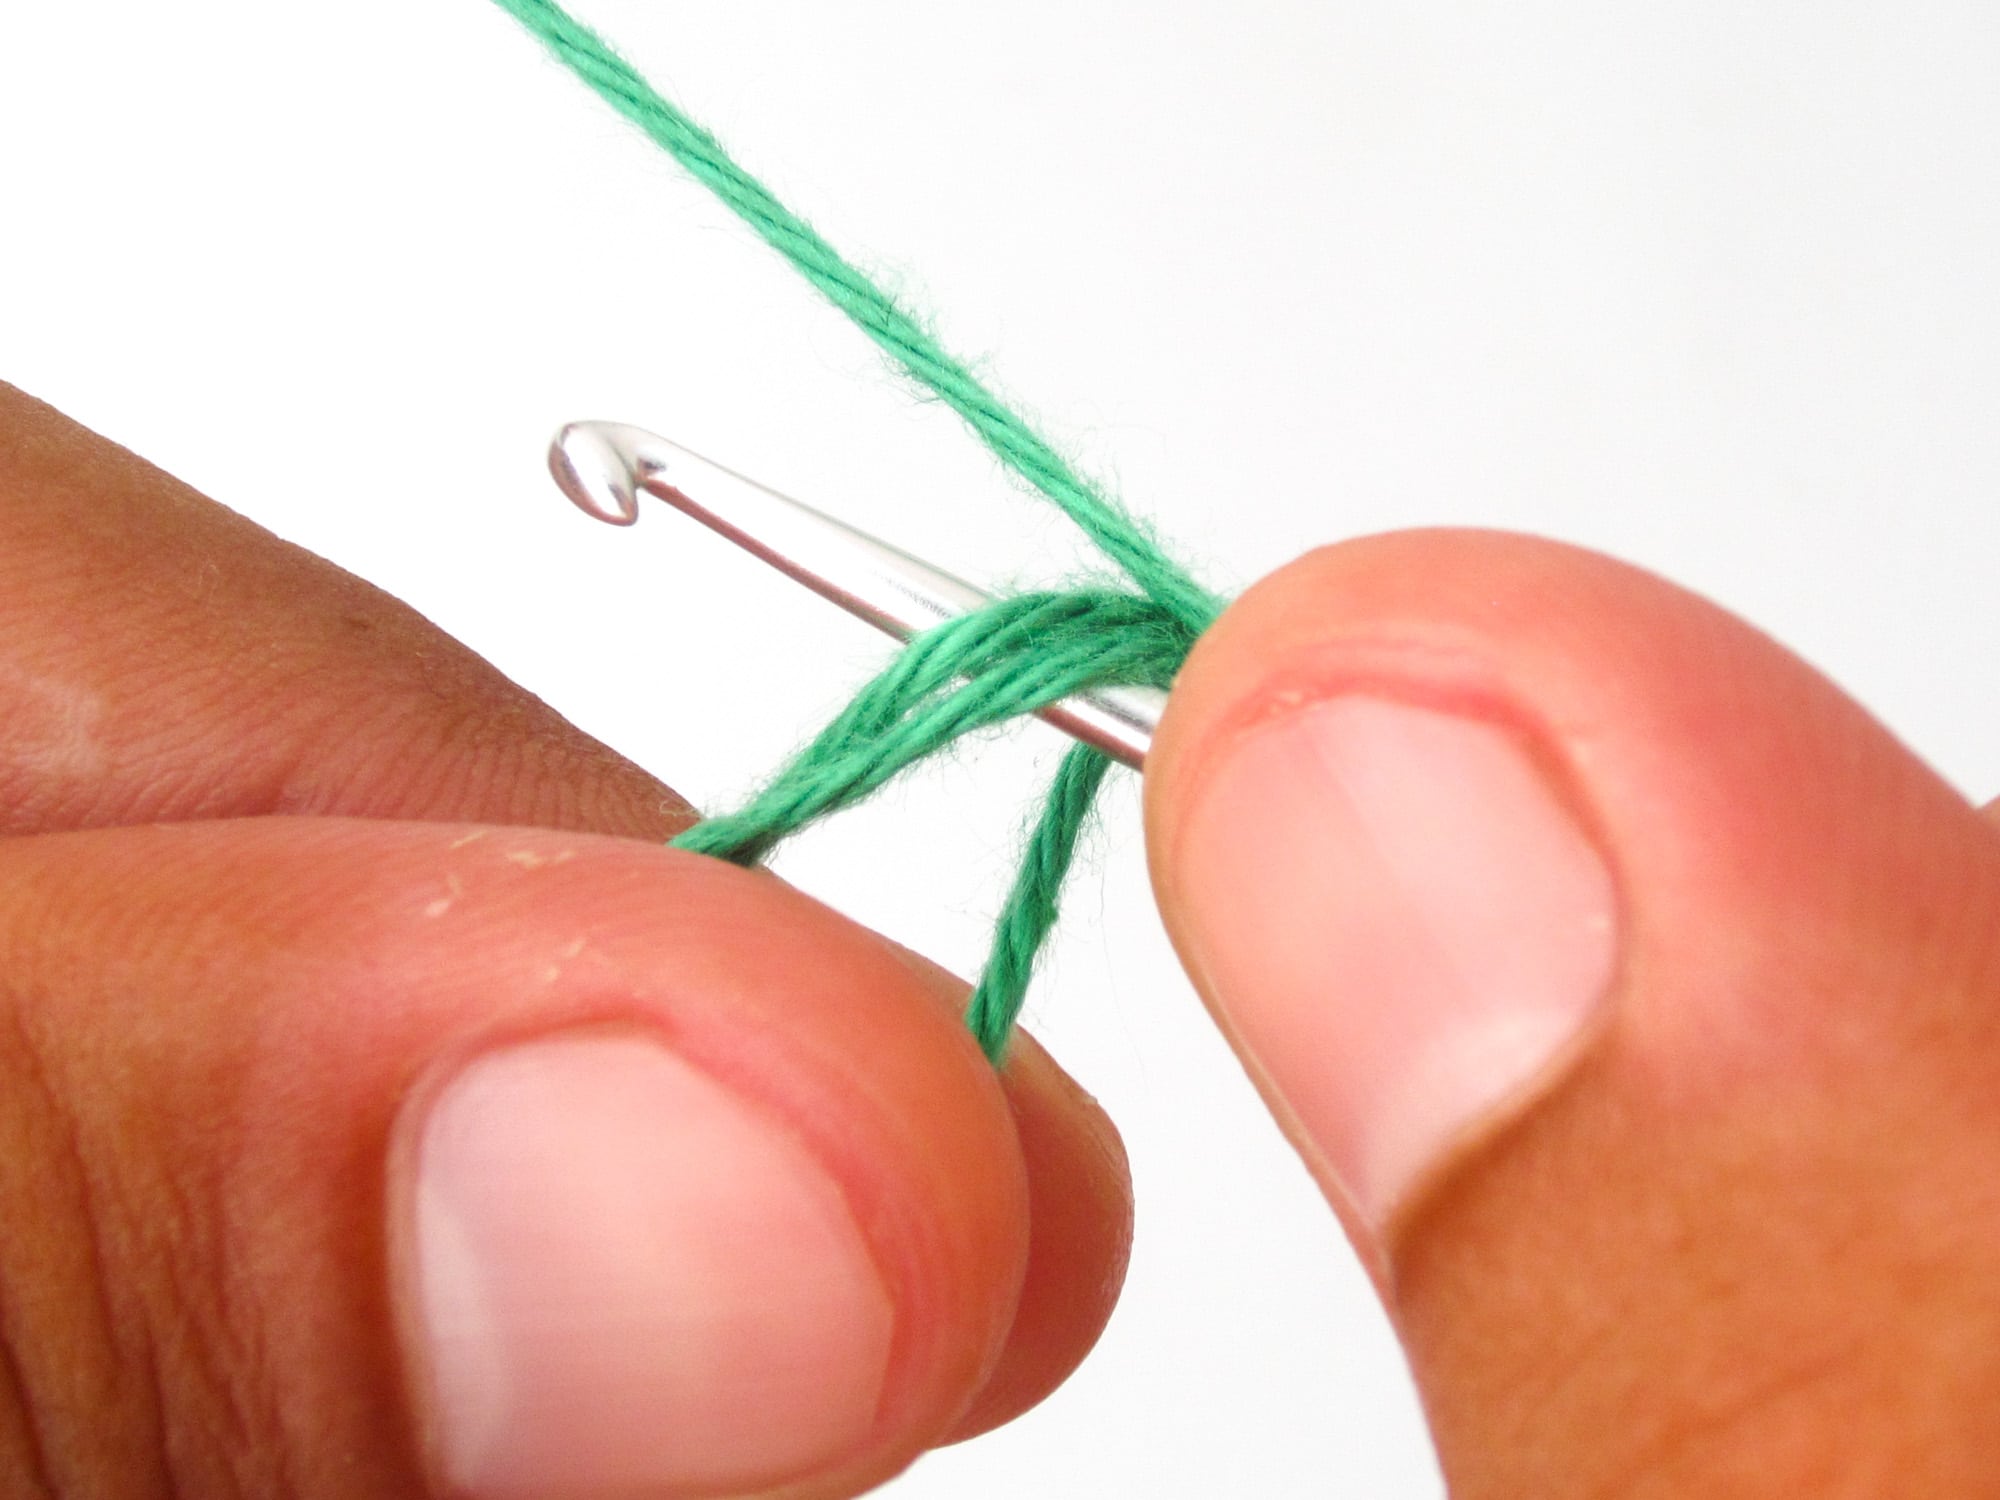
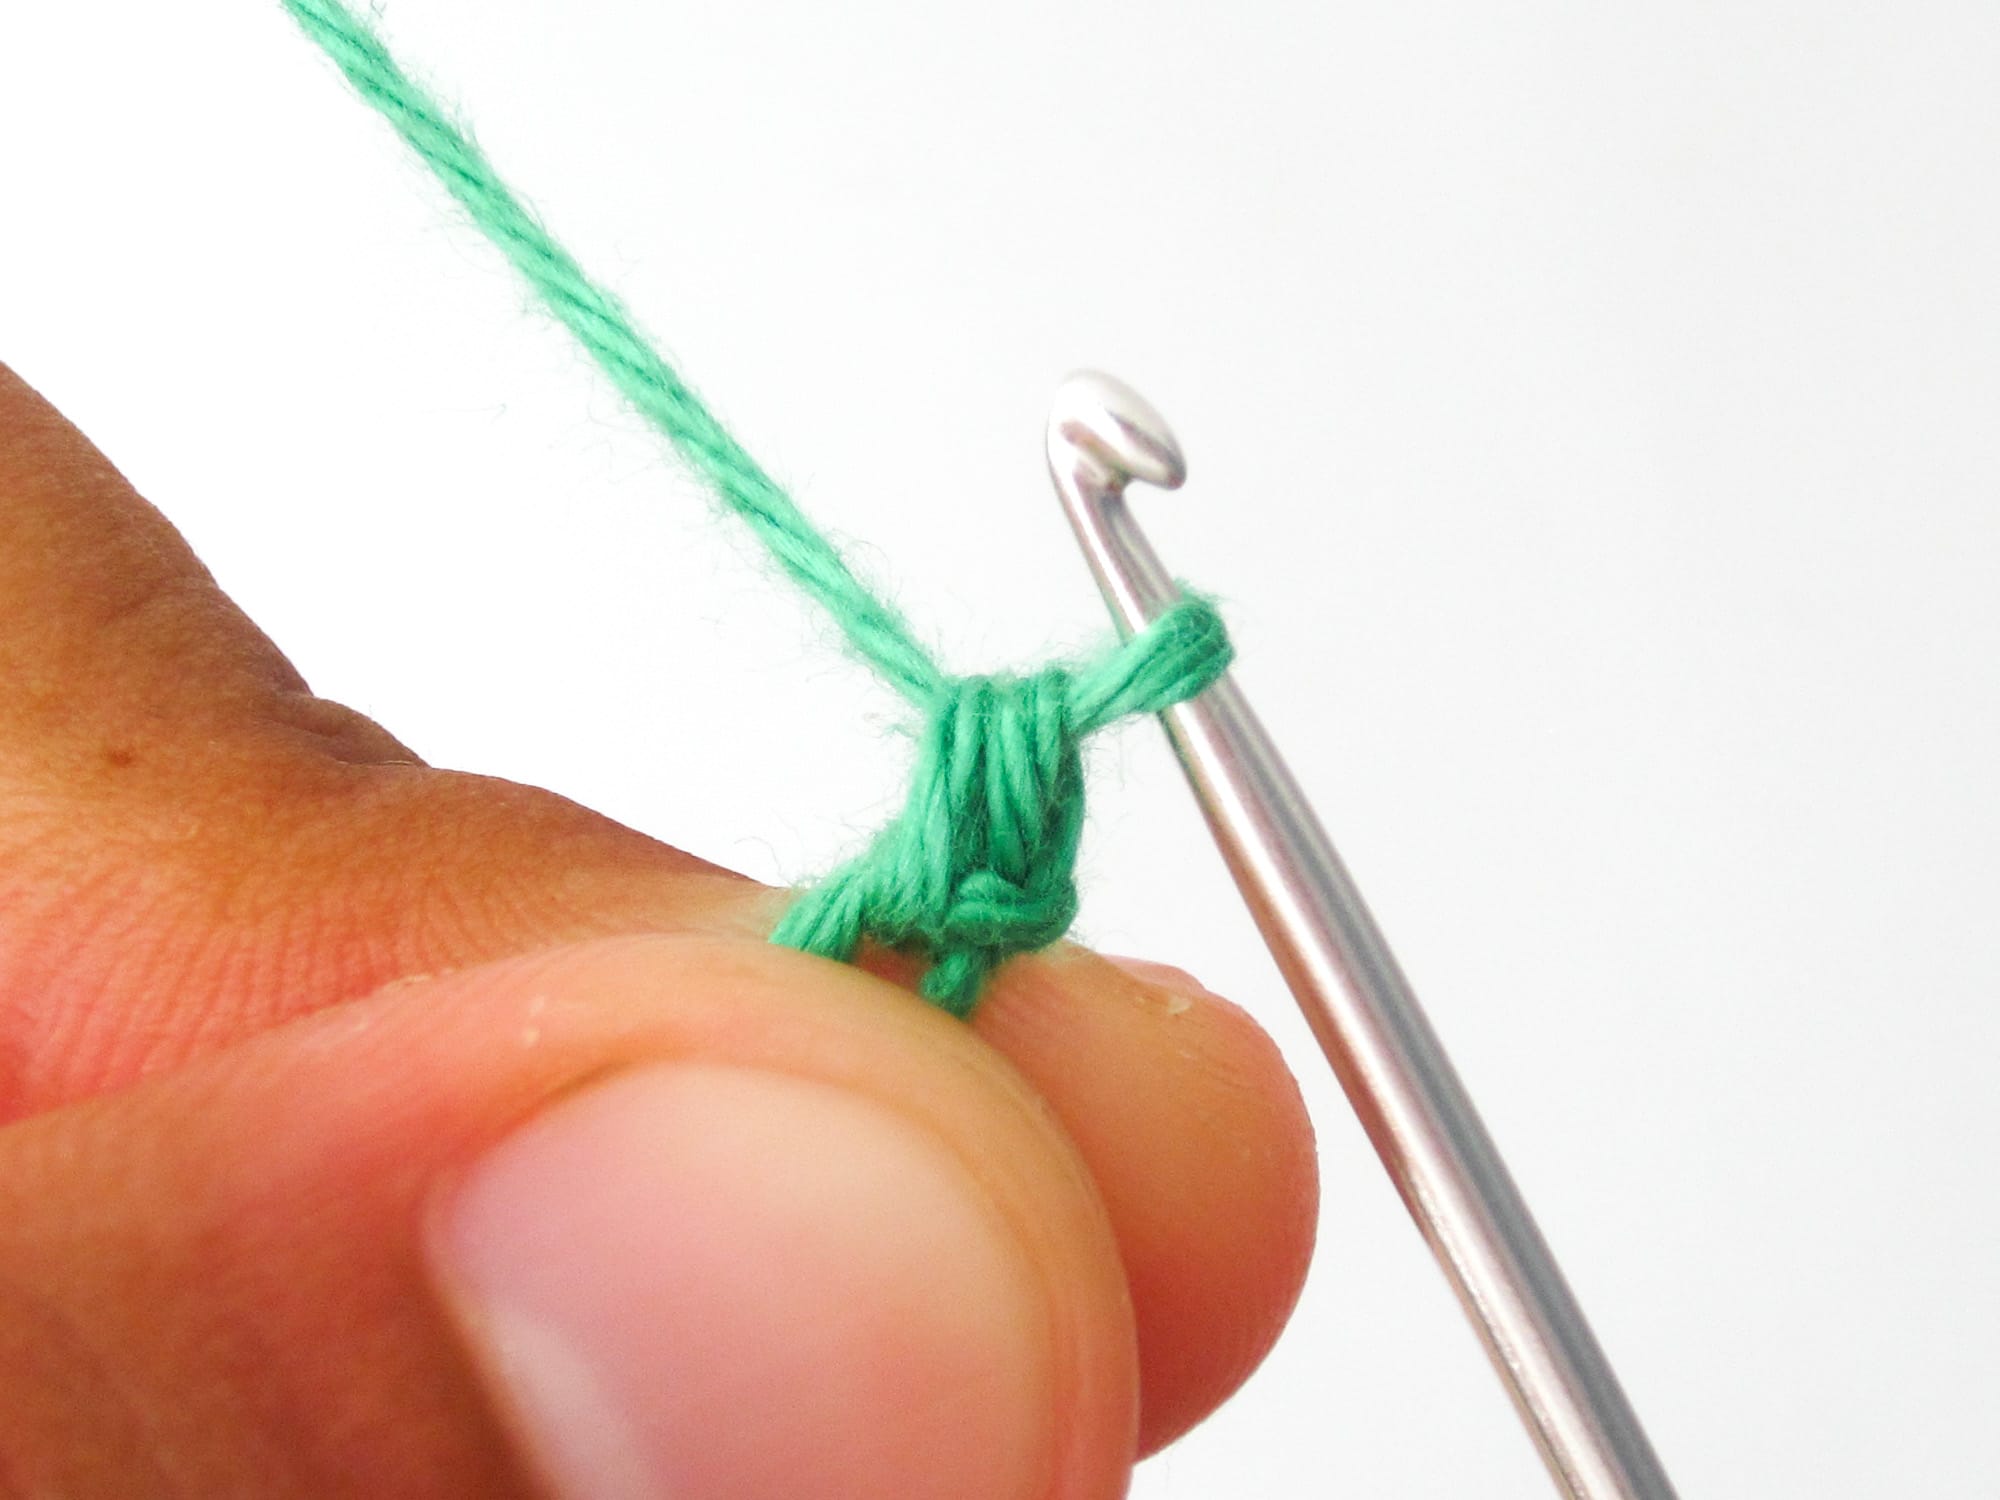
- Step 6: Now crochet 1 chain stitch. Take again the thread that runs over the left index finger and pull it through the loop on the crochet hook. Depending on which stitches you want to crochet into the magic ring, you have to crochet more or less chain stitches at this point. Read more about this below.
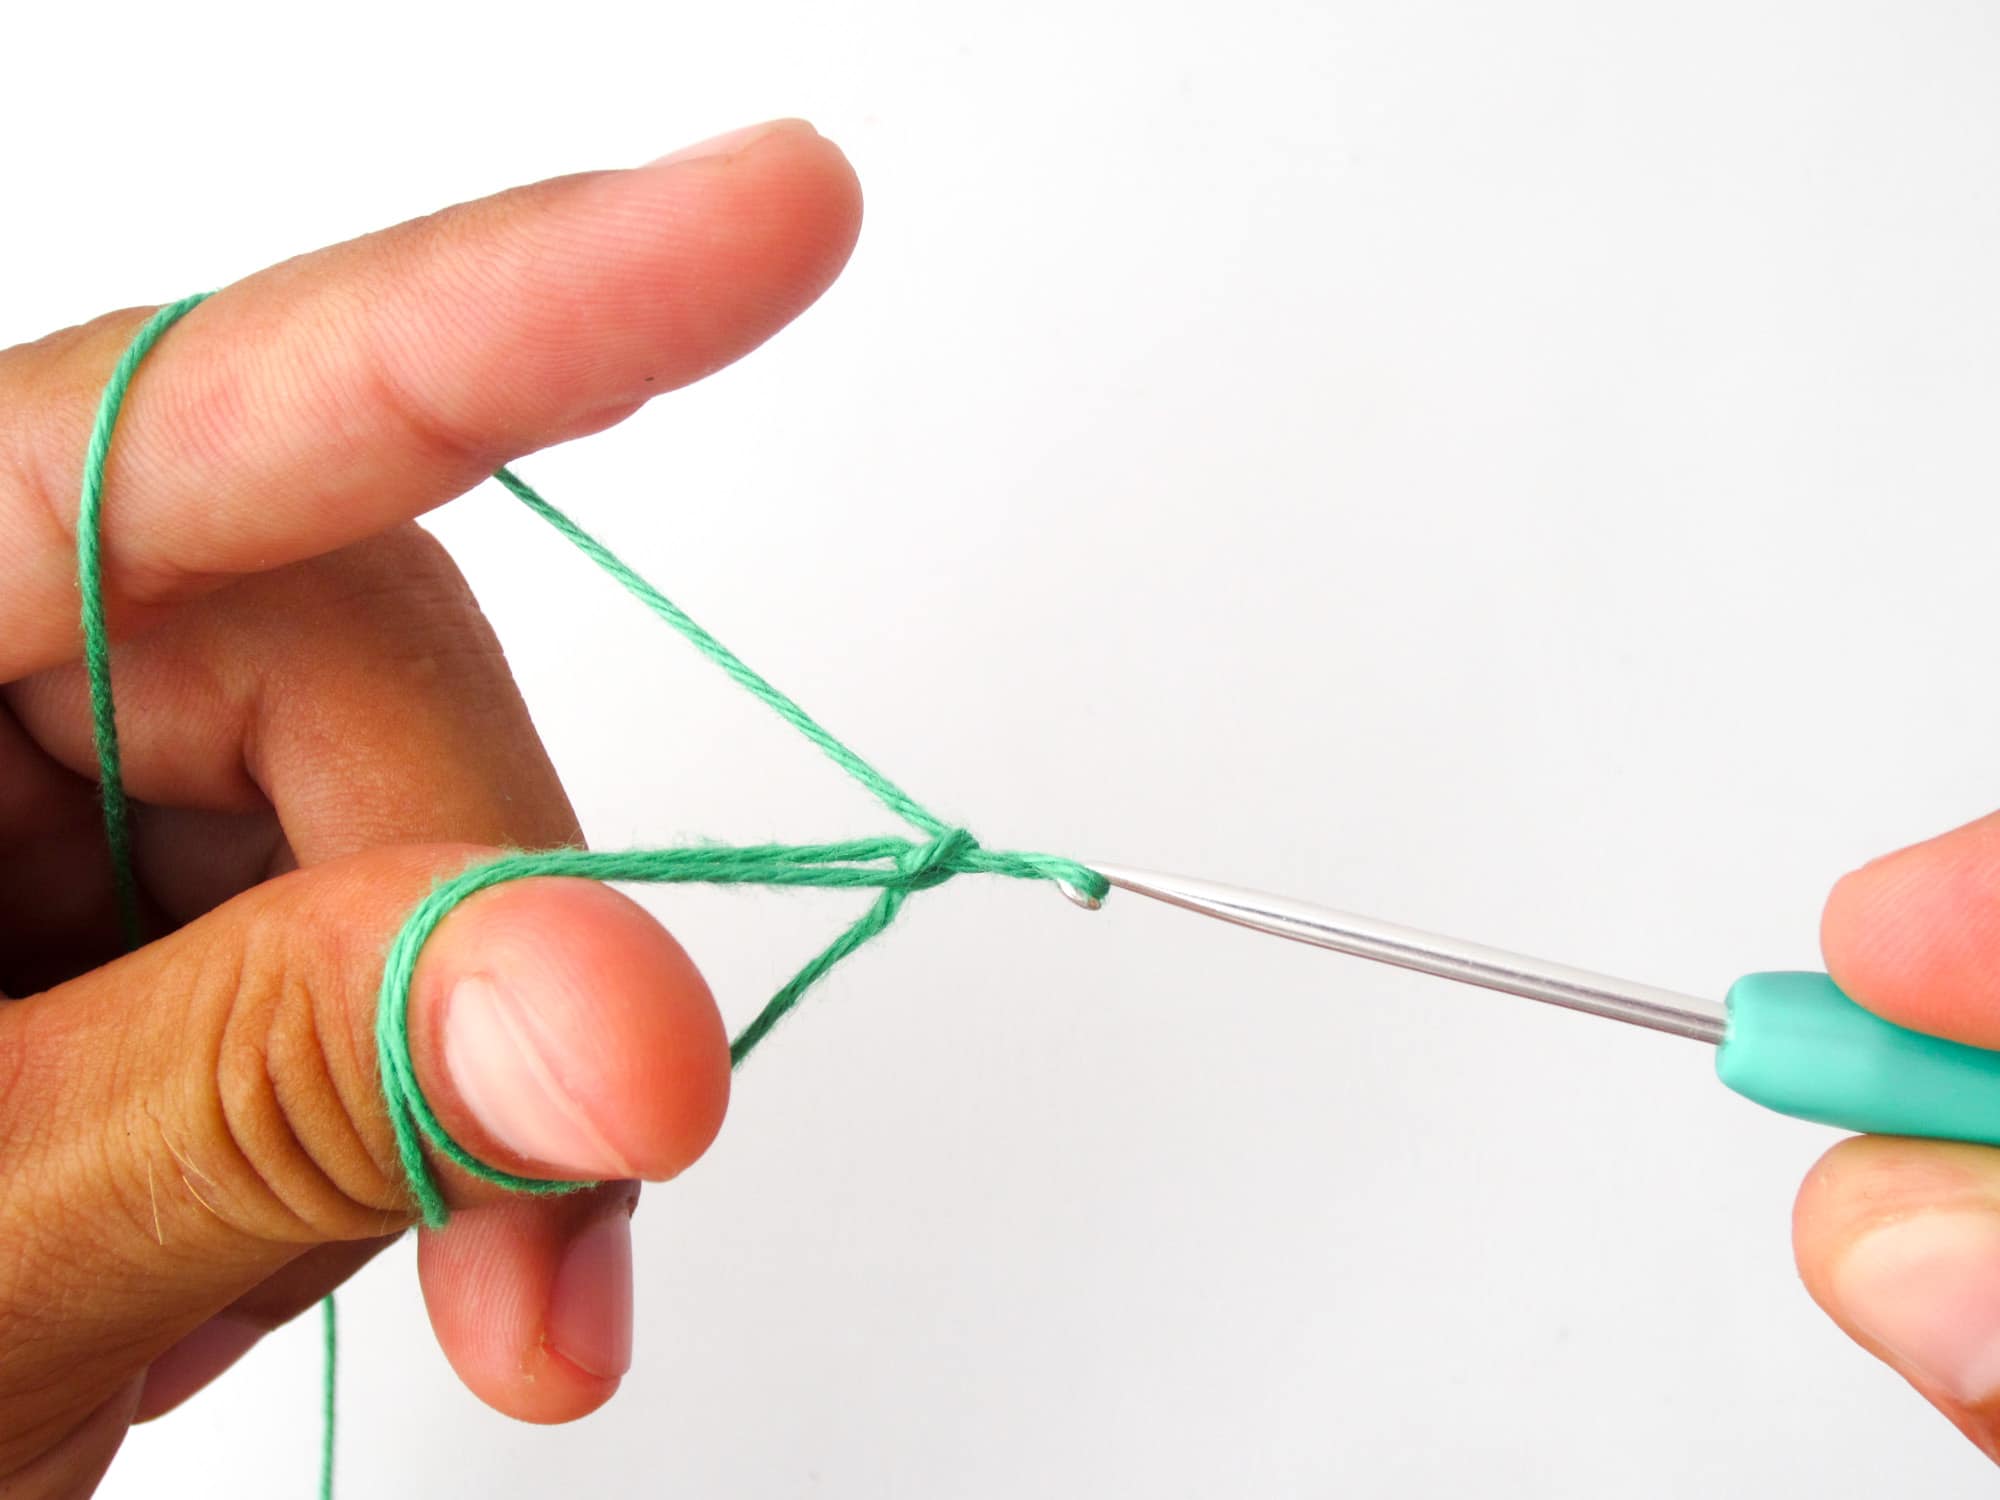
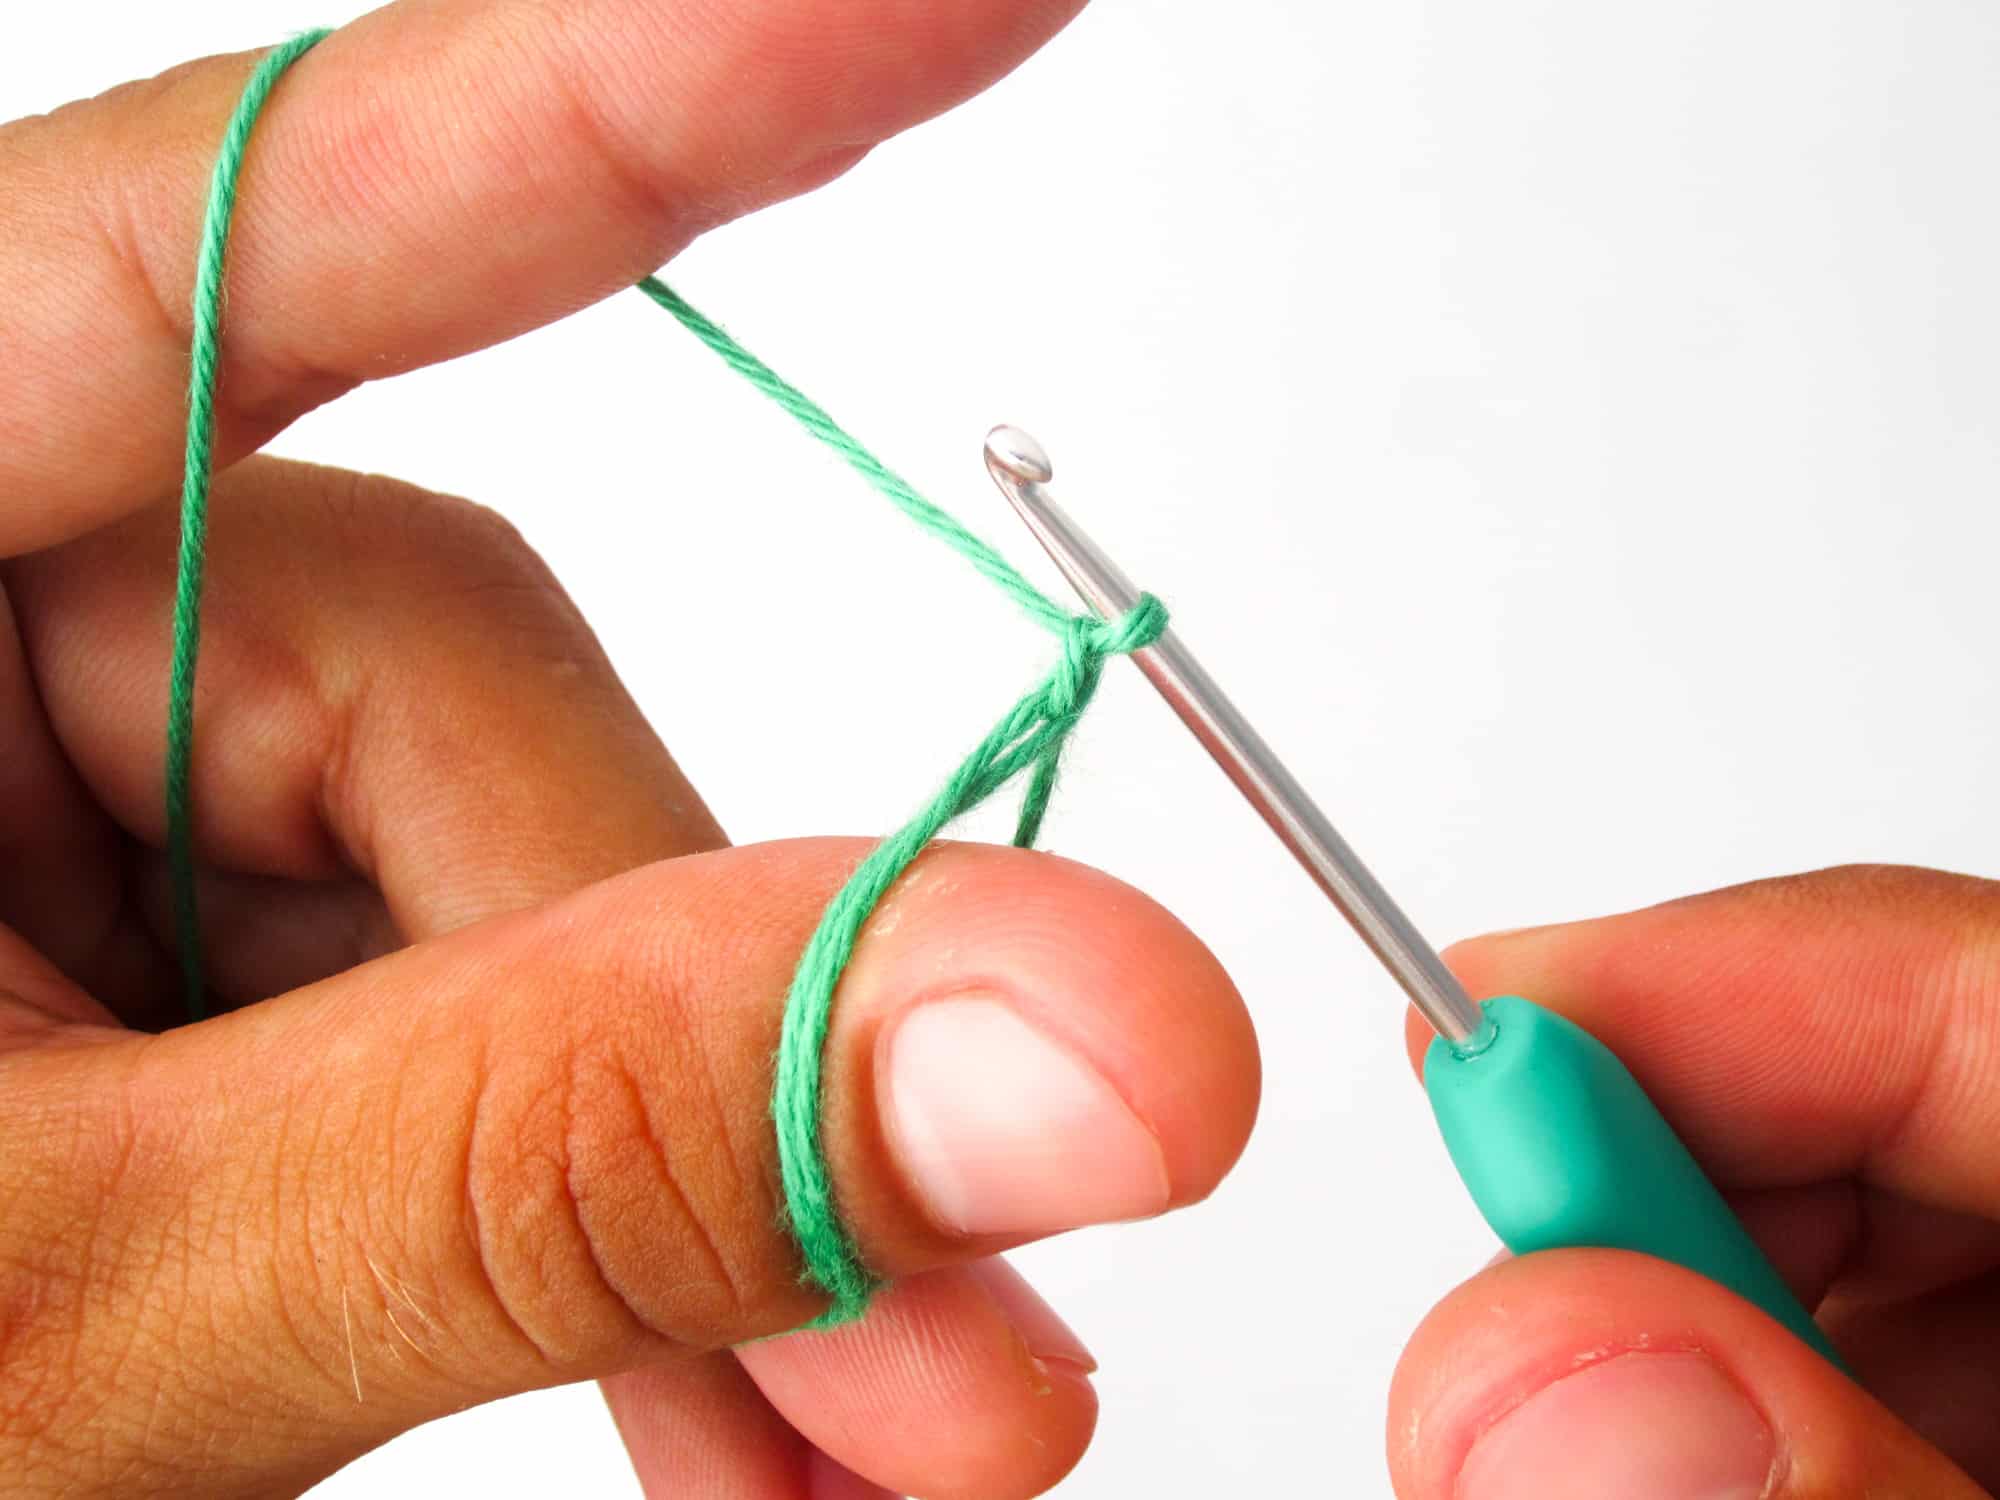

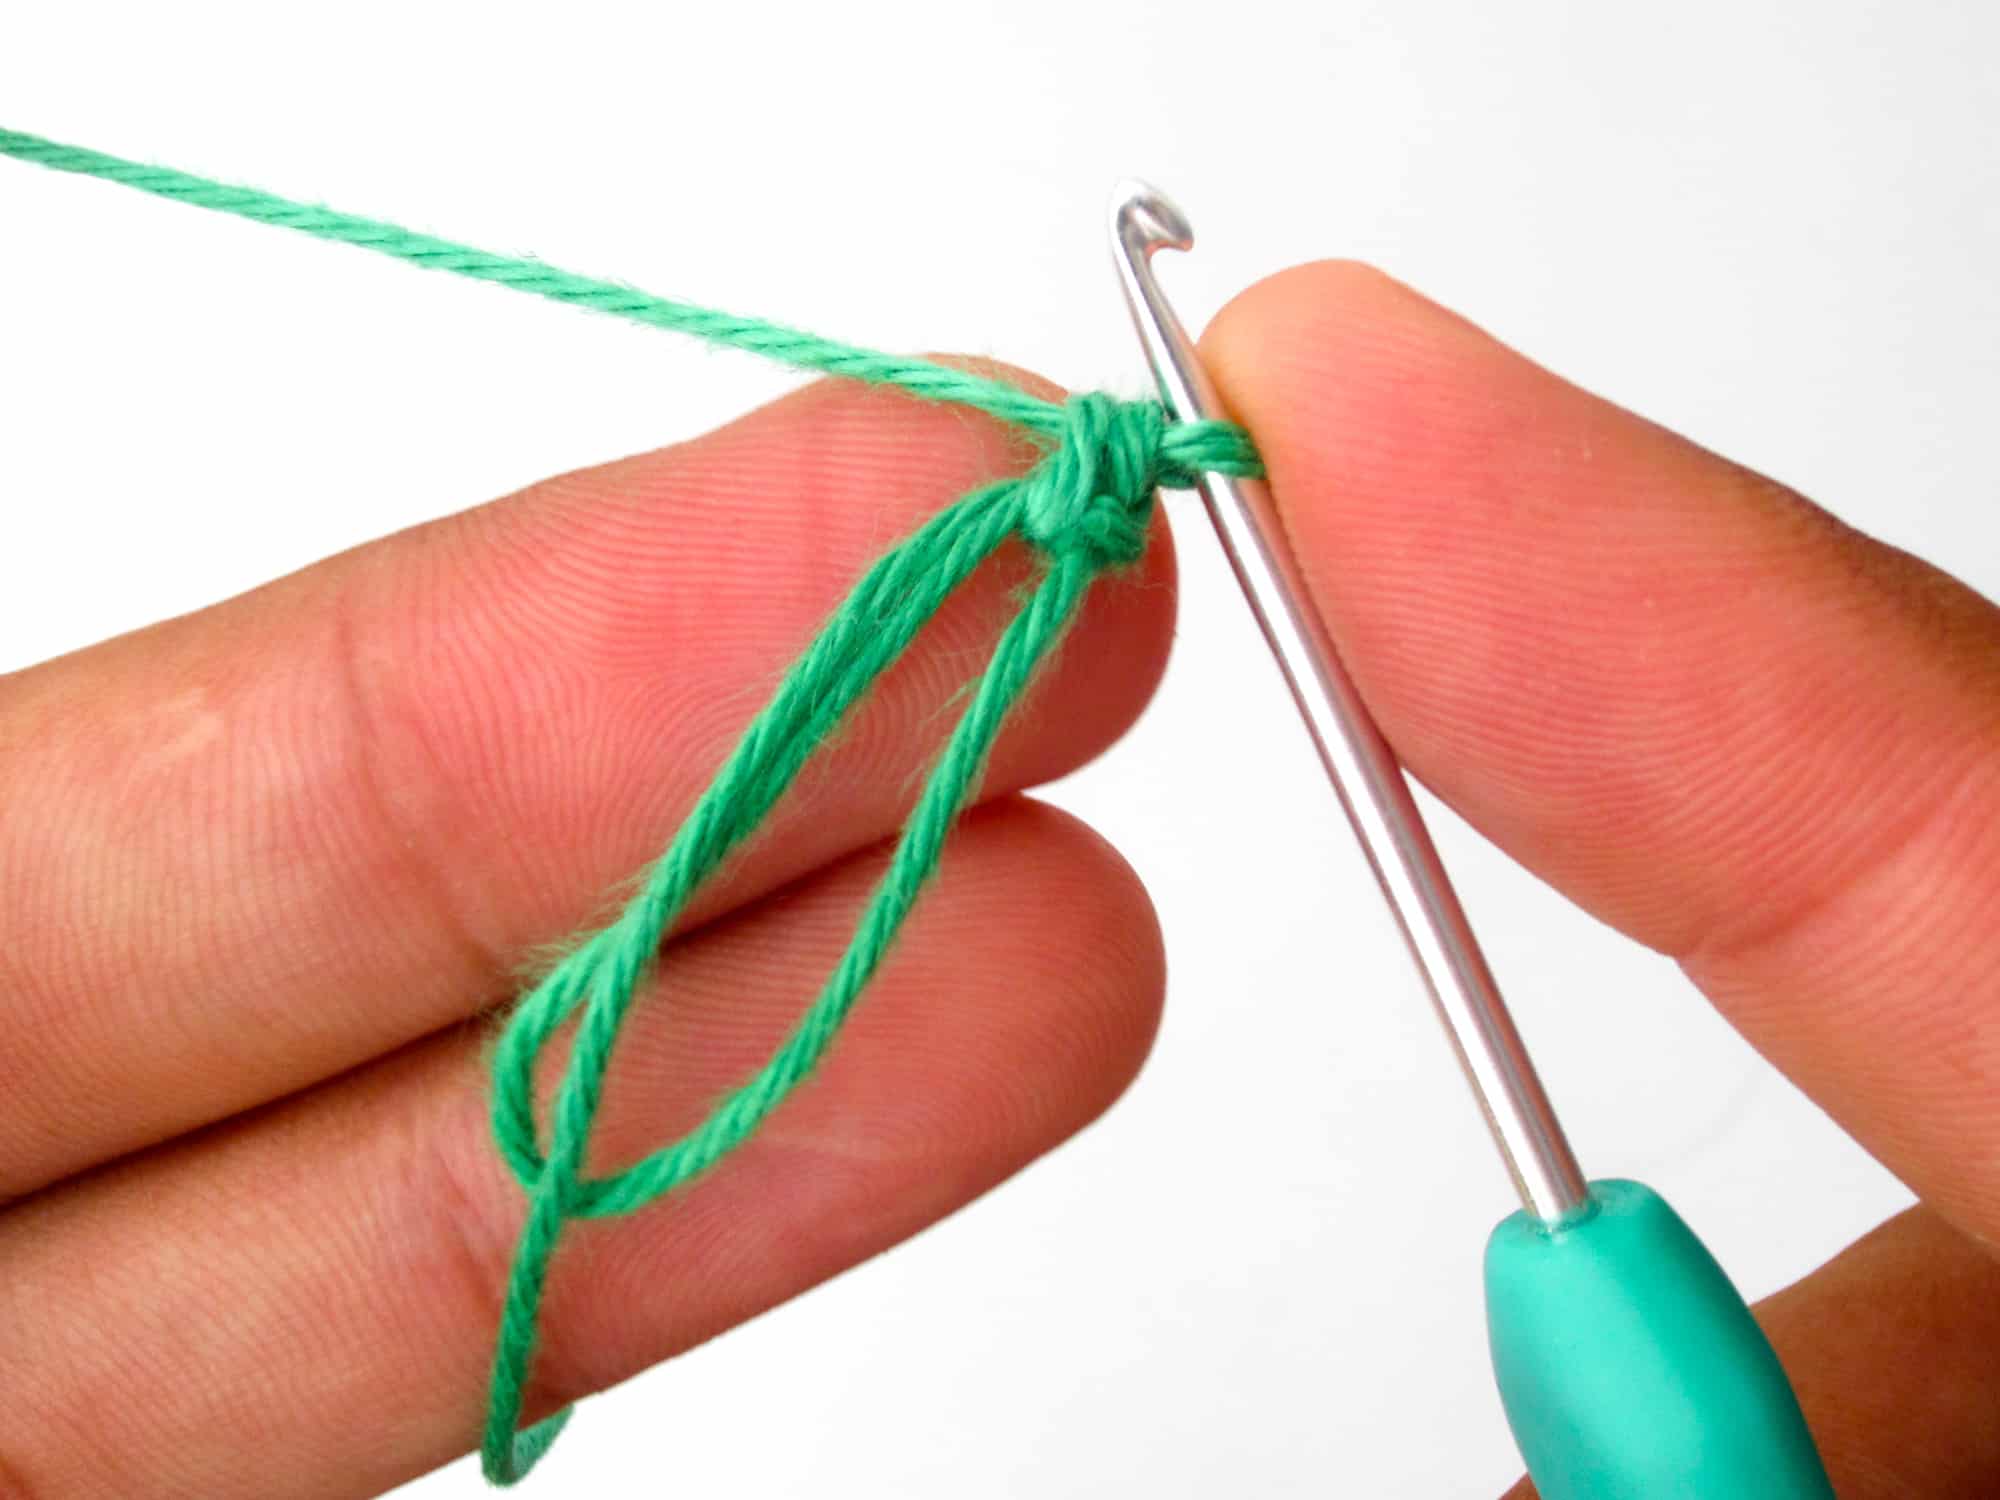
- Step 7: Hold now with the thumb and index finger of the right hand the “knot” which lies directly on the crochet hook. Pull the thumb out of the loop and grasp with the thumb and middle finger of your left hand the lower part of the ring which you now have in front of you. The end of the thread should also be held tight, it should be on the left side of the ring.
With this you have made your first magic ring!
How to Crochet Stitches into the Magic Ring
After you have successfully created the actual magic ring, the next step is how to crochet stitches into it.
In this example 6 single crochet stitches are crocheted into the magic ring. If you want to crochet other stitches into a magic ring, please read the description at the end of this tutorial.
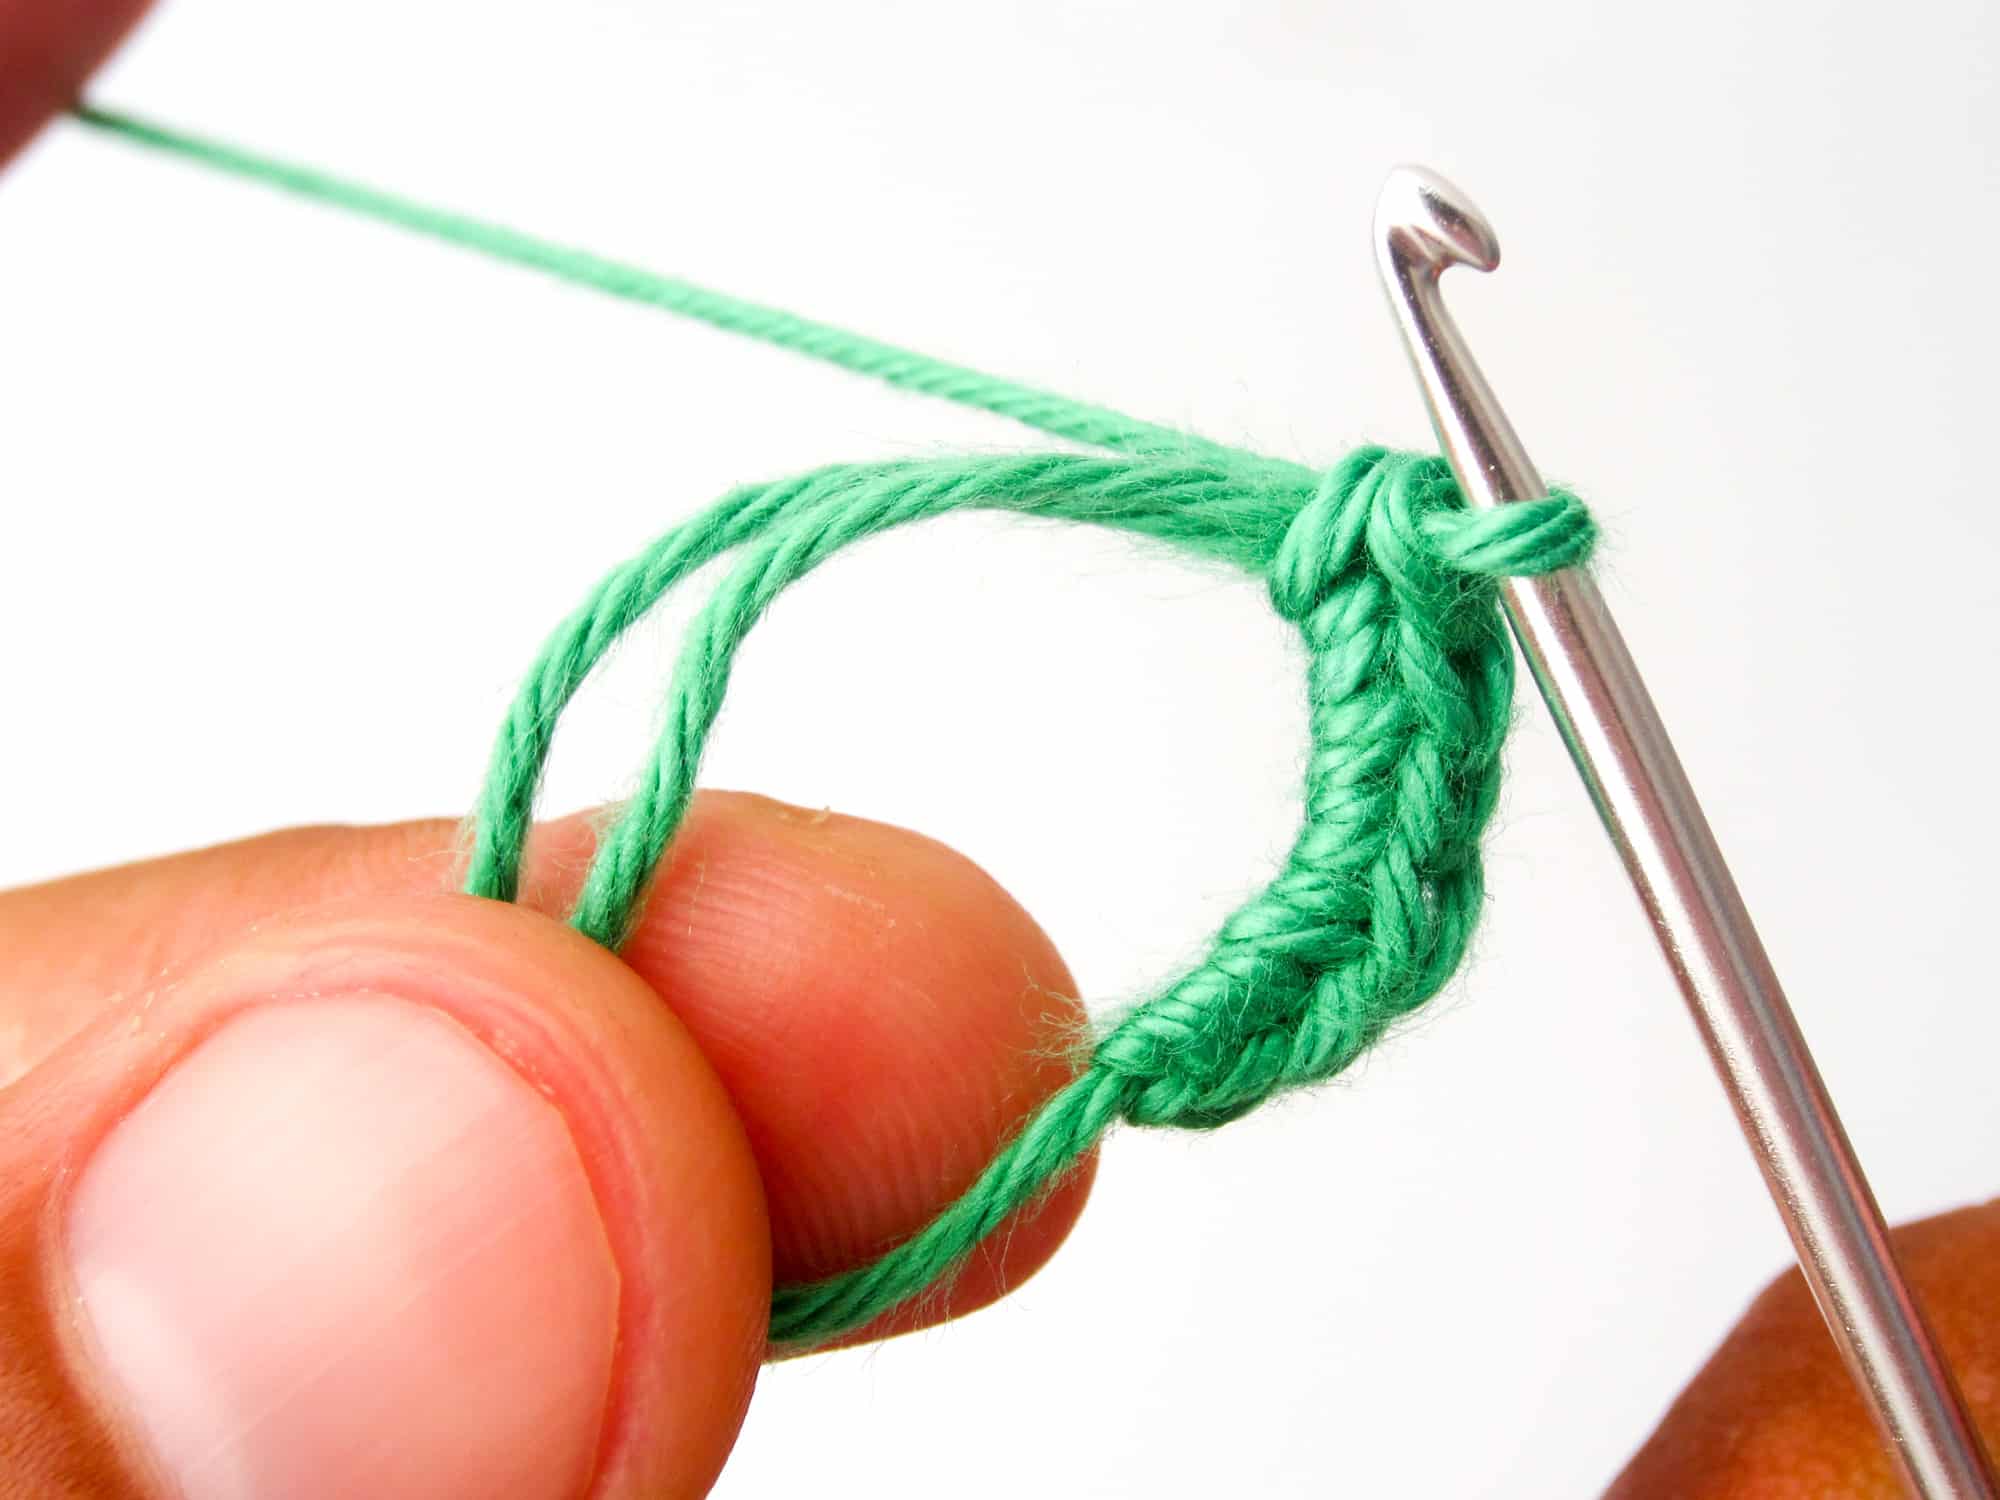
- Step 1: You have a loop on the crochet hook and hold the magic ring with two fingers, with 2 threads running on the left side of the ring.
- Step 2: Hold the loop on the crochet hook with your thumb, index finger or a finger of your choice of the right hand. This prevents the needle and the thread on it from slipping around too much while the first stitches are being crocheted.
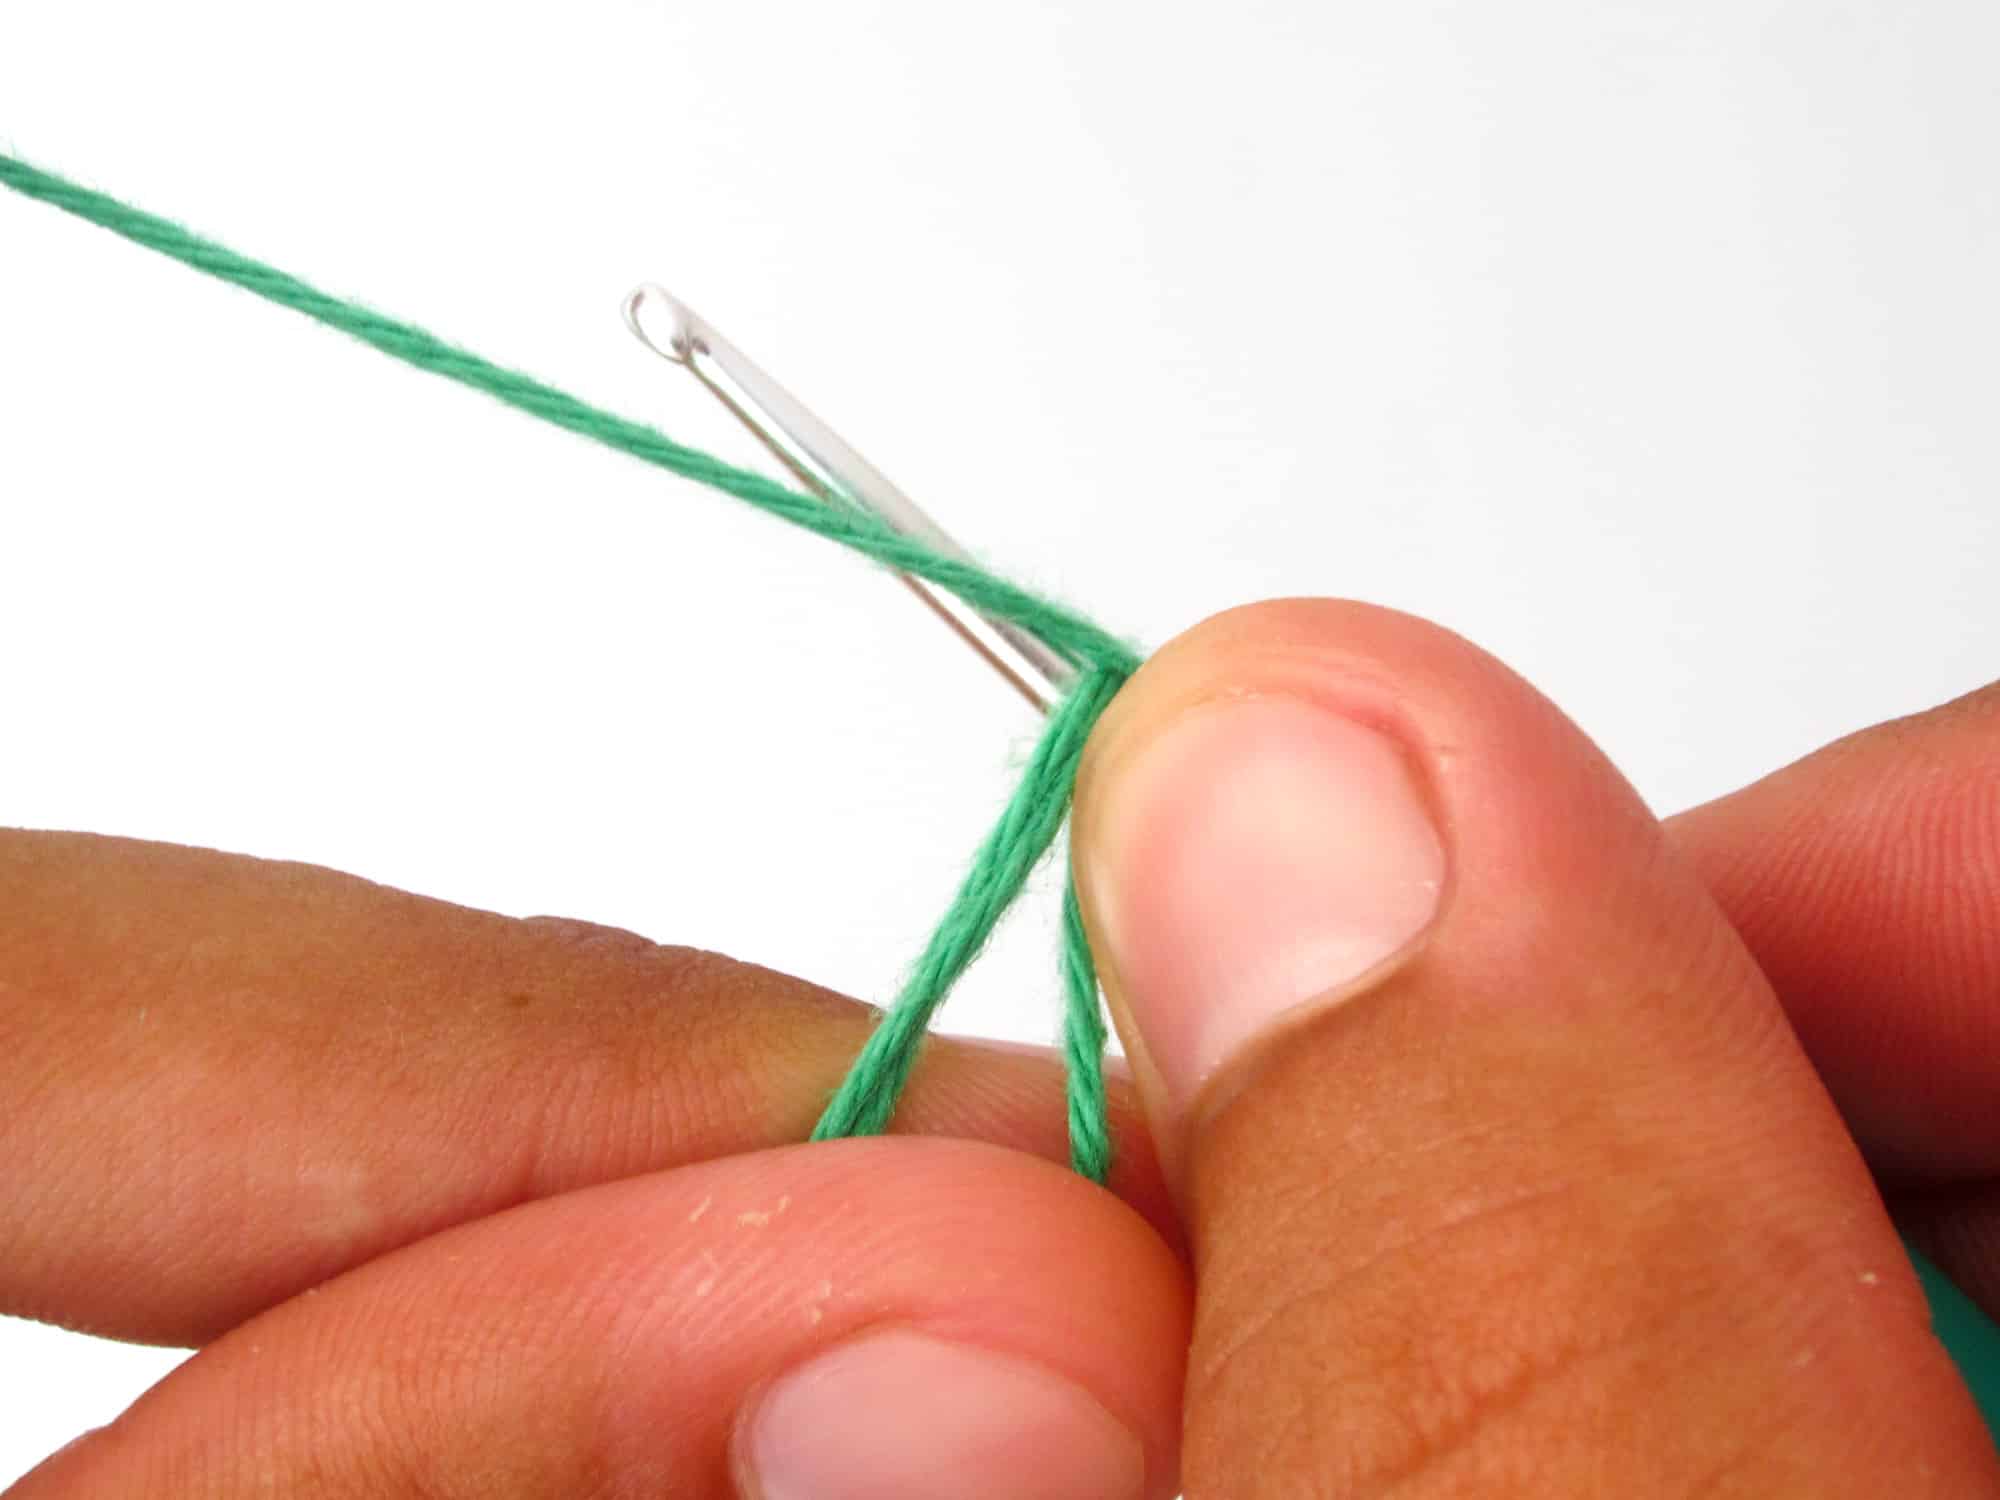
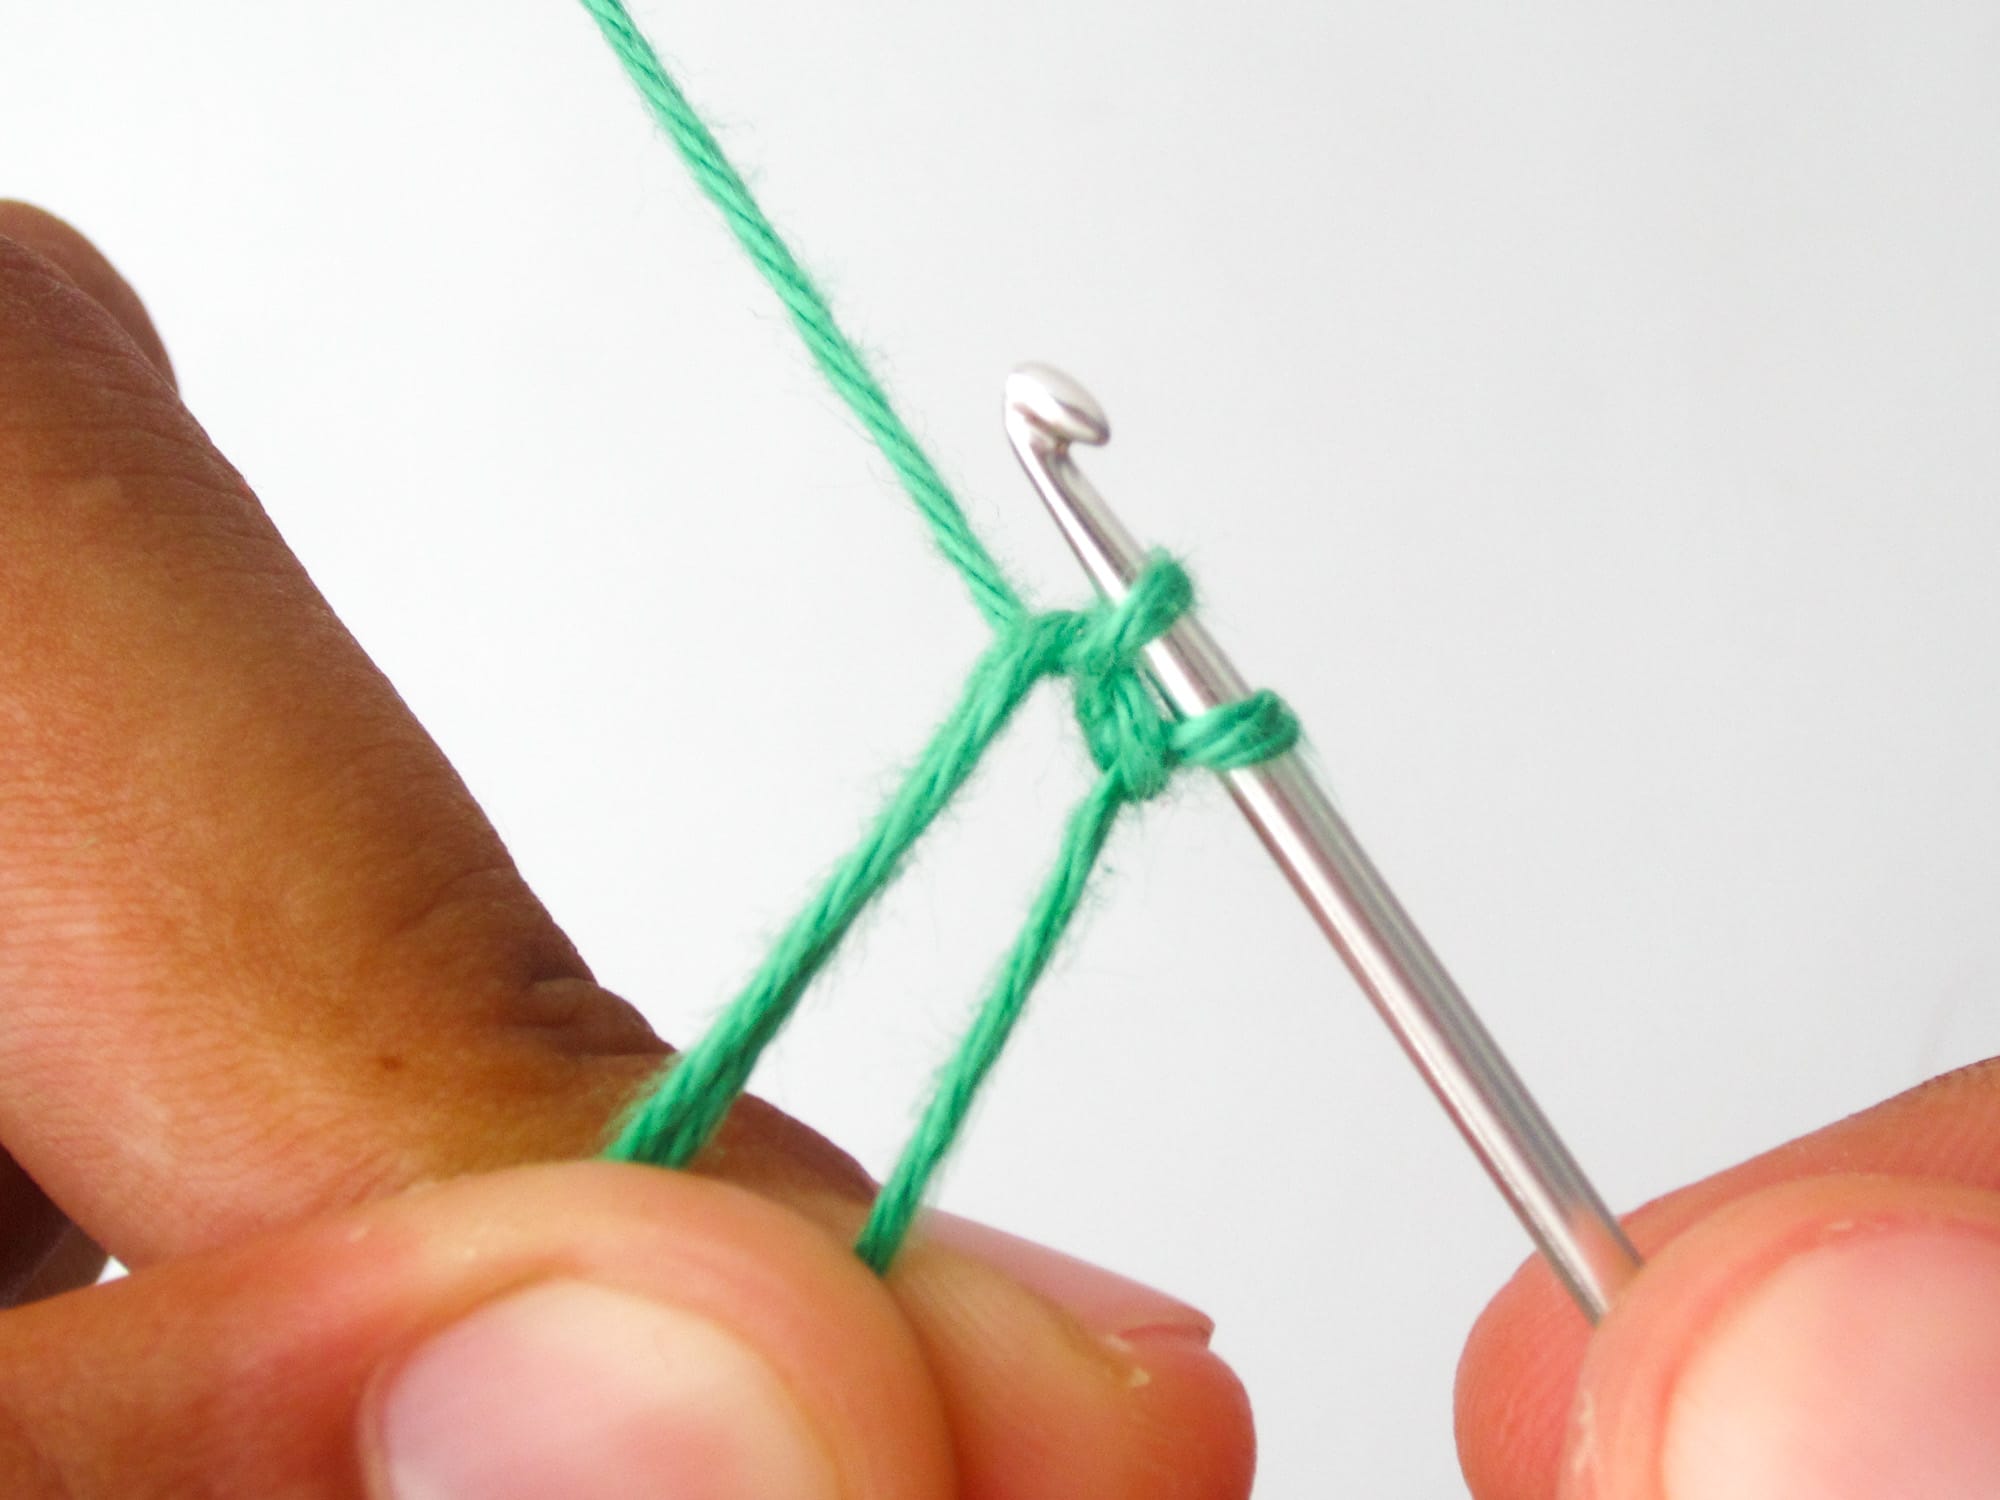
- Step 3: If you already know how to crochet single crochet stitches, crochet them around the two threads on the left side. If not, follow the instructions below: Pass the crochet hook UNDER the two threads on the left side of the ring and continue until it is behind the thread running from the left index finger to the crochet hook.
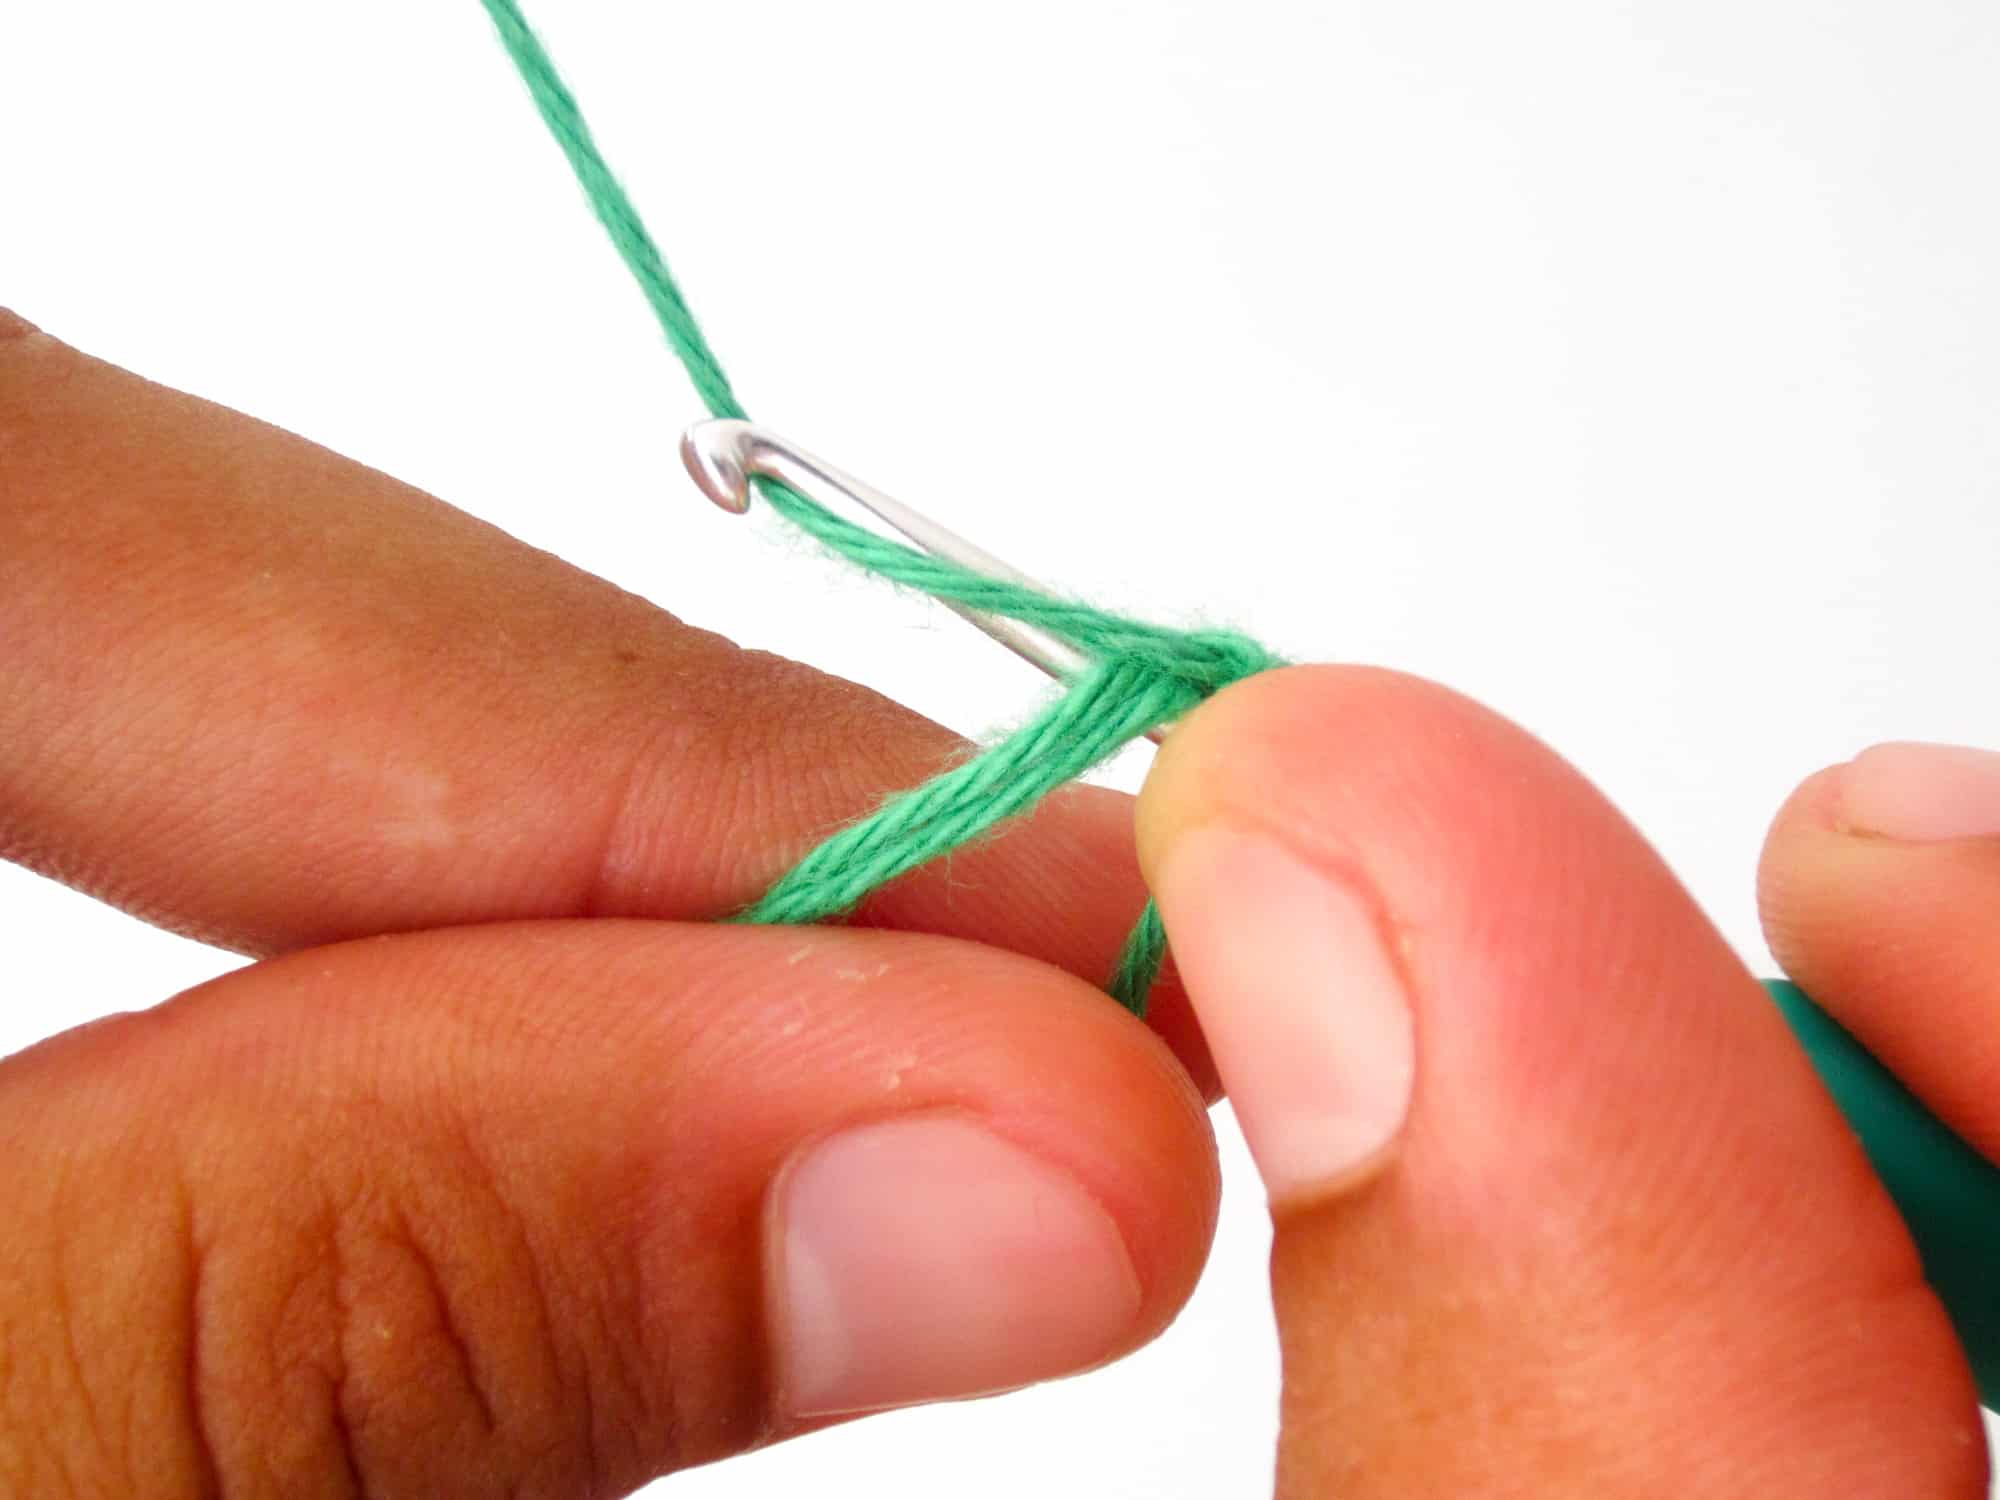
- Step 4: Now yarn over by turning the crochet hook counter-clockwise so the hook holds the thread.
- Step 5: Now pull the thread UNDER the two threads of the magic ring which lie above the crochet hook and then pull the crochet hook up. You should then have 2 loops on the crochet hook.
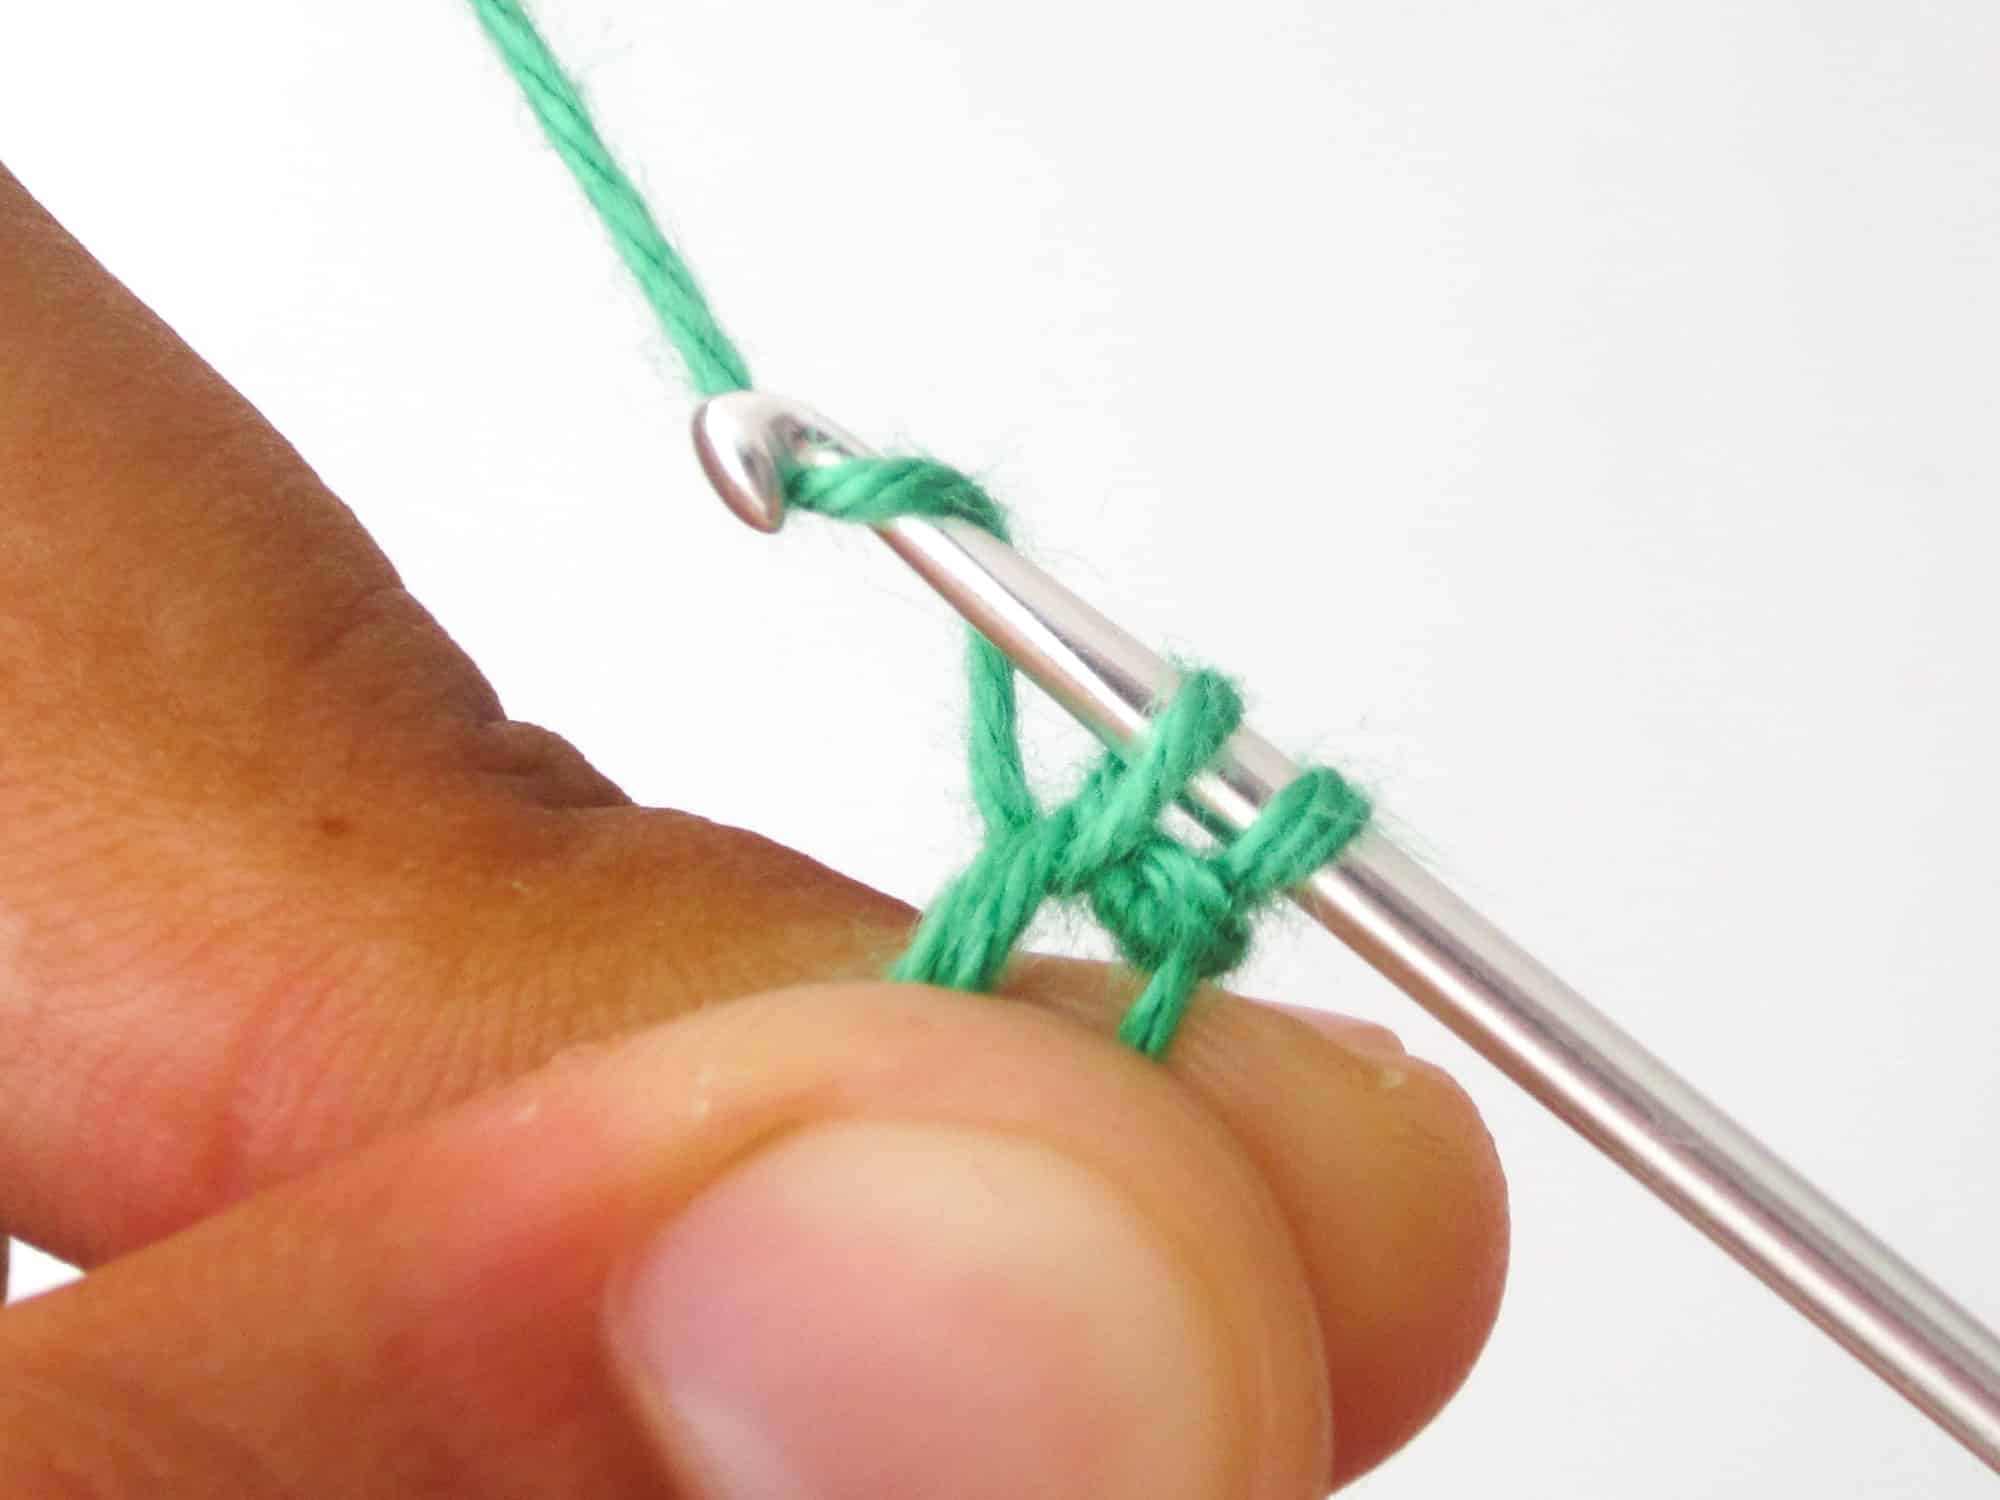
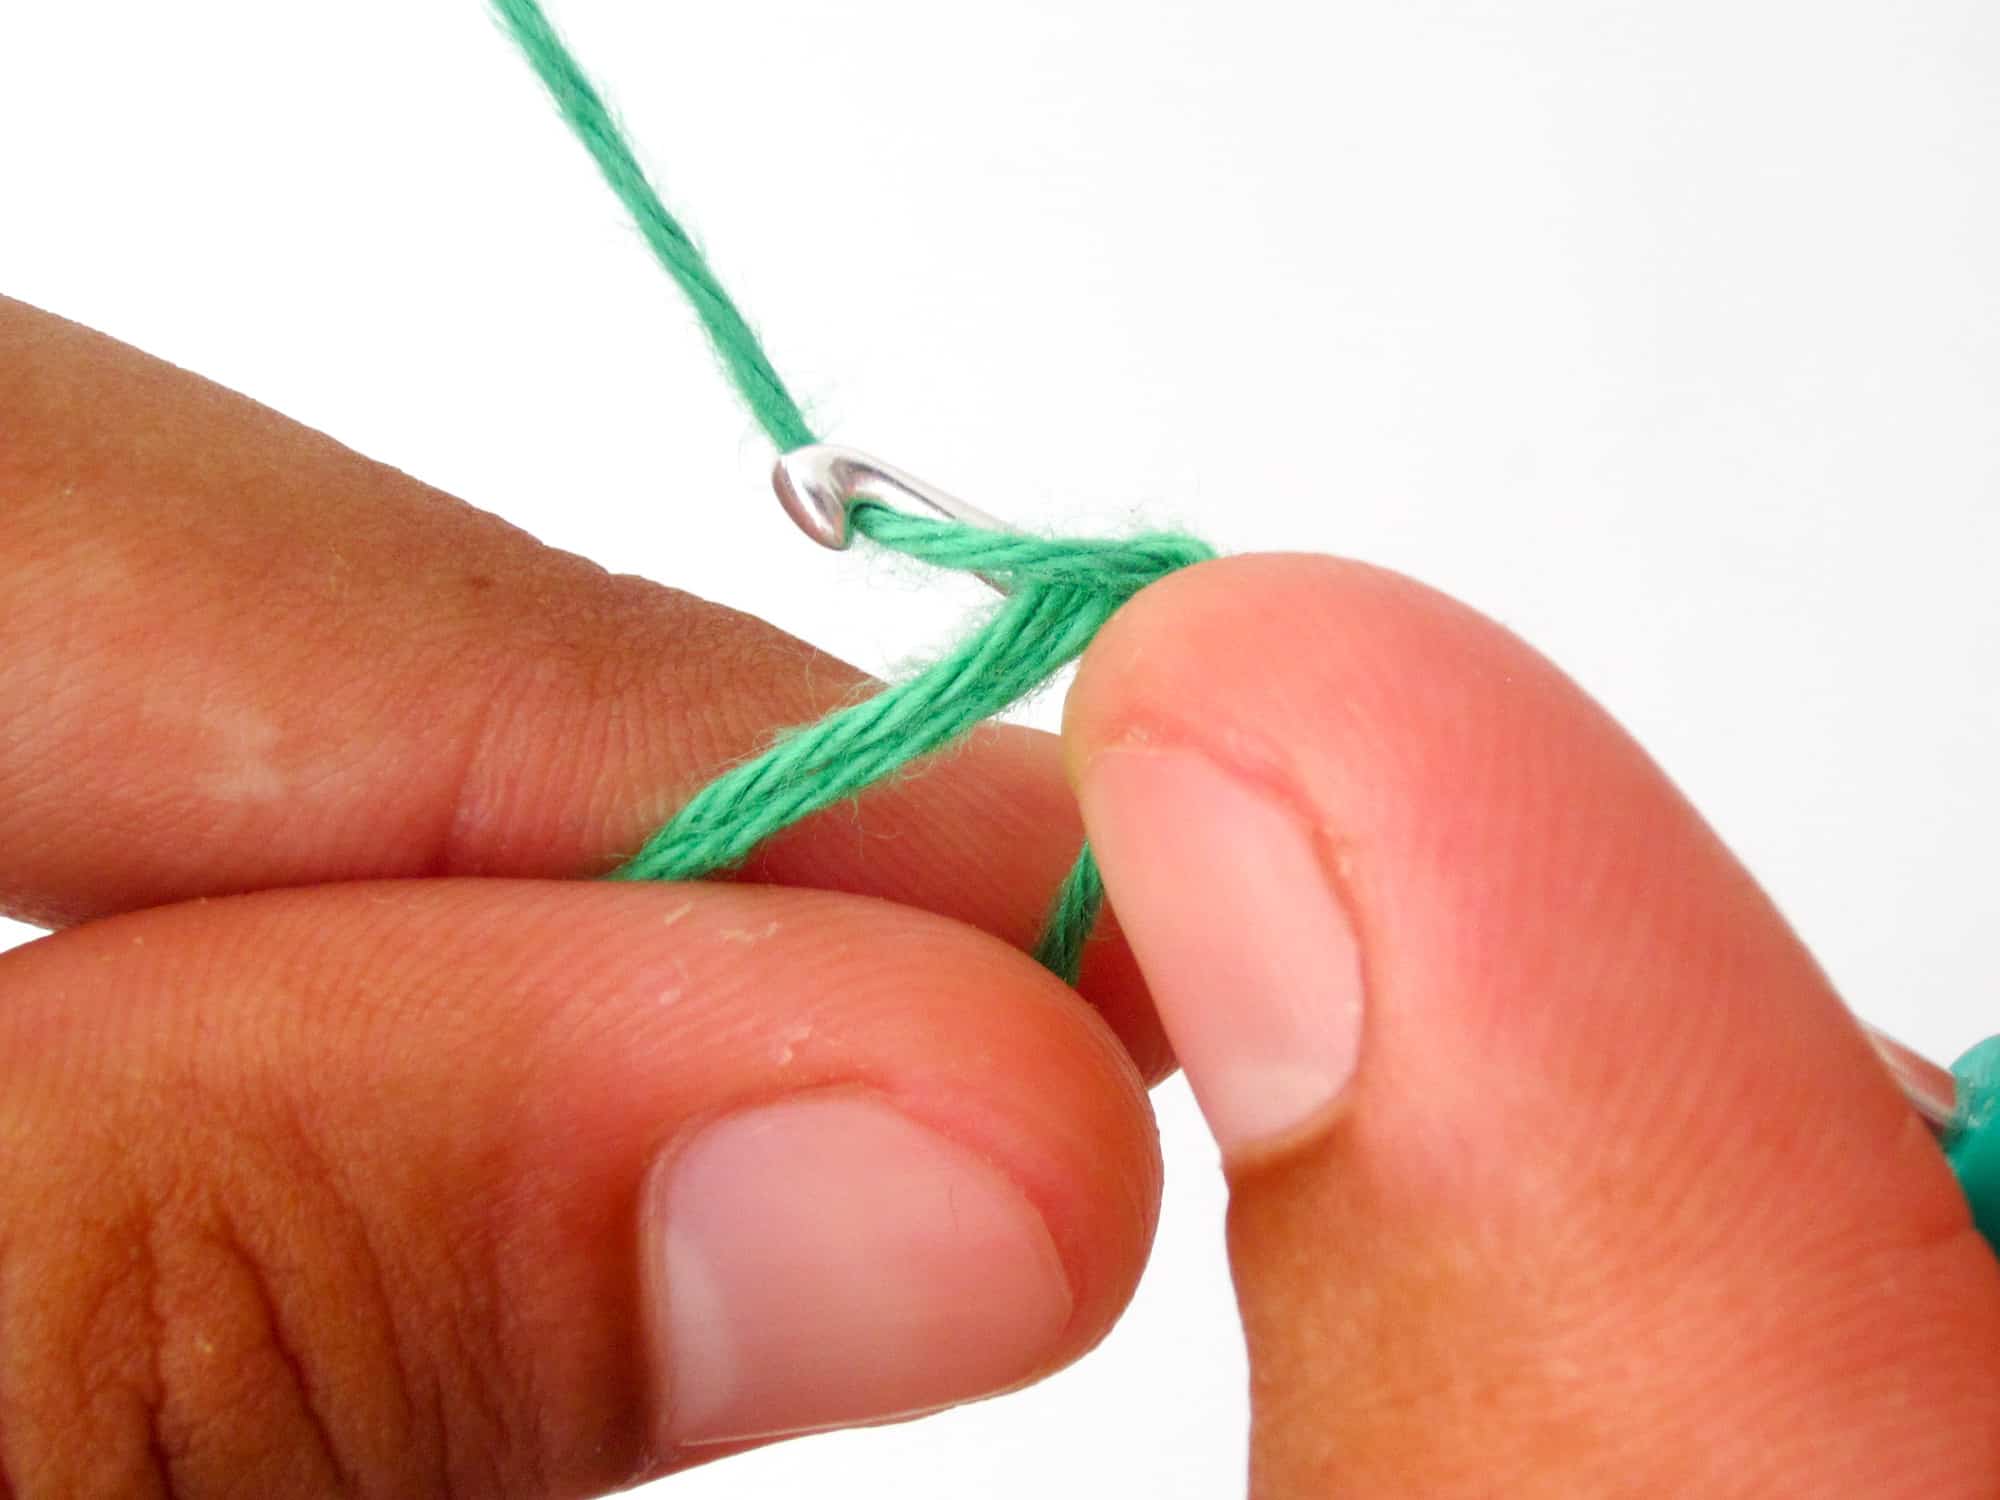
- Step 6: Yarn over the thread that runs from the left index finger to the crochet hook and pull it through both loops on the crochet hook. With this you have crocheted your first single crochet stitch into the magic ring.
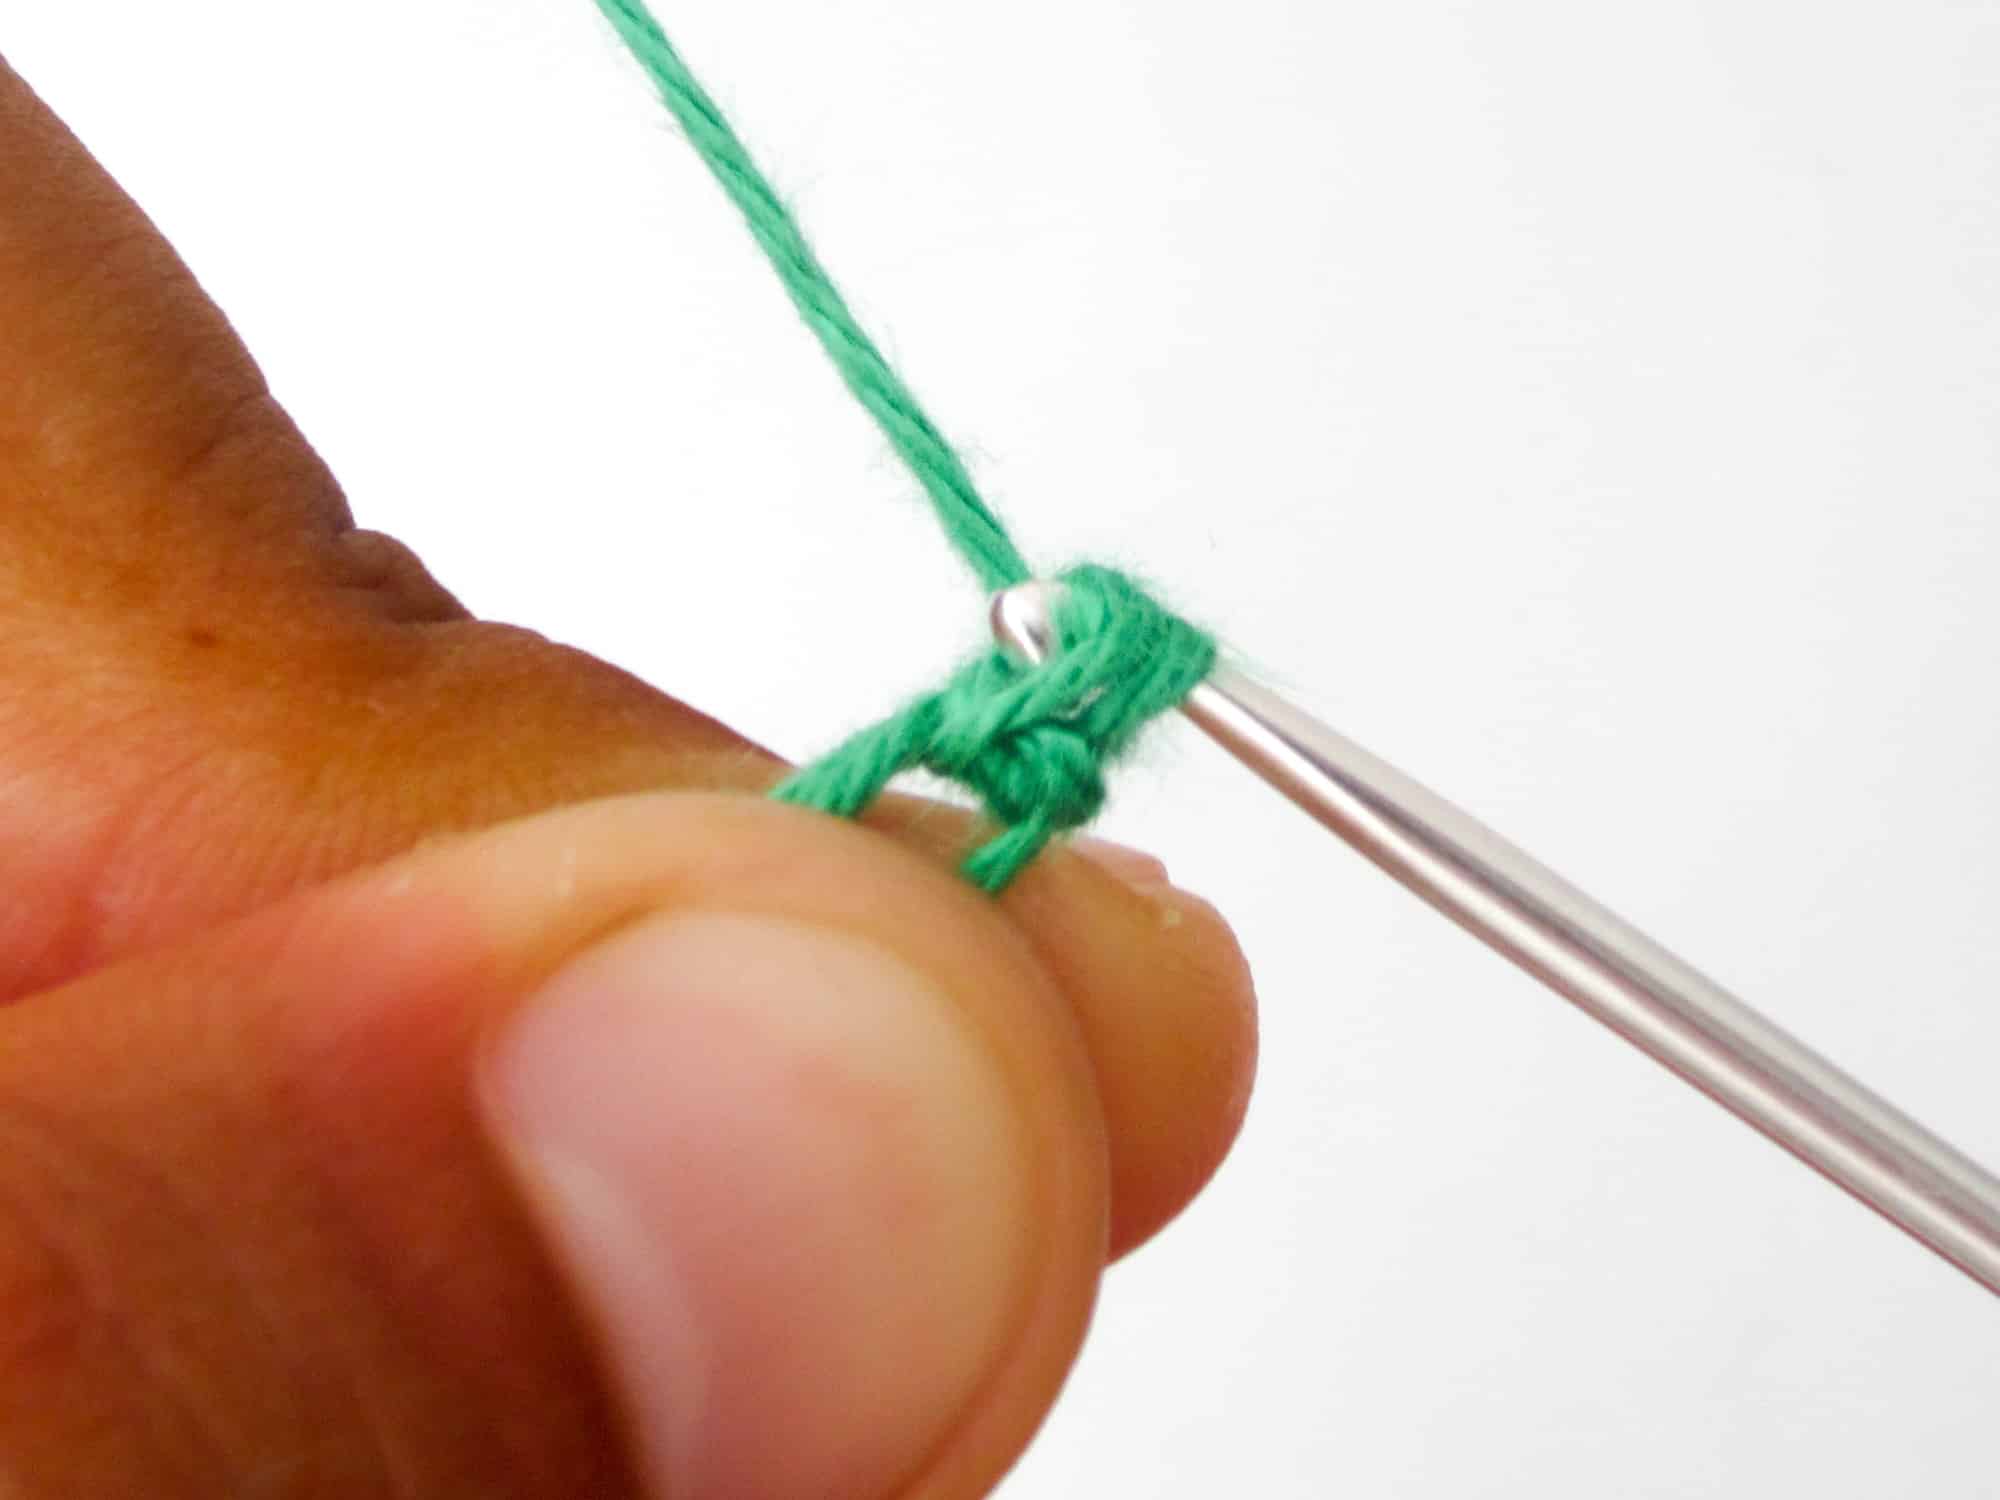
- Step 7: Now repeat this process 5 more times, so that you have crocheted a total of 6 single crochet stitches in the magic ring (of course you can also crochet more or less stitches).
- For the next single crochet stitches proceed in the same way as before: Put the crochet hook under the two left threads, yarn over and bring it forward. Thus you have 2 loops on the crochet hook. Yarn over again and pull it through both loops on the crochet hook.
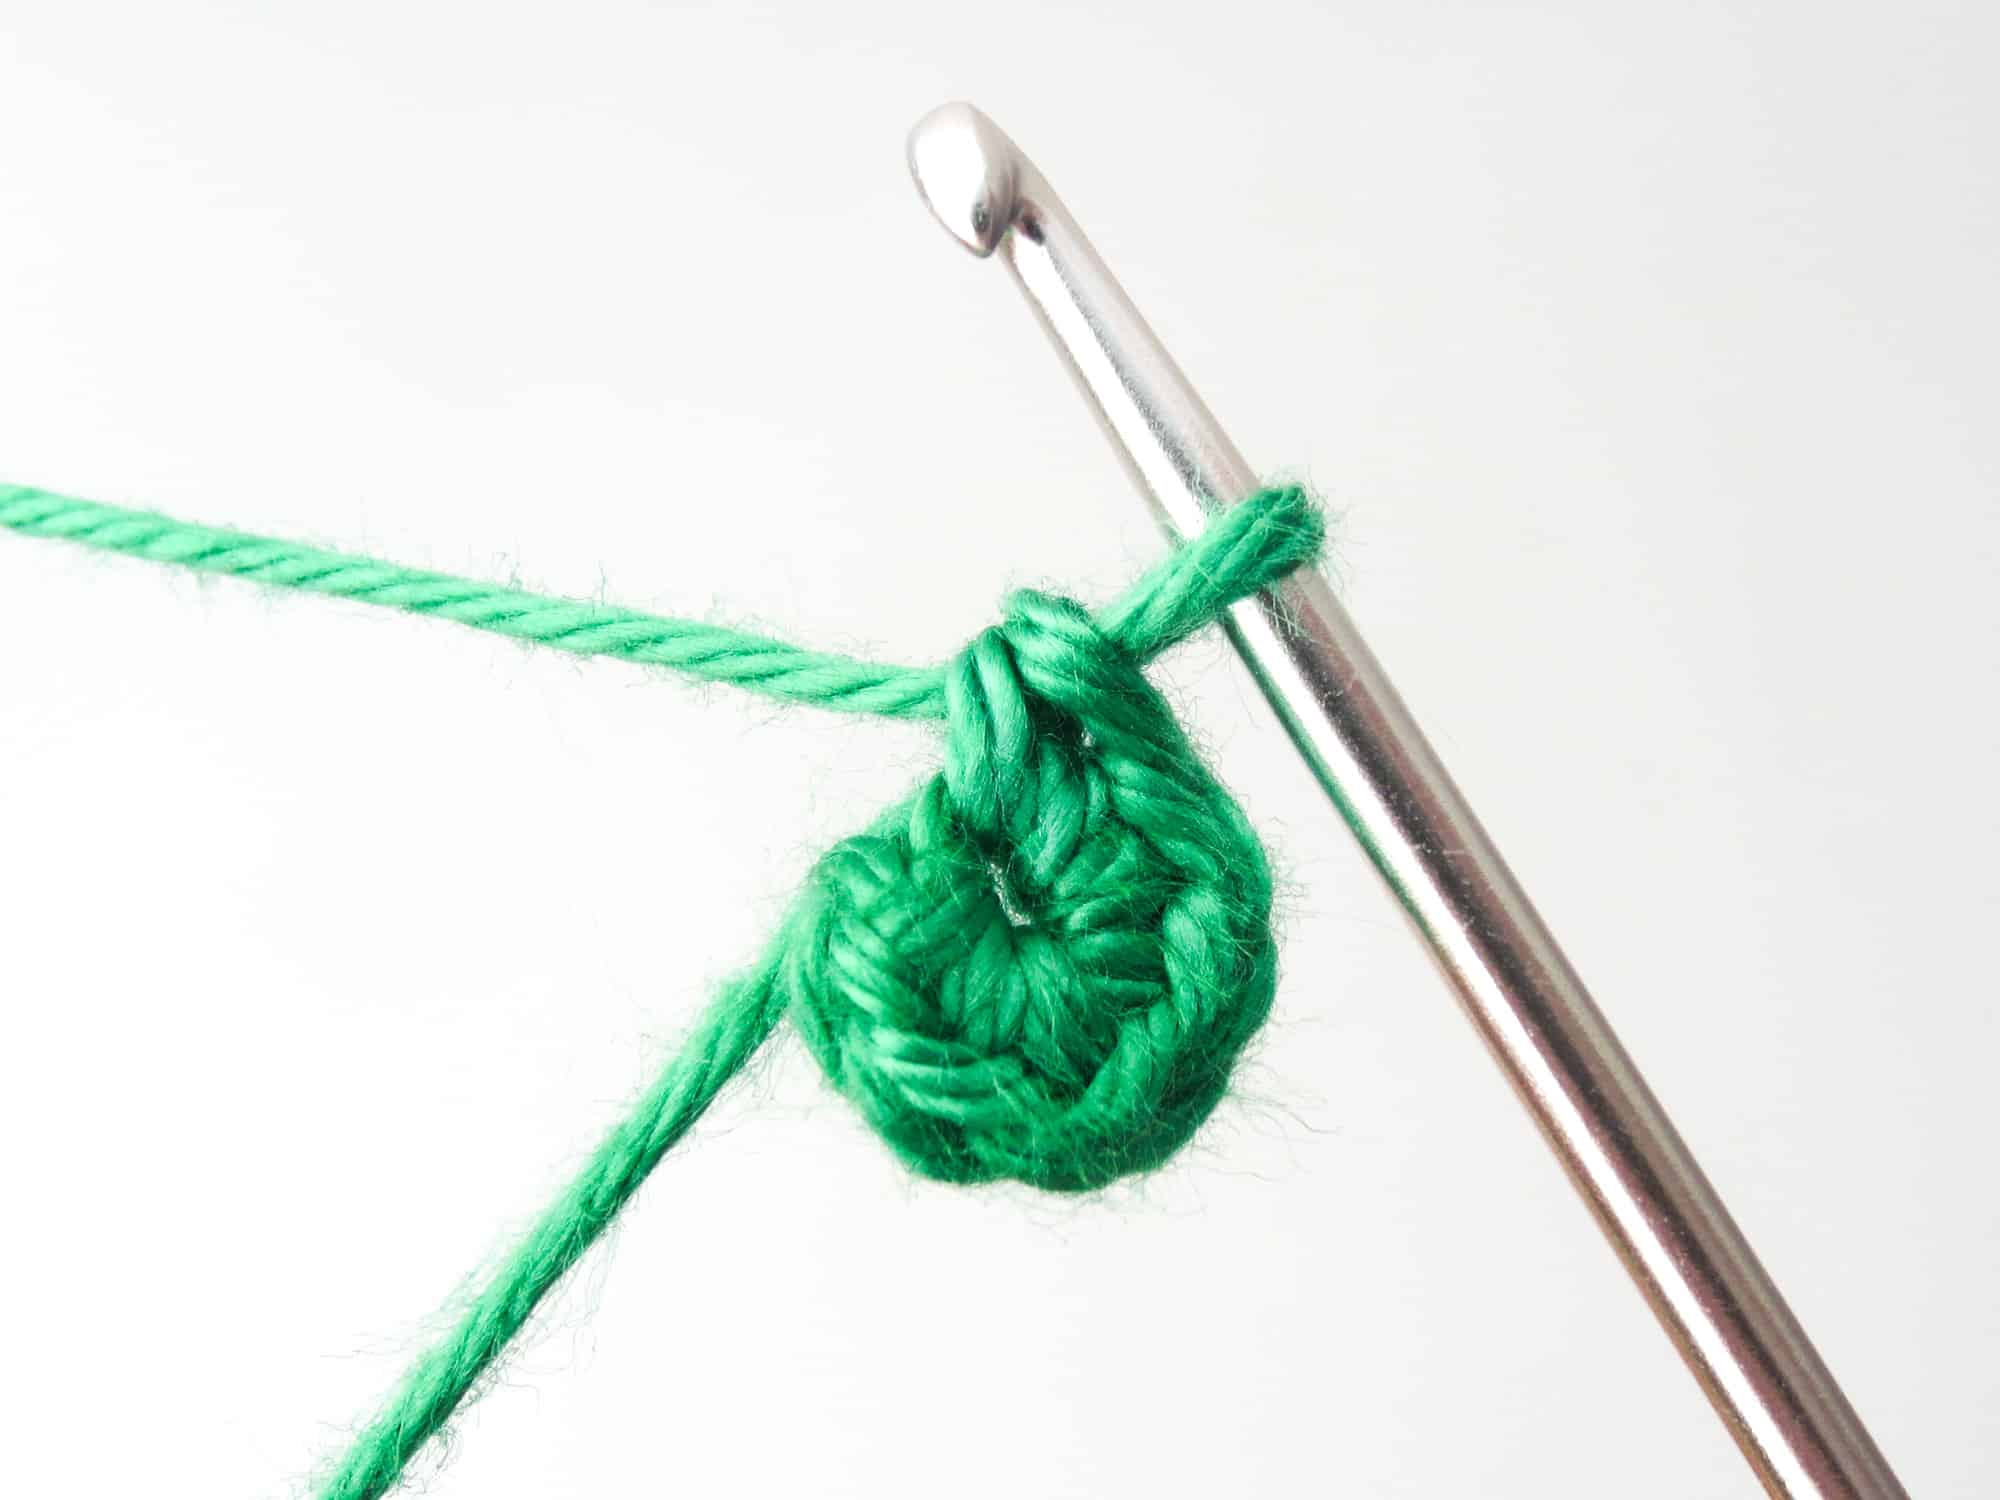
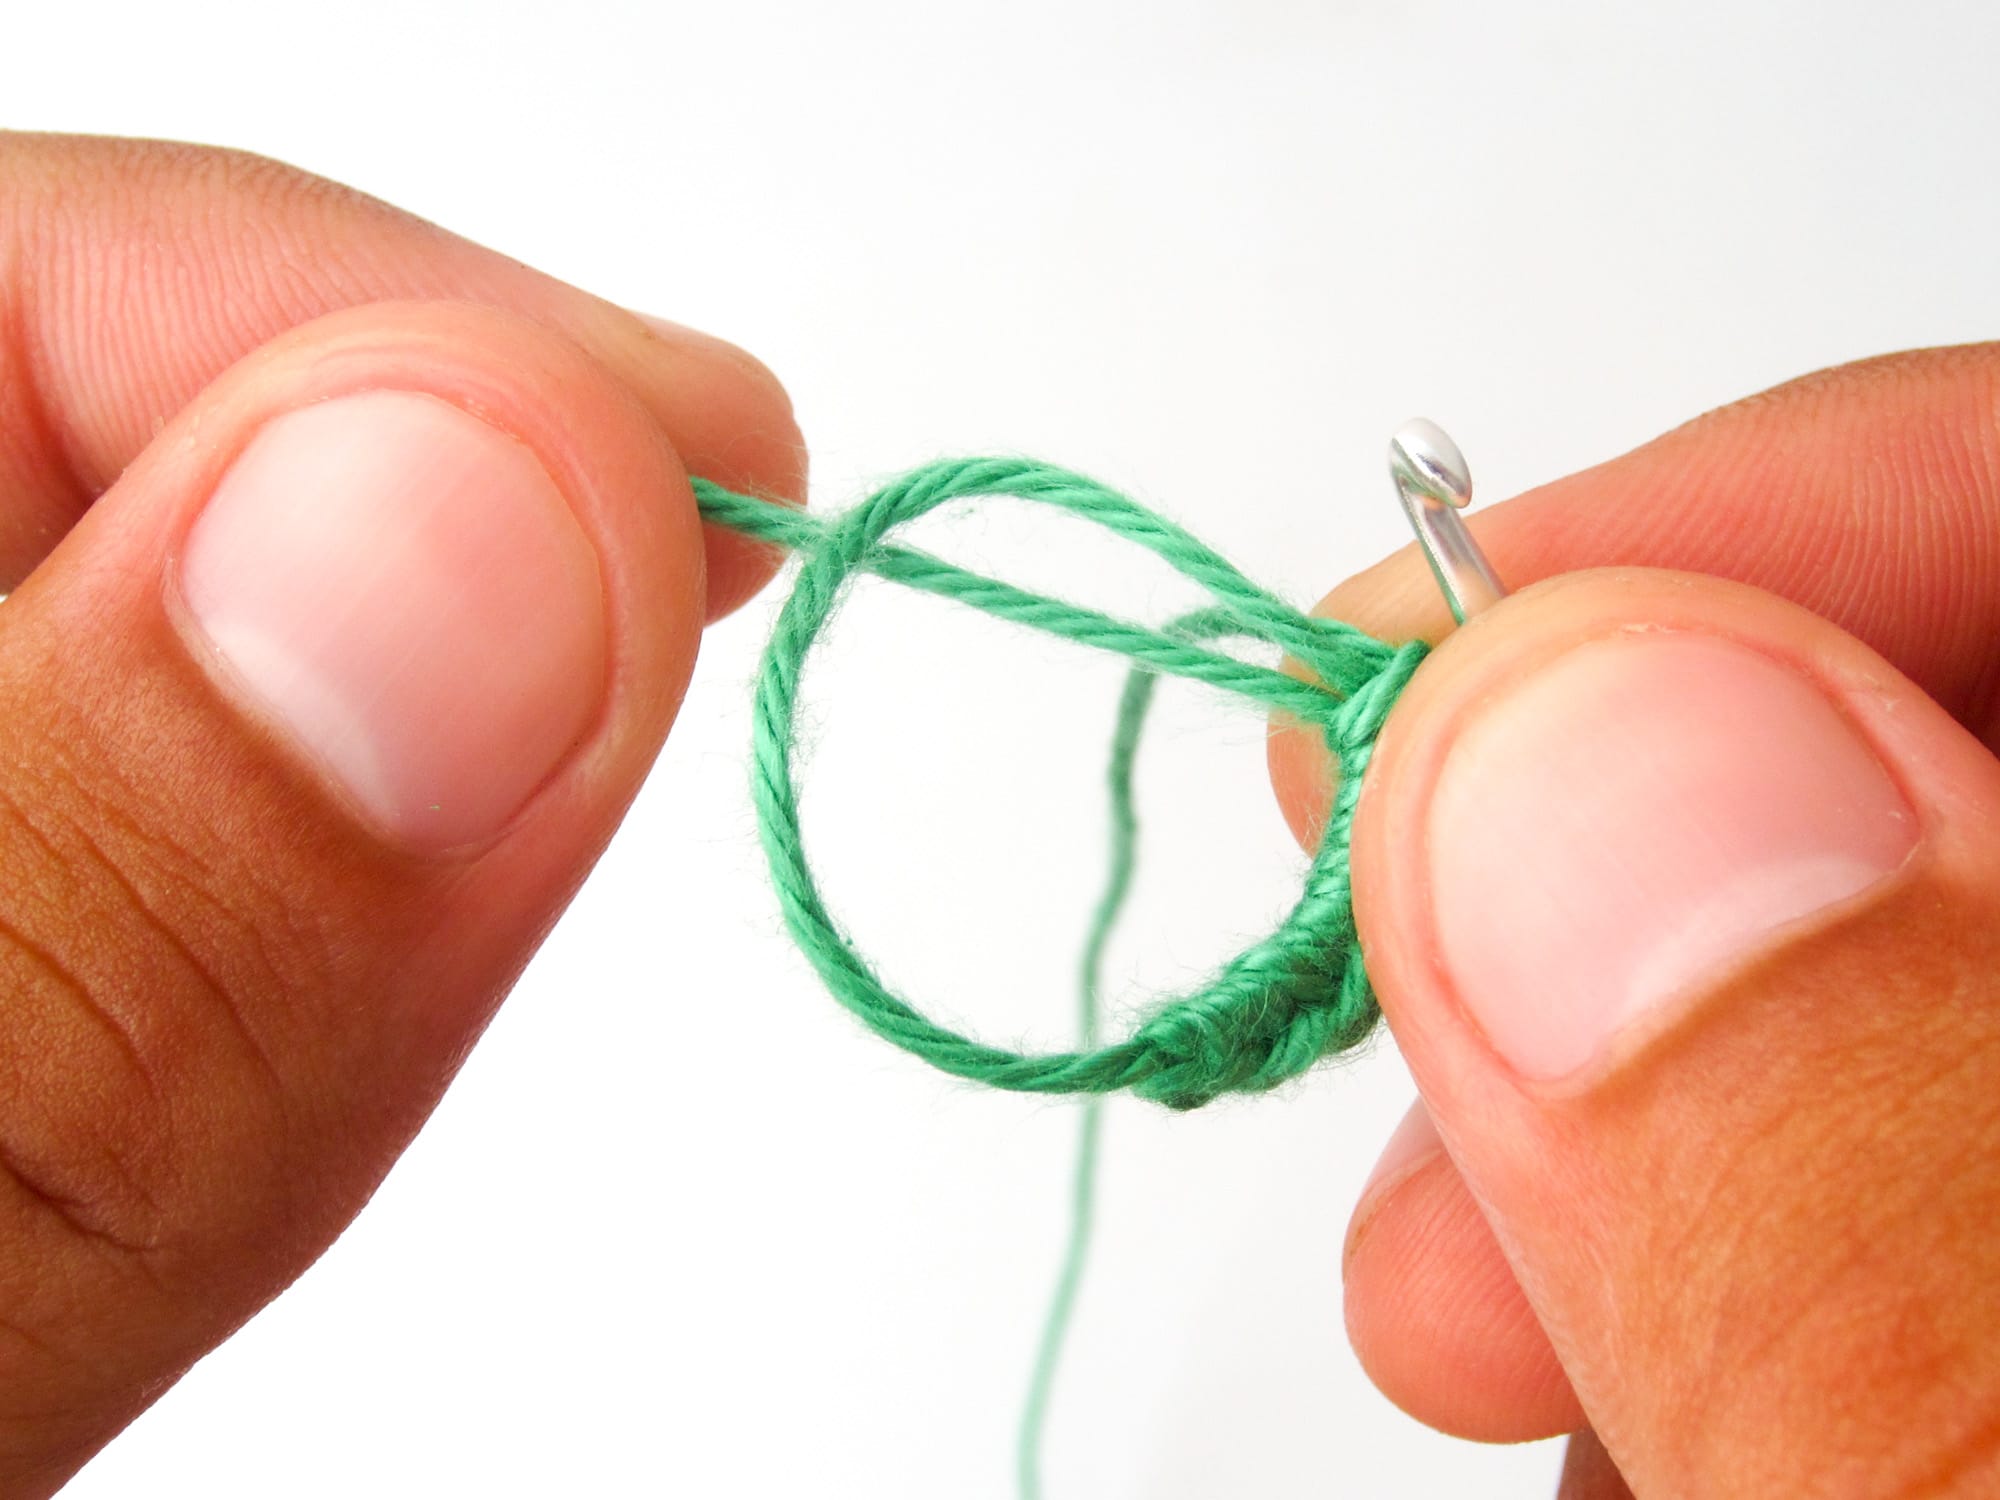
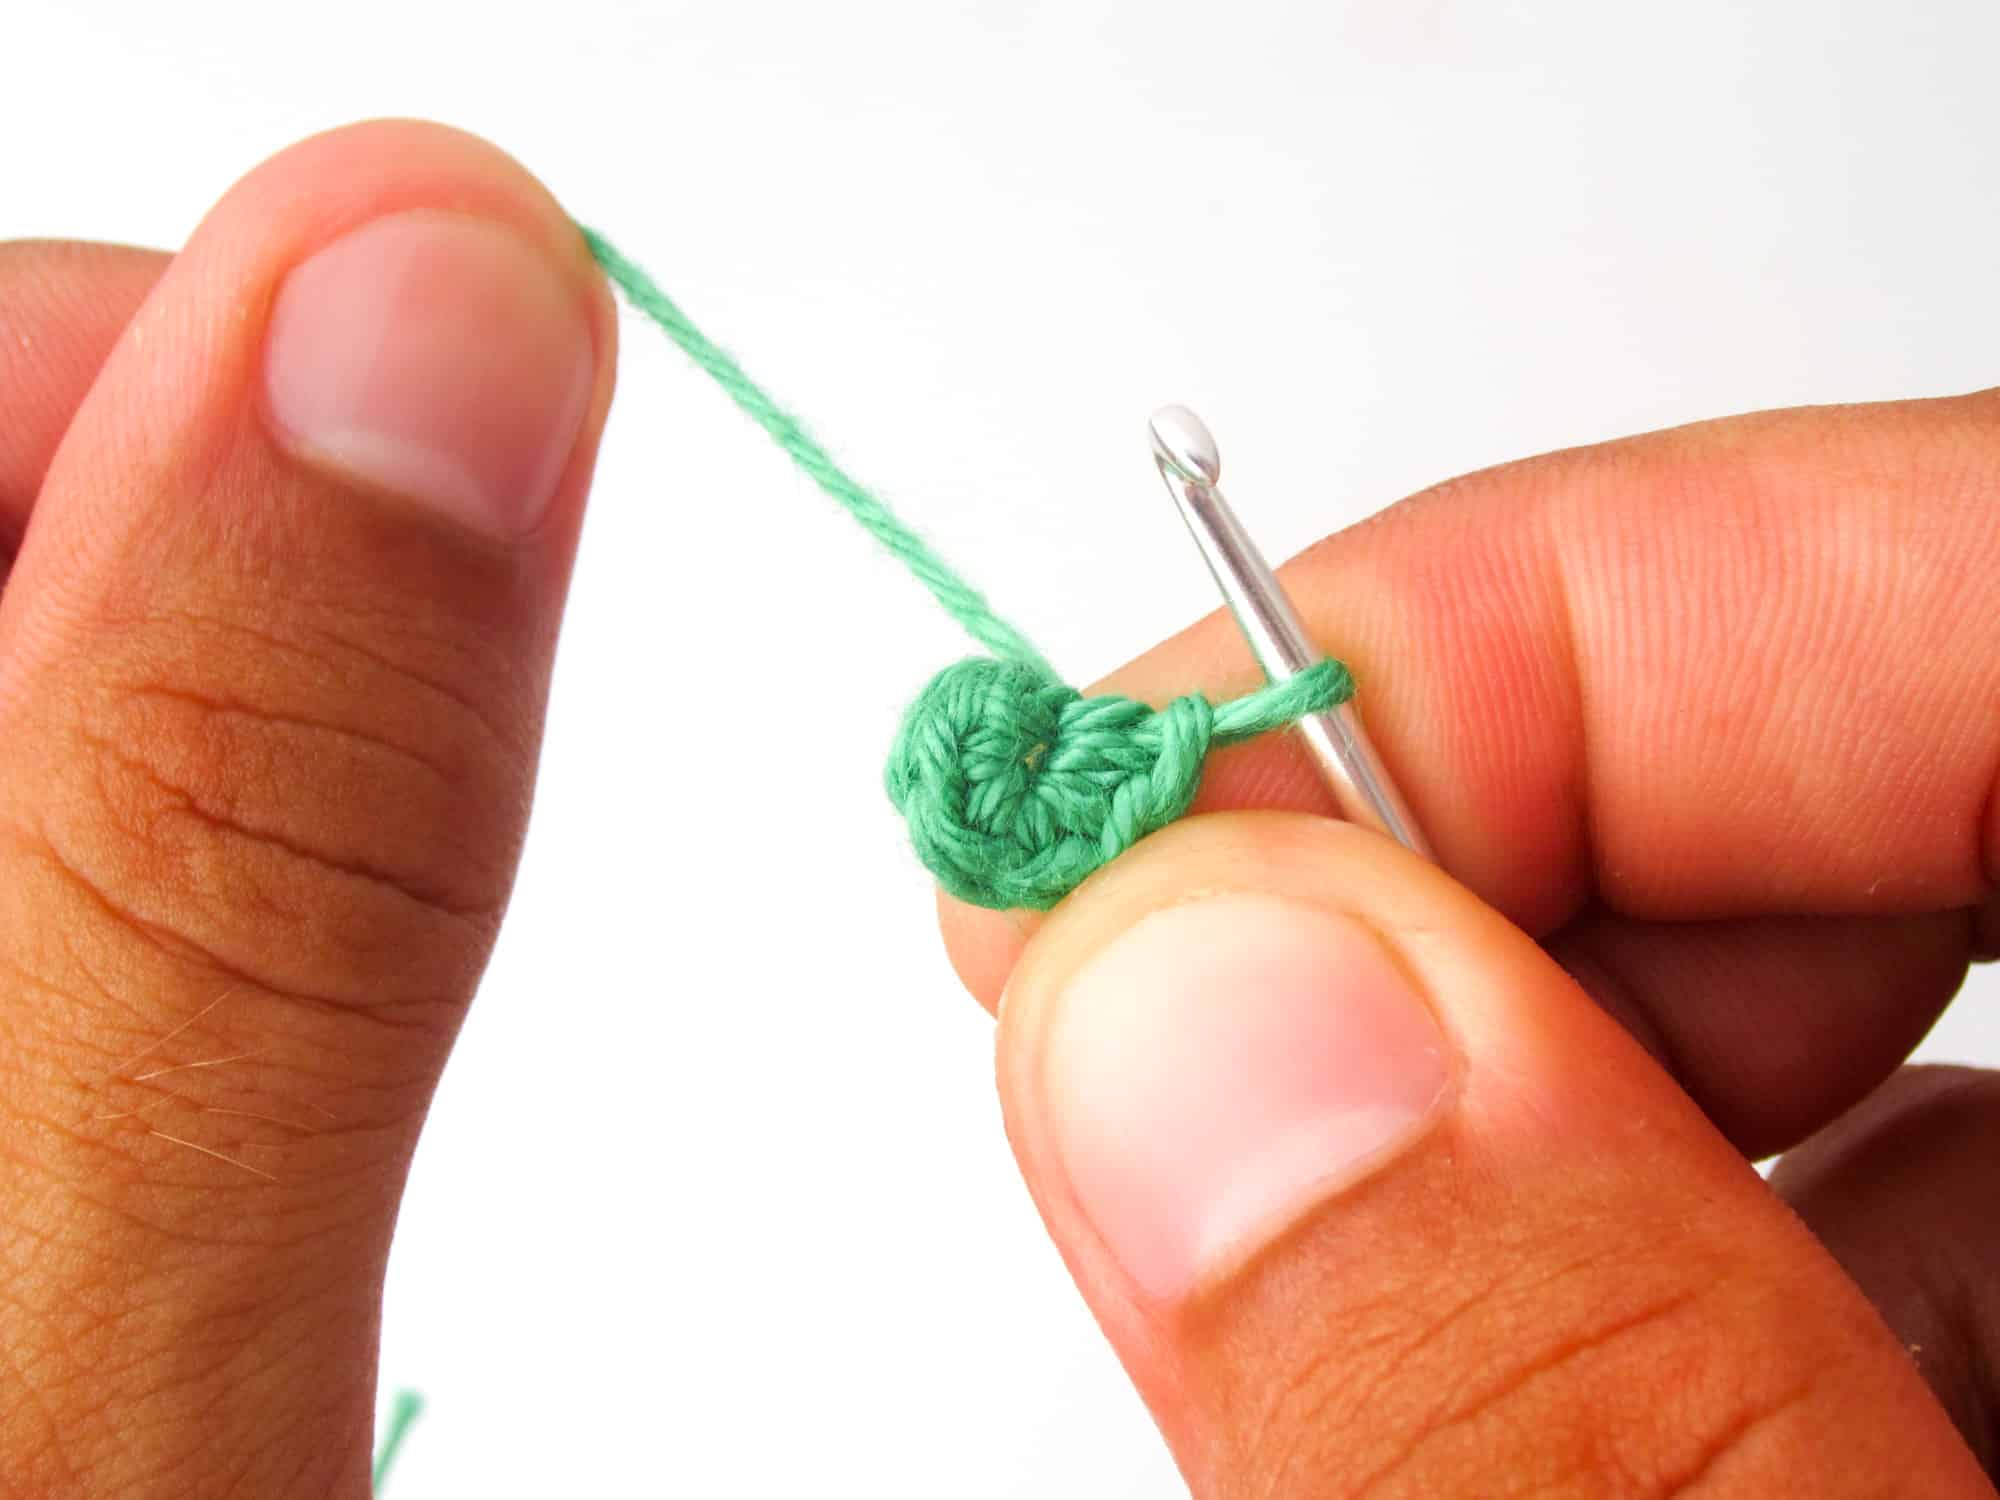
- Step 8: Finally you hold the crocheted stitches with one hand and pull at the end of the thread whereby the circle contracts and finally closes. Done is a magic ring with 6 single crochet stitches.

Crochet Different Stitches into the Magic Ring
Of course not only single crochet stitches but all other longer stitches, like half double crochet stitches, double crochet stitches etc., can be crocheted into a magic ring.
Since stitches like double crochet stitches are usually longer than single crochet stitches, you have to crochet more chain stitches in step 5 so that the stitches get their full size and are not compressed.
The number of chain stitches is the same as the number of turning chains needed for the respective stitch when you crochet the stitch in rows.
Here is a simple overview of the number of chain stitches required:
| Crocheted stitches into the magic ring | Number of chain stitches to be crocheted in step 5 |
| Single Crochet Stitch | 1 Chain Stitch |
| Half Double Crochet Stitch | 2 Chain Stitches |
| Double Crochet Stitch | 3 Chain Stitches |
| Treble Crochet Stitch | 4 Chain Stitches |
| Double Treble Crochet Stitch | 5 Chain Stitches |
| … | … |