
Contrary to the increase, with which a crochet piece becomes larger by crocheting several stitches into one stitch, with the decrease the crochet piece will be smaller/narrower by crocheting stitches together.
We differentiate between two different techniques of crocheting stitches together. First the “normal” decrease and second the “invisible” decrease, which should be the standard decrease in all amigurumi projects.
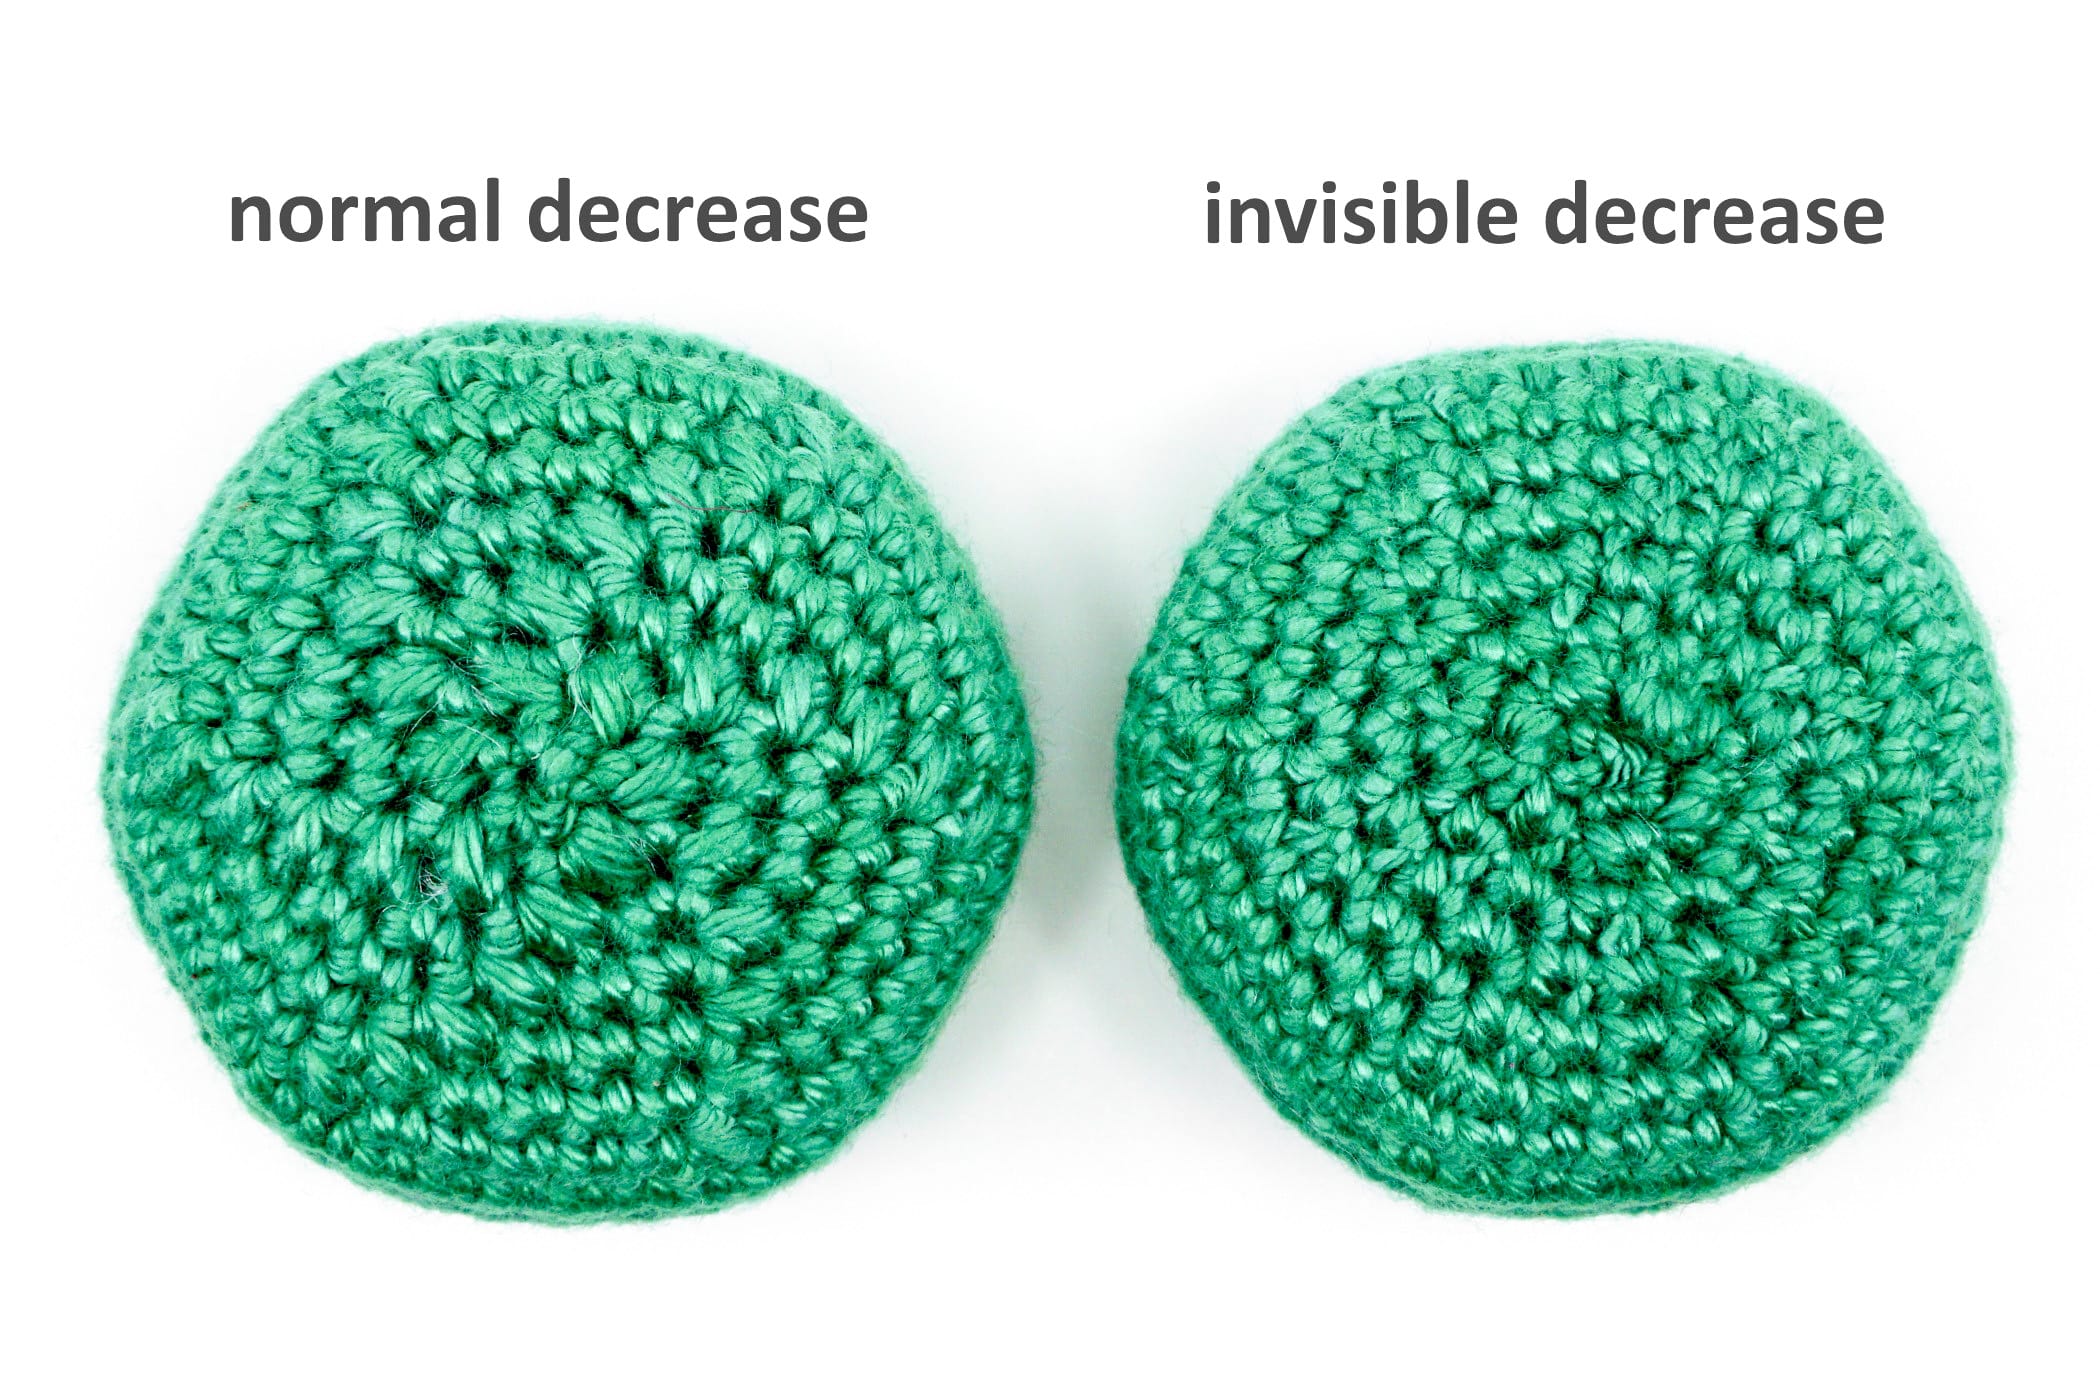
Both decreases do the same, decreasing the stitch count, but the difference lies in the way how to crochet them and especially how the final crocheted decrease looks.
Normal and Invisible Decrease
Needed Techniques
Needed Materials and Tools
To order the materials click on the respective link (affiliate link).
- Colors: green
- This pattern was crocheted using the “Schachenmayr Catania” yarn (100% Cotton, Meterage: 125 m, Yarn Ball Weight: 50 g, Yarn Weight: Sport – 5ply / Fine (2)) in the following colors:
- Golf Green (Golfgrün (241))
- 2.5 mm Crochet Hook
No products found.
Crochet Decrease: The Normal Way
The “normal” decrease is shown here on a crochet piece crocheted in rows with single crochet stitches. Since you always change sides when crocheting in rows it is recommended to use the normal decrease, because it looks almost the same on both sides, which is not the case with the invisible decrease.
The following example shows how to crochet 2 stitches together. You can also crochet together as many stitches as you like using the same technique.
Use the check boxes to mark your finished rounds, rows and steps.
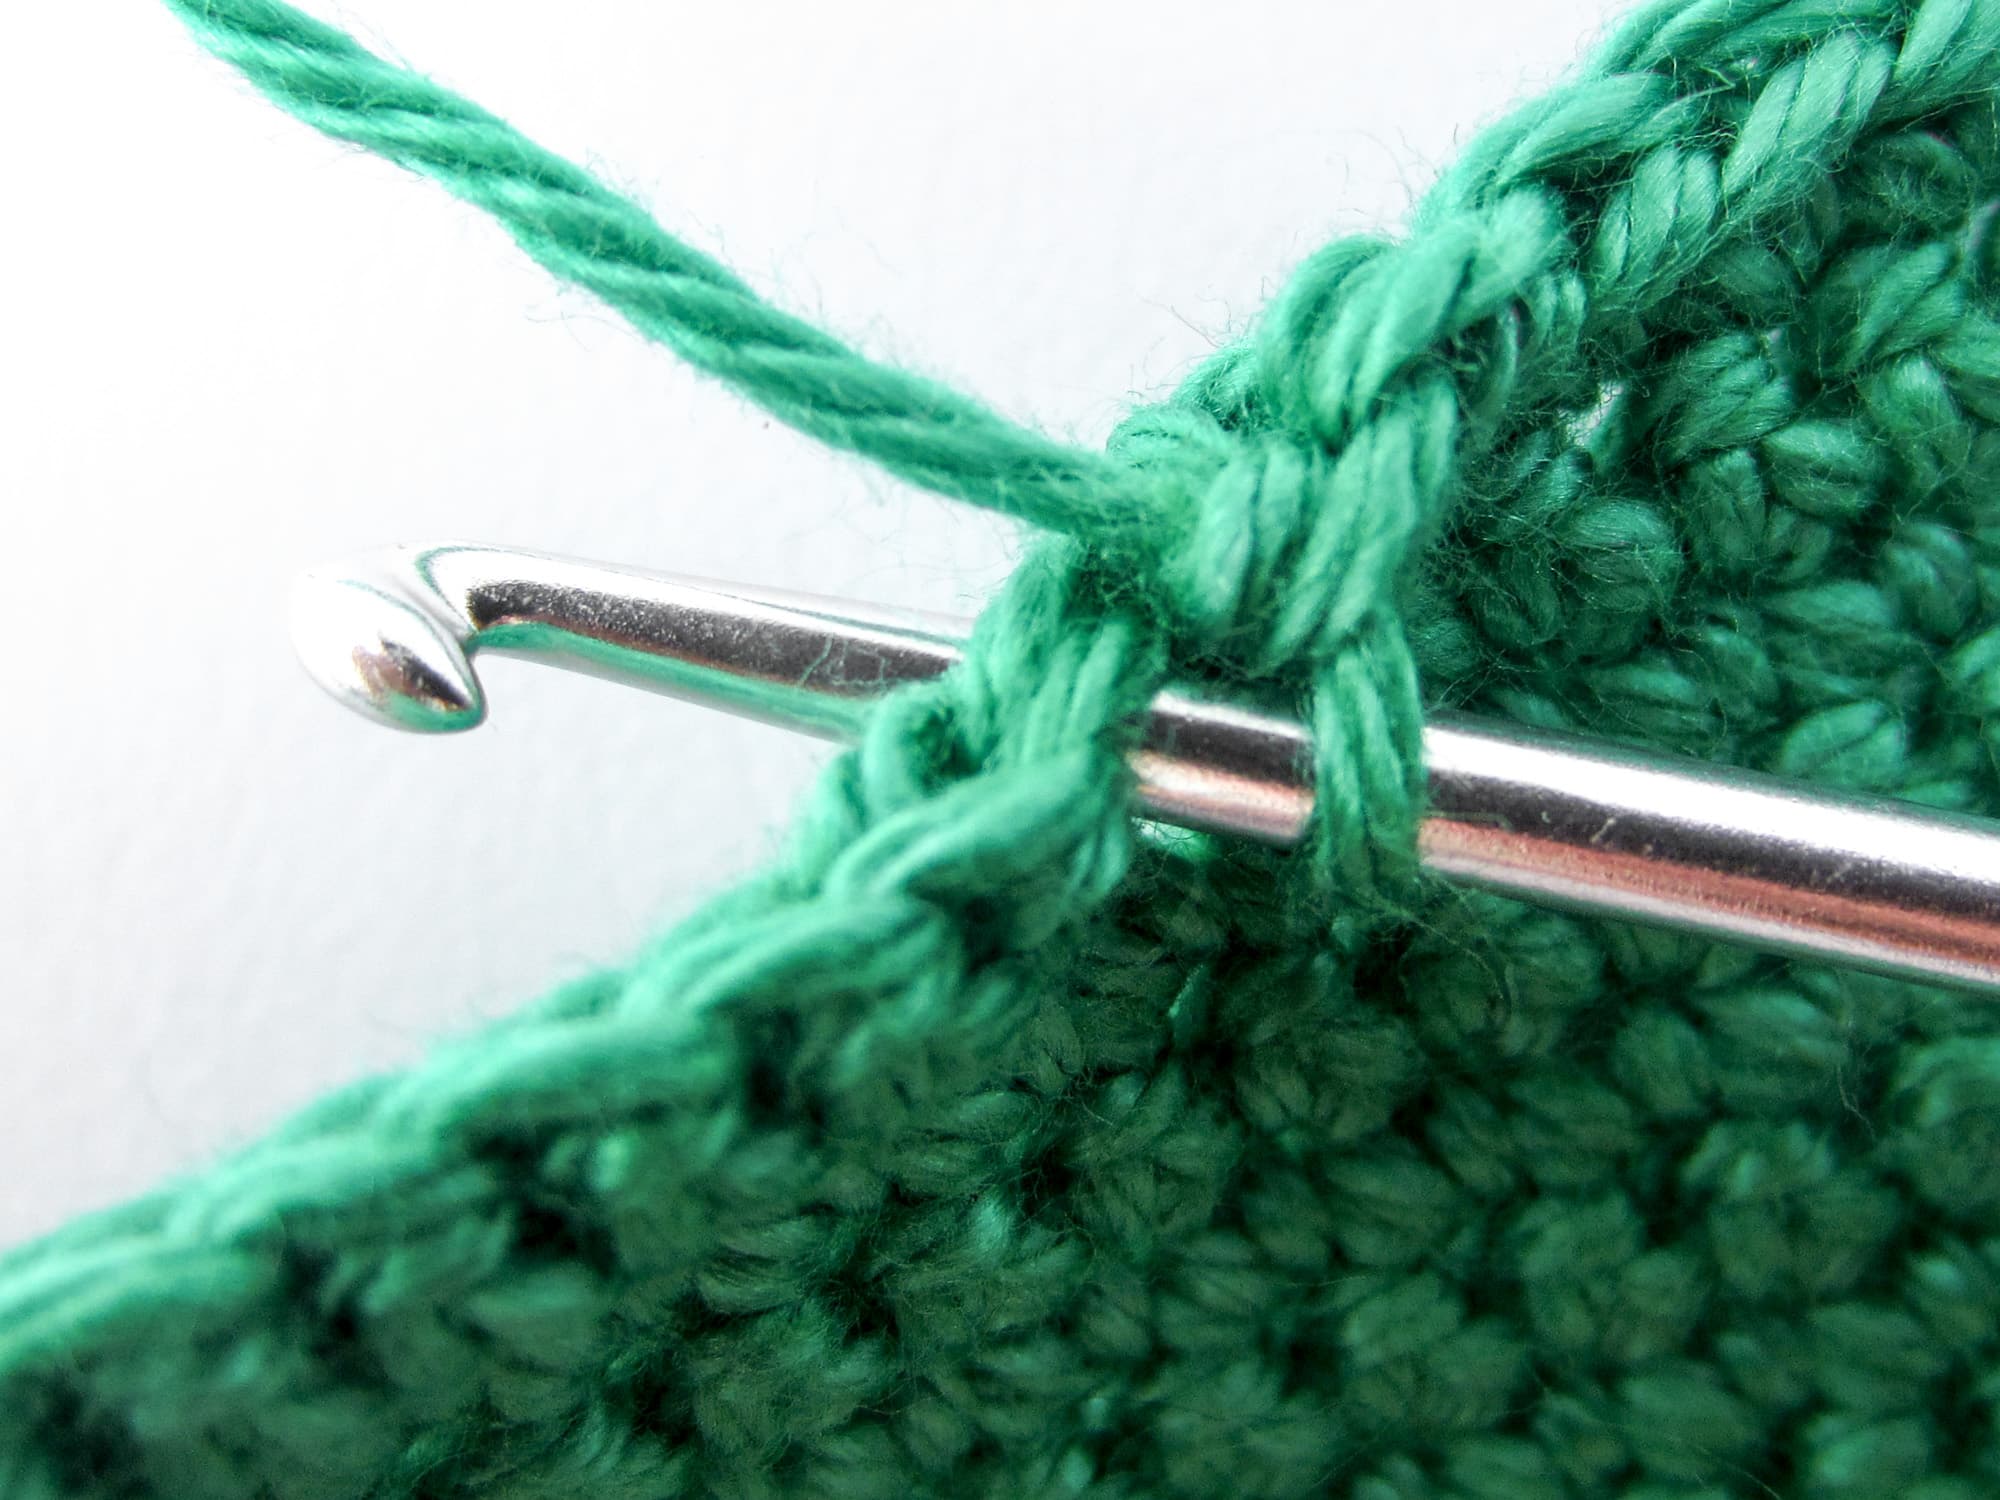
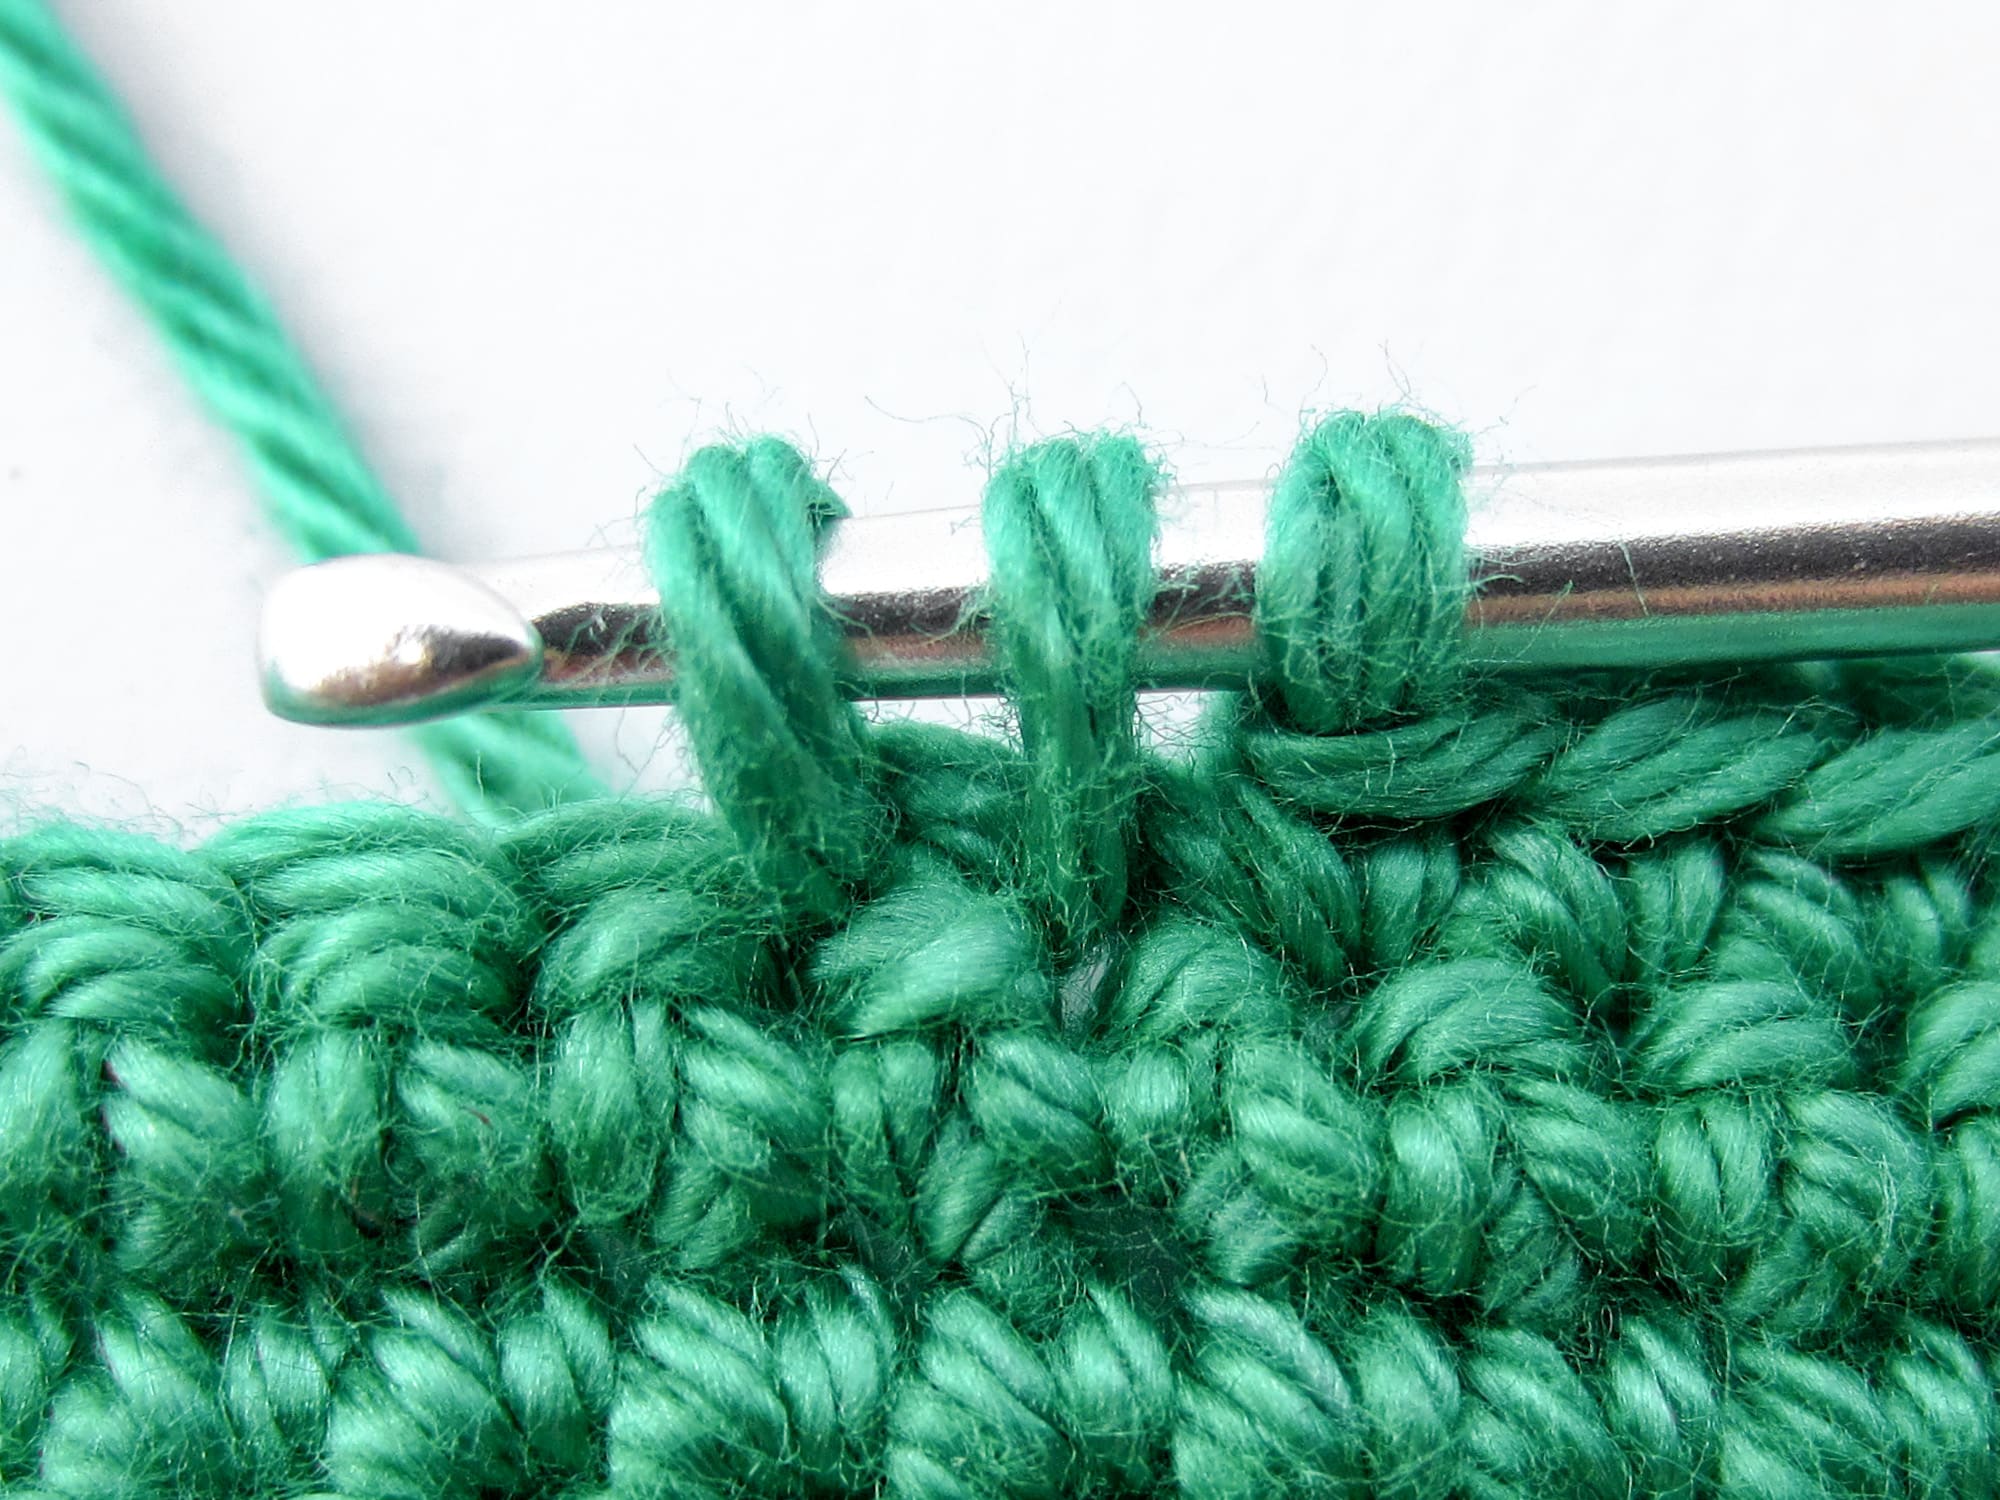
- Step 1: First push through the next stitch (through both loops), yarn over and pull the thread through the stitch you have just pushed through. You have 2 loops on the crochet hook.
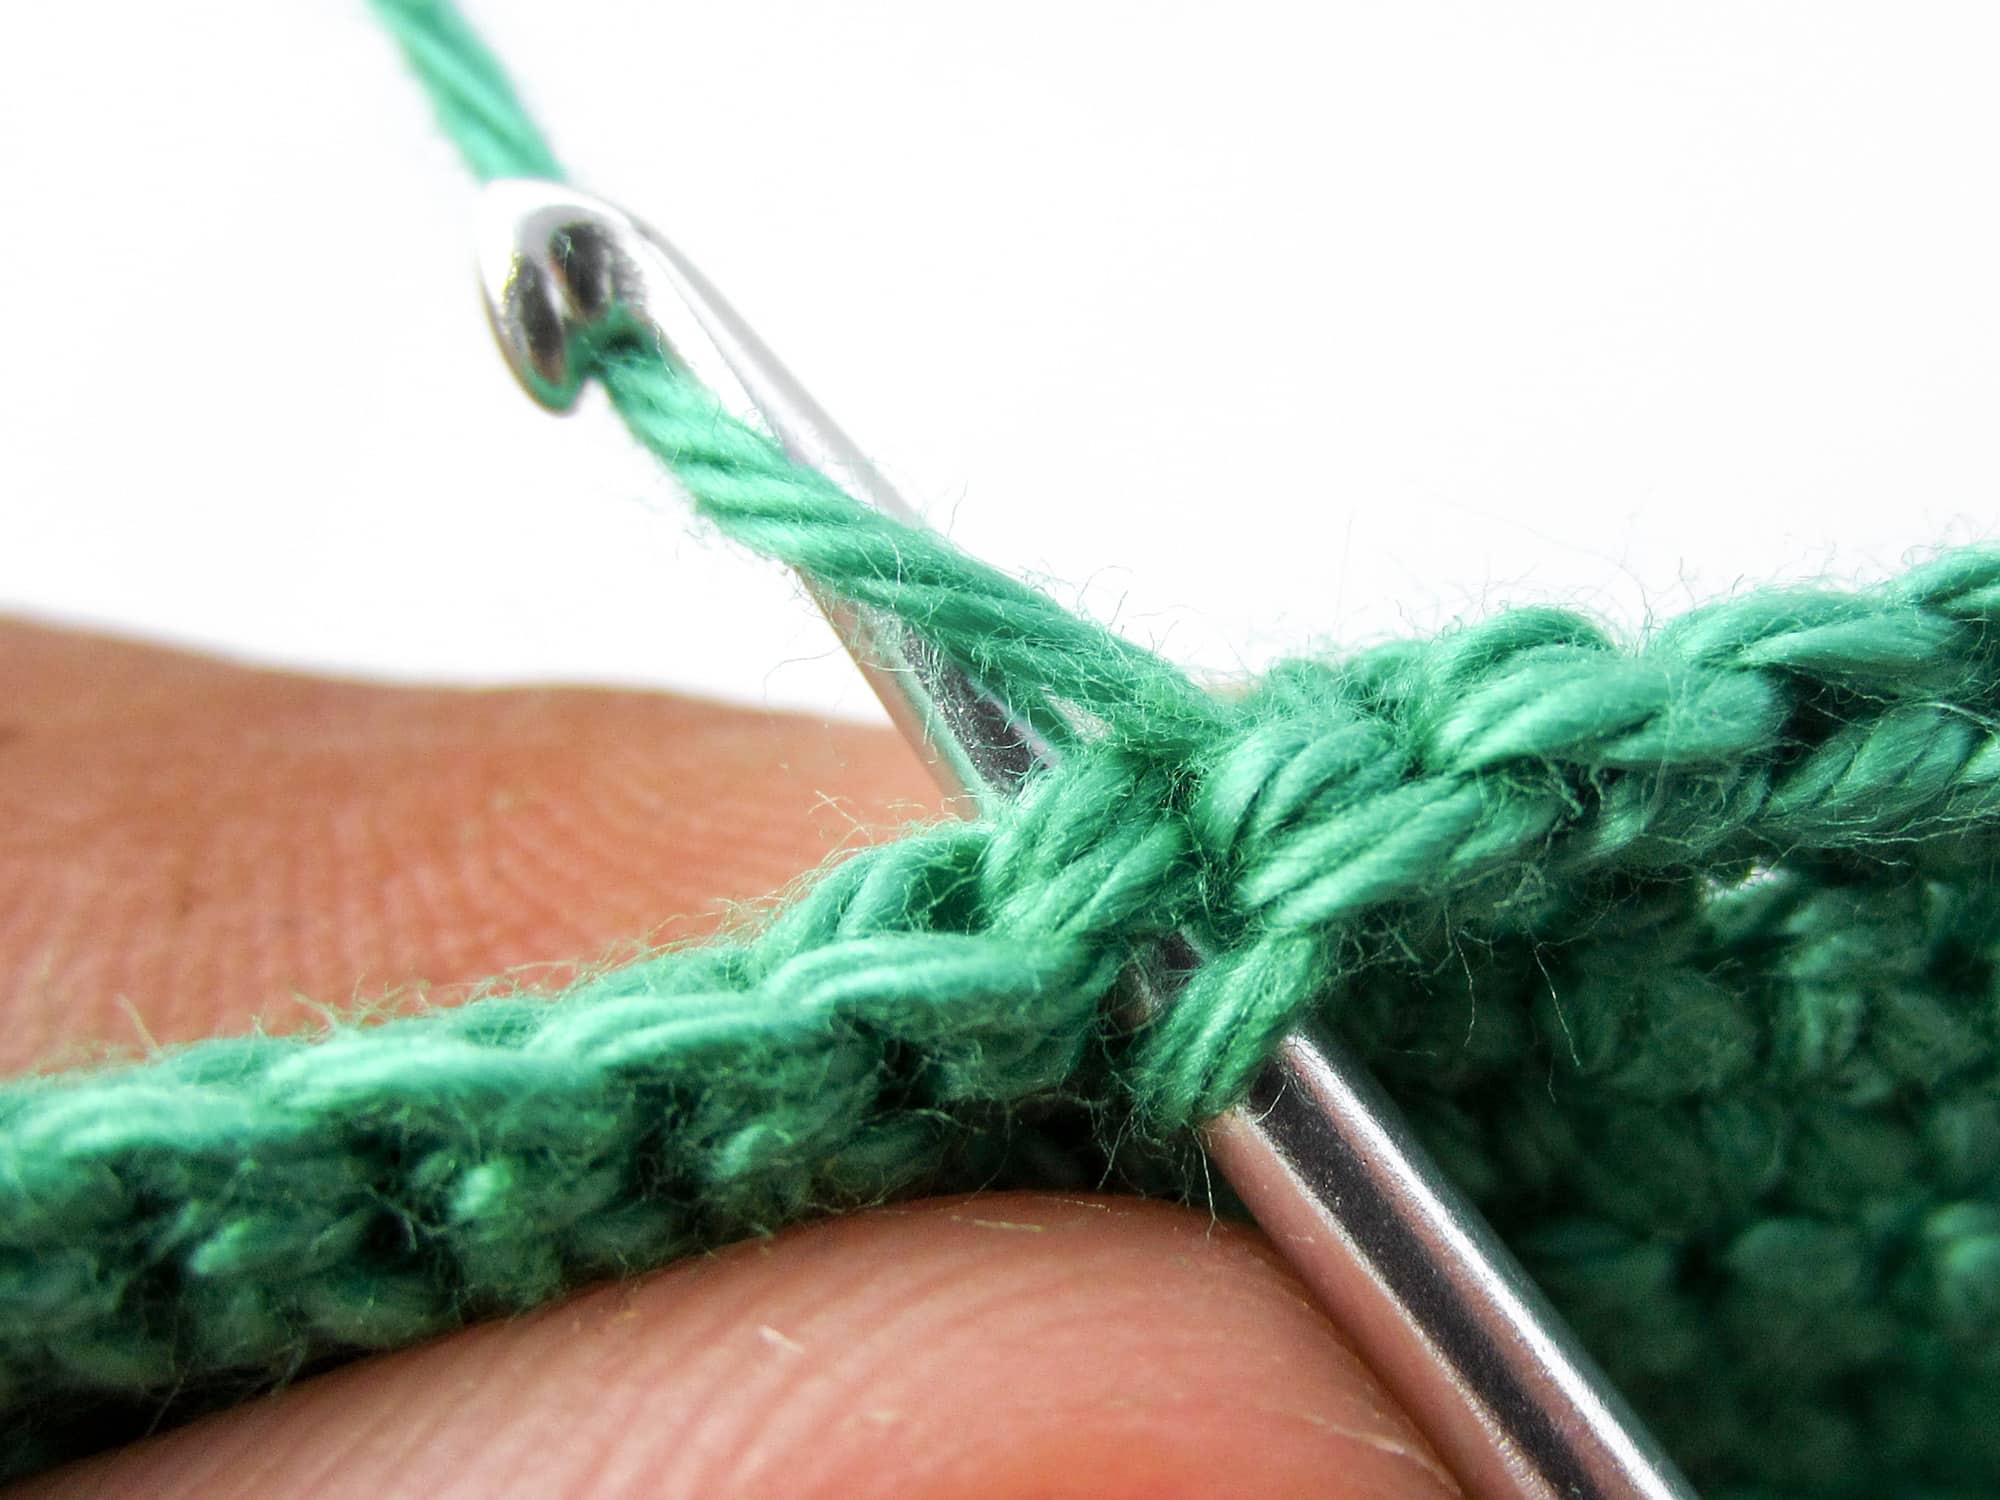
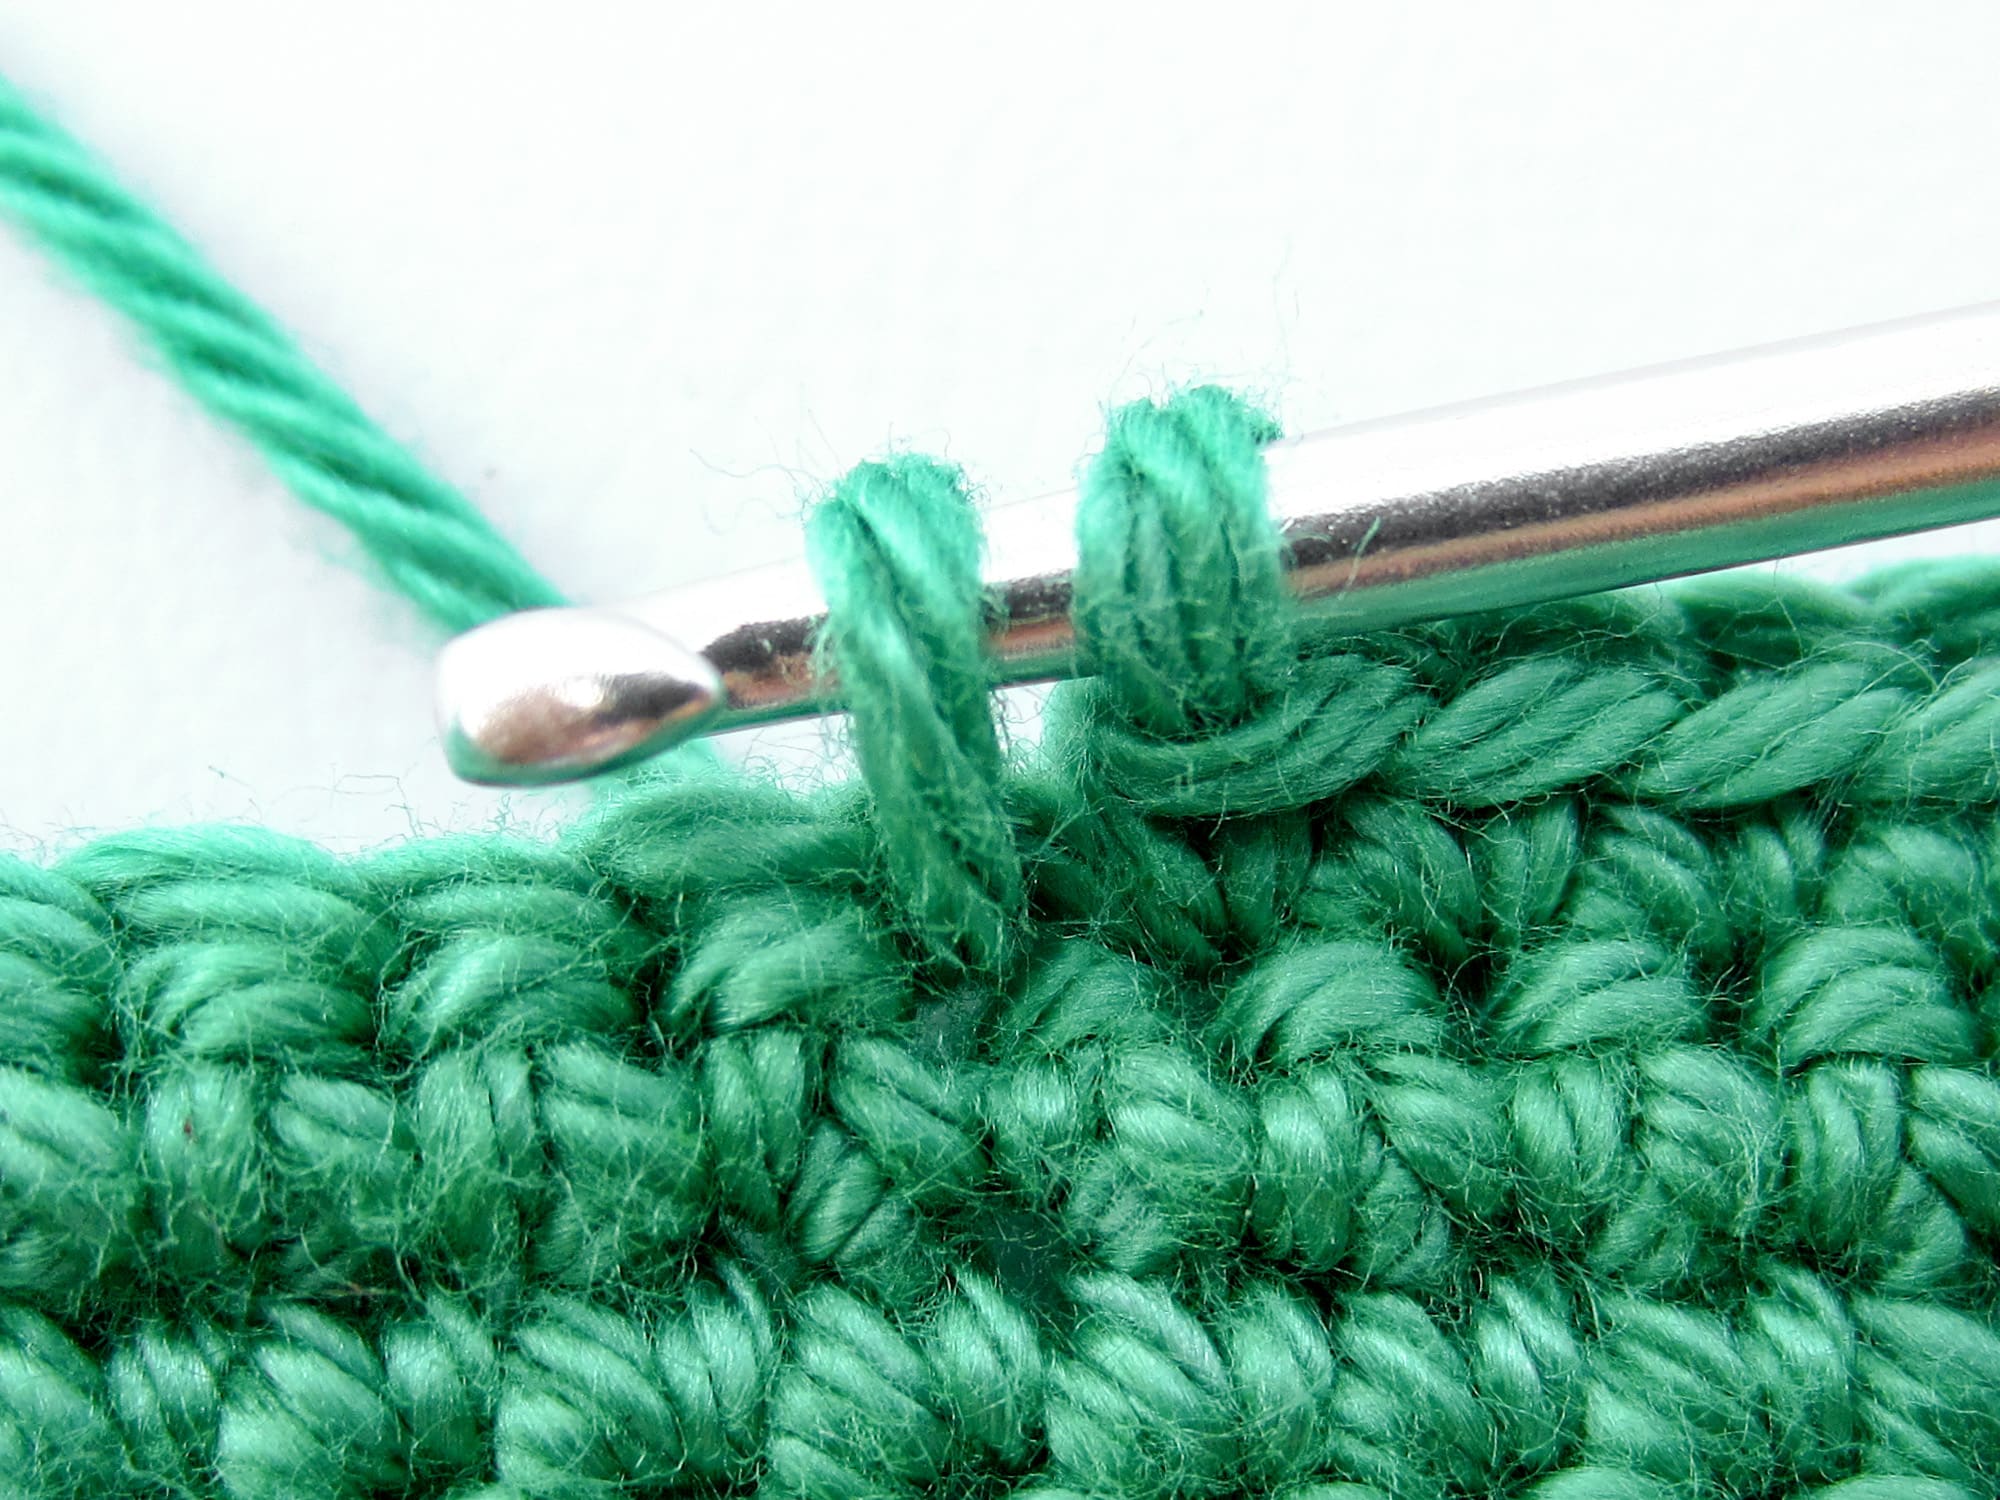
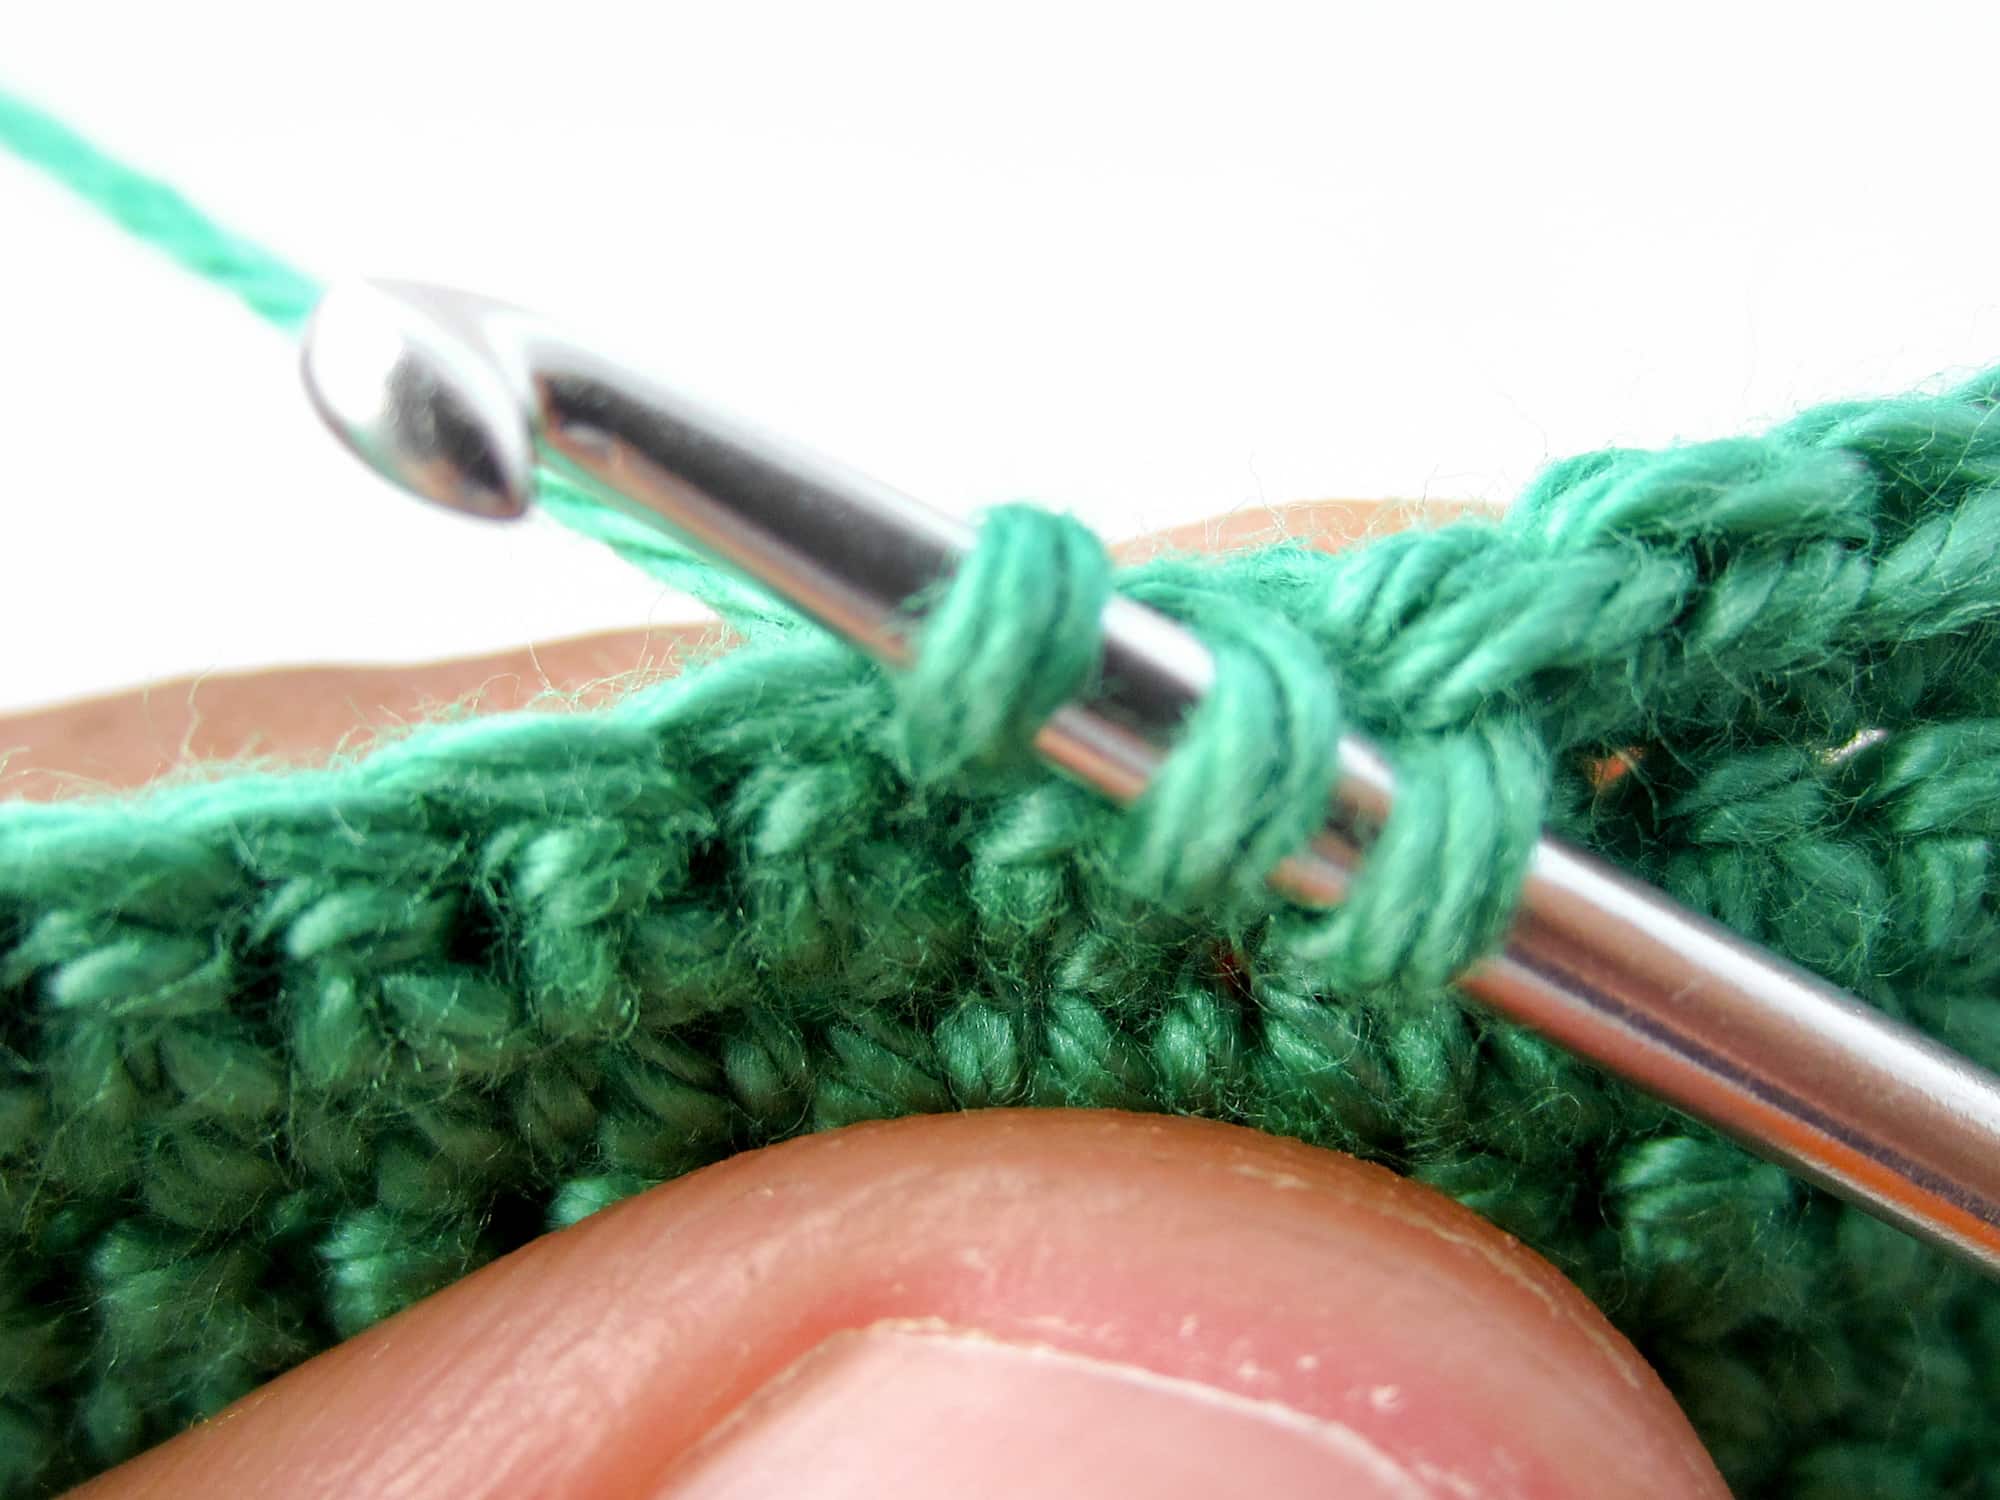
- Step 2: Push the crochet hook again through the next stitch, yarn over and pull the thread through the stitch you just pushed through. You have 3 loops on the crochet hook. You would repeat this procedure if you want to crochet more than 2 stitches together. In this case only 2 stitches are crocheted together. If you would crochet 3 stitches together, you would push through the next stitch again, yarn over and pull through.

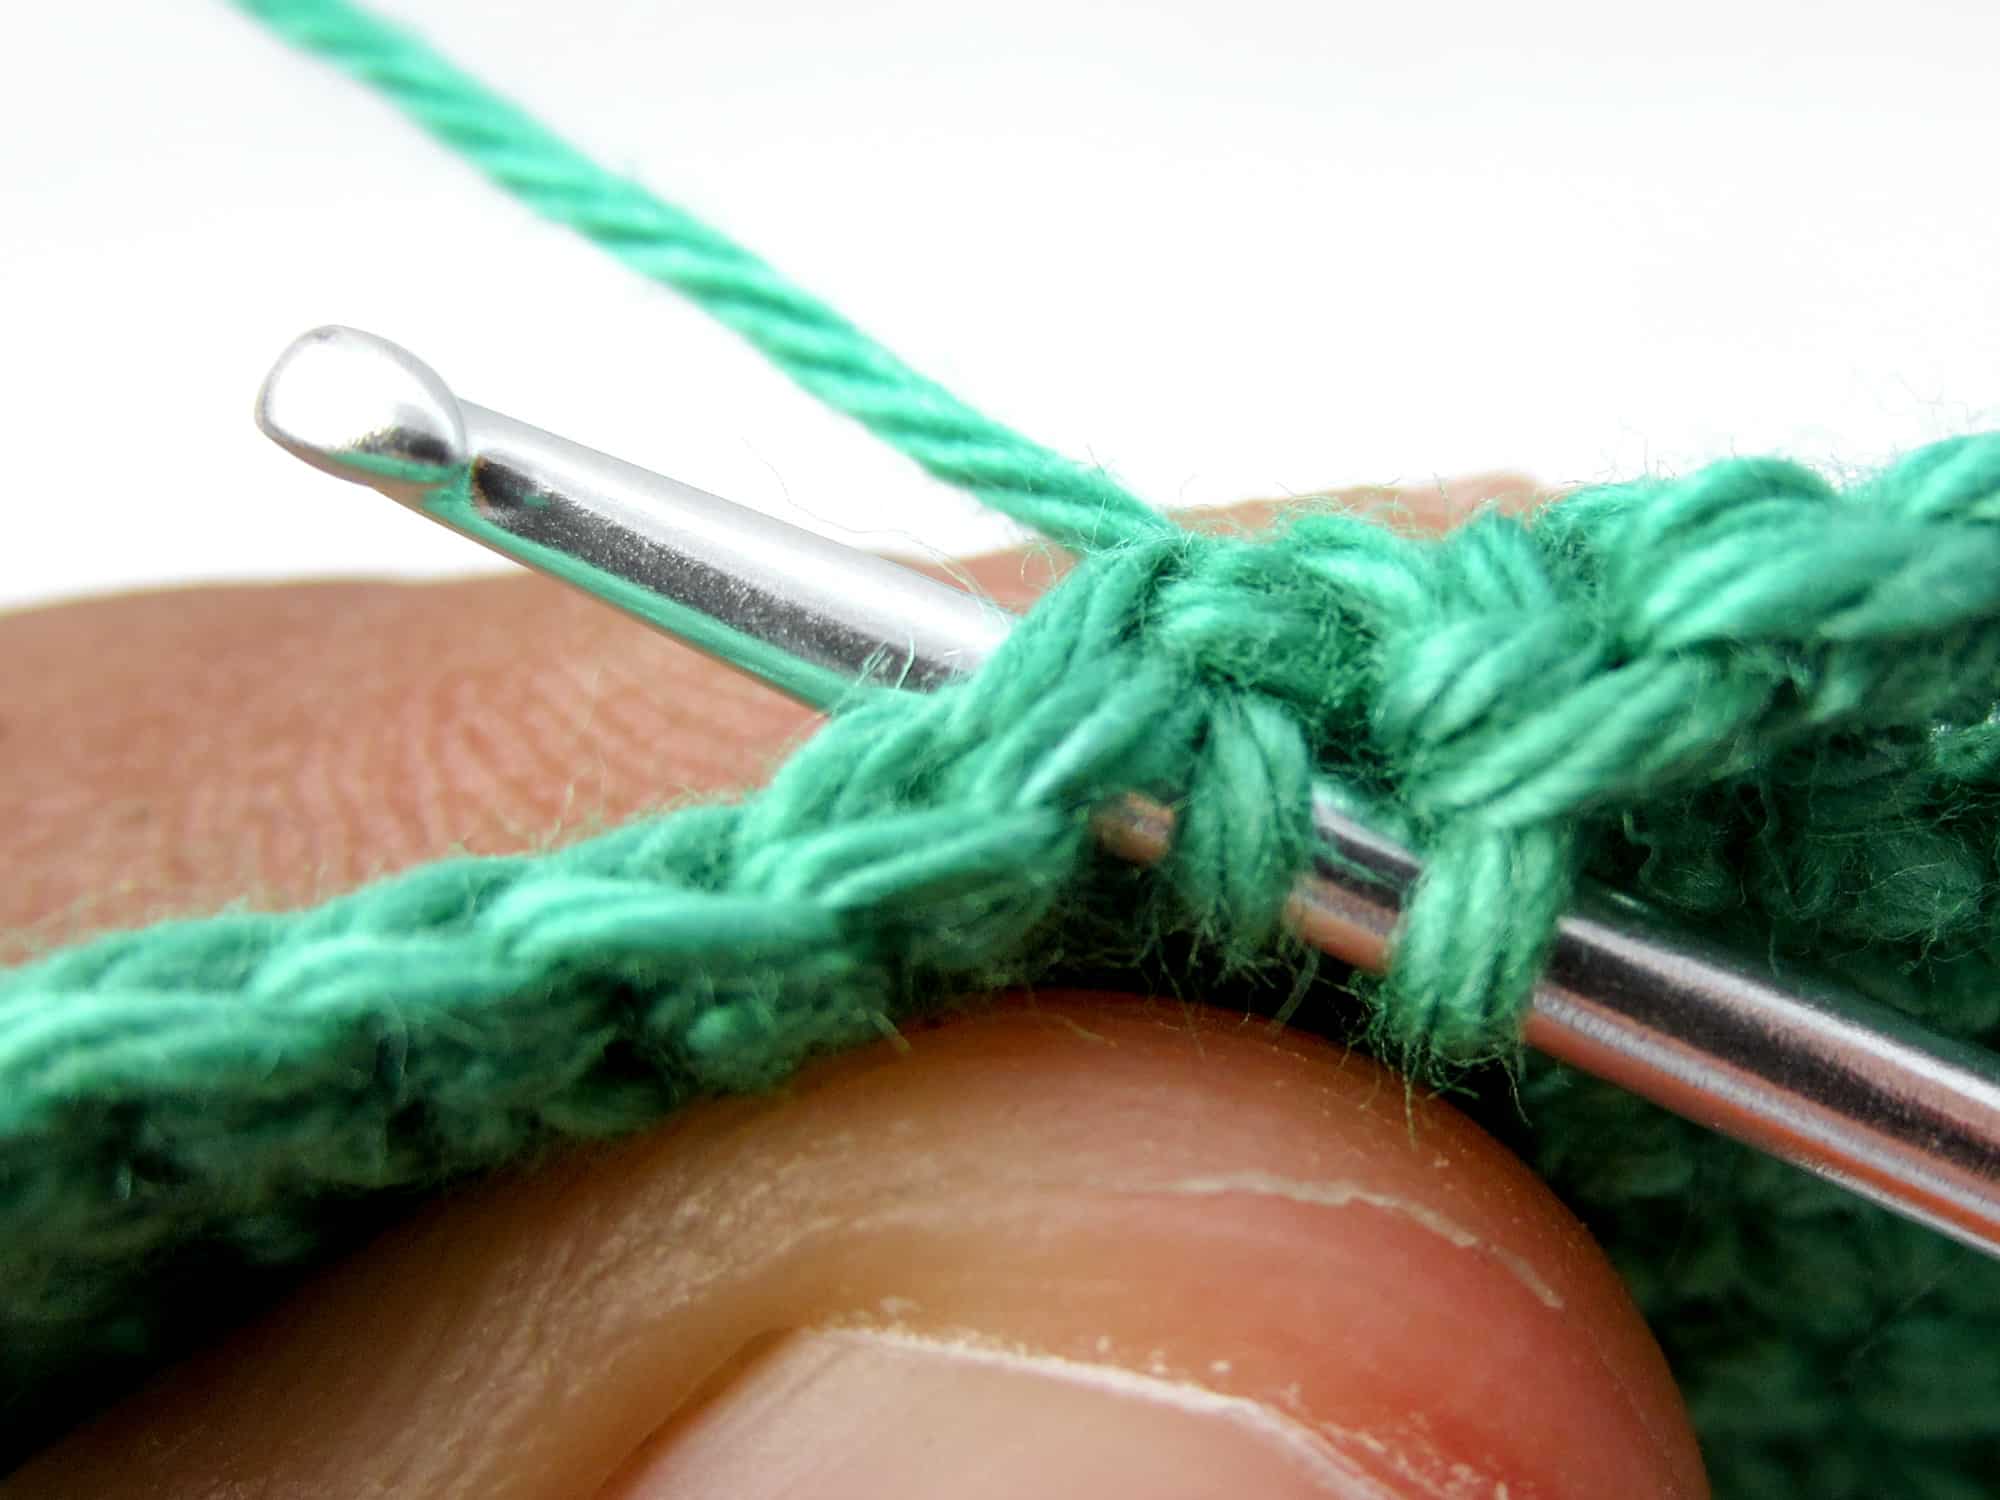

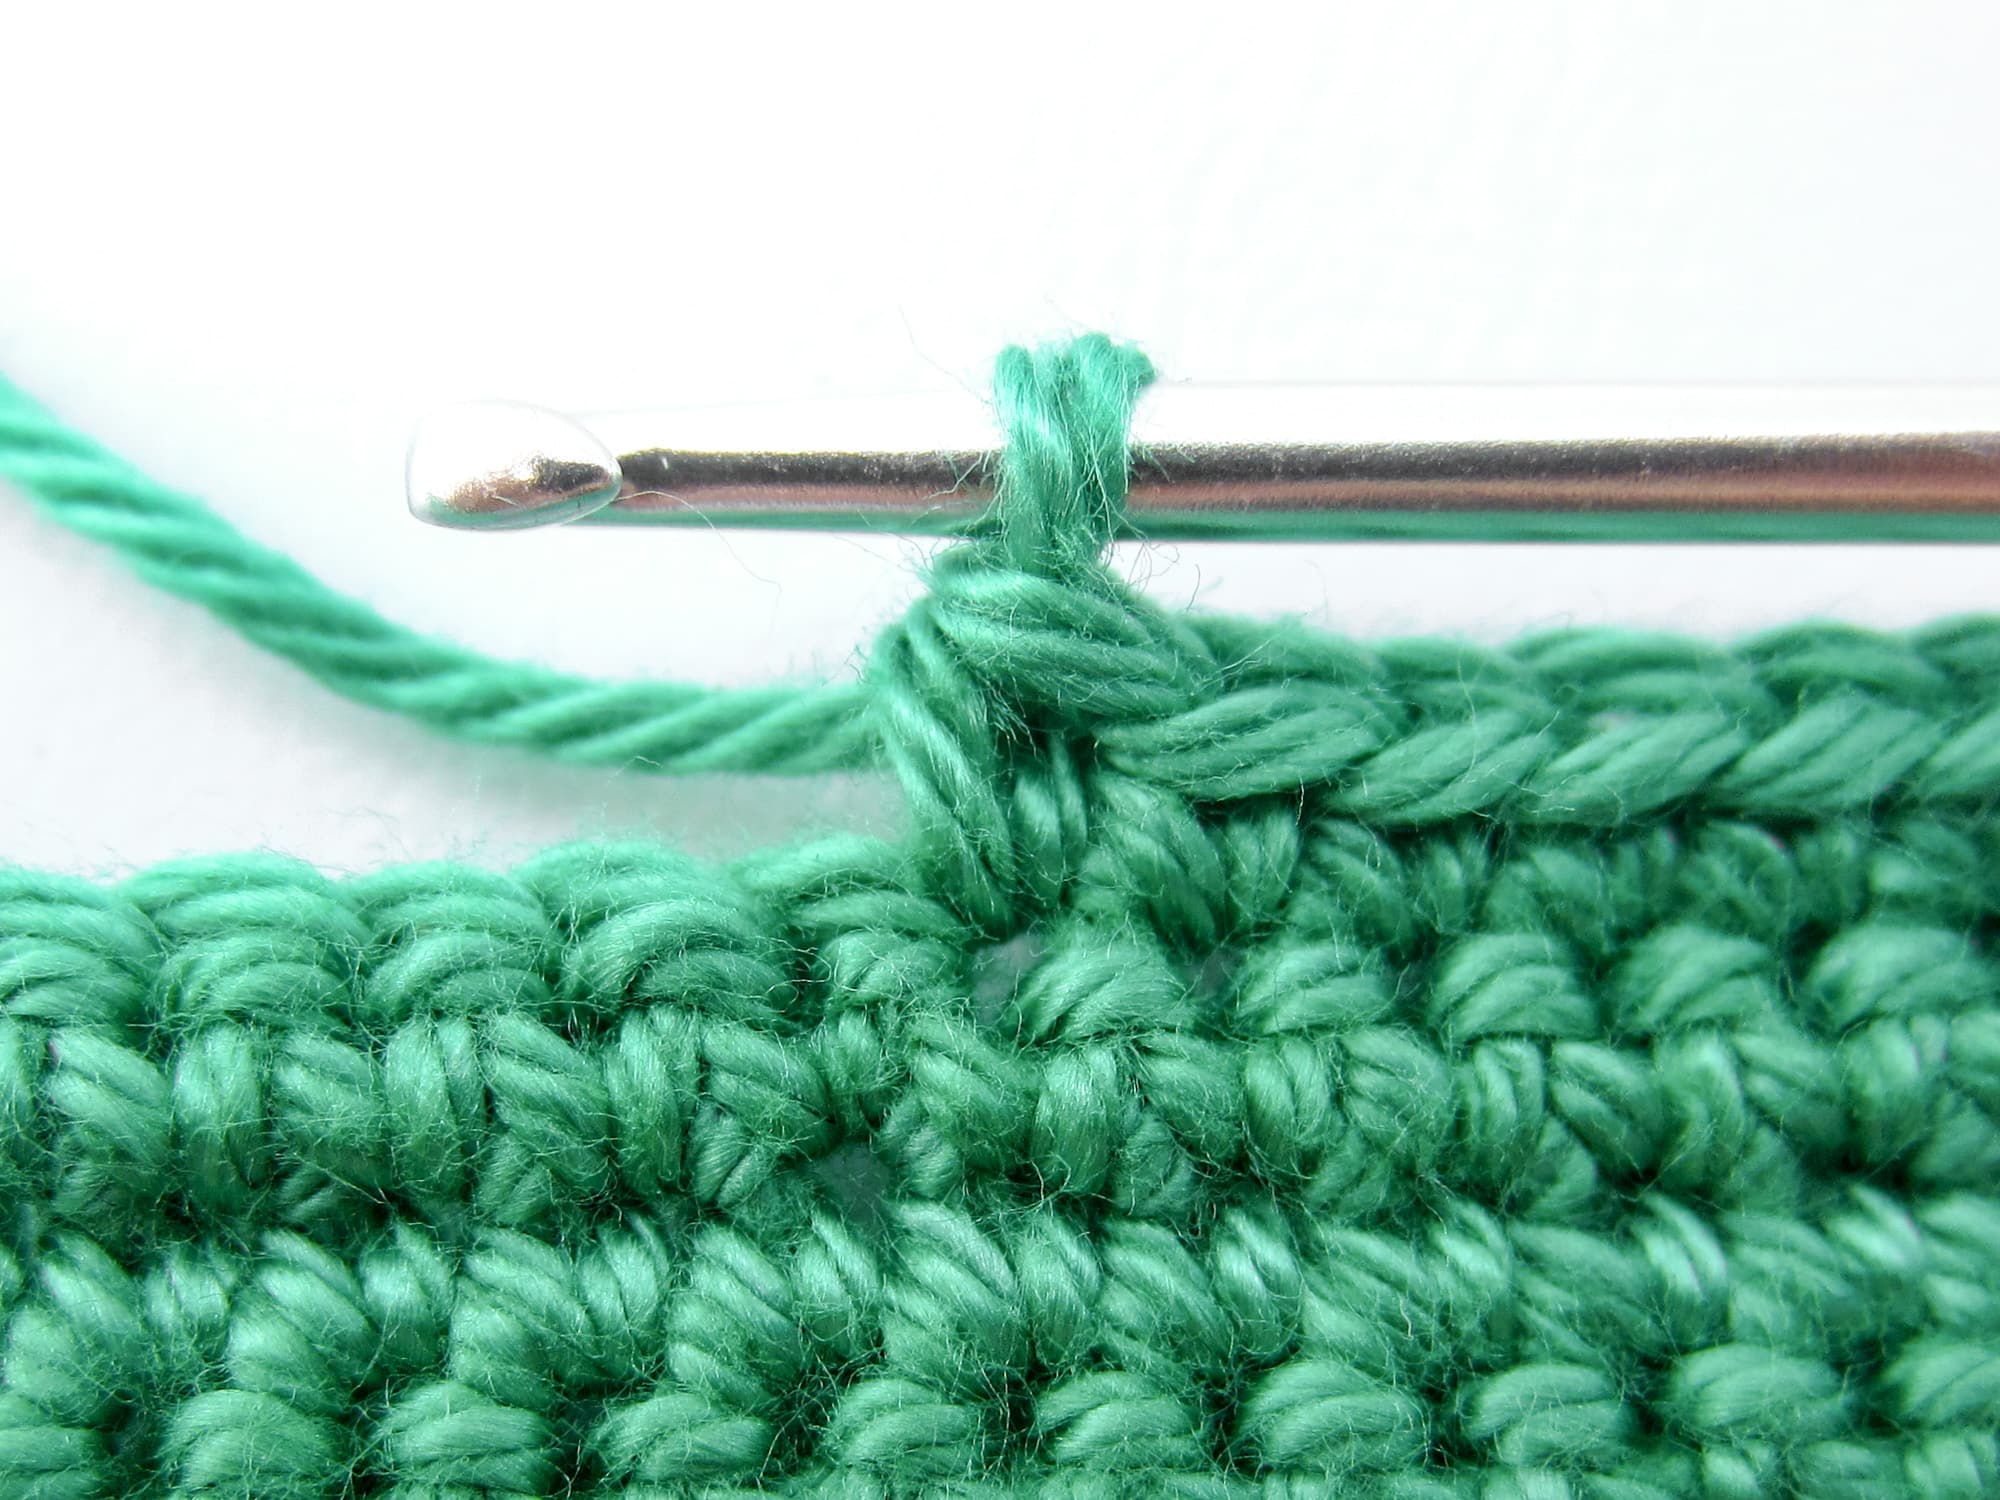
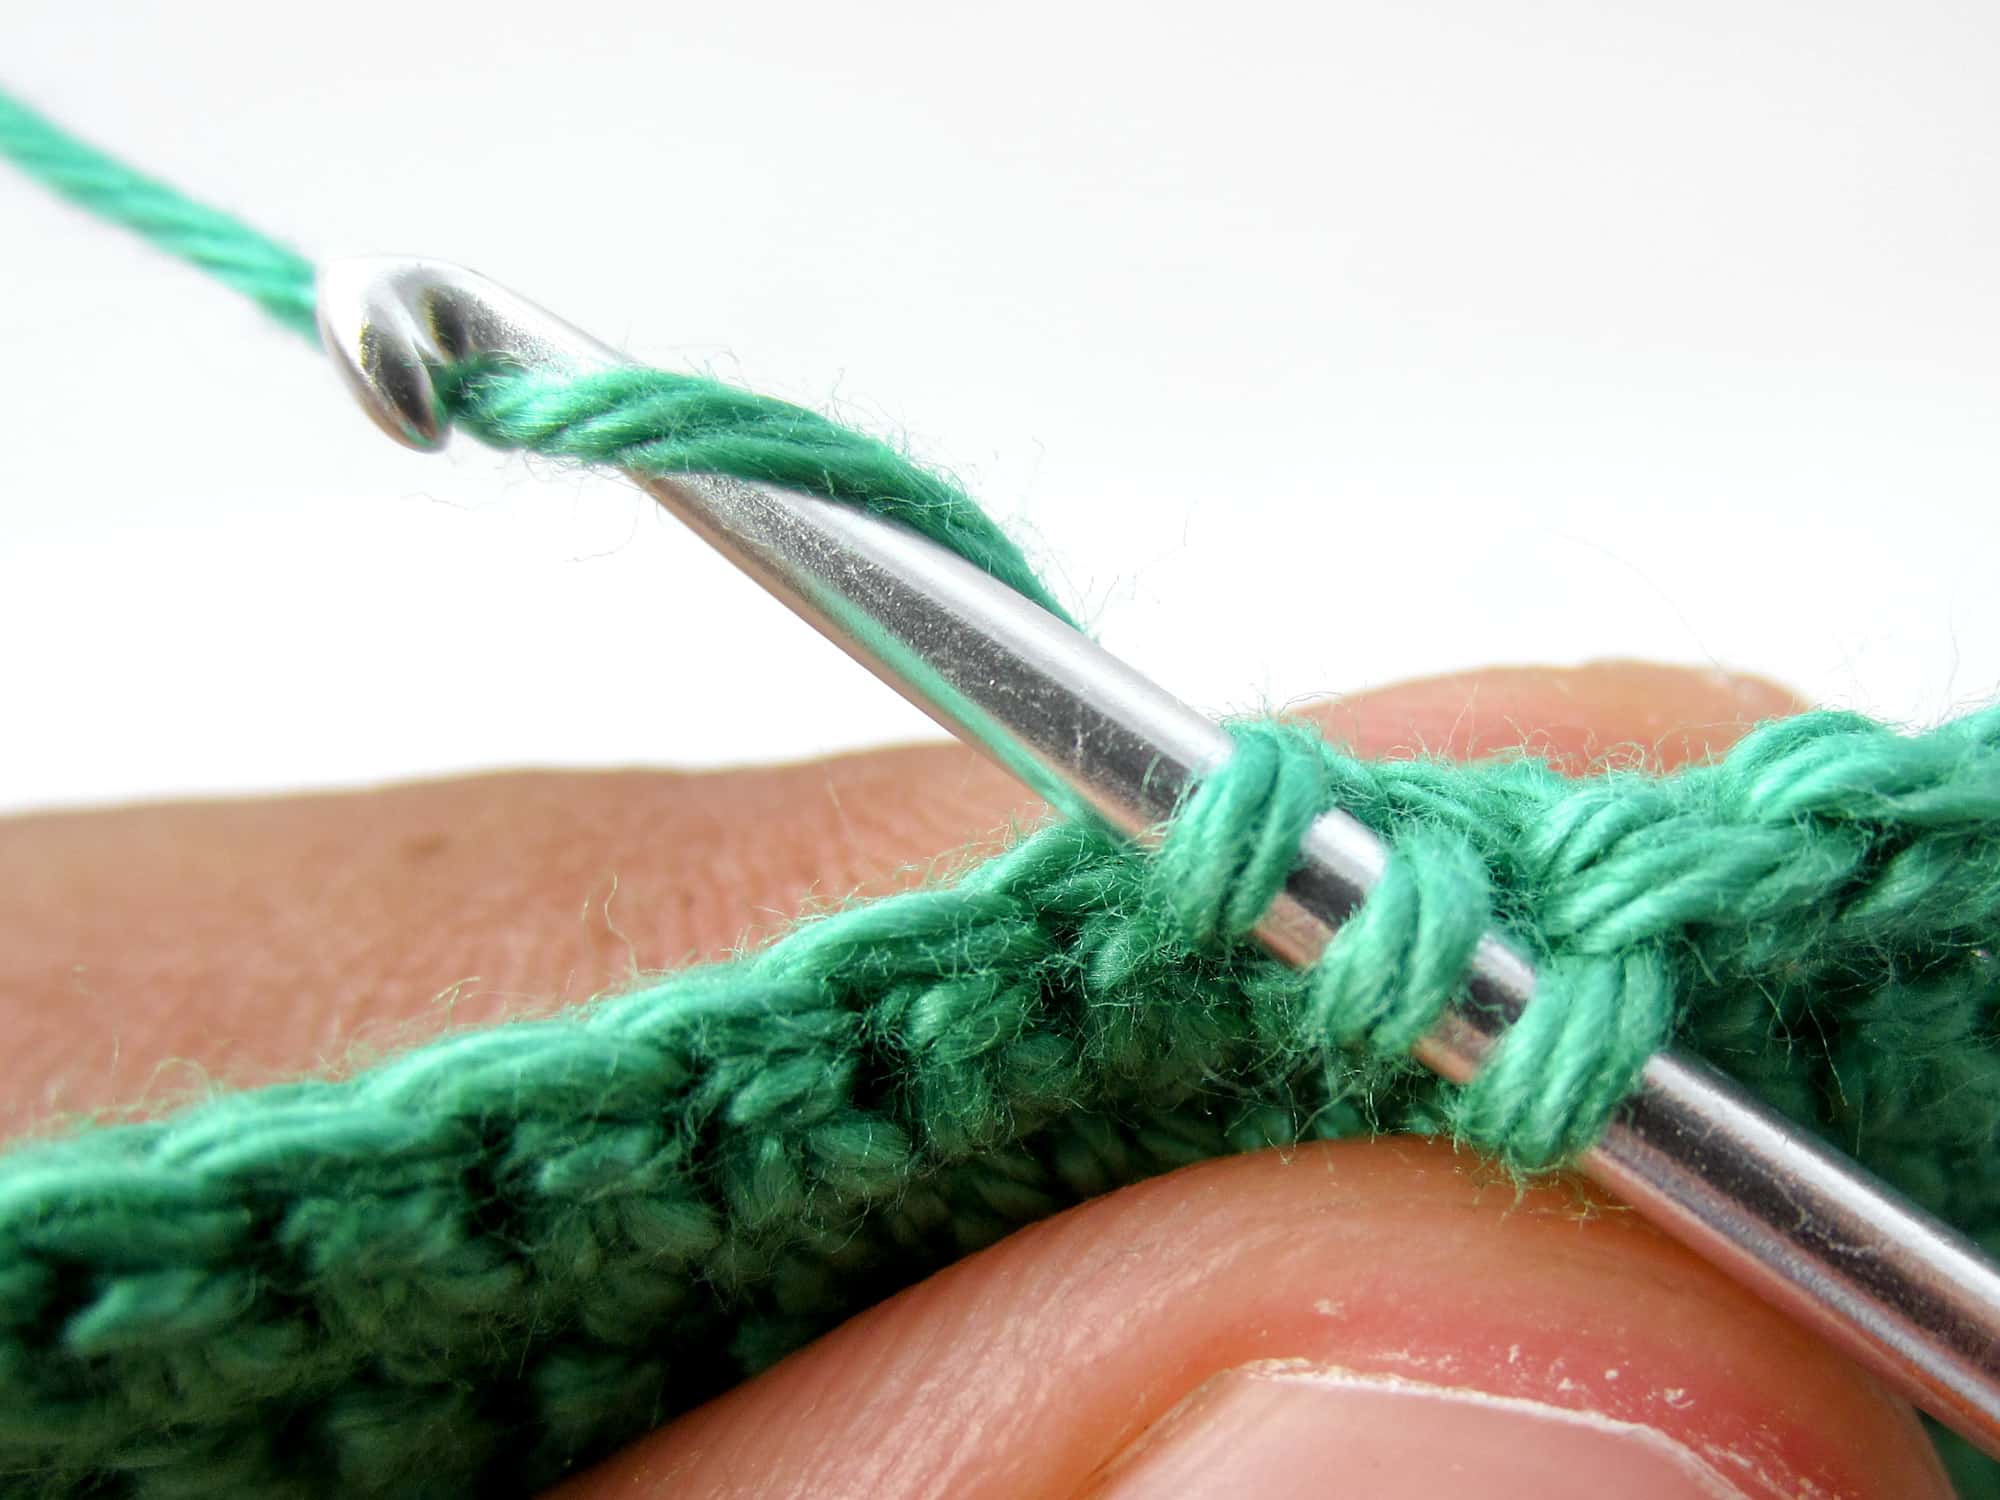
- Step 3: This is the moment when the two stitches are crocheted together. Yarn over again and pull the thread through all 3 loops on the crochet hook. You have crocheted 1 decrease. After crocheting the stitches together you have only 1 stitch left instead of the initial 2 stitches, no matter how many stitches you crochet together at once you always end up with only 1 stitch when decreasing.

You just decreased 2 stitches to 1 stitch. If you crochet more than 2 stitches together, proceed in the same way through as many stitches as you want to crochet together.
Important: The more stitches you crochet together, the more the crochet piece pulls together. For each stitch you crochet together you have 1 stitch less at the end of the round or row.
Example 1: You have a row with 20 stitches. In the next row you crochet 2 stitches together, i.e. 2 stitches become 1 stitch, so you have only 19 stitches left at the end of the row.
Example 2: You have a row with 20 stitches. In the next row you crochet 2 stitches together twice, so you have only 18 stitches left at the end of the row.
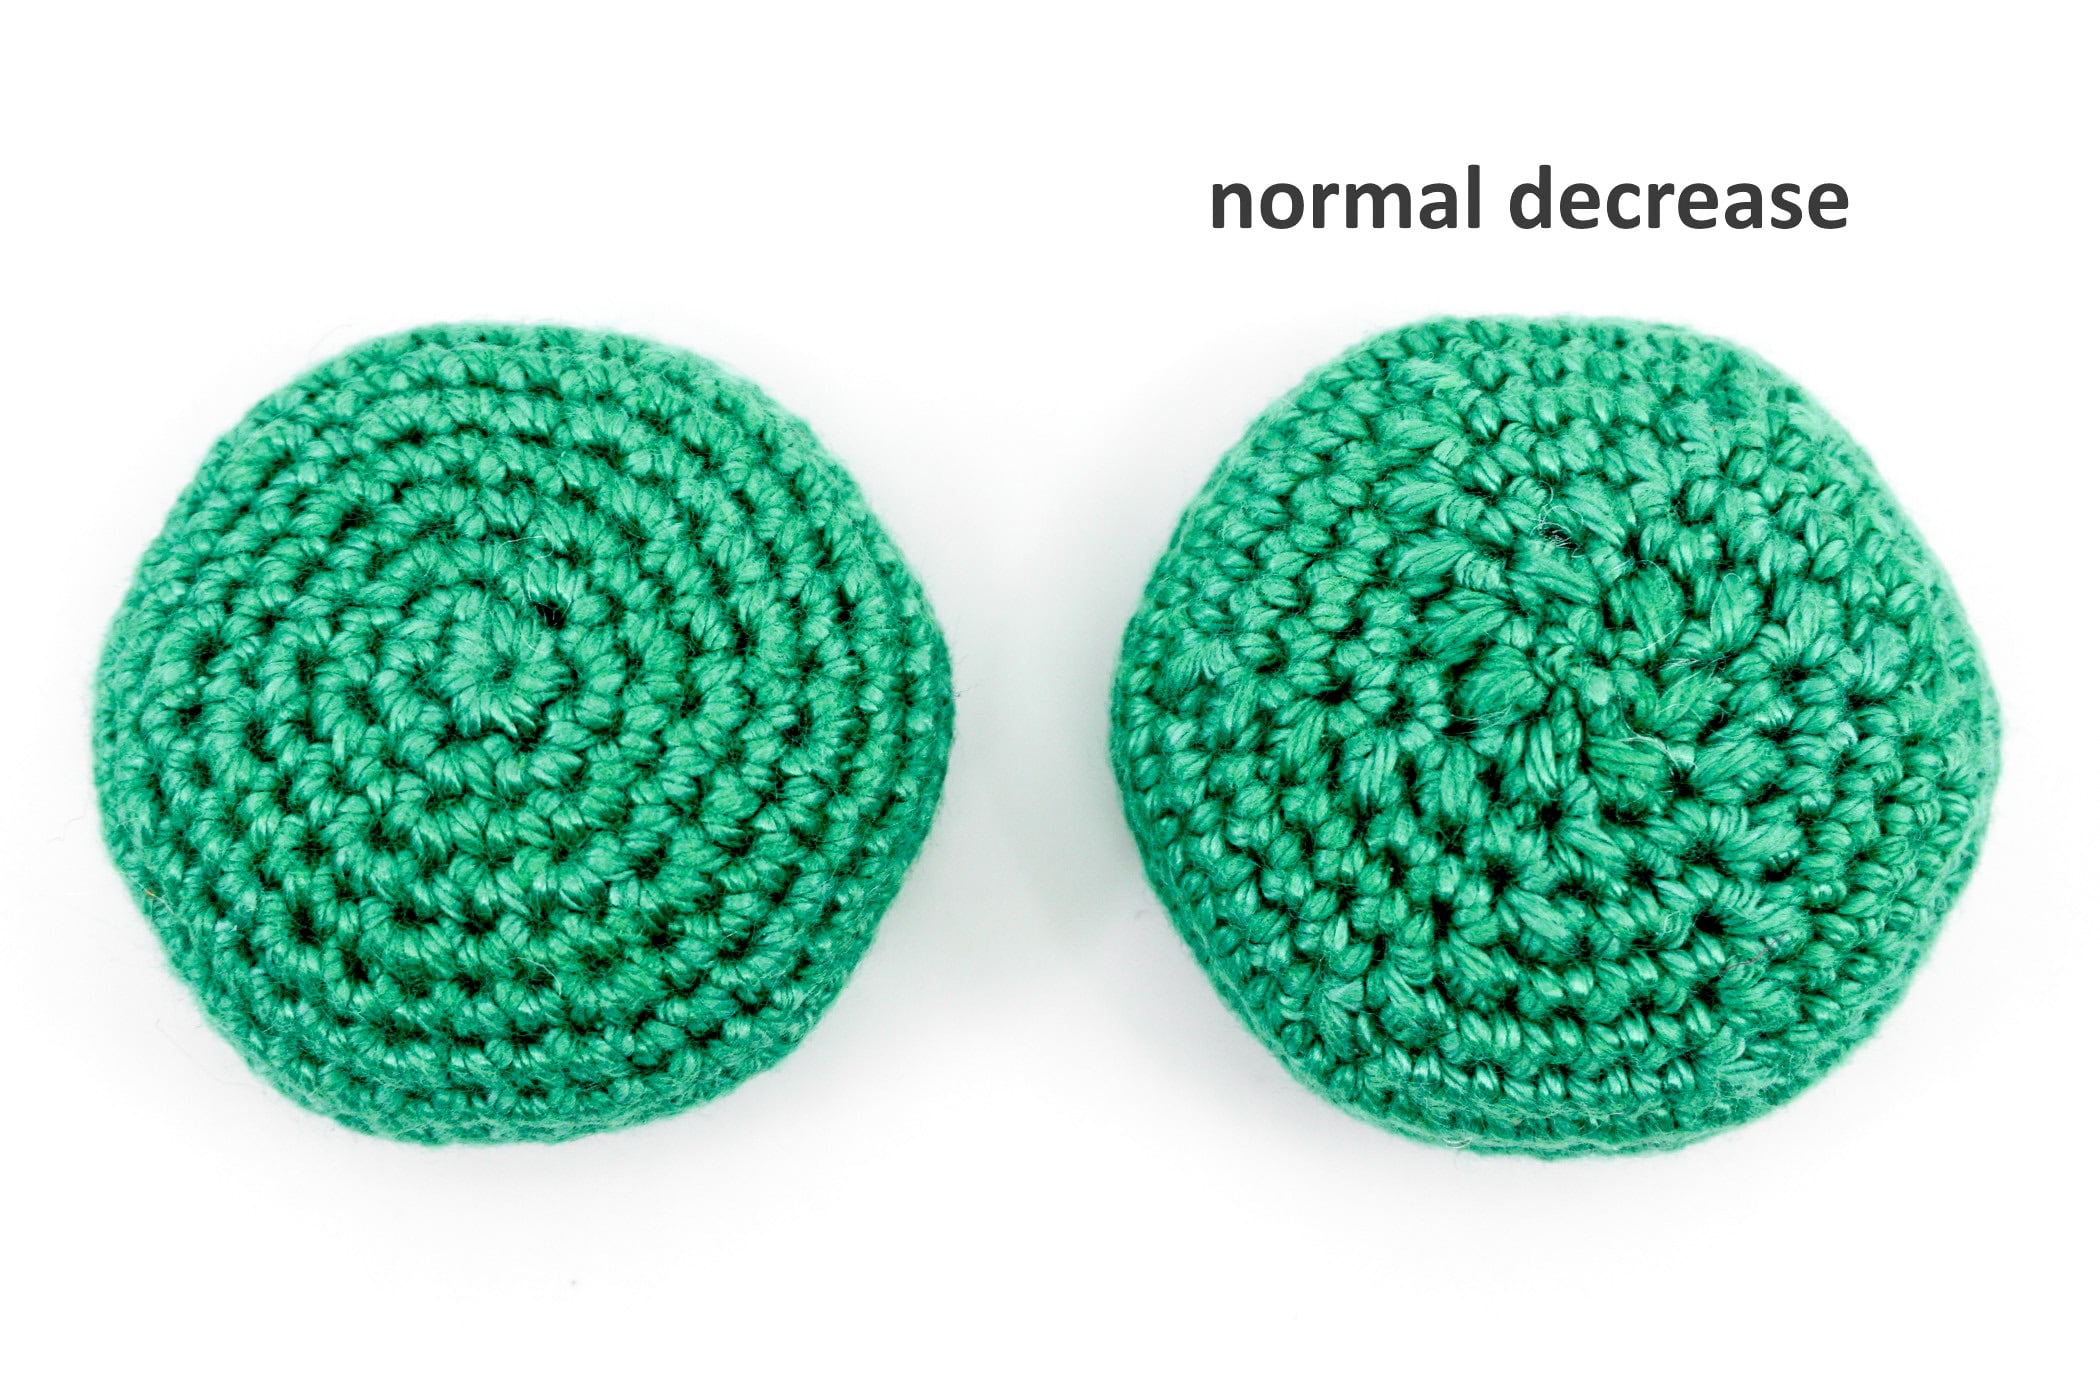
Following a comparison of how the normal decrease looks compared to the part that was crocheted with increases.
How to Crochet an Invisible Decrease
For the invisible decrease you should know what the front and the back loop is, because for the invisible decrease you ONLY crochet into the front loop.
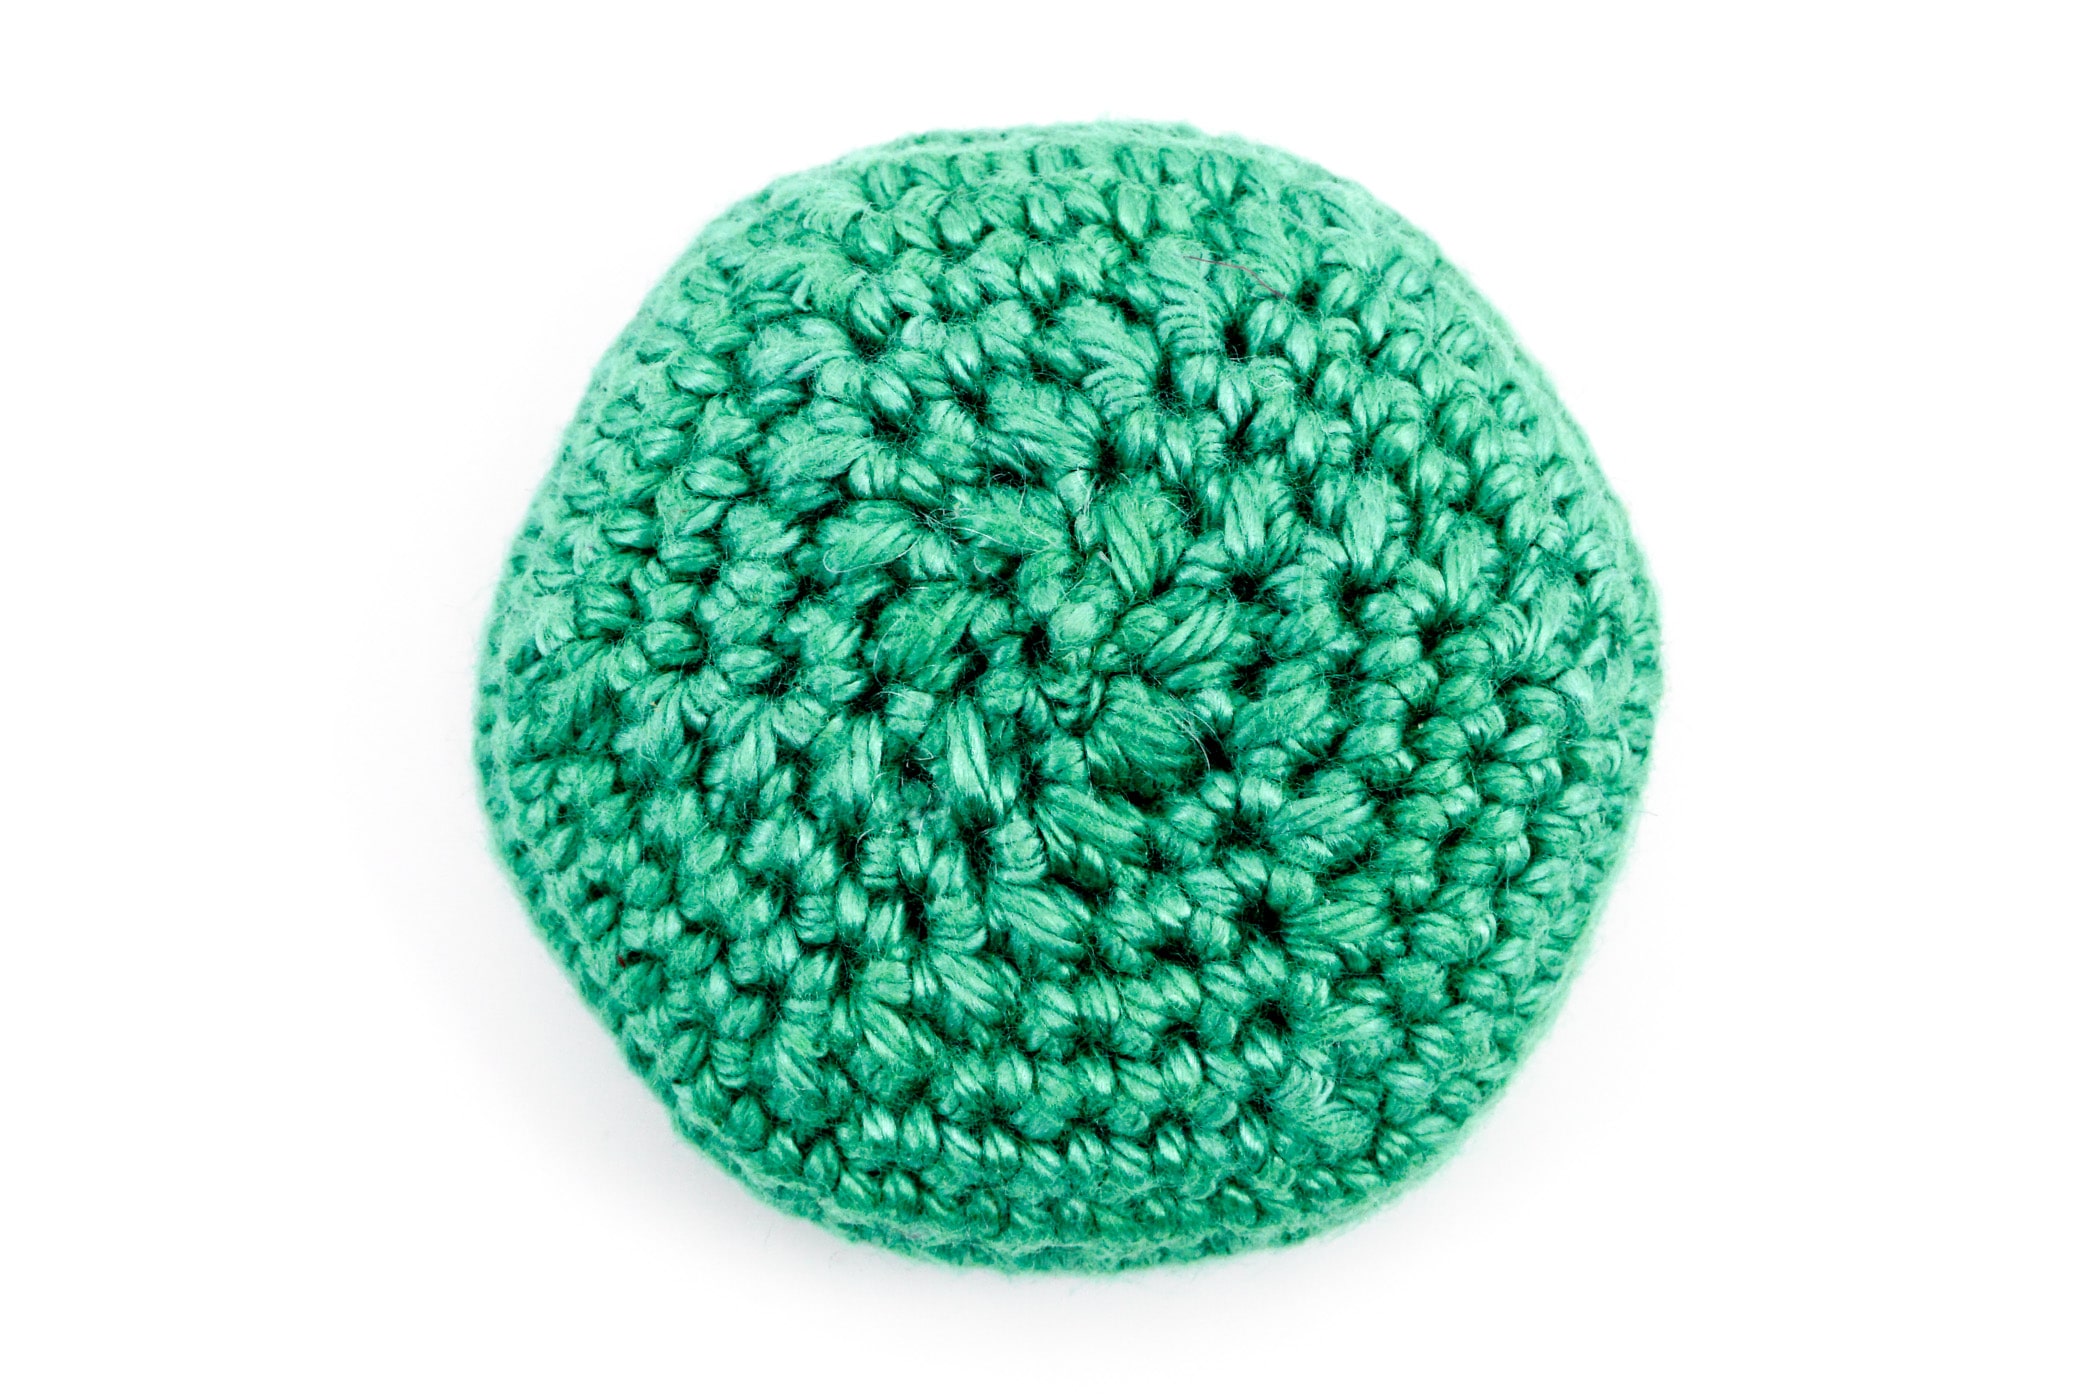
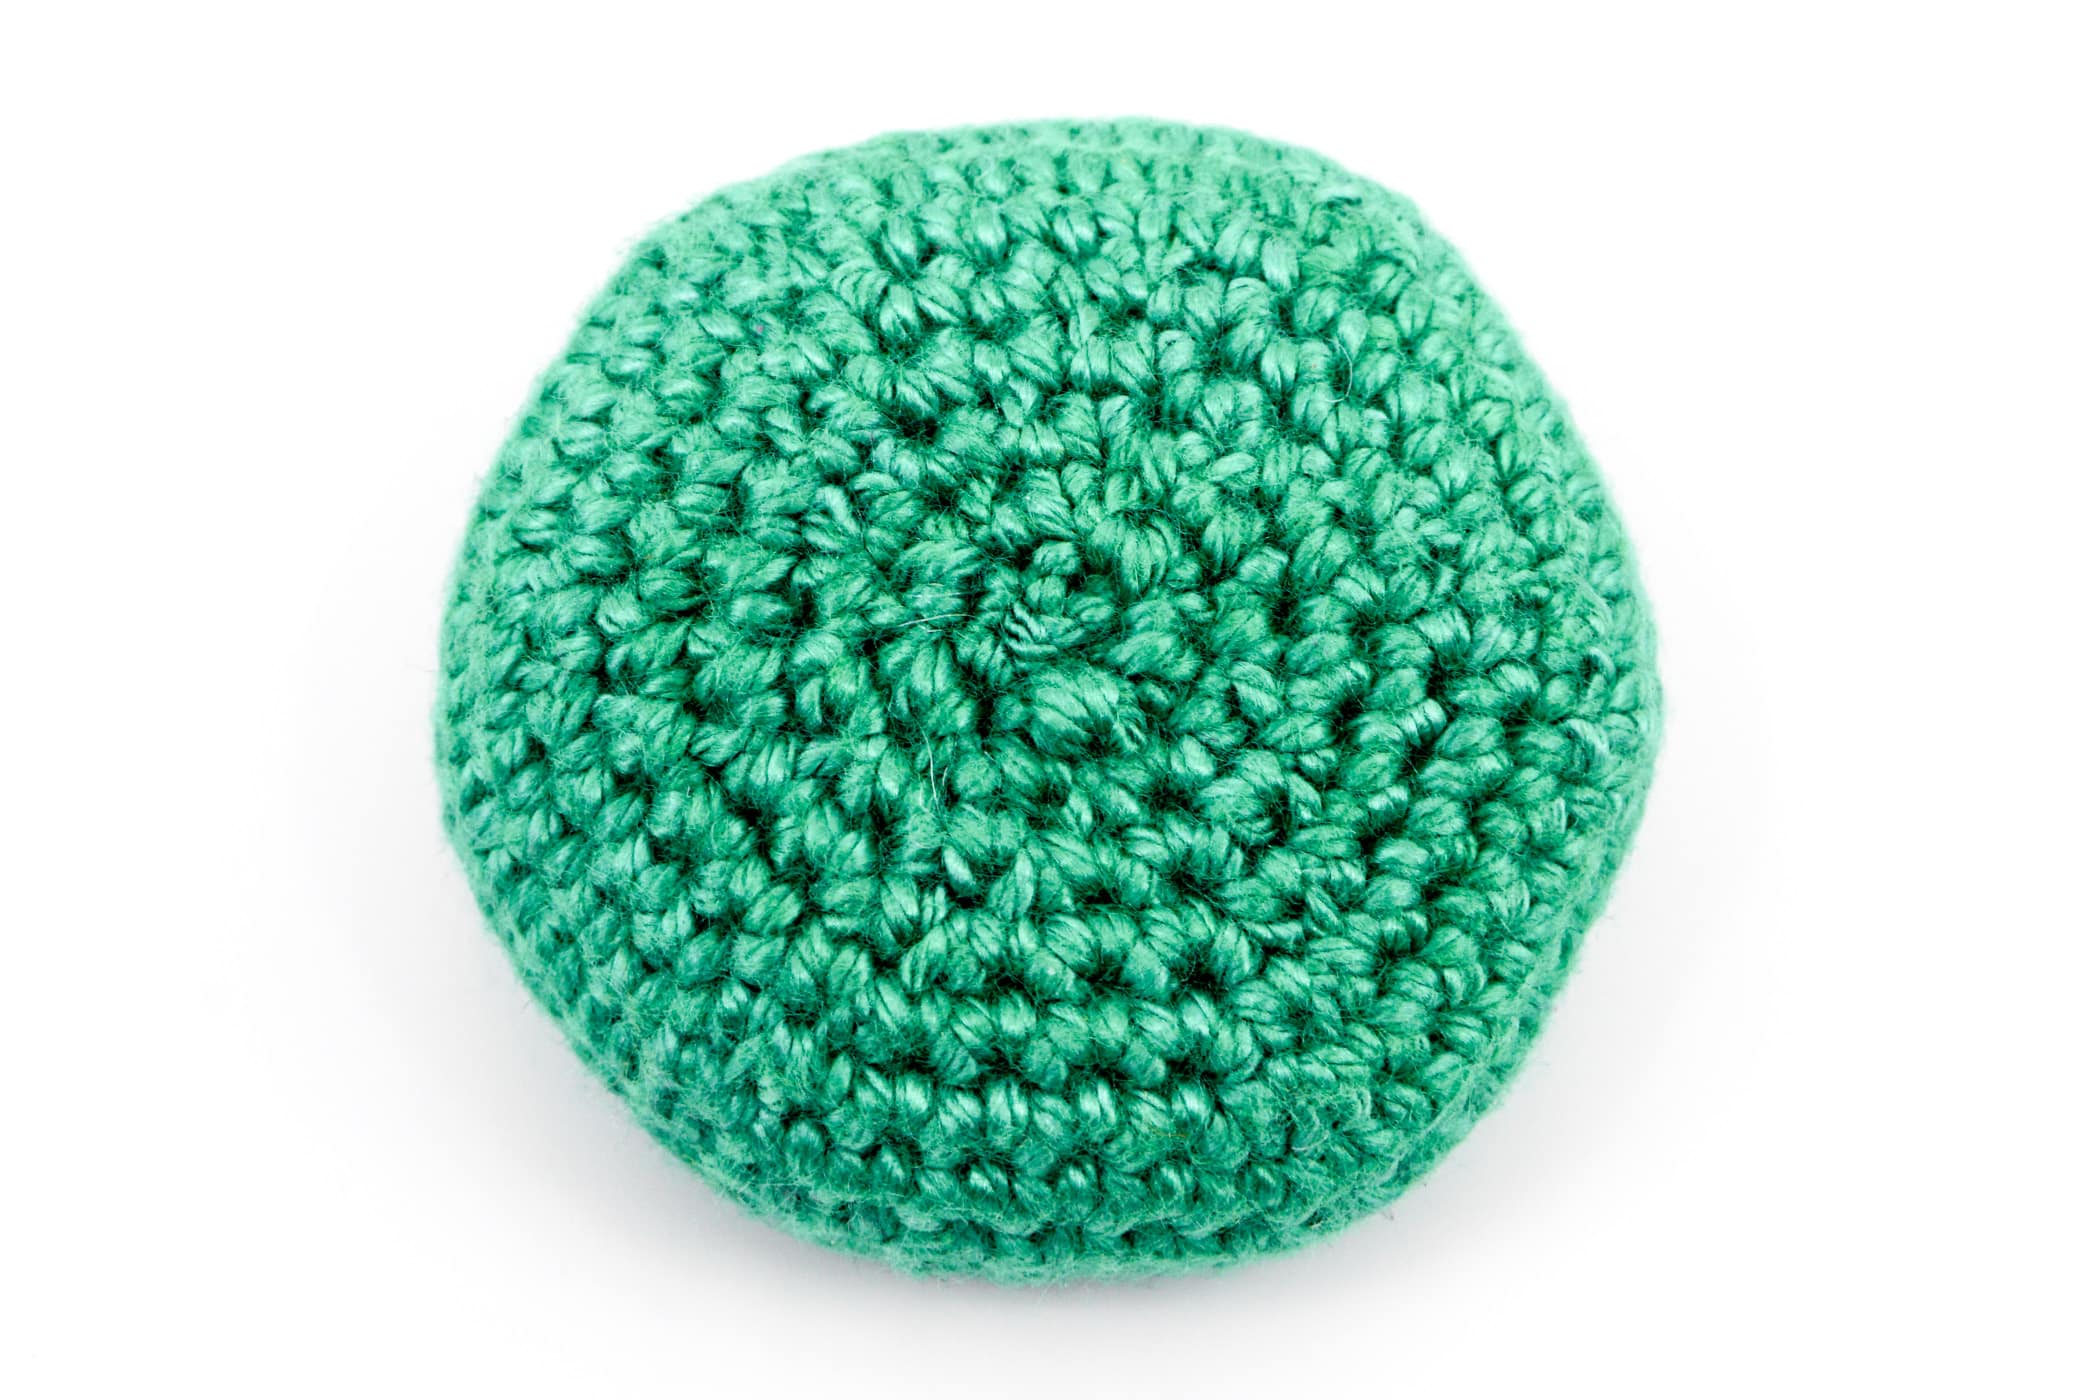
In this example the invisible decrease is shown on a round piece crocheted in spiral rounds with single crochet stitches. You can also use the invisible decreases on pieces crocheted in rows or in joined rounds.
However, since the invisible decrease creates a visible different look on the “inside” of a crochet piece, it is recommended to use the invisible decrease only for projects where the inside is not visible, like when crocheting amigurumi.
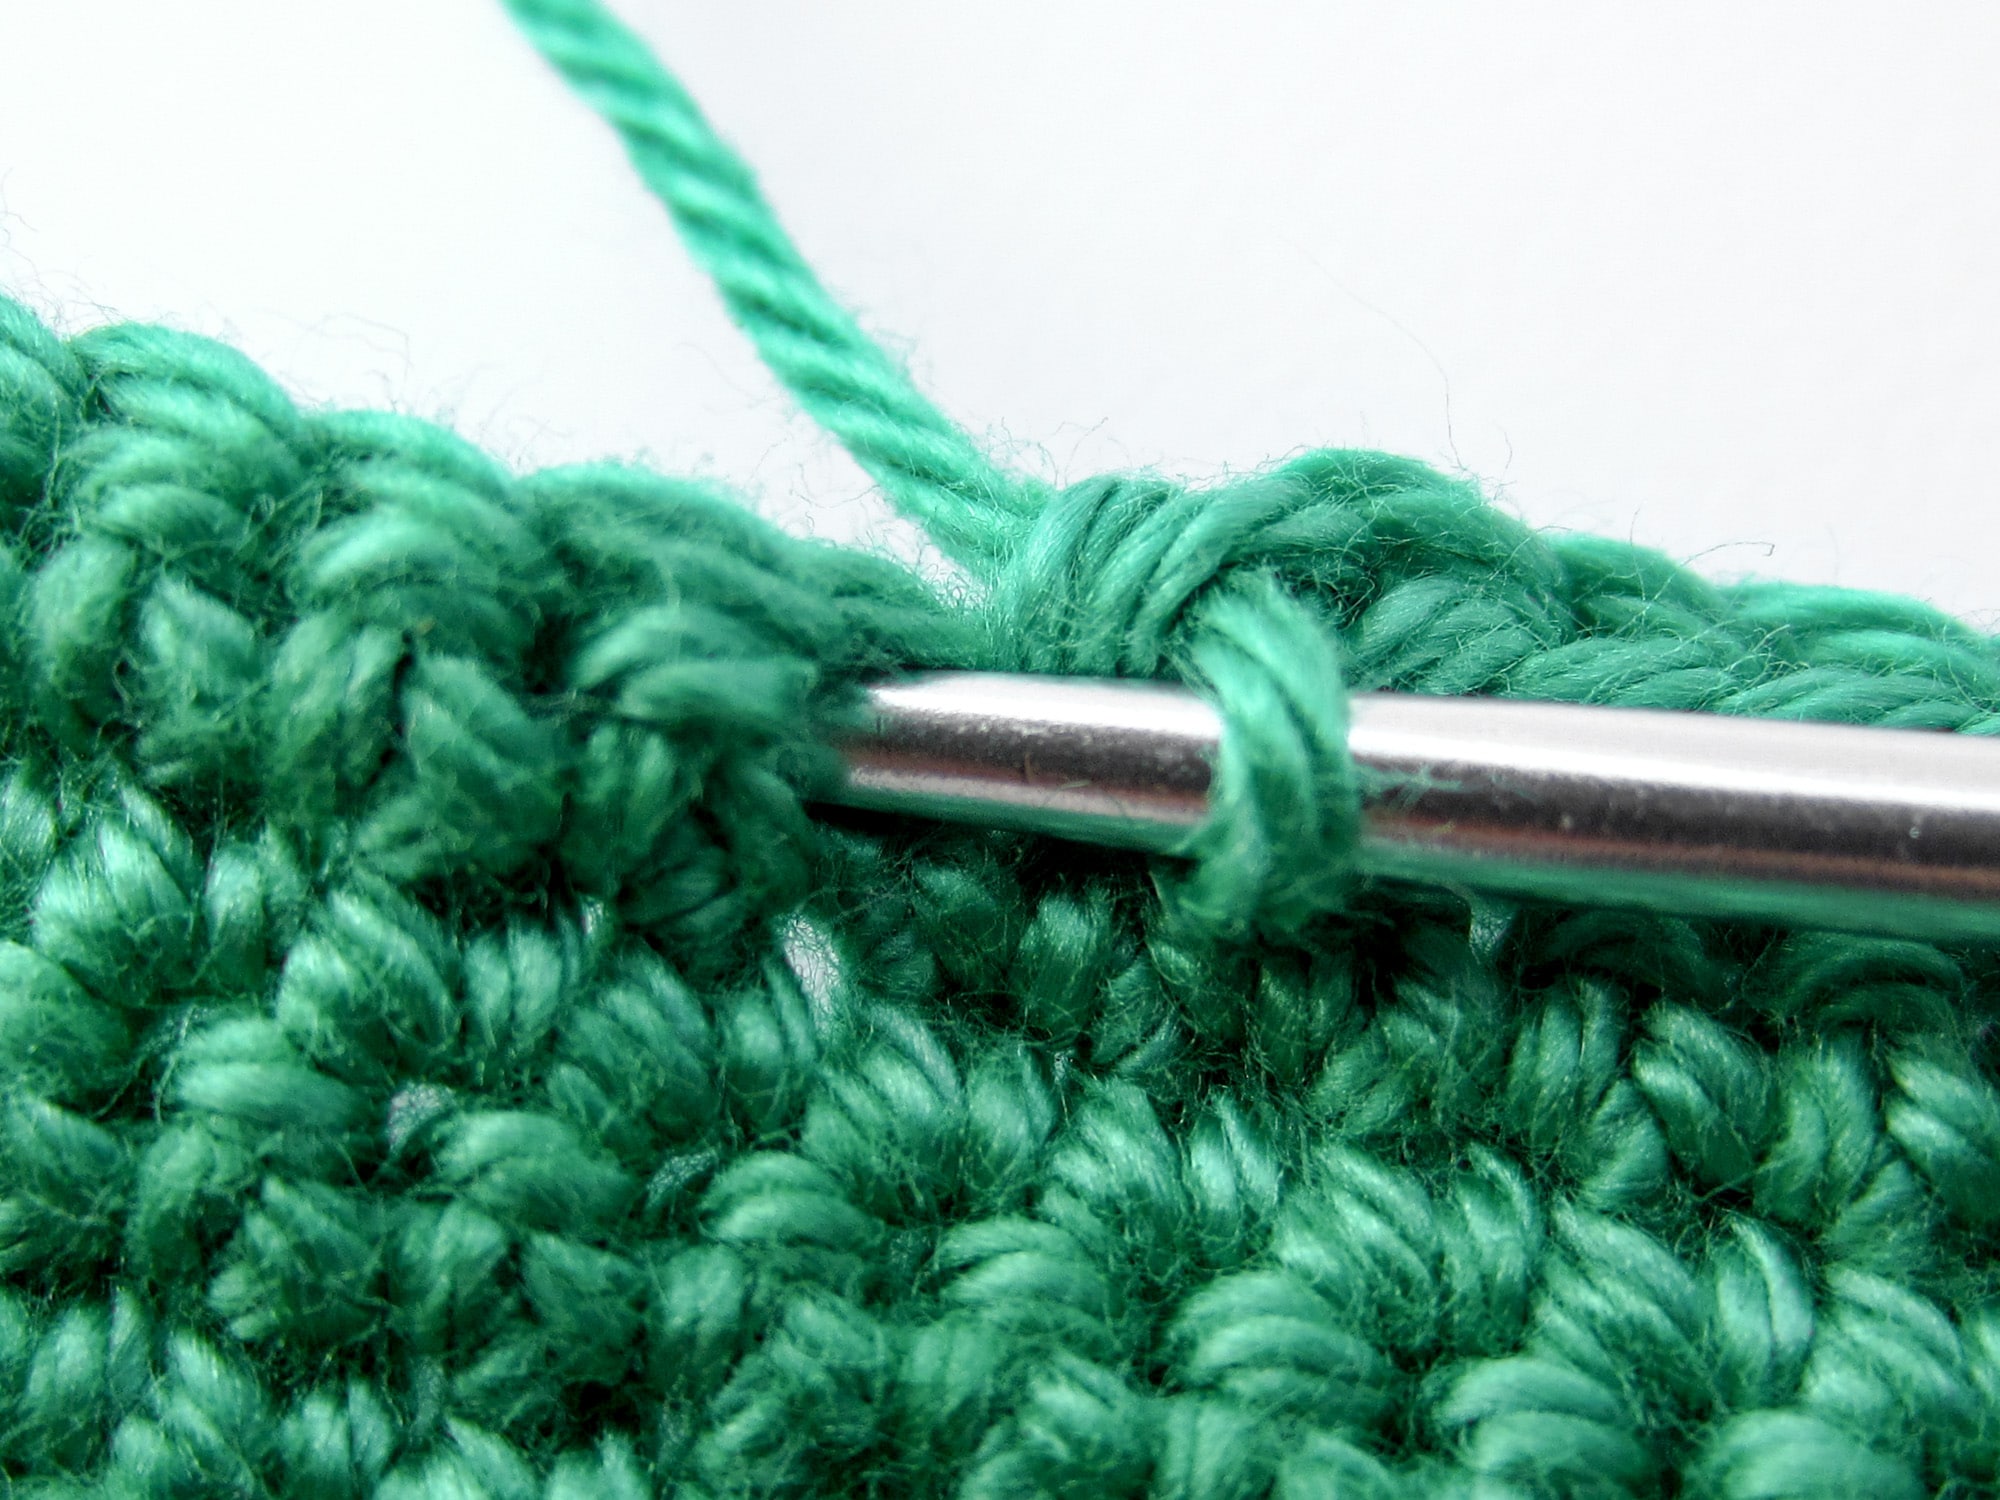
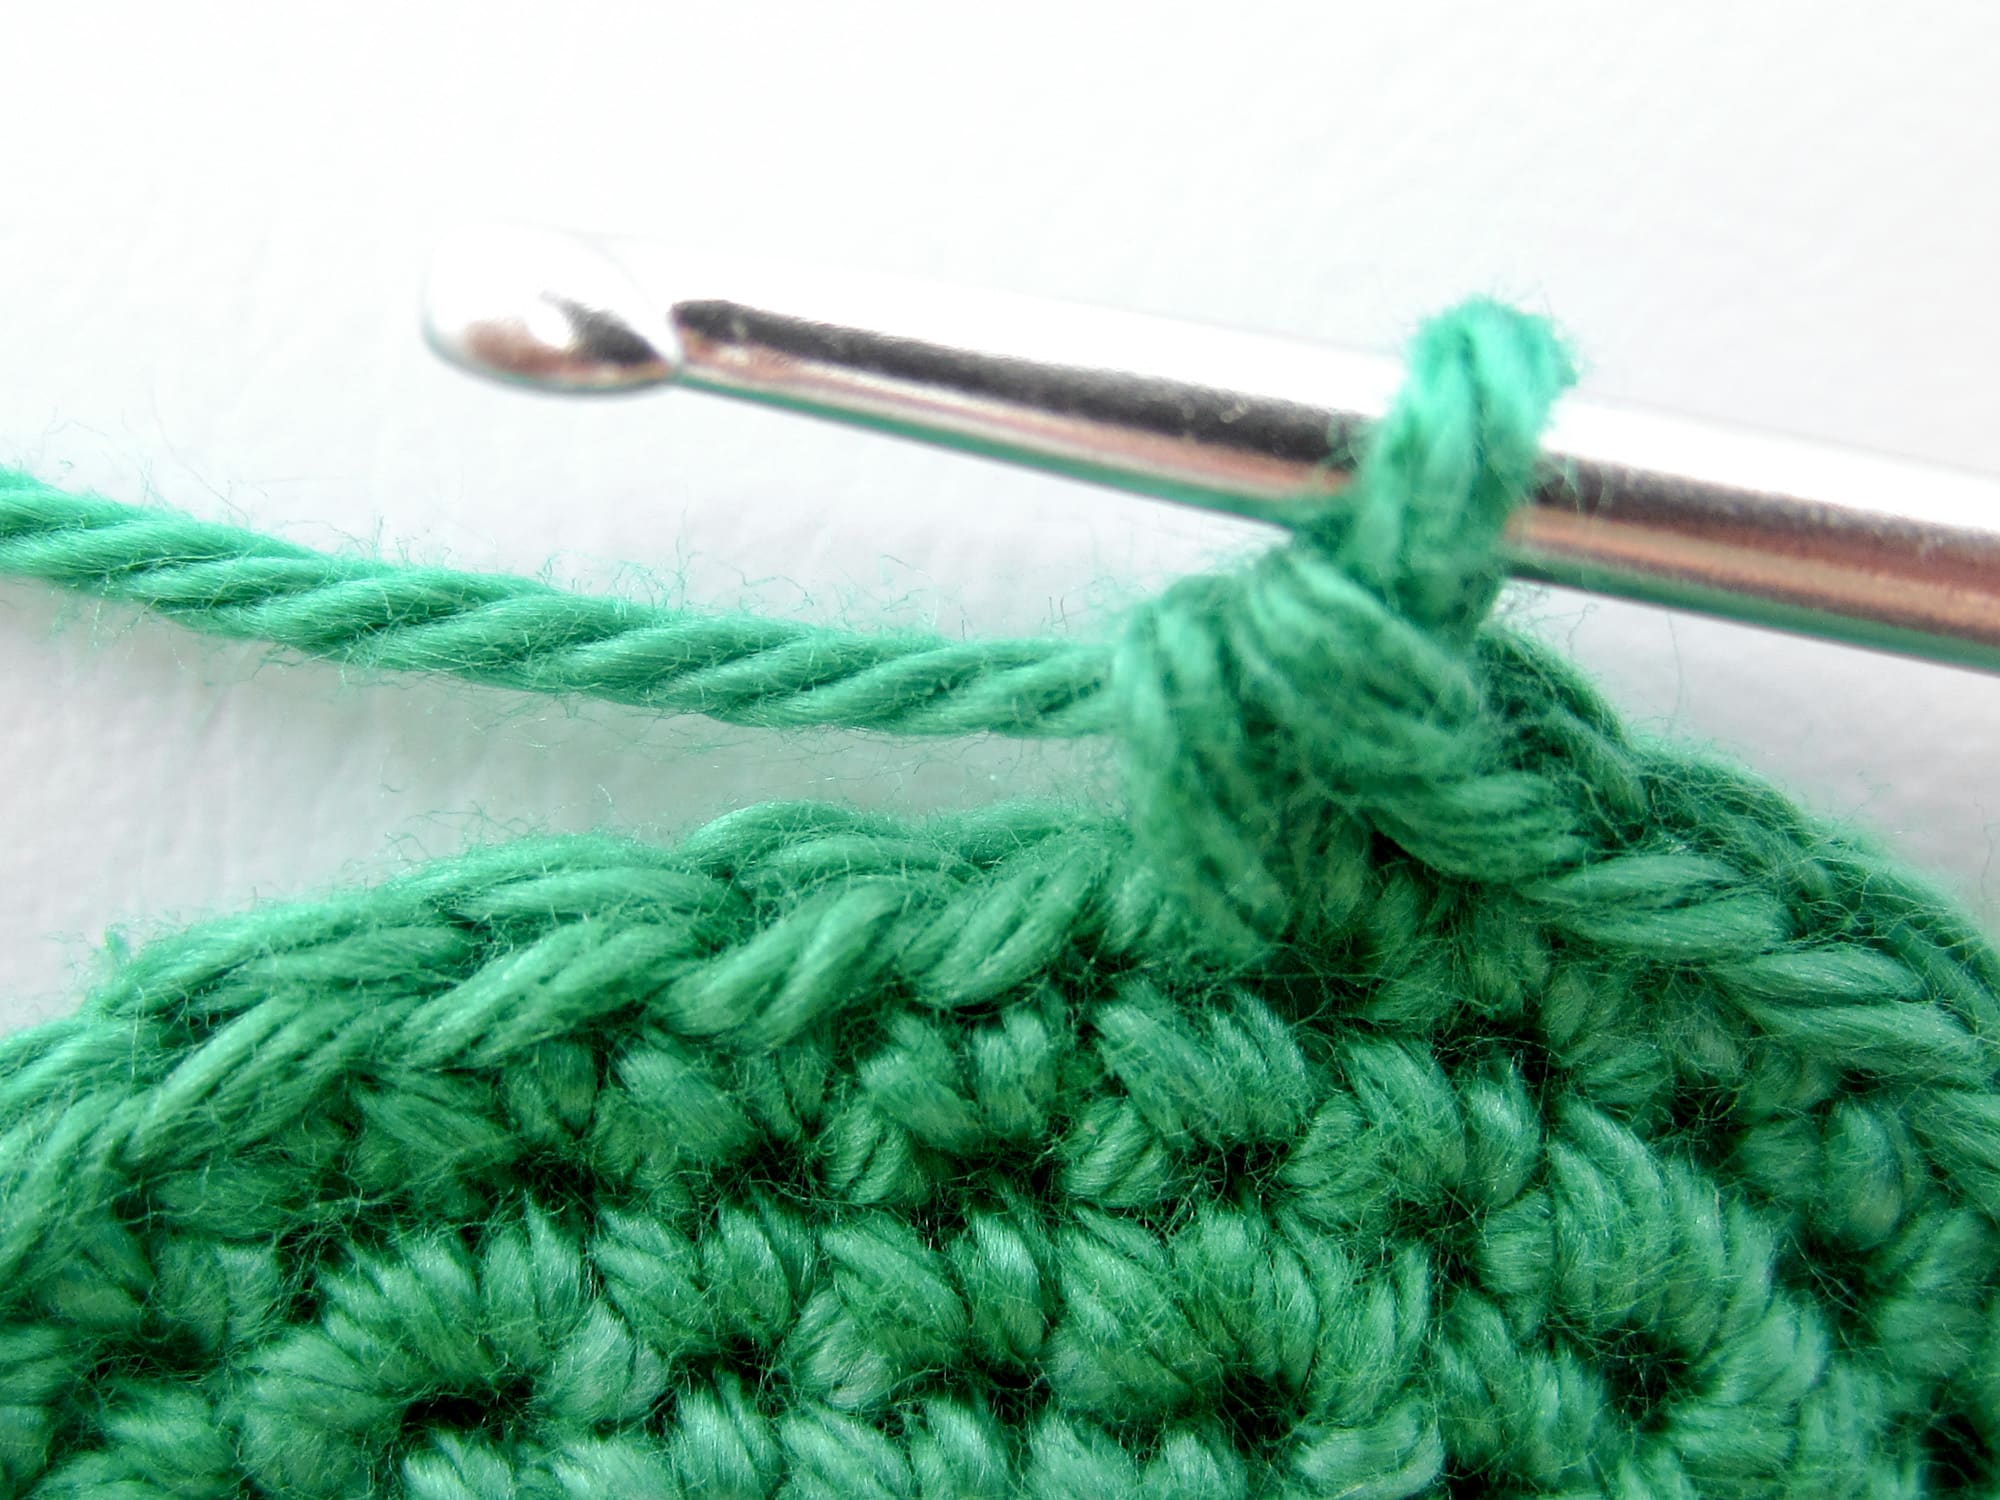
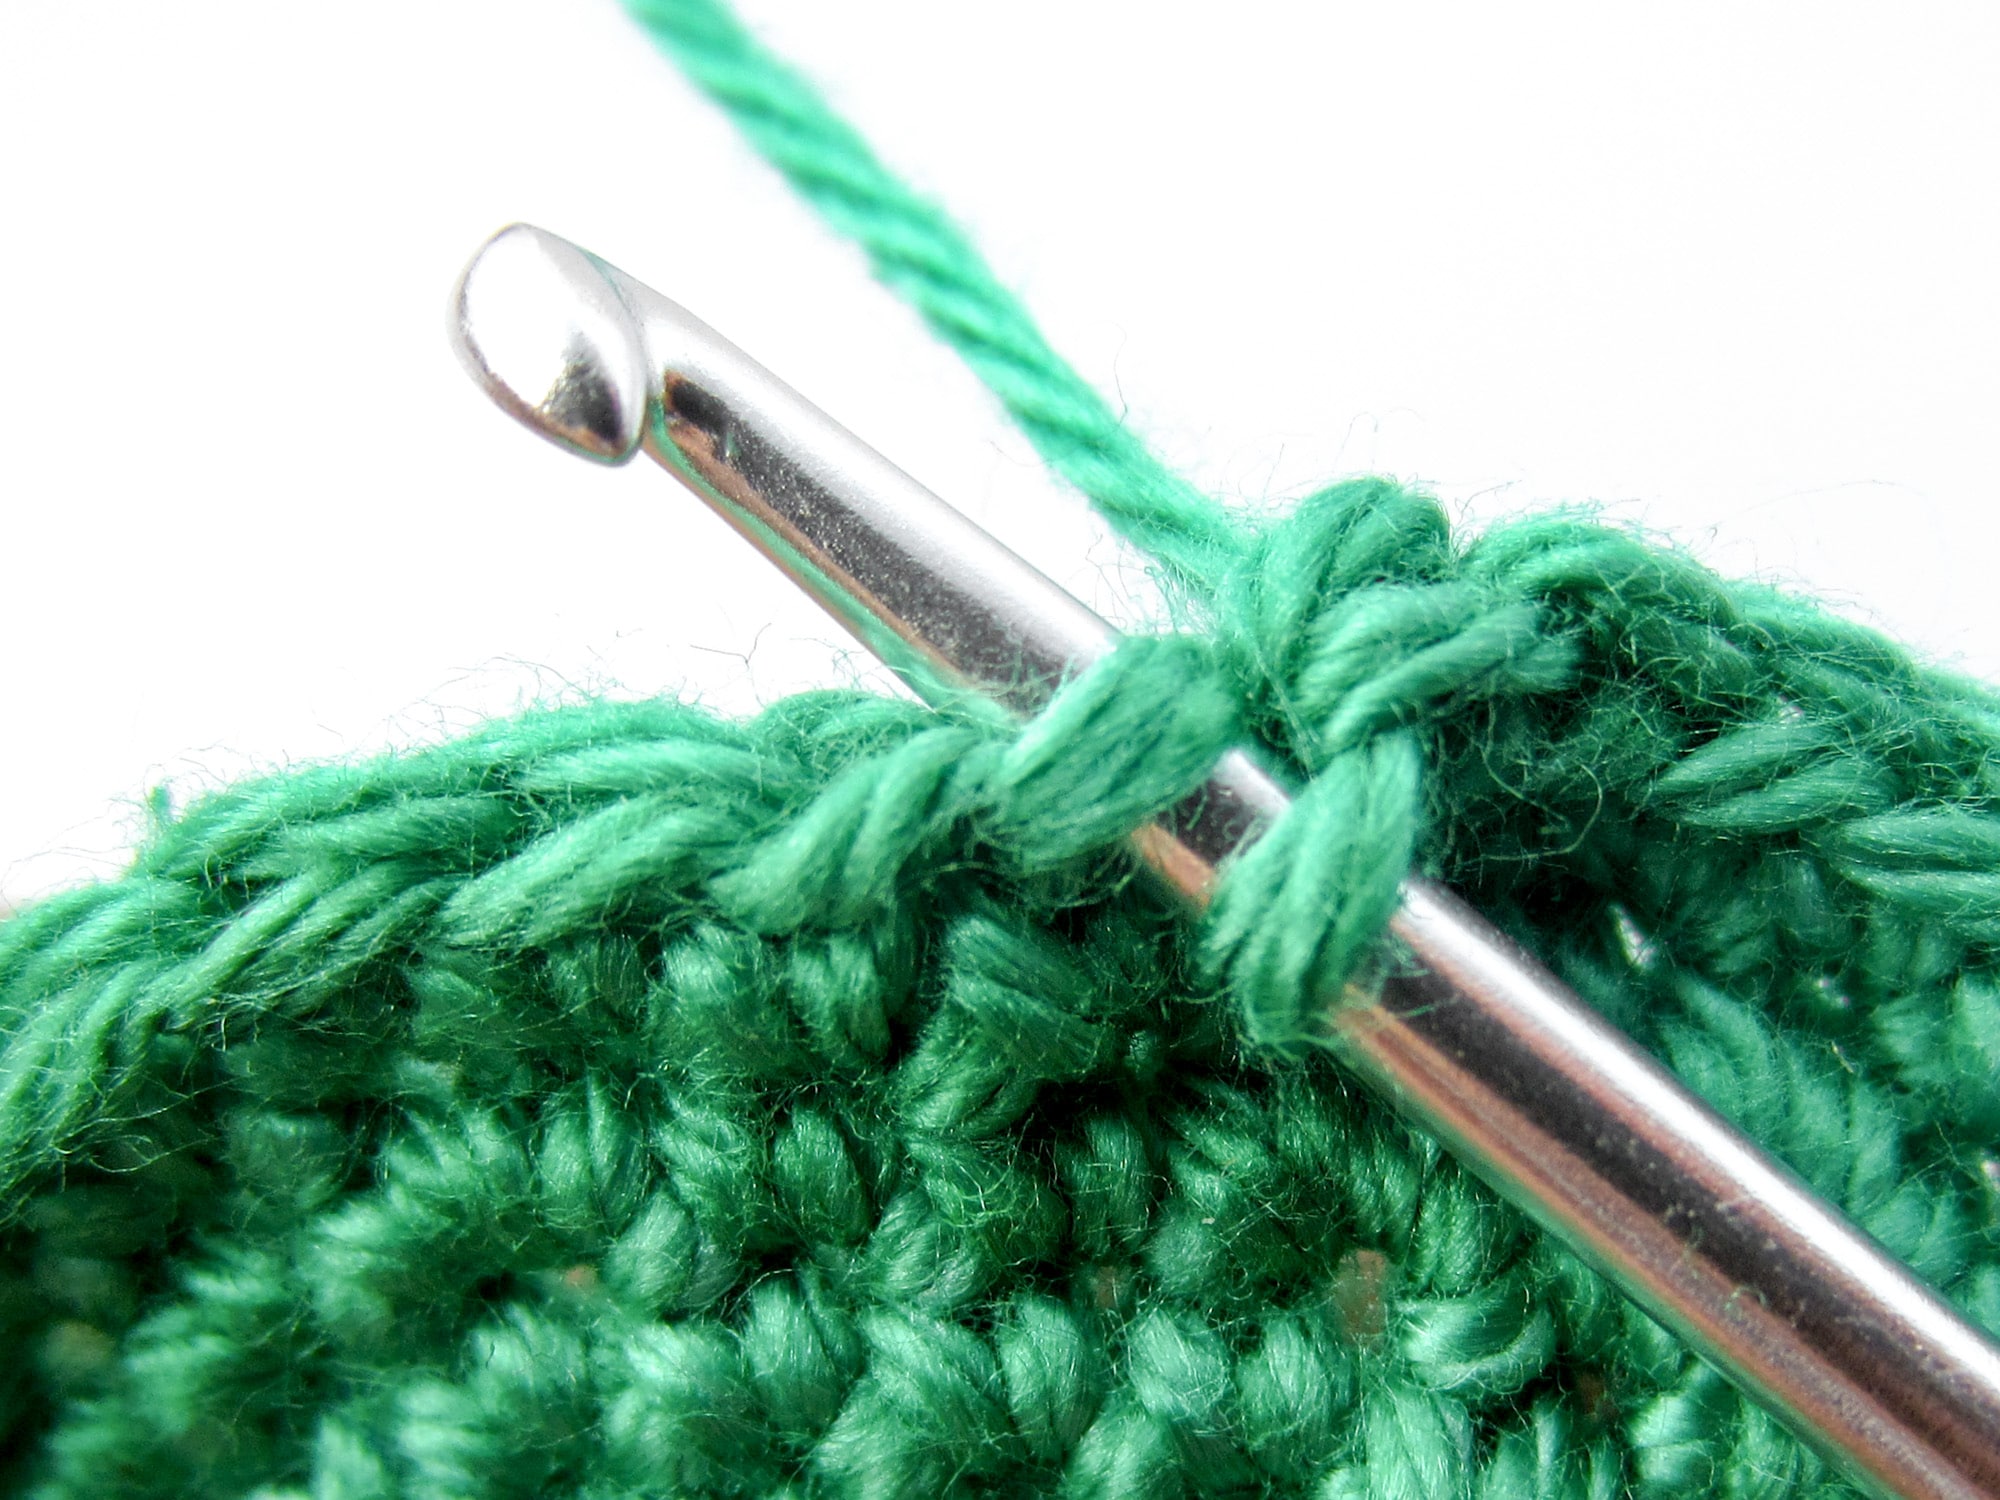
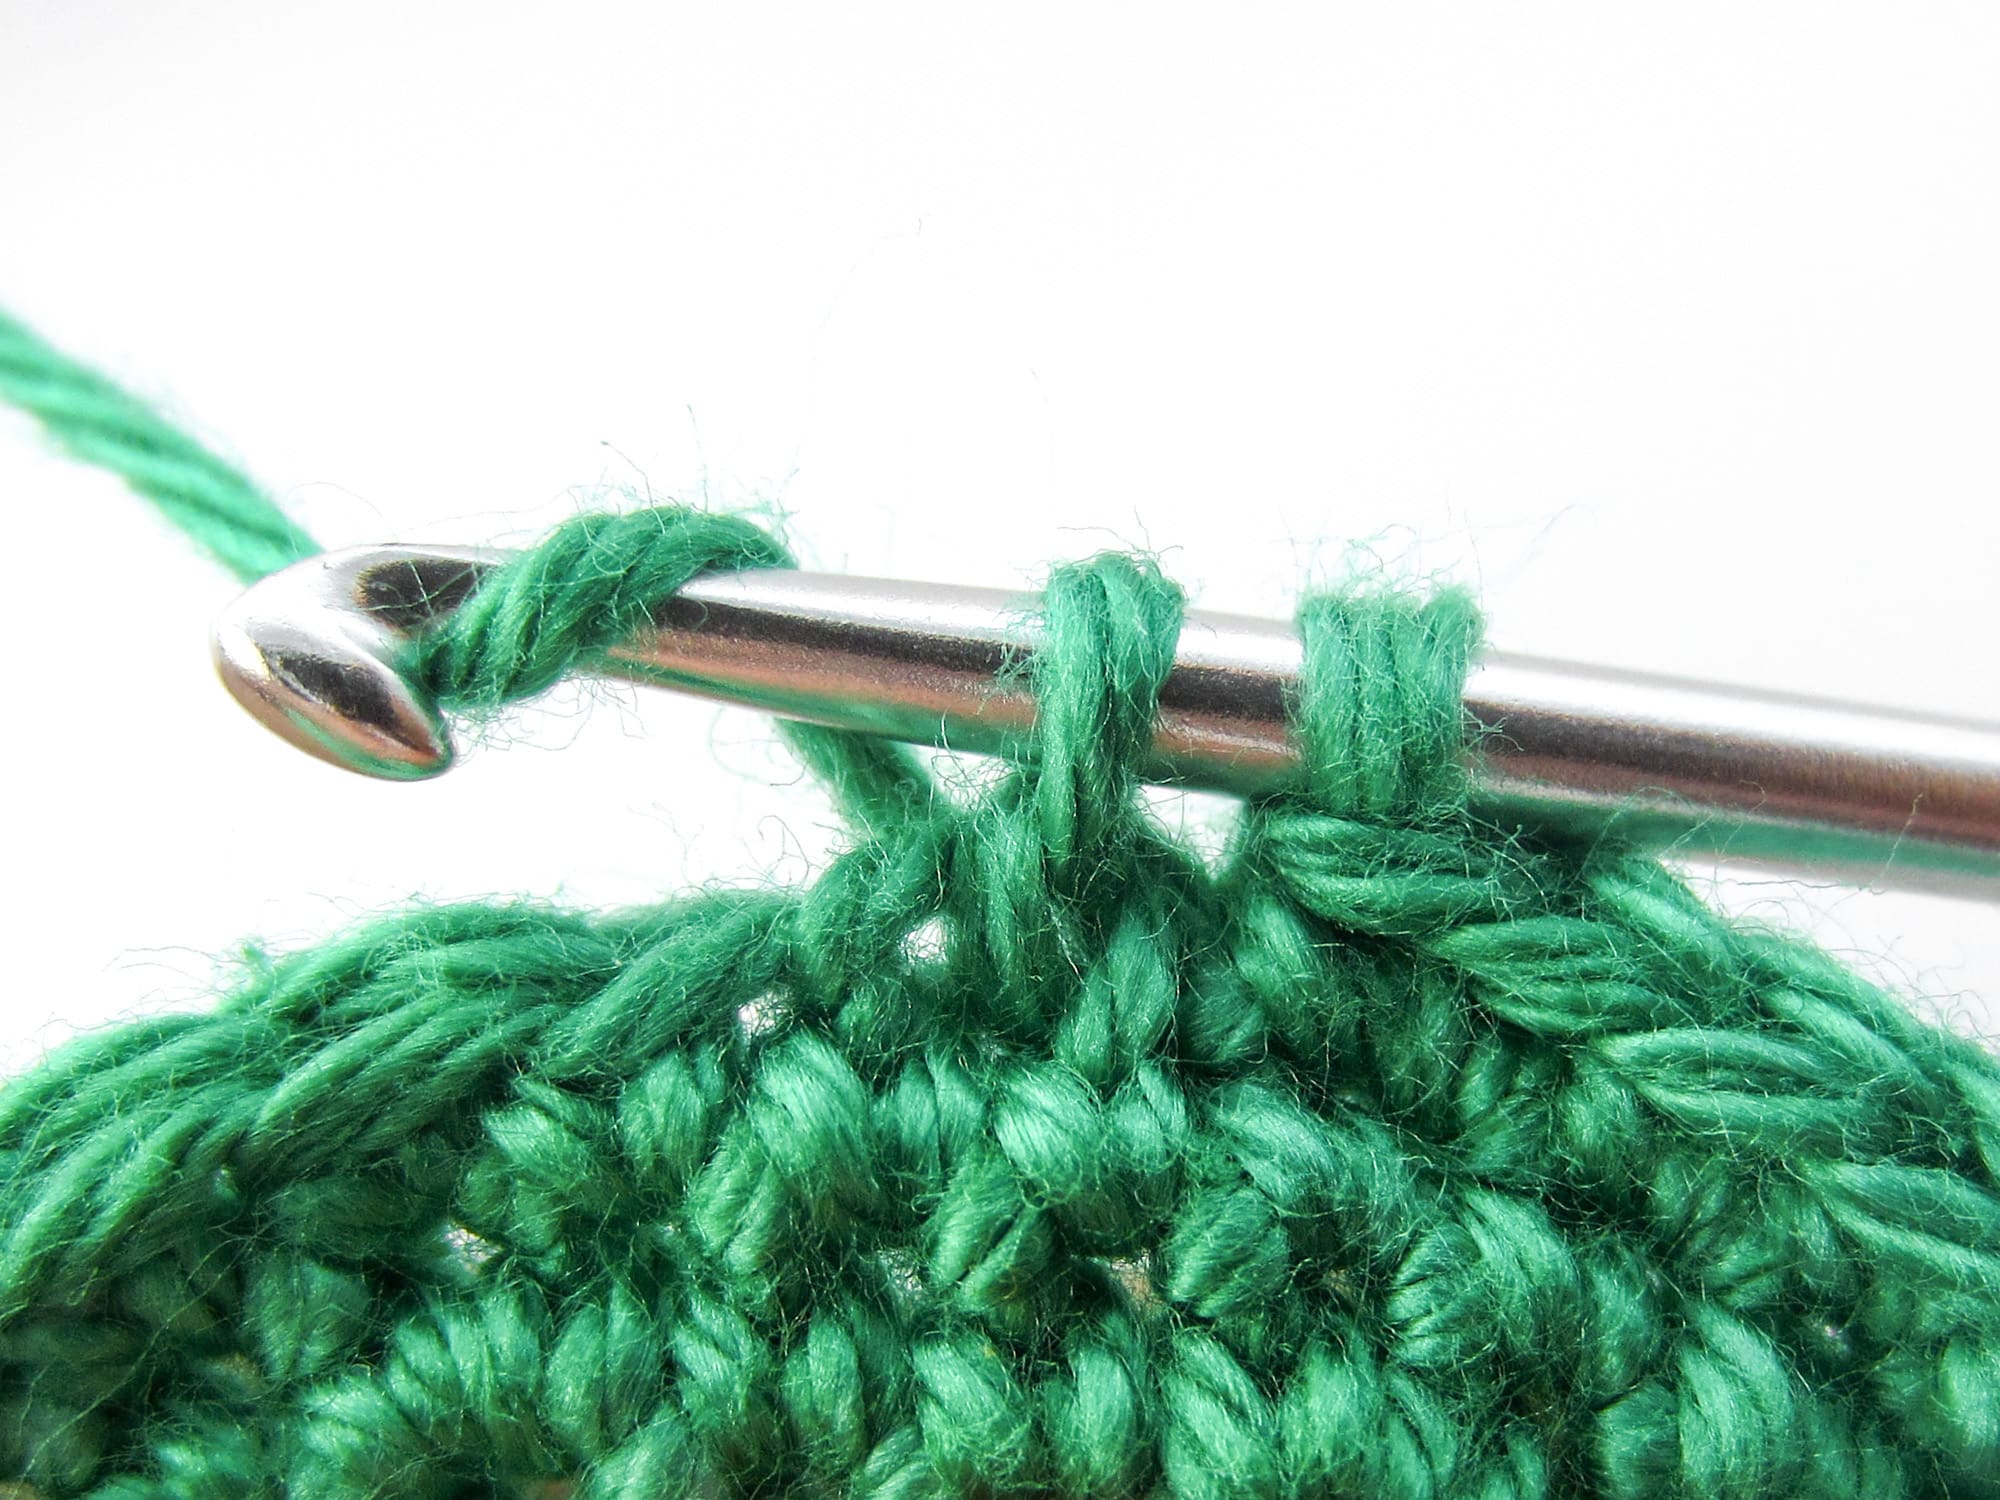
- Step 1: Instead of pushing through the whole next stitch, as it is the case with the normal decrease, you ONLY push with your crochet hook through the front loop of the next stitch, so that the crochet hook comes out between the two stitch loops. You have 2 loops on the crochet hook.
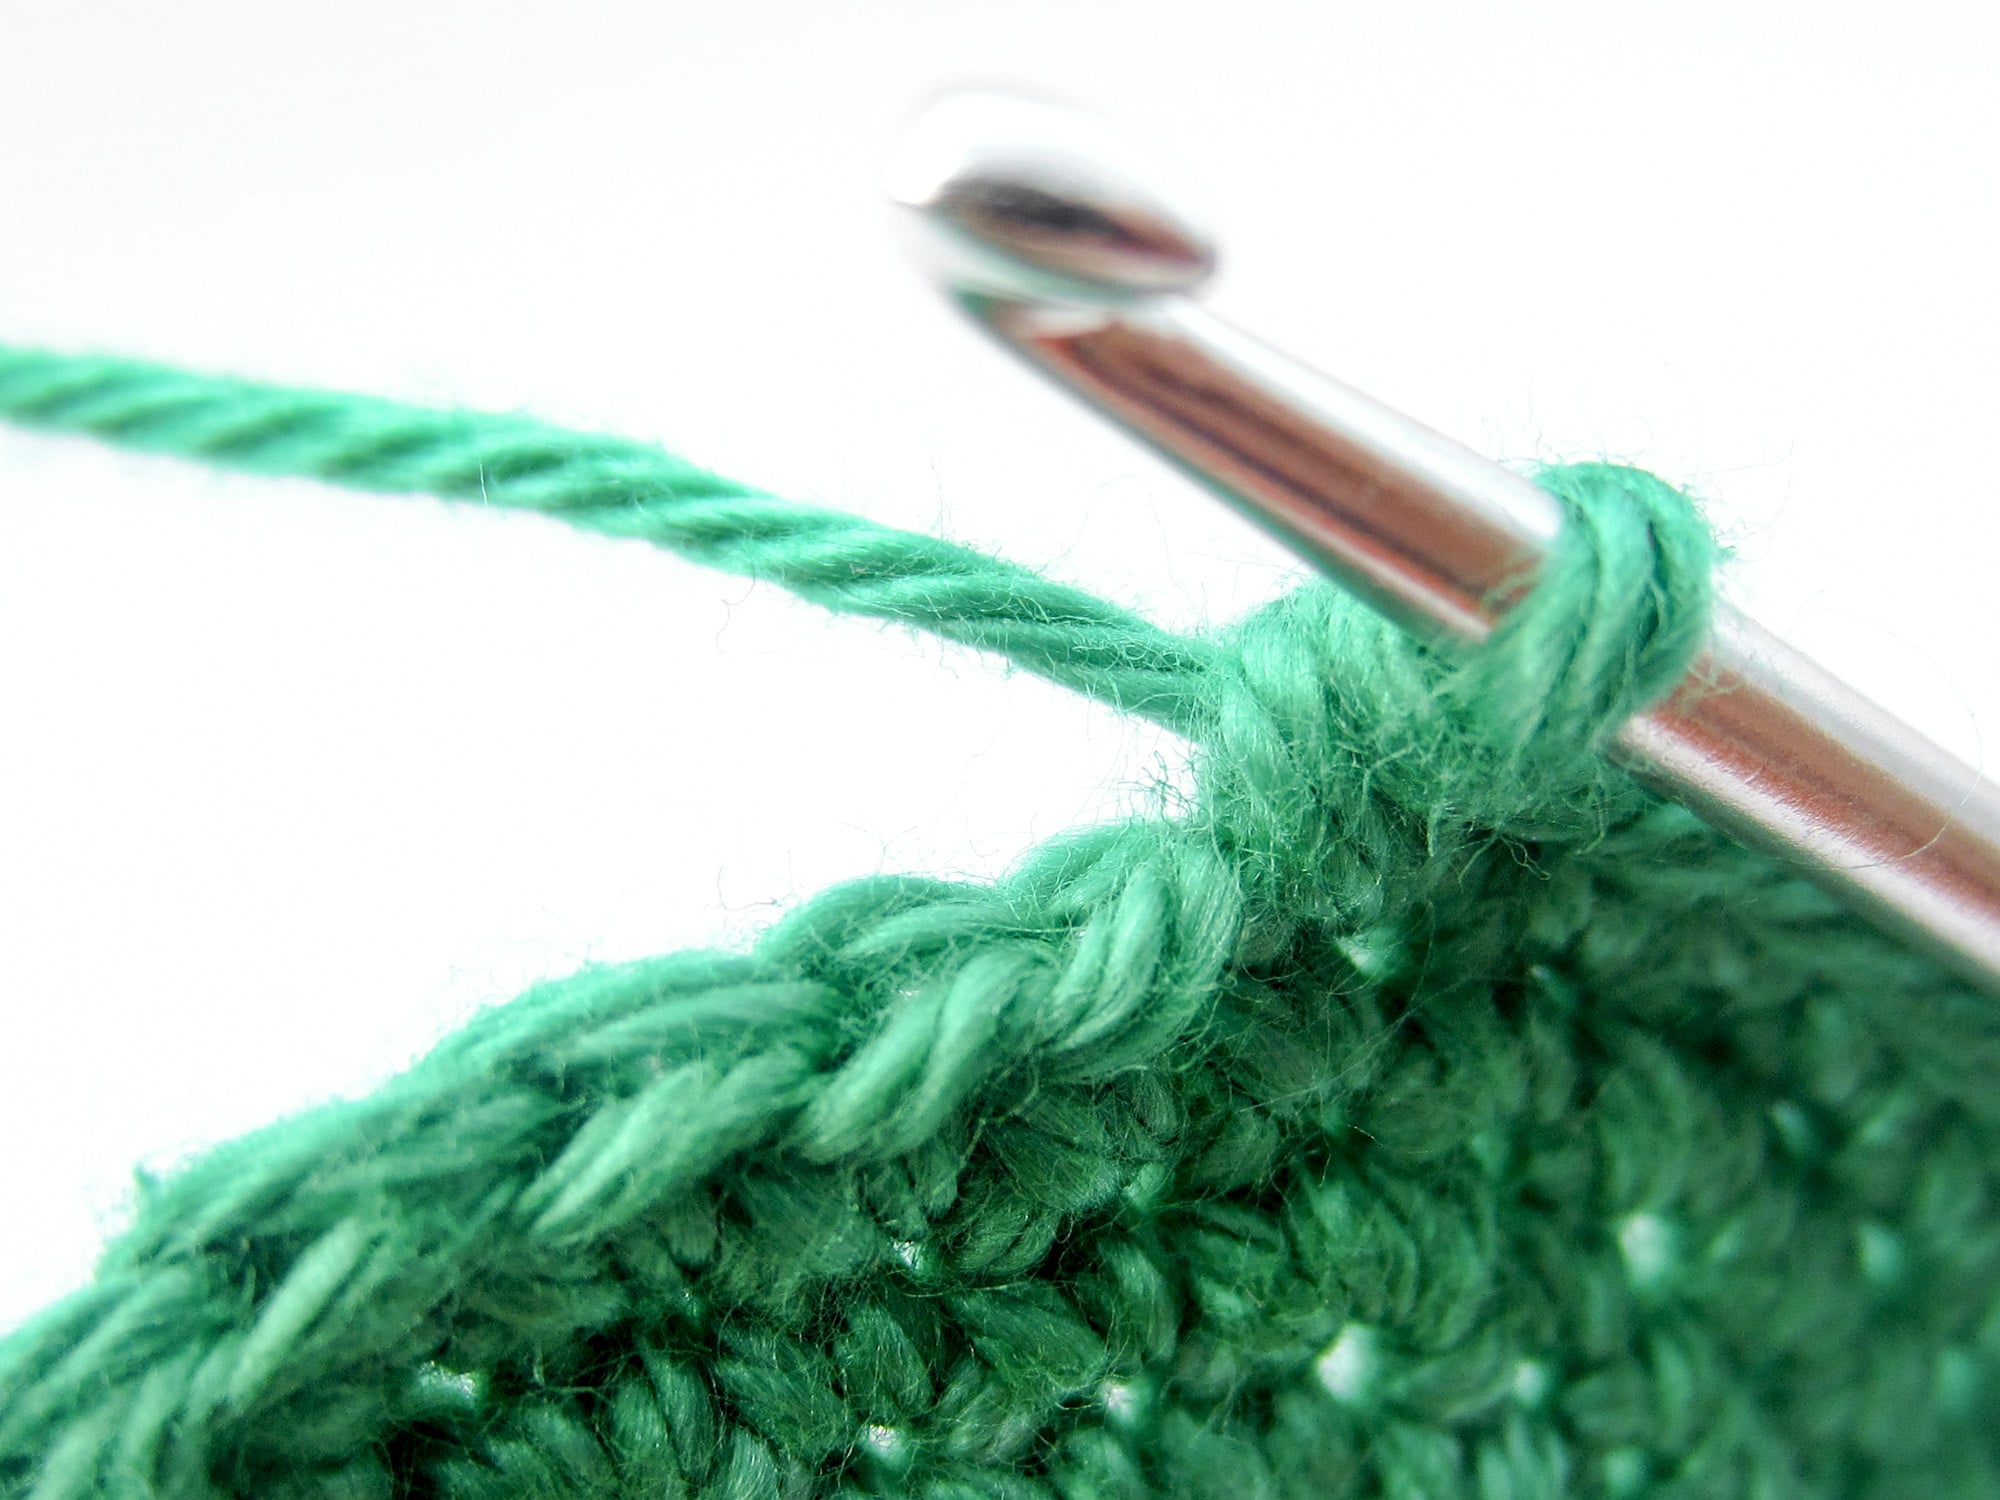
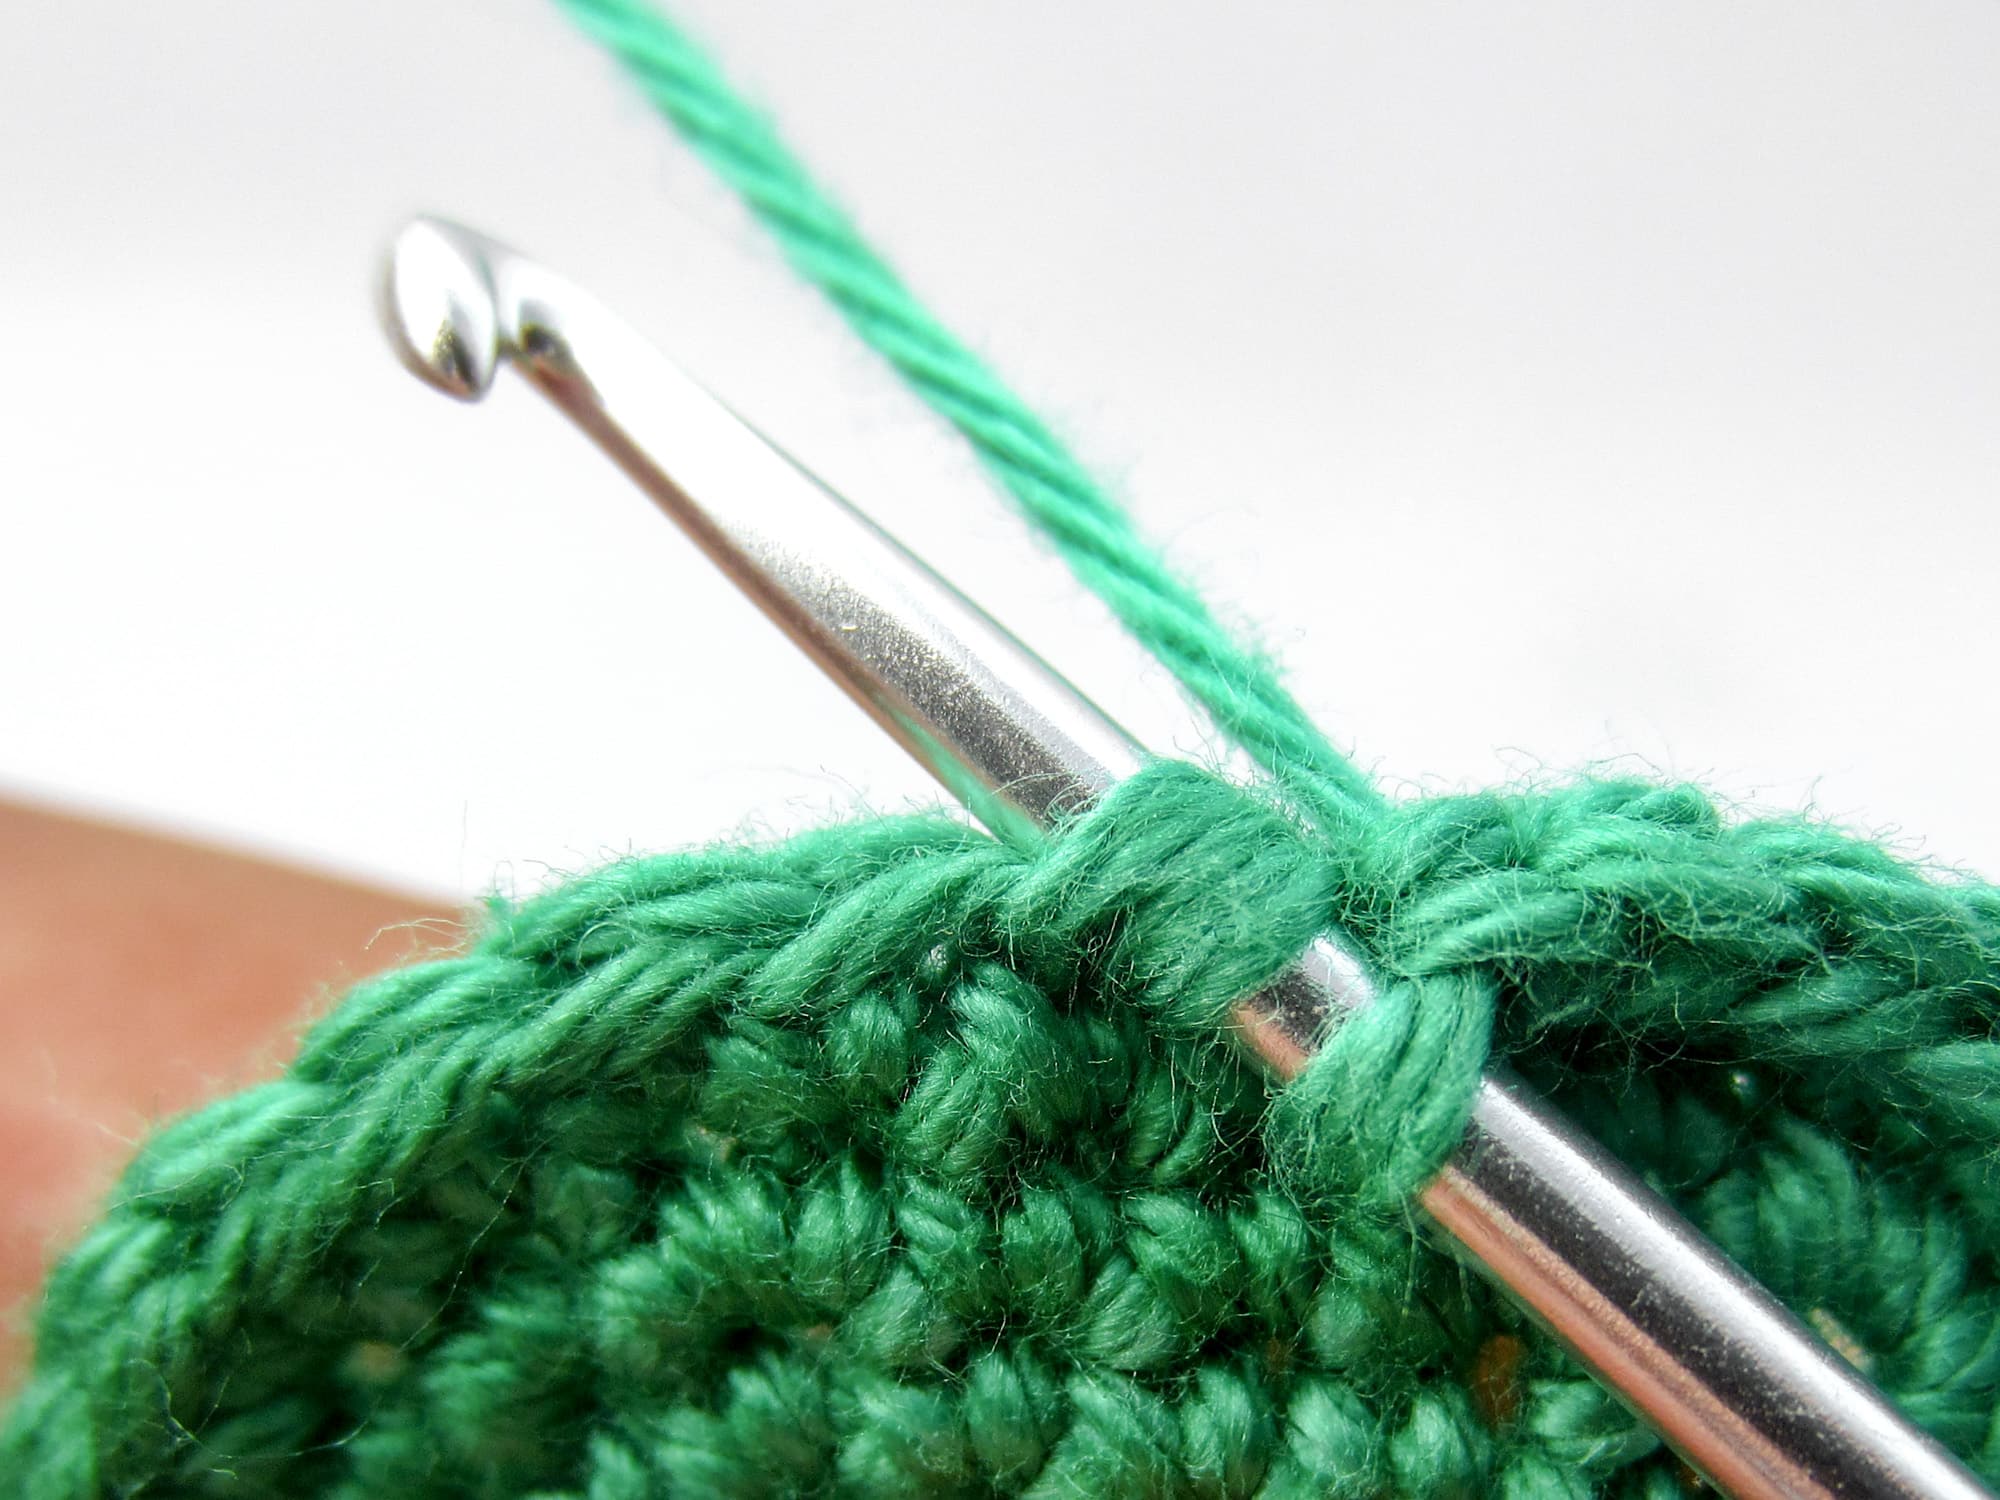
- Step 2: Instead of yarn over the thread and pulling it through, you ONLY stitch through the front loop of the next stitch again. You have 3 loops on the crochet hook.
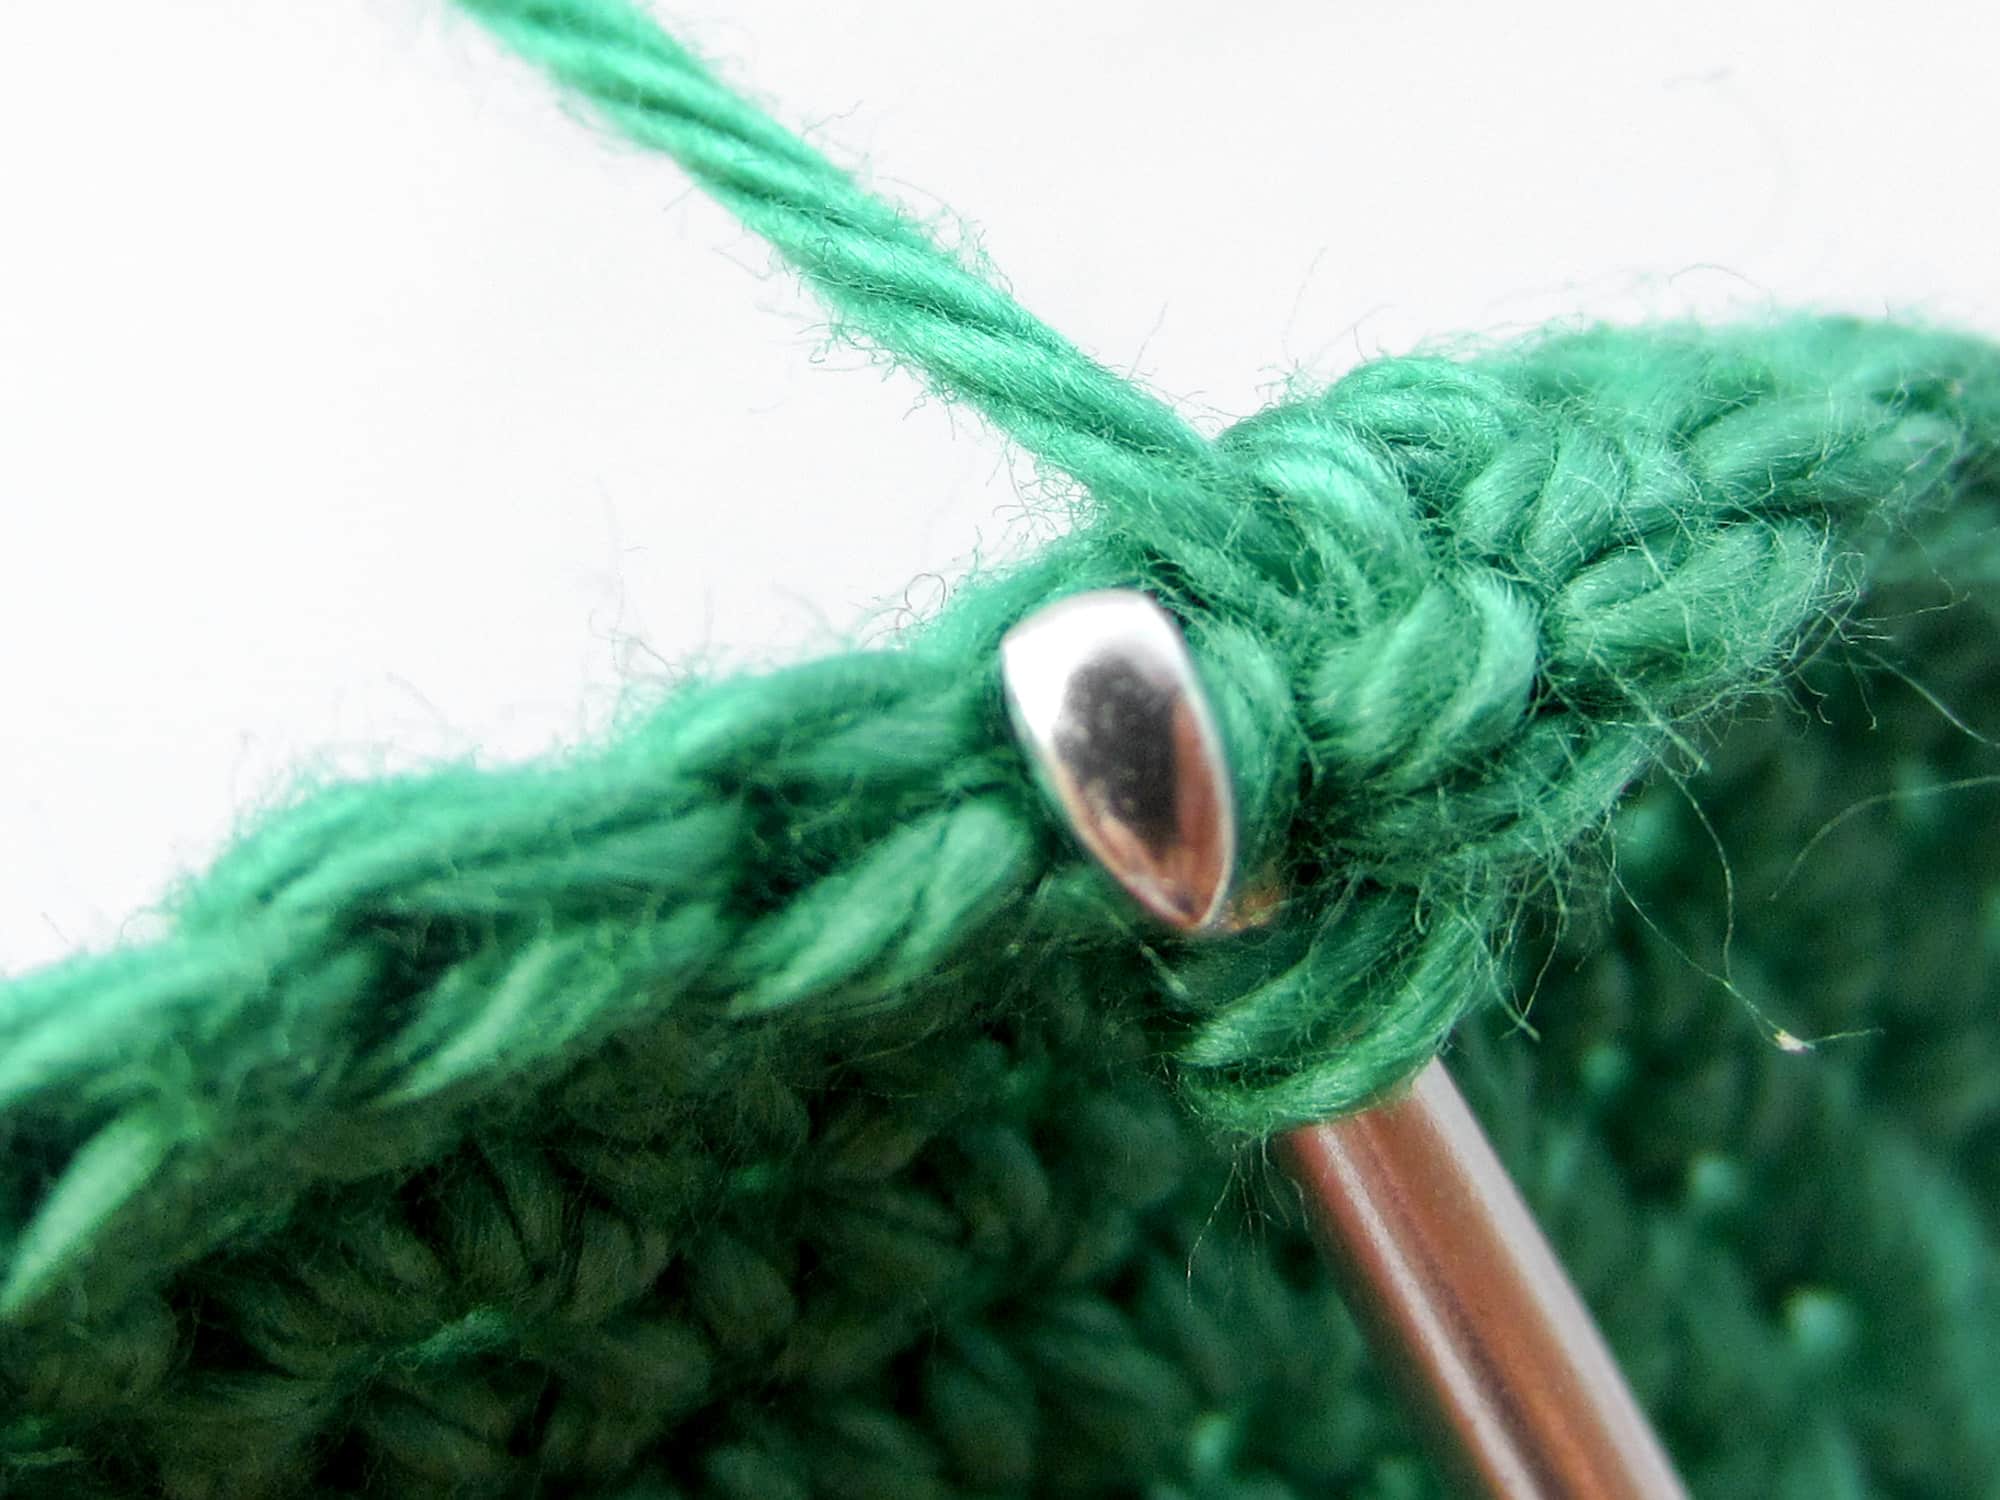
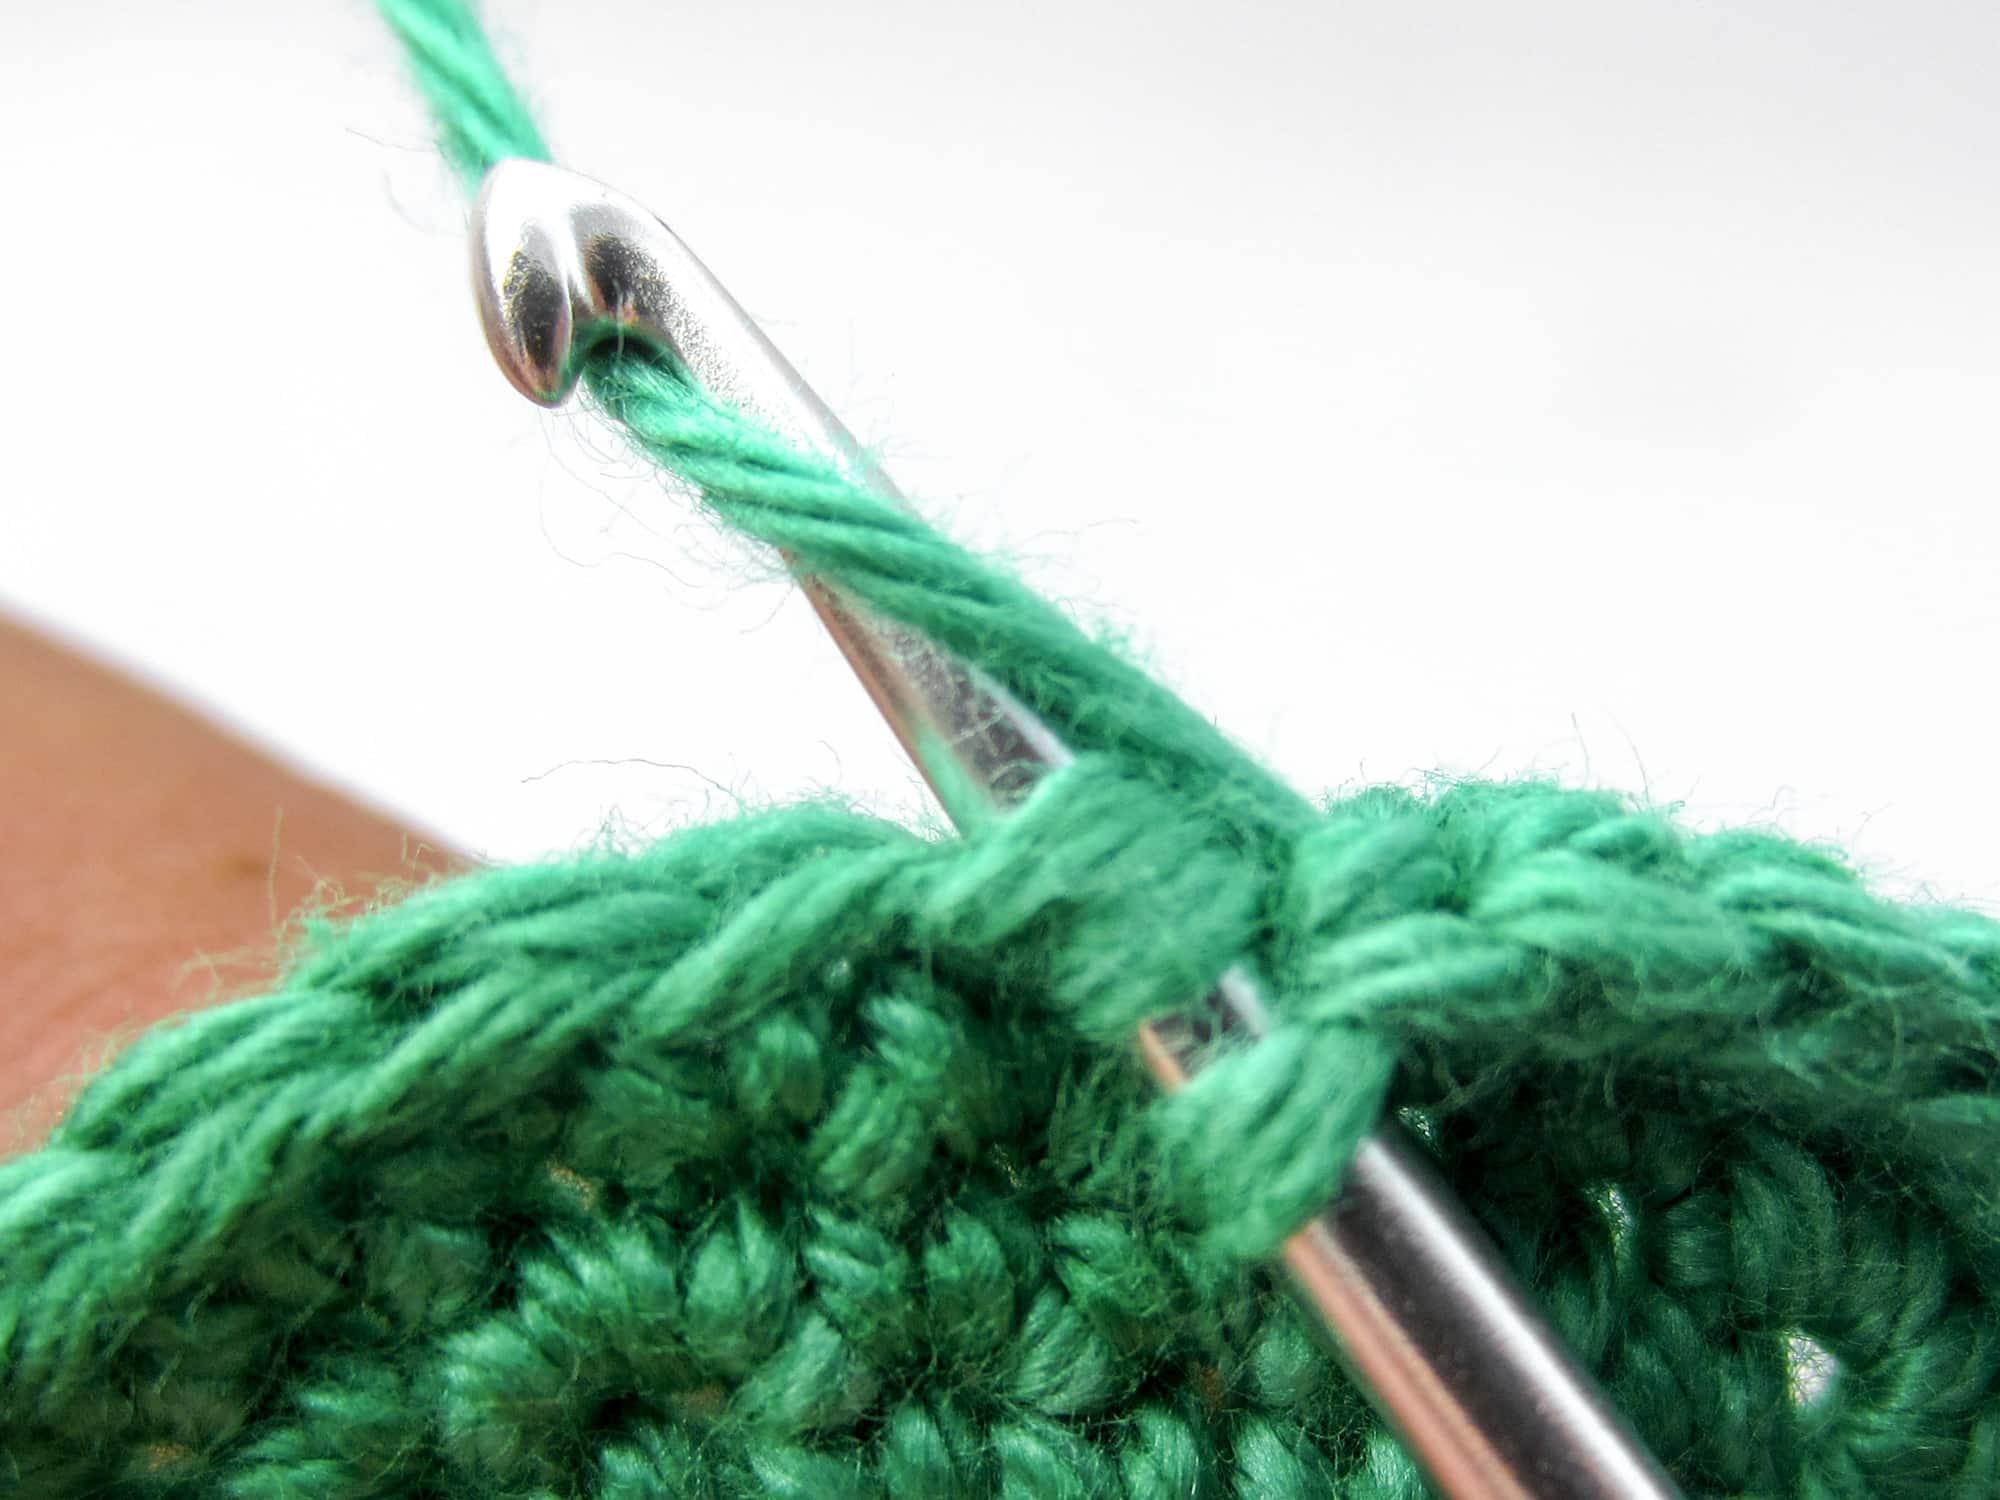
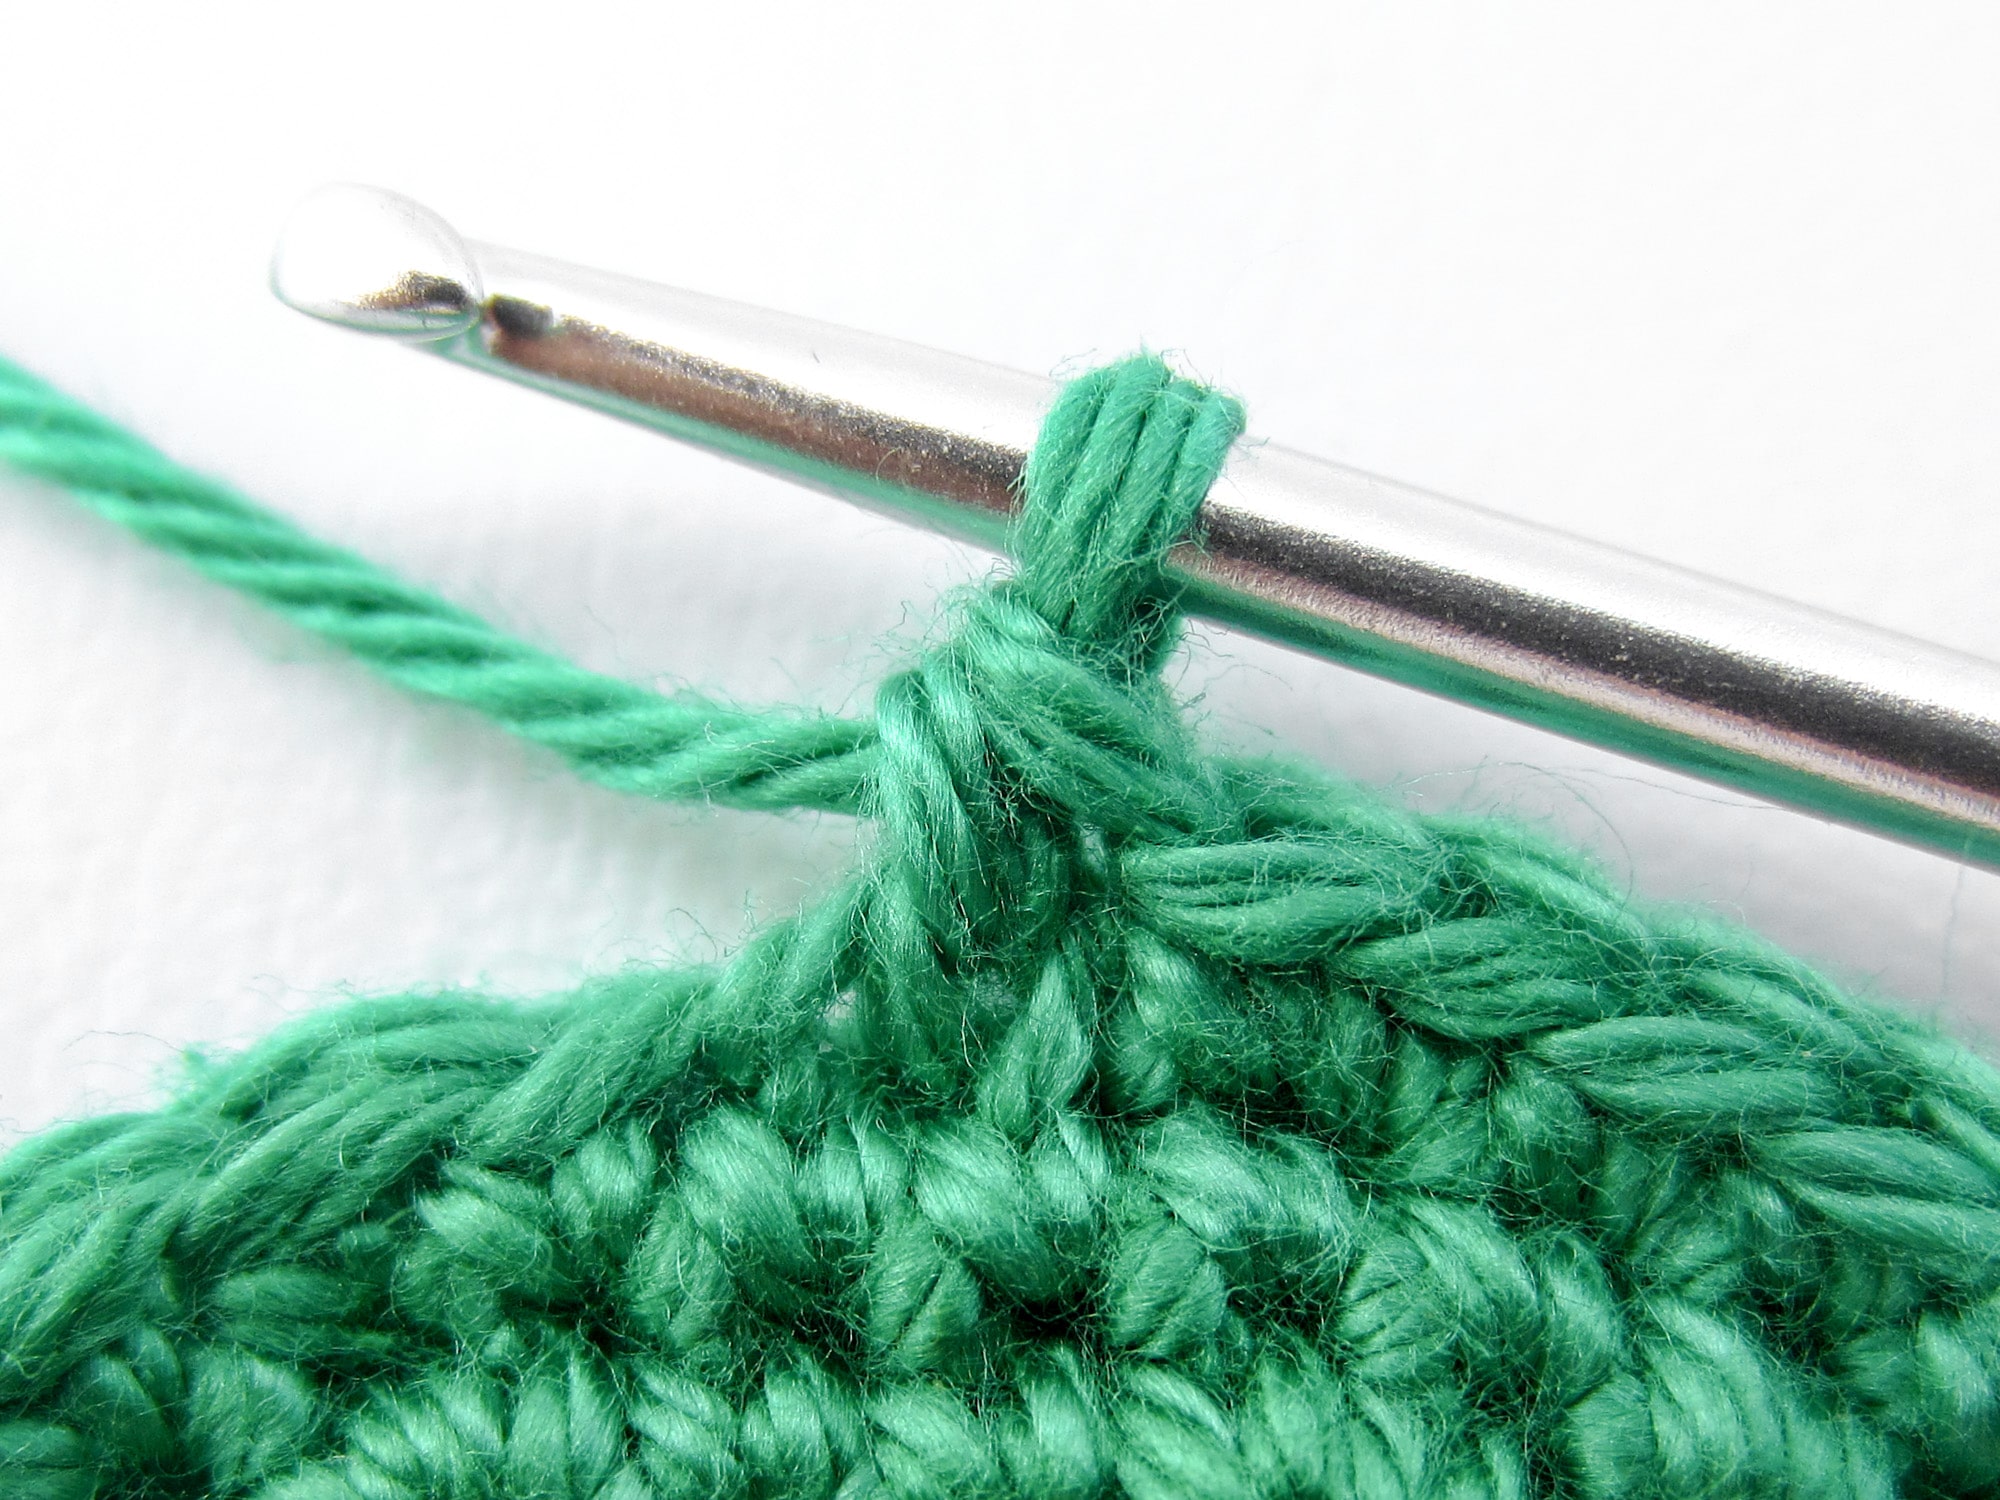
- Step 3: Now yarn over and pull the thread ONLY through the first 2 loops on the crochet hook. Now you have again only 2 loops on the crochet hook.
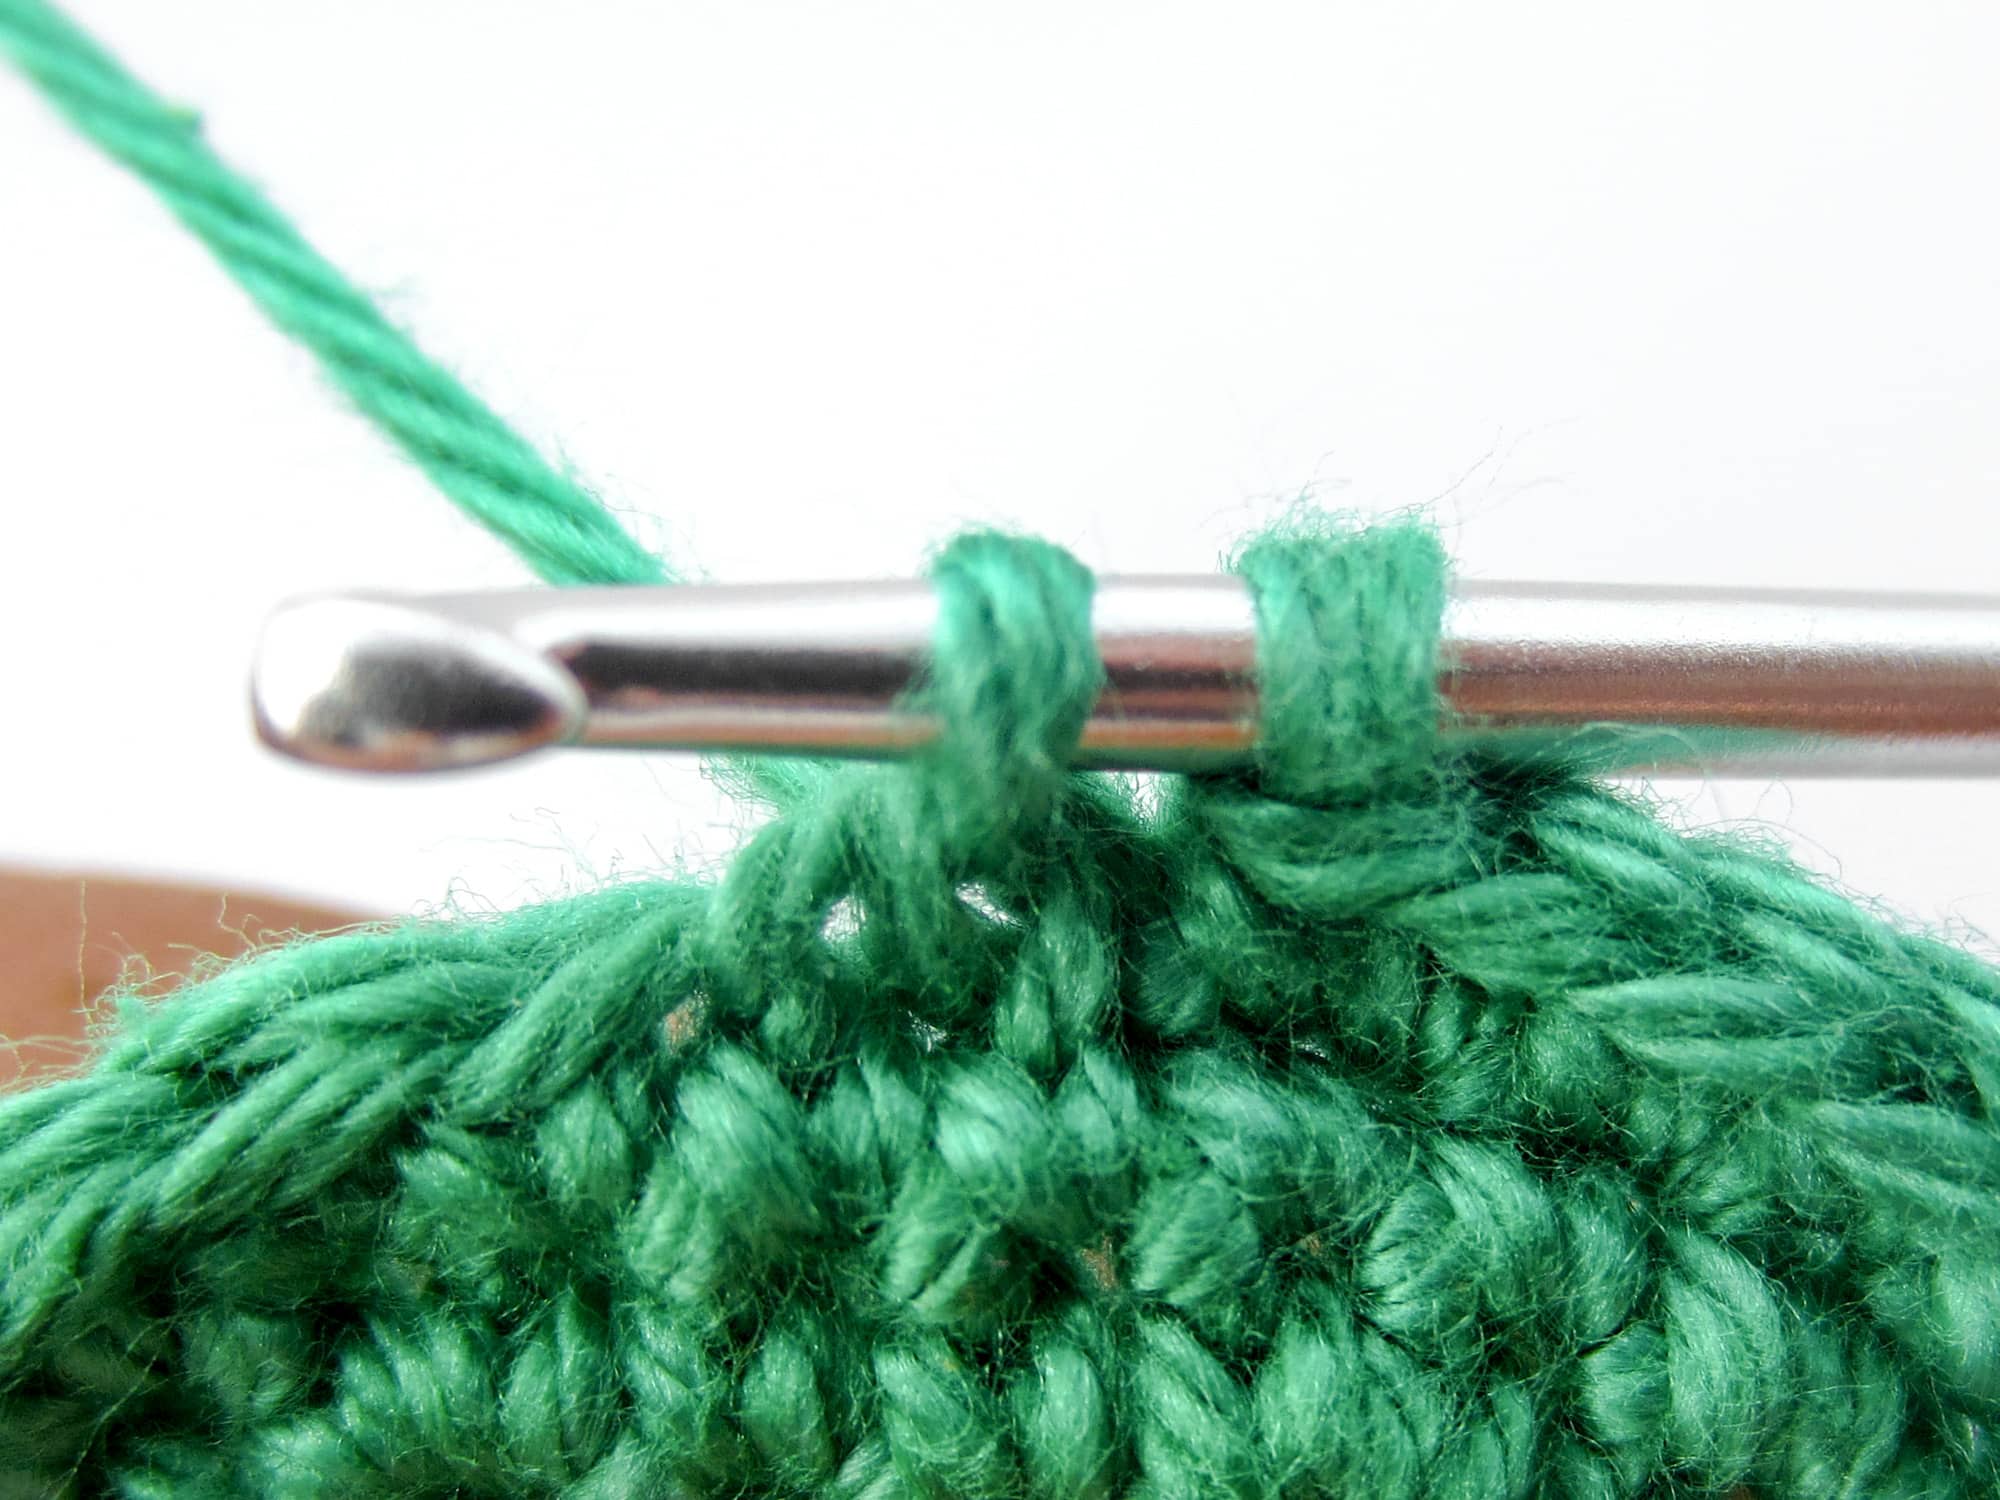
- Step 4: Yarn over again and pull it now through both loops on the crochet hook. You crocheted 2 stitches together.
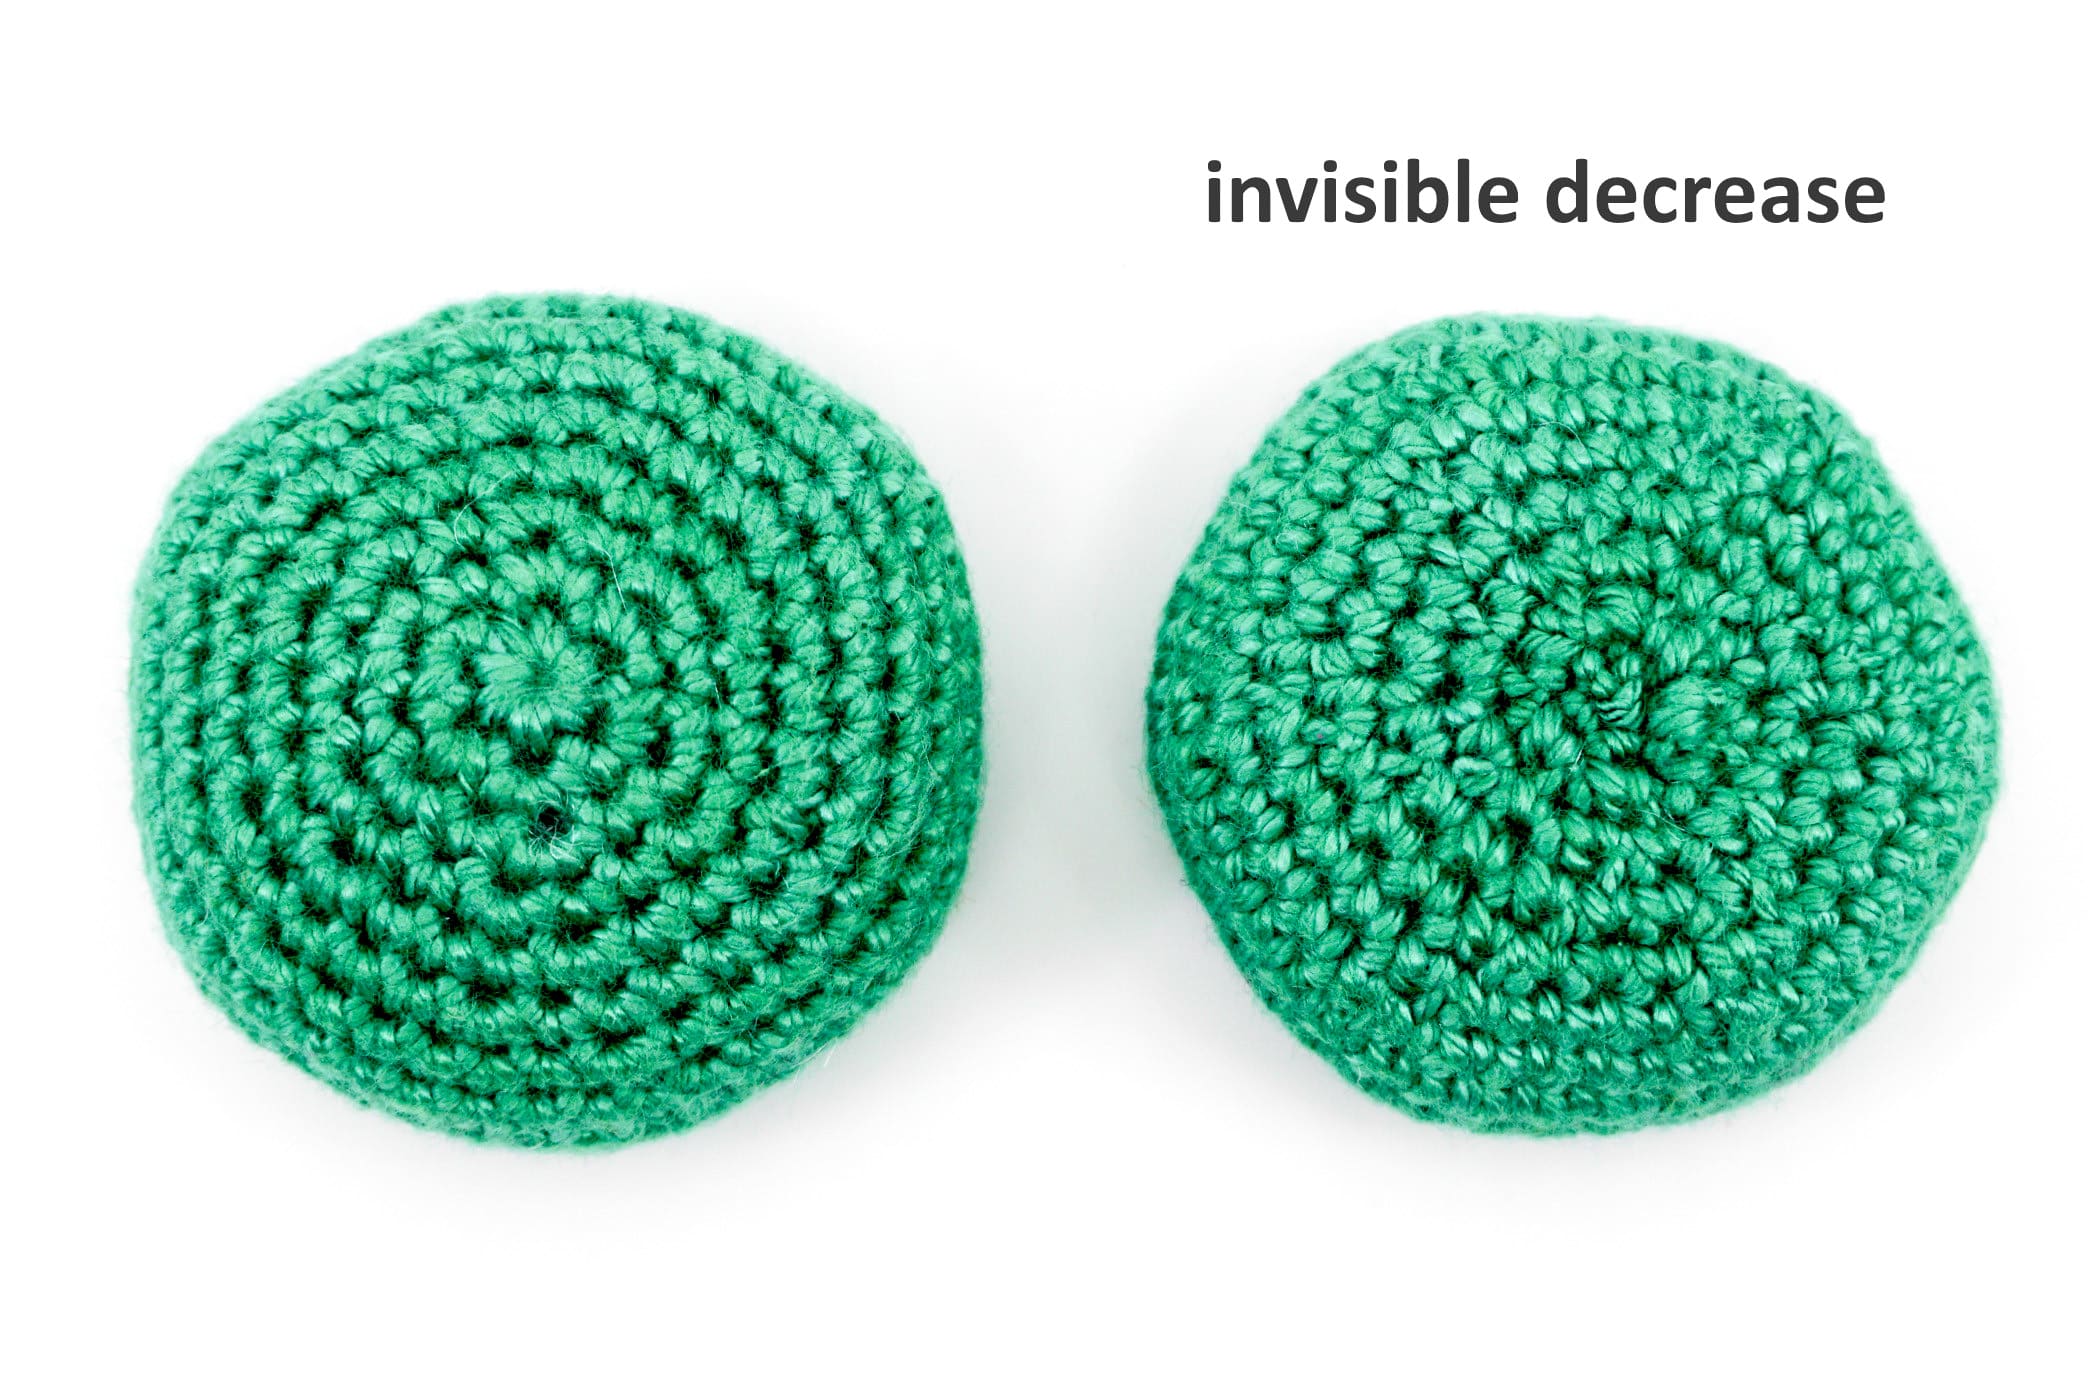
Even if it should not give the impression at first sight, the invisible decrease creates a clearly nicer stitch pattern which resembles the stitch pattern of normally crocheted single crochet stitches much more than with the normal decrease.
As with the normal decrease, you can also crochet more than 2 stitches together with the invisible decrease. You only have to push through as many front loops as the number of stitches you want to crochet together.
No matter if you crochet the normal decrease or the invisible decrease, the more stitches you crochet together at once, the coarser and more obvious this decrease will be. The invisible decrease, just like the normal decrease, creates 1 stitch less for each crocheted decrease.
If you crochet in one round 2 stitches together, you end up with 1 stitch less than in the previous round. If you crochet 3 stitches together, thus 3 stitches become 1 stitch, i.e. you have 2 stitches less than in the previous round.
Following a comparison of how the invisible decrease looks compared to the part that was crocheted with increases.
When to Use the Different Decreases
Learn both methods, because depending on what you are crocheting, there may be different instructions in the respective pattern as to which type of decrease to use.
In general, however, you should ALWAYS remember to use the invisible decrease for all amigurumi projects, as far as this is possible, as it simply produces the better and more beautiful result.
Both techniques can be used regardless of how and what you crochet, whether you crochet in rows, spiral rounds or joined rounds.