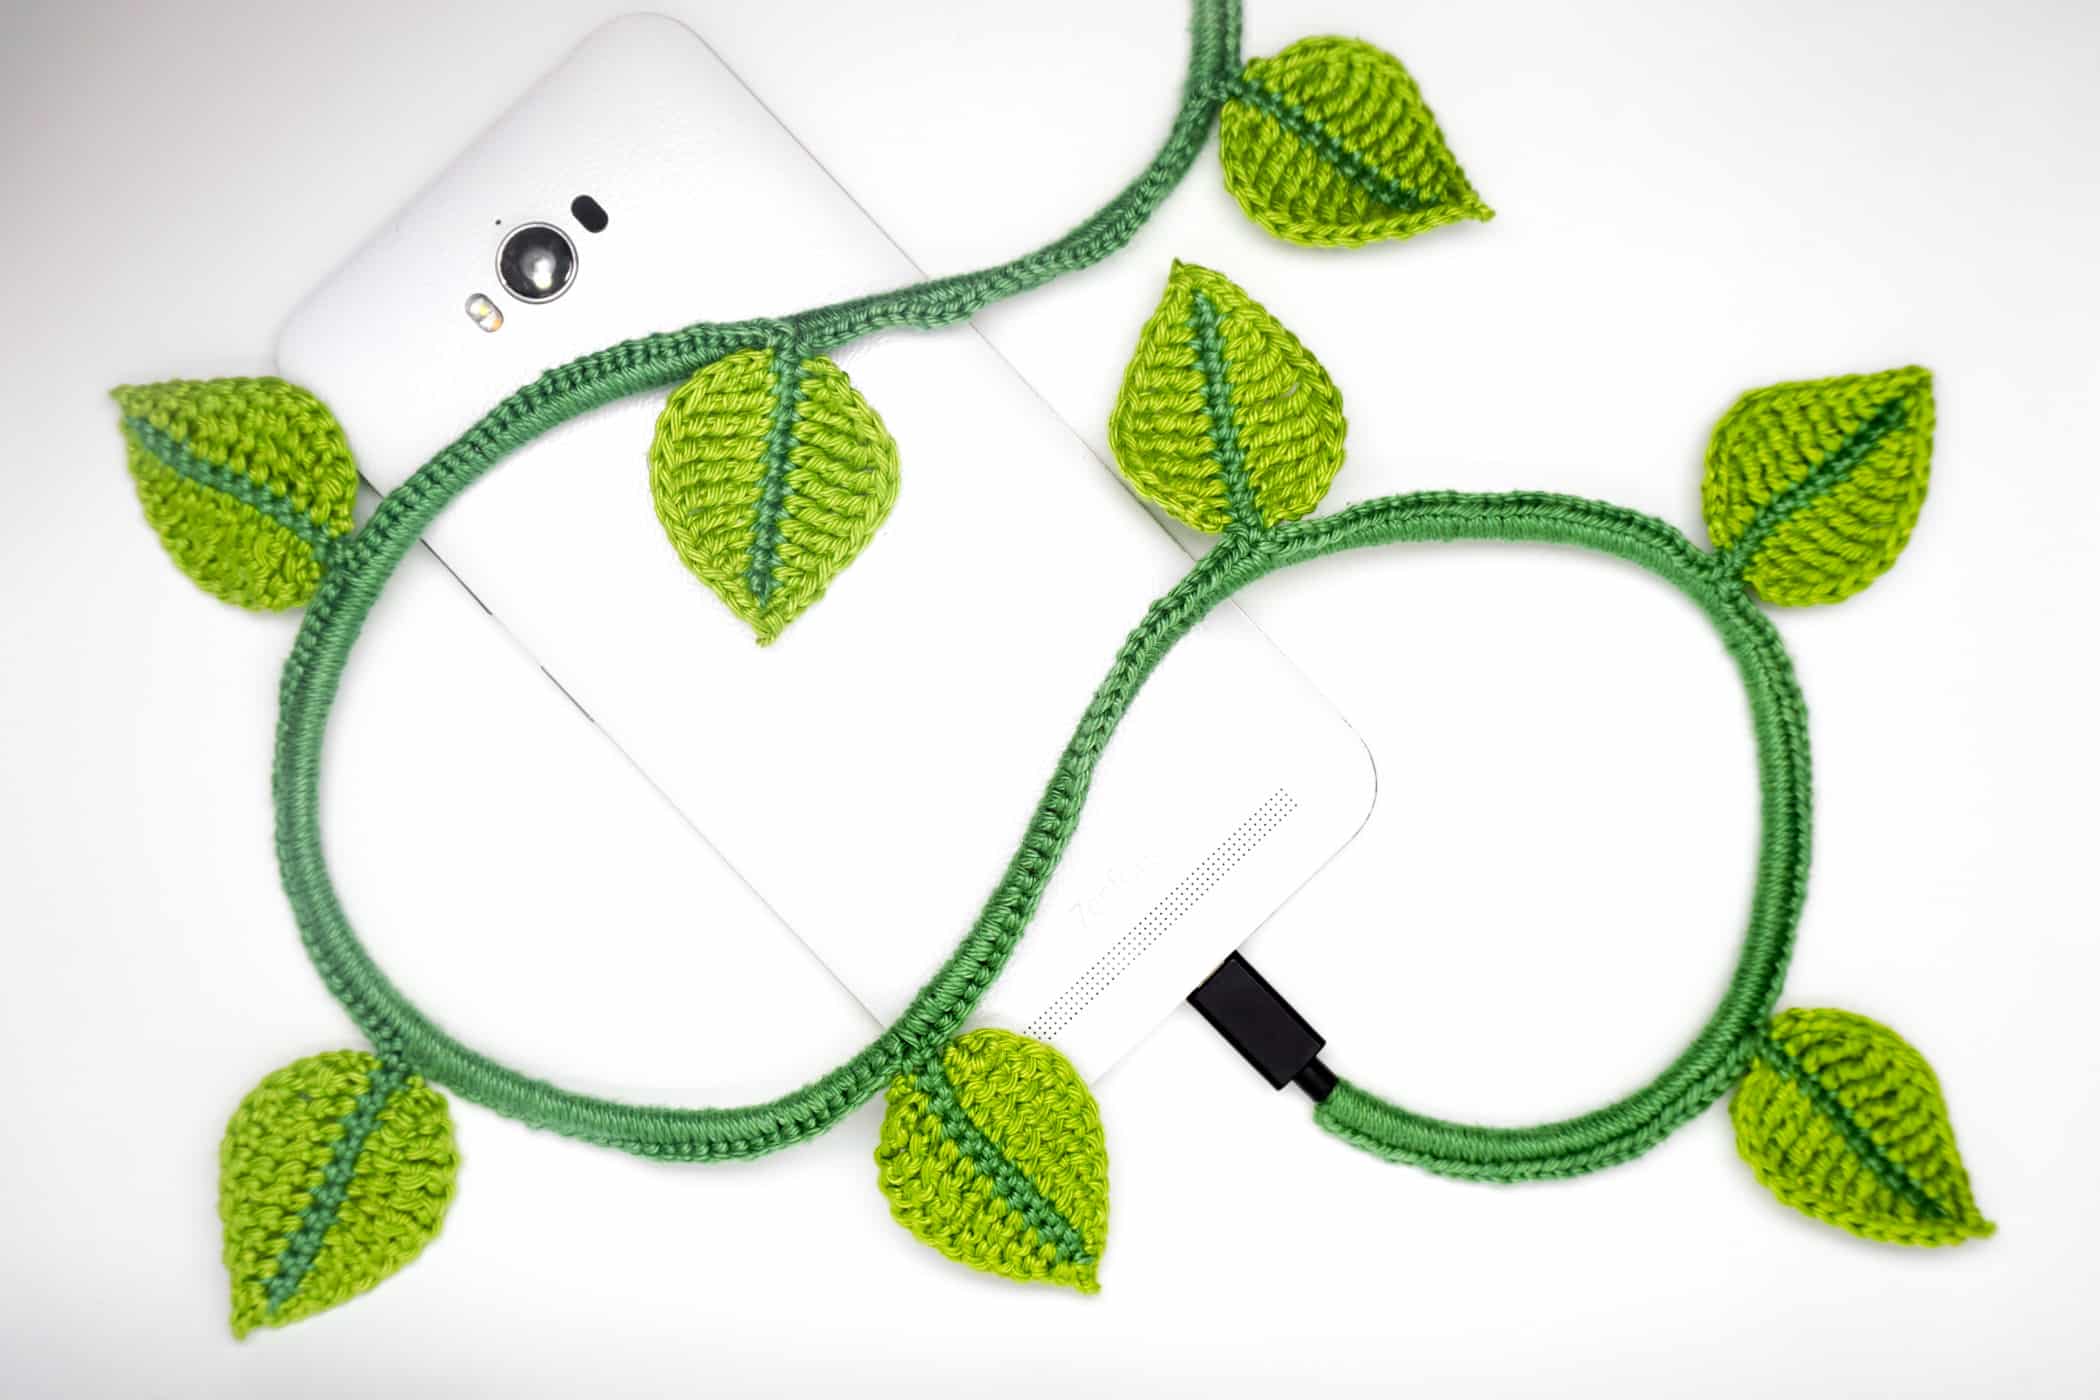
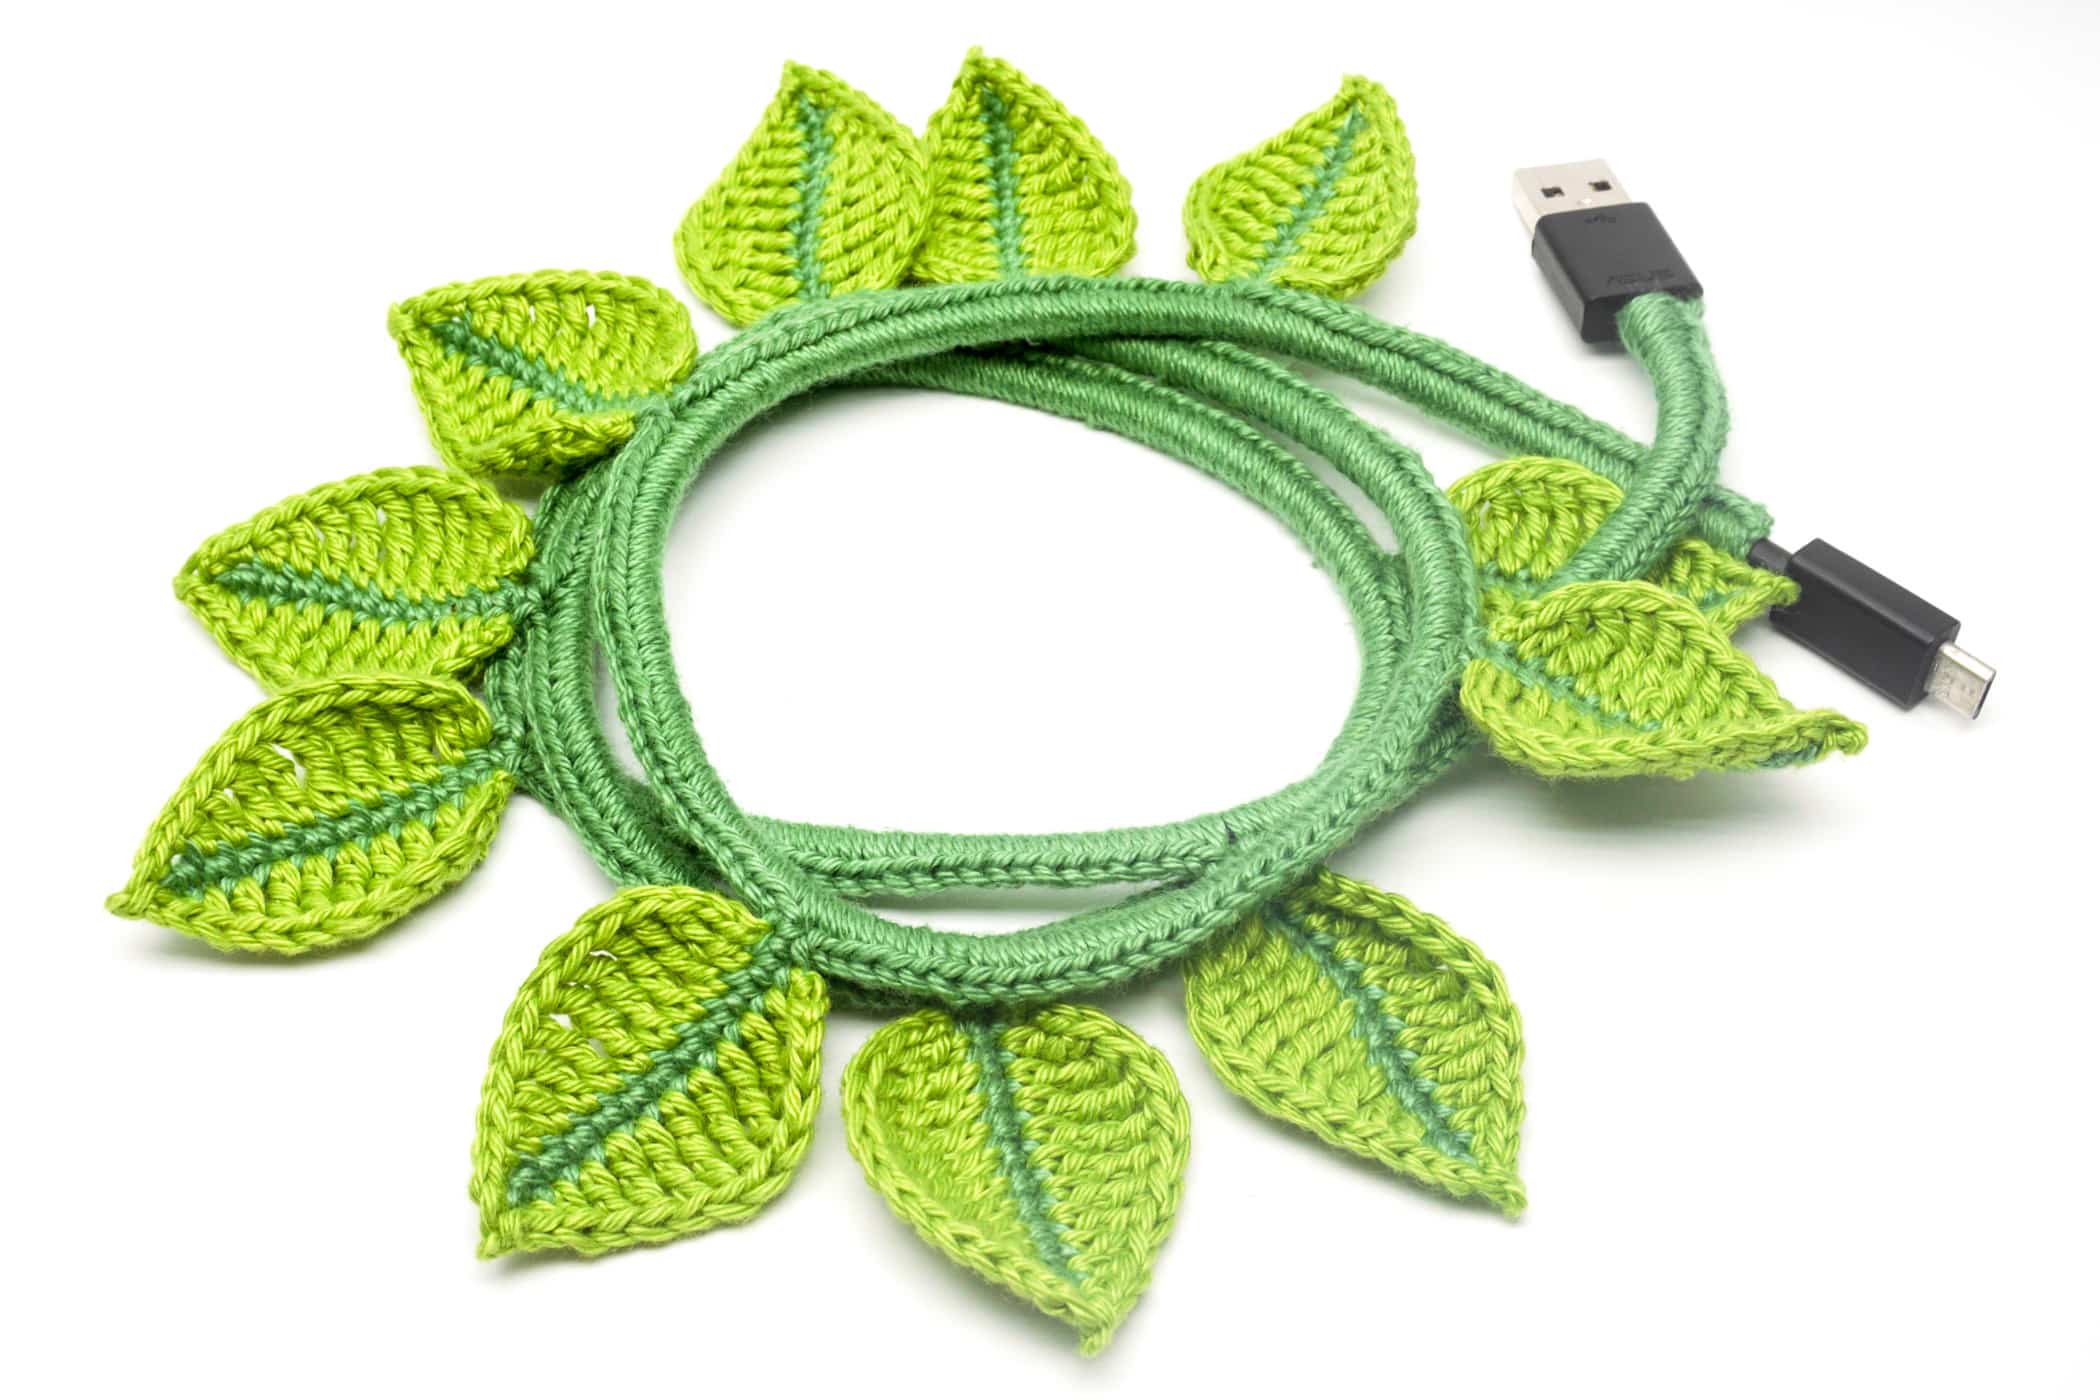
Bored by the dreary black and white cable chaos? Enhance your cables with some color, or in this case, with some green and pseudo-nature.
The technique described below, crochet around the cable, does not necessarily need to be crocheted with leaves, but can also be used to just add a little more color to the domestic cable chaos. Especially multi-colored yarn is particularly effective here.
The whole method is extremely easy and uncomplicated to learn and can be used for any kind of cable and cable, thick or thin.
To crochet around cables you only need to know how to crochet single crochet stitches.
The Cable Ivy on the other hand is crocheted with chain stitches, slip stitches, single crochet stitches, double crochet stitches, treble crochet stitches and double treble crochet stitches in rows and is easy to crochet.
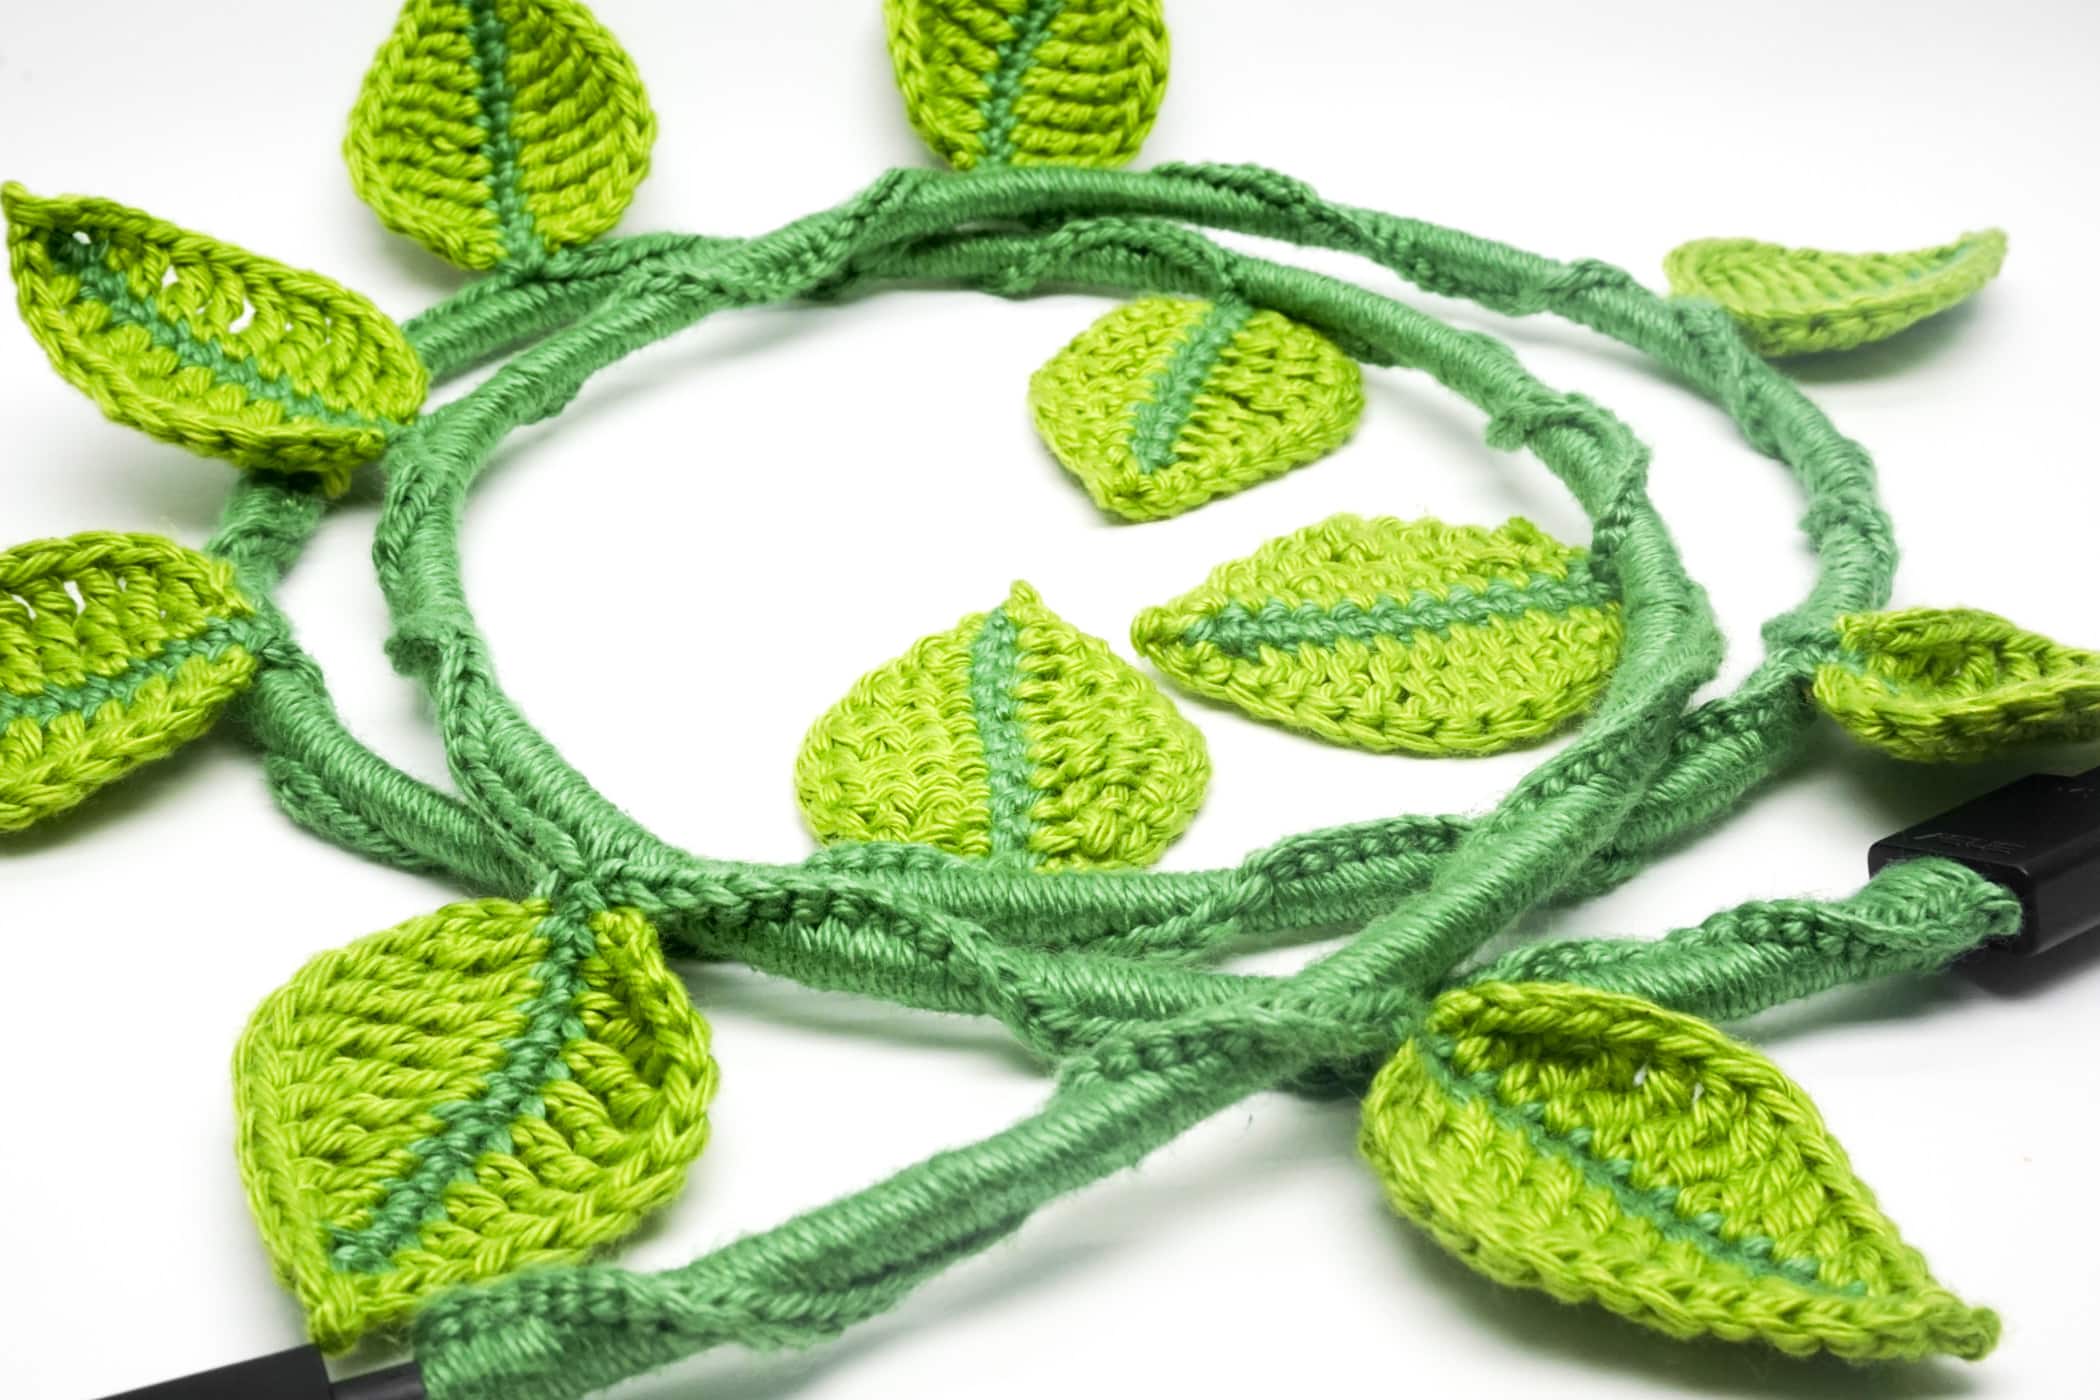
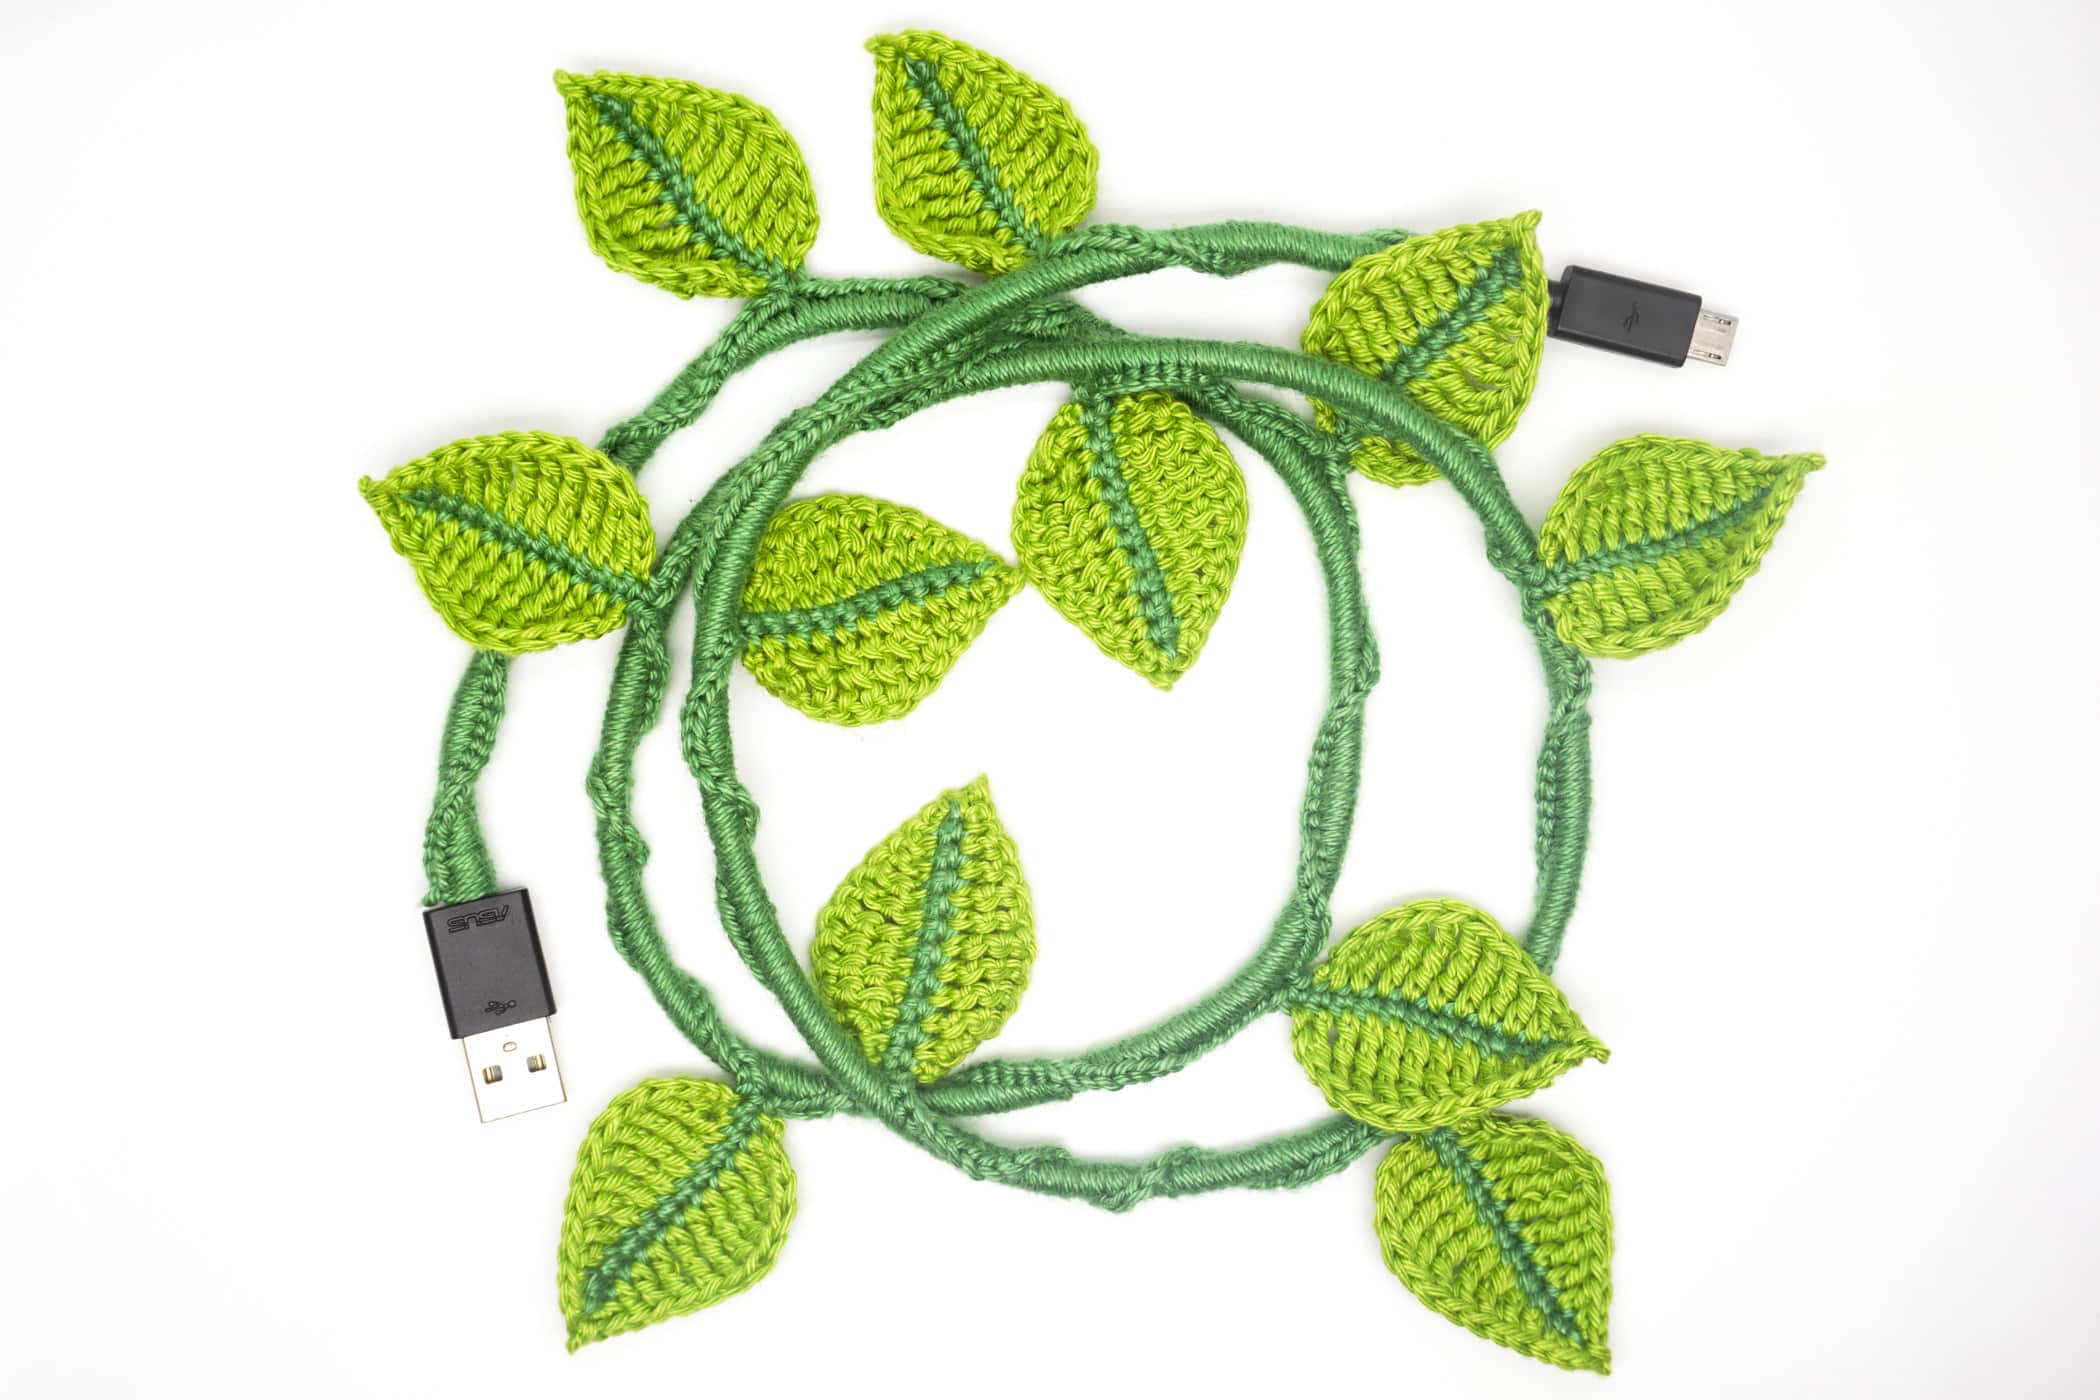
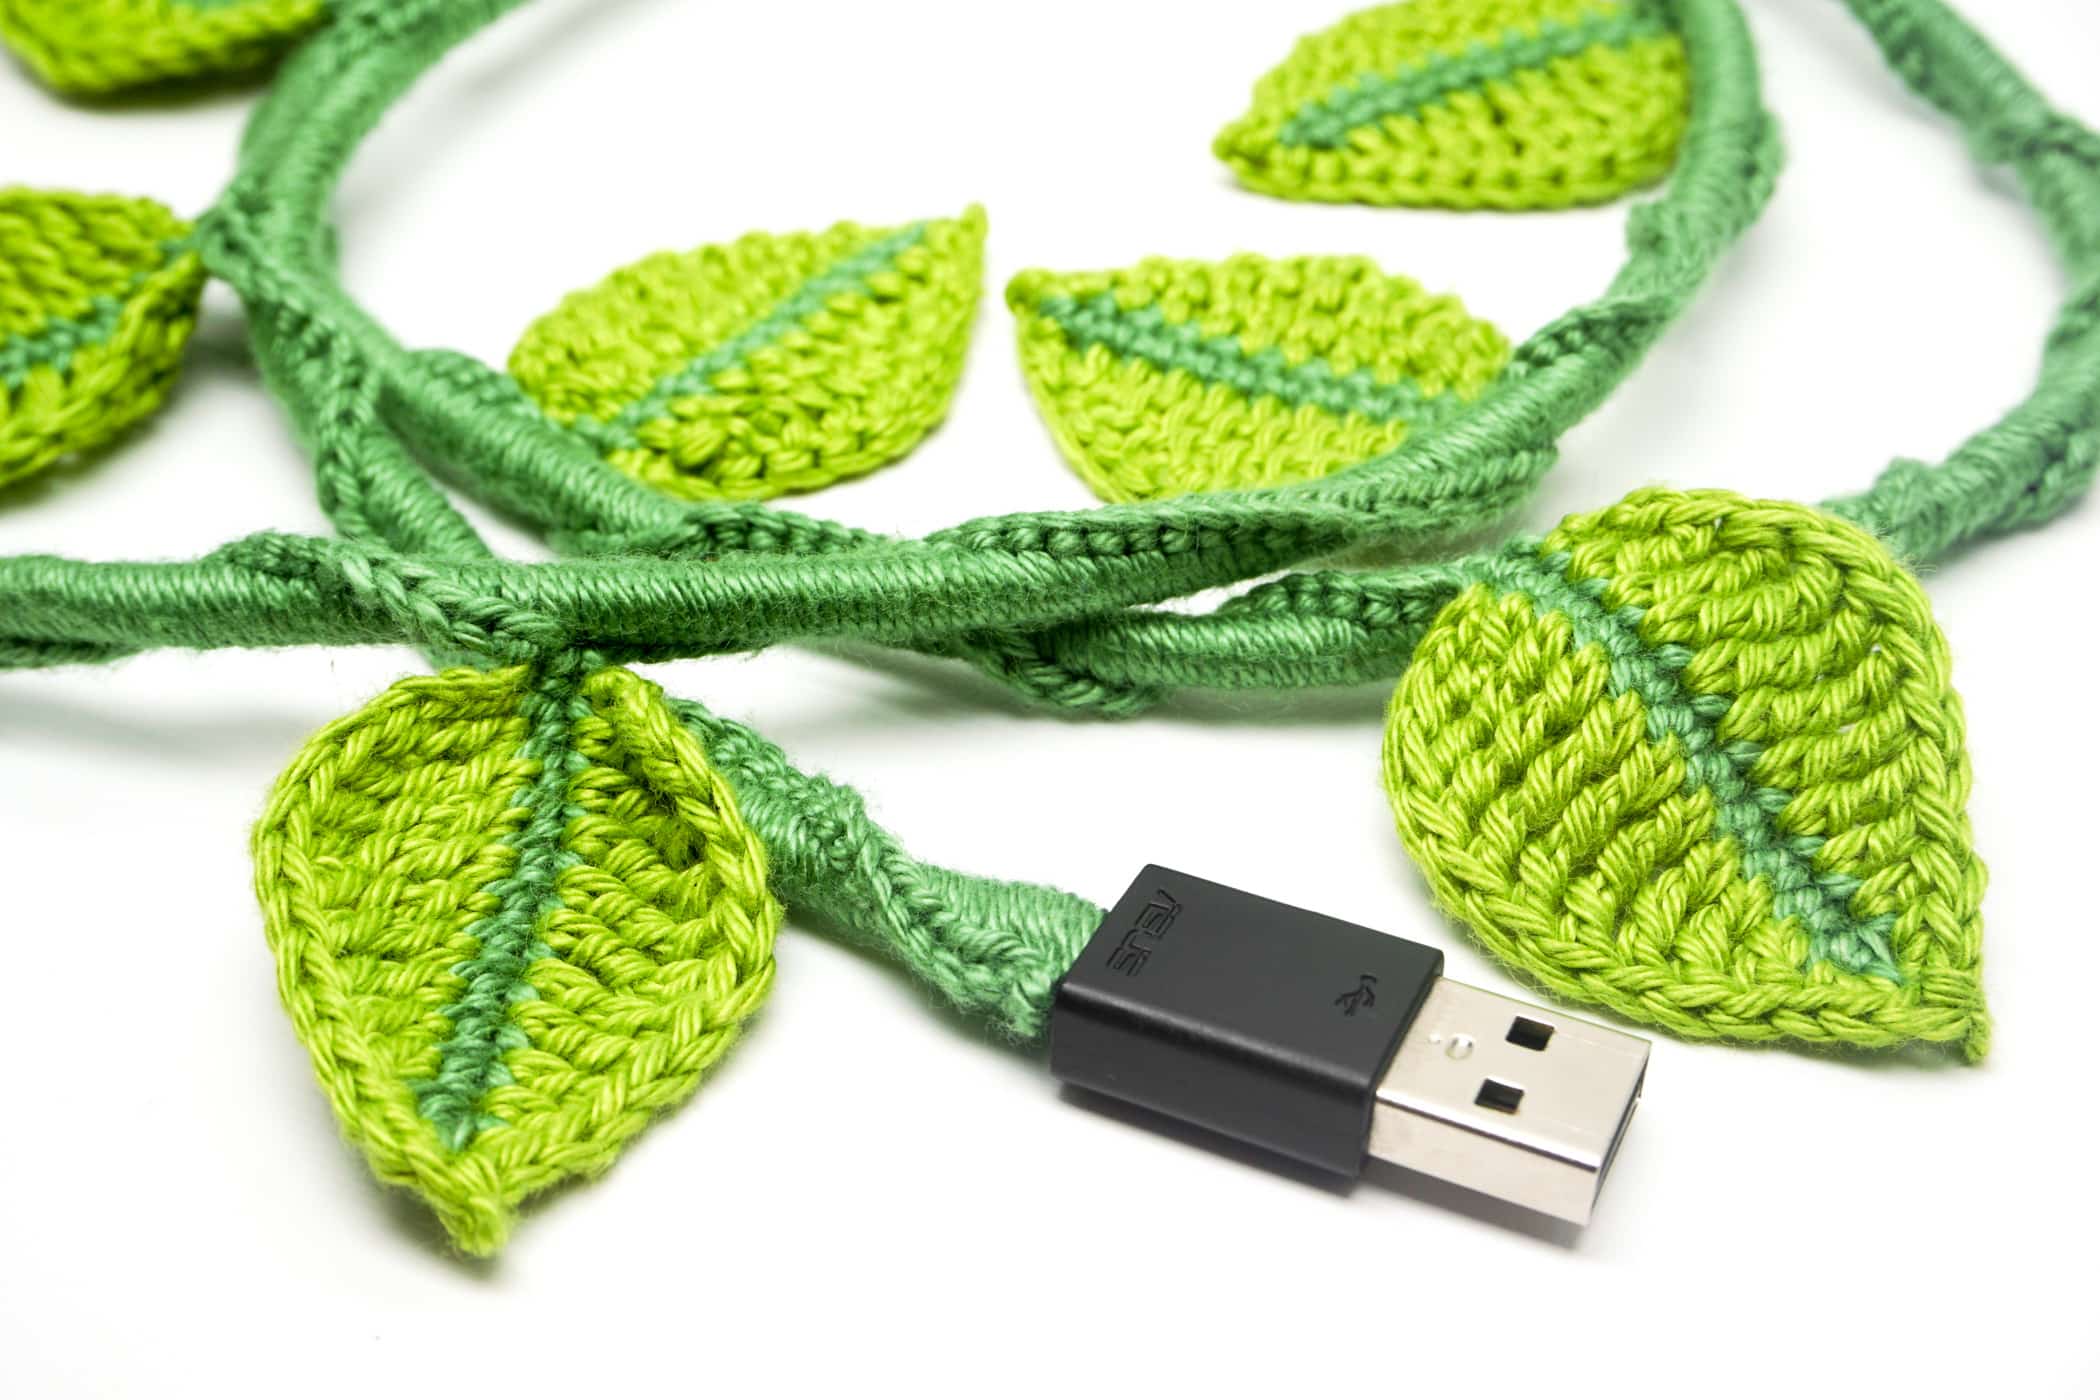
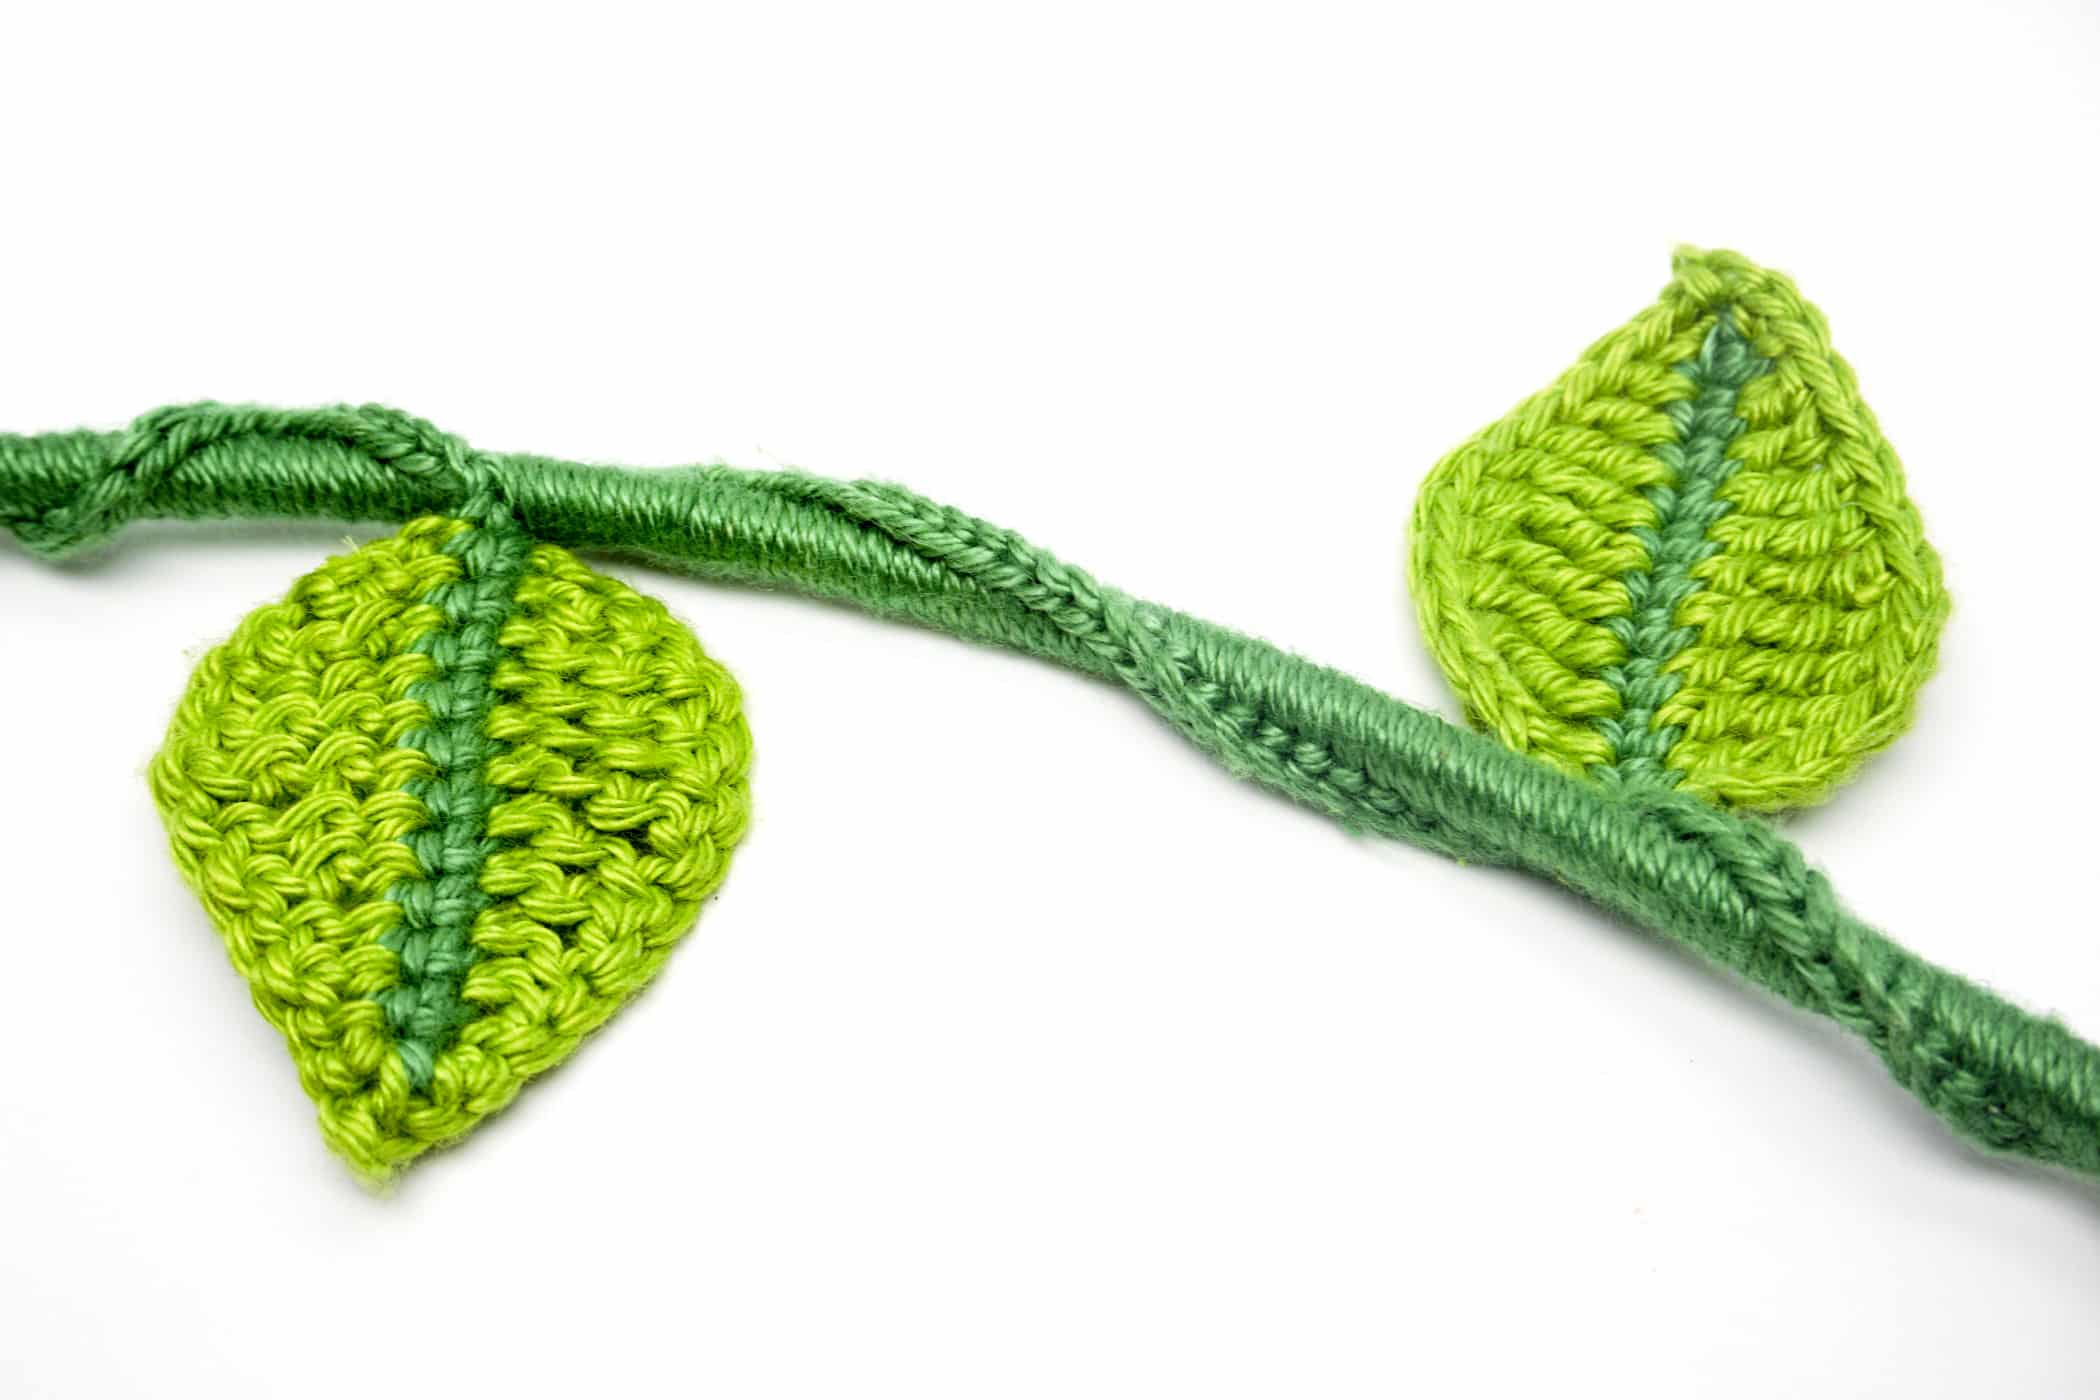
The depicted Cable Ivy has been crocheted with the “Schachenmayr Catania” yarn with a 2.5 mm crochet hook.
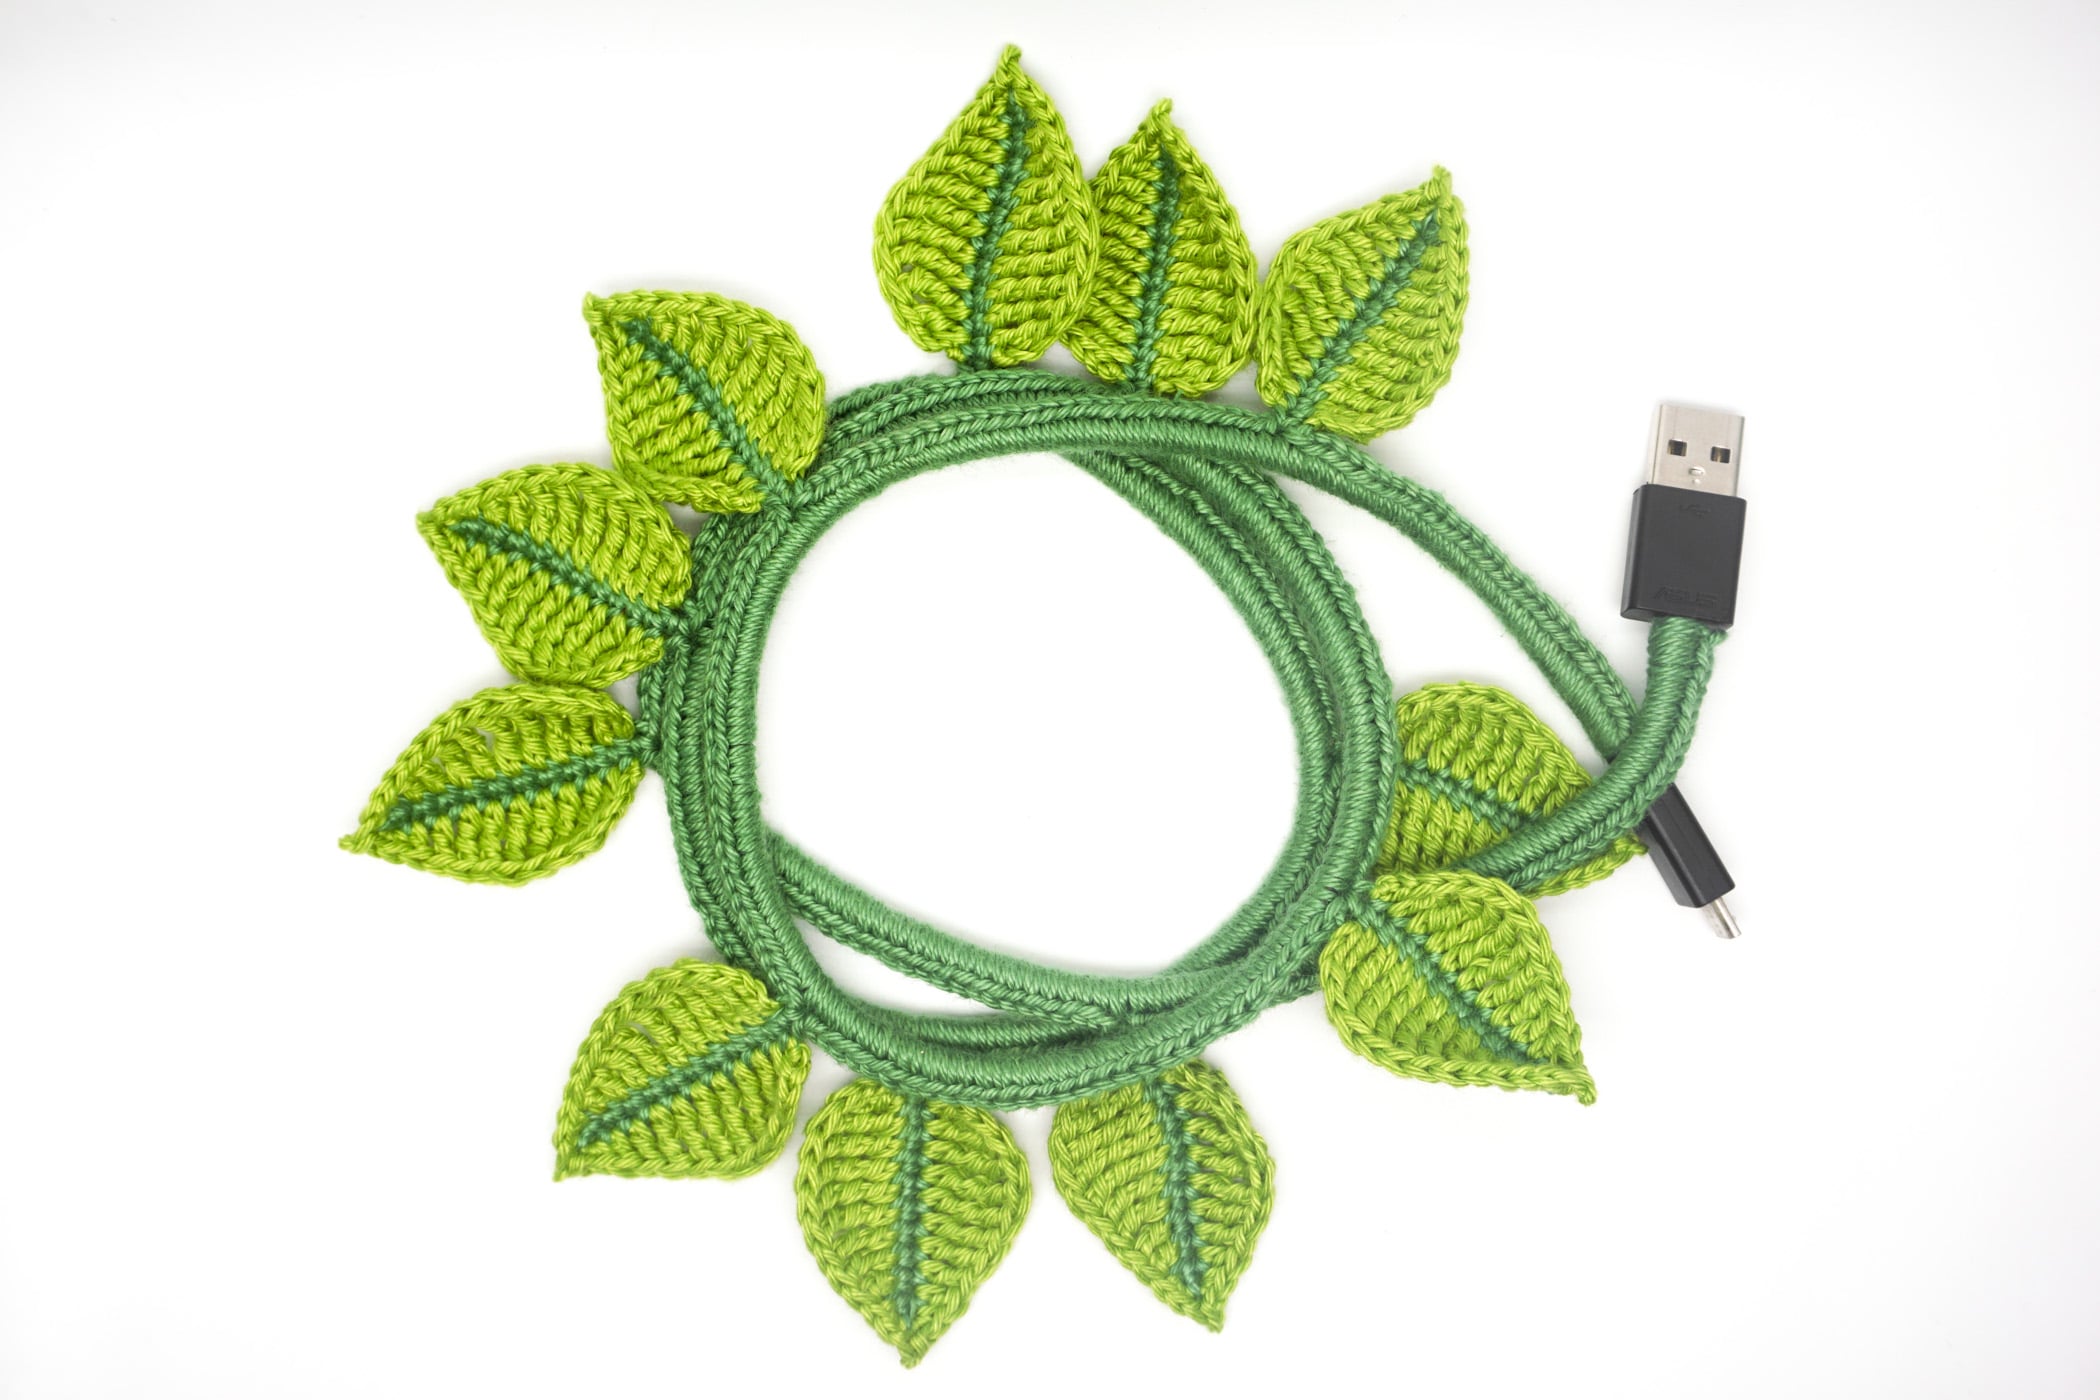
Free Cable Ivy Crochet Pattern
ATTENTION: The pattern, in whole or in parts, may not be published, resold, translated, changed or exchanged in any way whatsoever!
Needed Techniques
- Chain Stitch
- Slip Stitch
- Single Crochet (sc)
- Double Crochet
- Treble Crochet
- Double Treble Crochet
- Increase
Needed Materials and Tools
To order the materials click on the respective link (affiliate link).
- Colors: dark green, bright green
- This pattern was crocheted using the “Schachenmayr Catania” yarn (100% Cotton, Meterage: 125 m, Yarn Ball Weight: 50 g, Yarn Weight: Sport – 5ply / Fine (2)) in the following colors:
- Moss (Moos (412)), Apple (Apfel (205))
- 2.5 mm Crochet Hook
- Scissors
- Tapestry Needle
No products found.
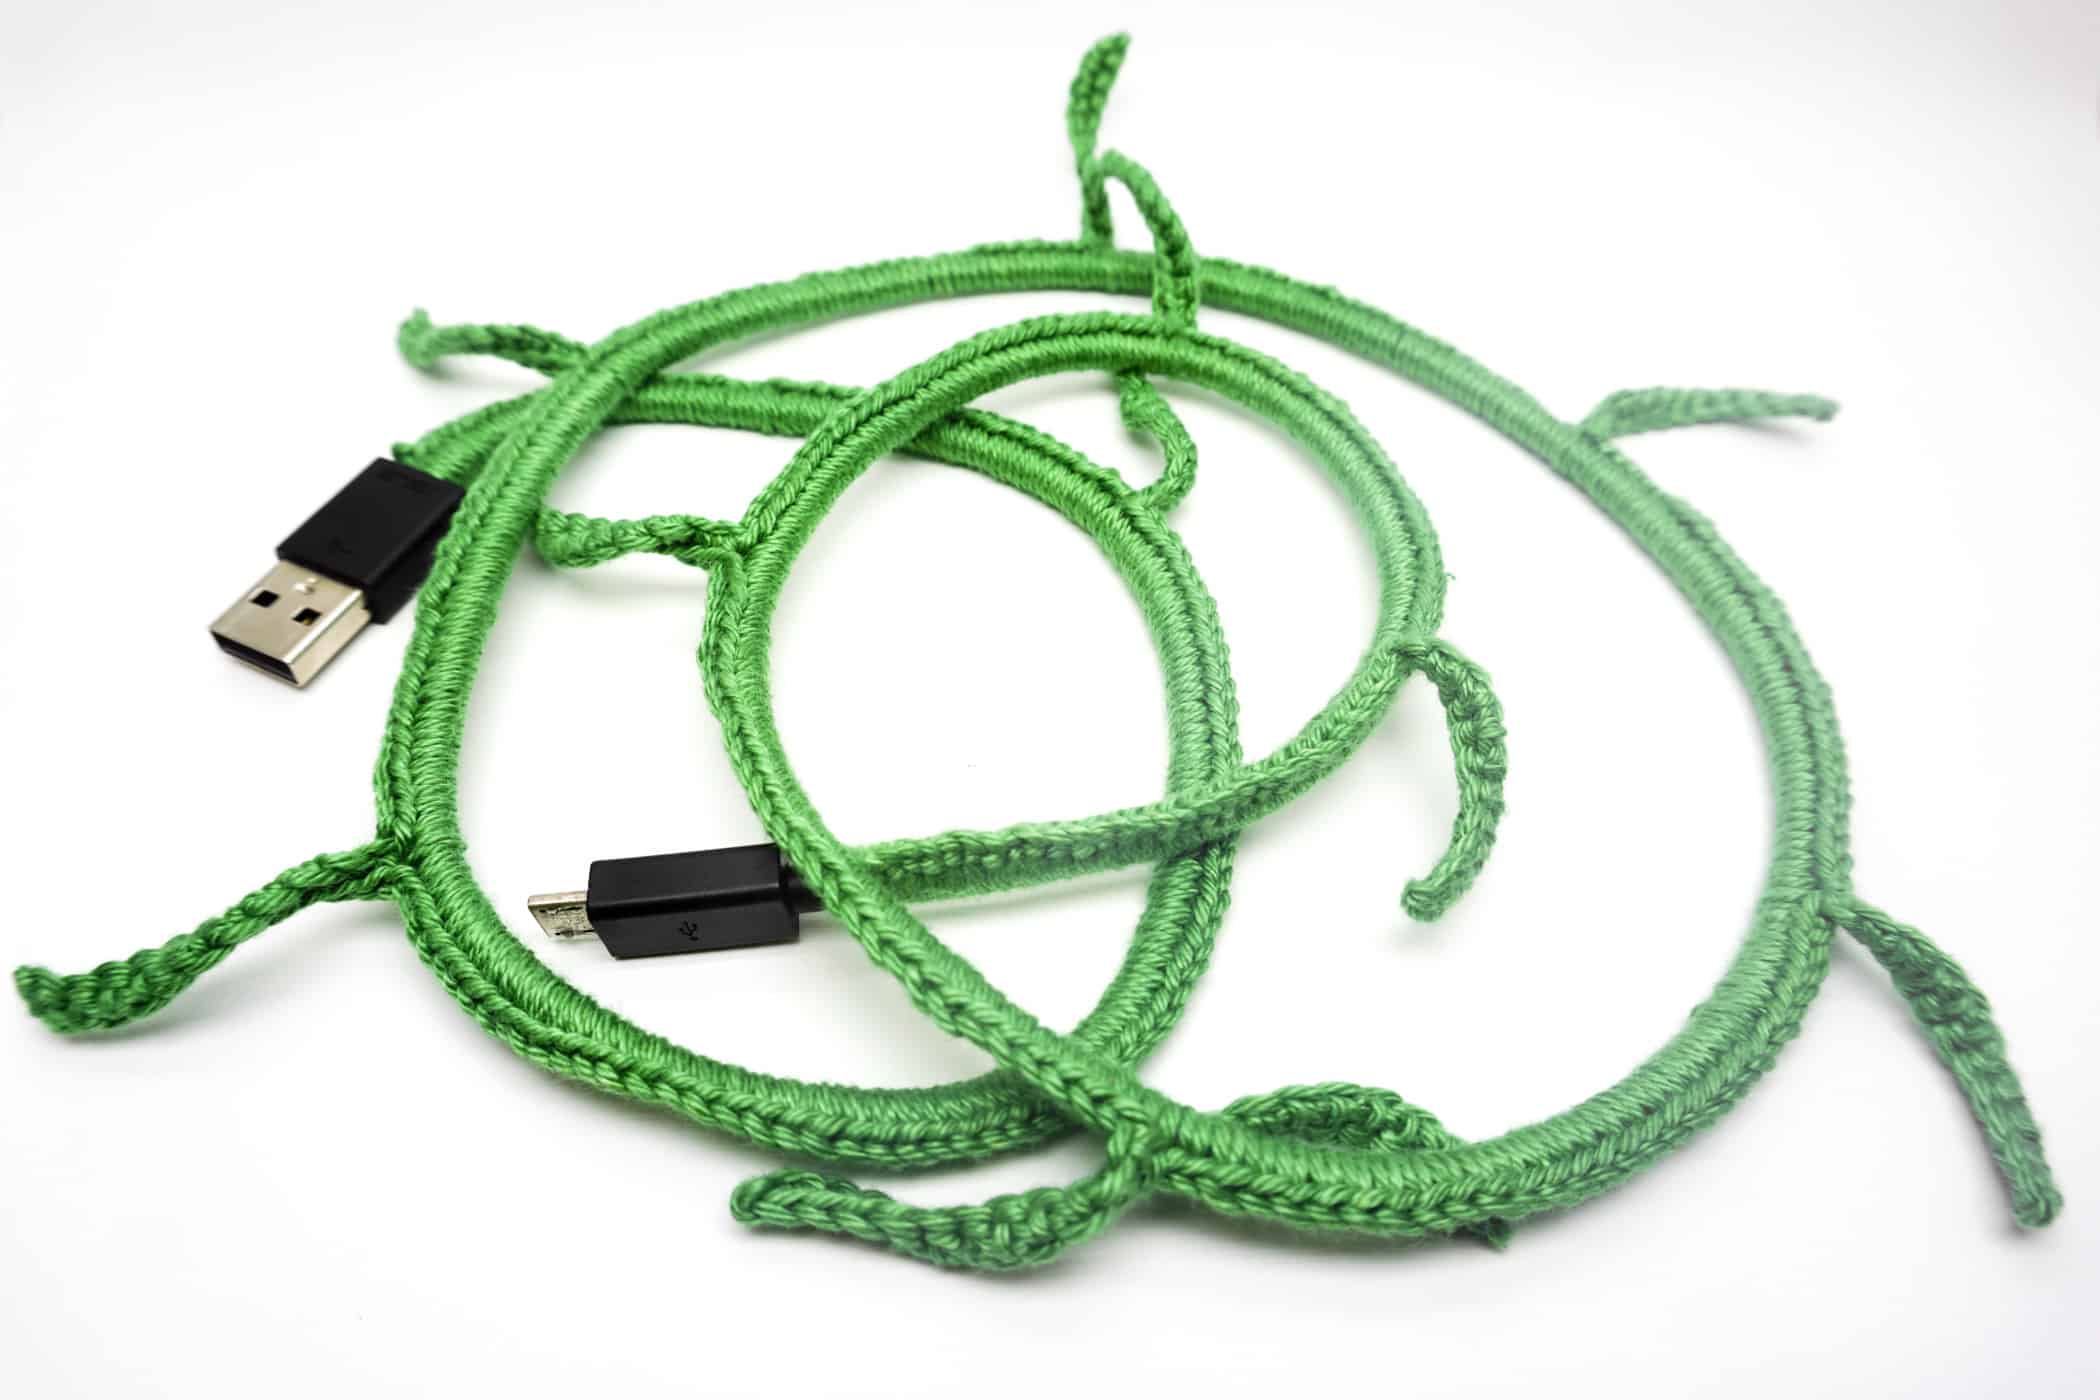
Crochet around a Cable
With the following method you are able to crochet around any cable, no matter how thick or long. If you are only interested in adding some color to your cord, skip the part that creates the actual leaf. Especially multi-colored yarn is highly recommended.
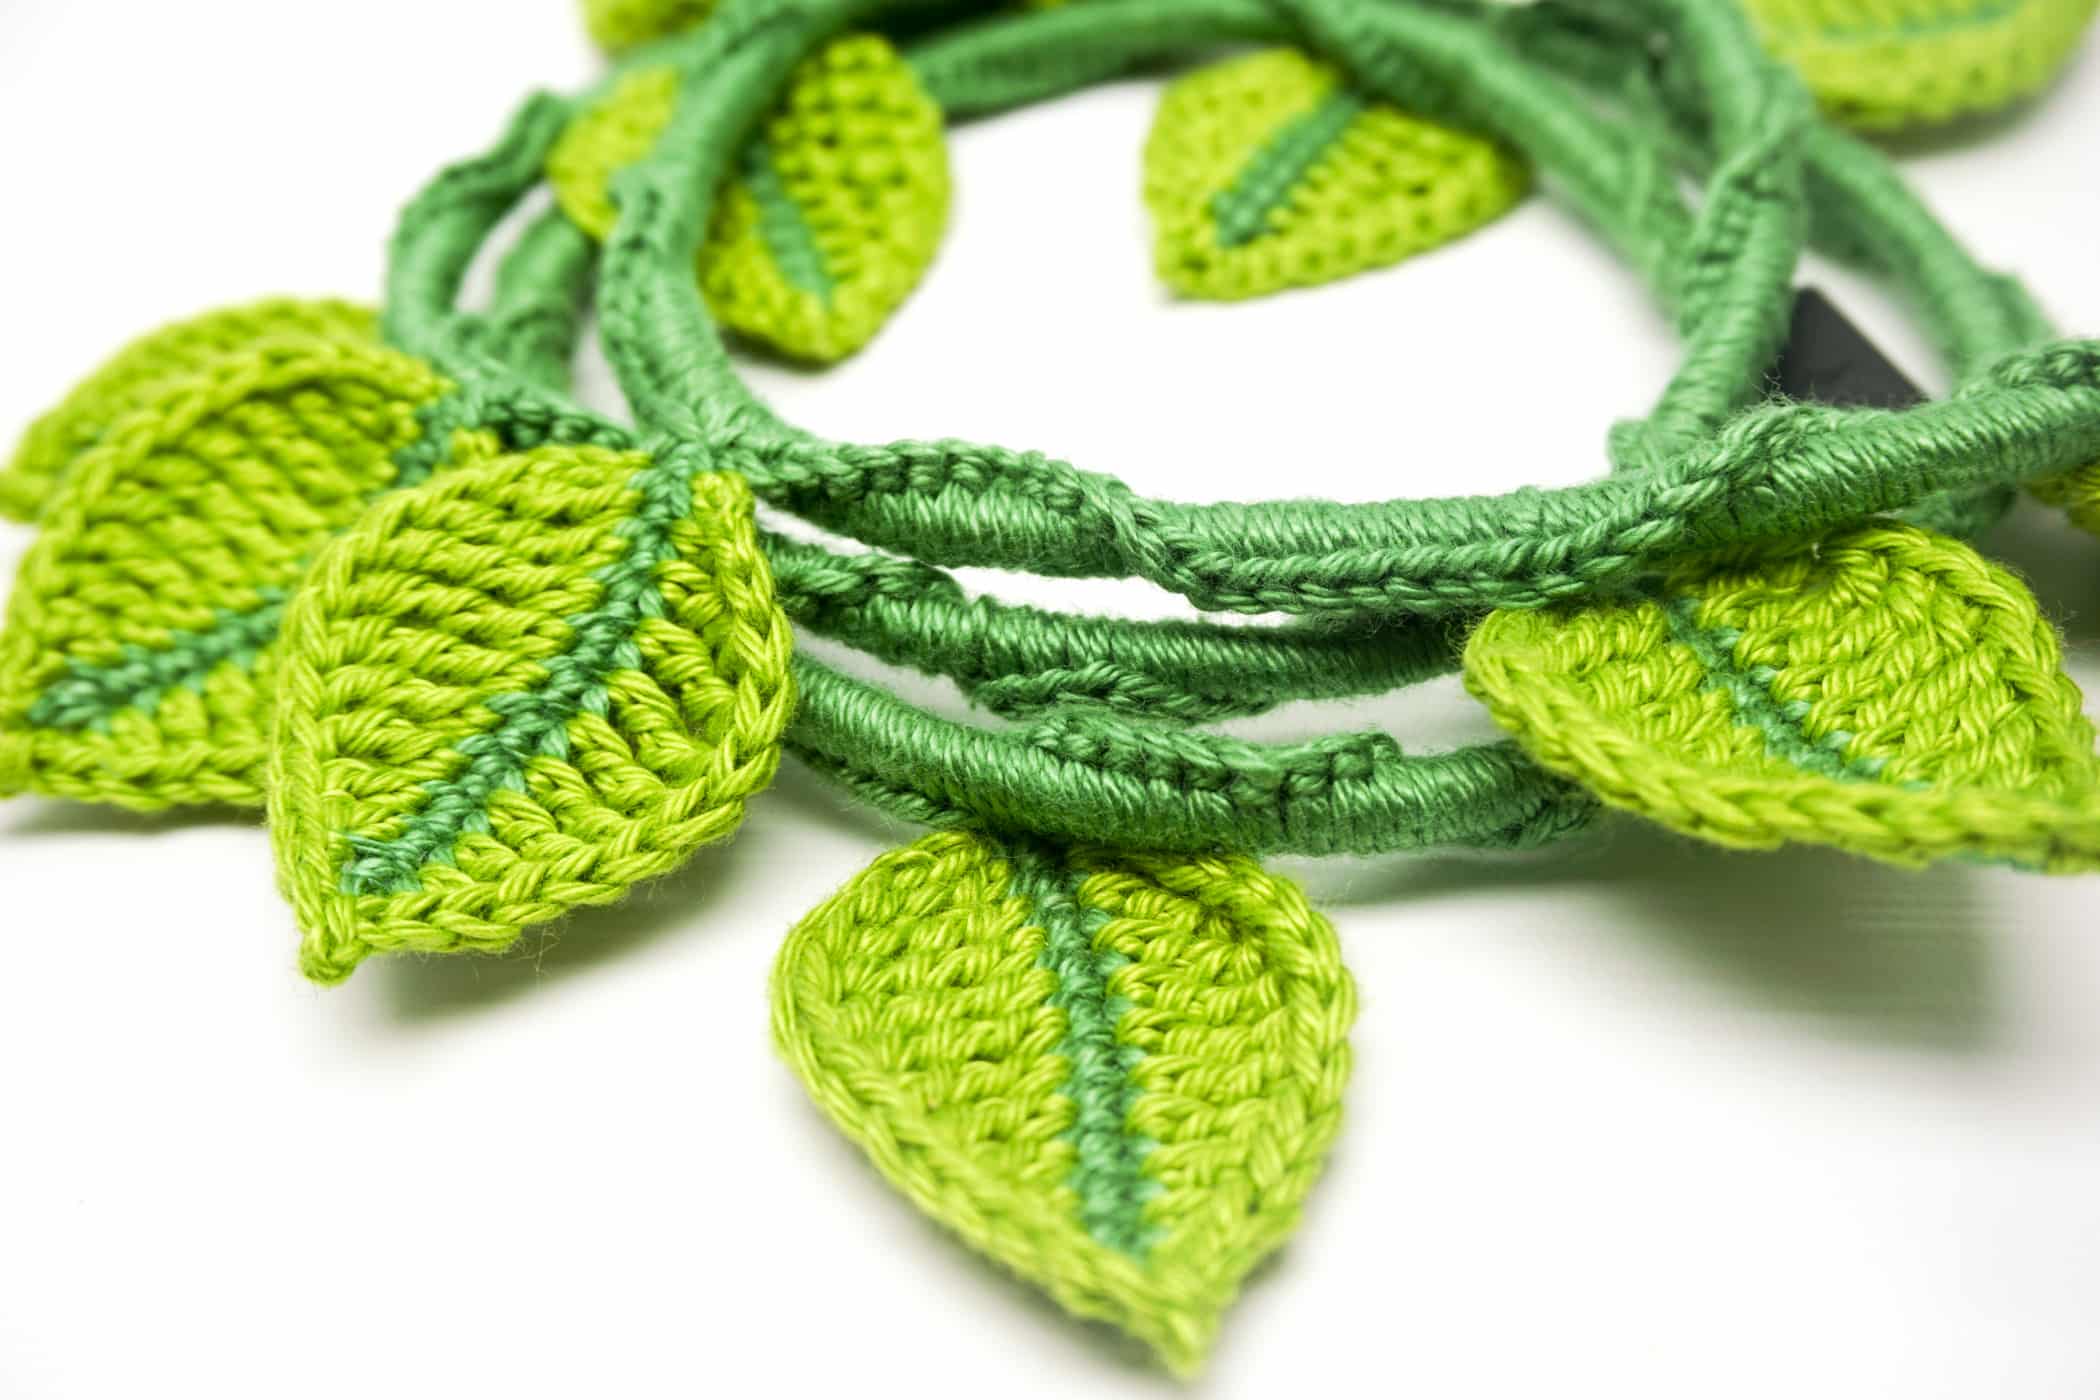
The cable is crocheted in Moss in rows with single crochet stitches and chain stitches.
Use the check boxes to mark your finished rounds, rows and steps.
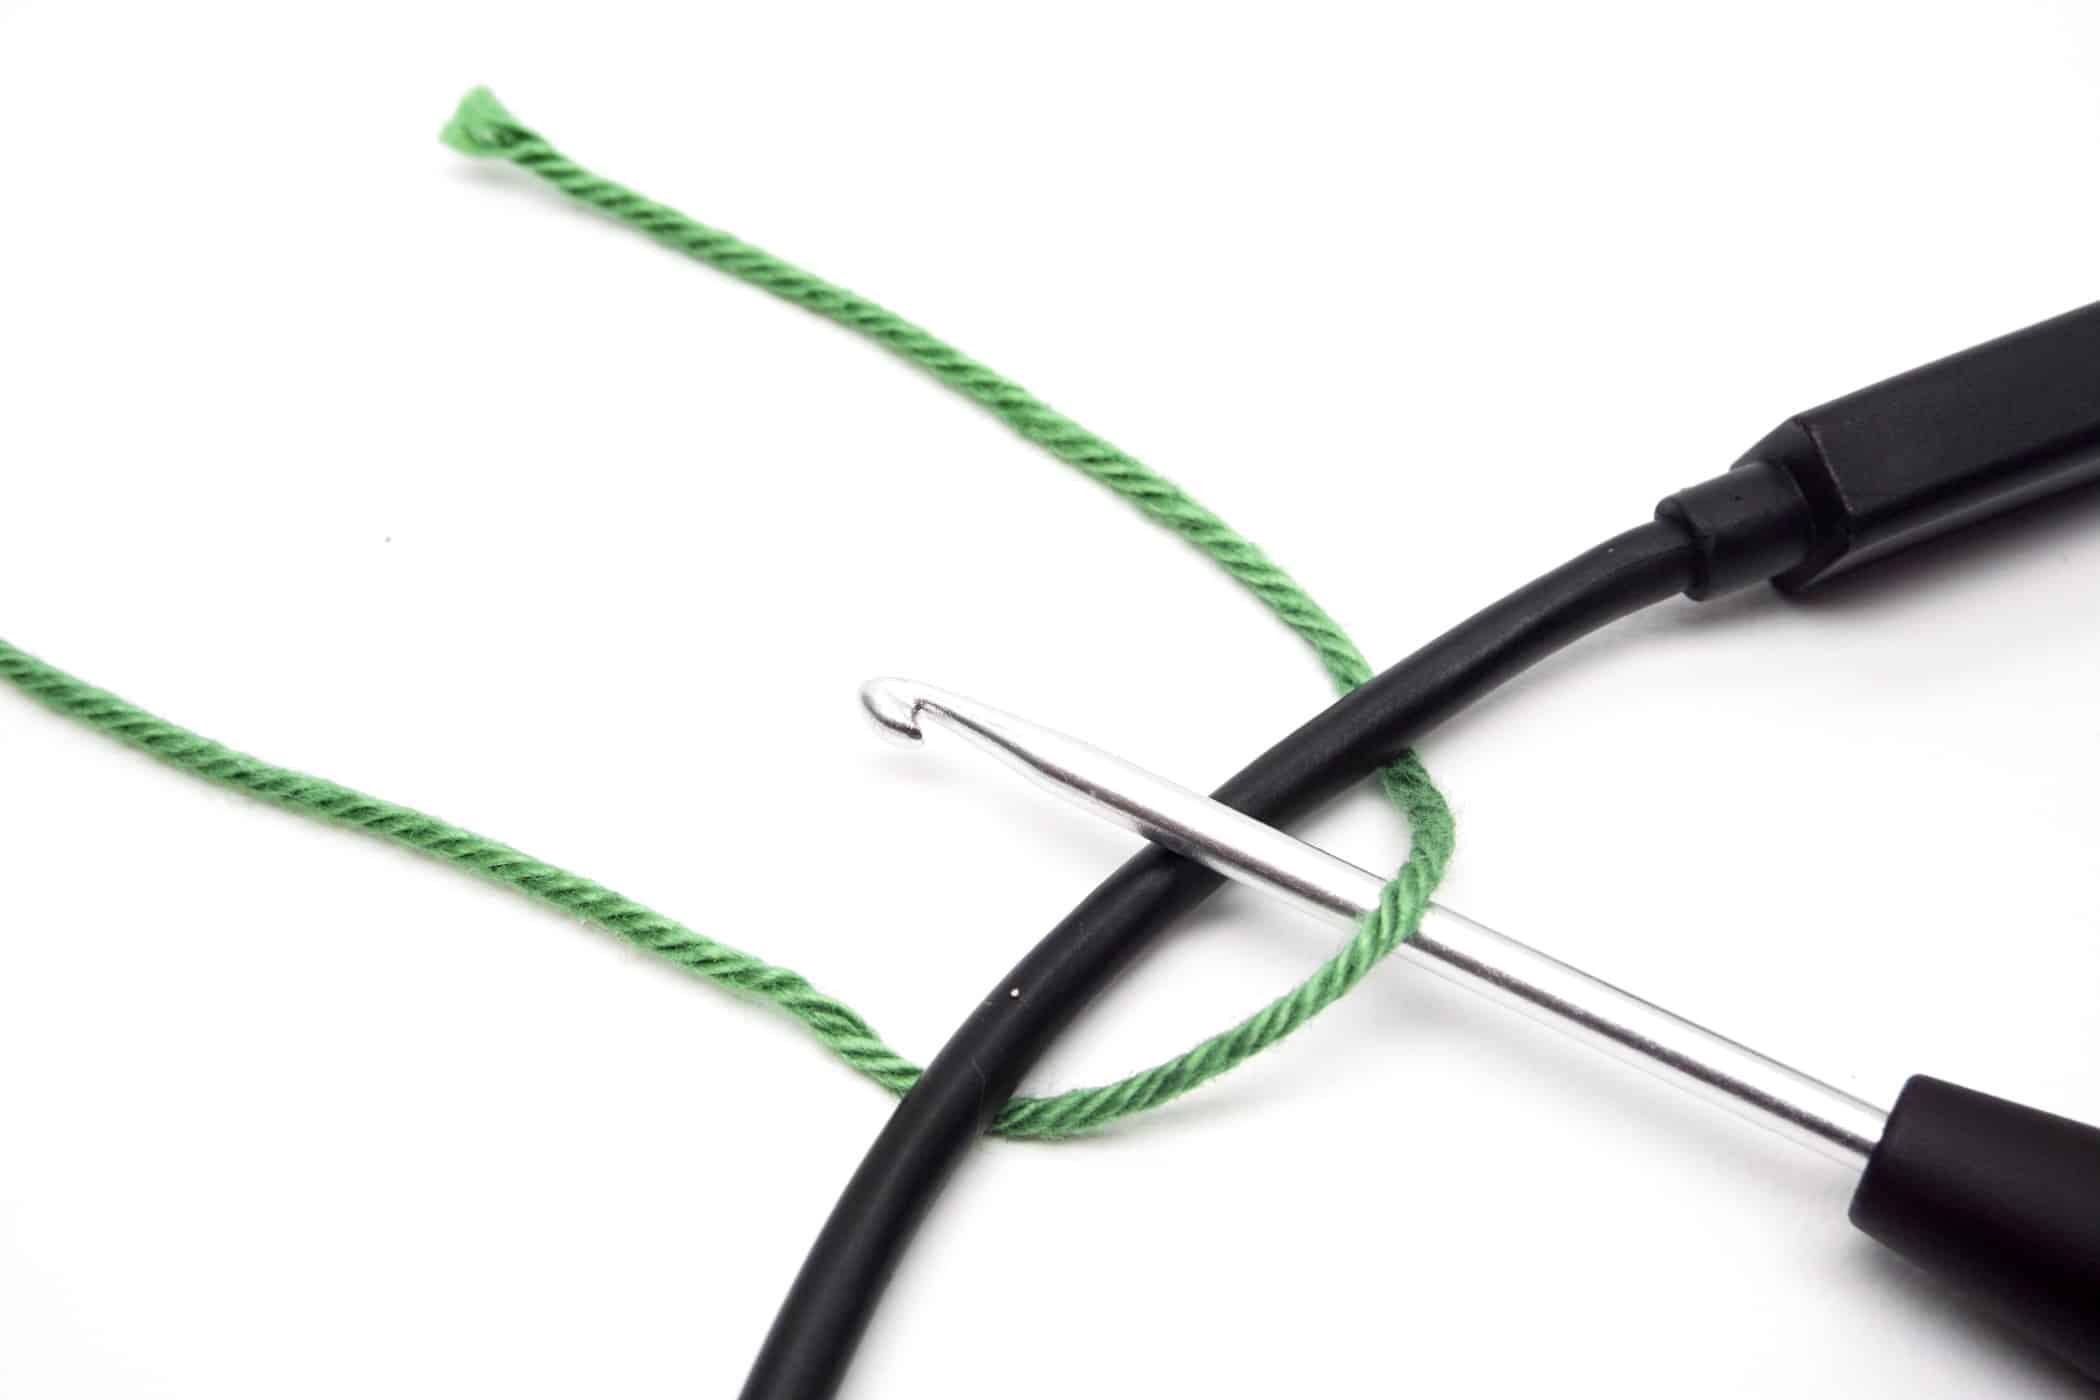
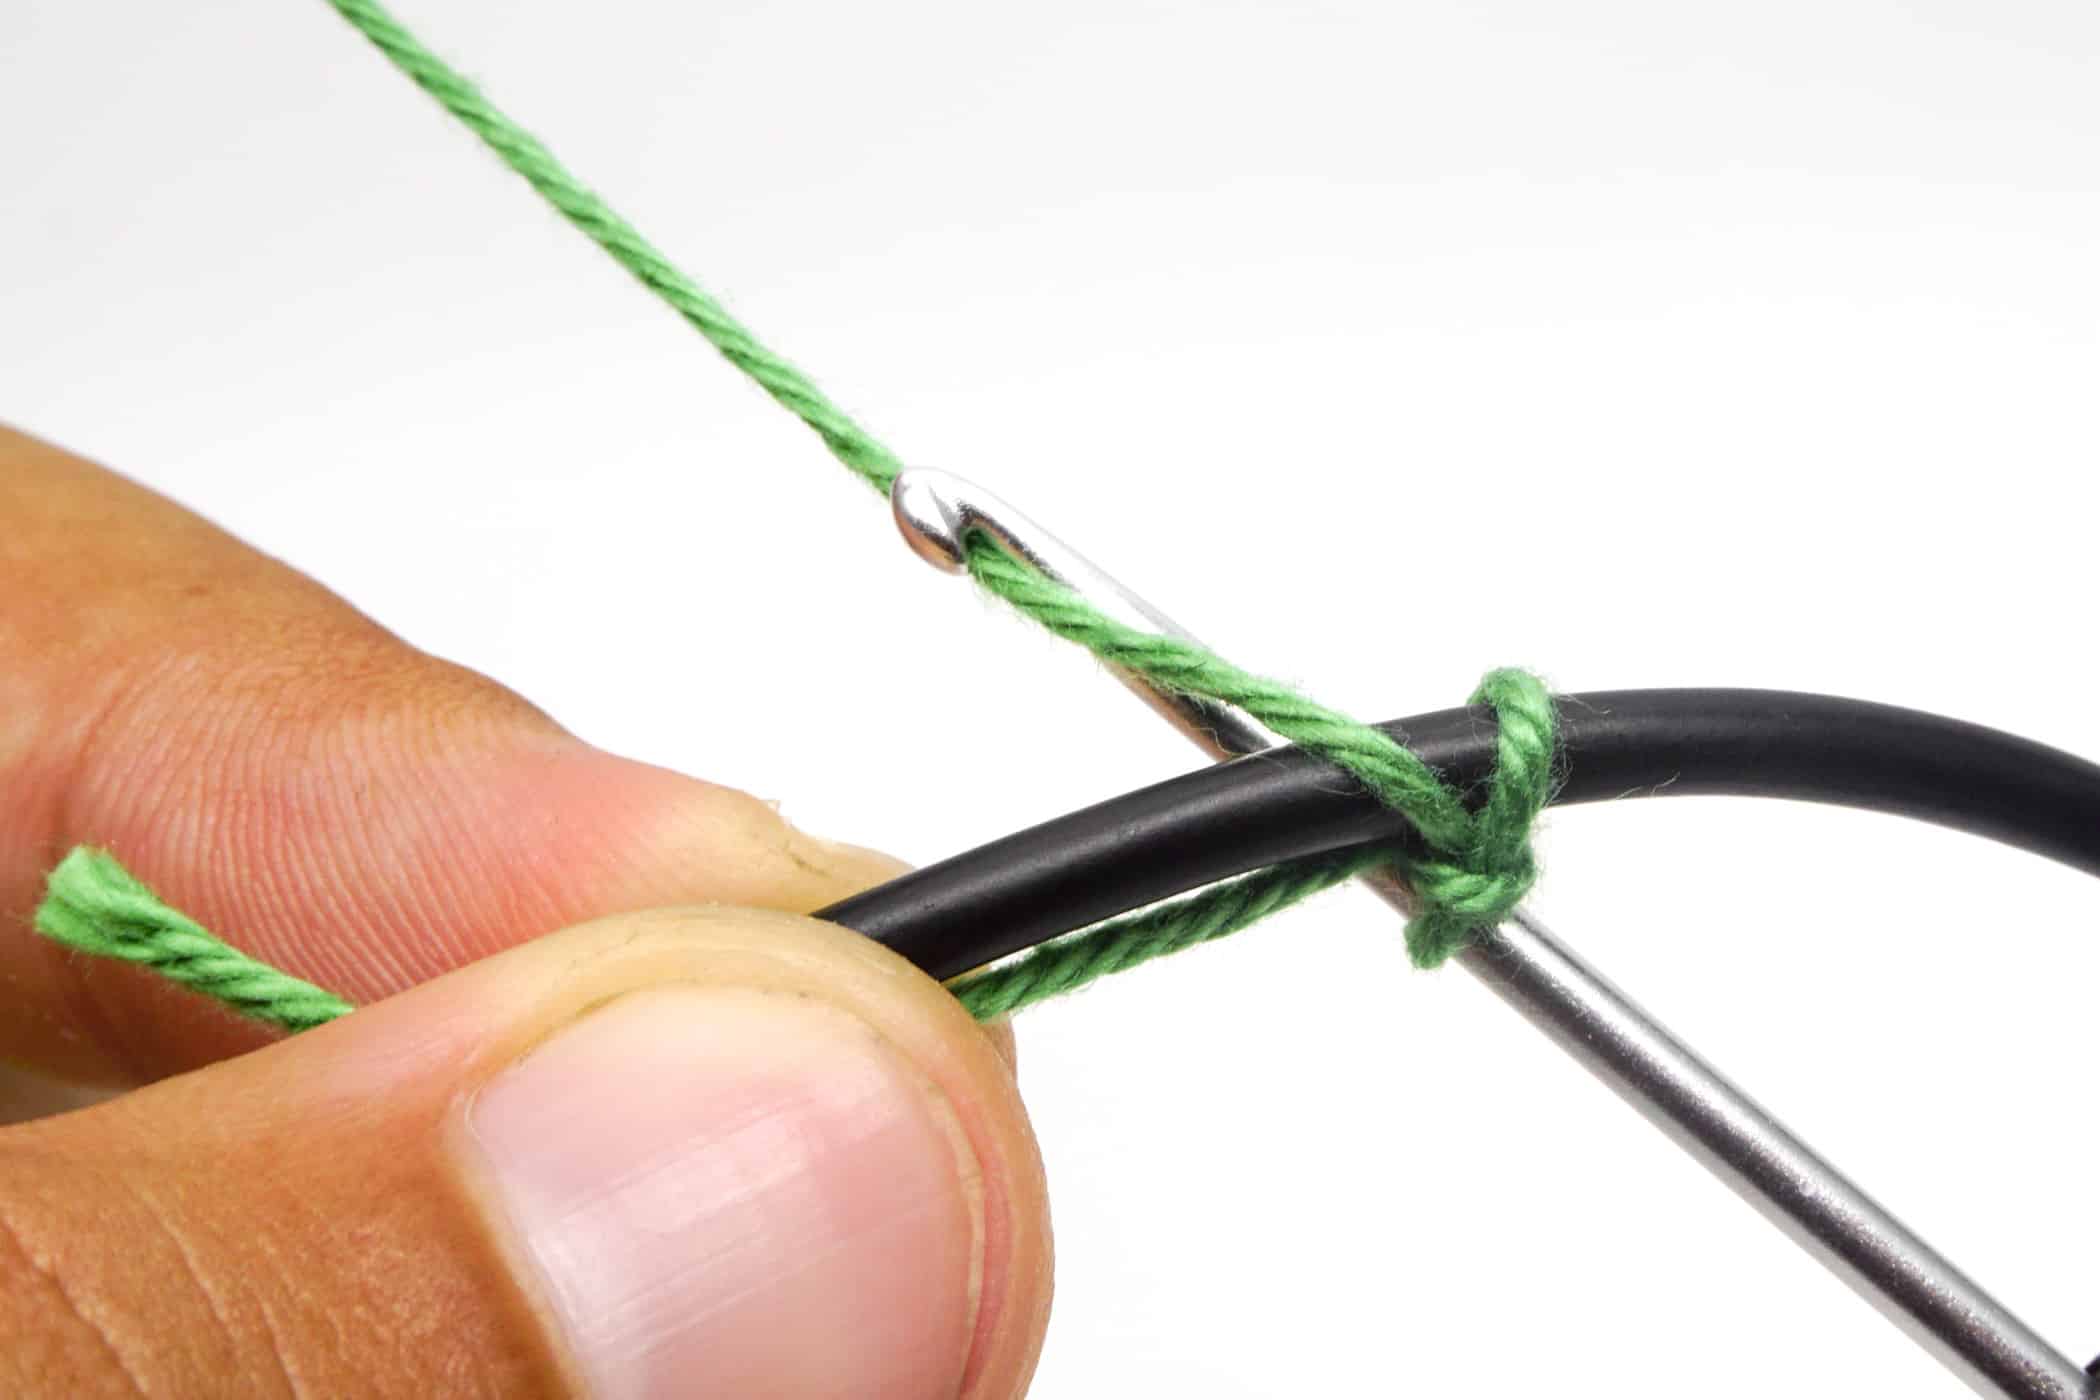
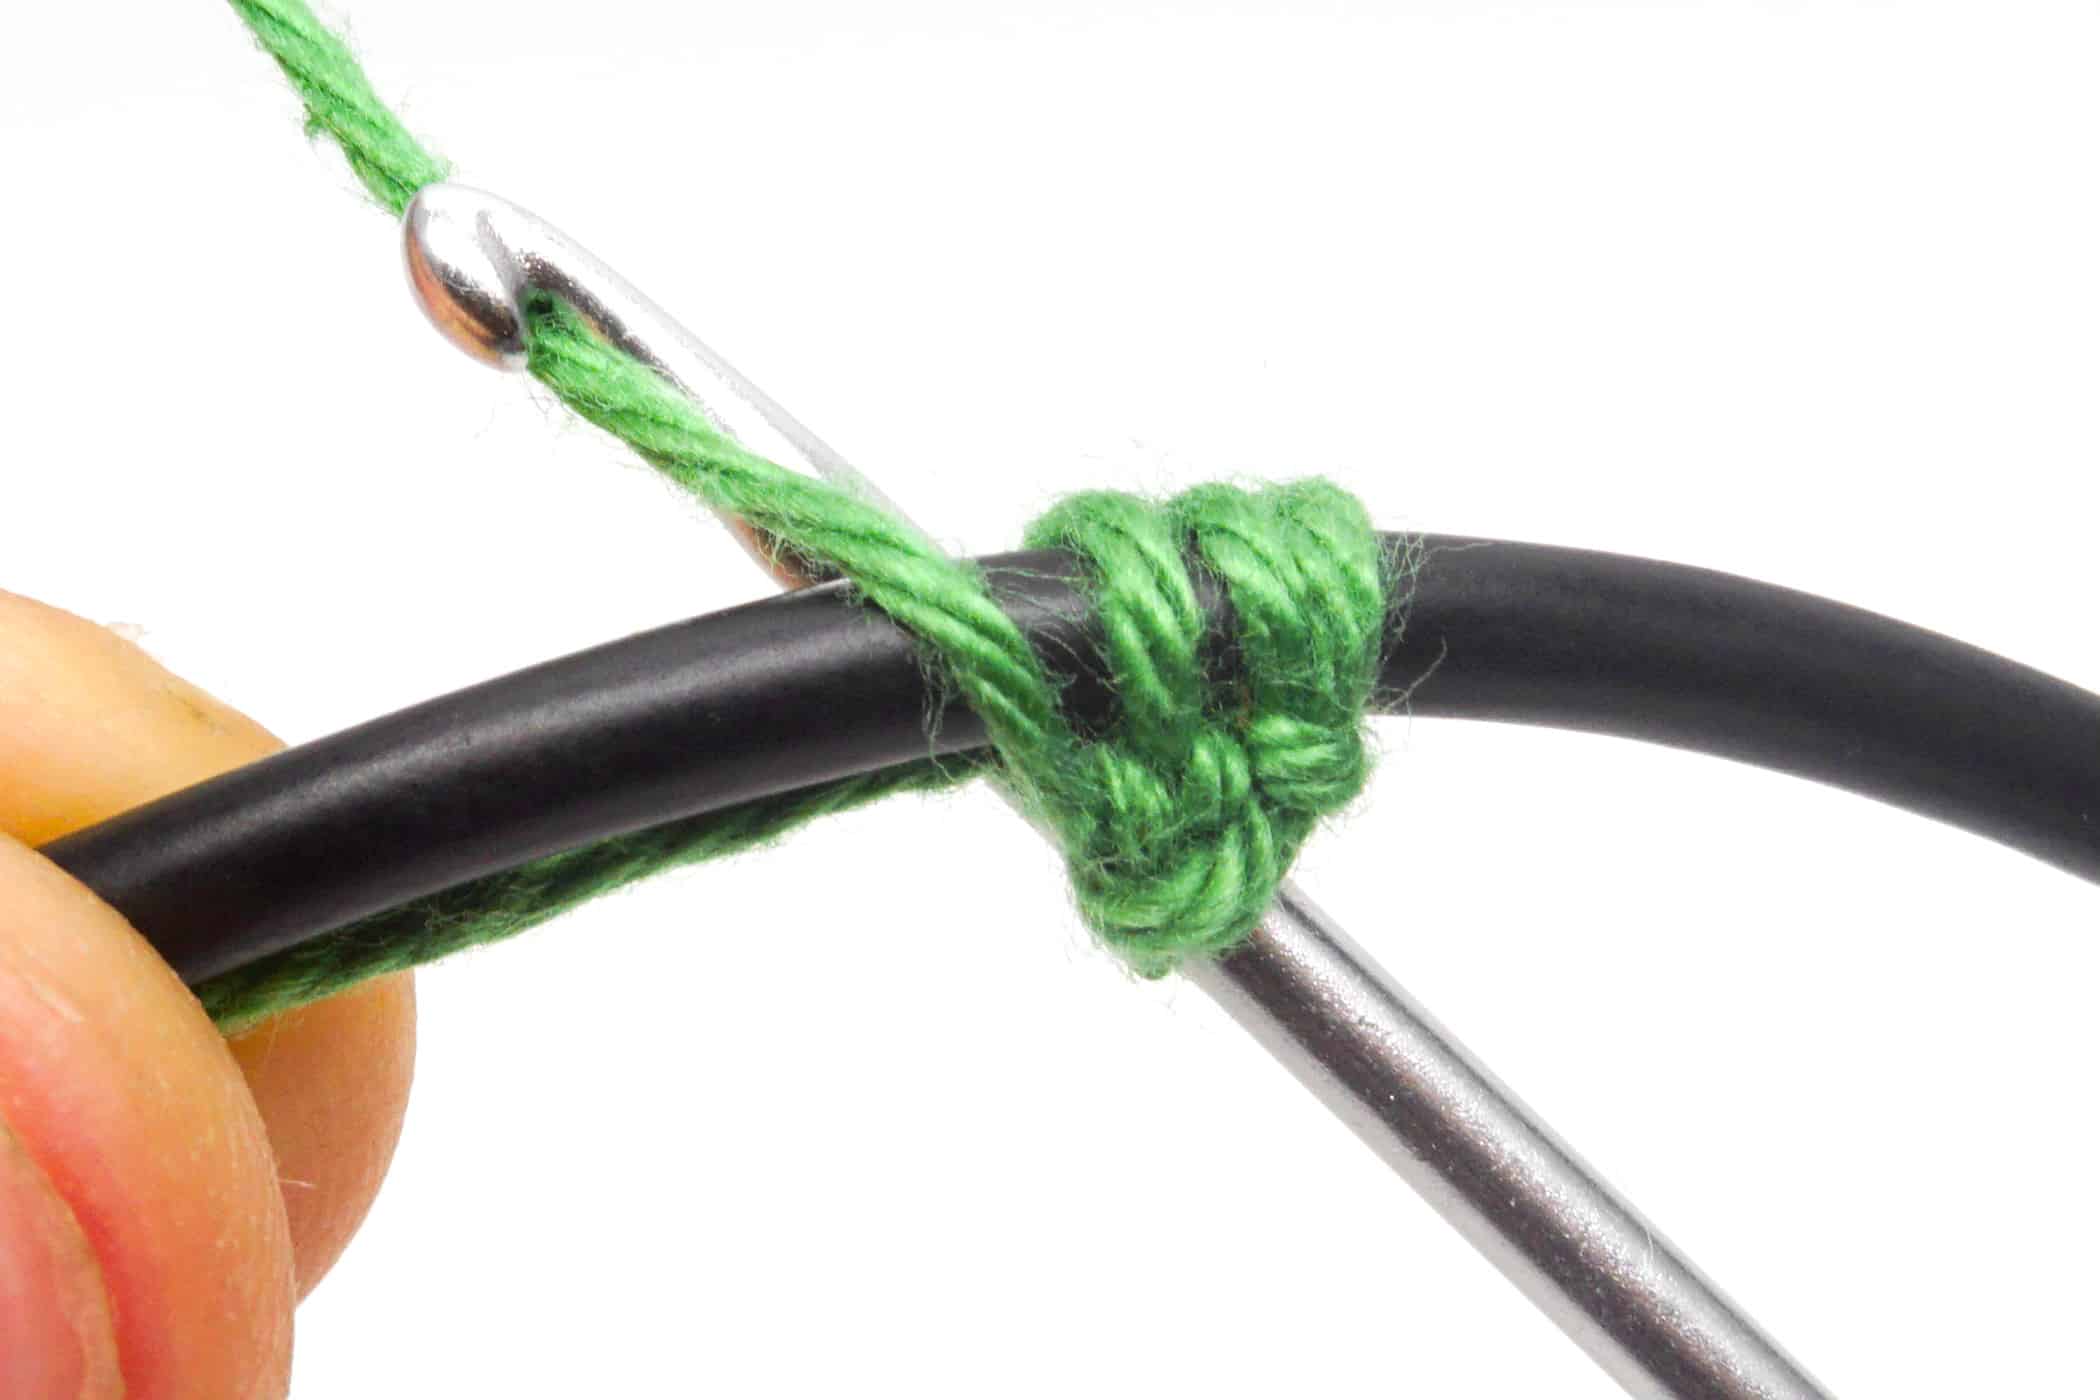
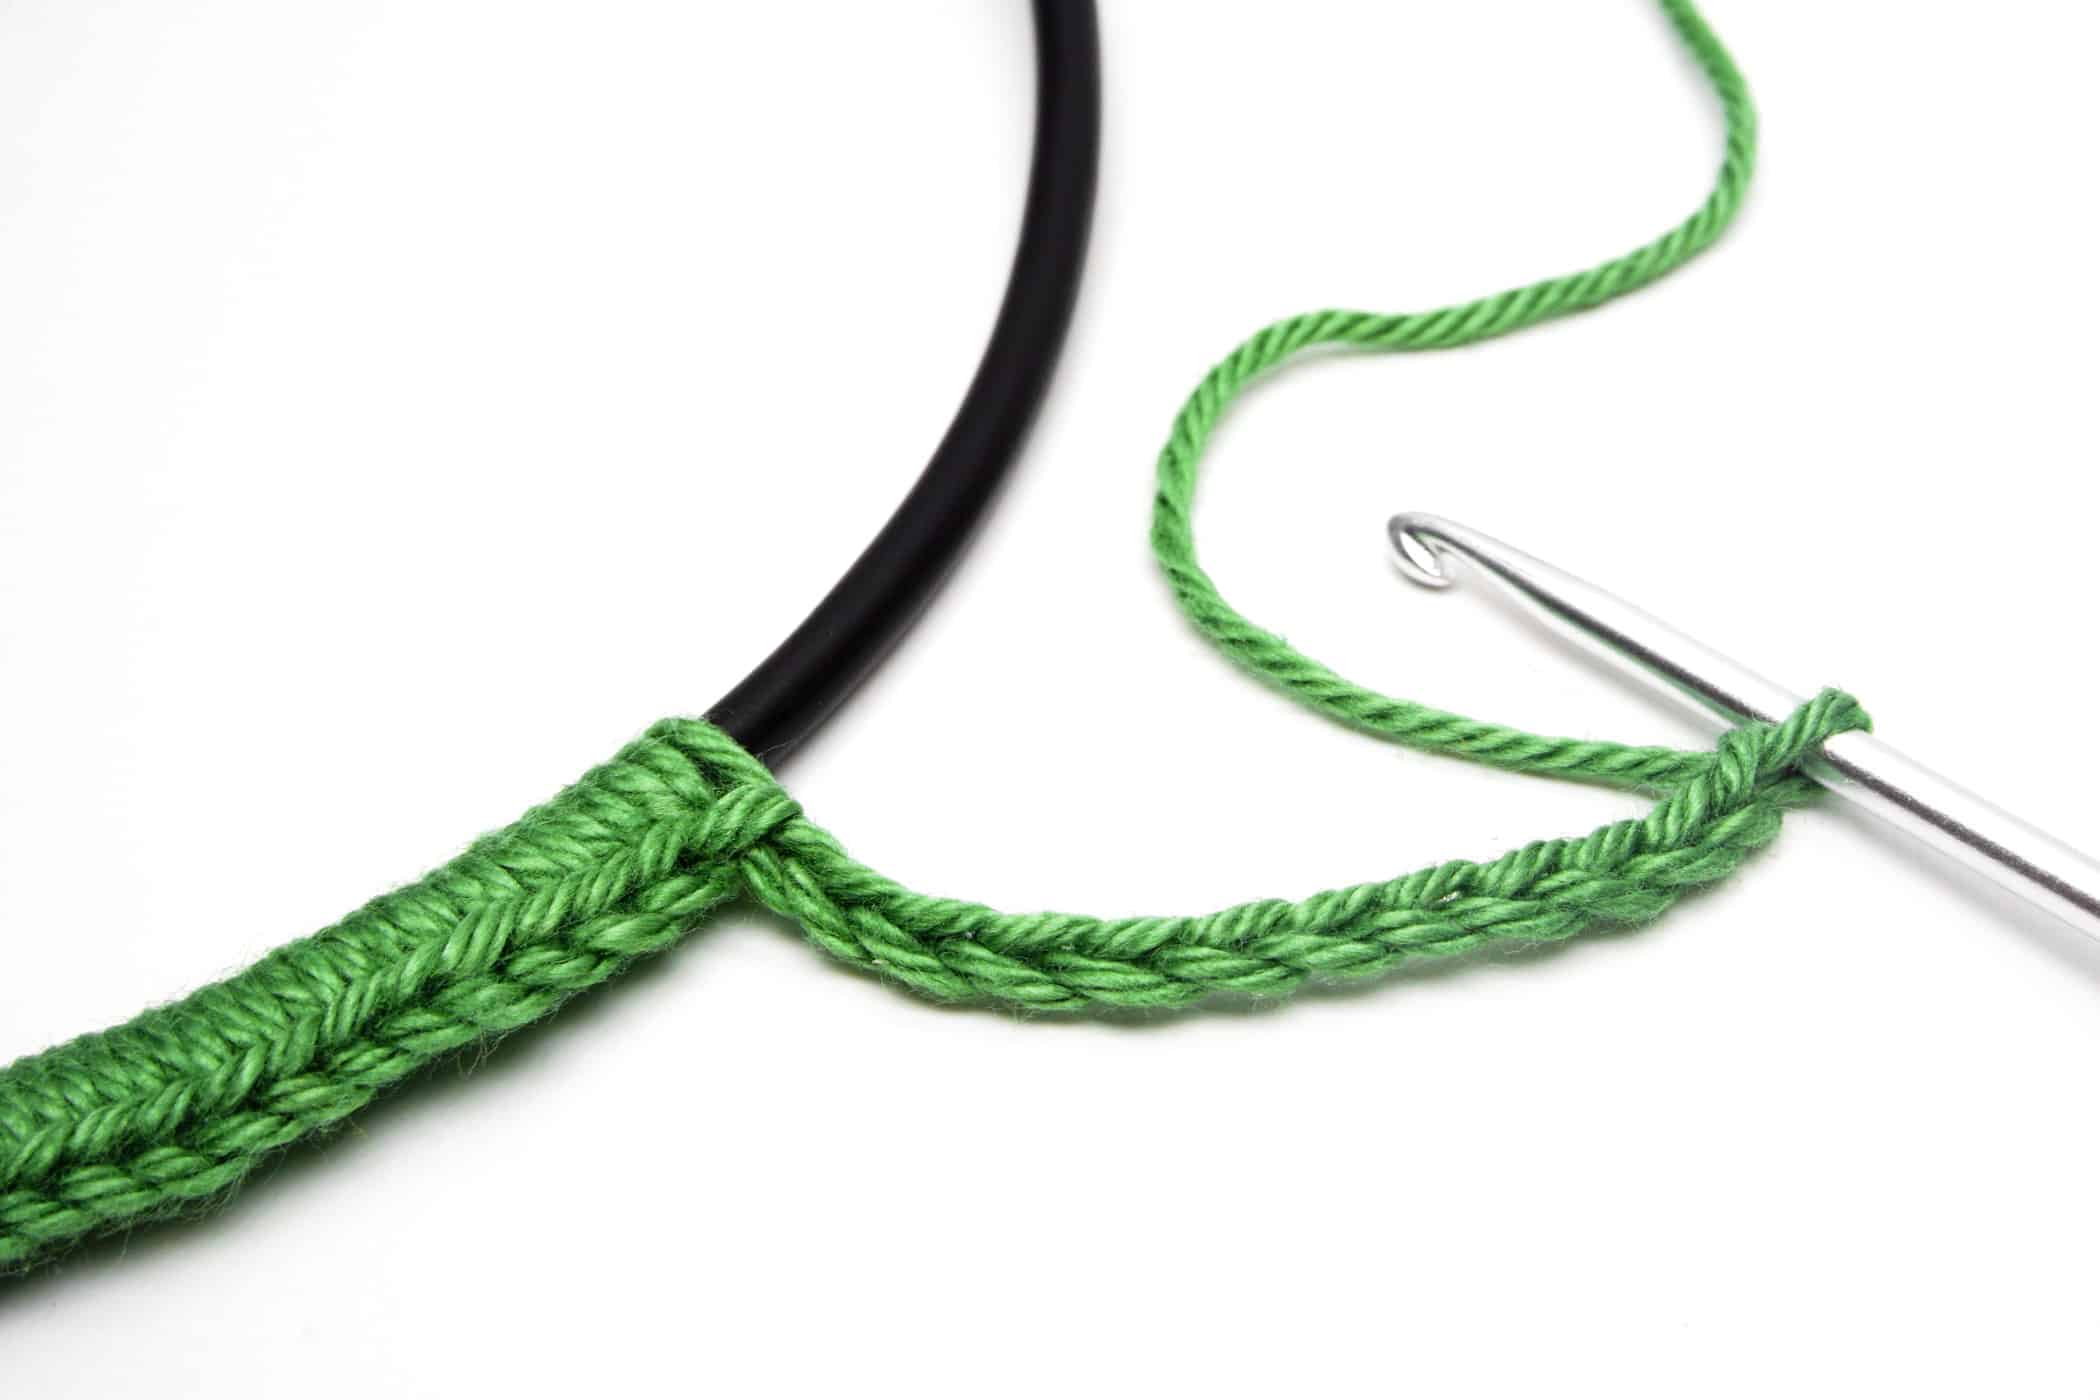
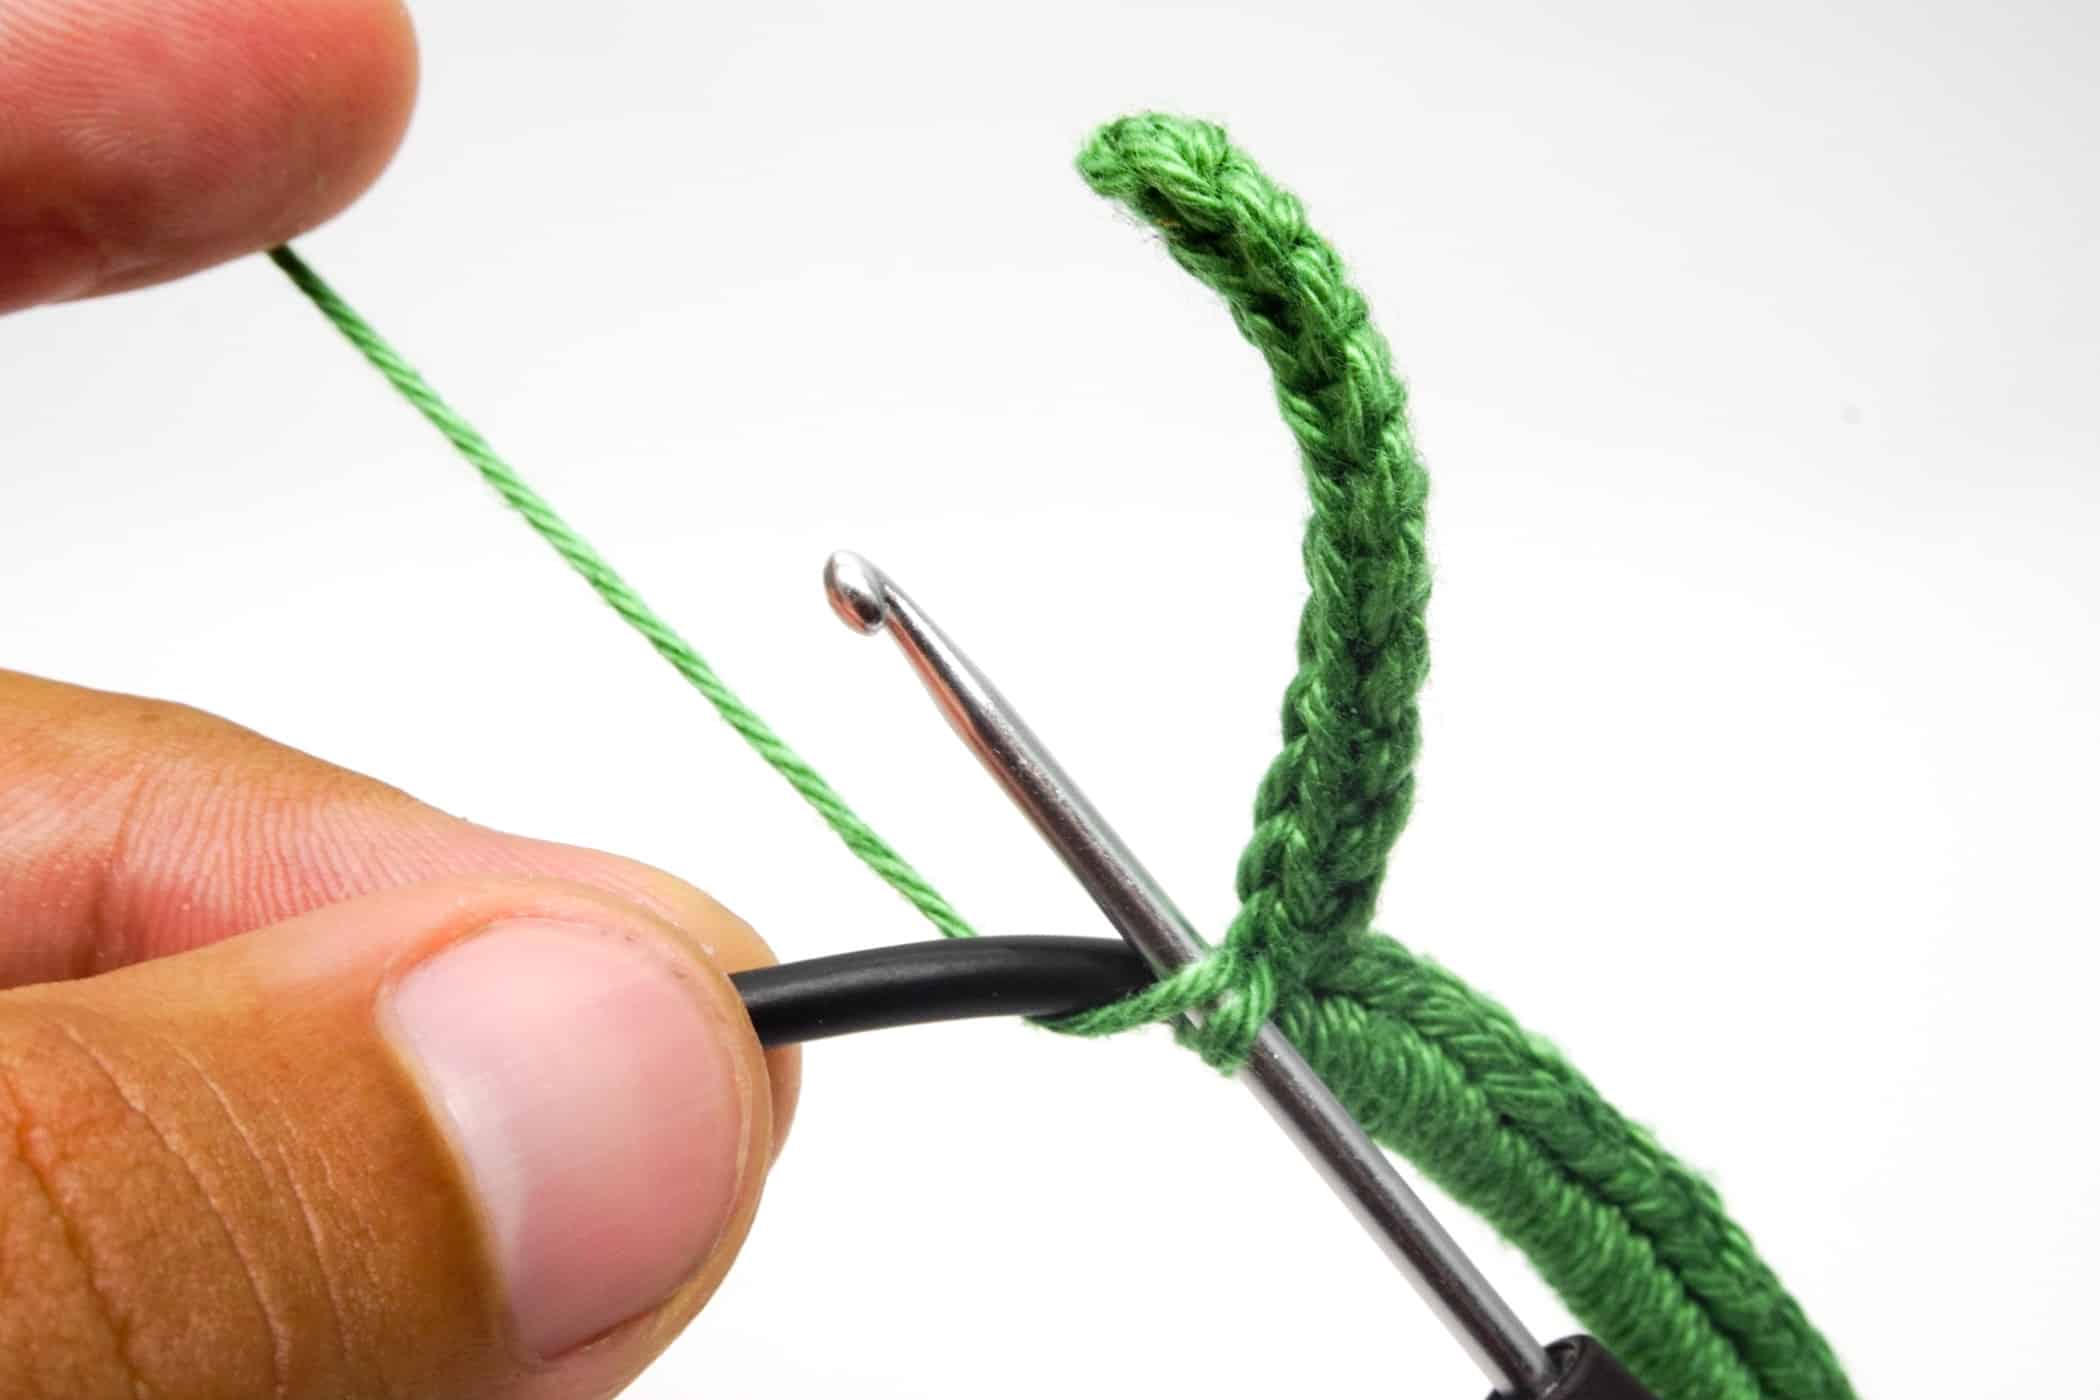
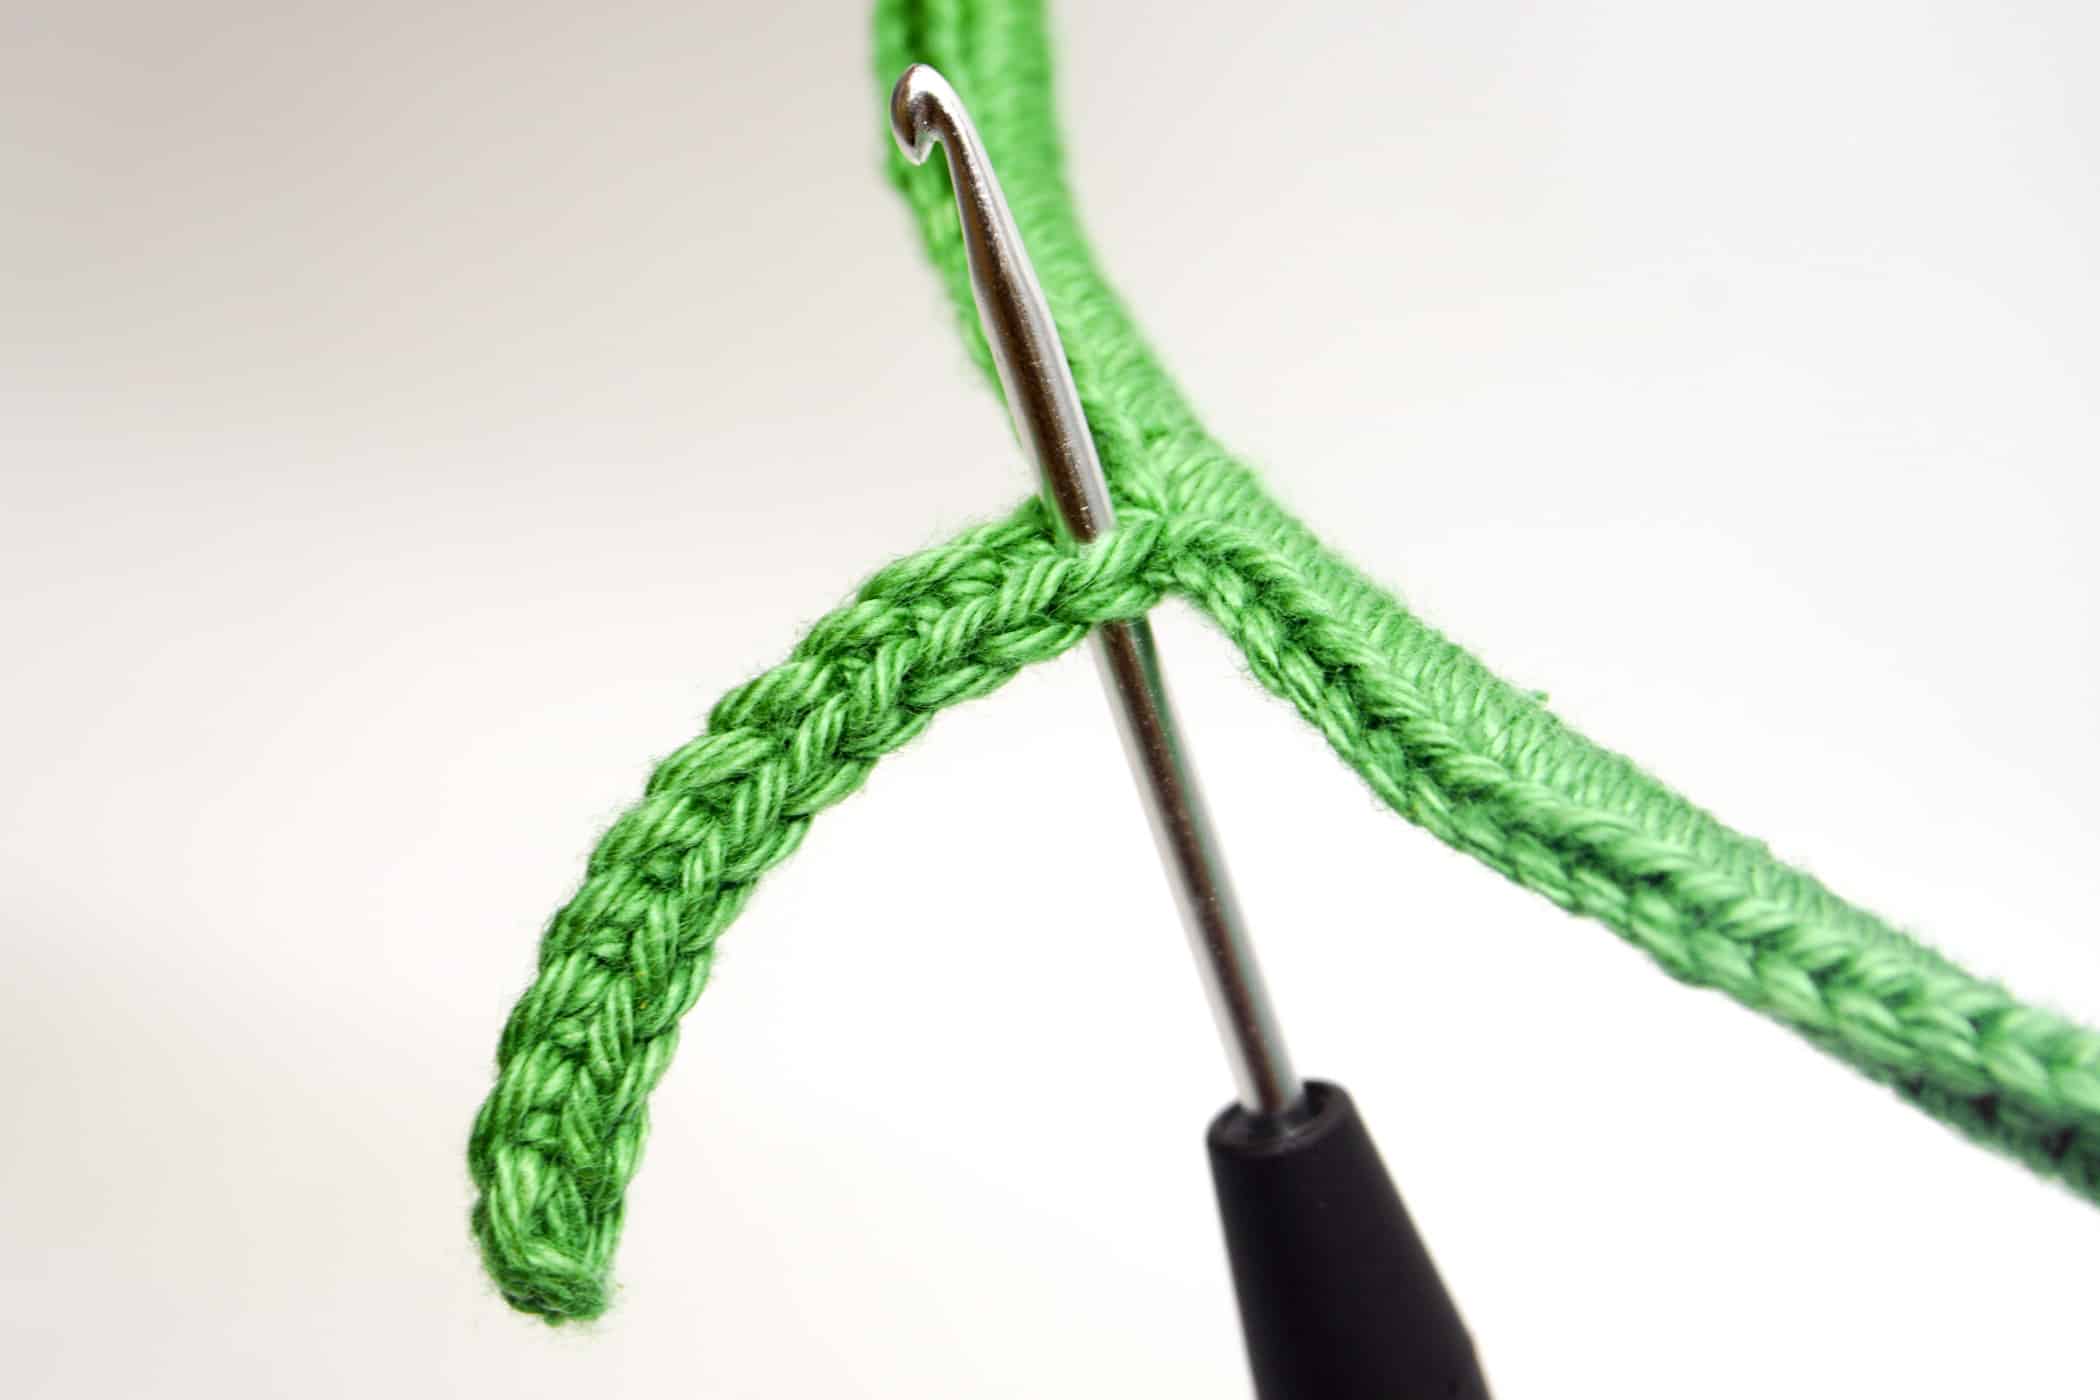
- Step 1: Crochet around the cable with the color Moss. Take the cord you want to crochet around and put the desired yarn under the cord in an U-shape, as shown in the picture.

- Step 2: Now put the crochet hook under the thread and over the cable, then pull both threads. Yarn over the thread that runs to the ball of yarn and pull it through the loop over the crochet hook. You crocheted 1 chain stitch.
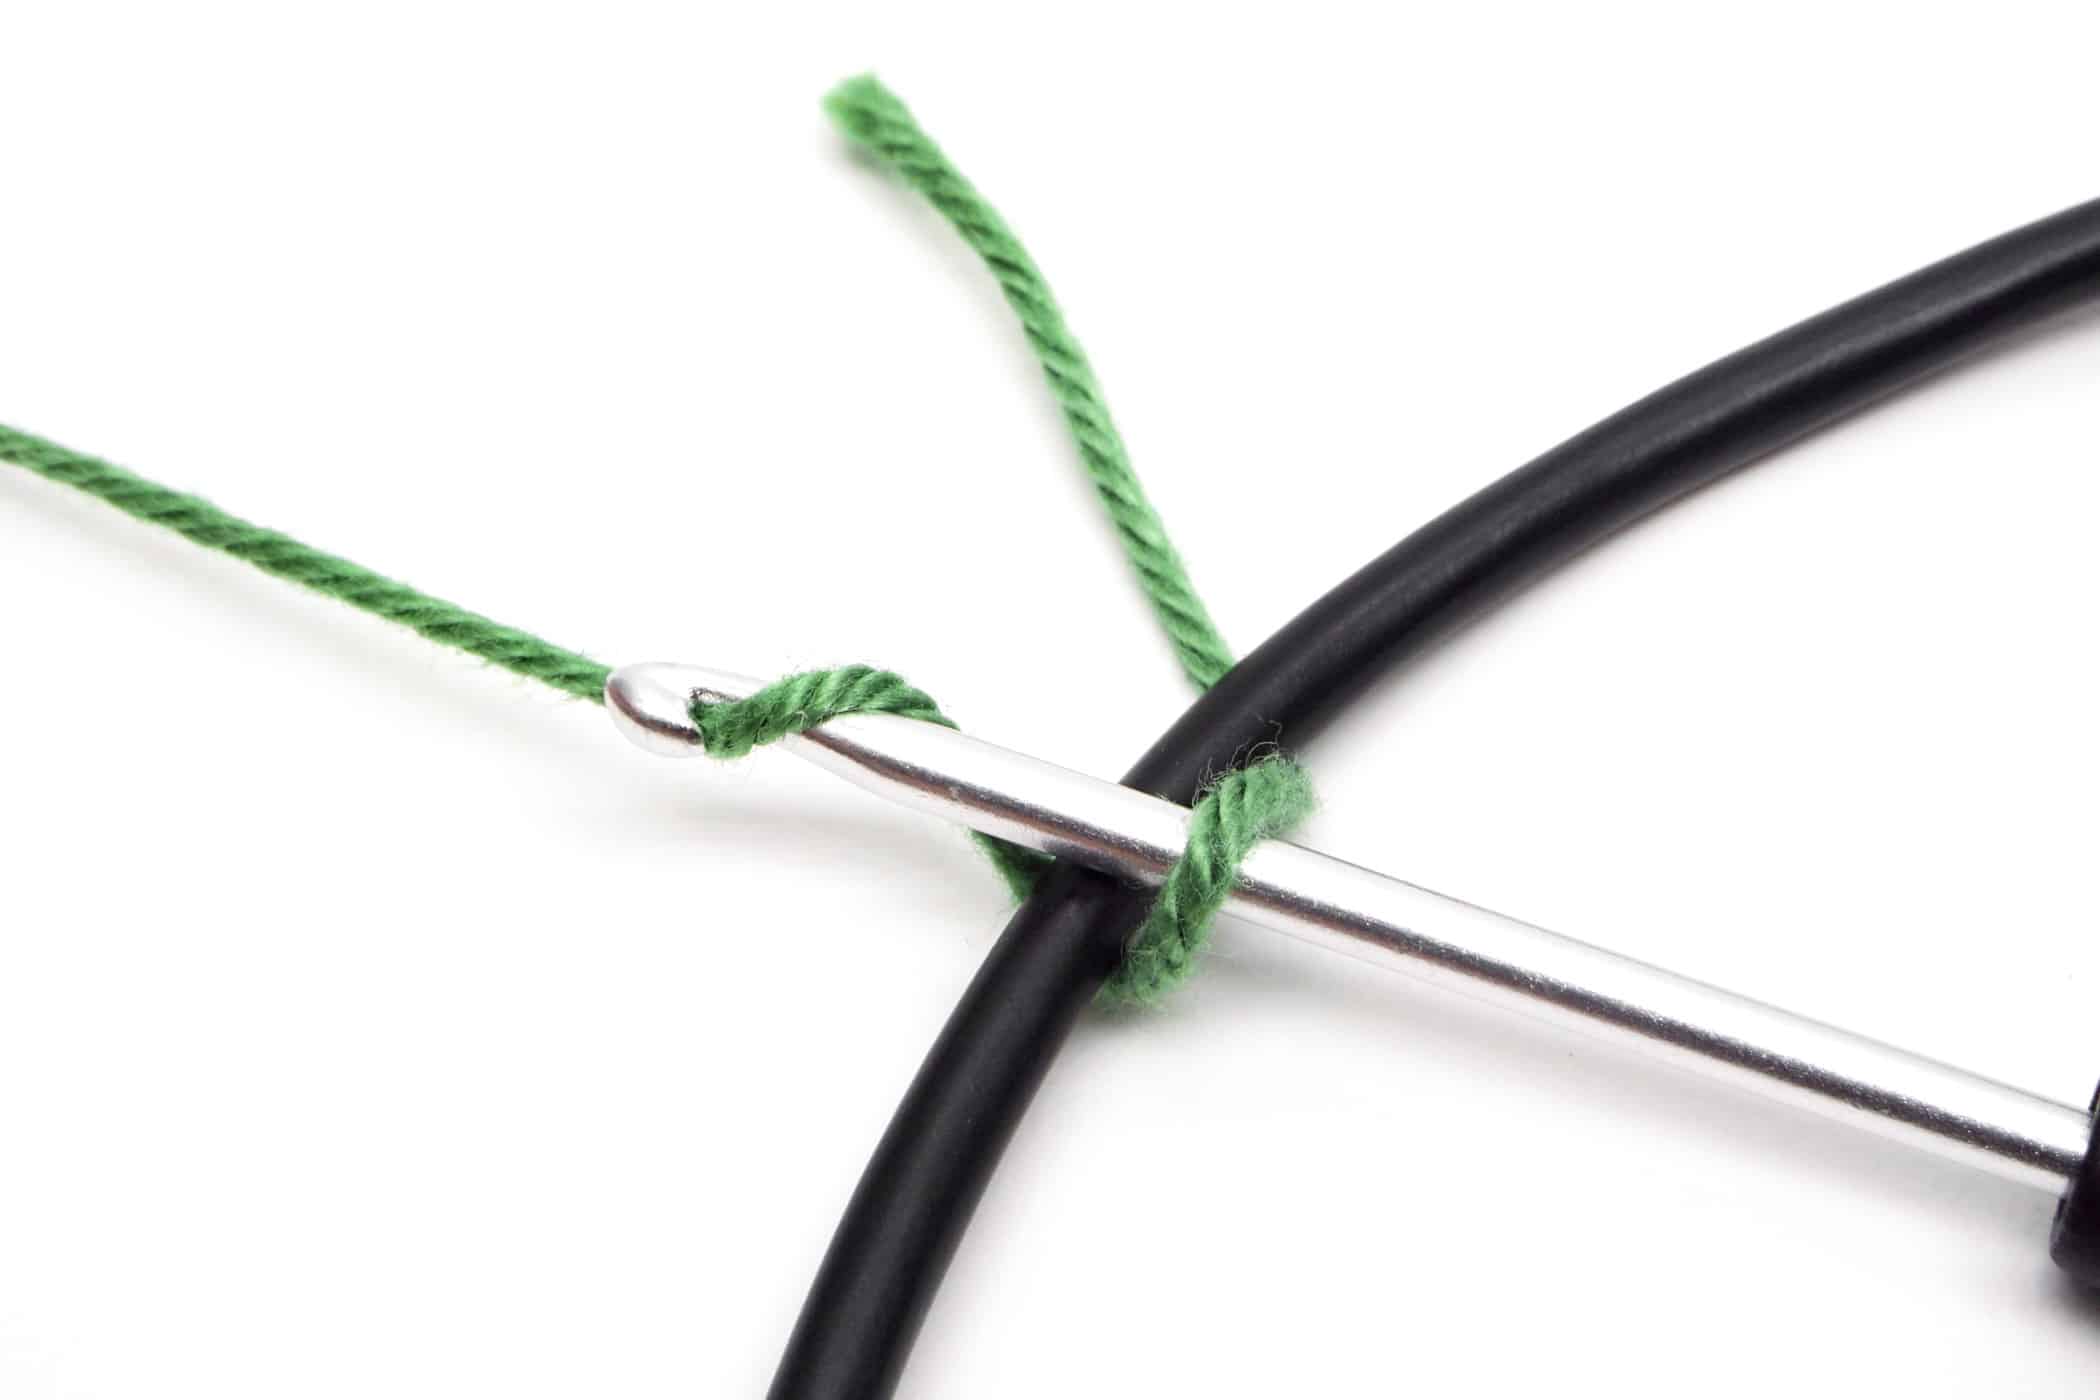
- Step 3: So that you do not have to sew in the end of the thread later, hold the end of the thread with the cable and crochet around cable and thread.
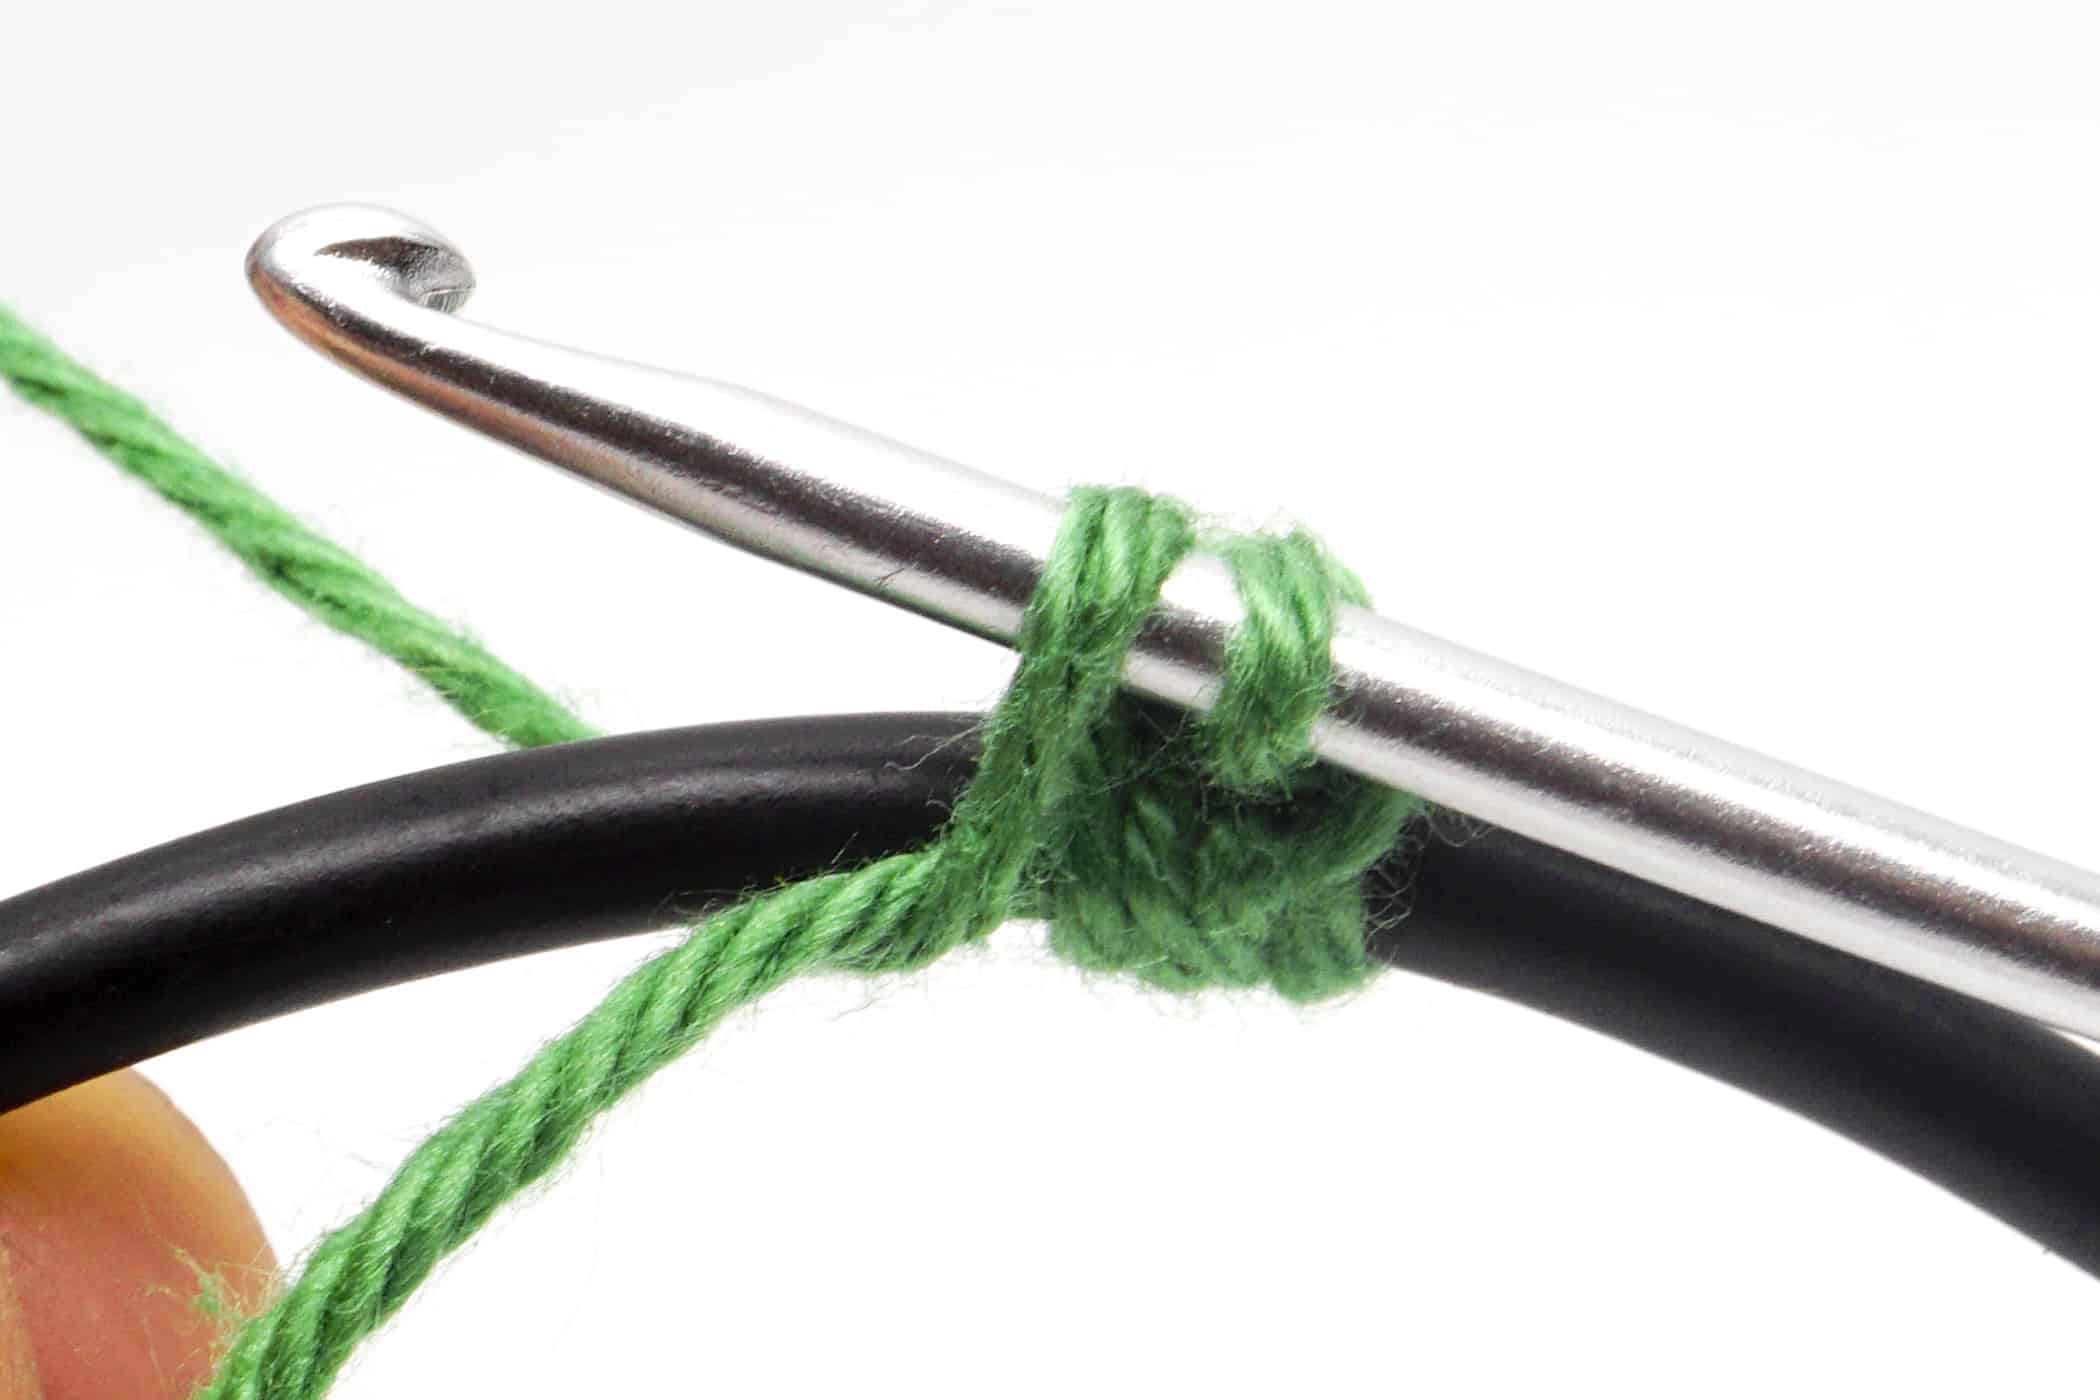
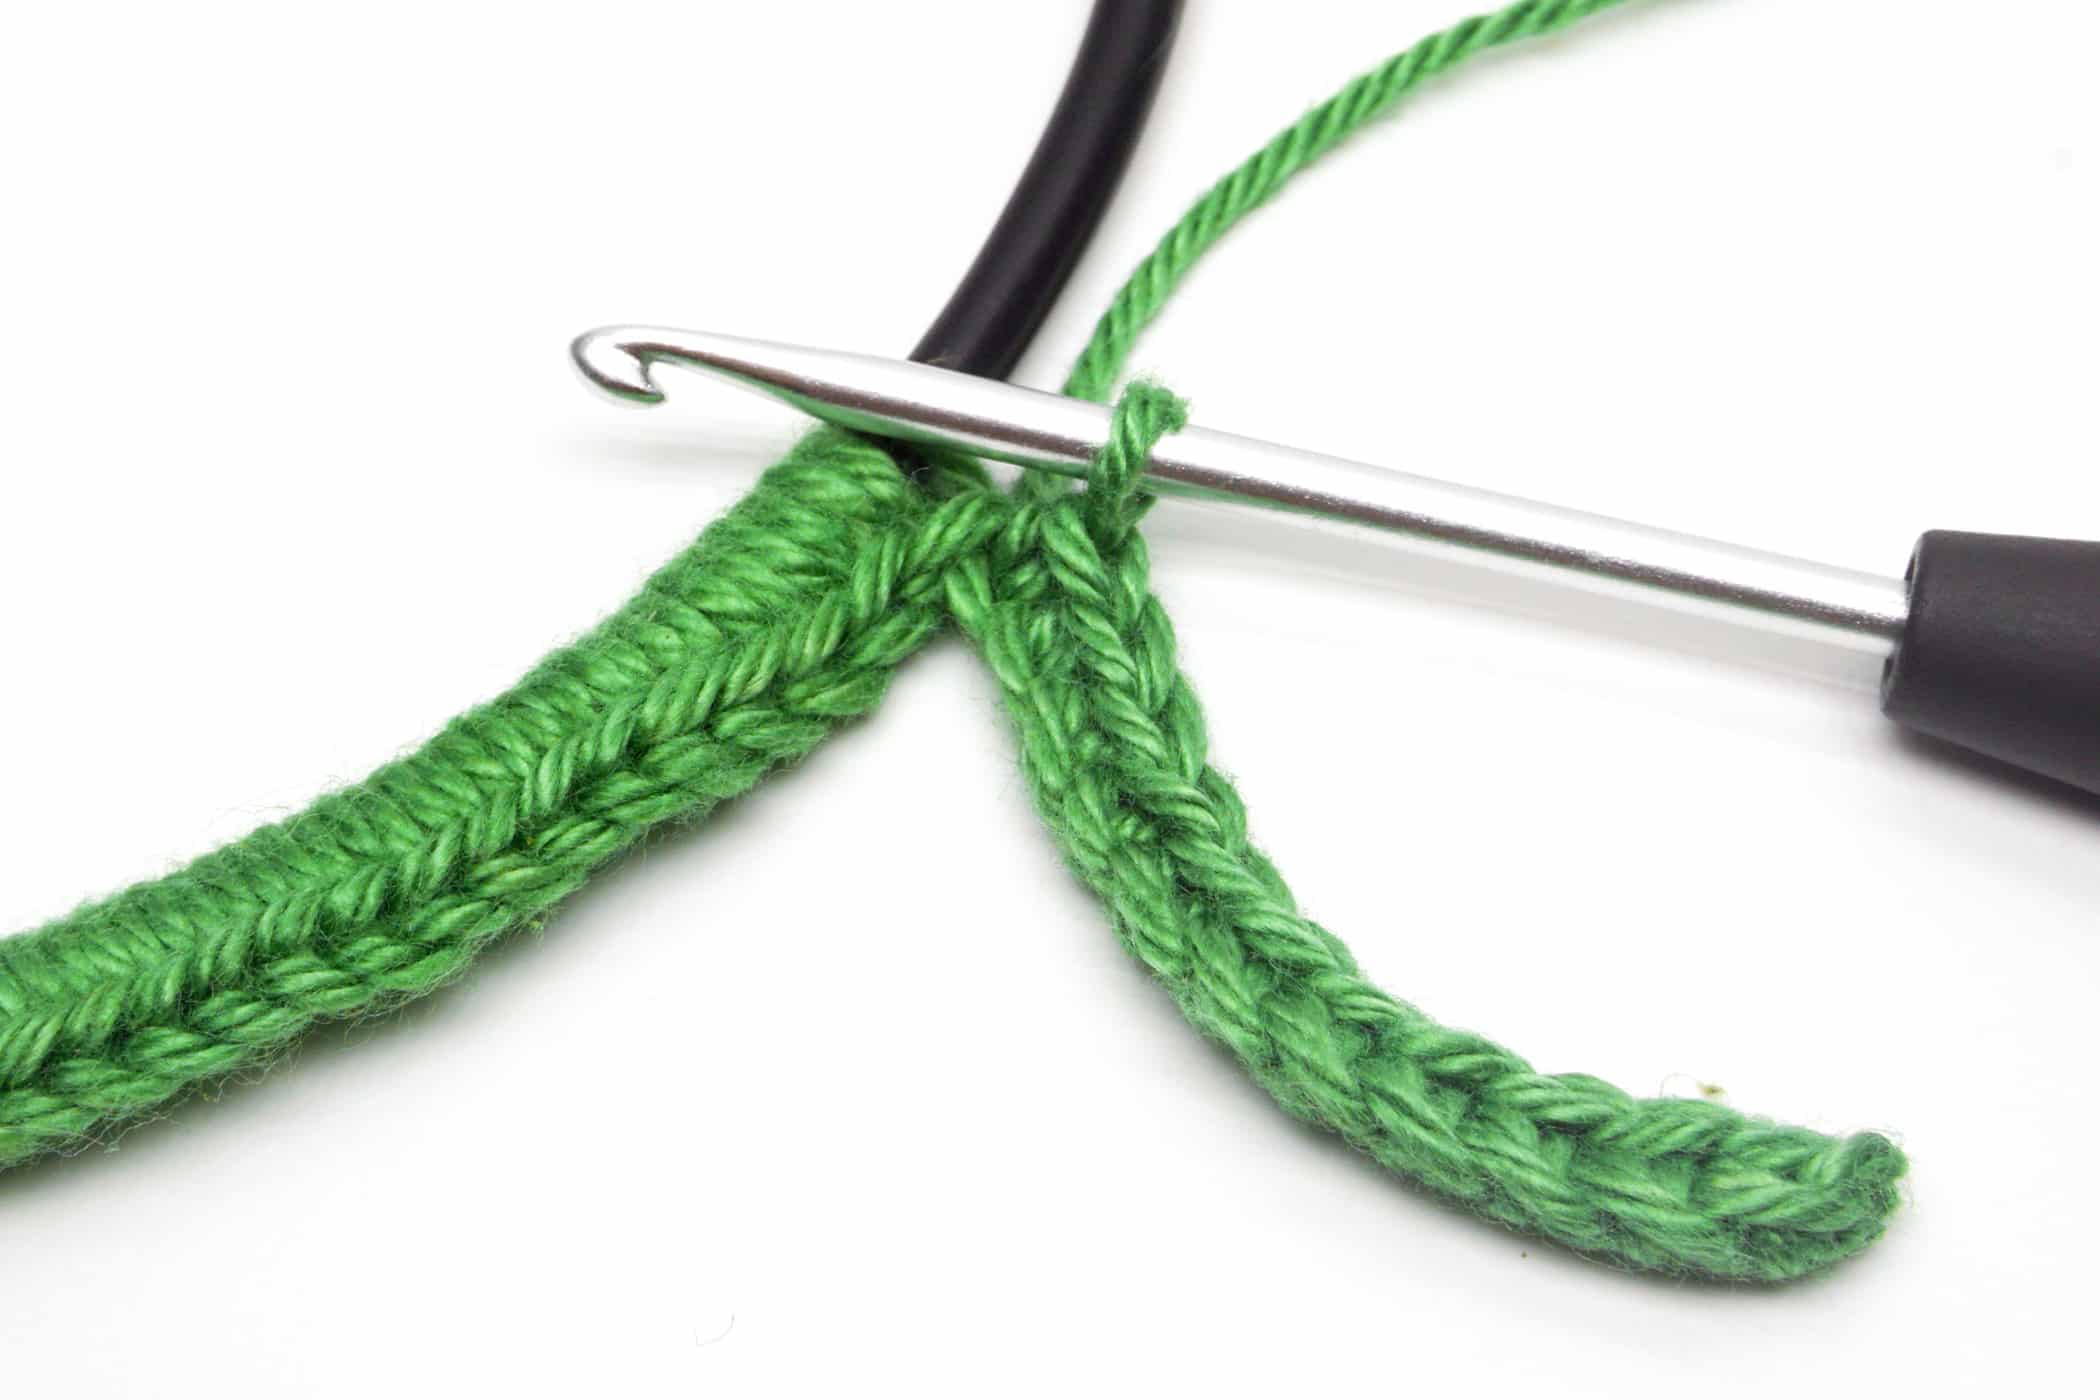
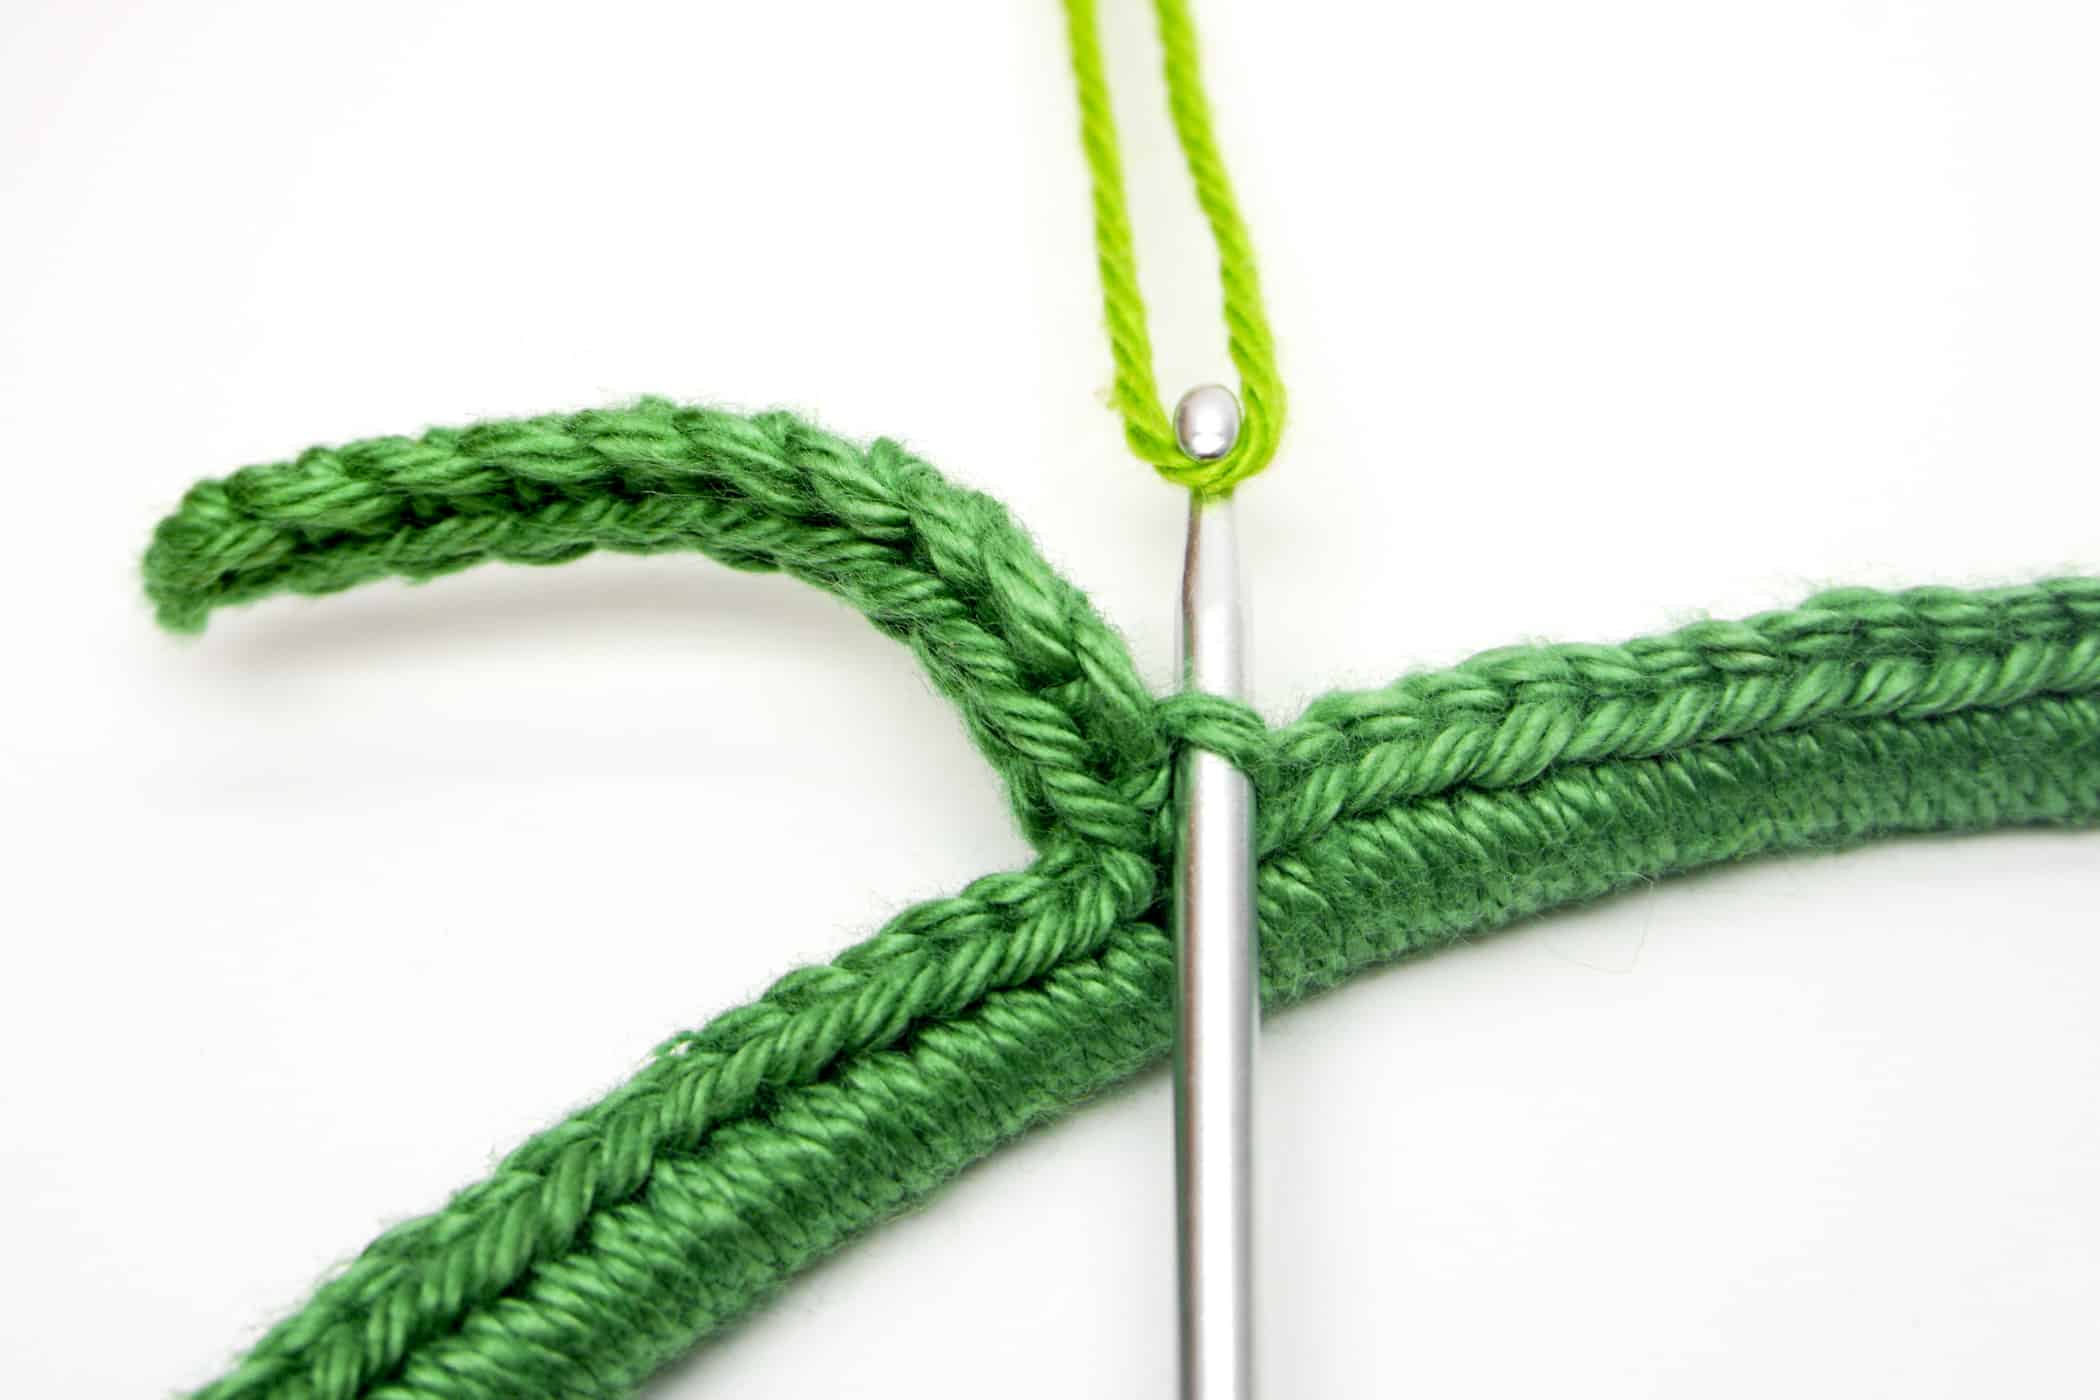
- Step 4: Now crochet the 1st single crochet stitch. Move the crochet hook under the cable. Don’t worry if the chain stitch turns while crocheting it. Yarn over the thread and pull it under the cable to the front. You now have 2 loops on the crochet hook. Yarn over again and pull it through both loops on the crochet hook. Done is the 1st sc.

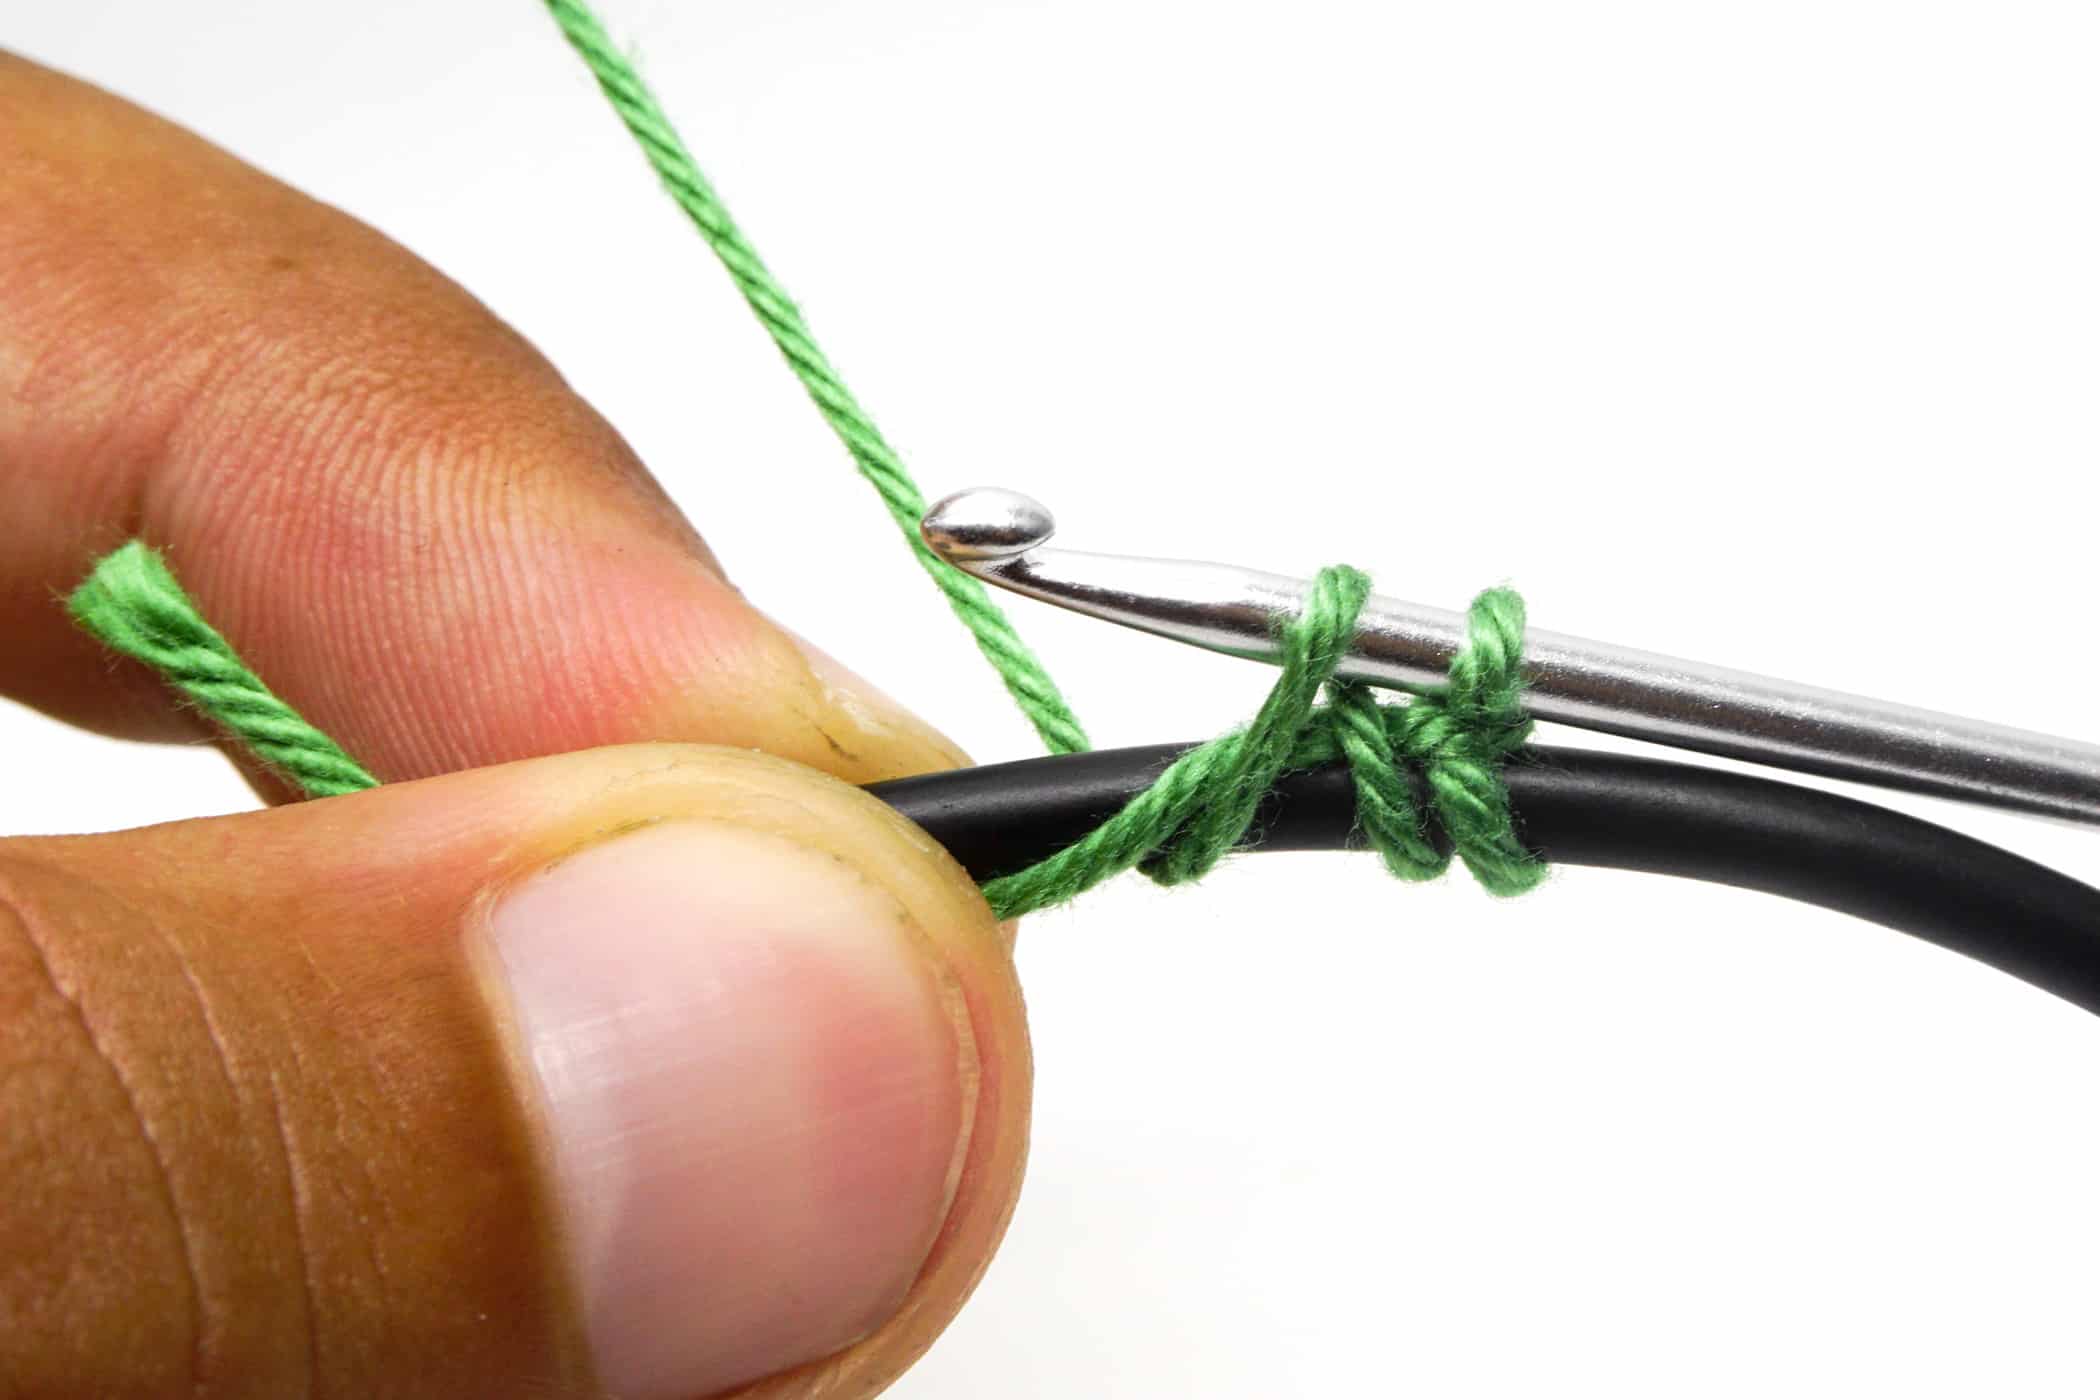
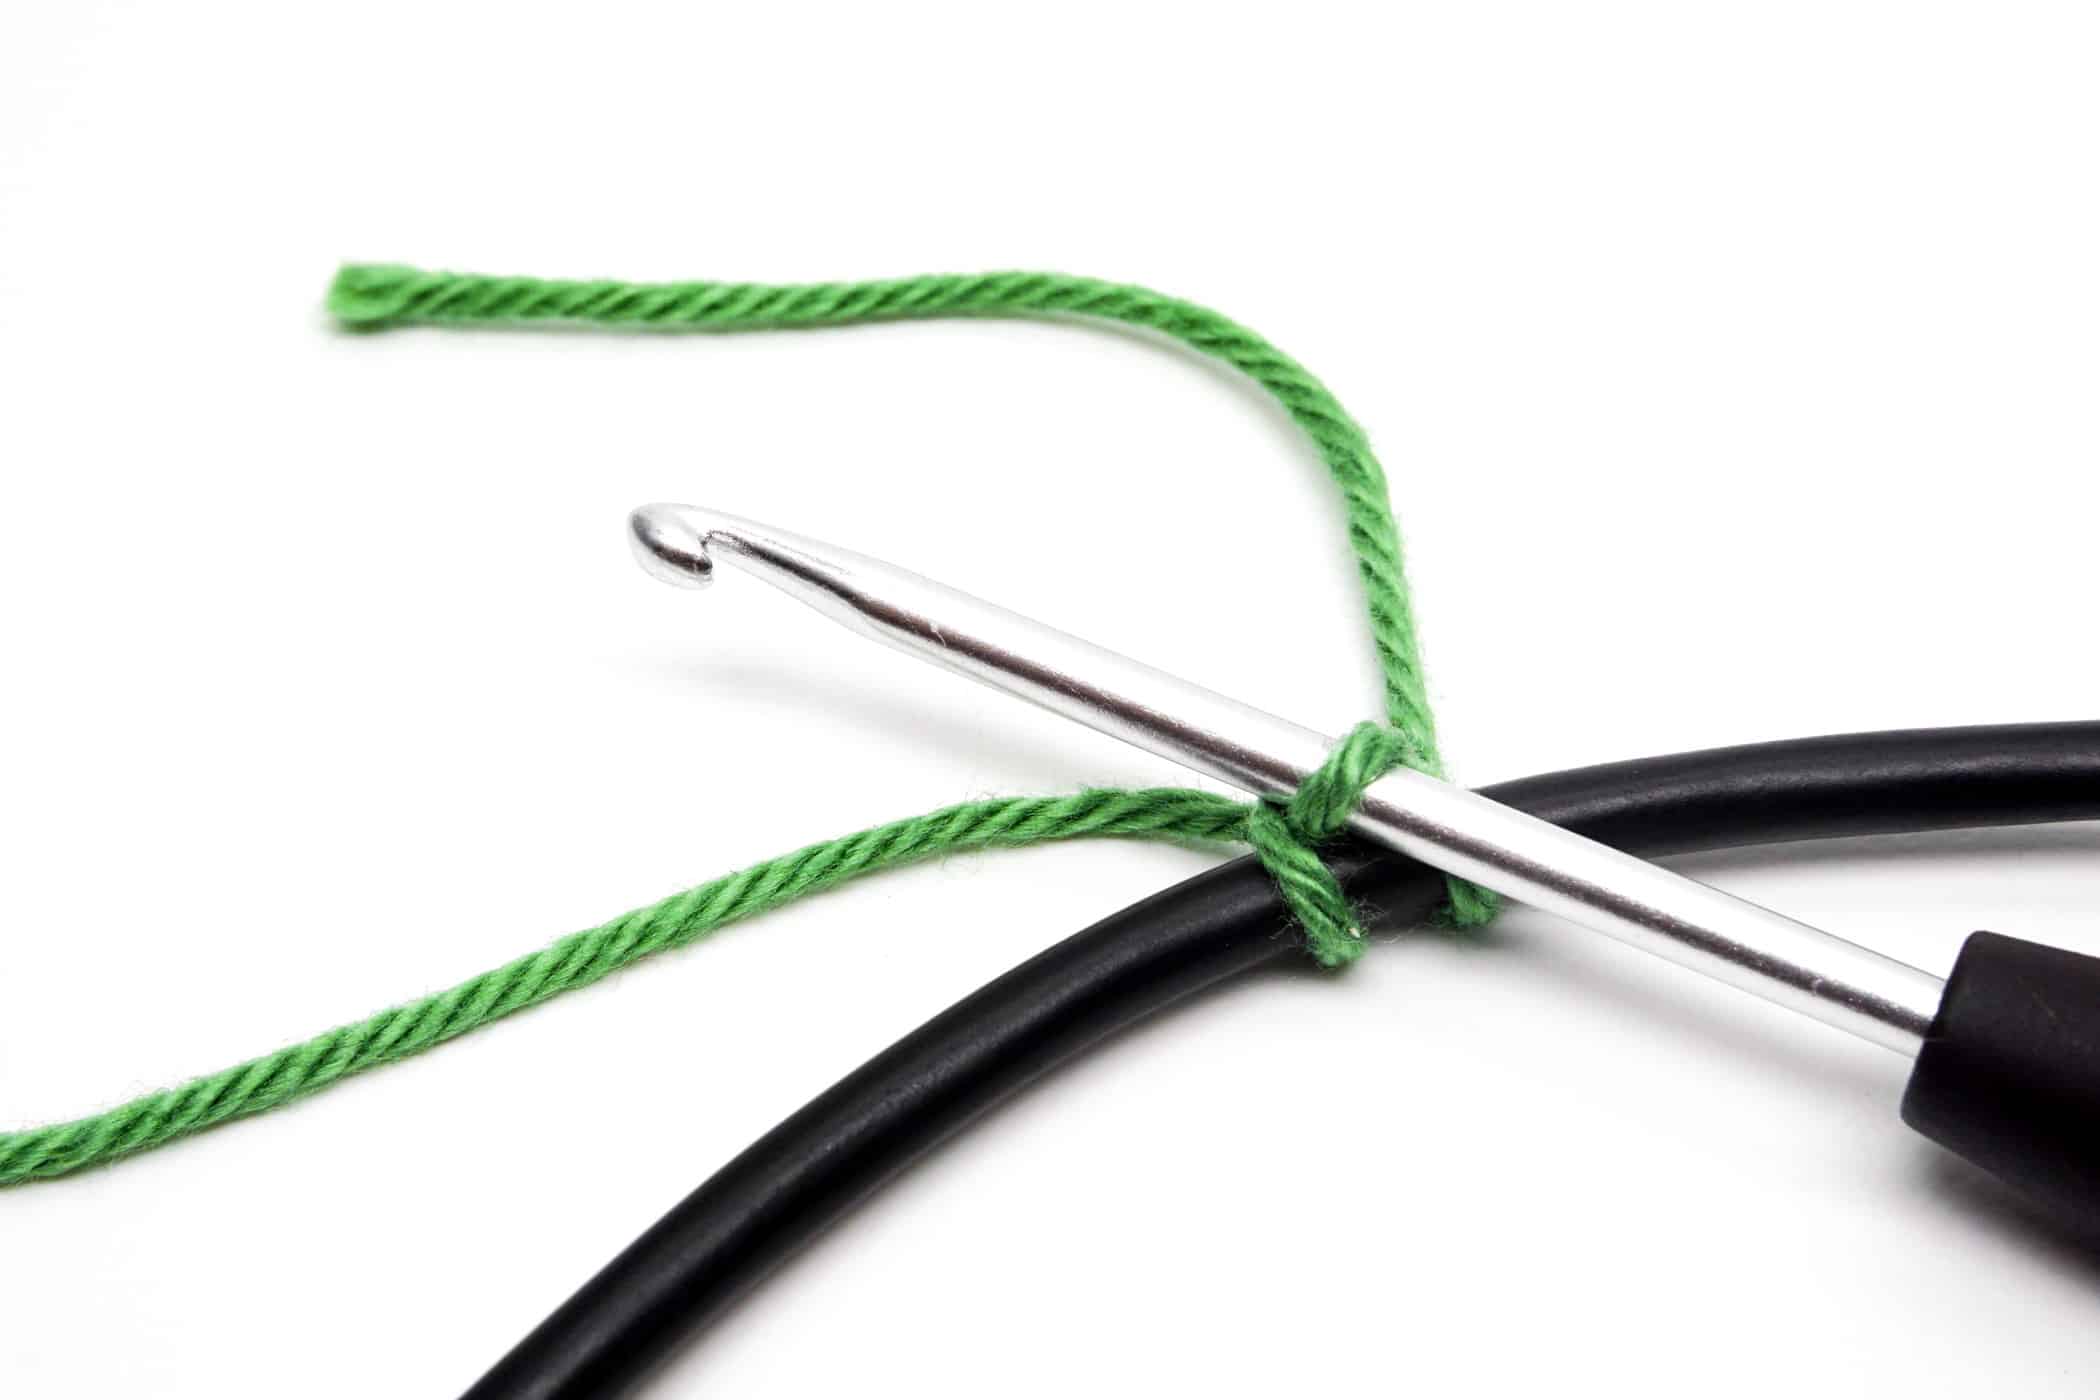
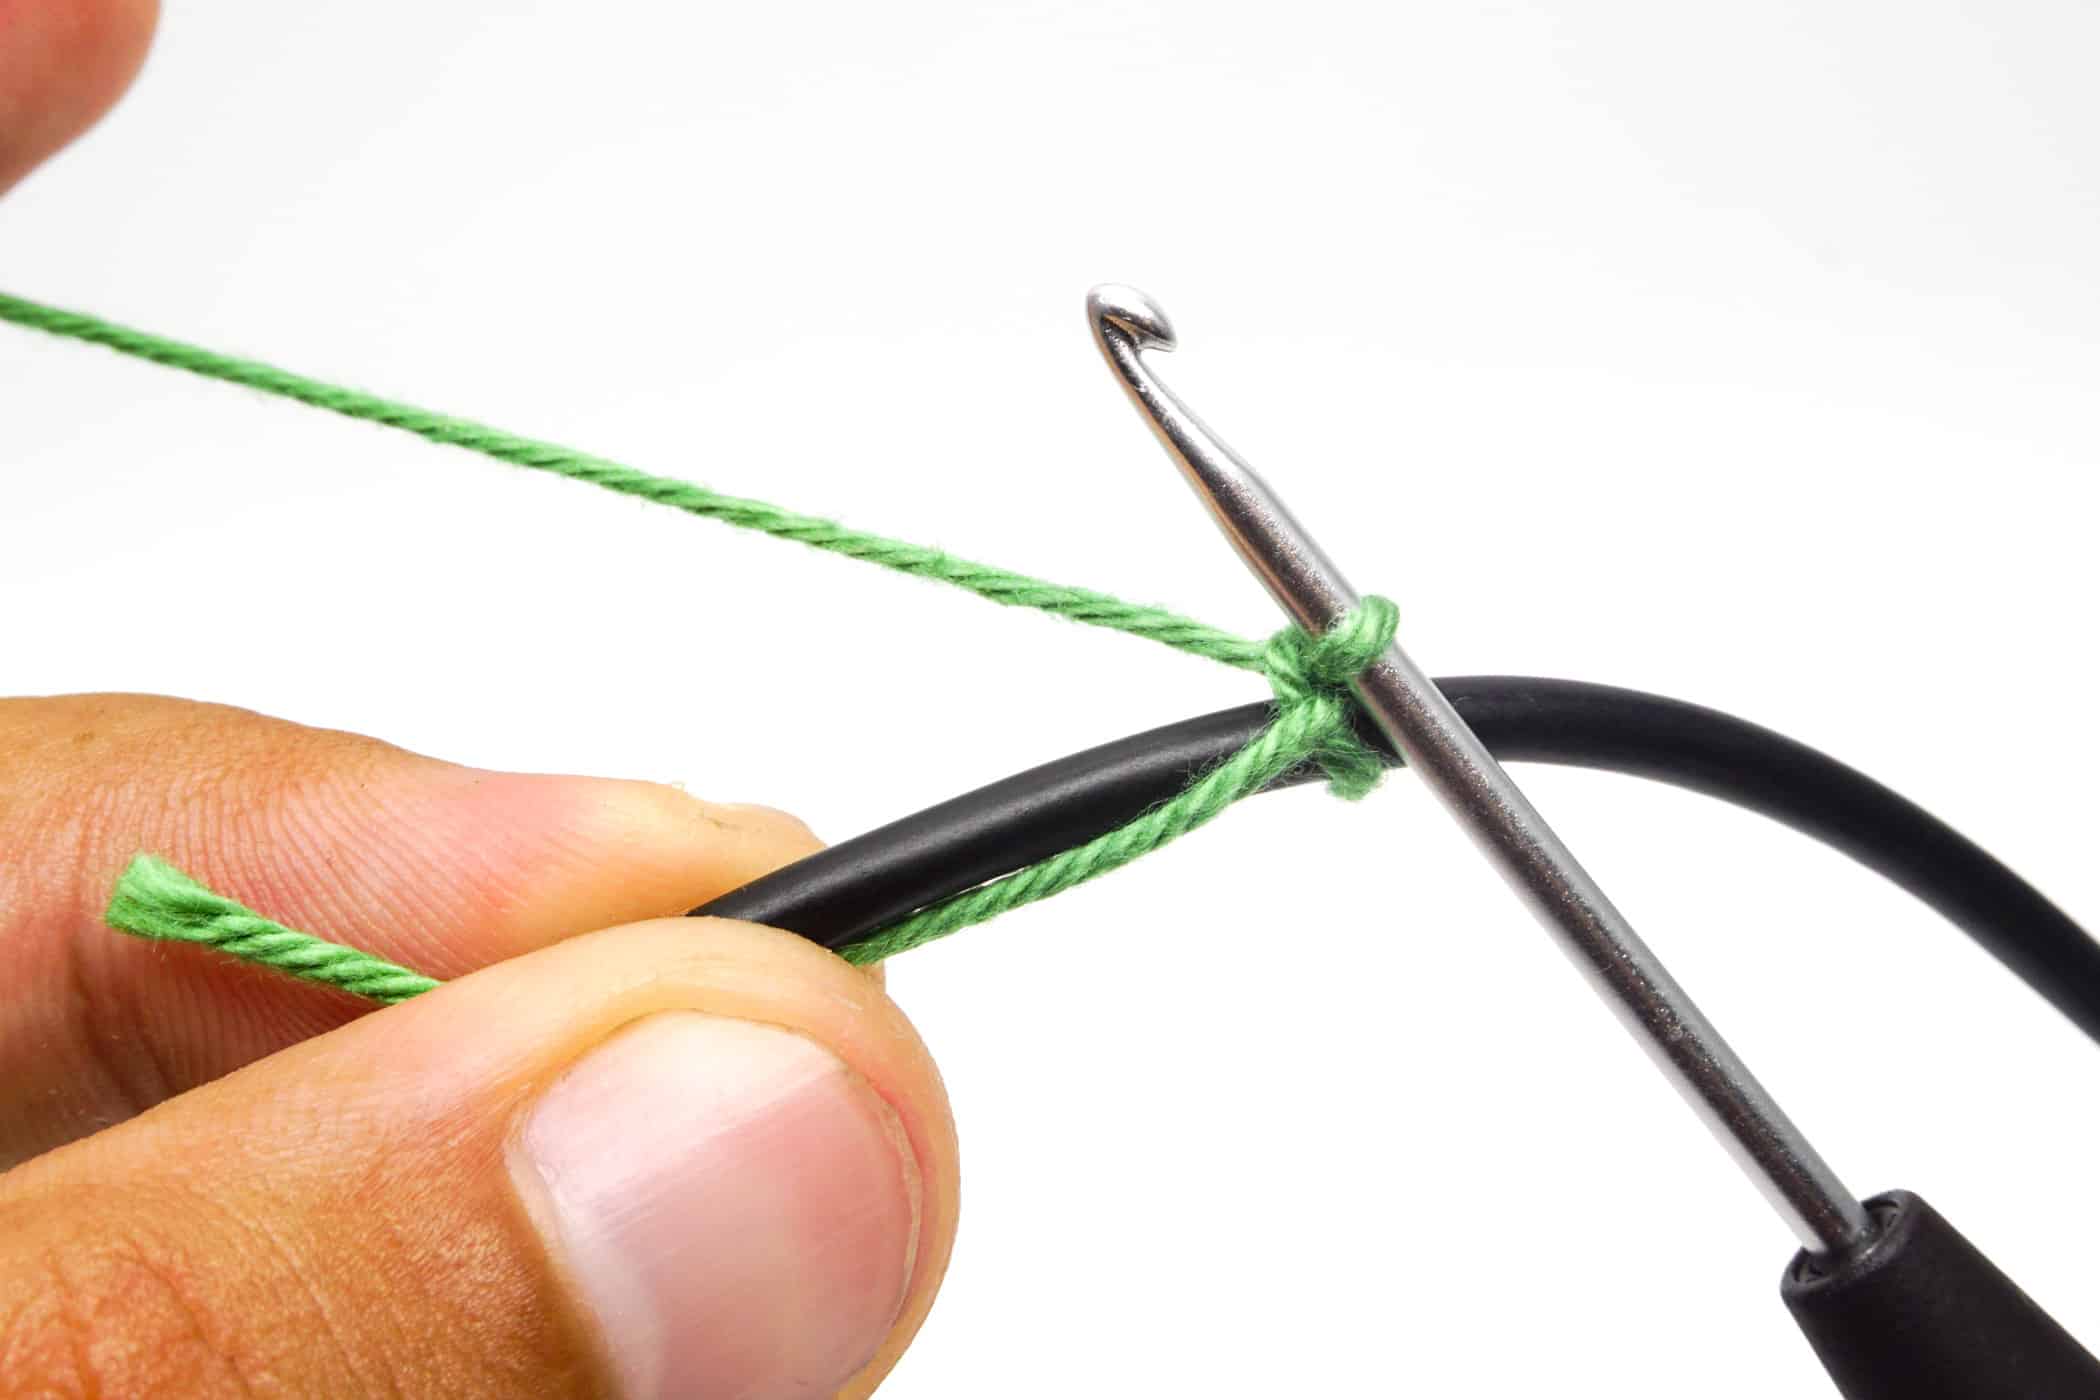
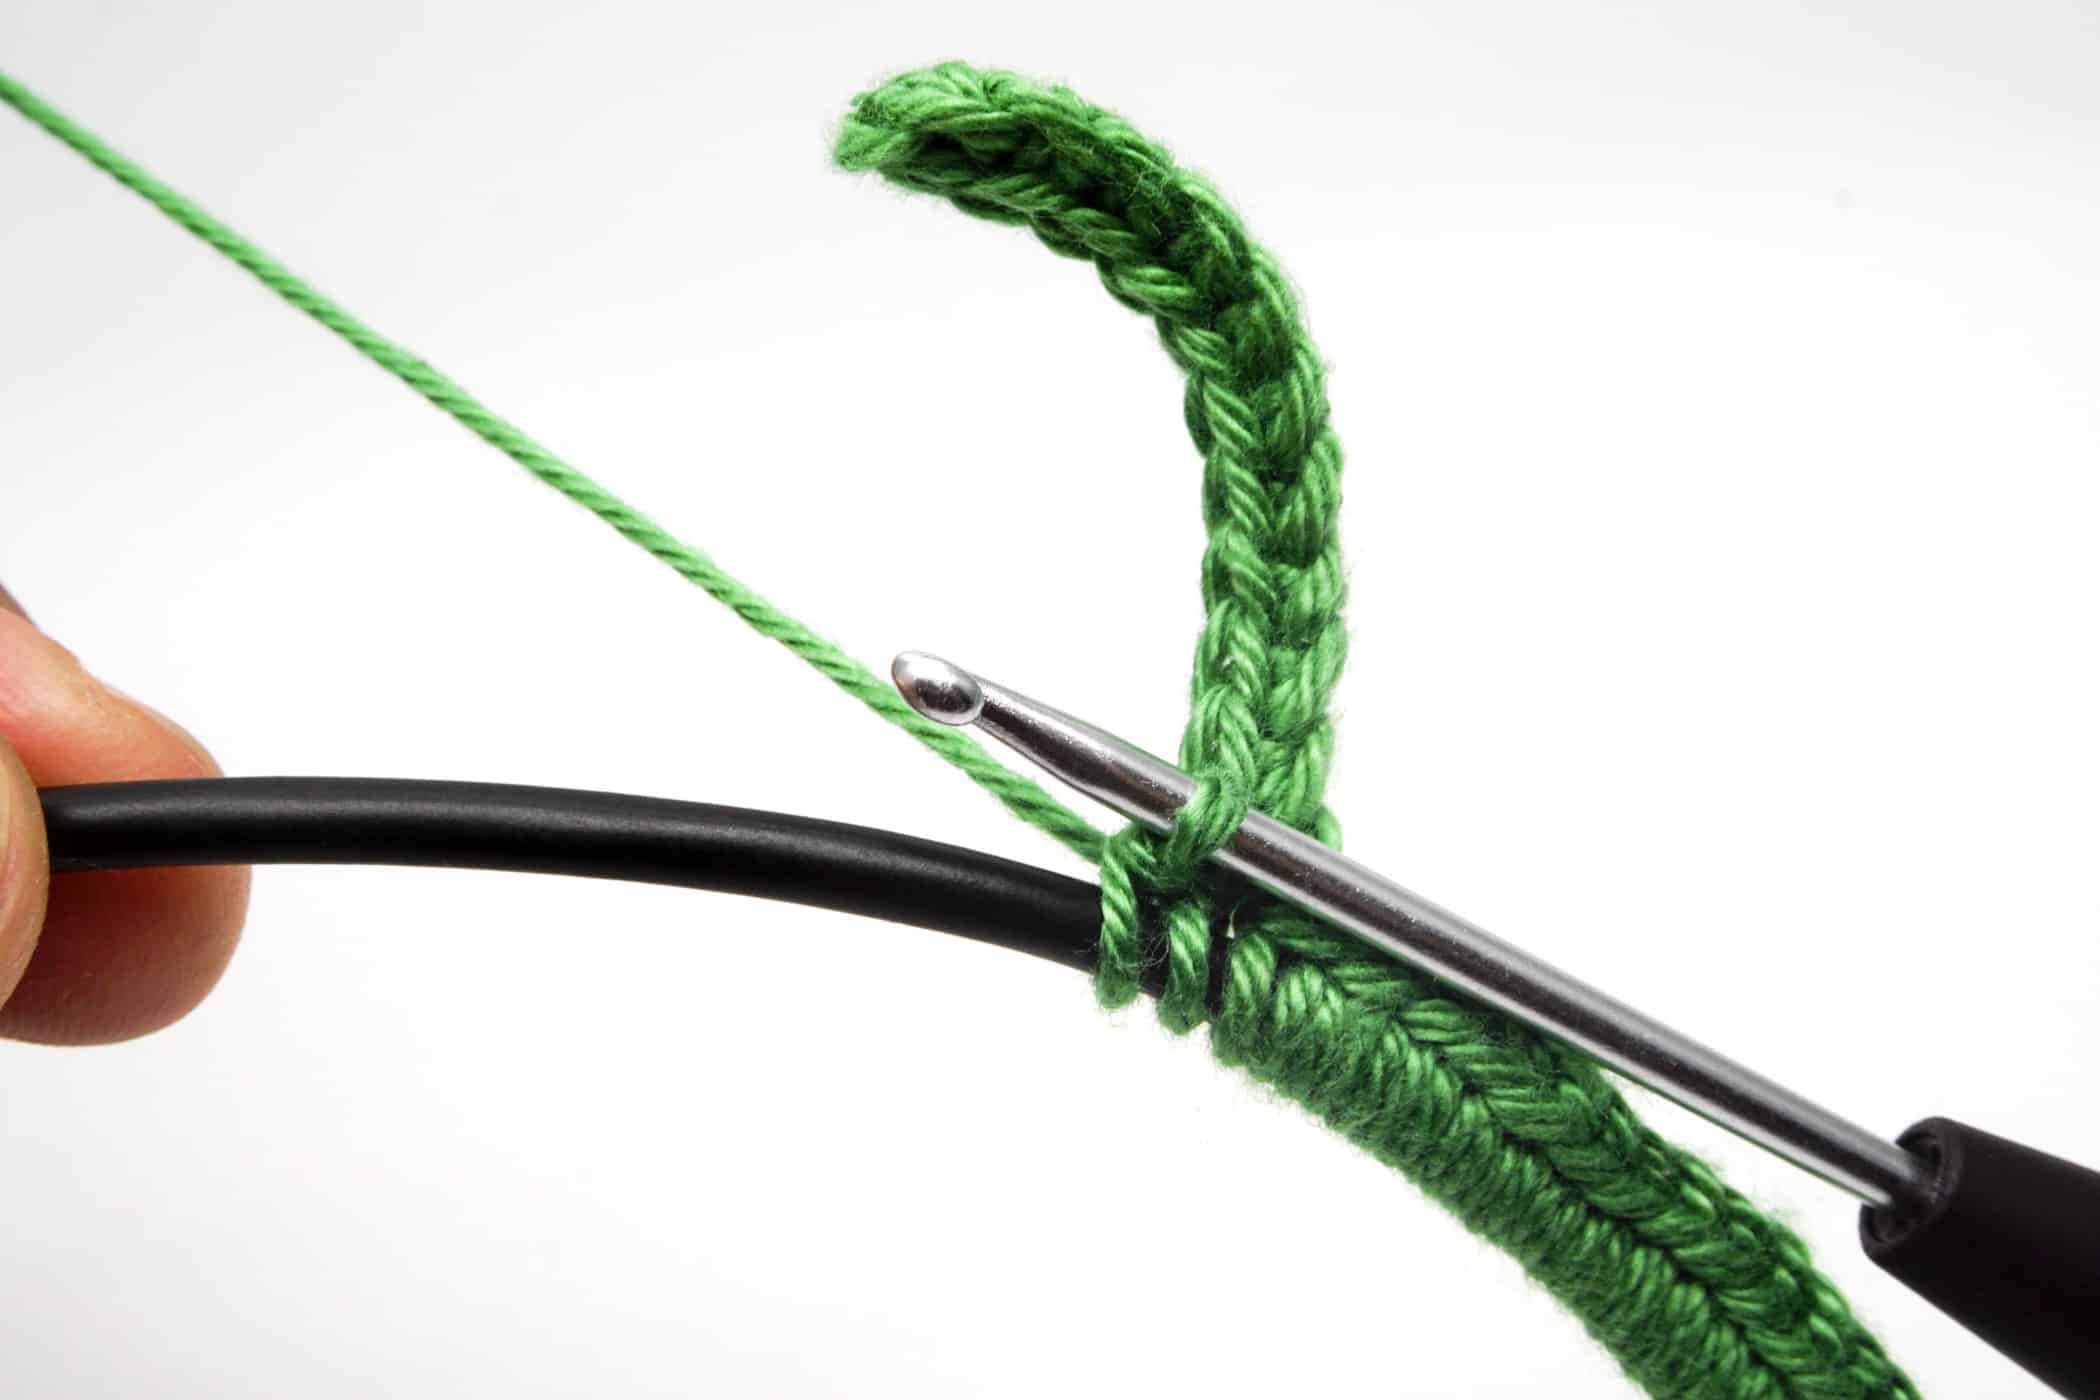
- Step 5: That’s already it. From now on you simply continue to crochet single crochet stitches along the cable. The next stitch is crocheted exactly as described in the previous steps. Again, you move the crochet hook under the cable, yarn over the thread and pull it under the cable to the front, yarn over again and pull through both loops on the crochet hook. Done is the 2nd sc.
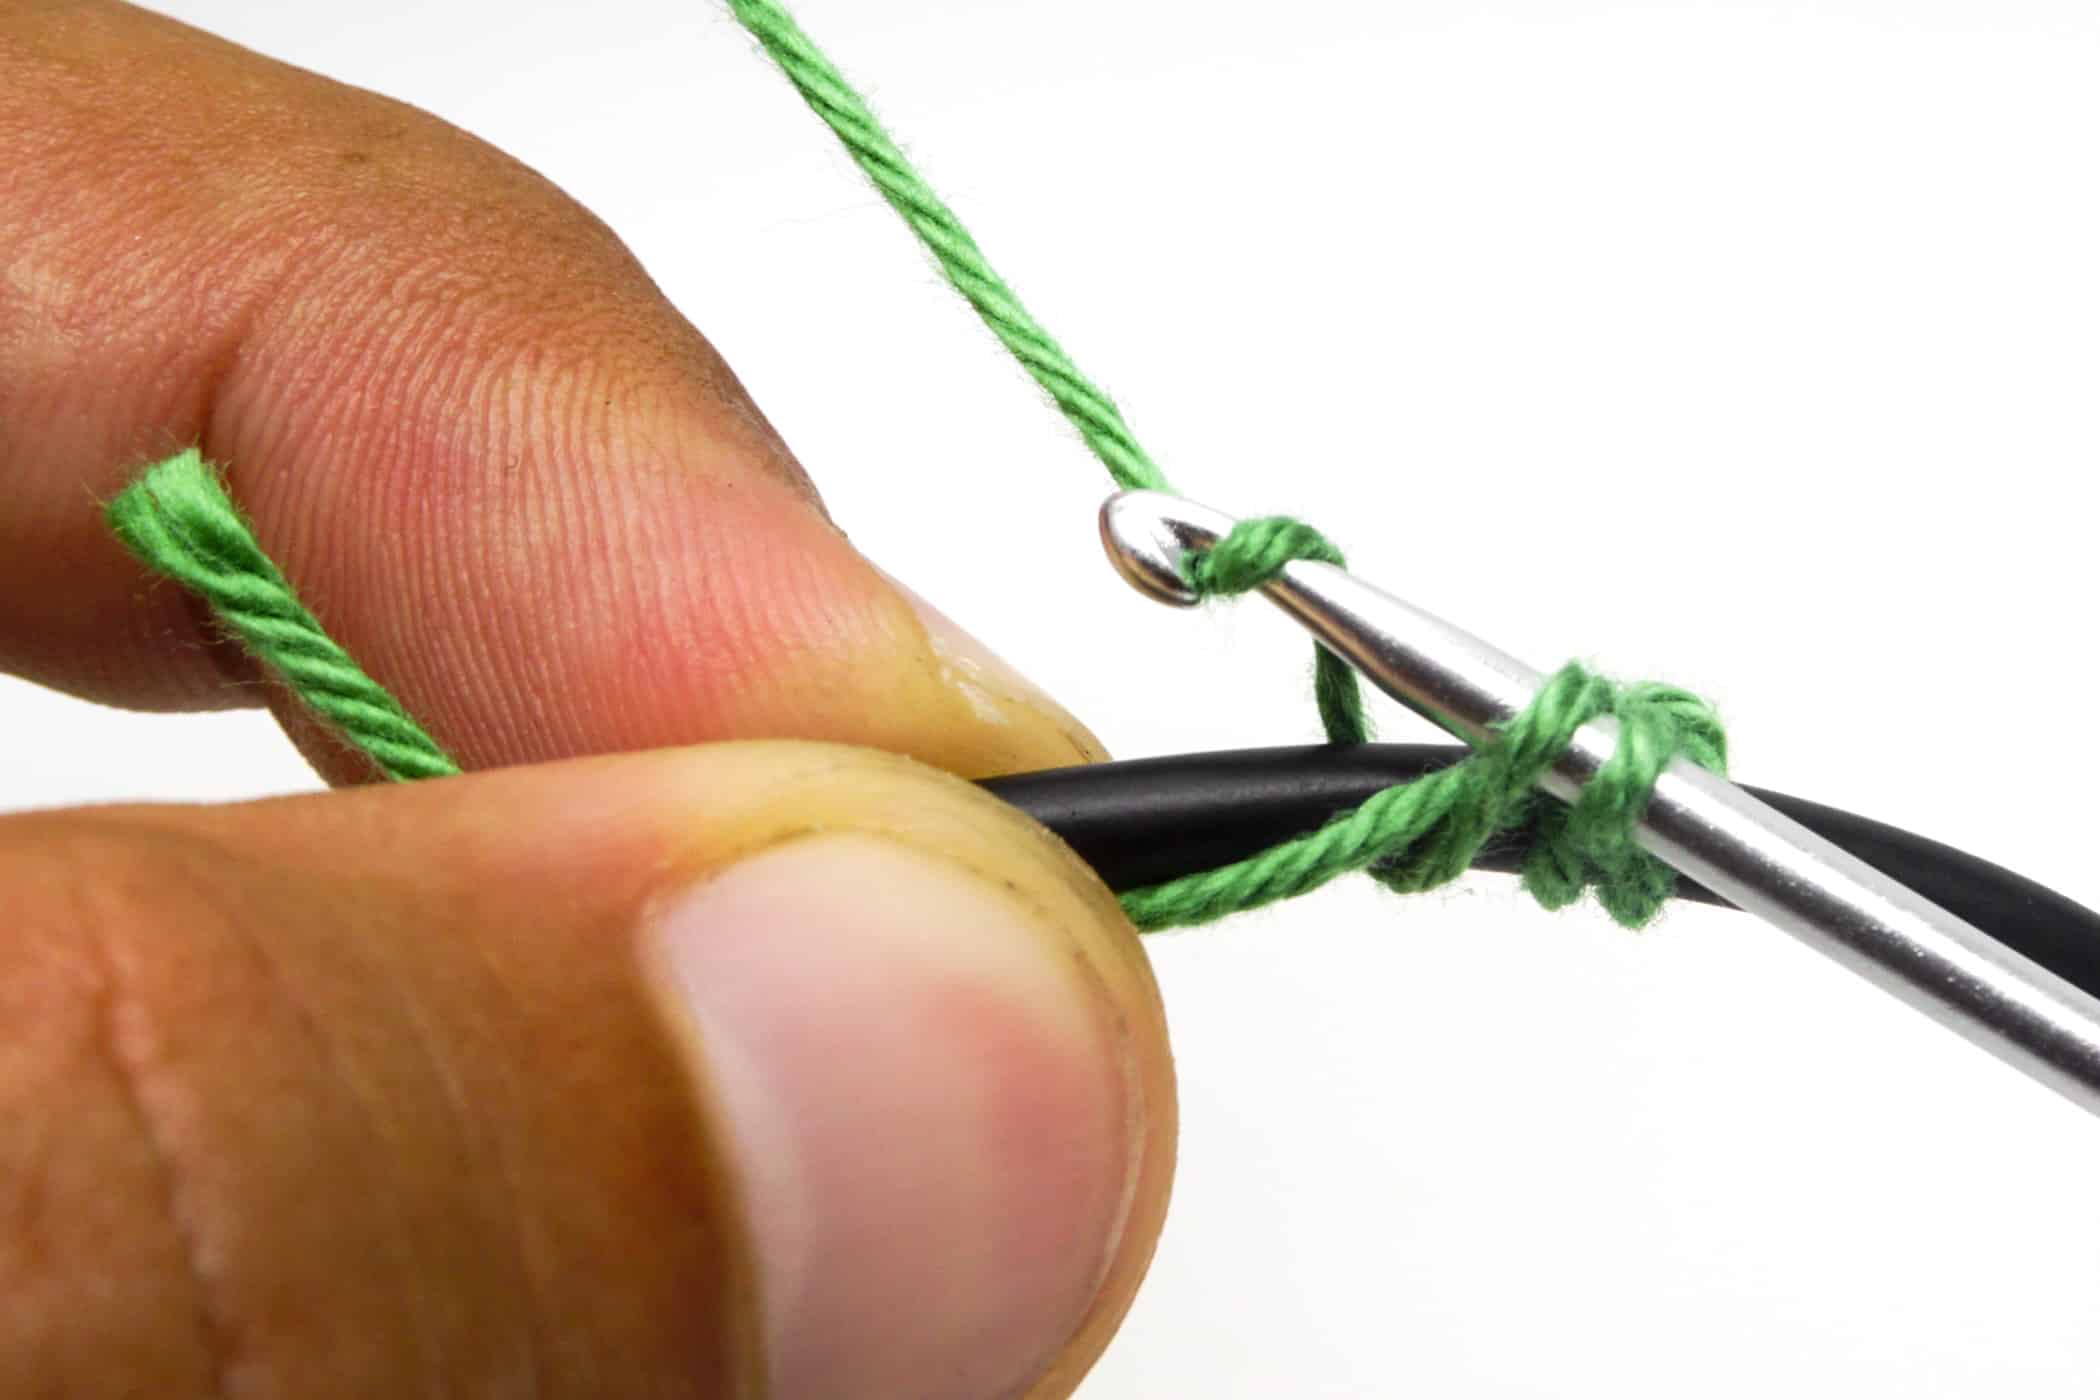
- Step 6: Continue crocheting until you want to crochet the first leaf. In this example the 1st leaf is crocheted after 30 sc.
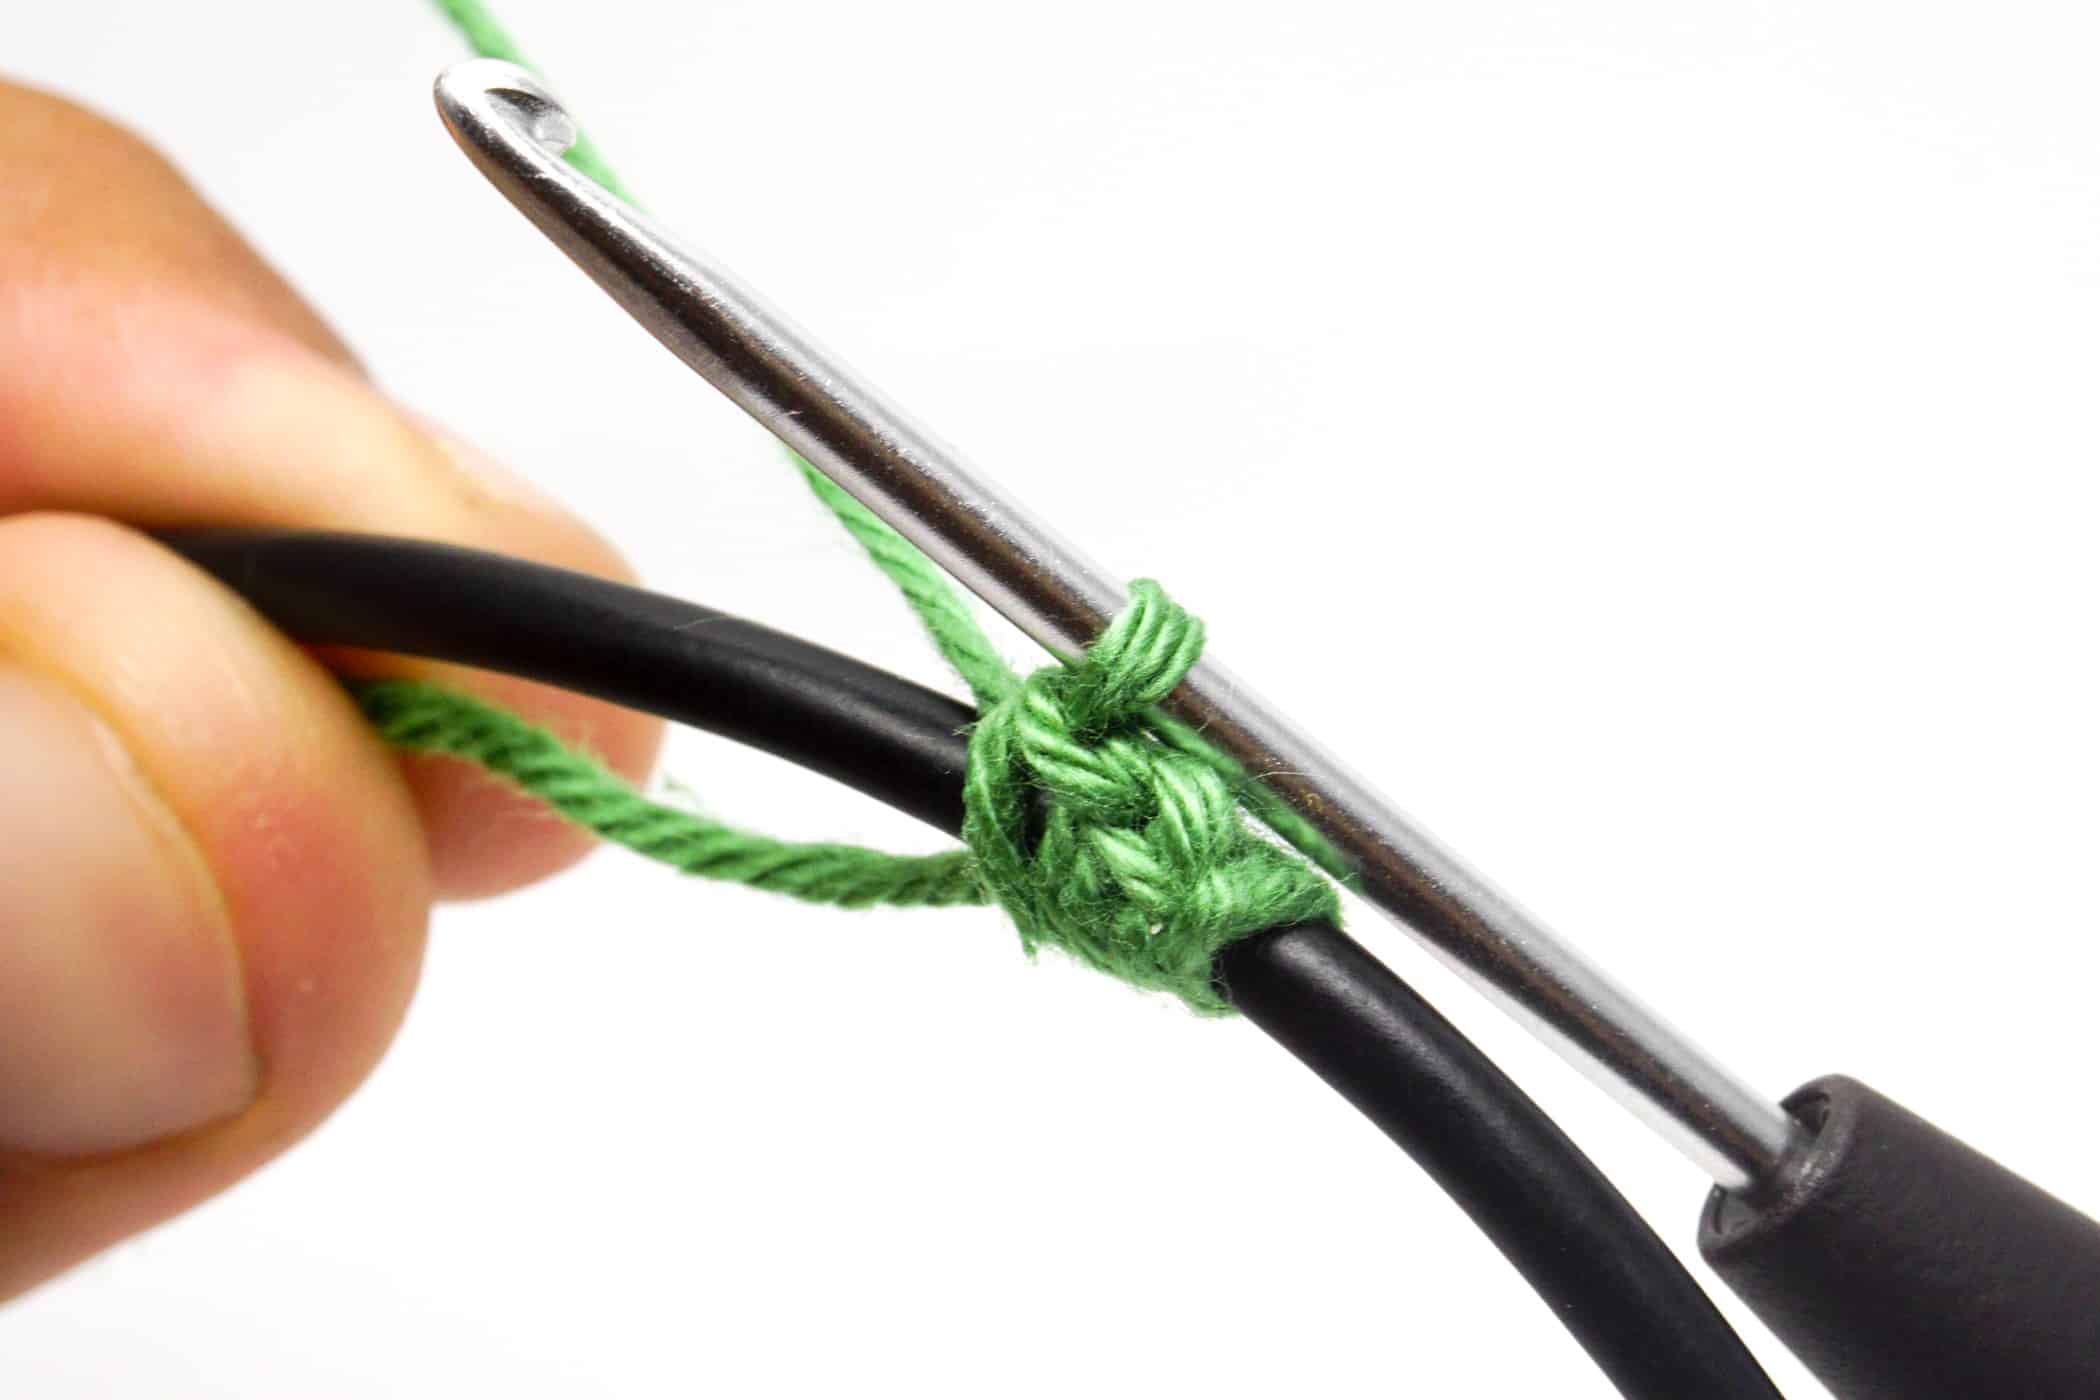
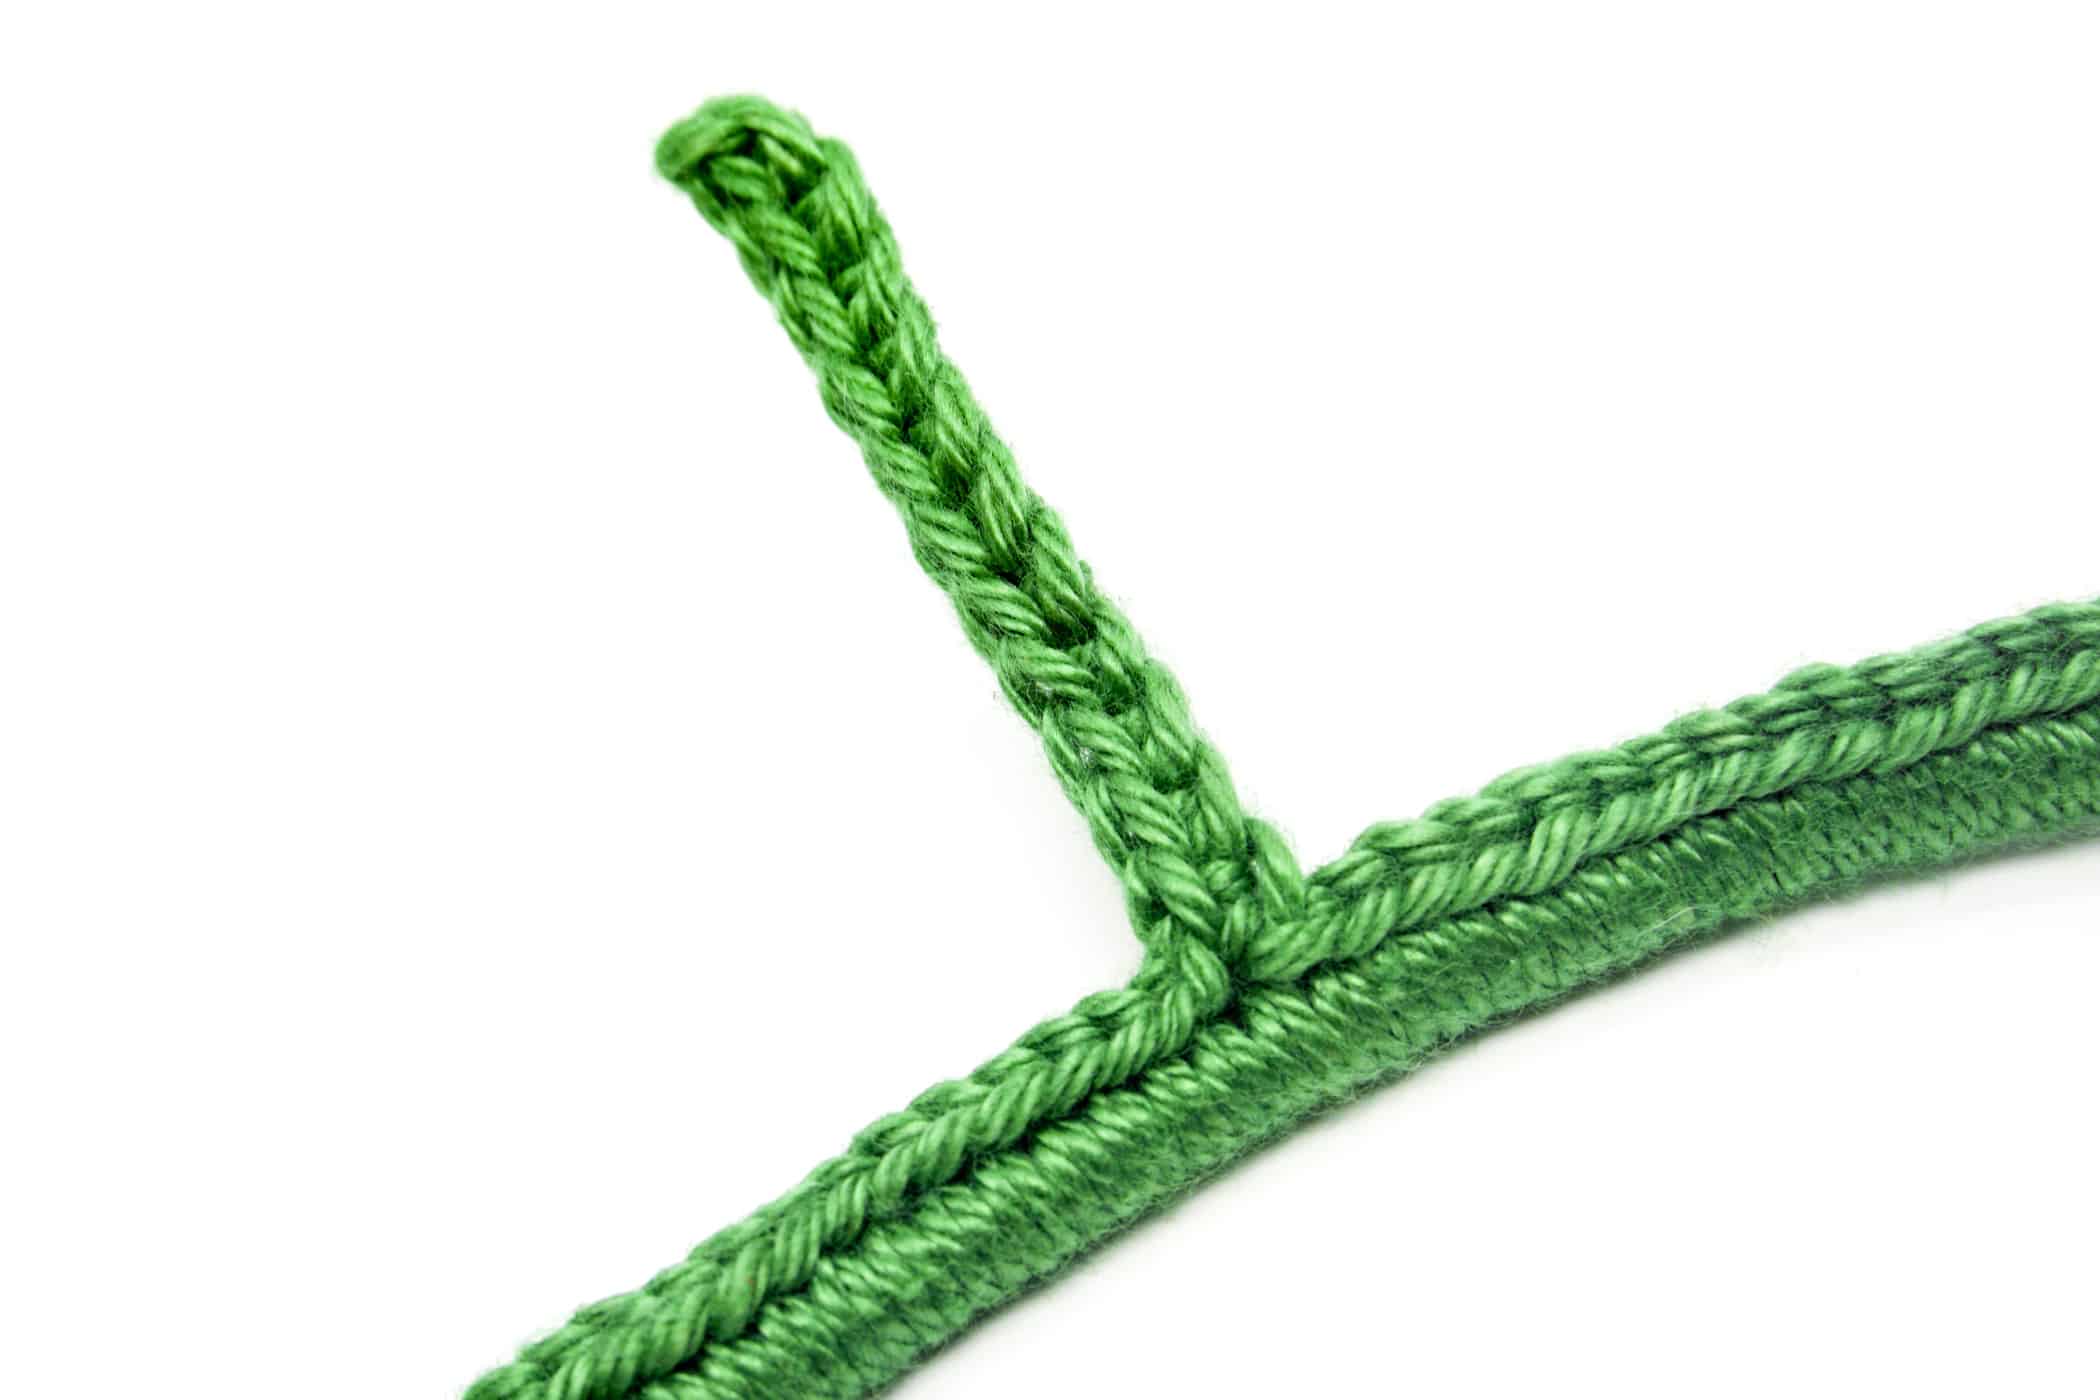
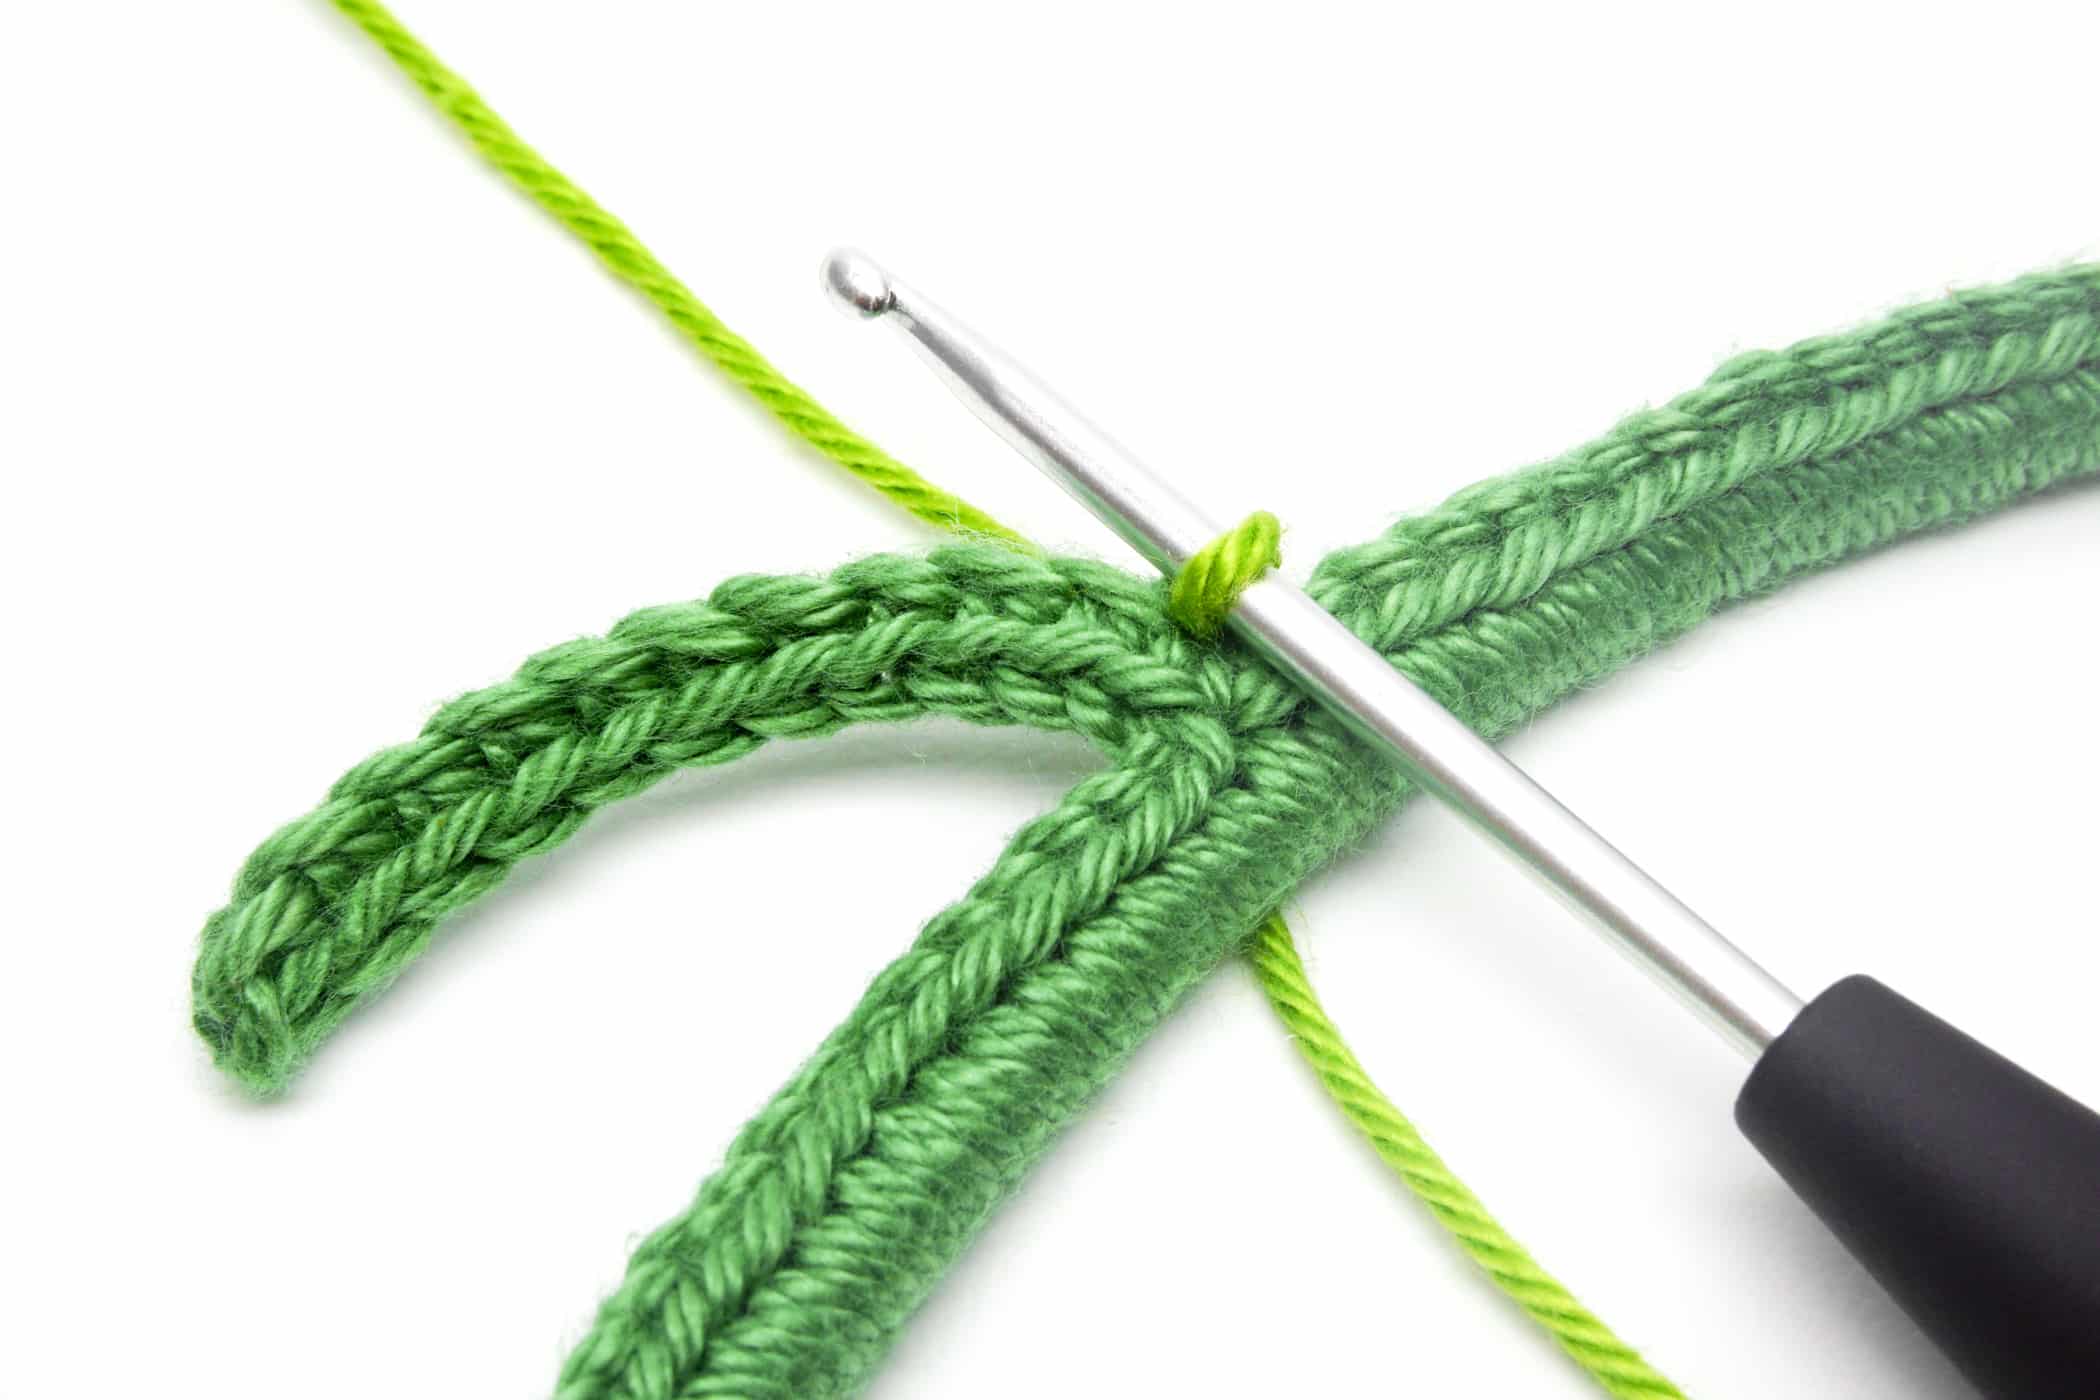
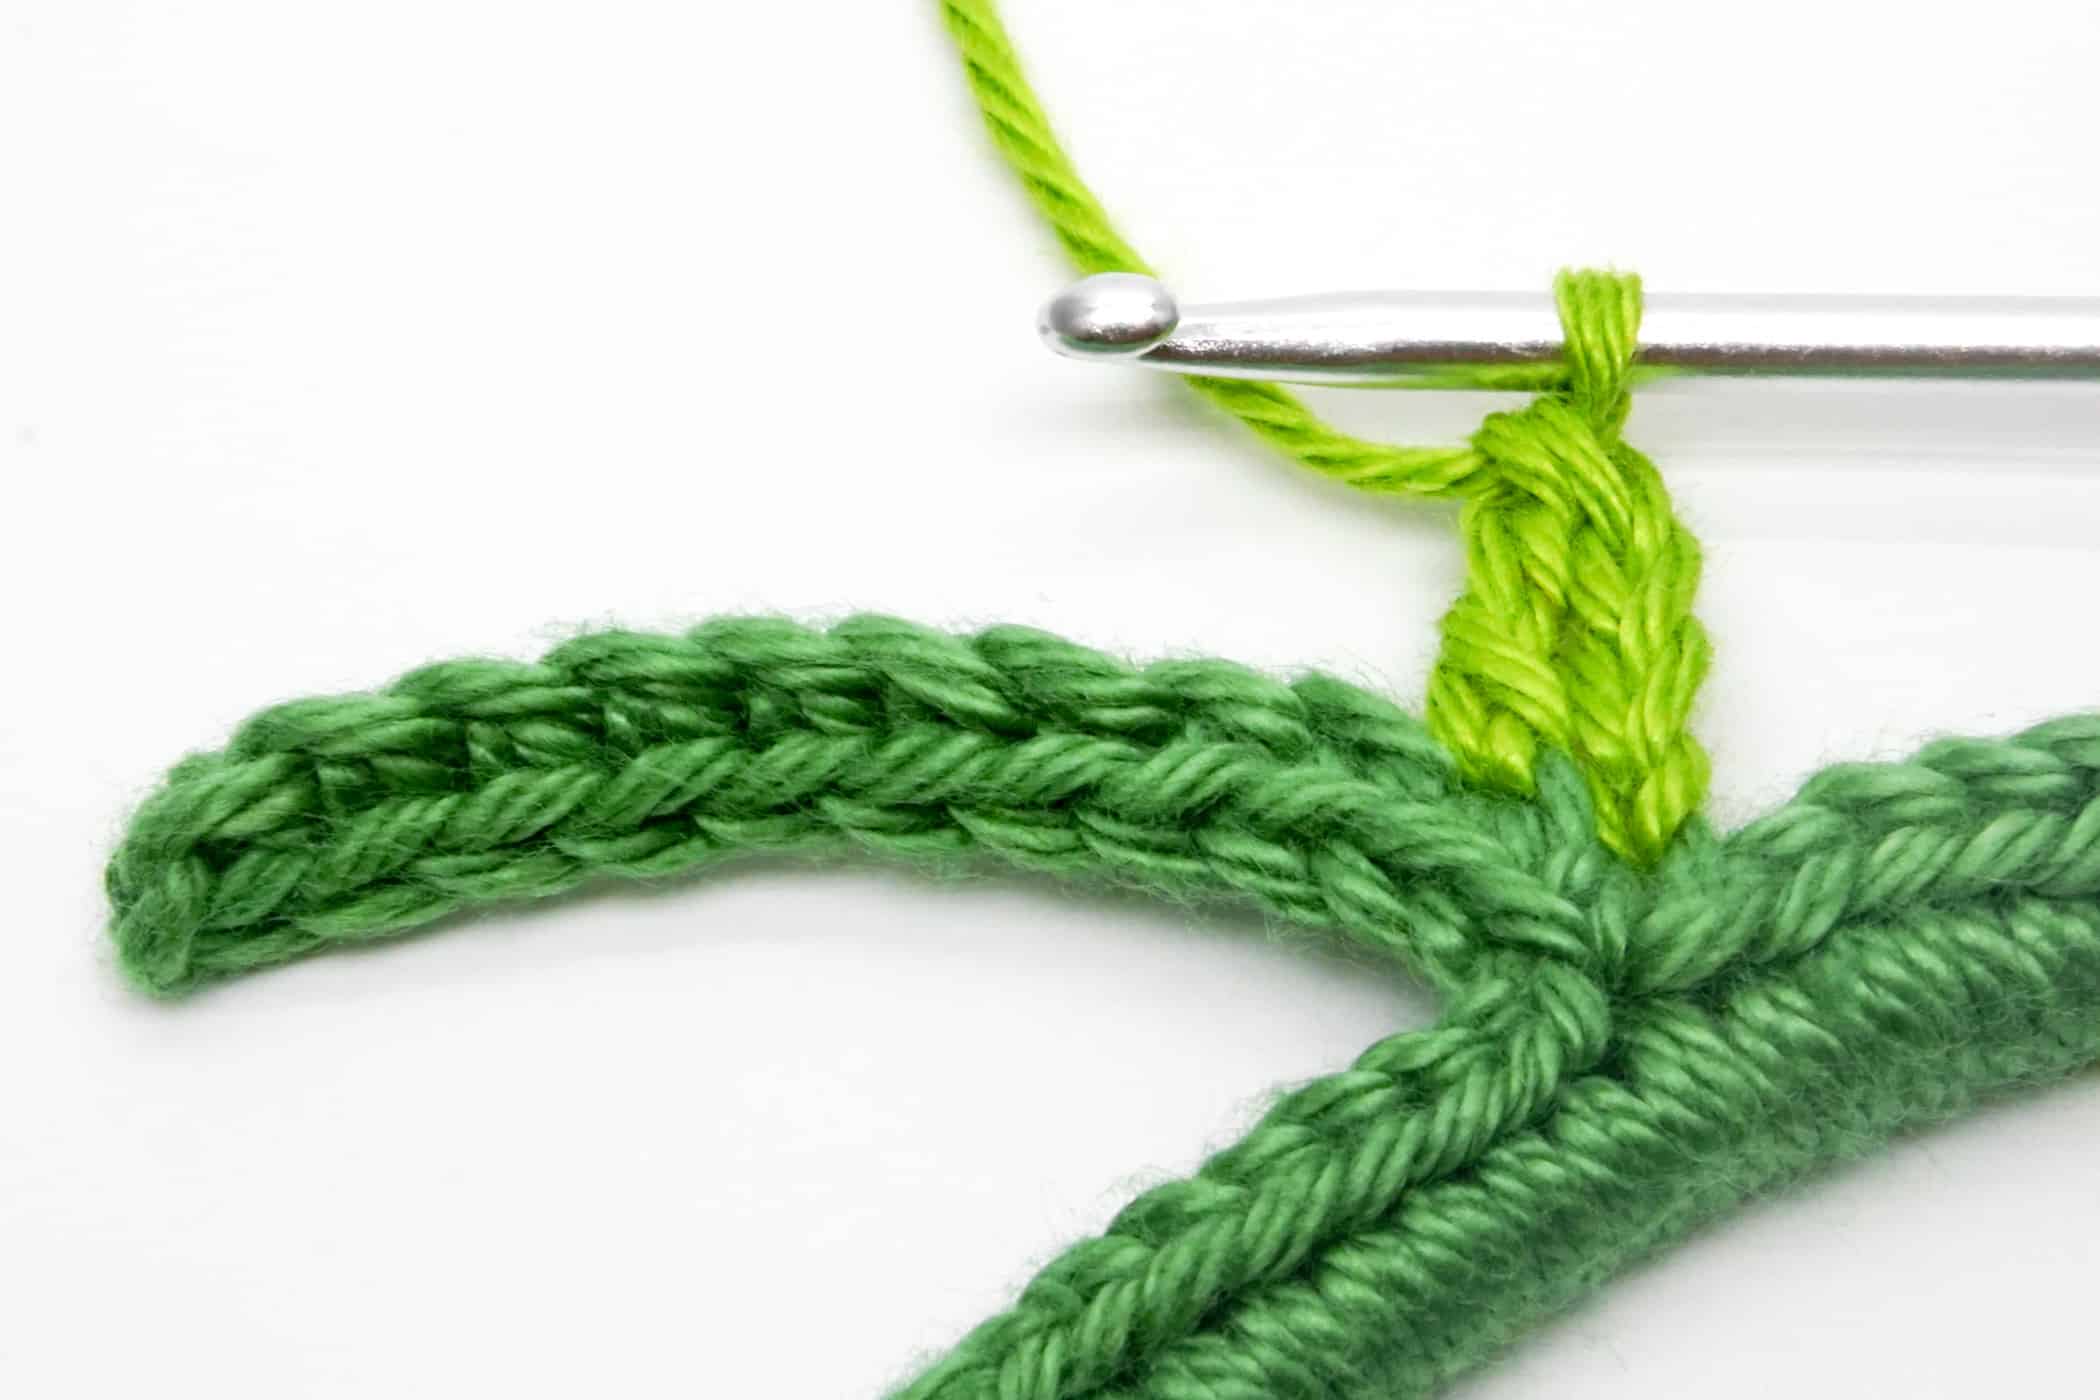
- Step 7: Now crochet the node where later the leaf is crocheted on. Crochet 12 chain stitches. You can crochet the node longer as described here if you do not want it to be directly at the cable, but not shorter. Then crochet 1 sc into the 2nd stitch from the hook and another 10 sc along the chain. Done is the node.
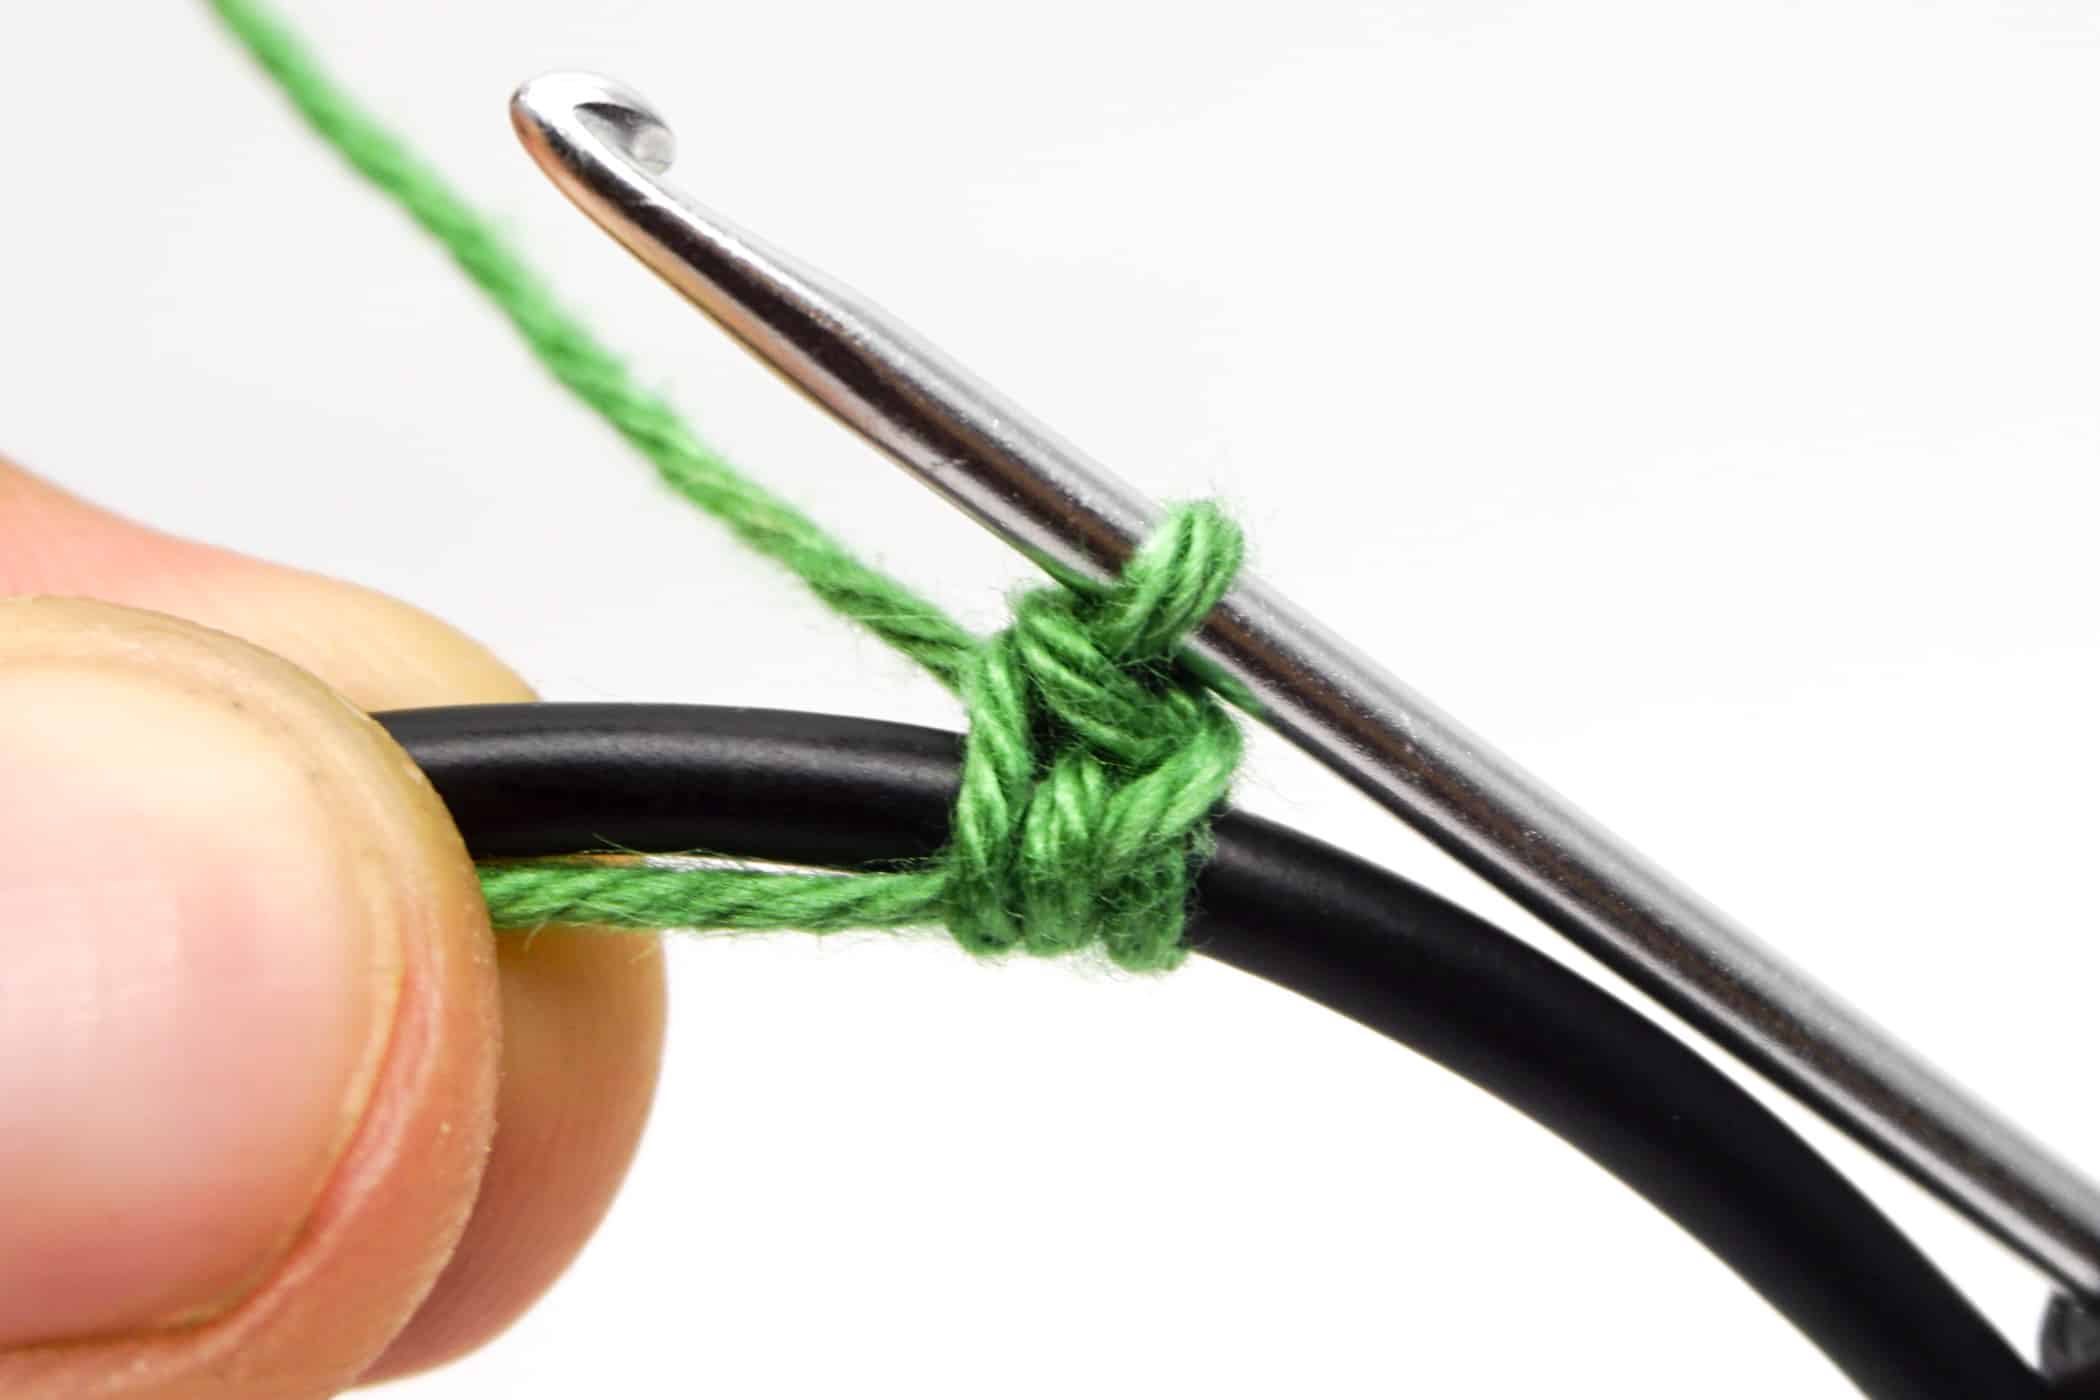
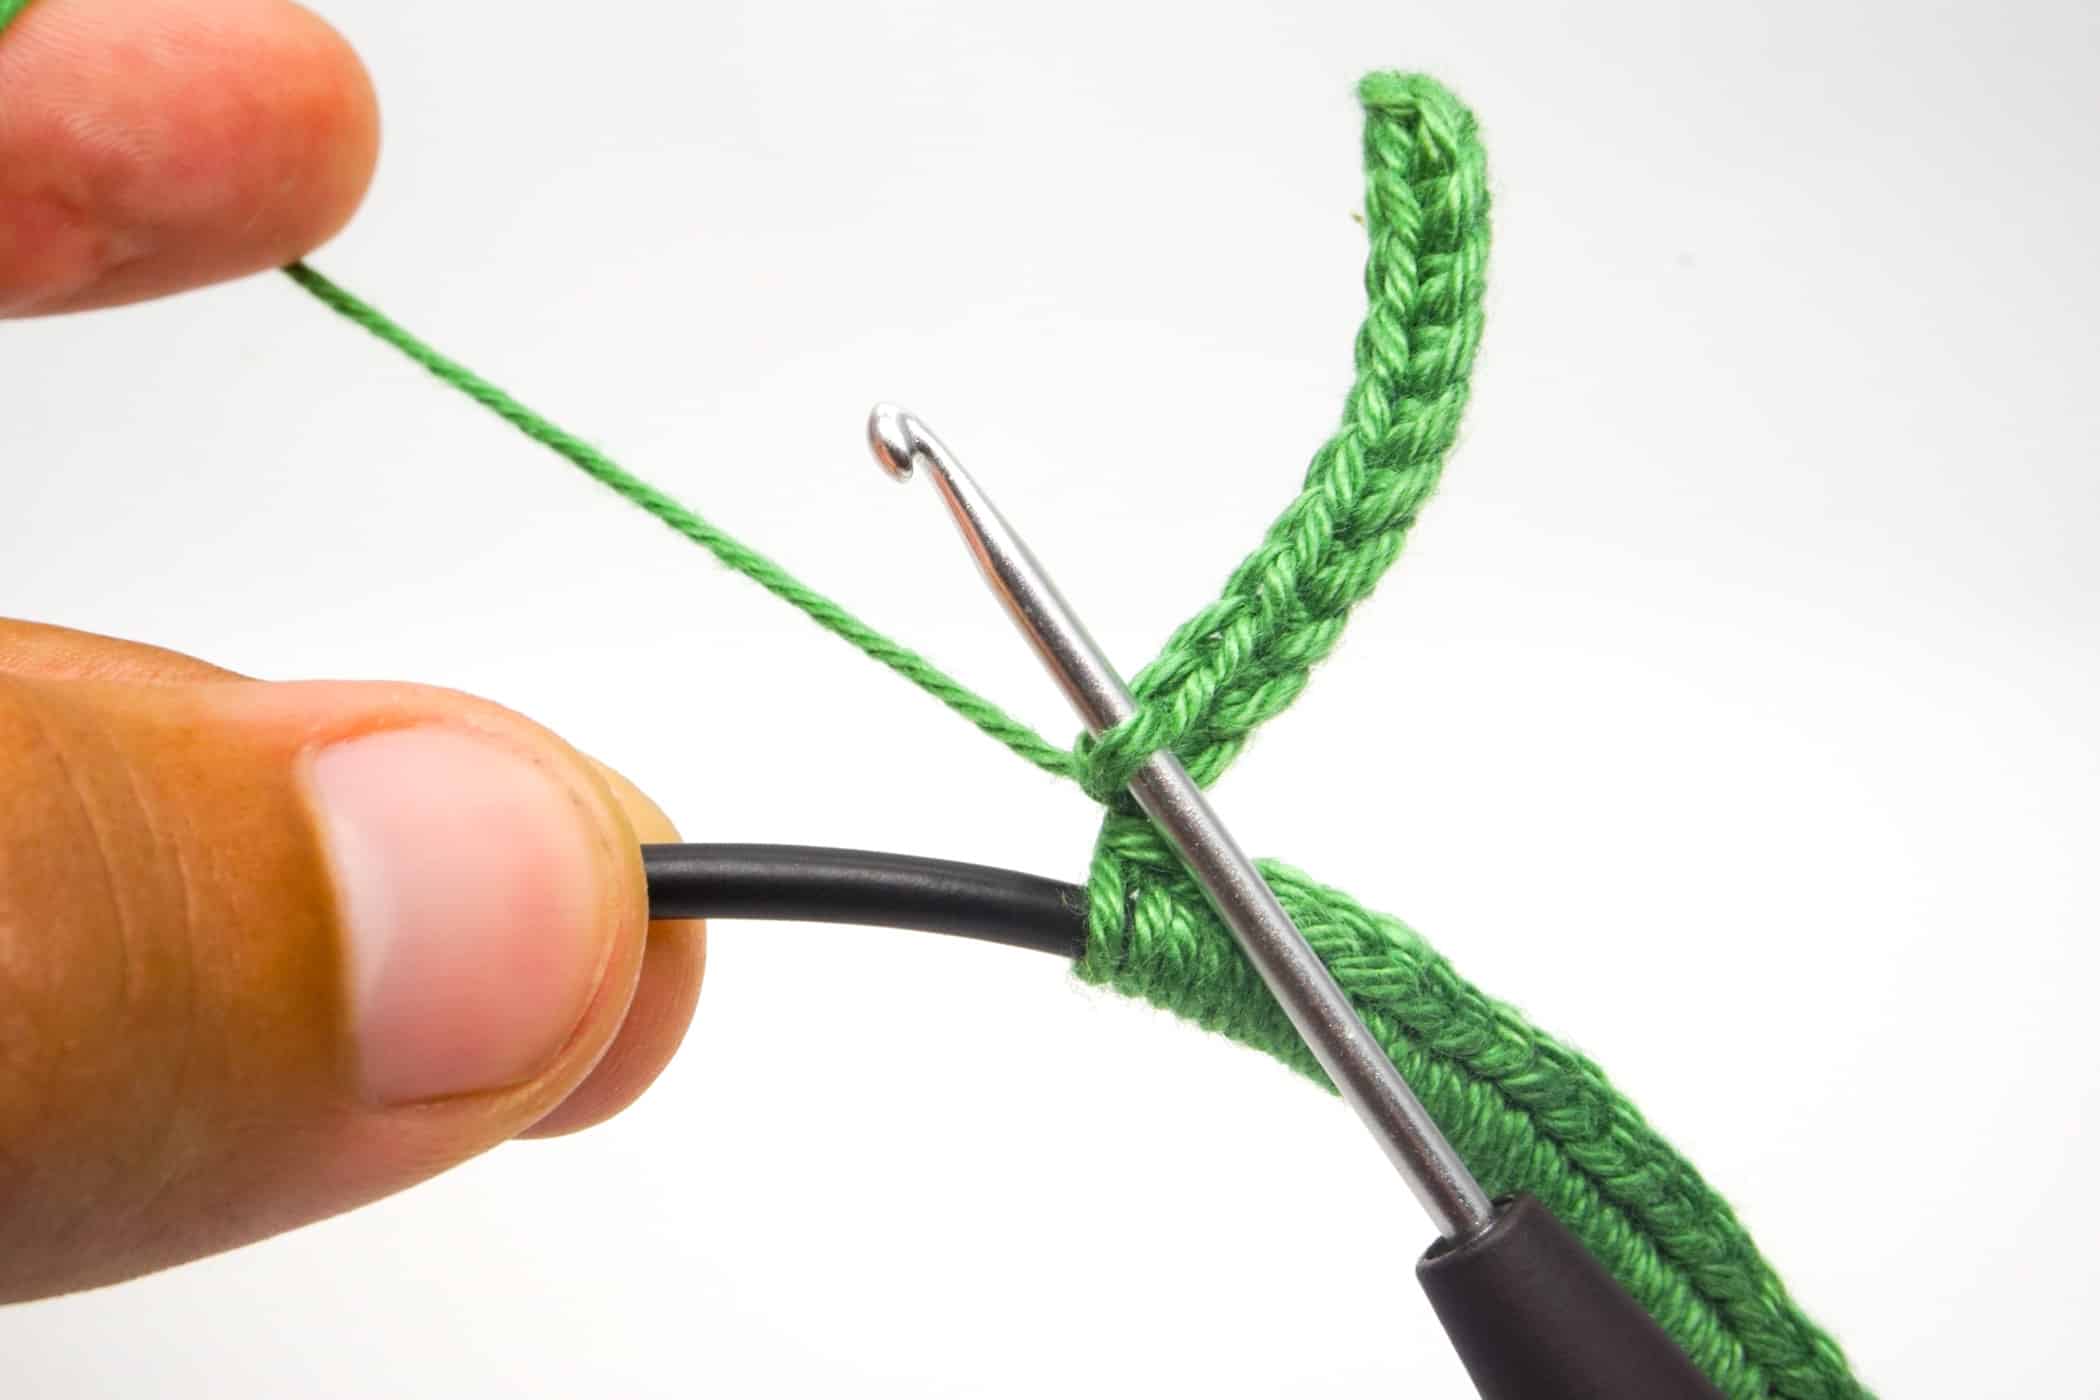
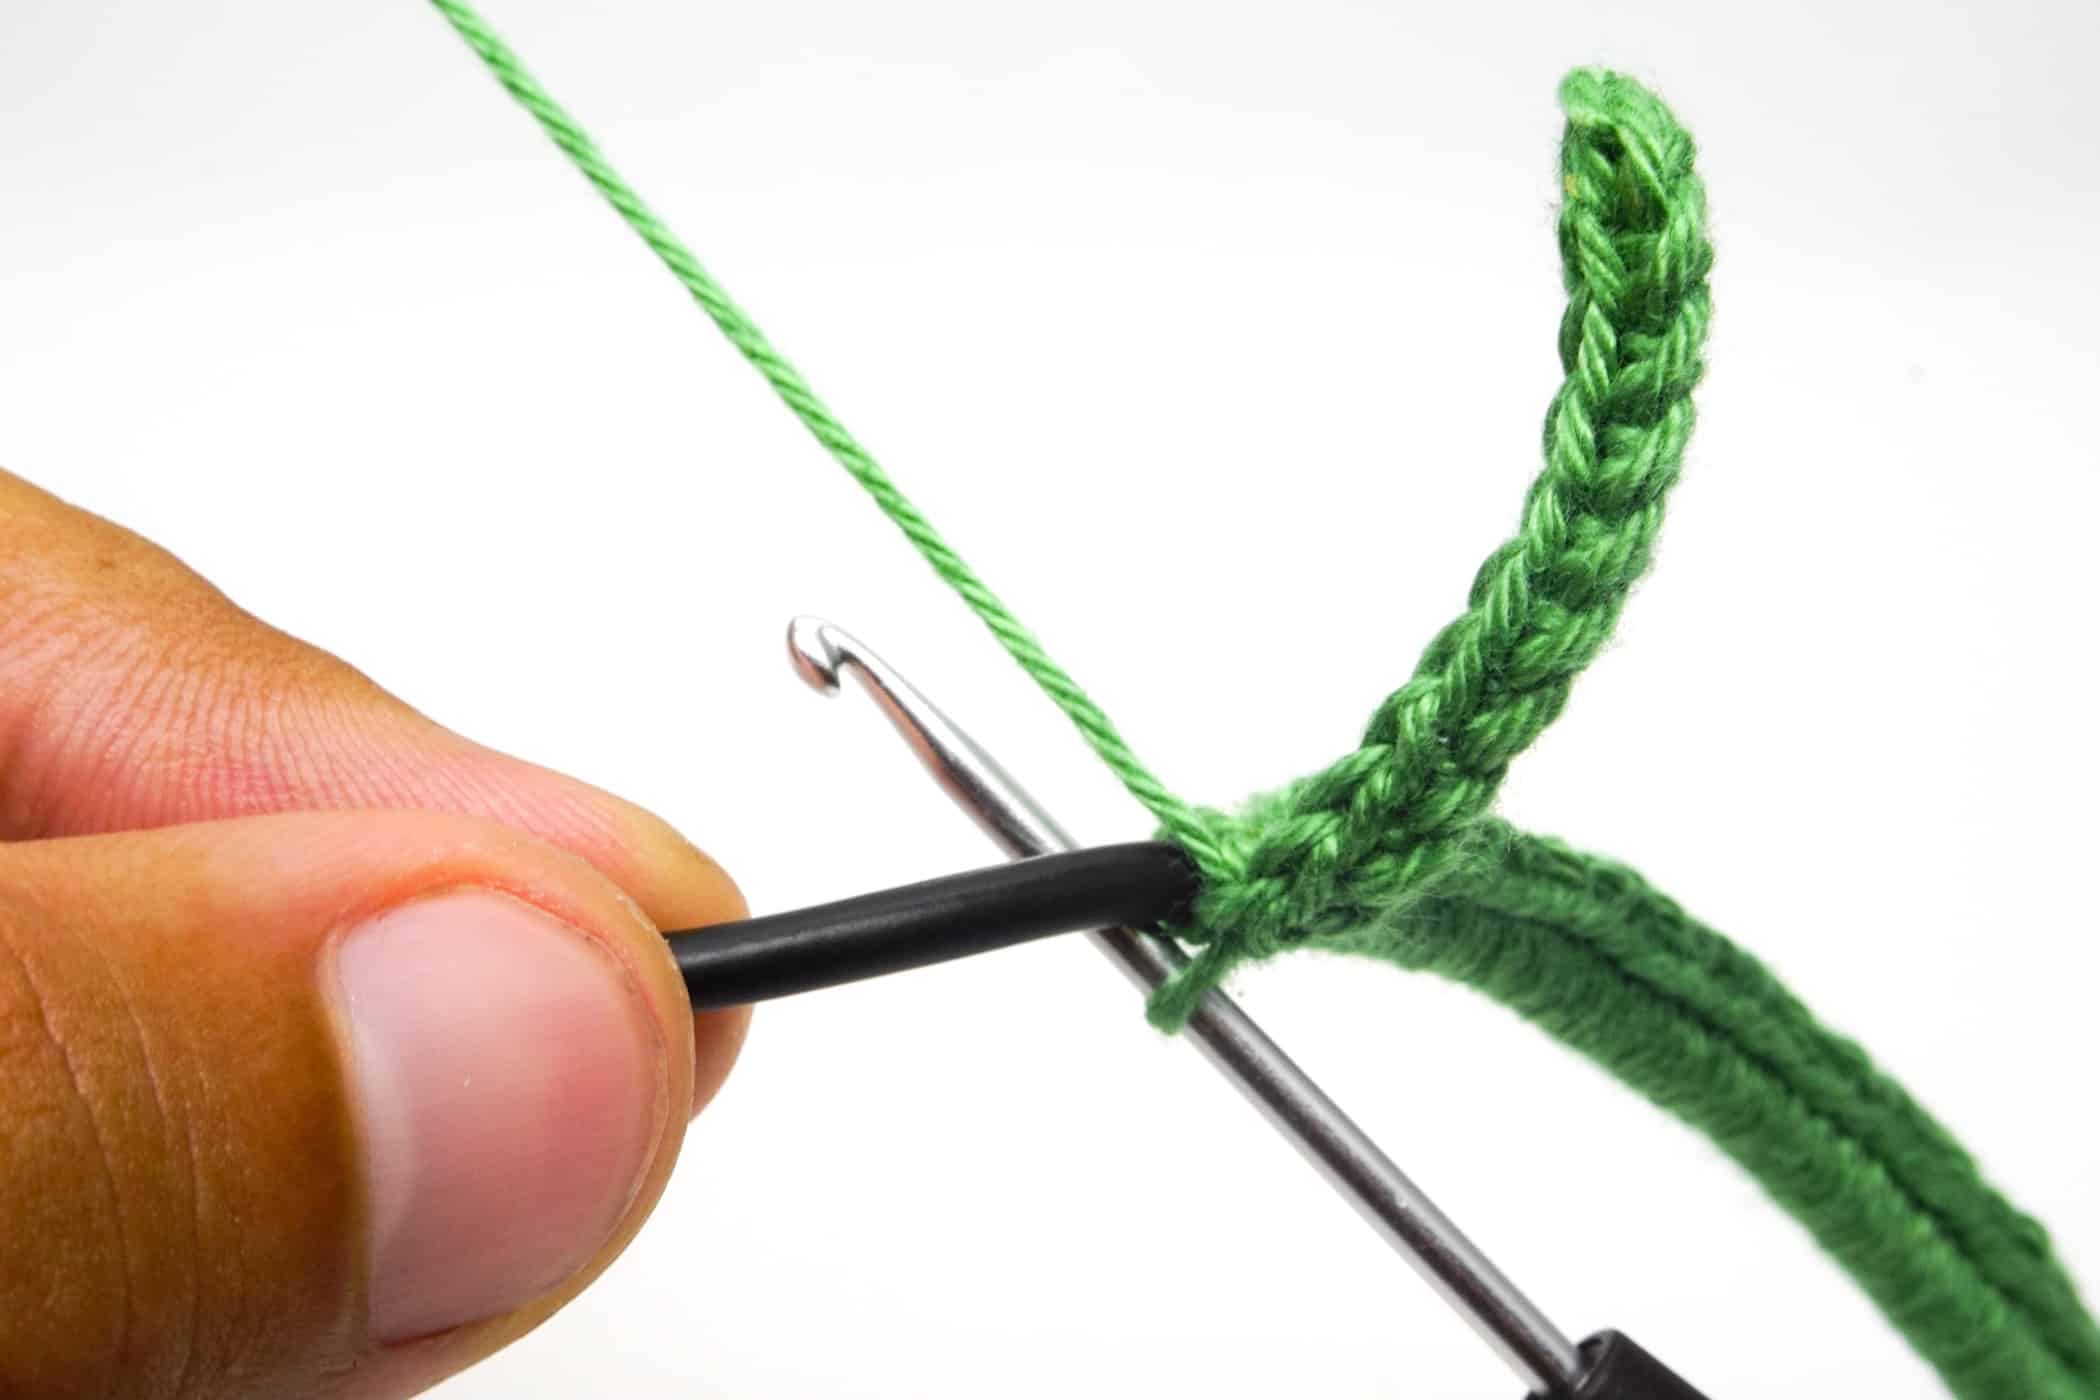
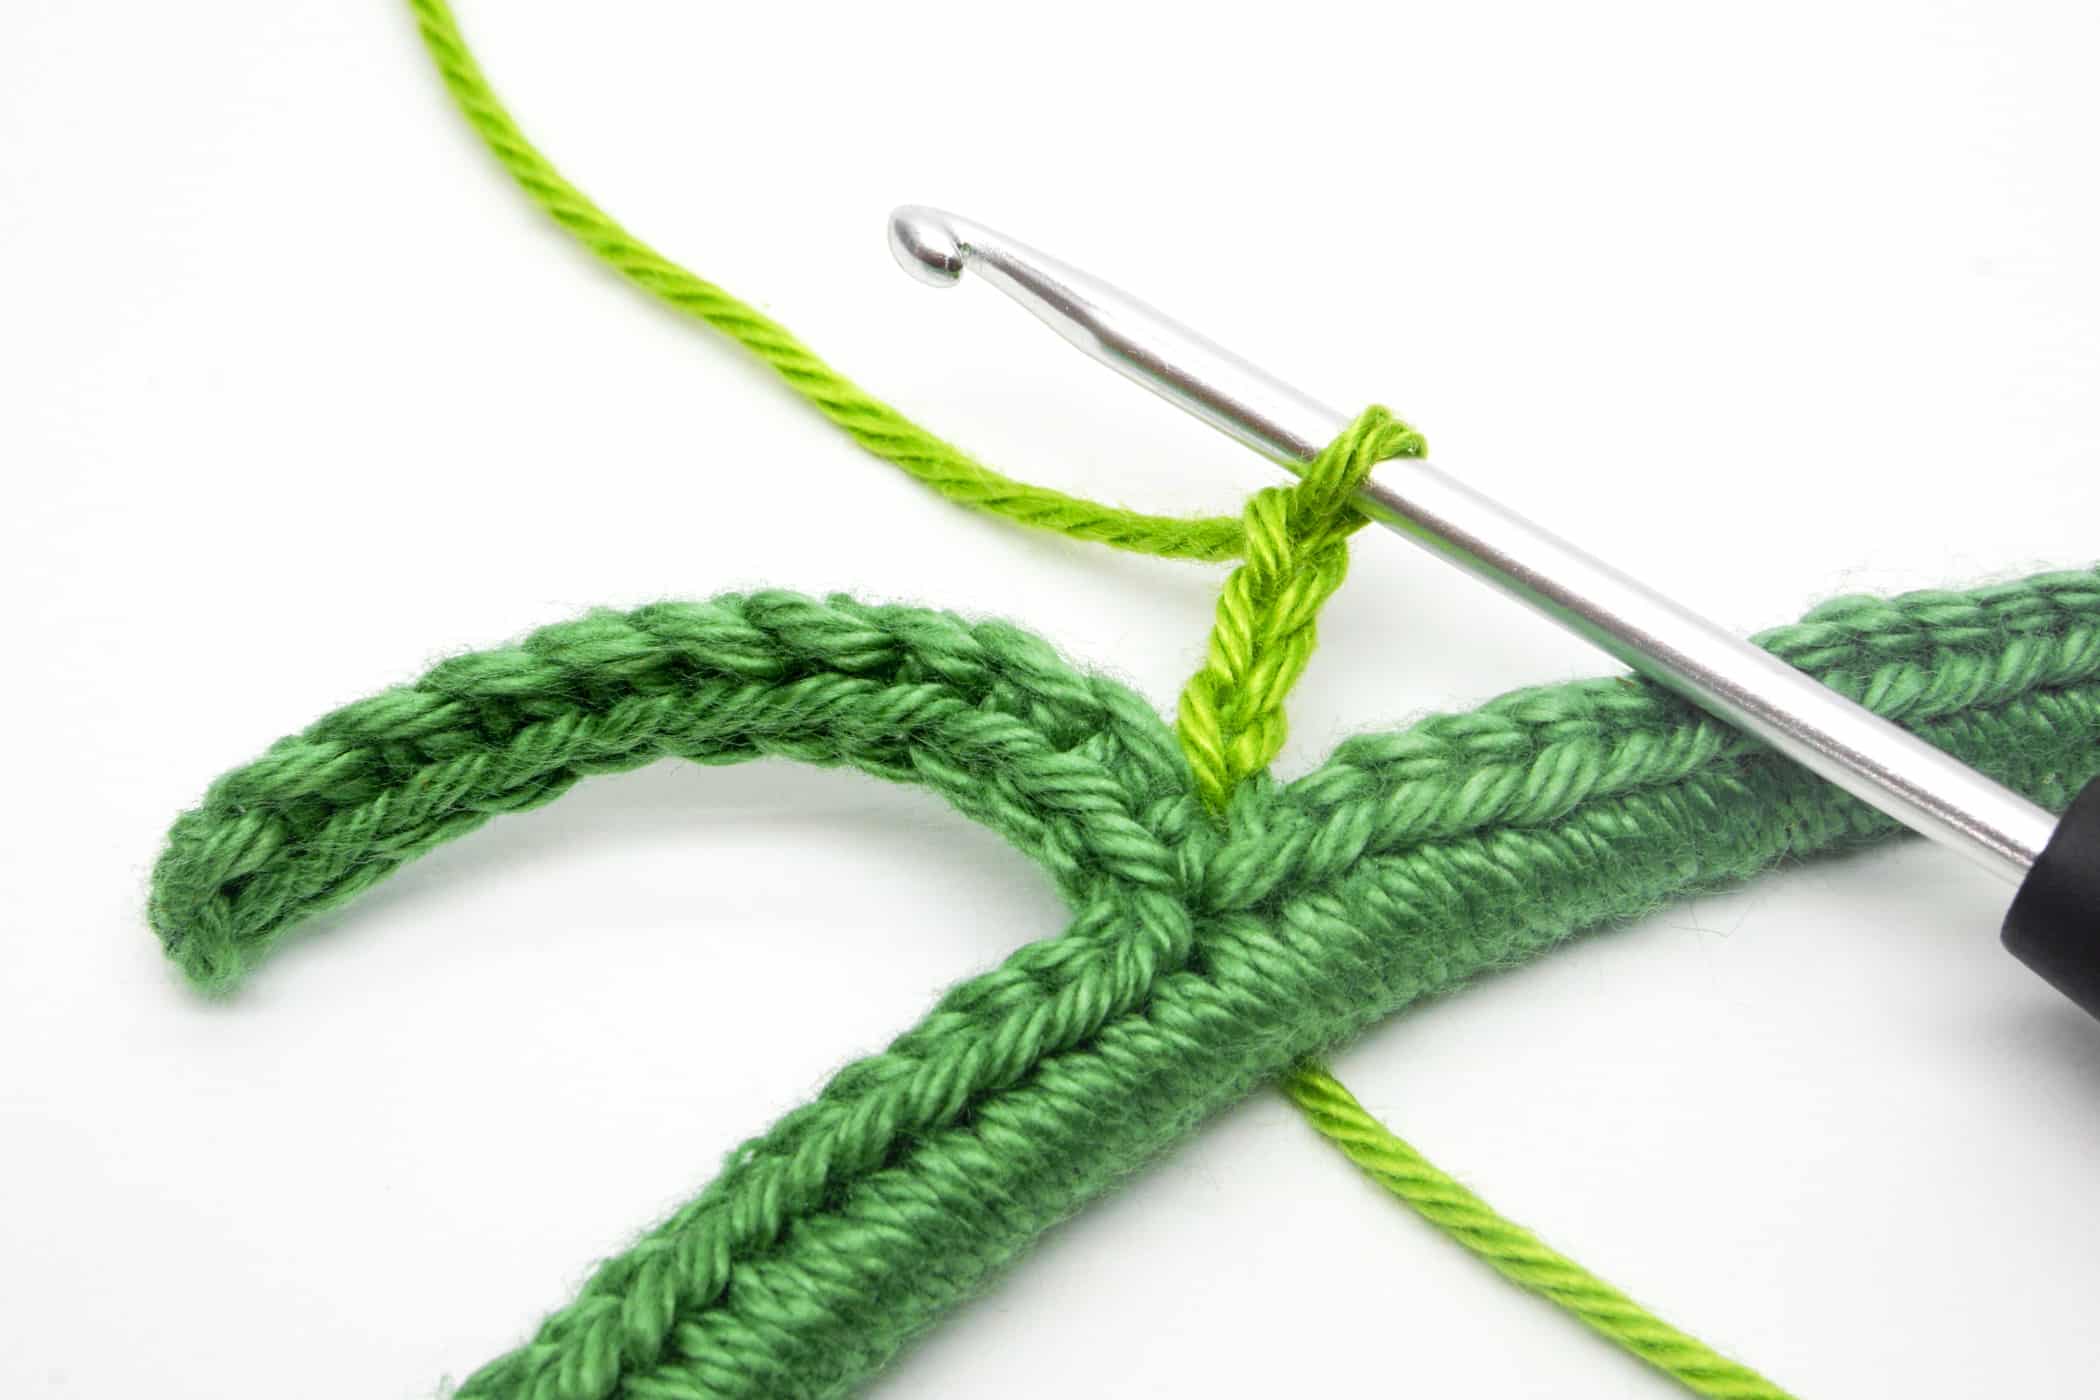
- Step 8: Now continue crocheting around the cable as before. As before, move the crochet hook under the cable, yarn over the thread, pull it forward, yarn over again and pull through both loops on the crochet hook.
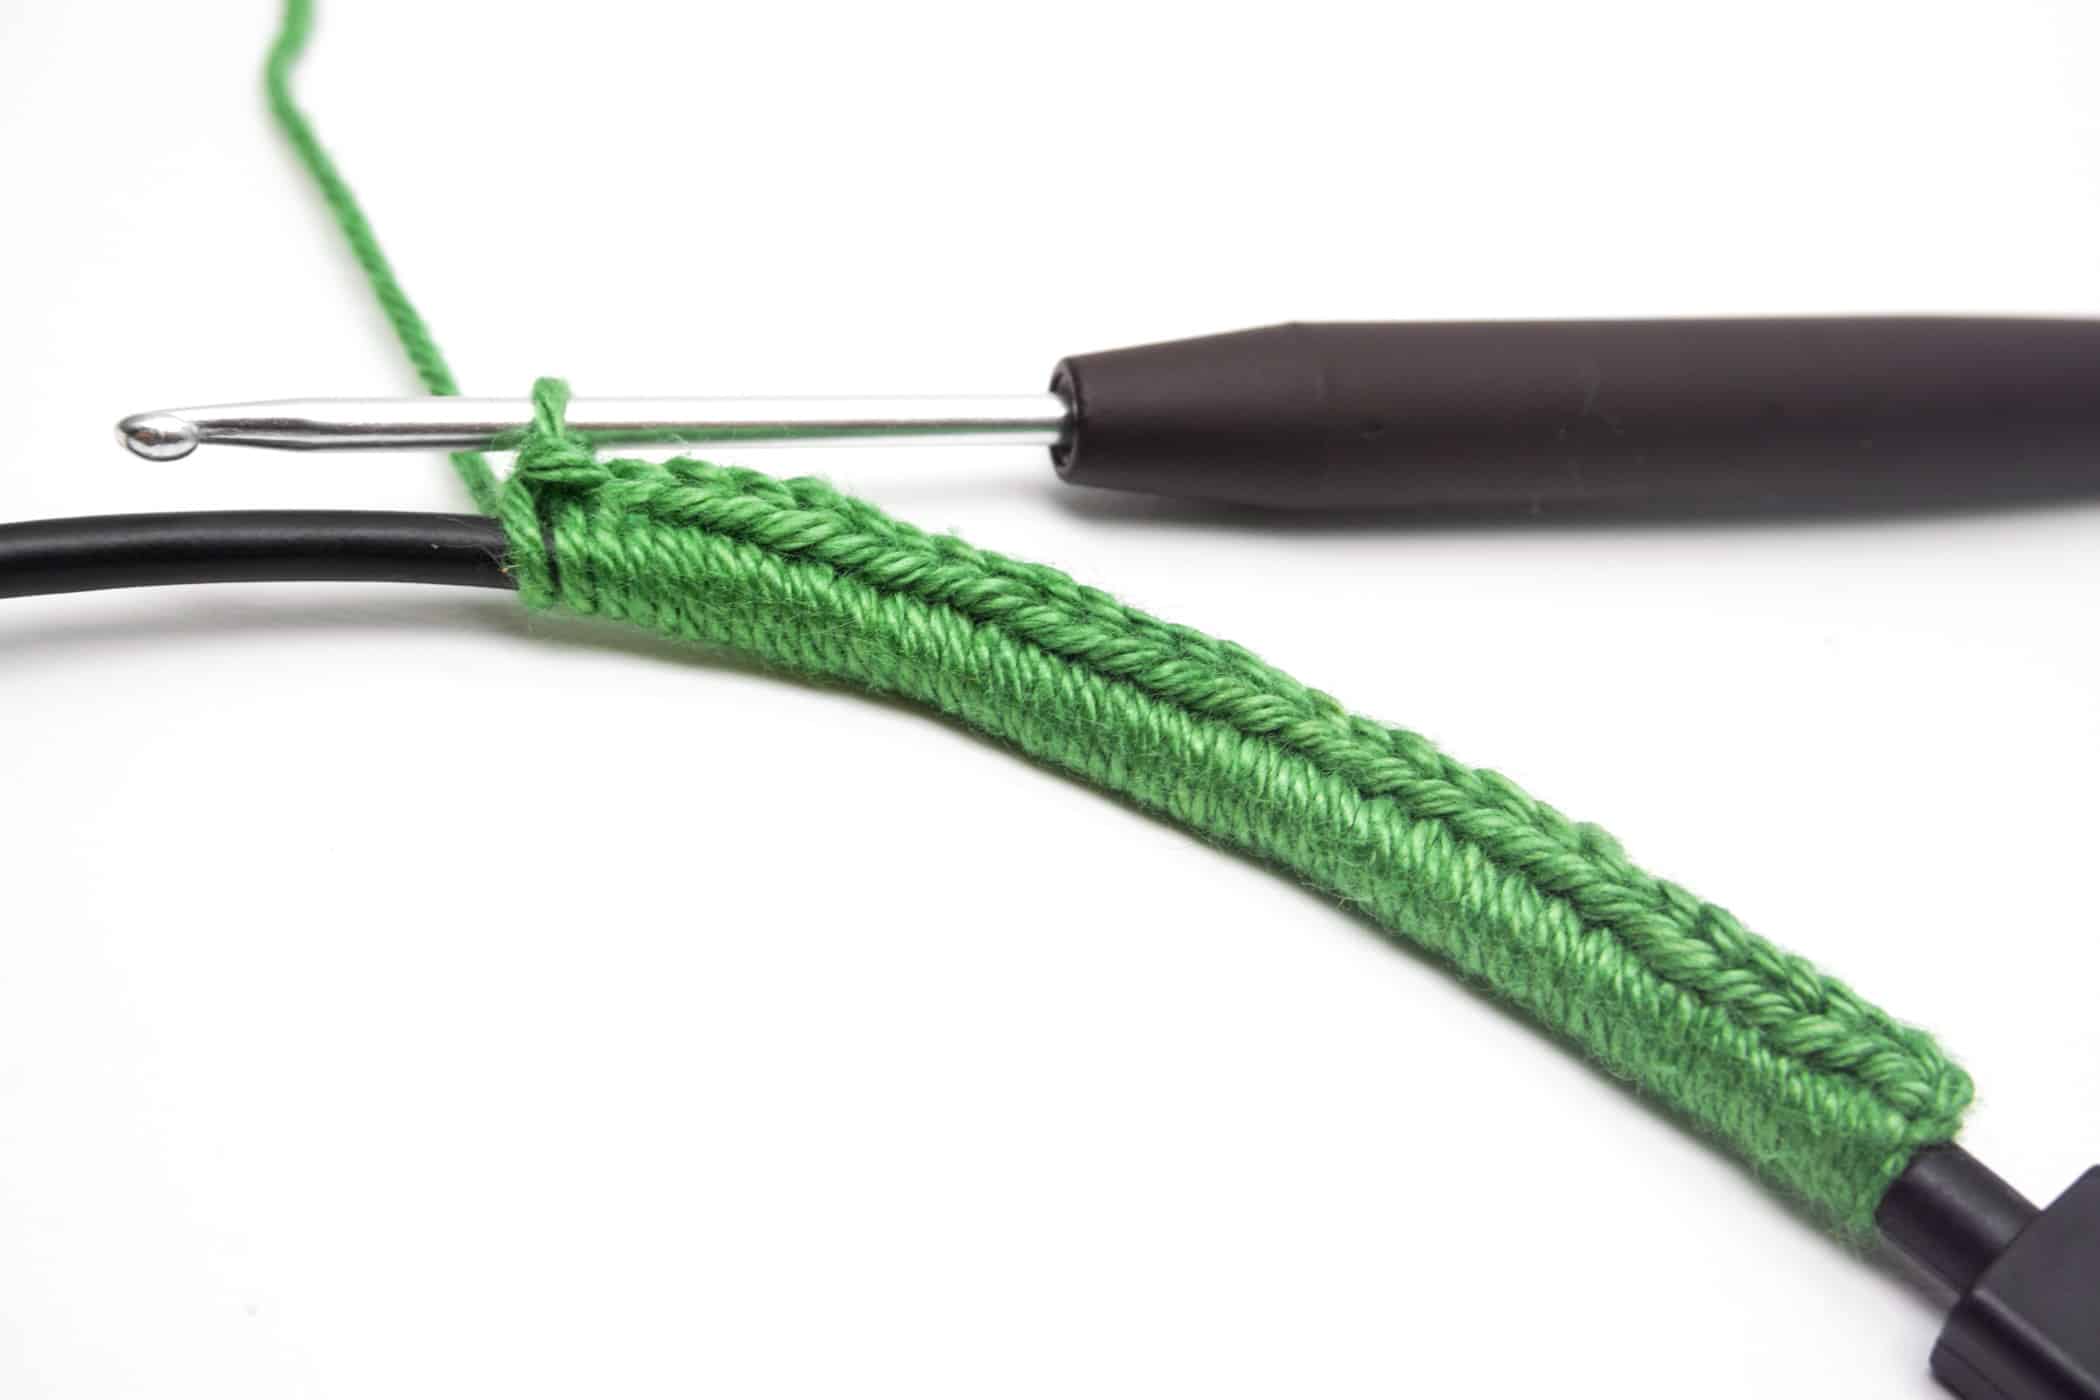
- Step 9: Now crochet as many single crochet stitches as you like in even or uneven distances around the cable (in this case, I always crocheted 30 sc between each node) and where you want to crochet a leaf later, crochet a node, as described before, until you reach the end of the cable. Finally cut the thread and hide it.

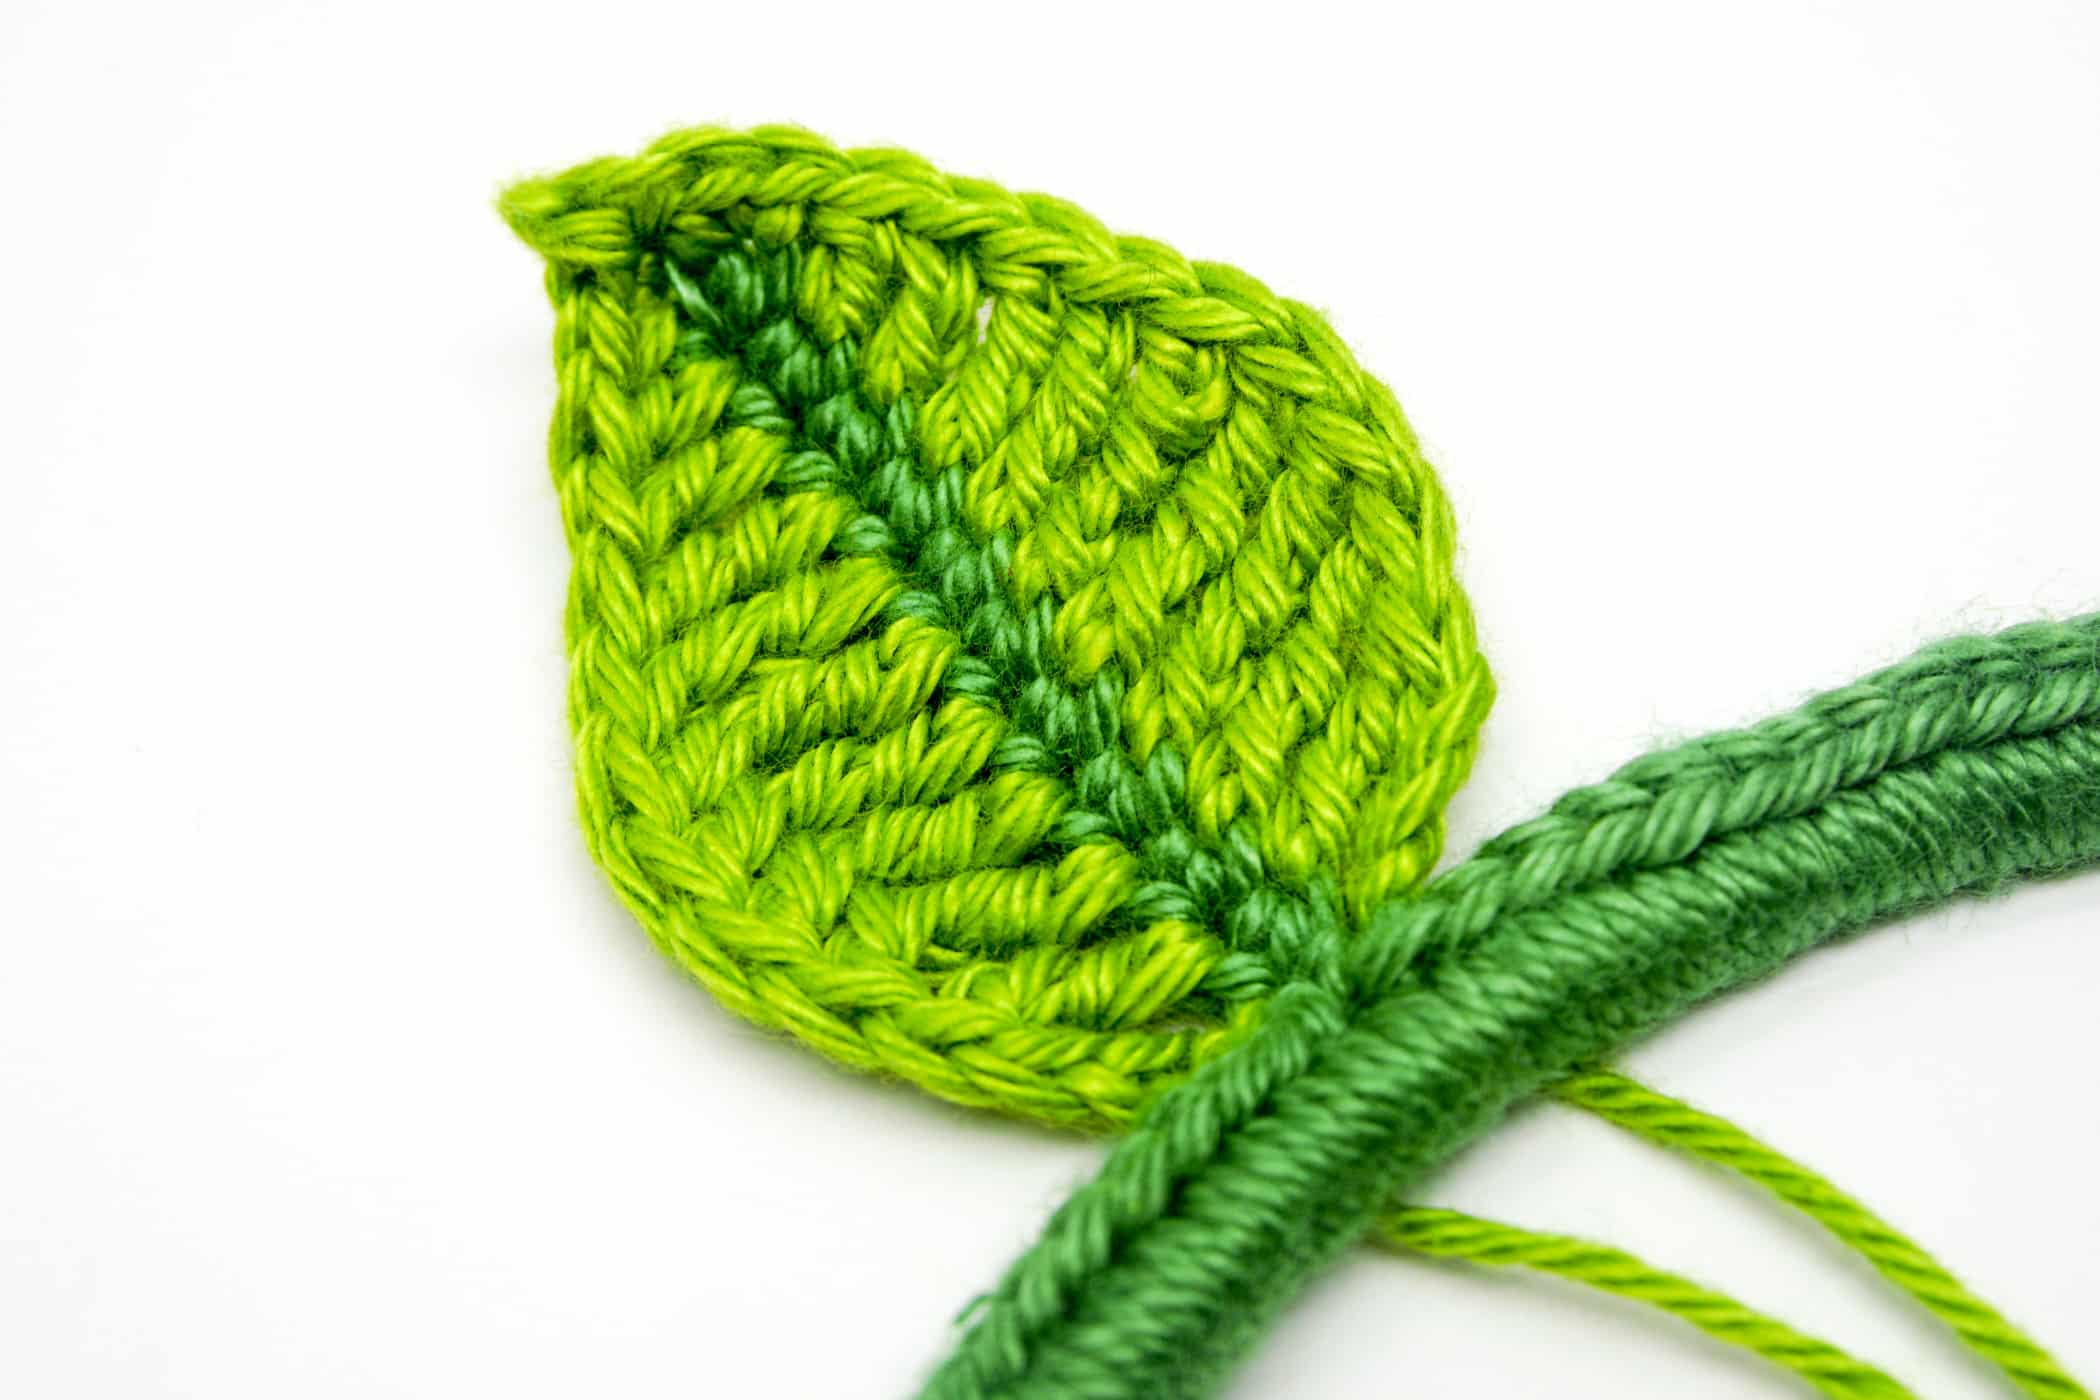
Crochet the Leaf
The leaf is crocheted in Apple in rows with chain stitches, slip stitches, single crochet stitches, double crochet stitches, treble crochet stitches and double treble crochet stitches.
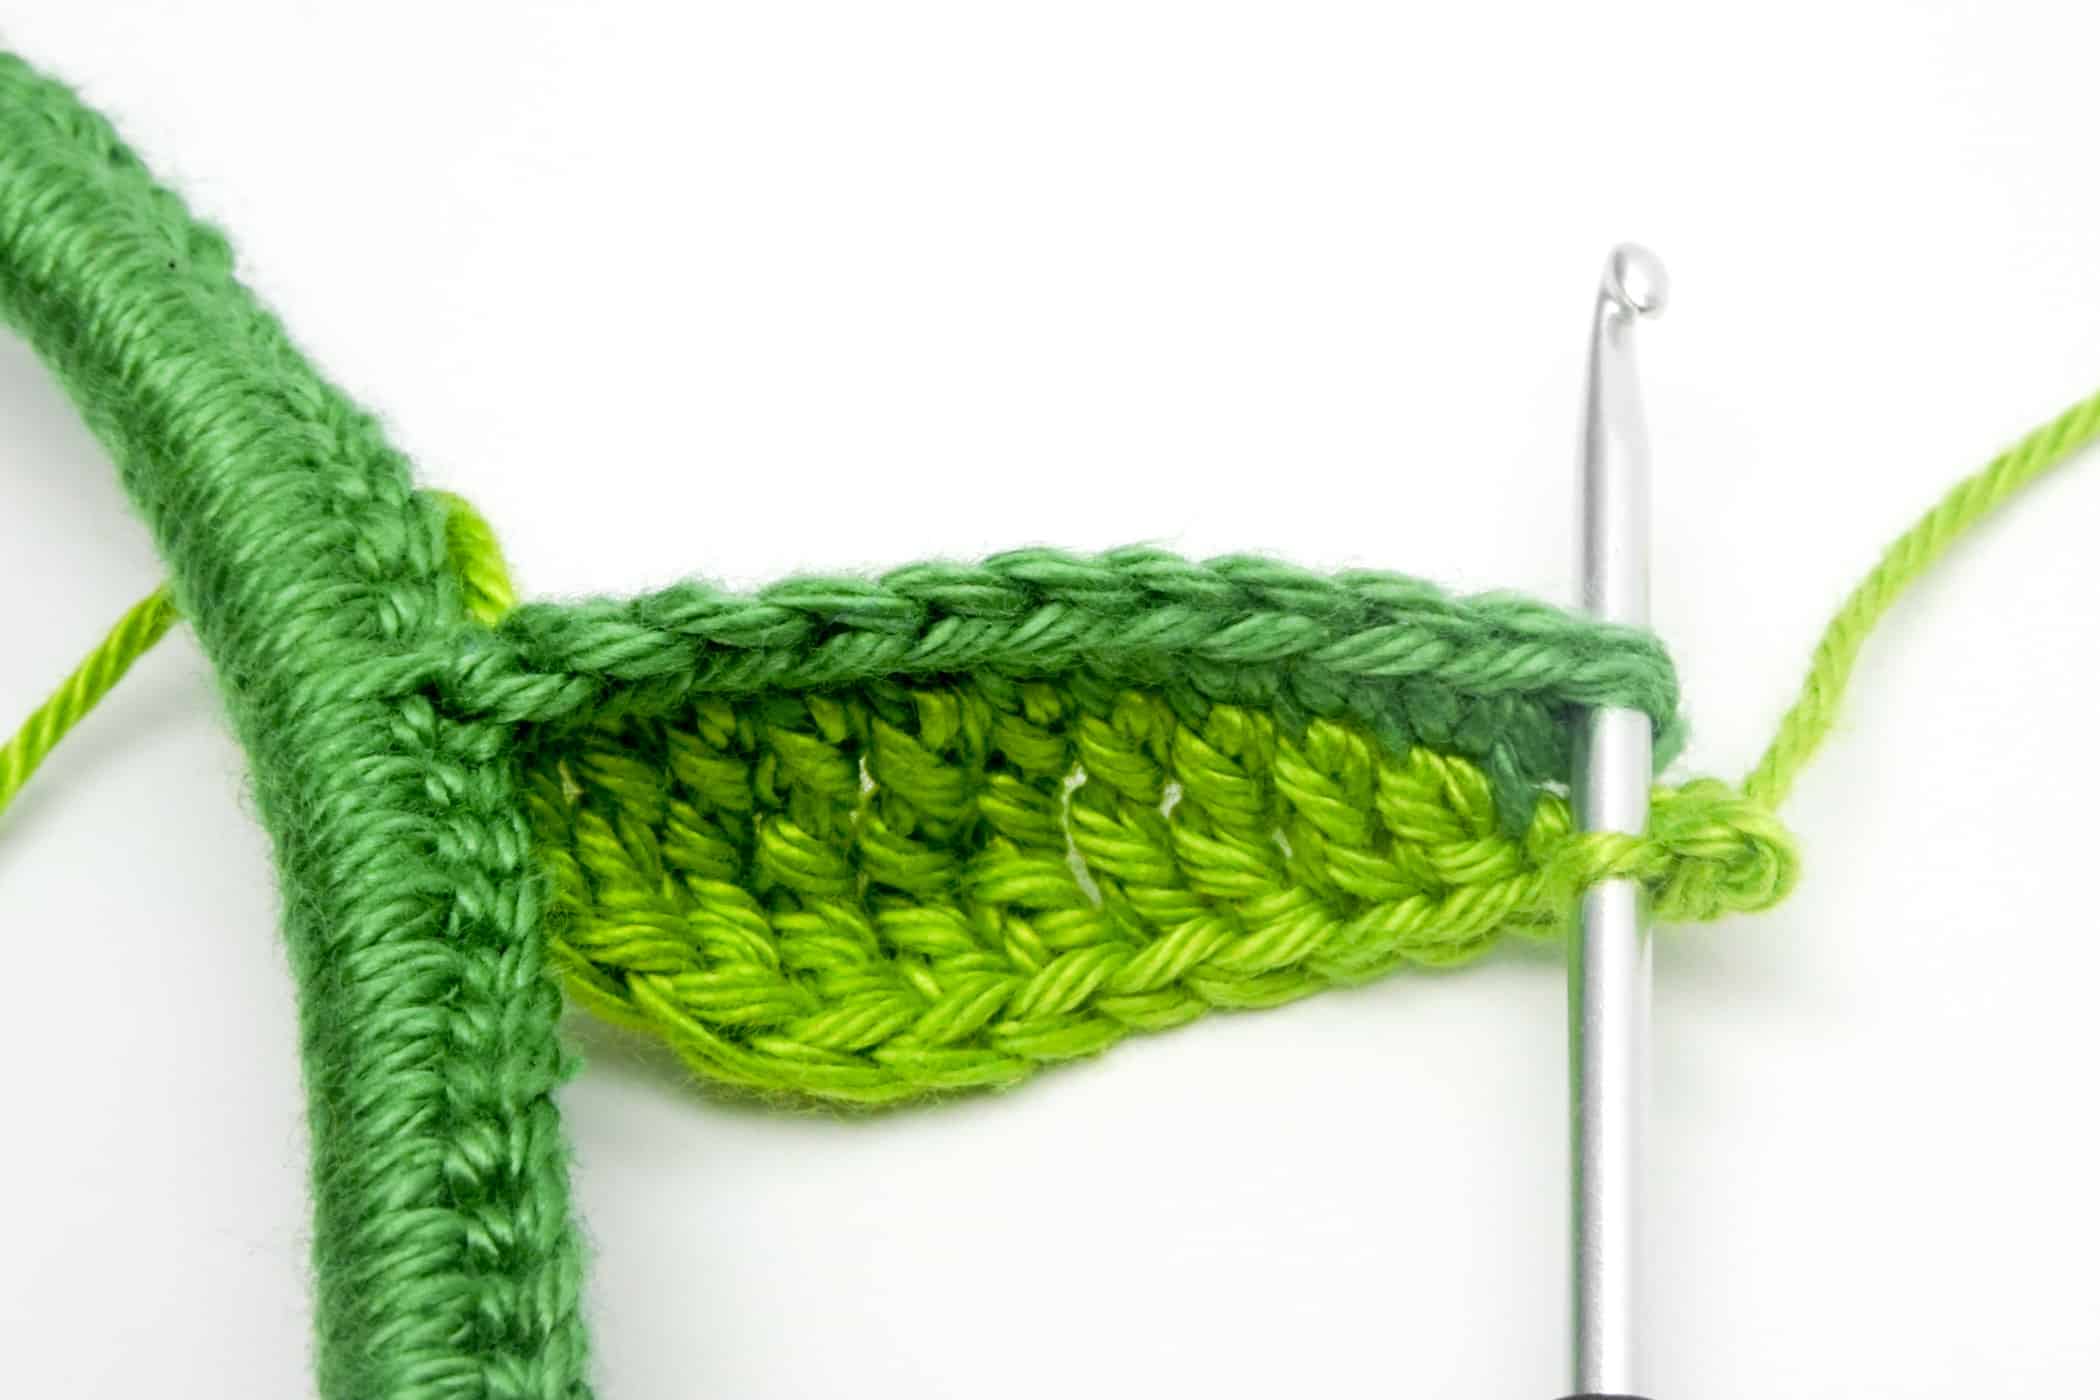
- Step 1: Push the crochet hook through the 11th stitch, counting from the end of the node. It does not matter on which side of the node you start.

- Step 2: Now yarn over the Apple colored thread and pull it through.
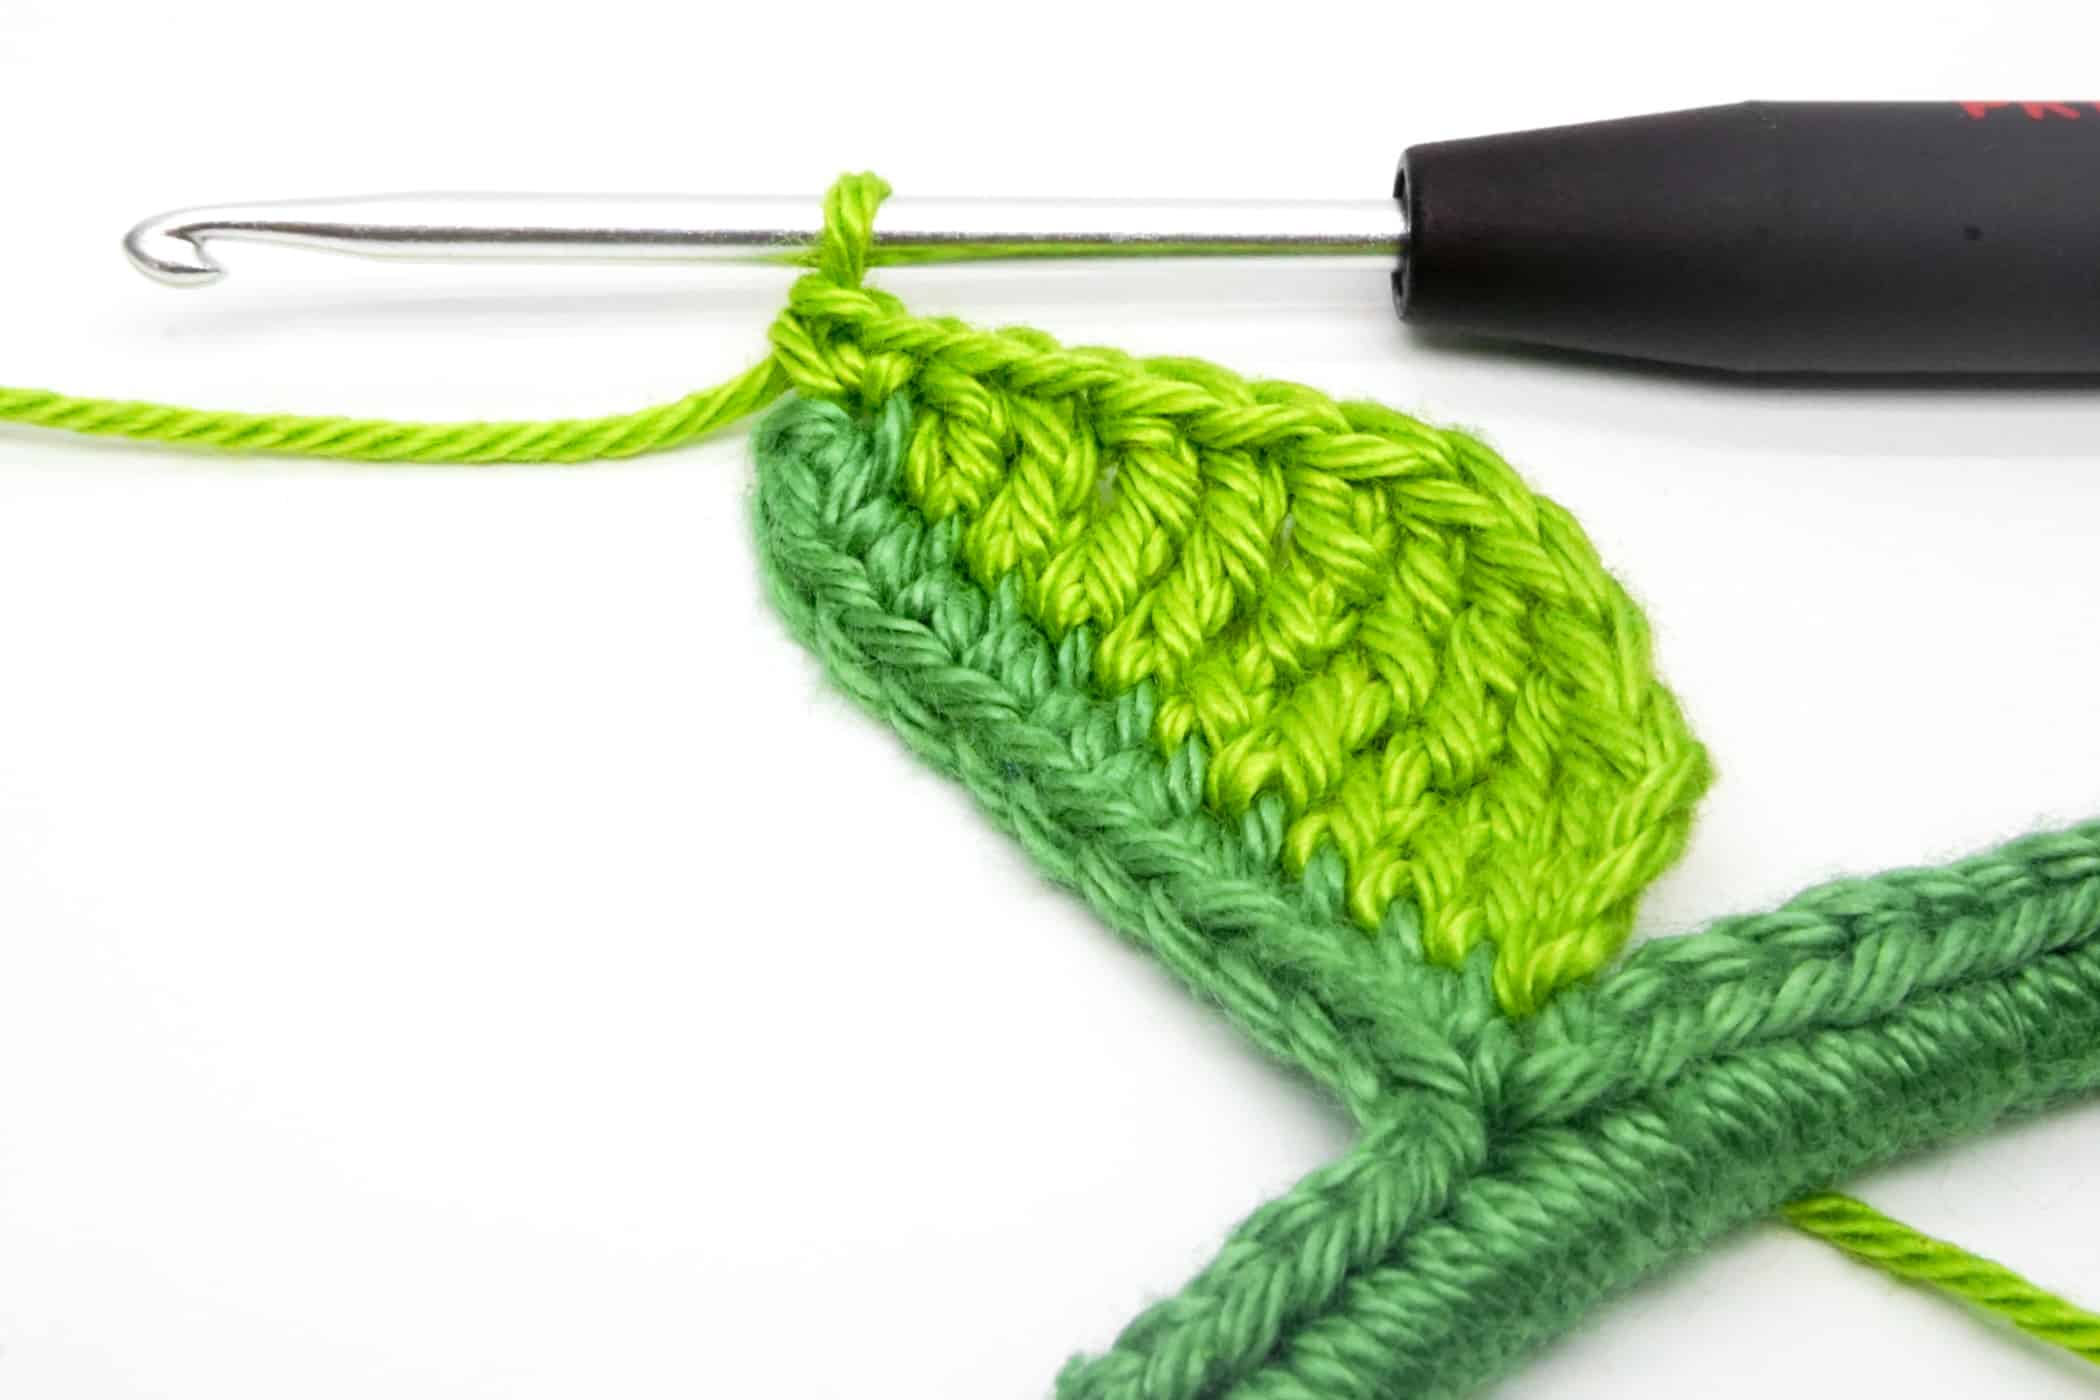
- Step 3: Crochet 3 chain stitches and 1 treble crochet stitch into the next stitch on the node.
- Step 4: Continue crocheting the first half of the leaf as follows: 4 double treble crochet stitches, 2 treble crochet stitches, 2 double crochet stitches, 2 sc into the next stitch.
- Step 5: Now crochet the tip of the leaf. Crochet 2 chain stitches and then 1 slip stitch into the 2nd stitch from the hook.
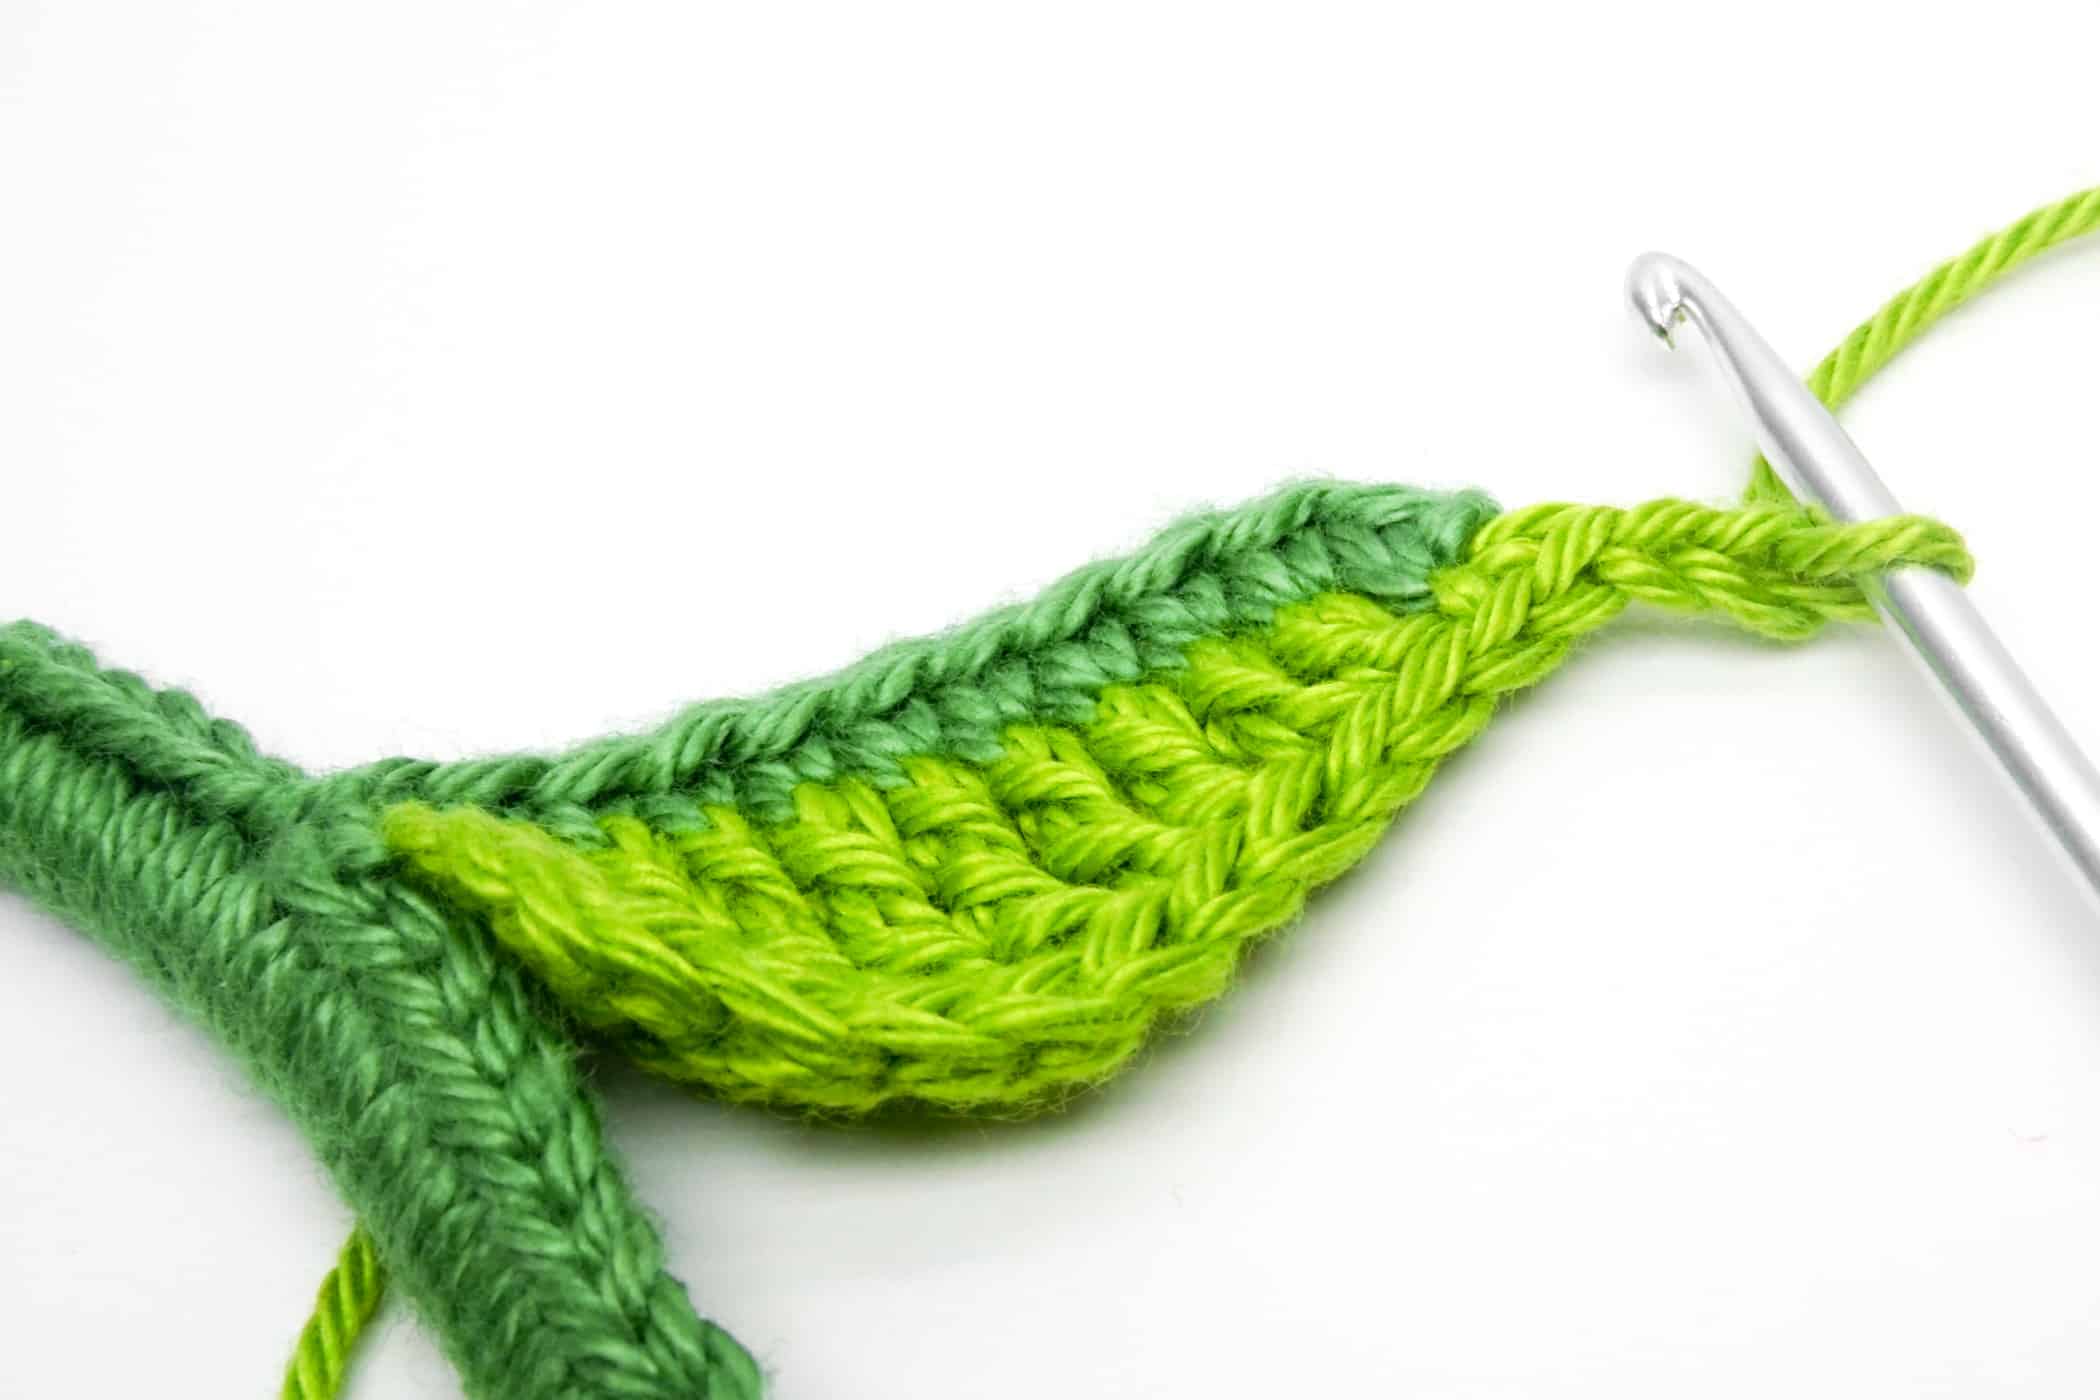
- Step 6: Now push the crochet hook through the next stitch on the not yet crocheted side. Crochet 2 sc into this 1st stitch.
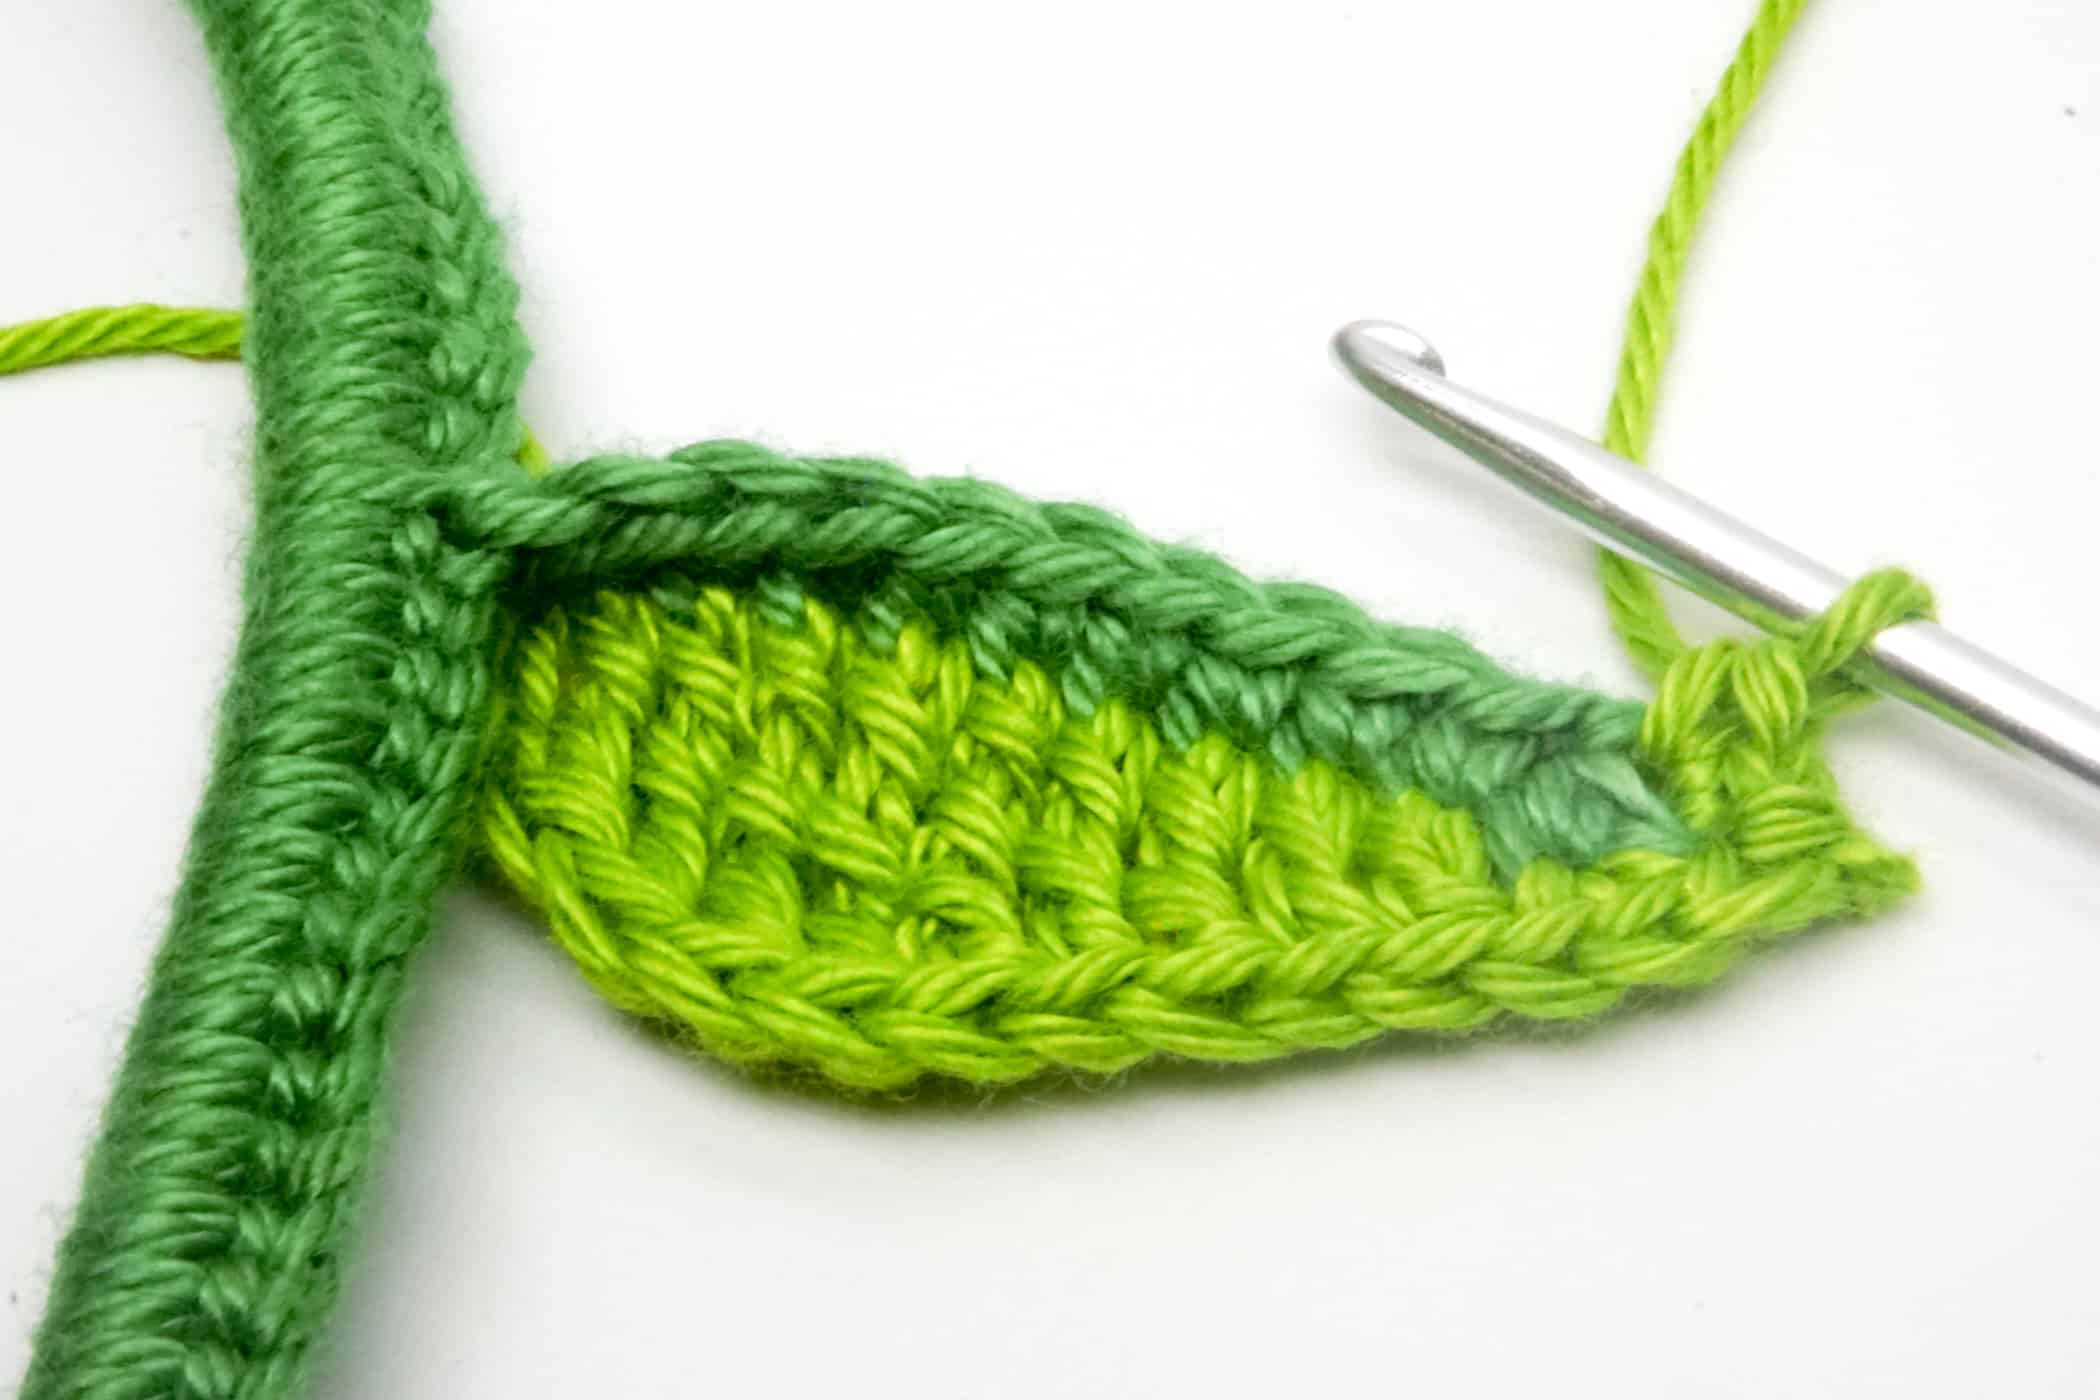
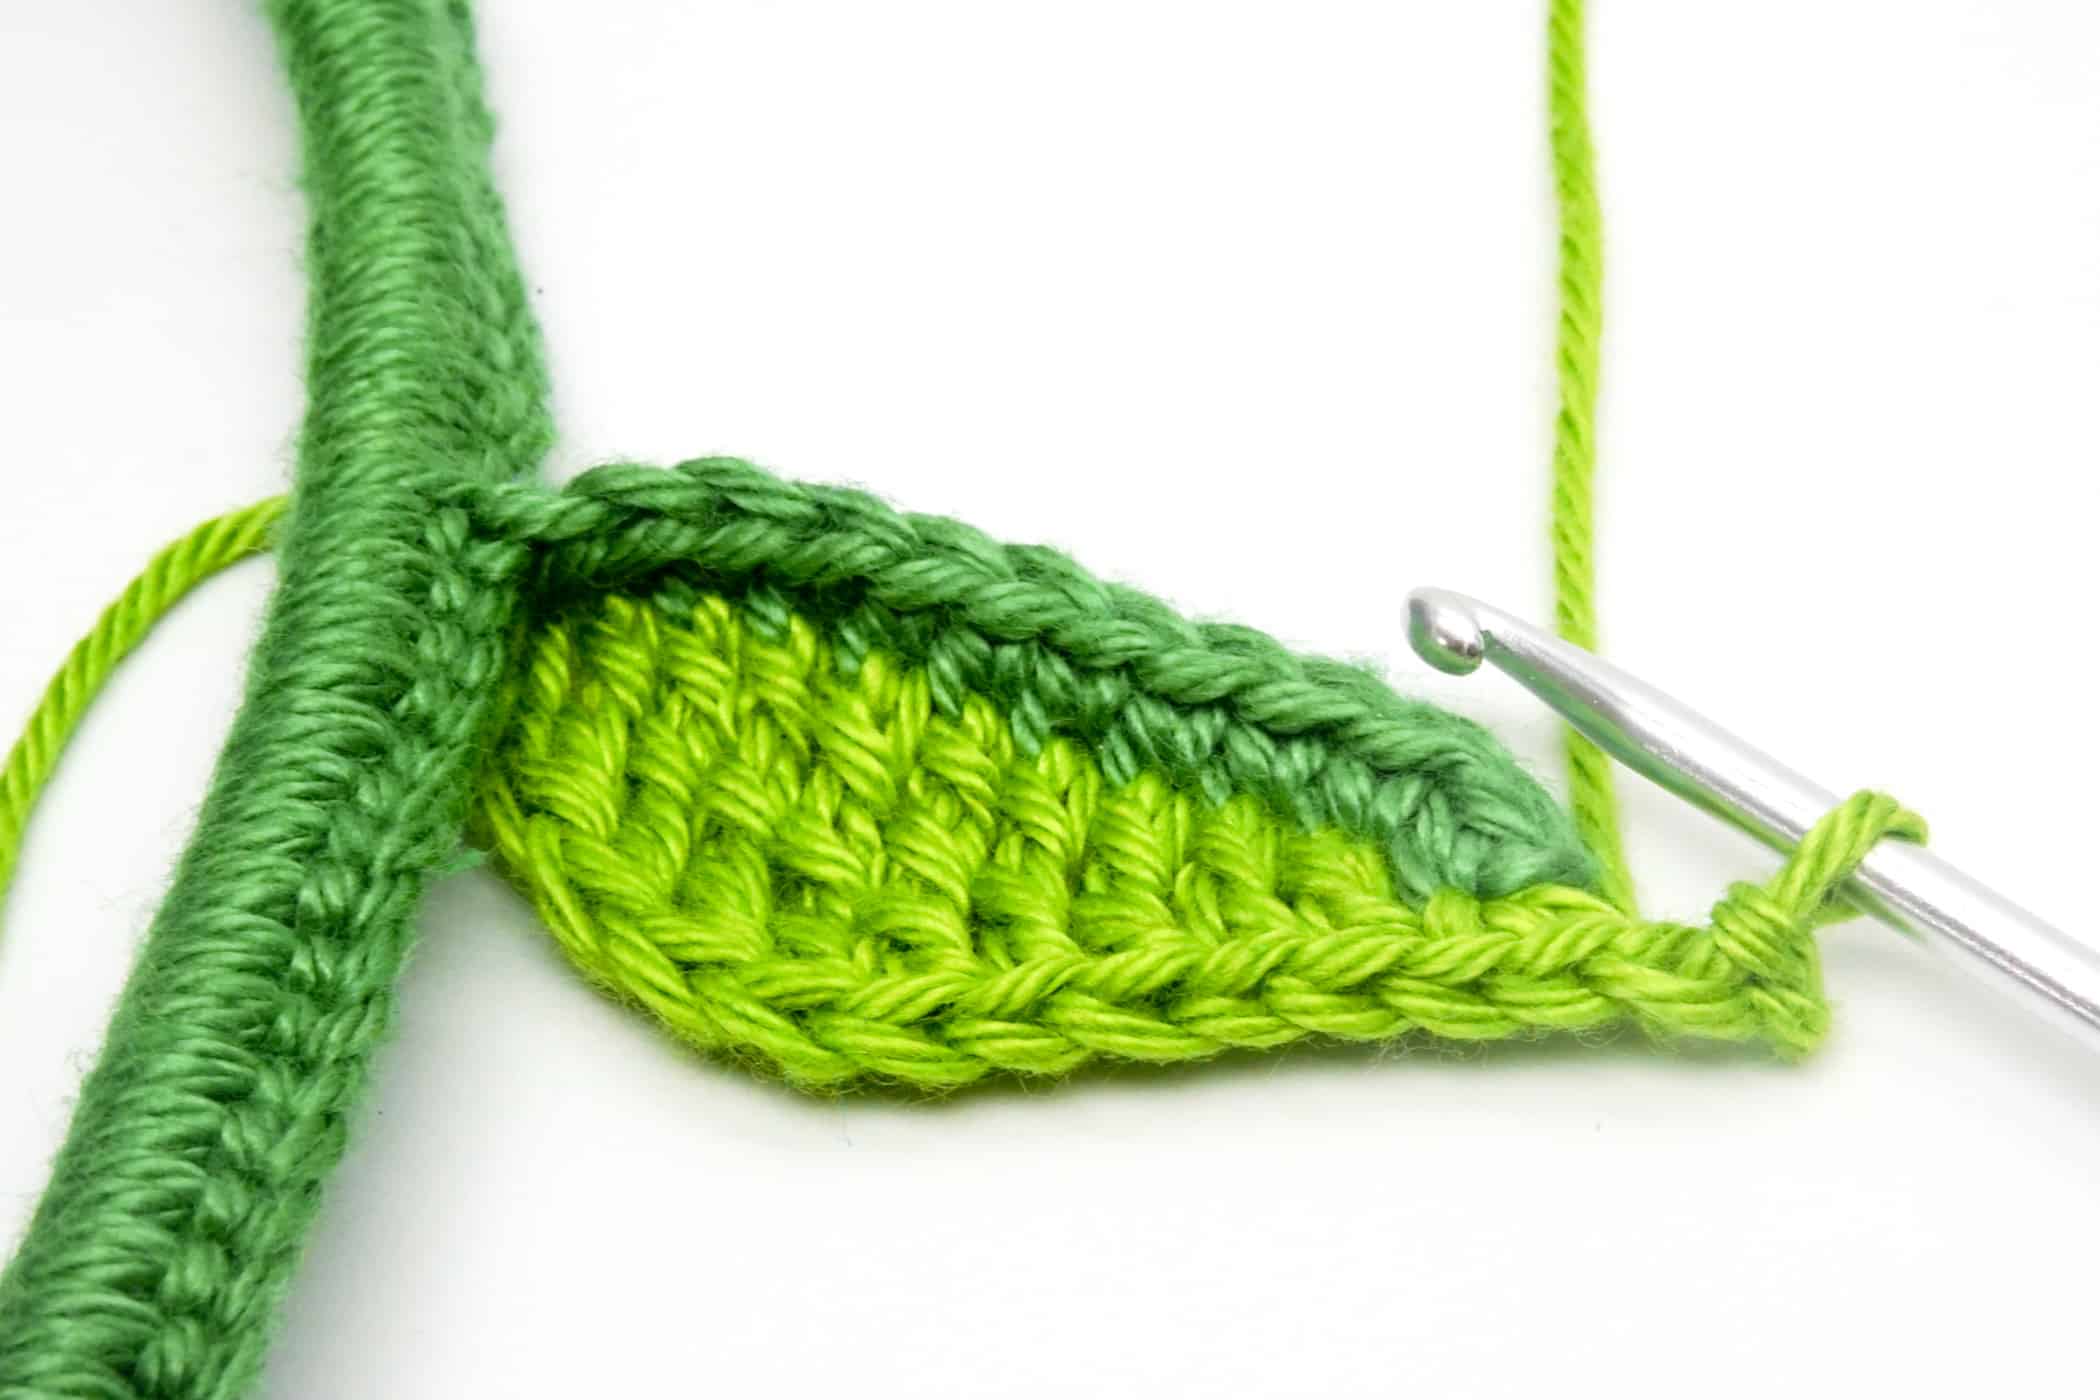
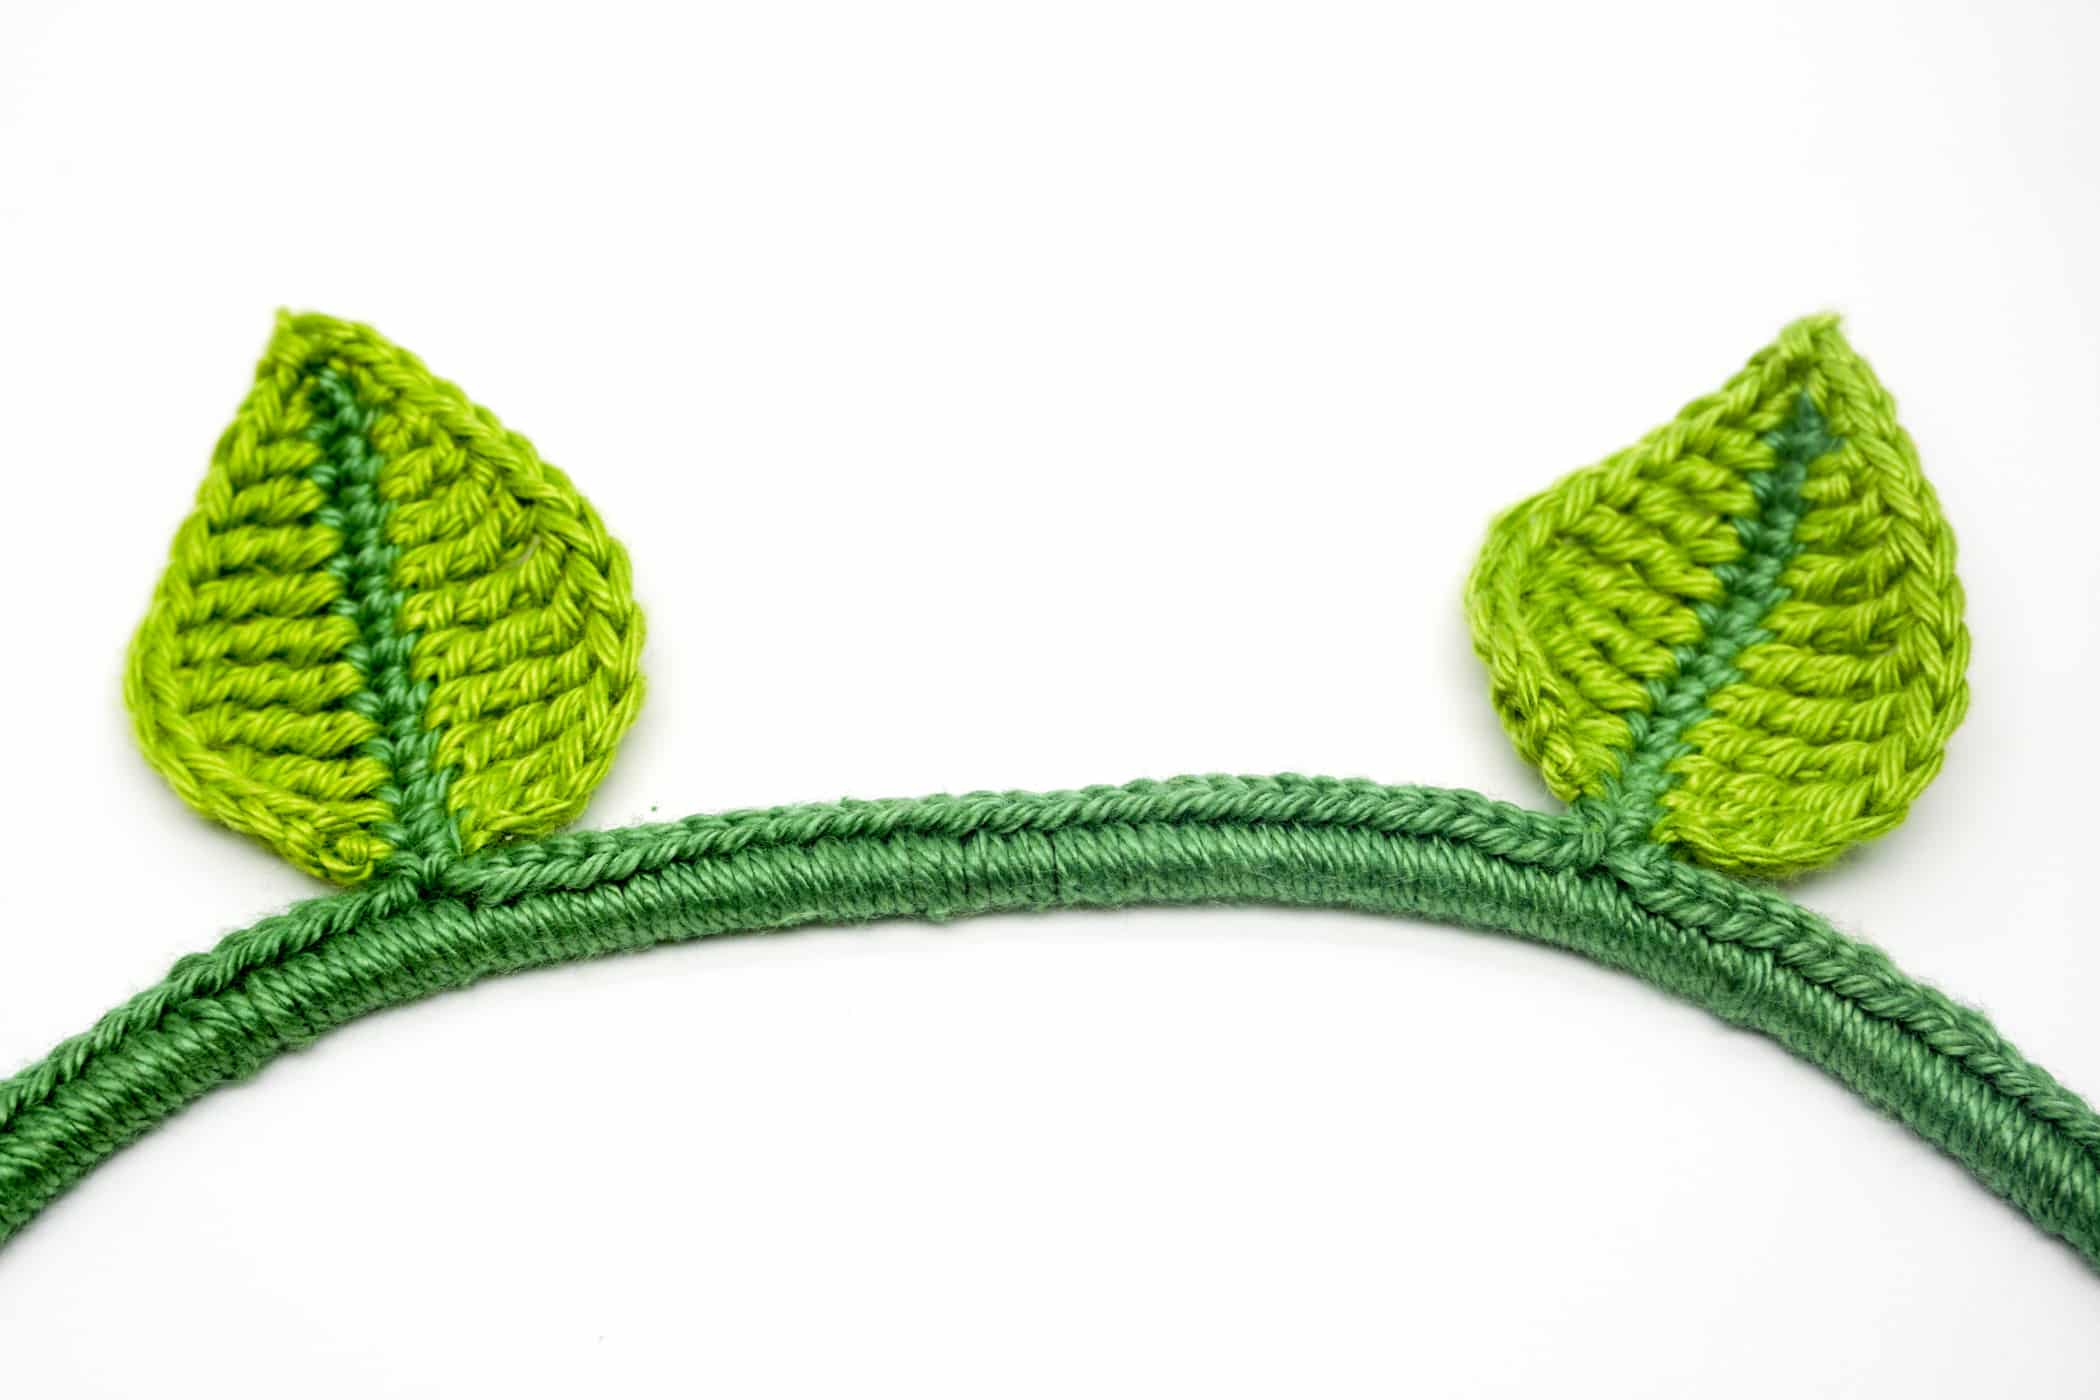
- Step 7: Crochet the 2nd half of the leaf as follows: 2 double crochet stitches, 2 treble crochet stitches, 4 double treble crochet stitches, 1 treble crochet stitch. Finally crochet 3 chain stitches and crochet 1 slip stitch into the next stitch on the node. Done is the first leaf.
- Finish: Now crochet all remaining leaves and cut off, sew in and hide the remaining threads. Done is your cable ivy!
If you want a less “neat”, more organic look, twist the stitches in any direction along the cable.
DONE!