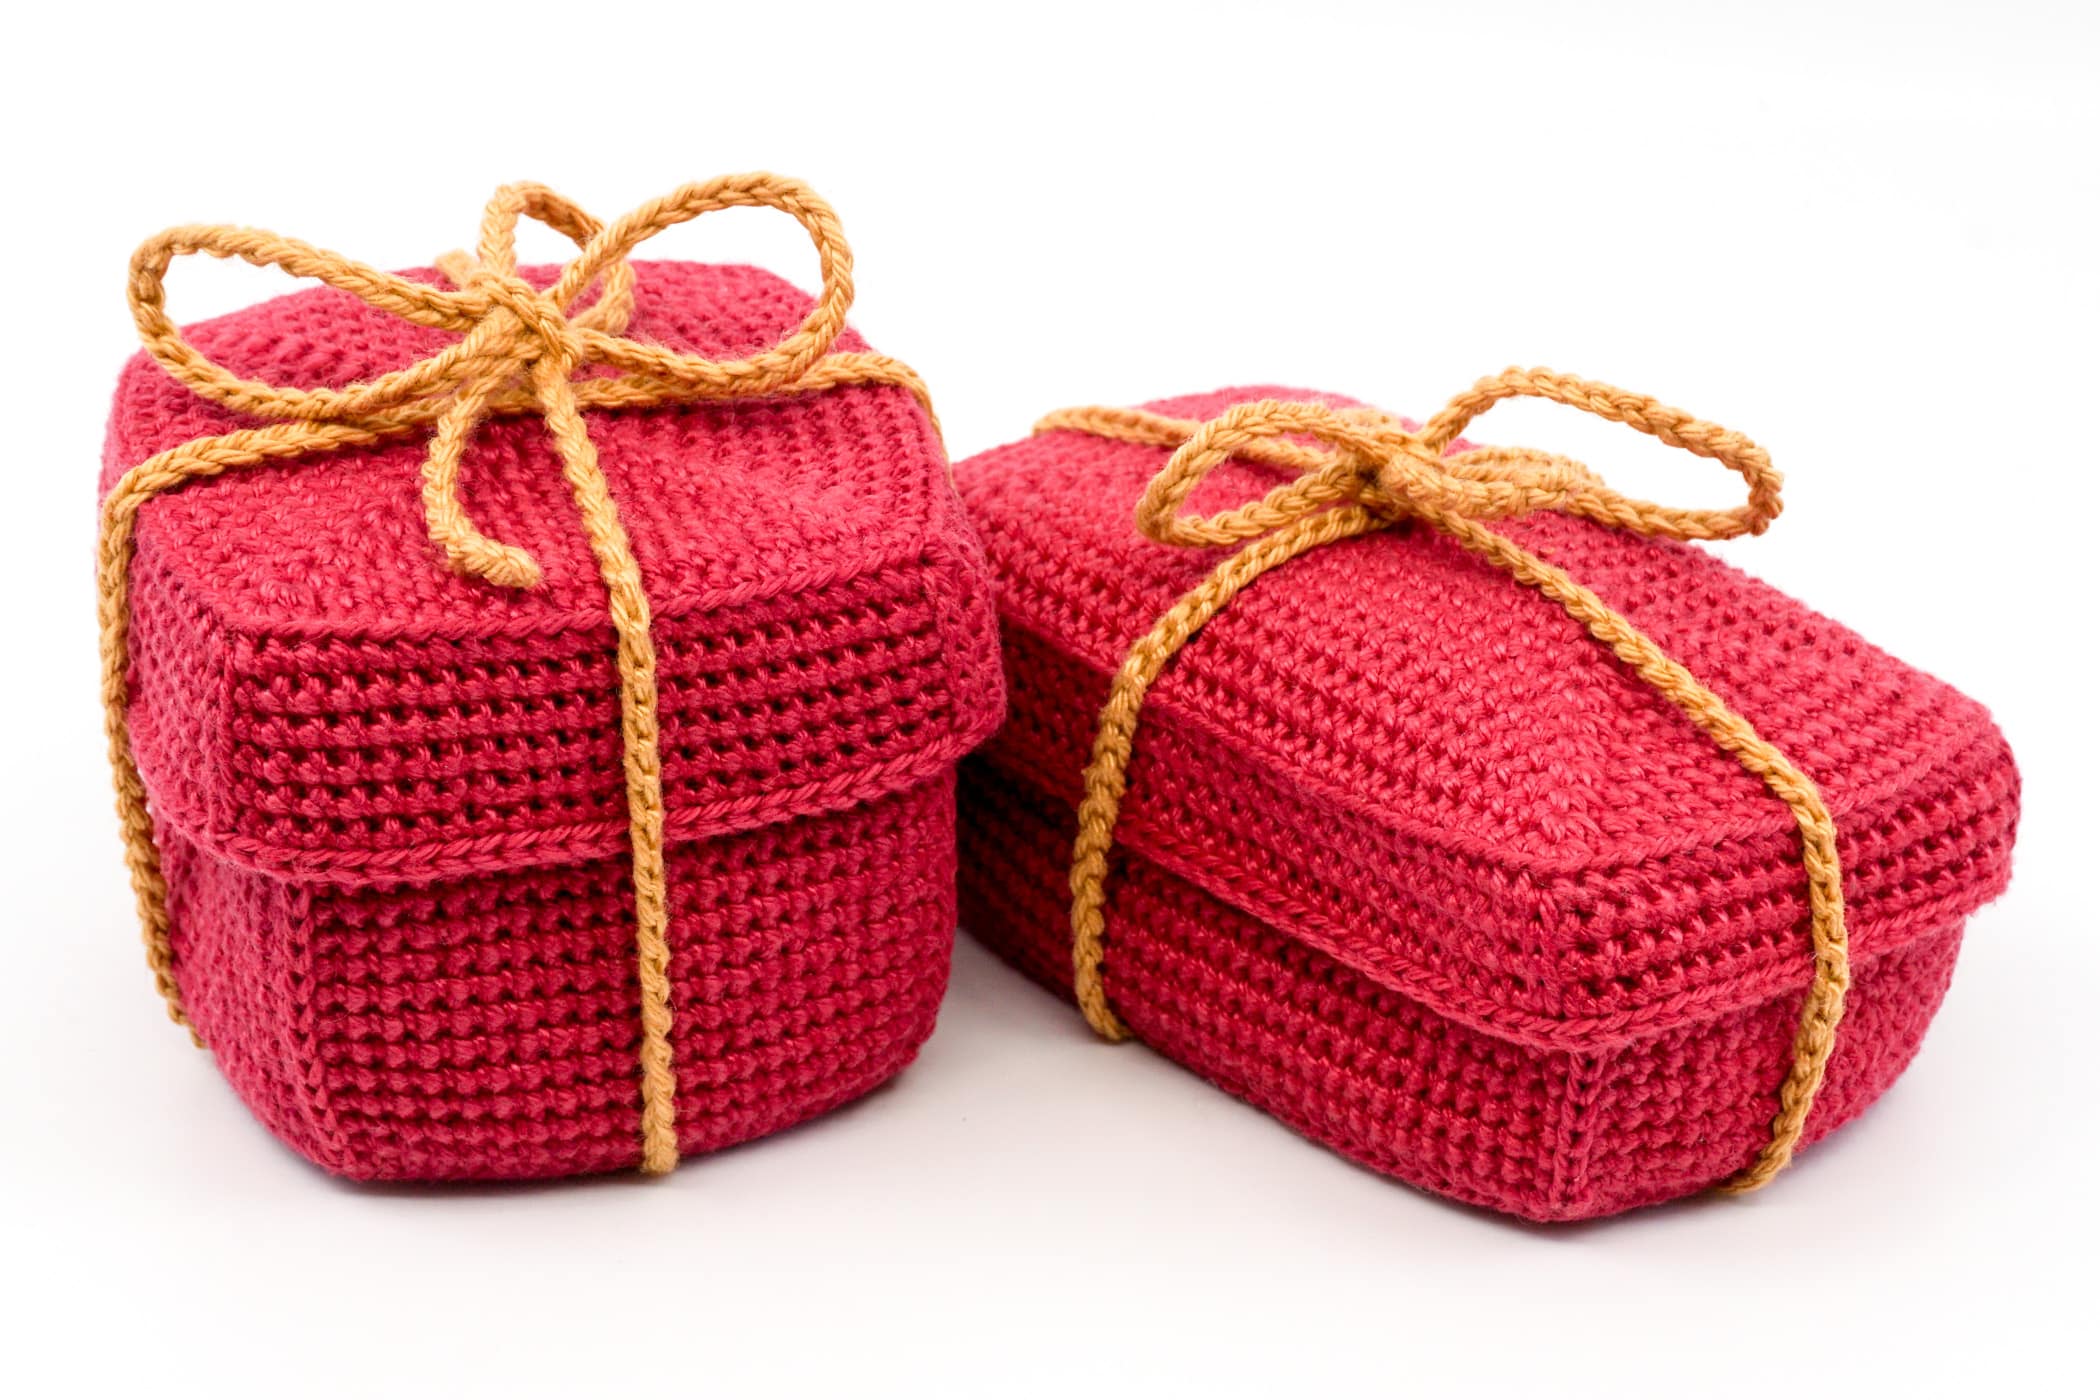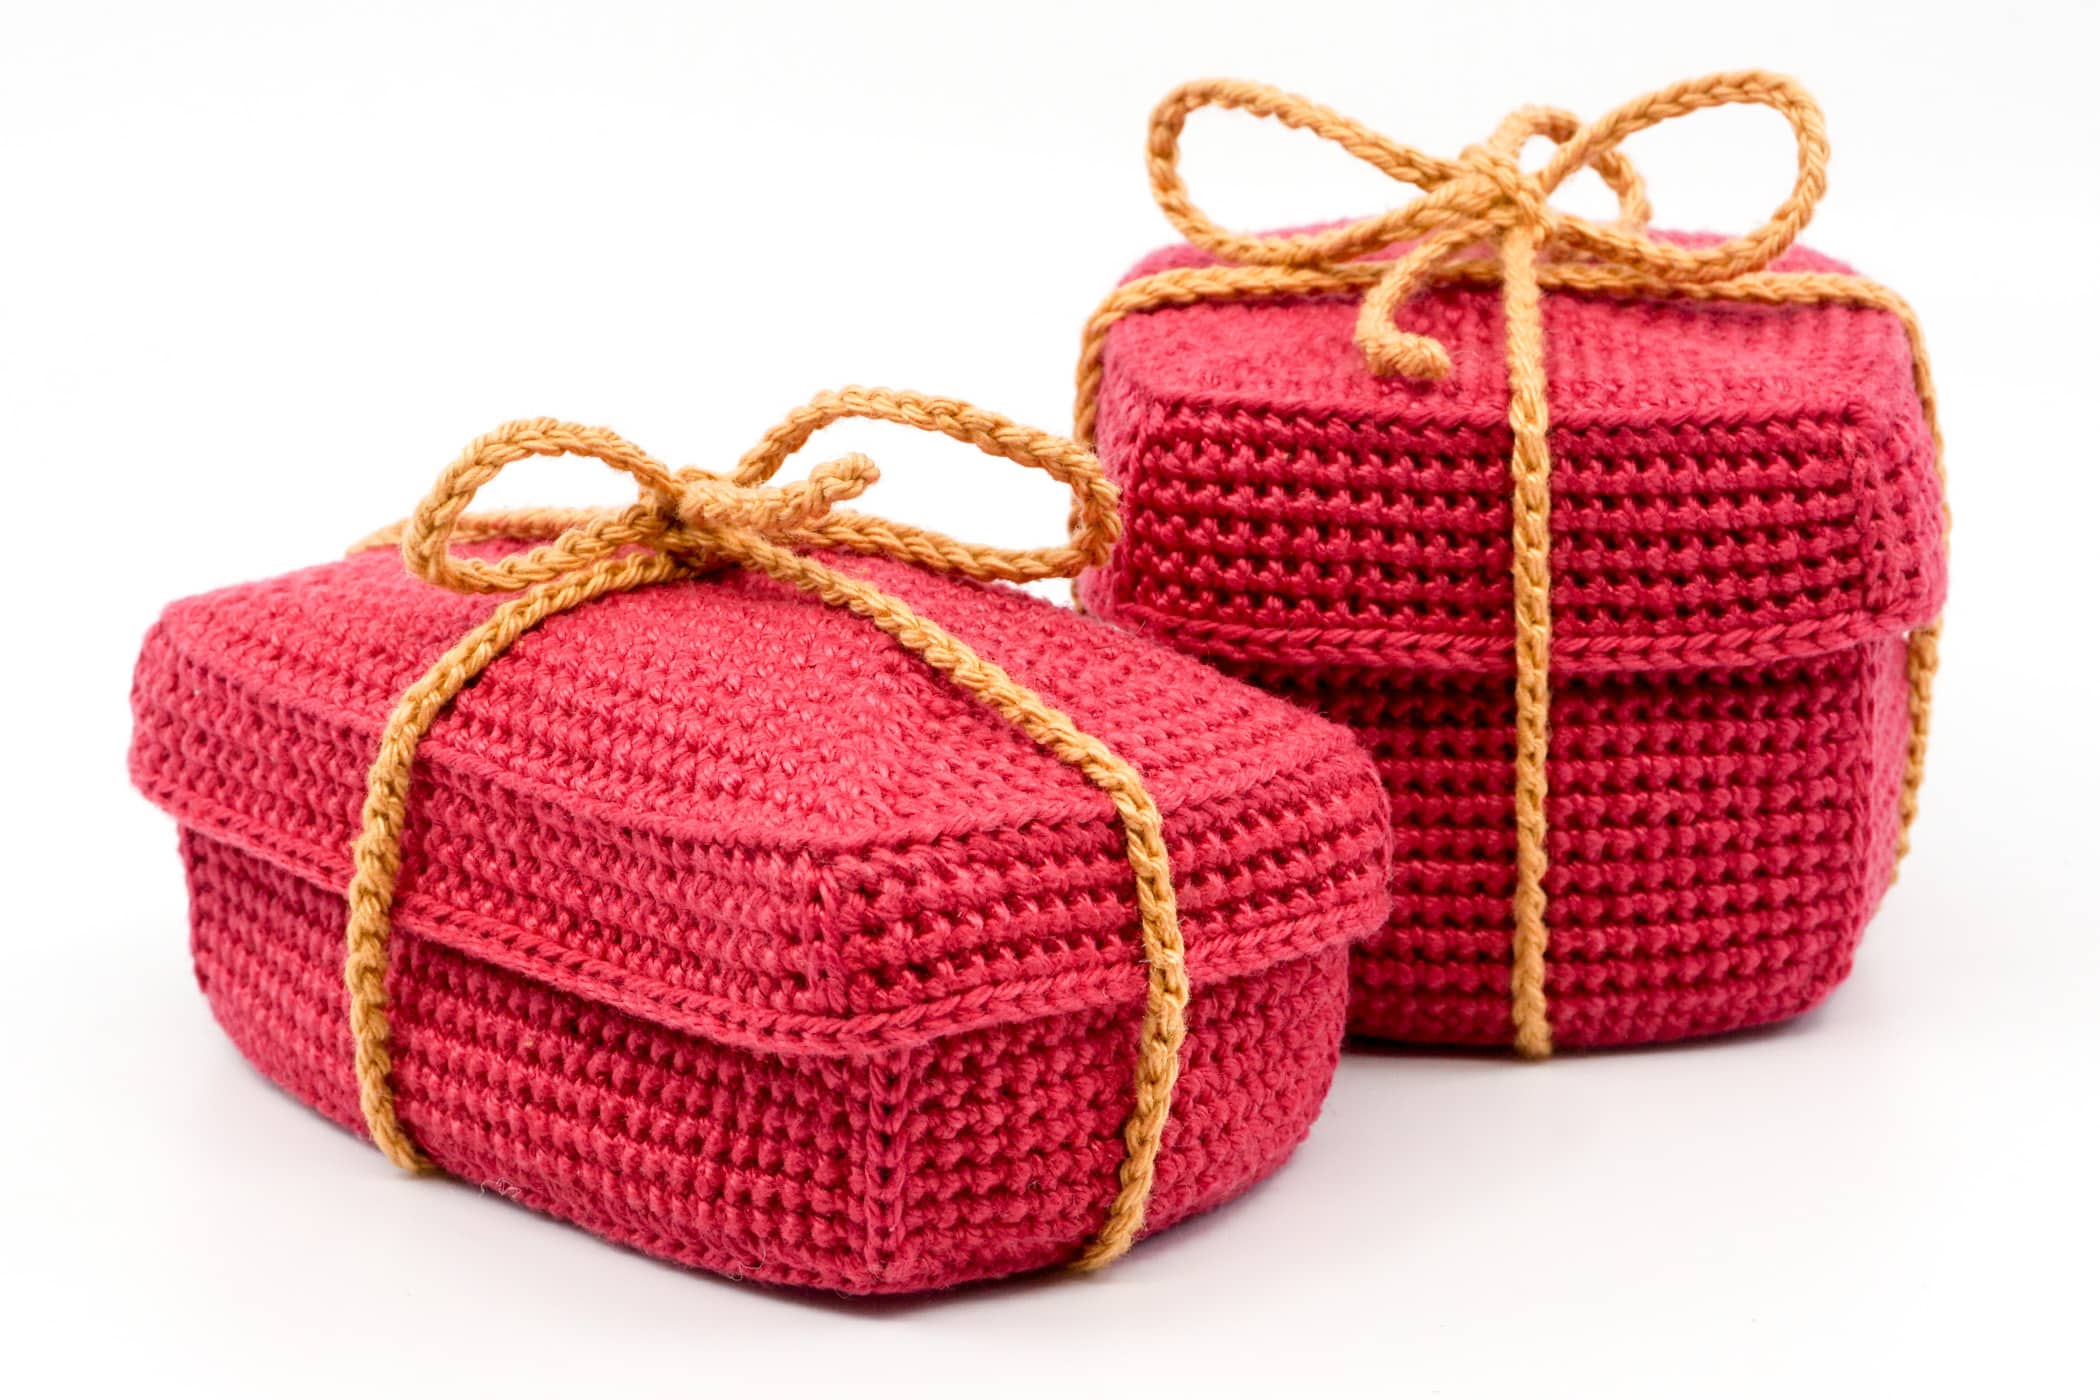
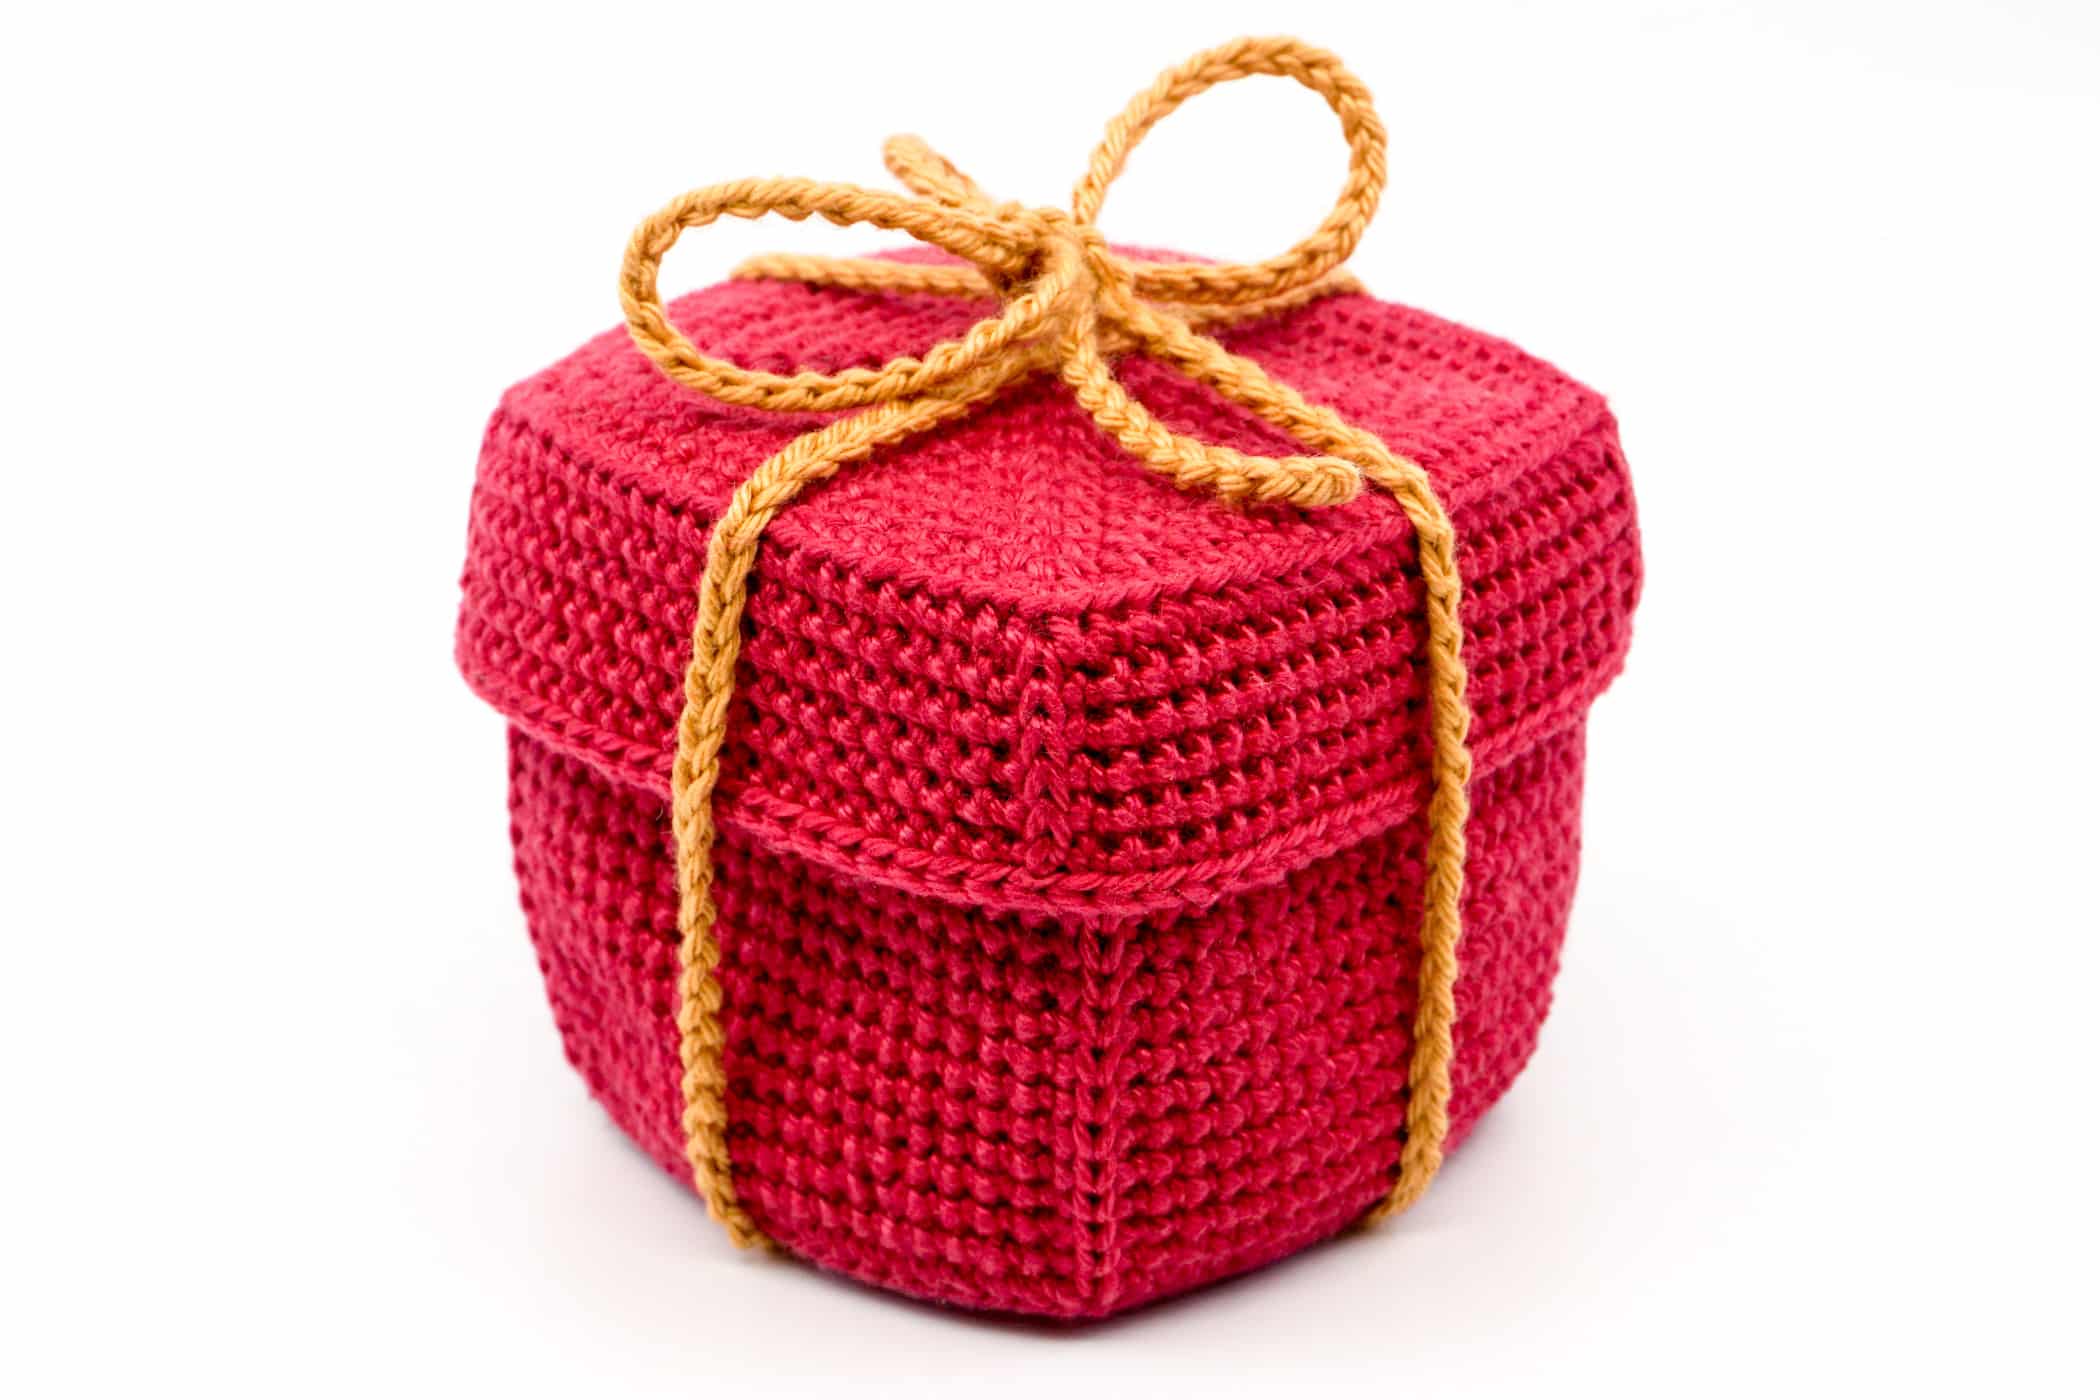
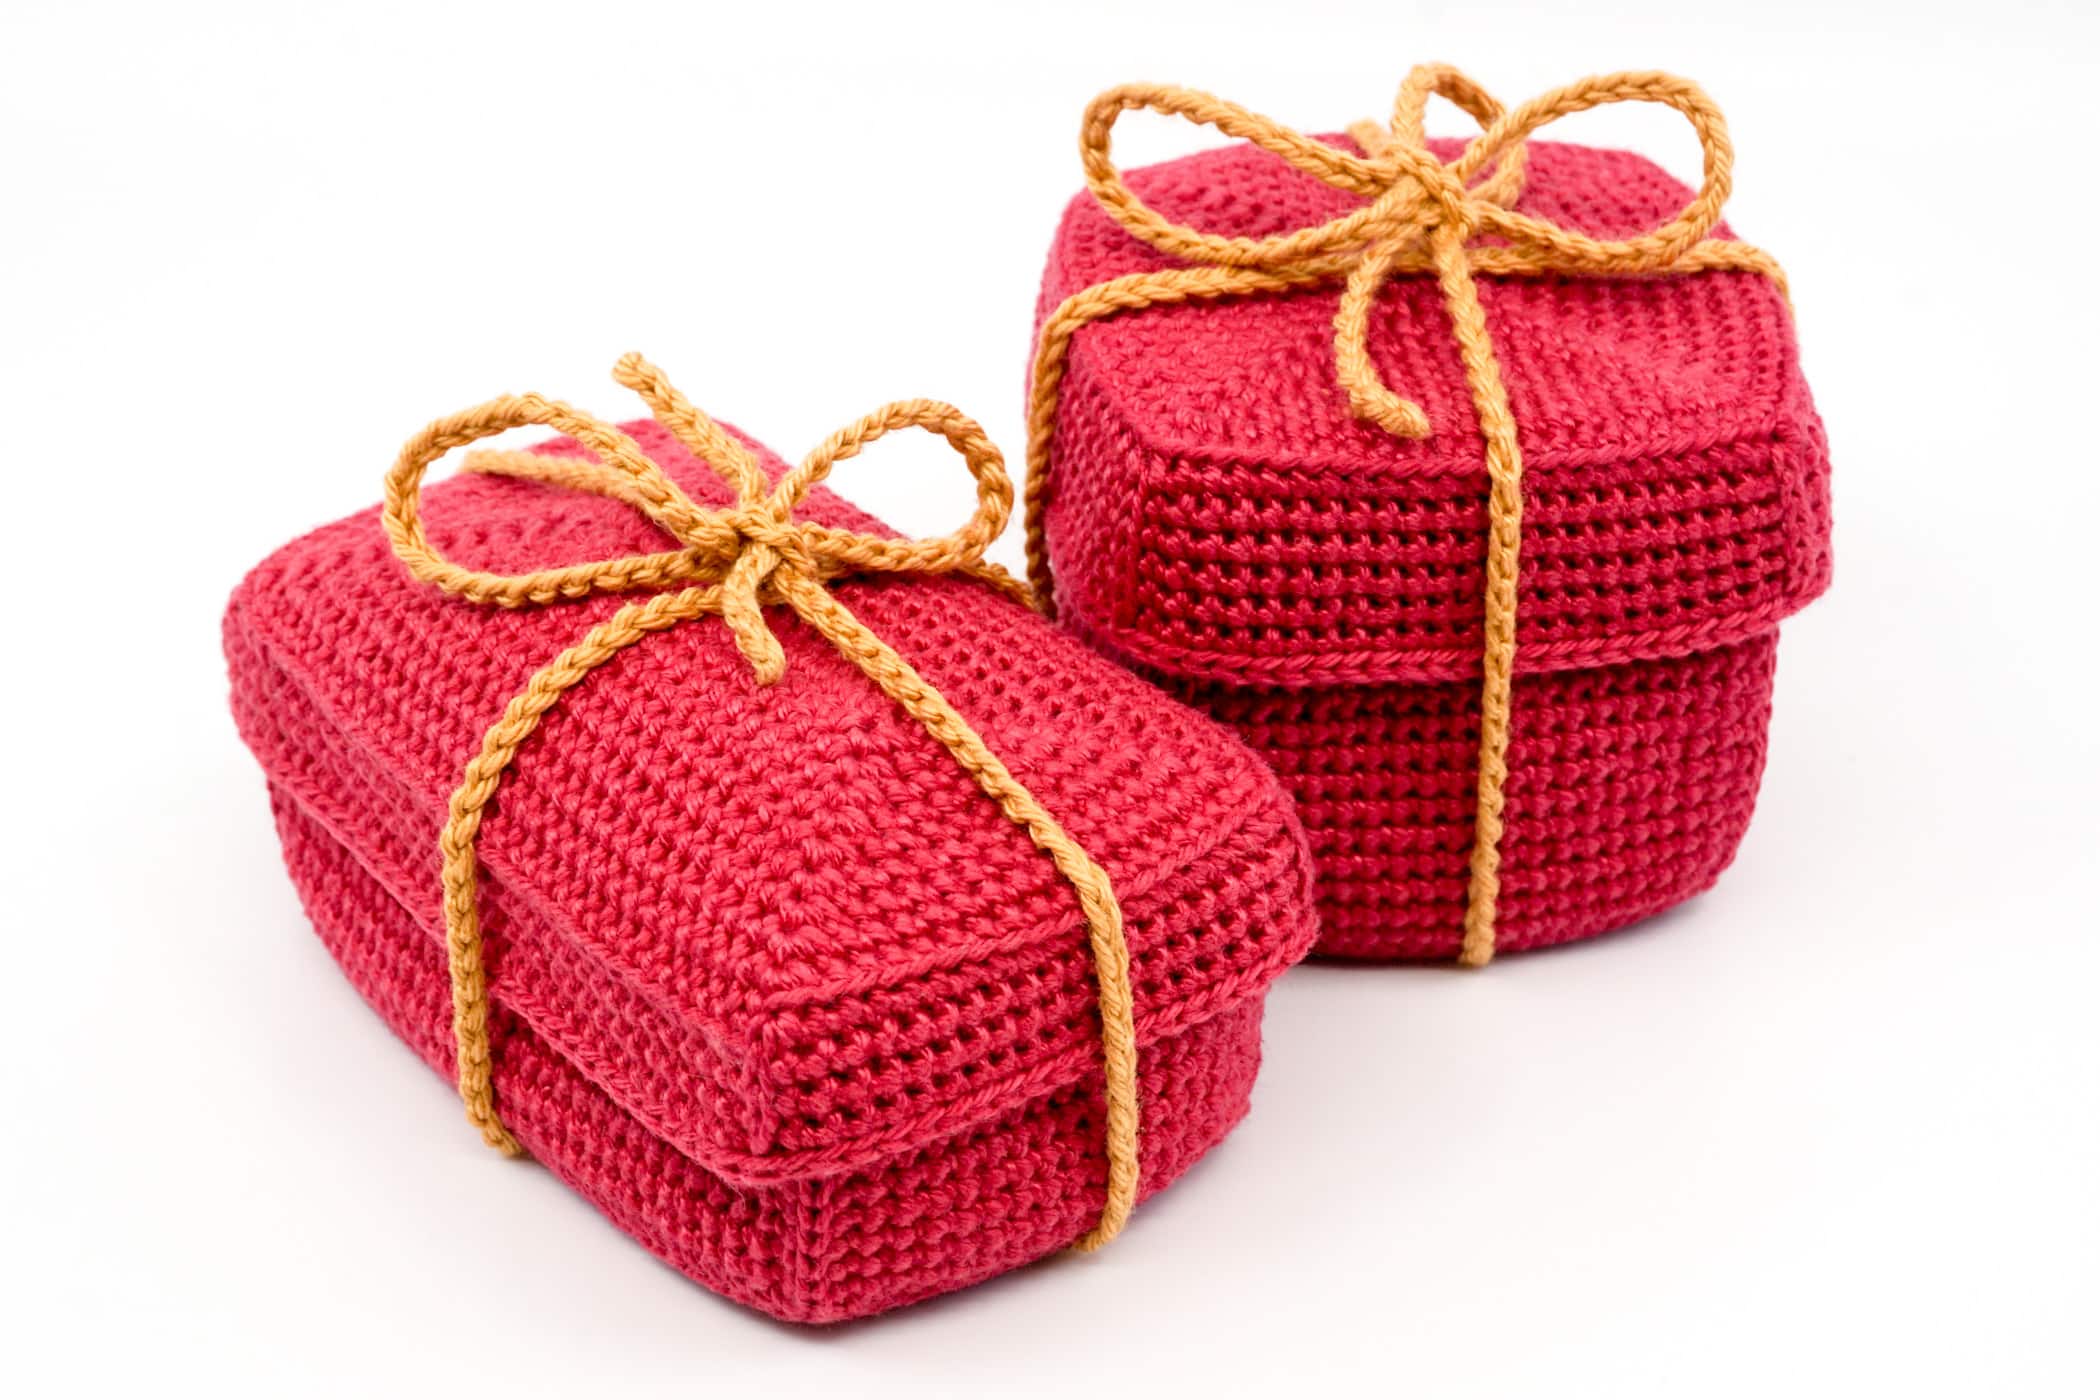
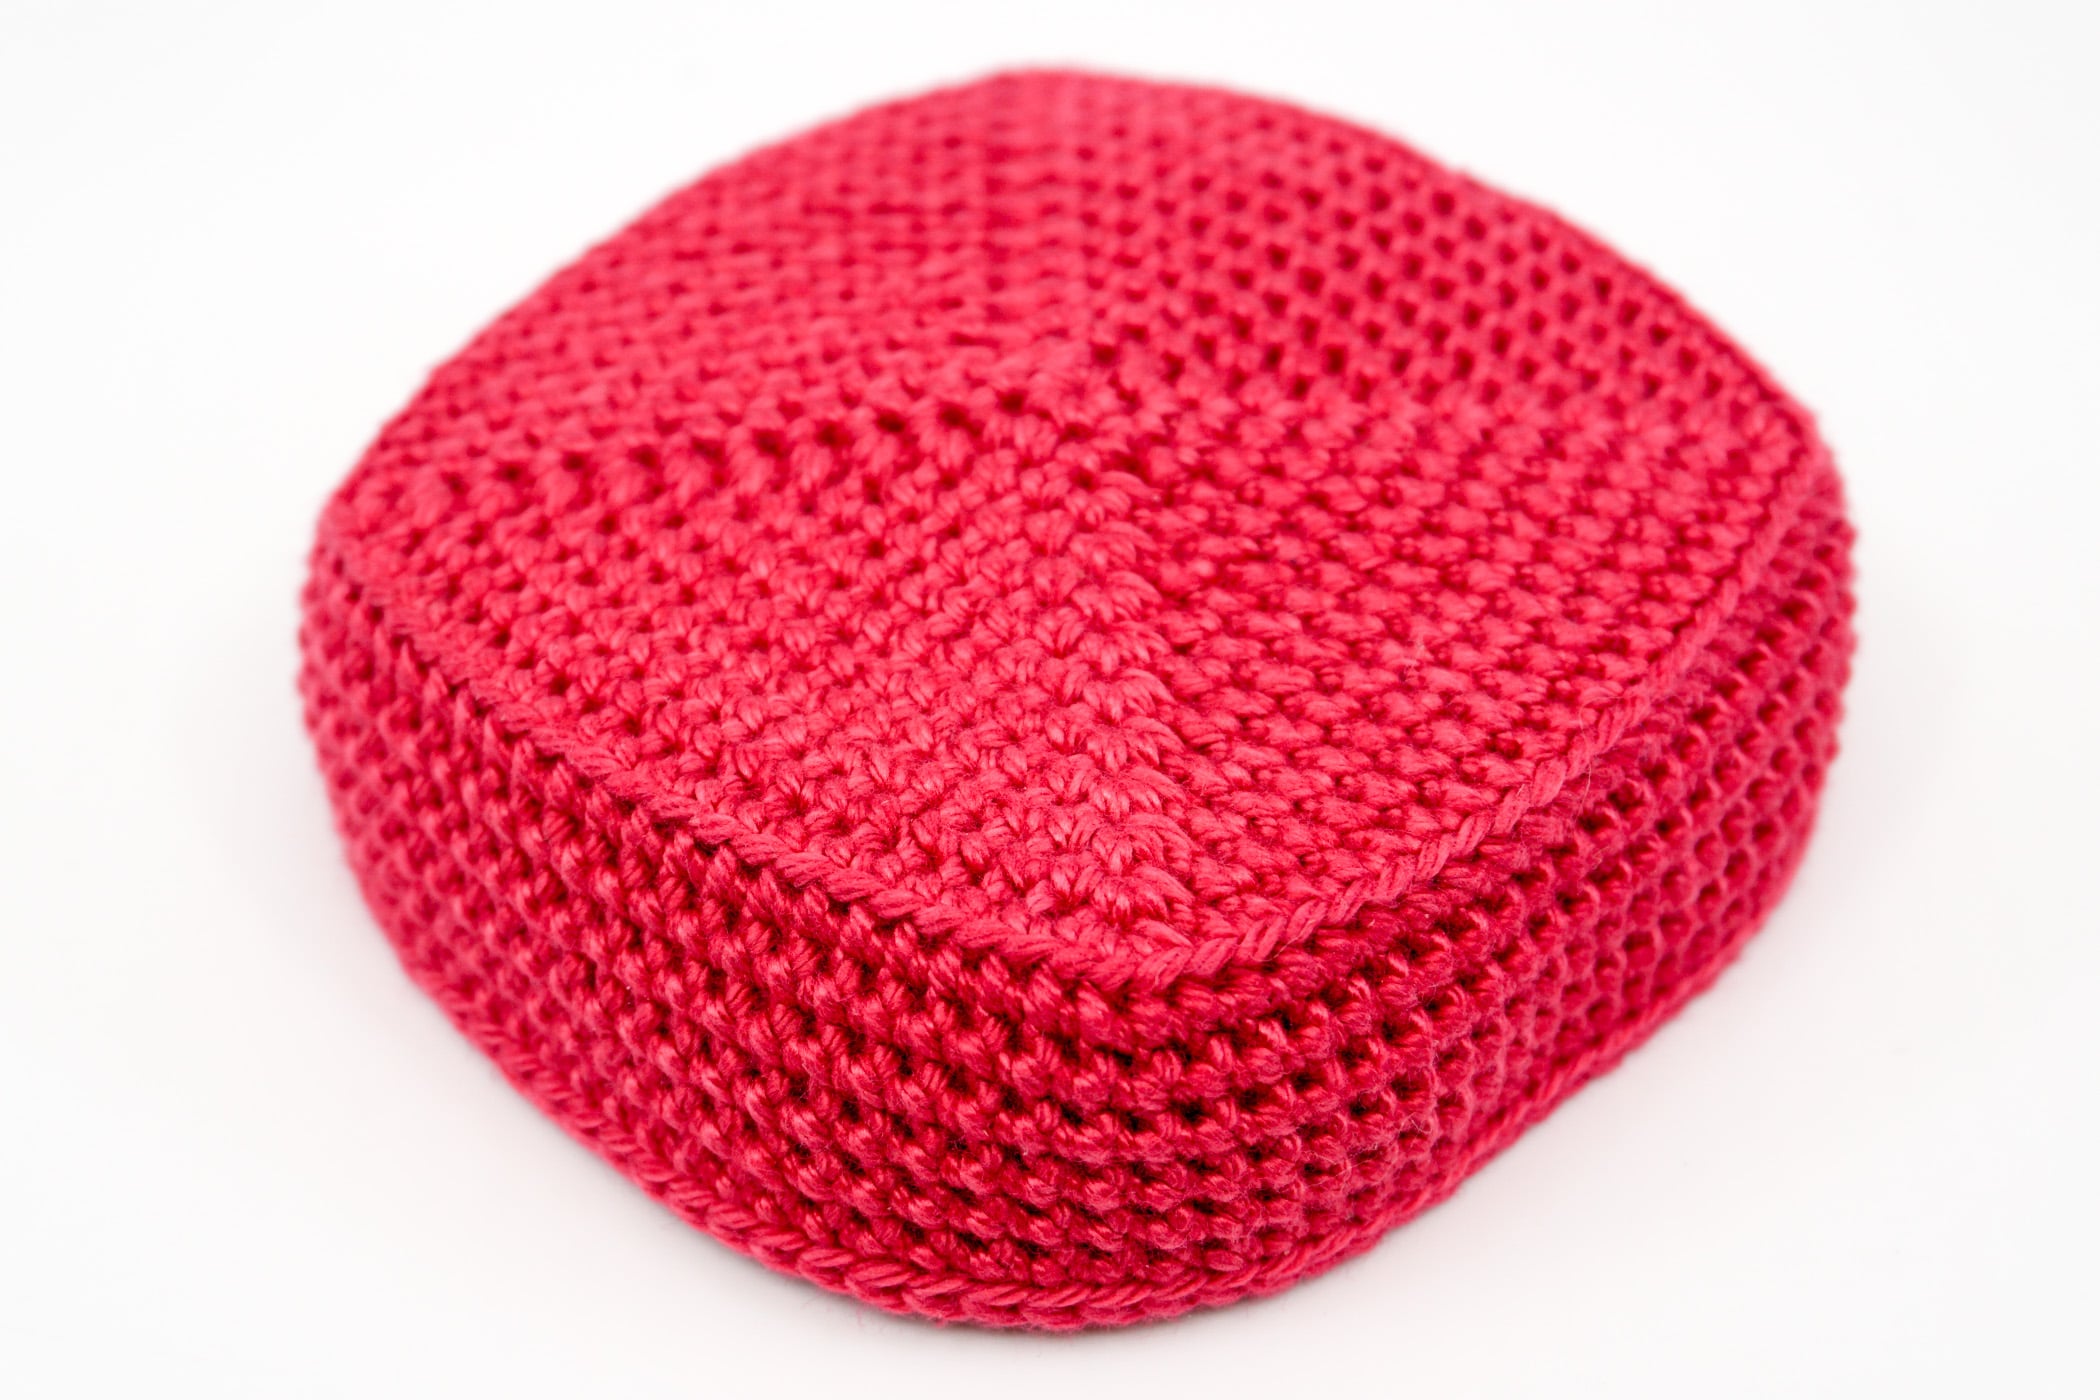
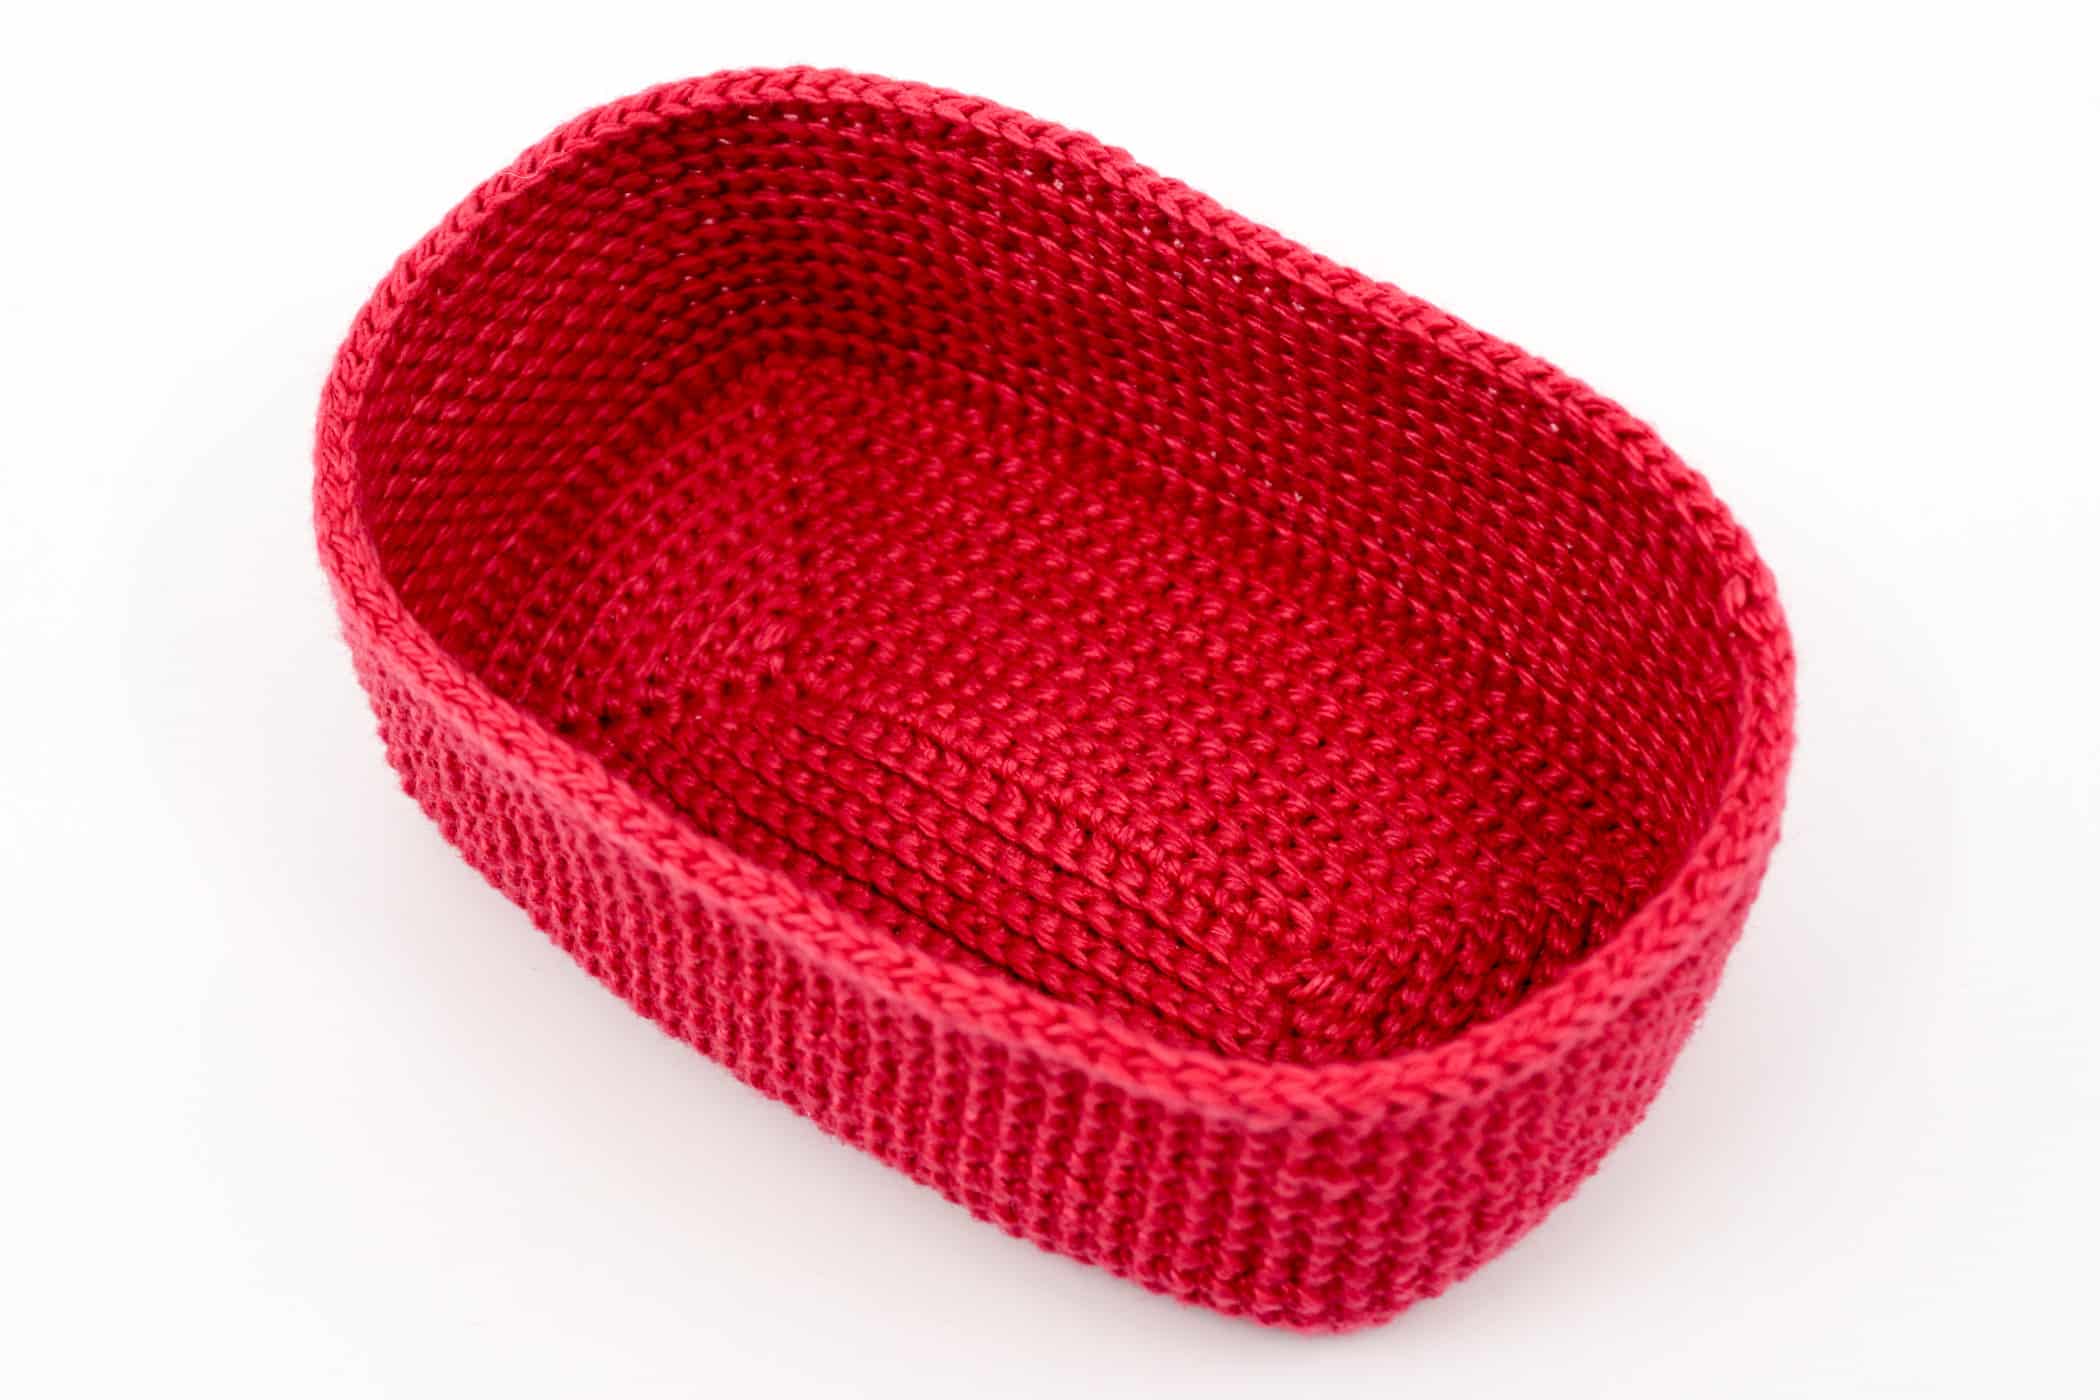
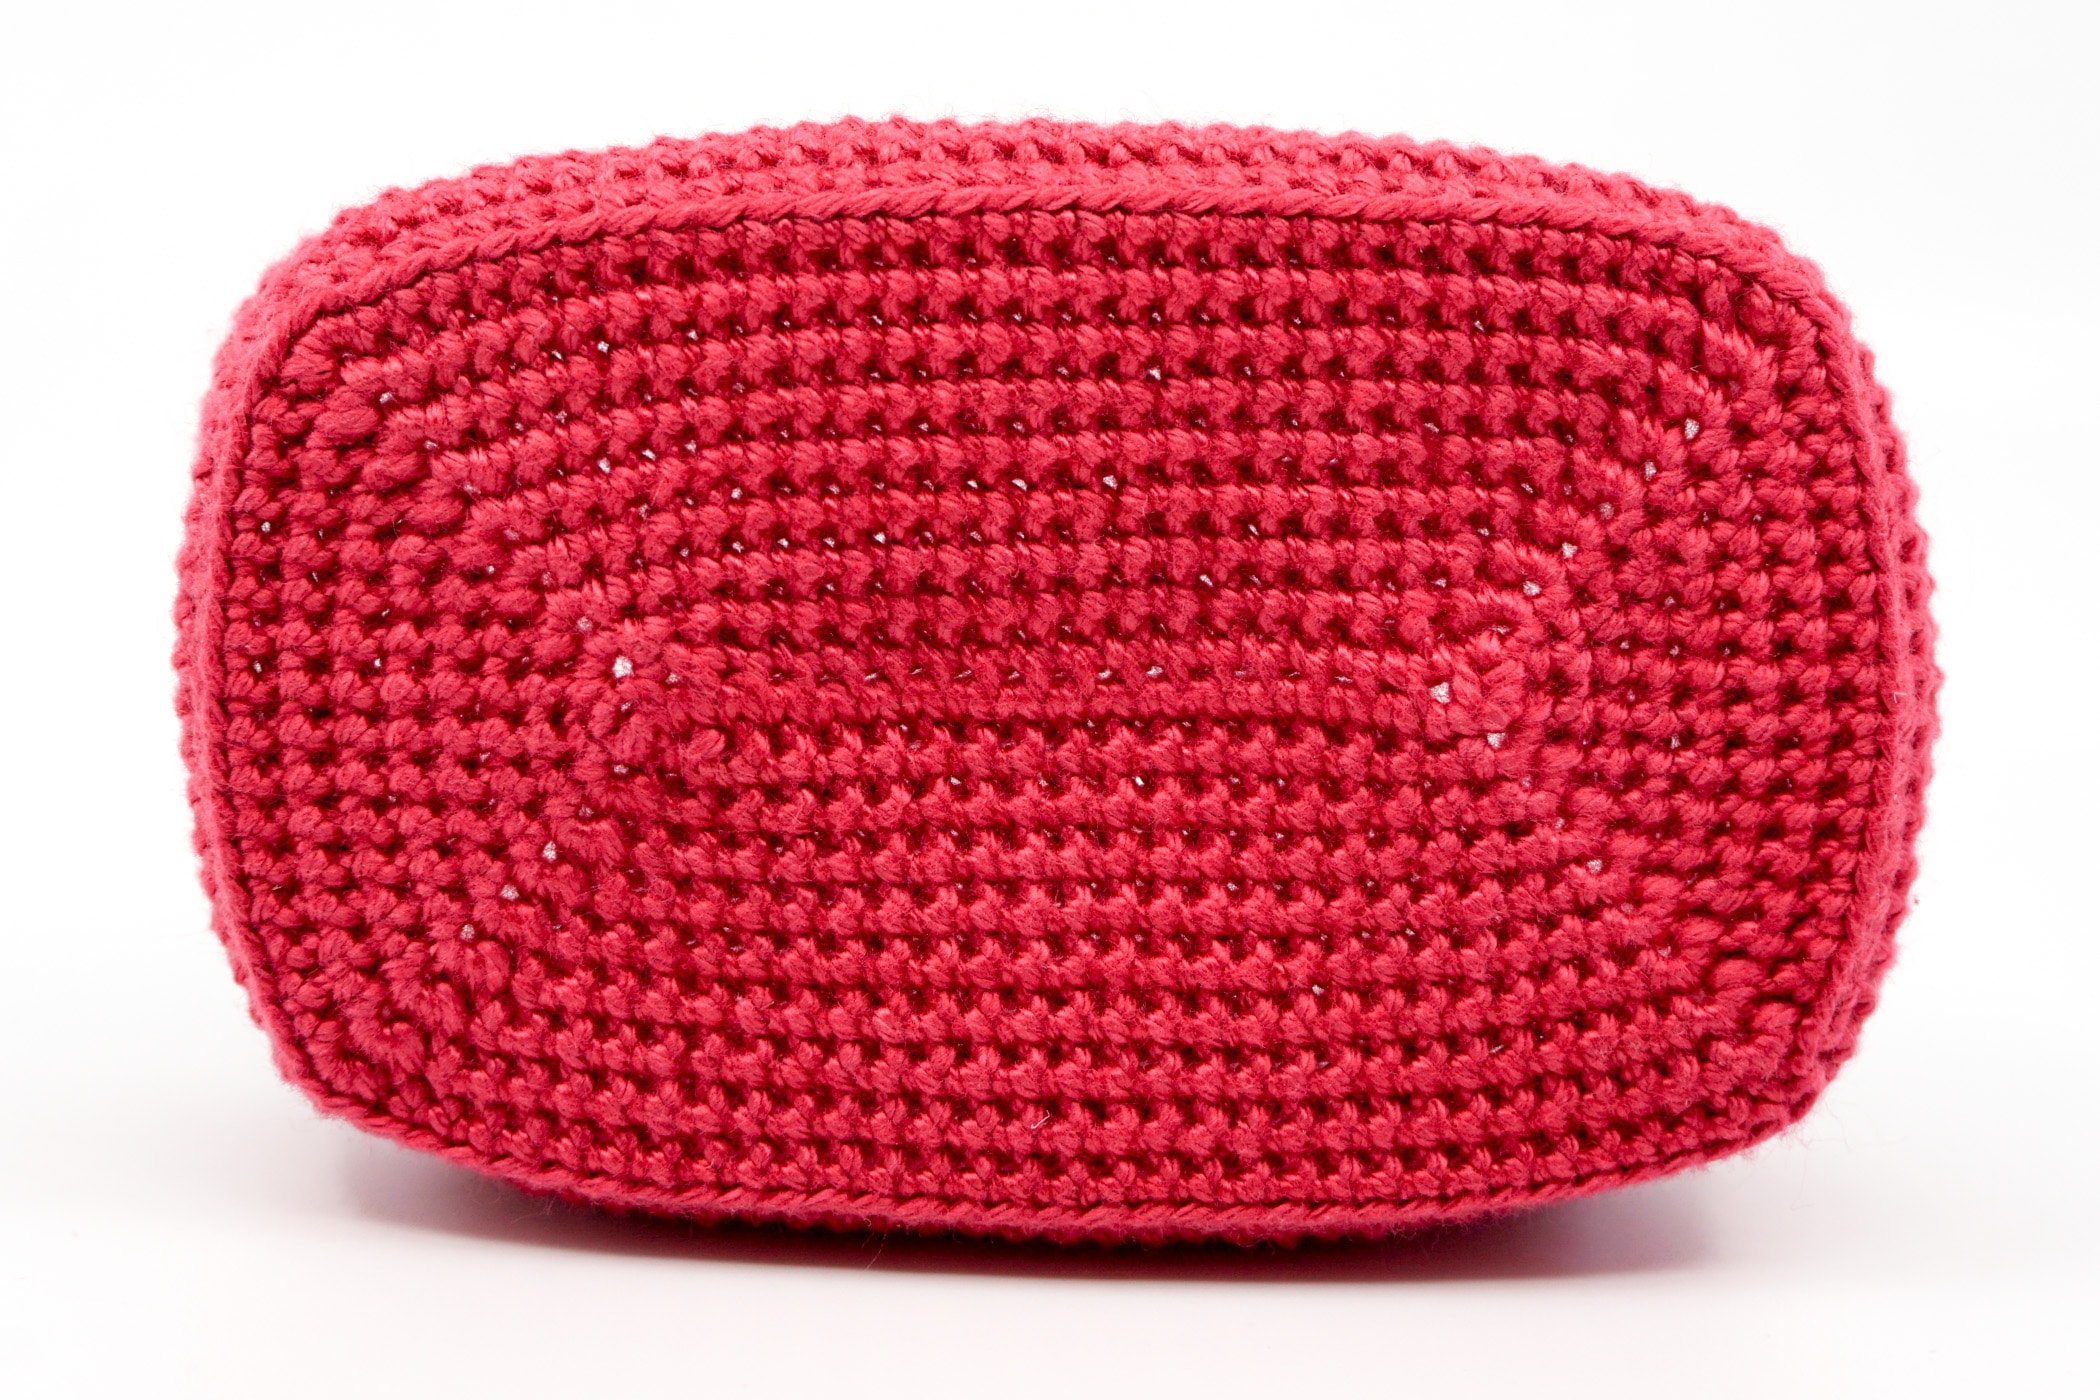
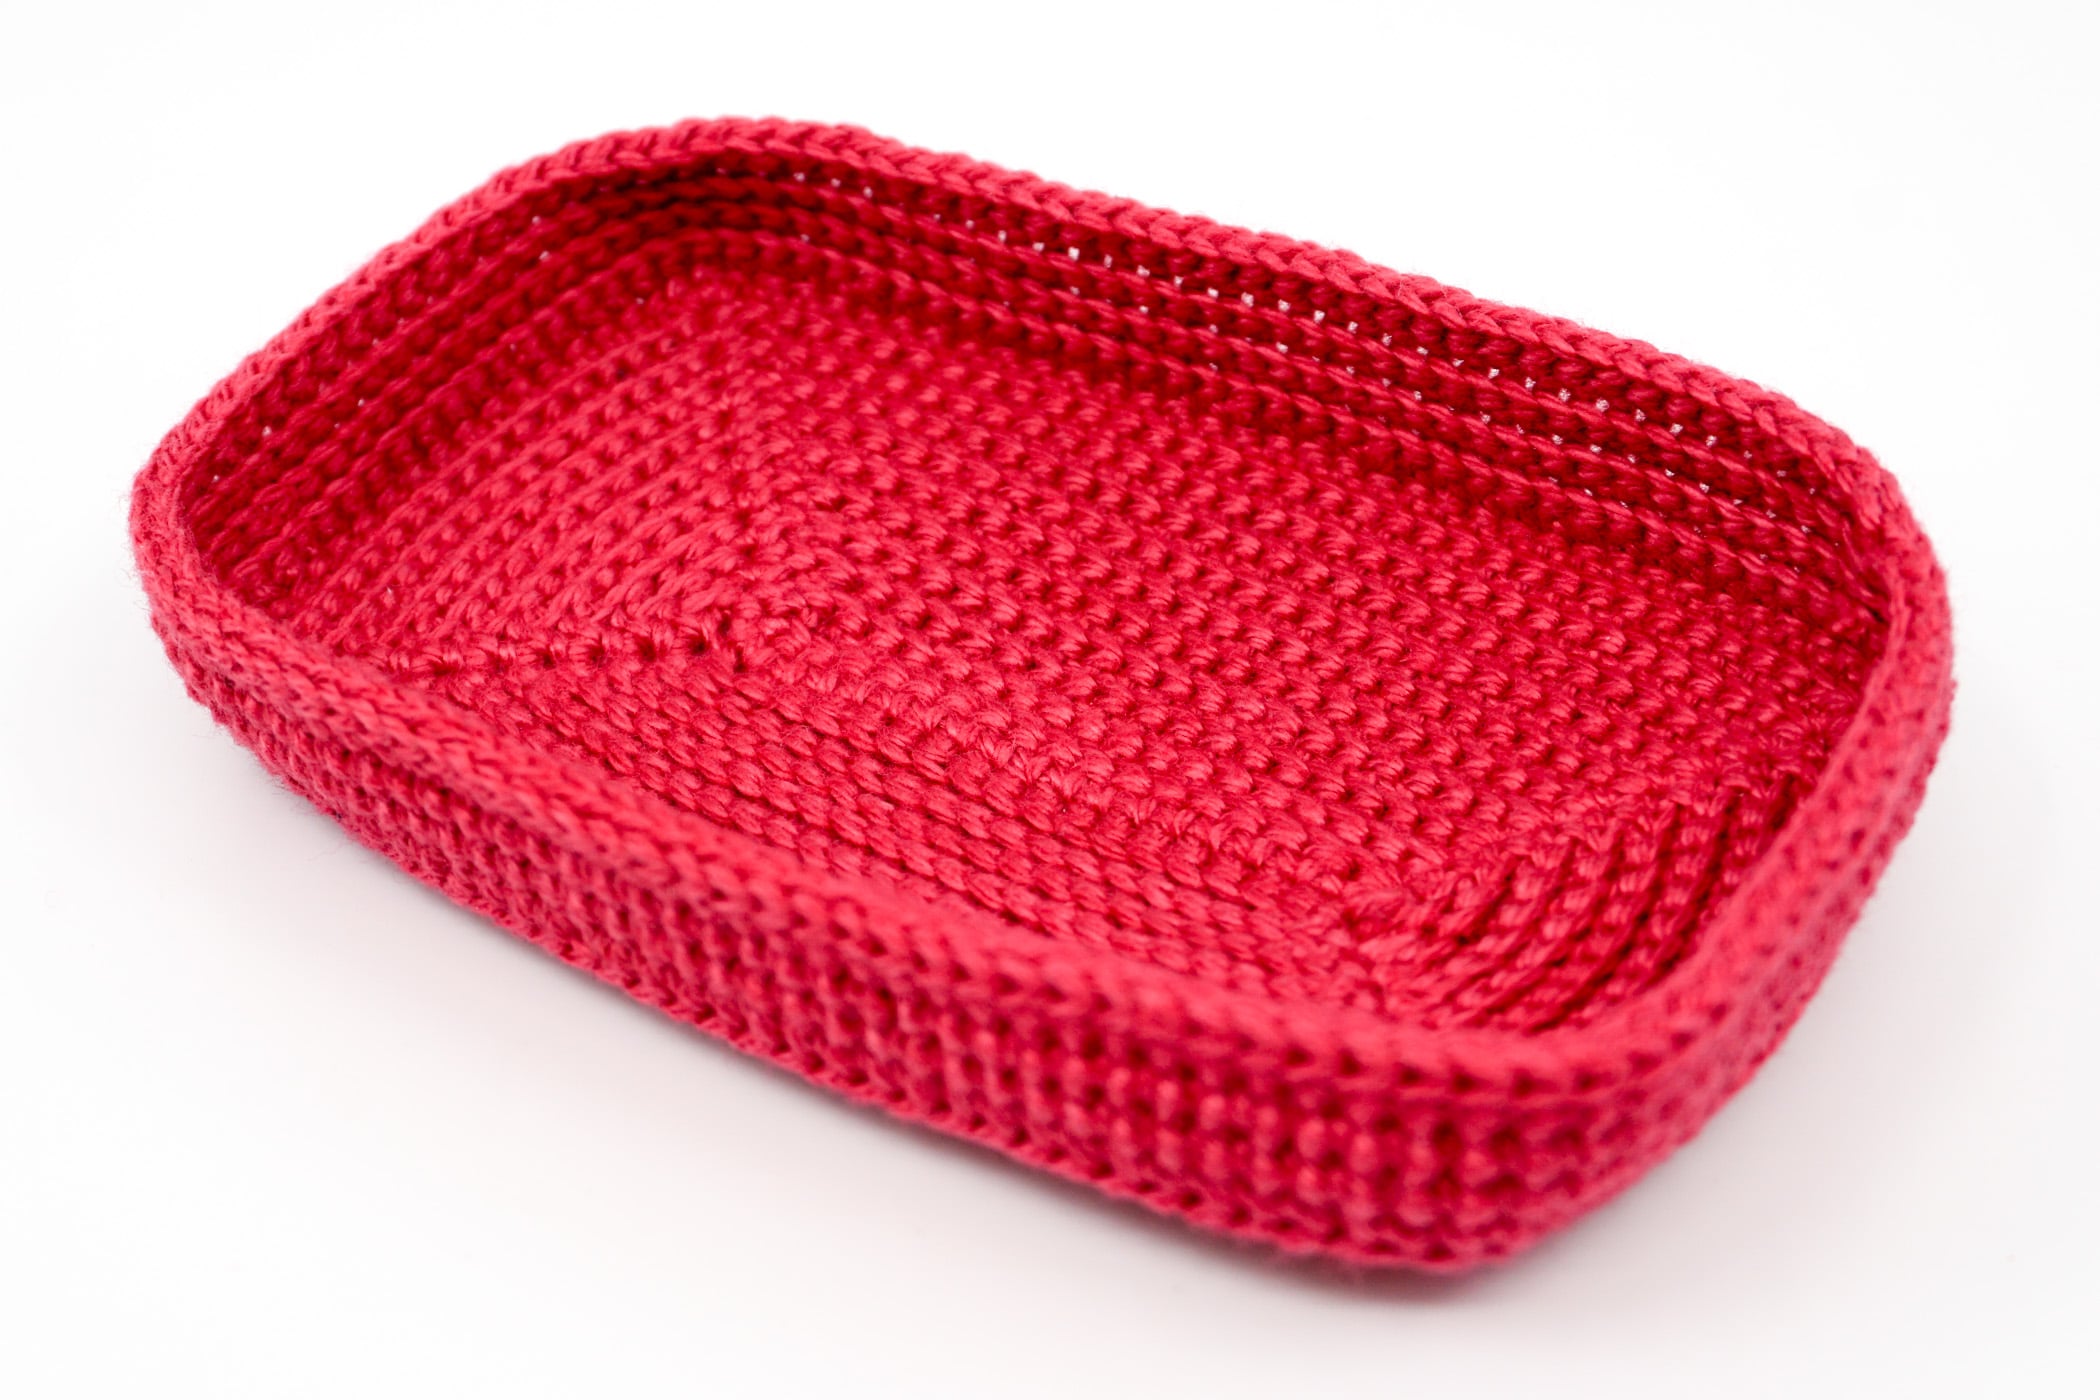
These crocheted, reusable gift boxes are ideal if you stylishly want to give away small amigurumi and do not want to produce unnecessary packaging waste for the sake of the environment.
The boxes are specially designed to fit amigurumi by Supergurumi, but can of course also be used for all other amigurumi with similar dimensions.
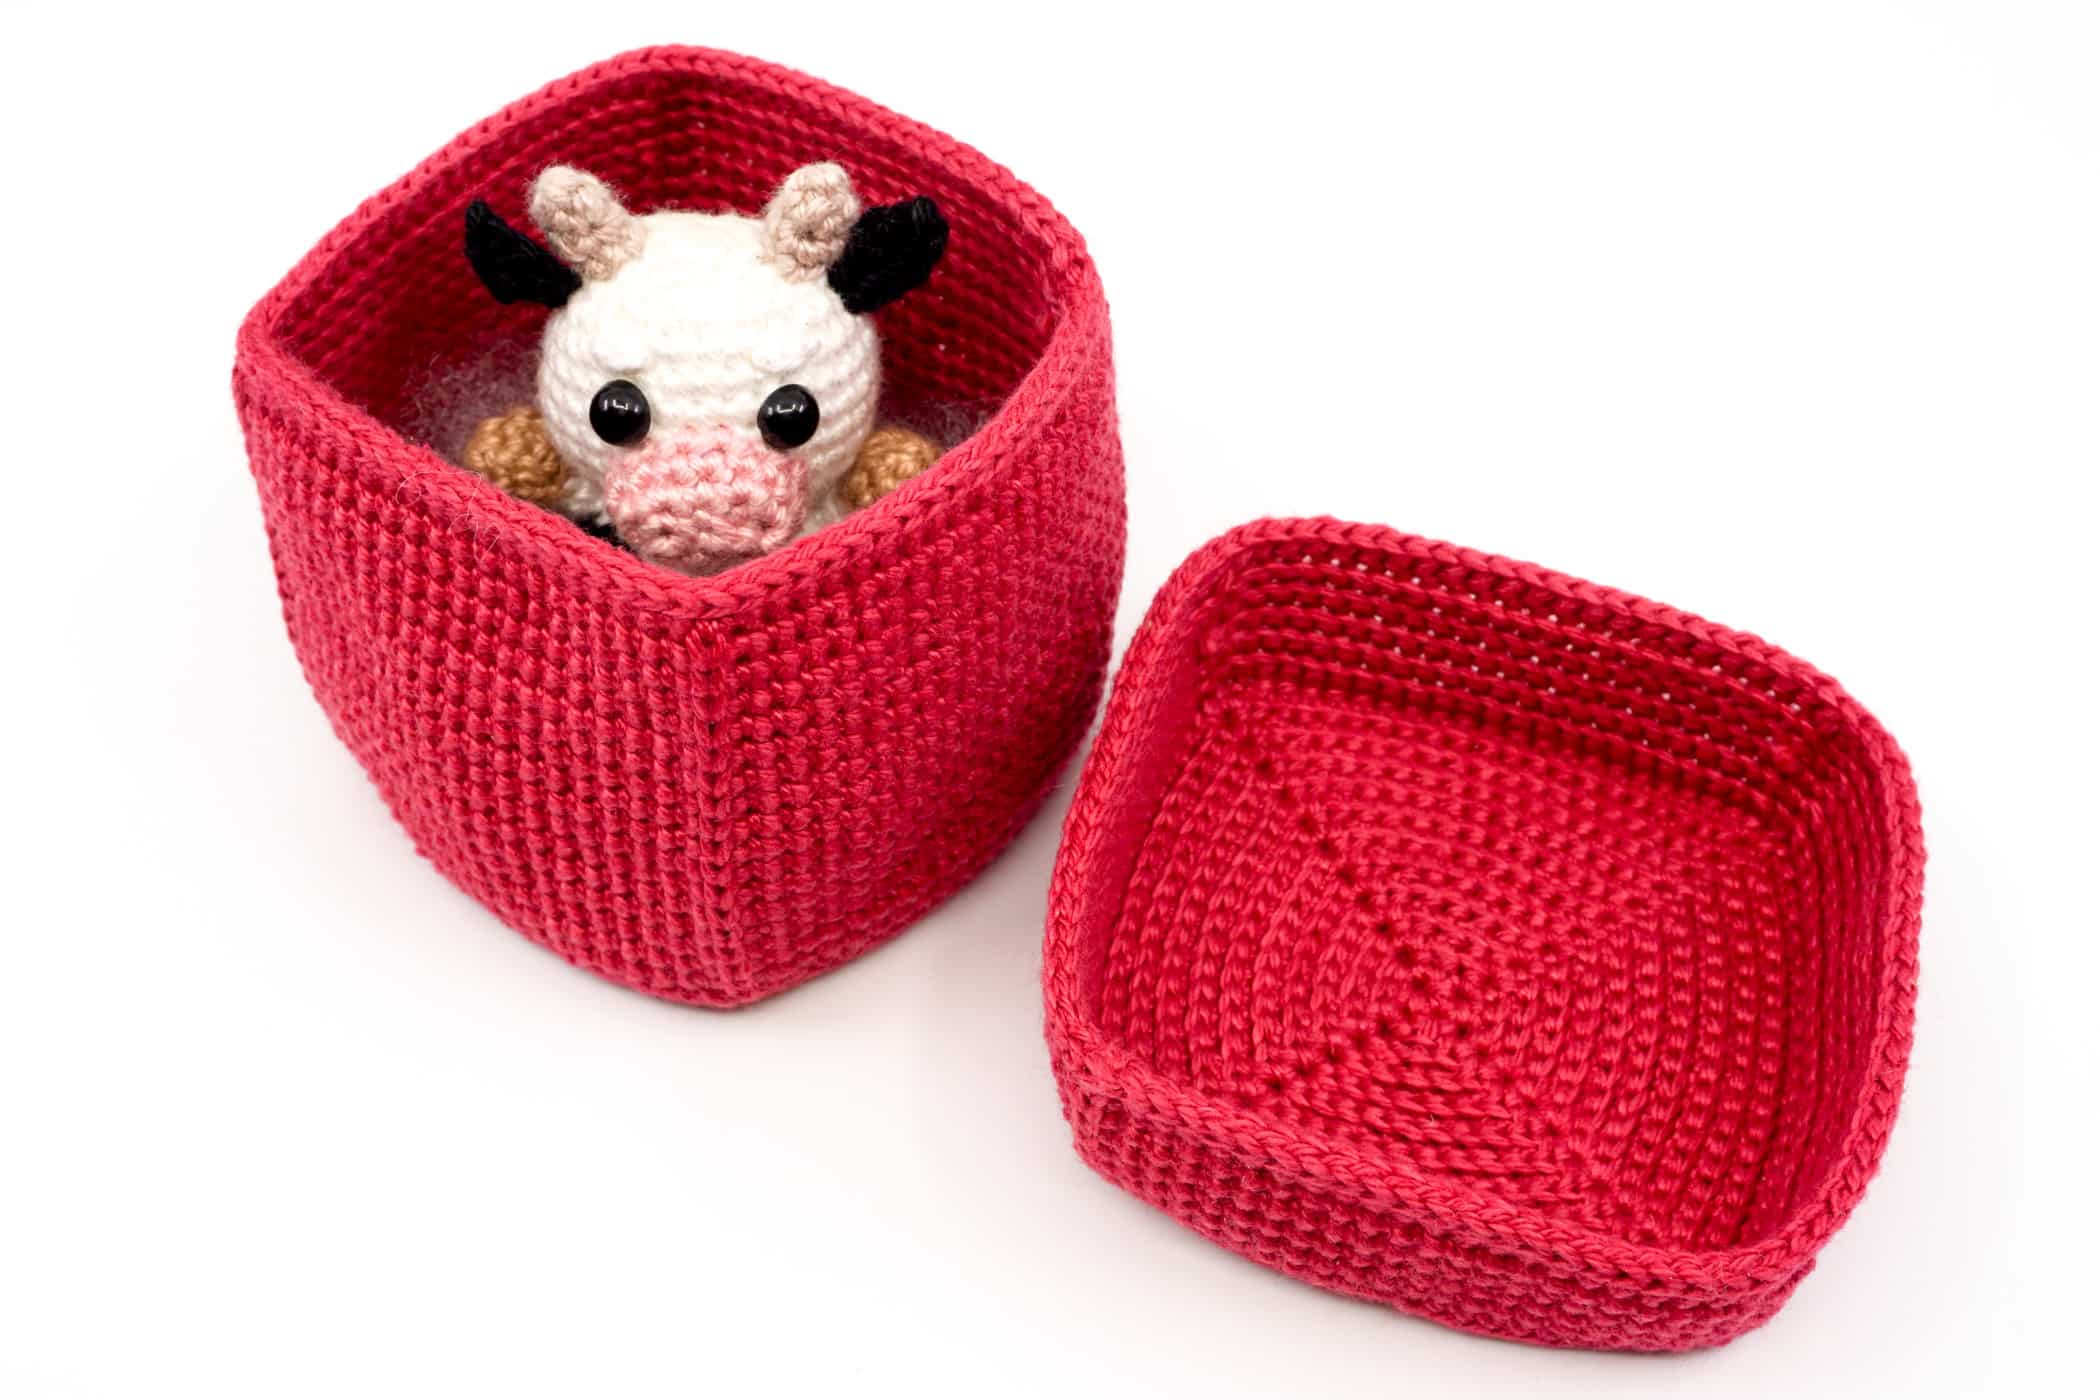
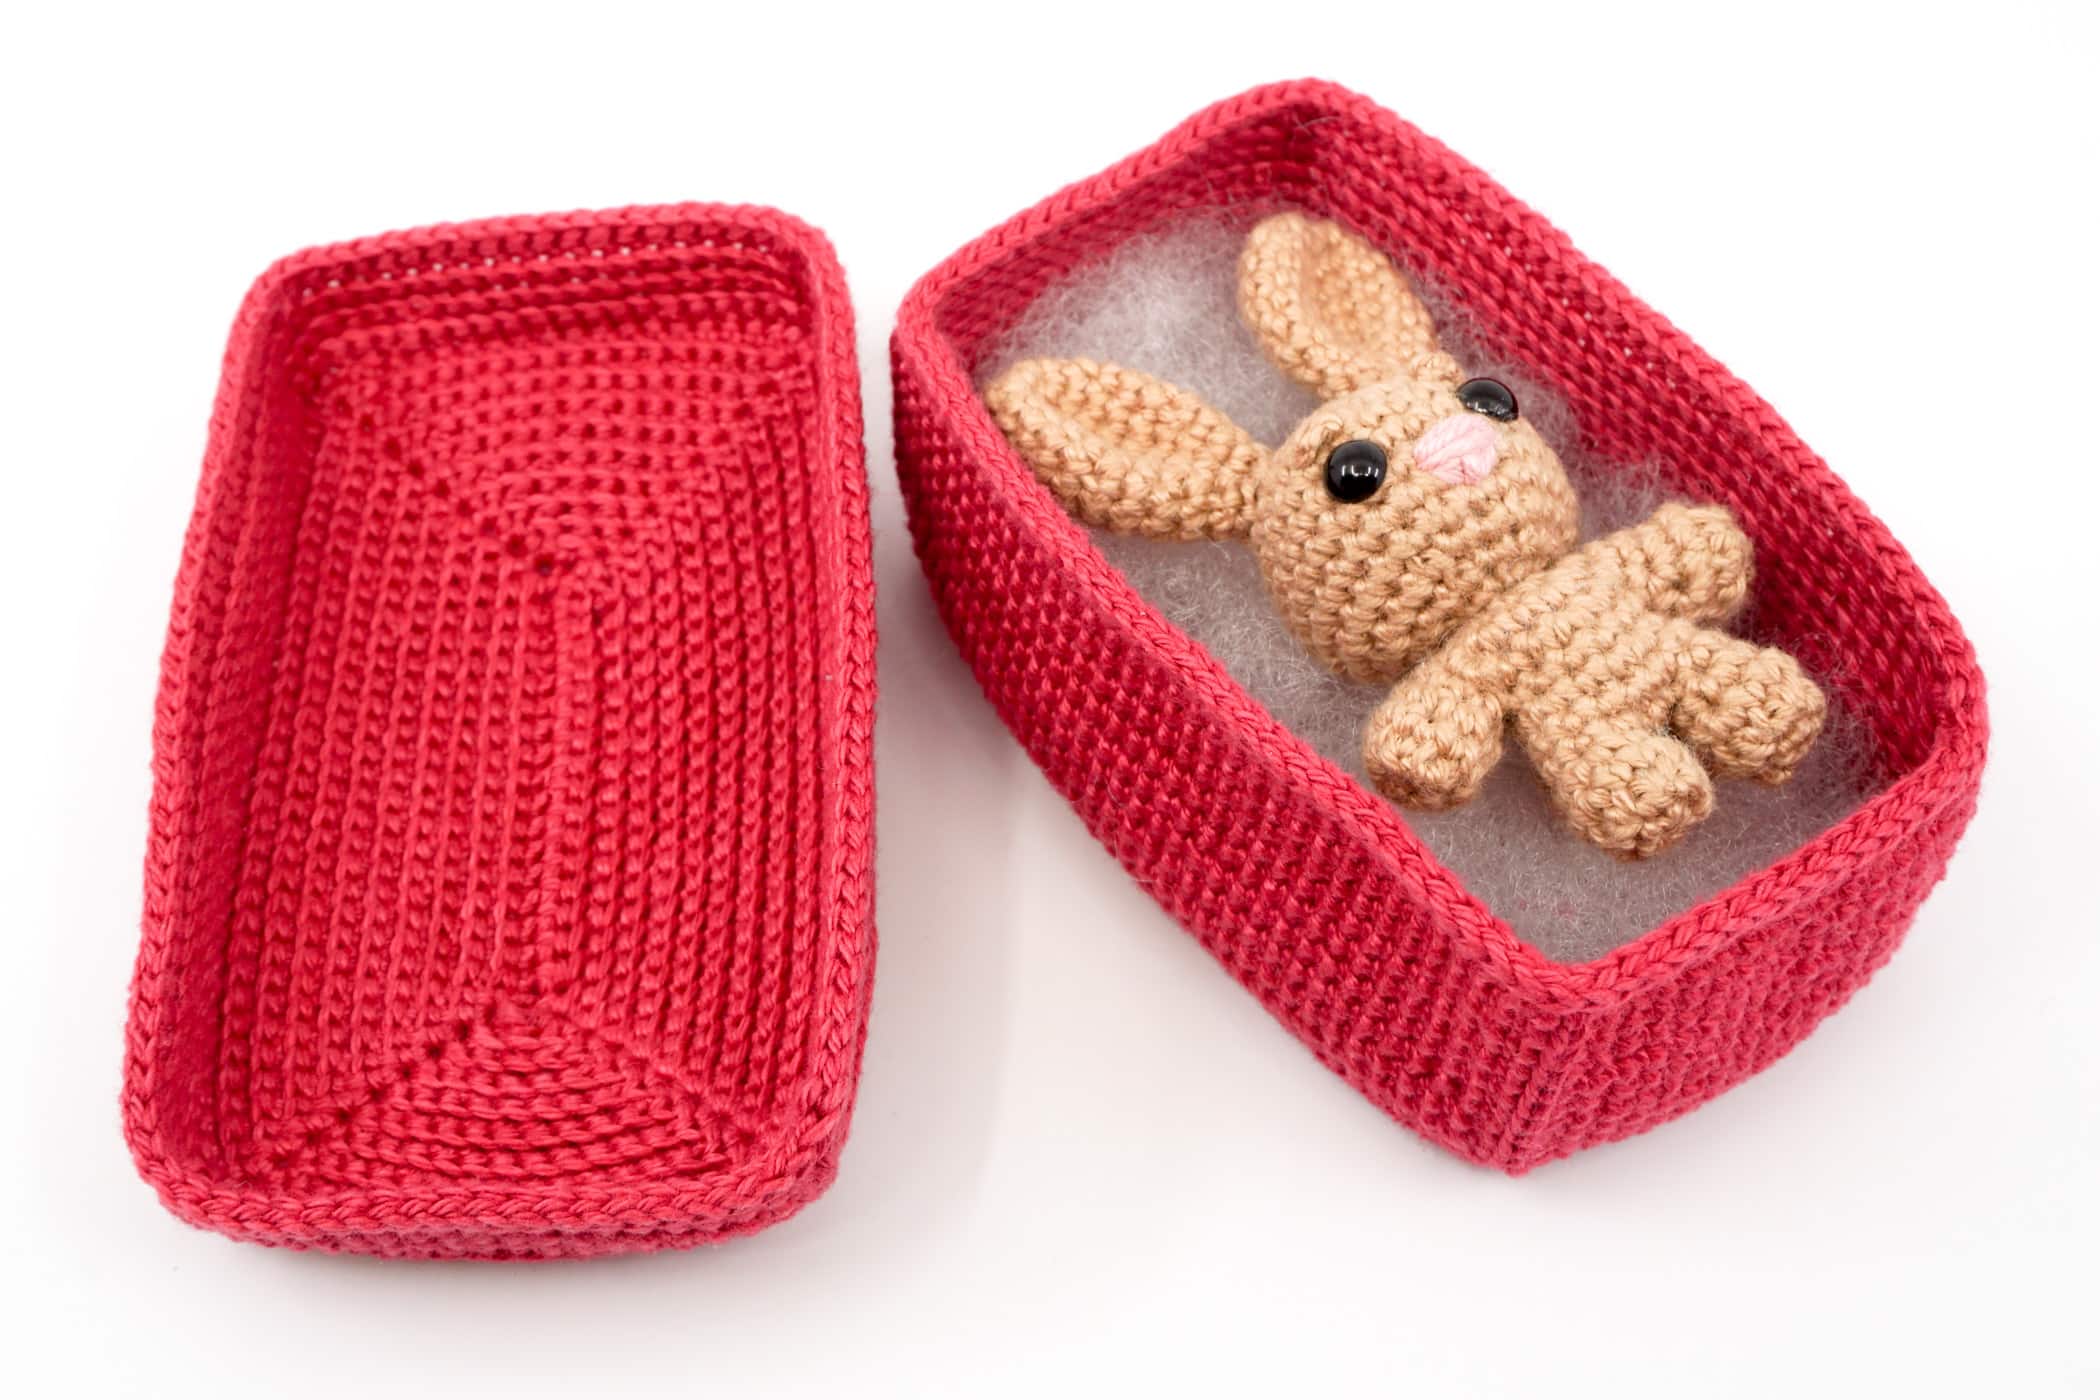
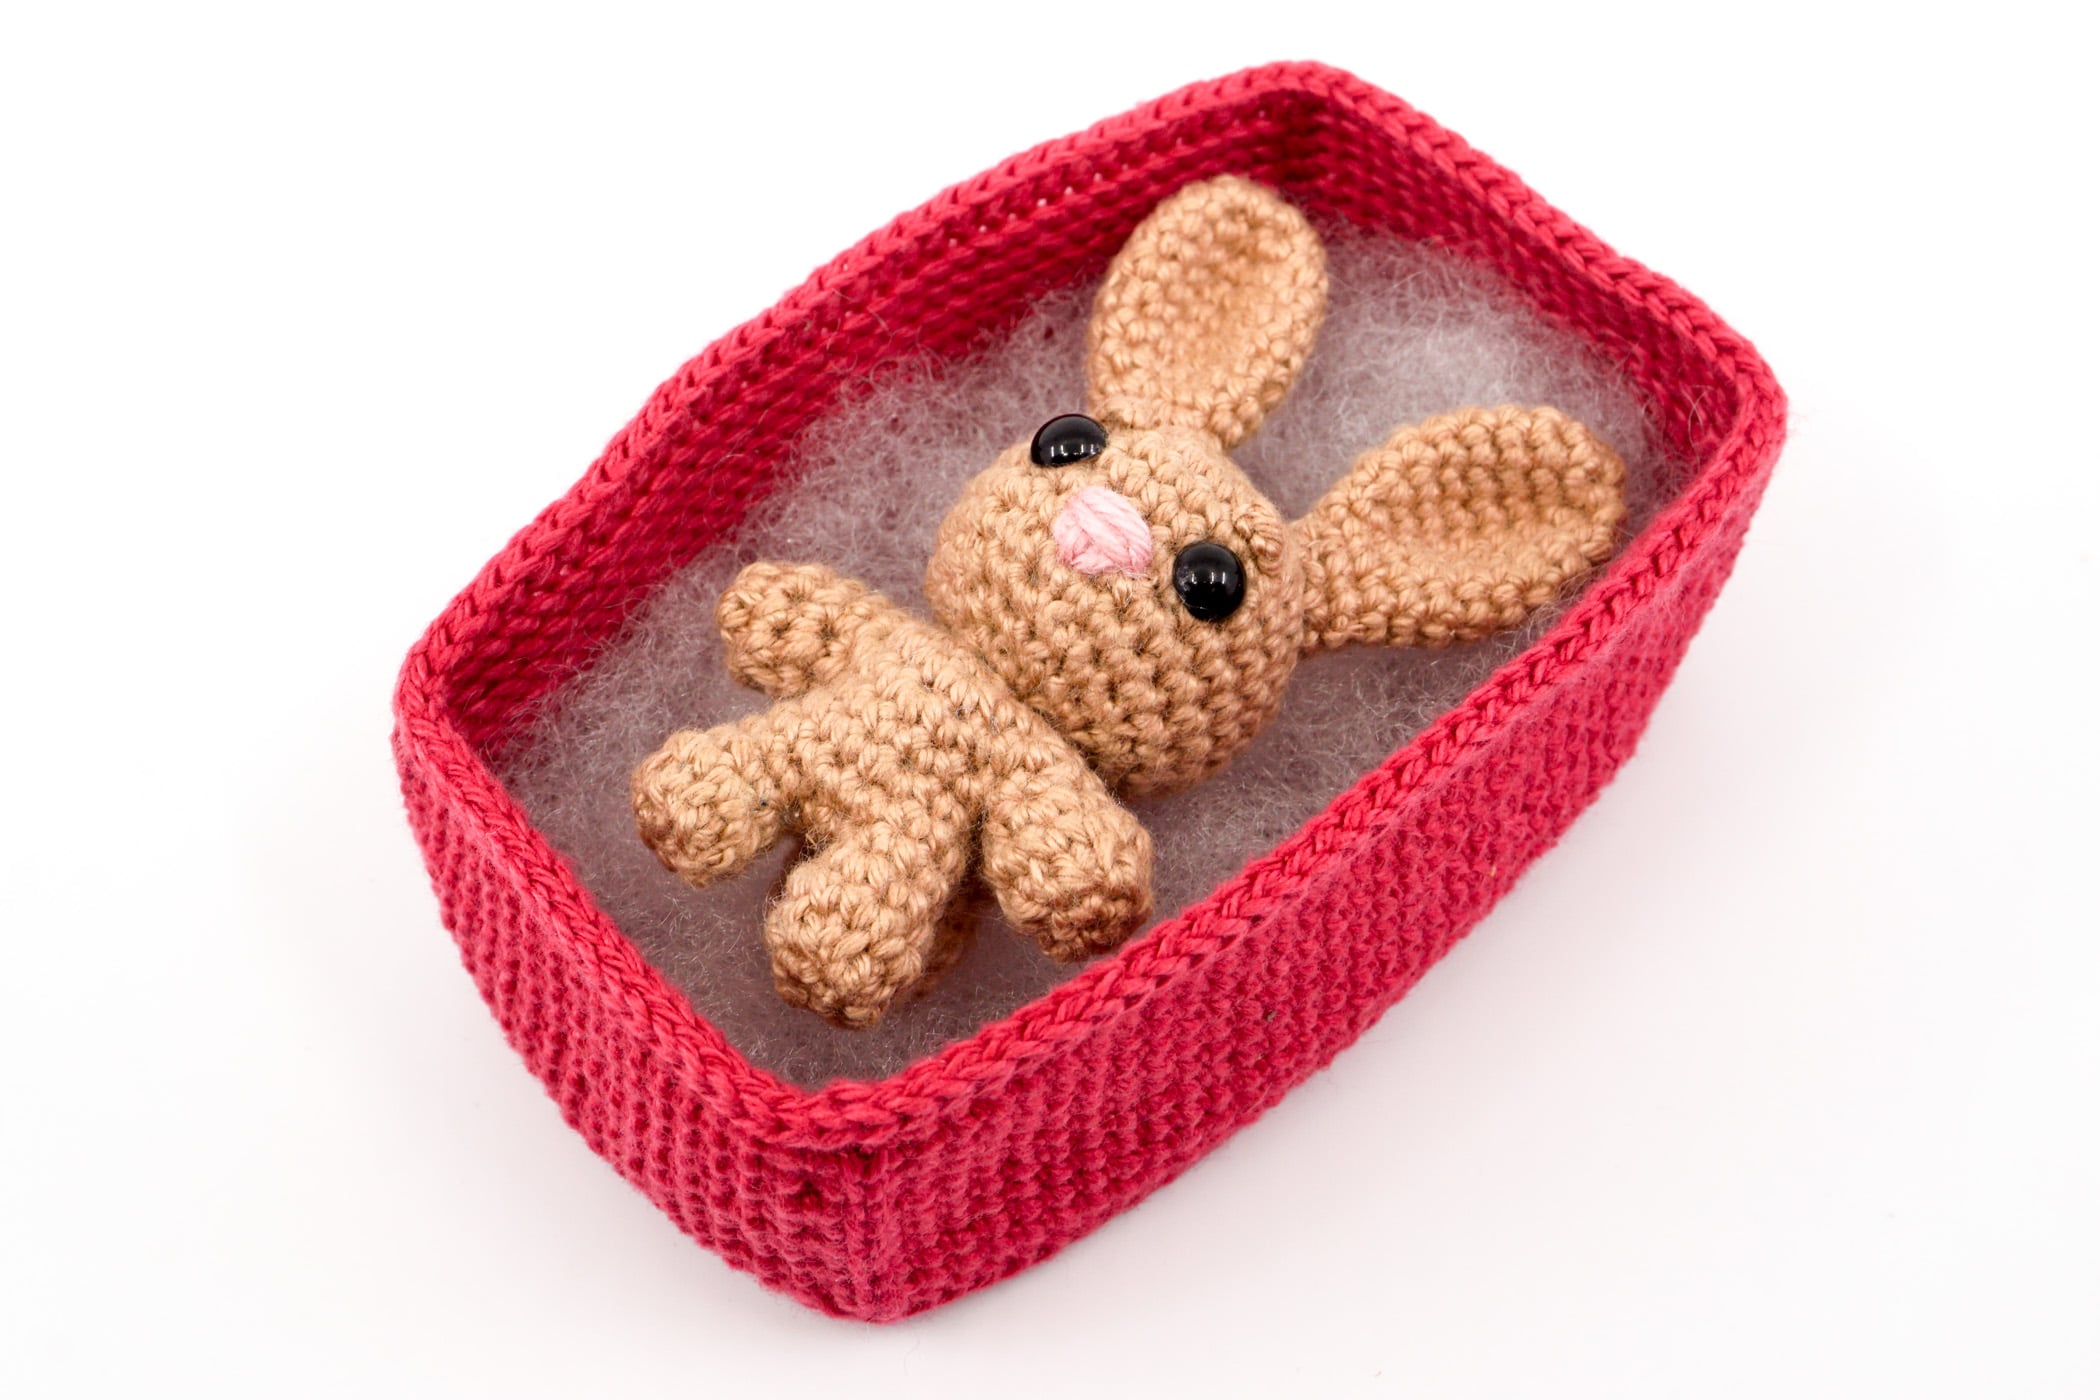
The square gift box is perfect for all mini amigurumi, while the rectangular gift box is best for the mini Nosos.
These crochet gift boxes are crocheted with chain stitches, slip stitches and single crochet stitches in spiral rounds and in rows and are easy to crochet.
The depicted amigurumi gift boxes have been crocheted with the “Schachenmayr Catania” yarn with a 2.5 mm crochet hook. The dimensions of the square box are 6 x 6 x 6 cm (height x length x width) and the rectangular gift box measures 3.5 x 9.5 x 5.5 cm (height x length x width).

Free Gift Boxes Crochet Pattern
ATTENTION: The pattern, in whole or in parts, may not be published, resold, translated, changed or exchanged in any way whatsoever!
Needed Techniques
- Slip Knot
- Magic Ring
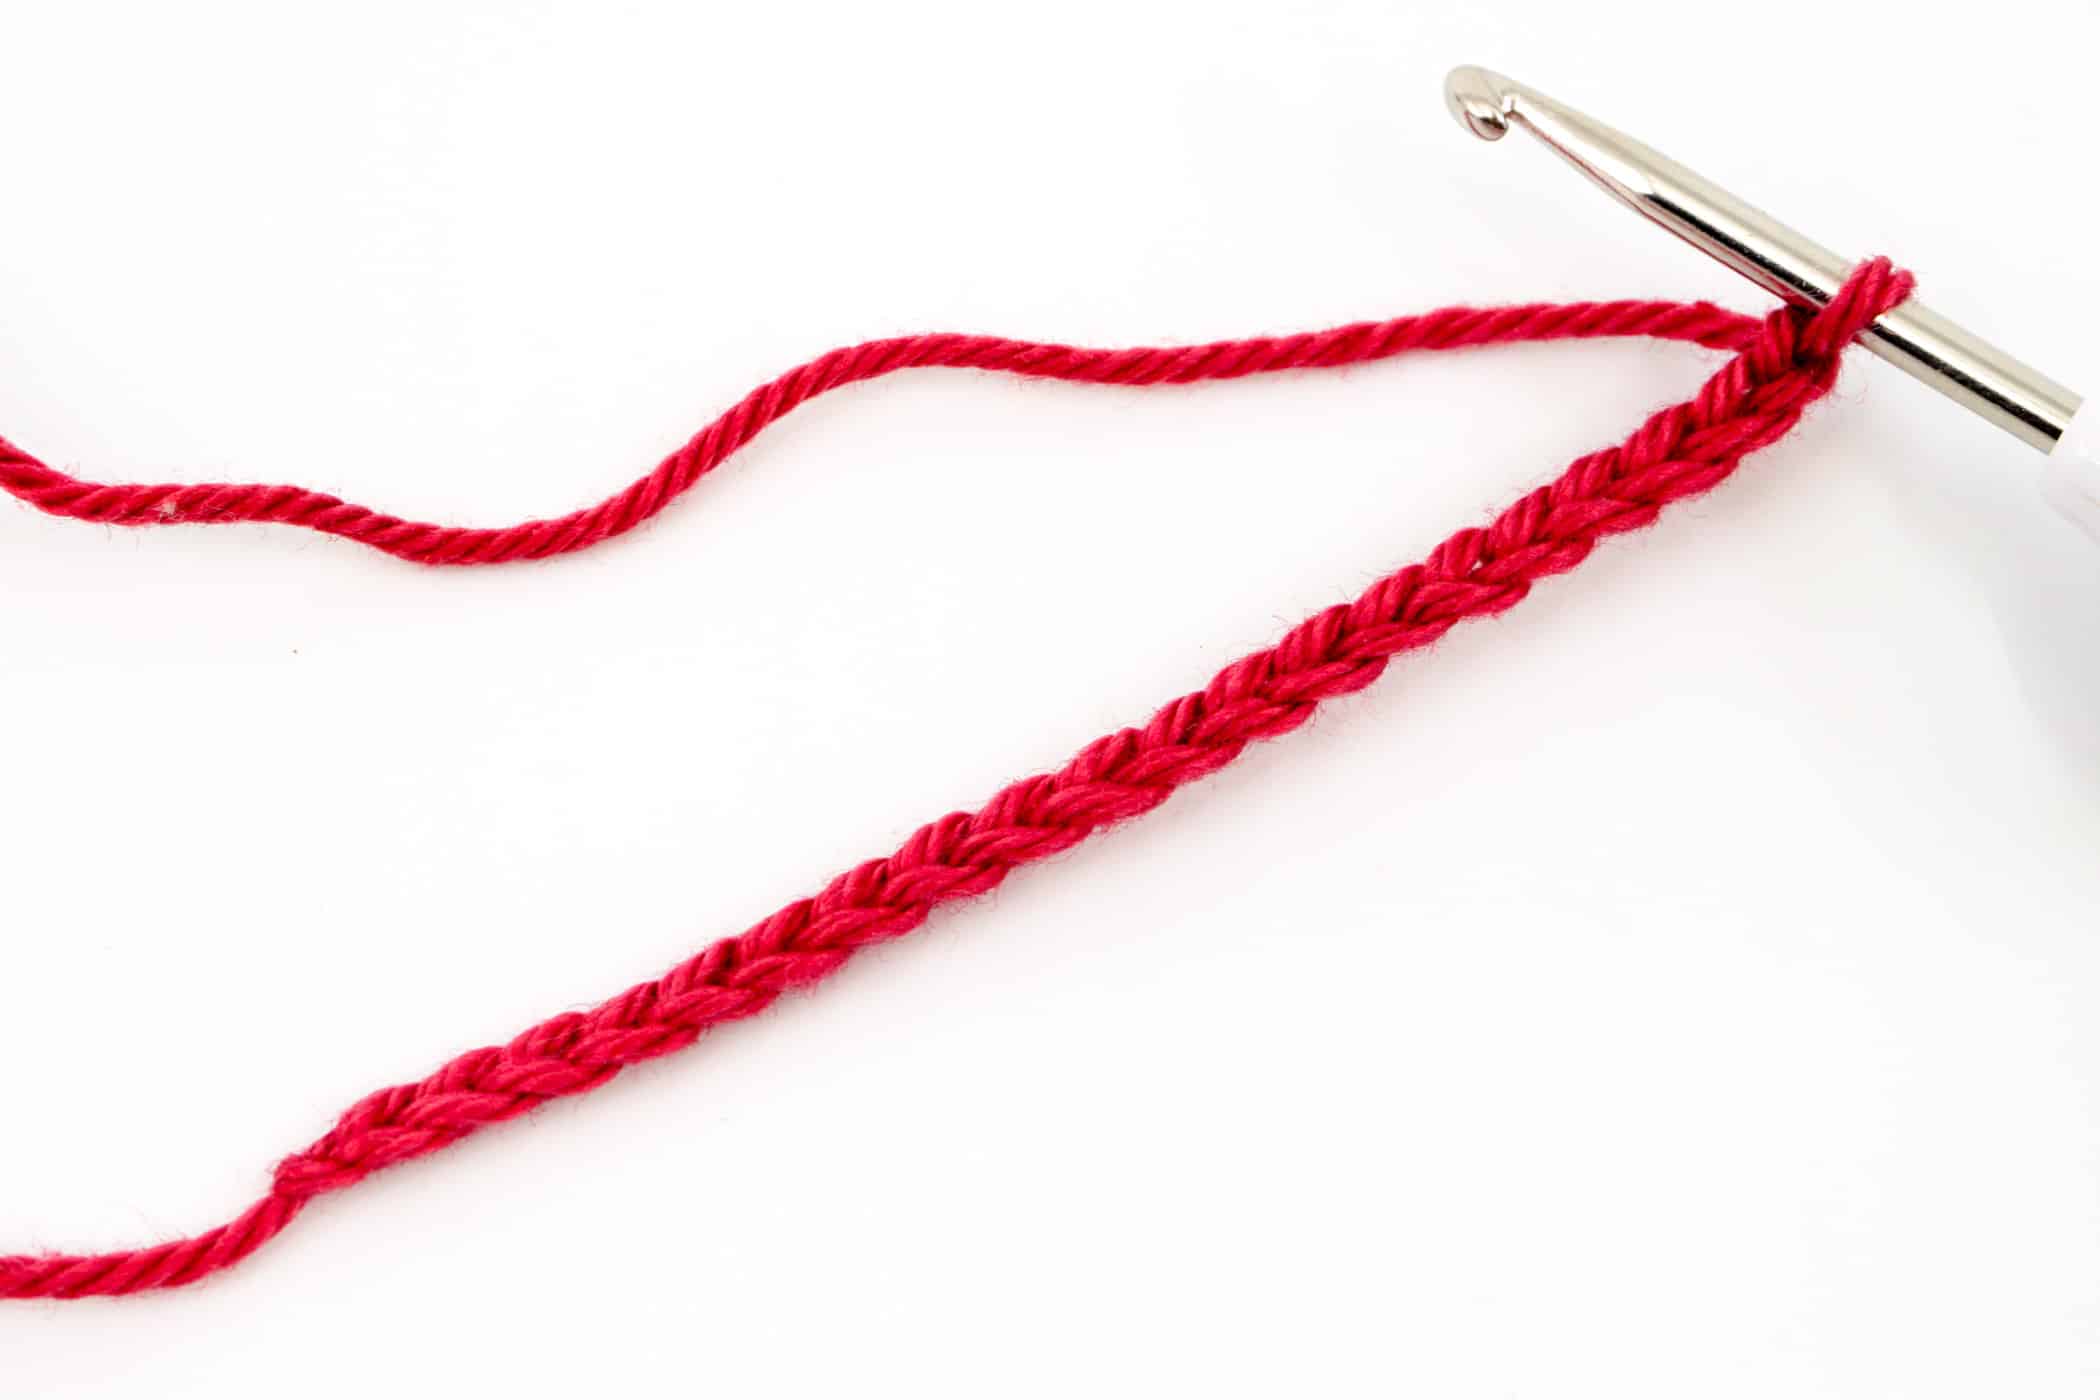
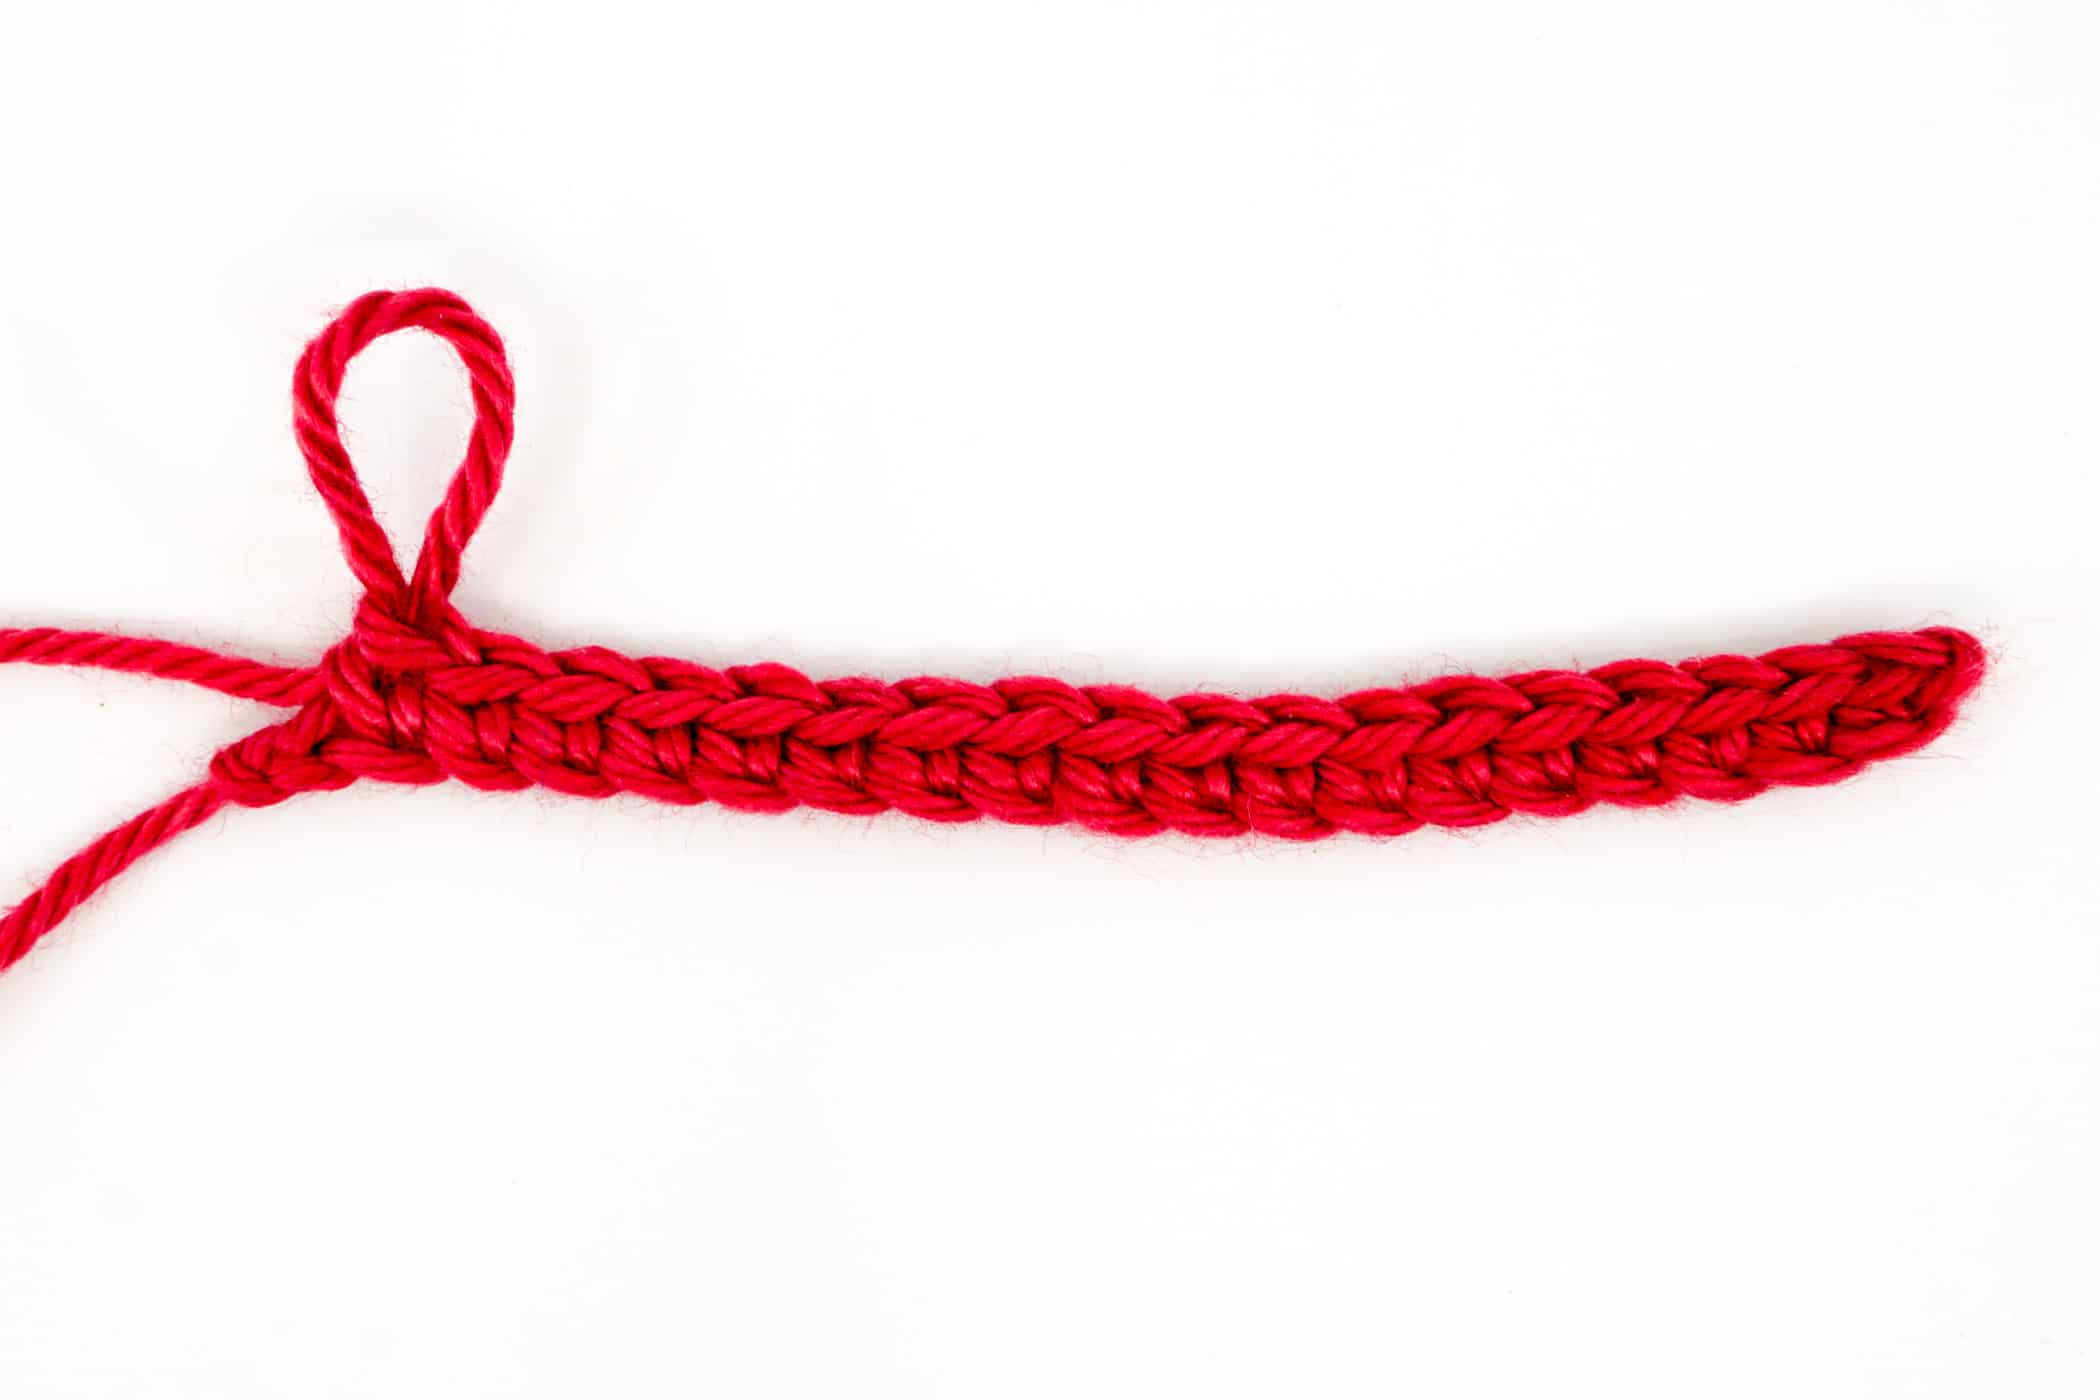
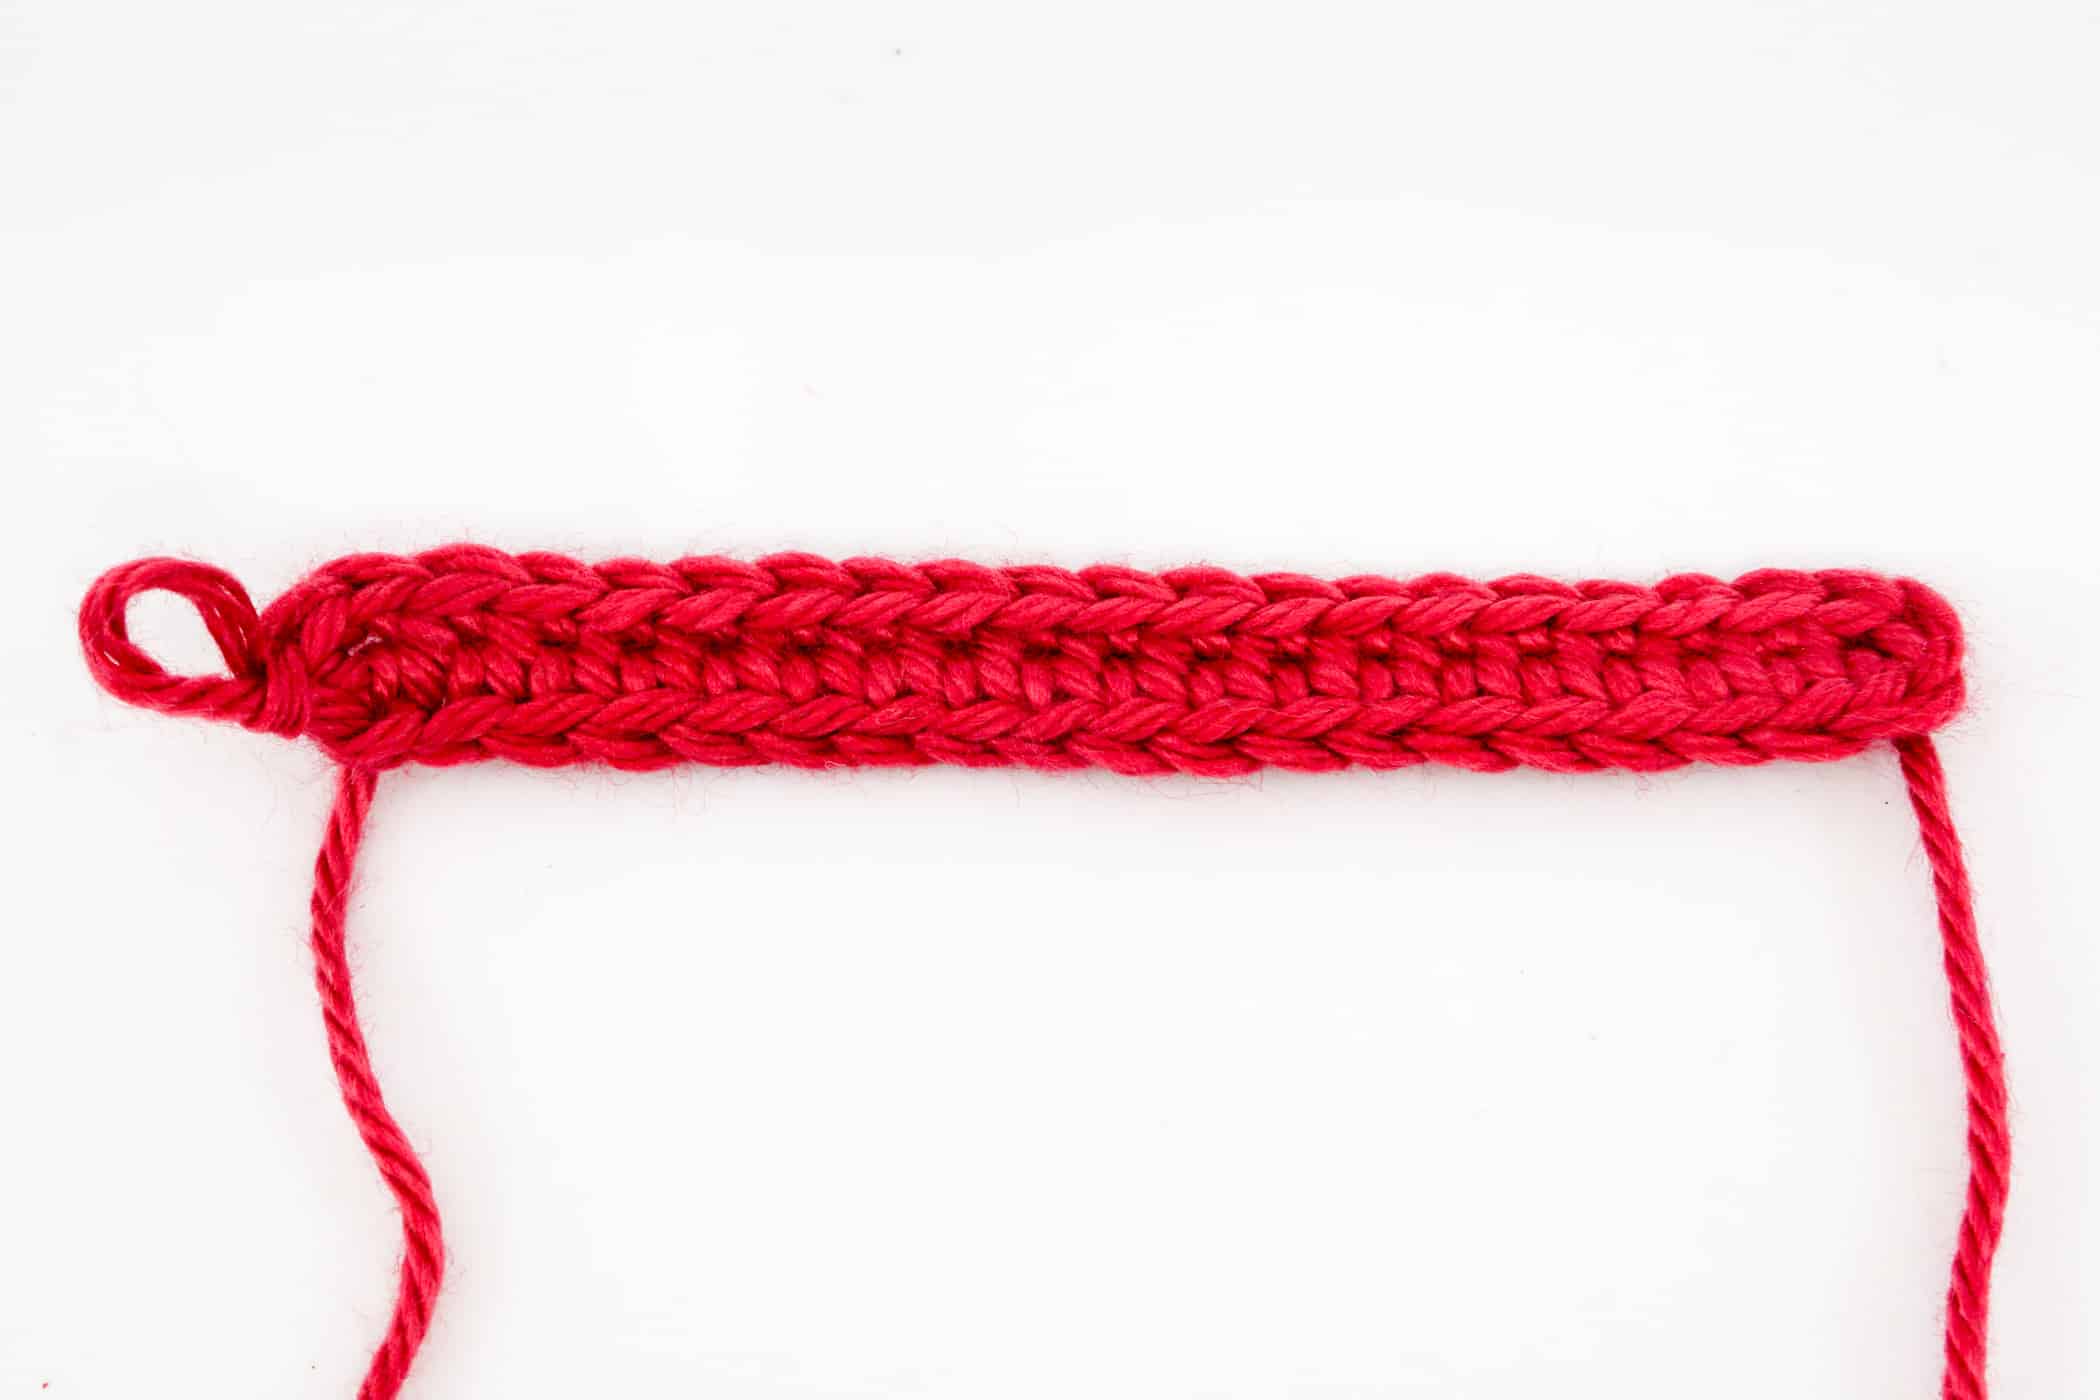
- Chain Stitch
- Slip Stitch
- Single Crochet (sc)
- Increase
- Decrease
- Crochet into Front and Back Loop
- Close Openings
Needed Materials and Tools
To order the materials click on the respective link (affiliate link).
- Colors: red, gold
- This pattern was crocheted using the “Schachenmayr Catania” yarn (100% Cotton, Meterage: 125 m, Yarn Ball Weight: 50 g, Yarn Weight: Sport – 5ply / Fine (2)) in the following colors:
- Strawberry (Erdbeere (258)), Camel (Camel (179))
- 2.5 mm Crochet Hook
- Polyfill
- Scissors
- Tapestry Needle
- Stitch Marker
No products found.
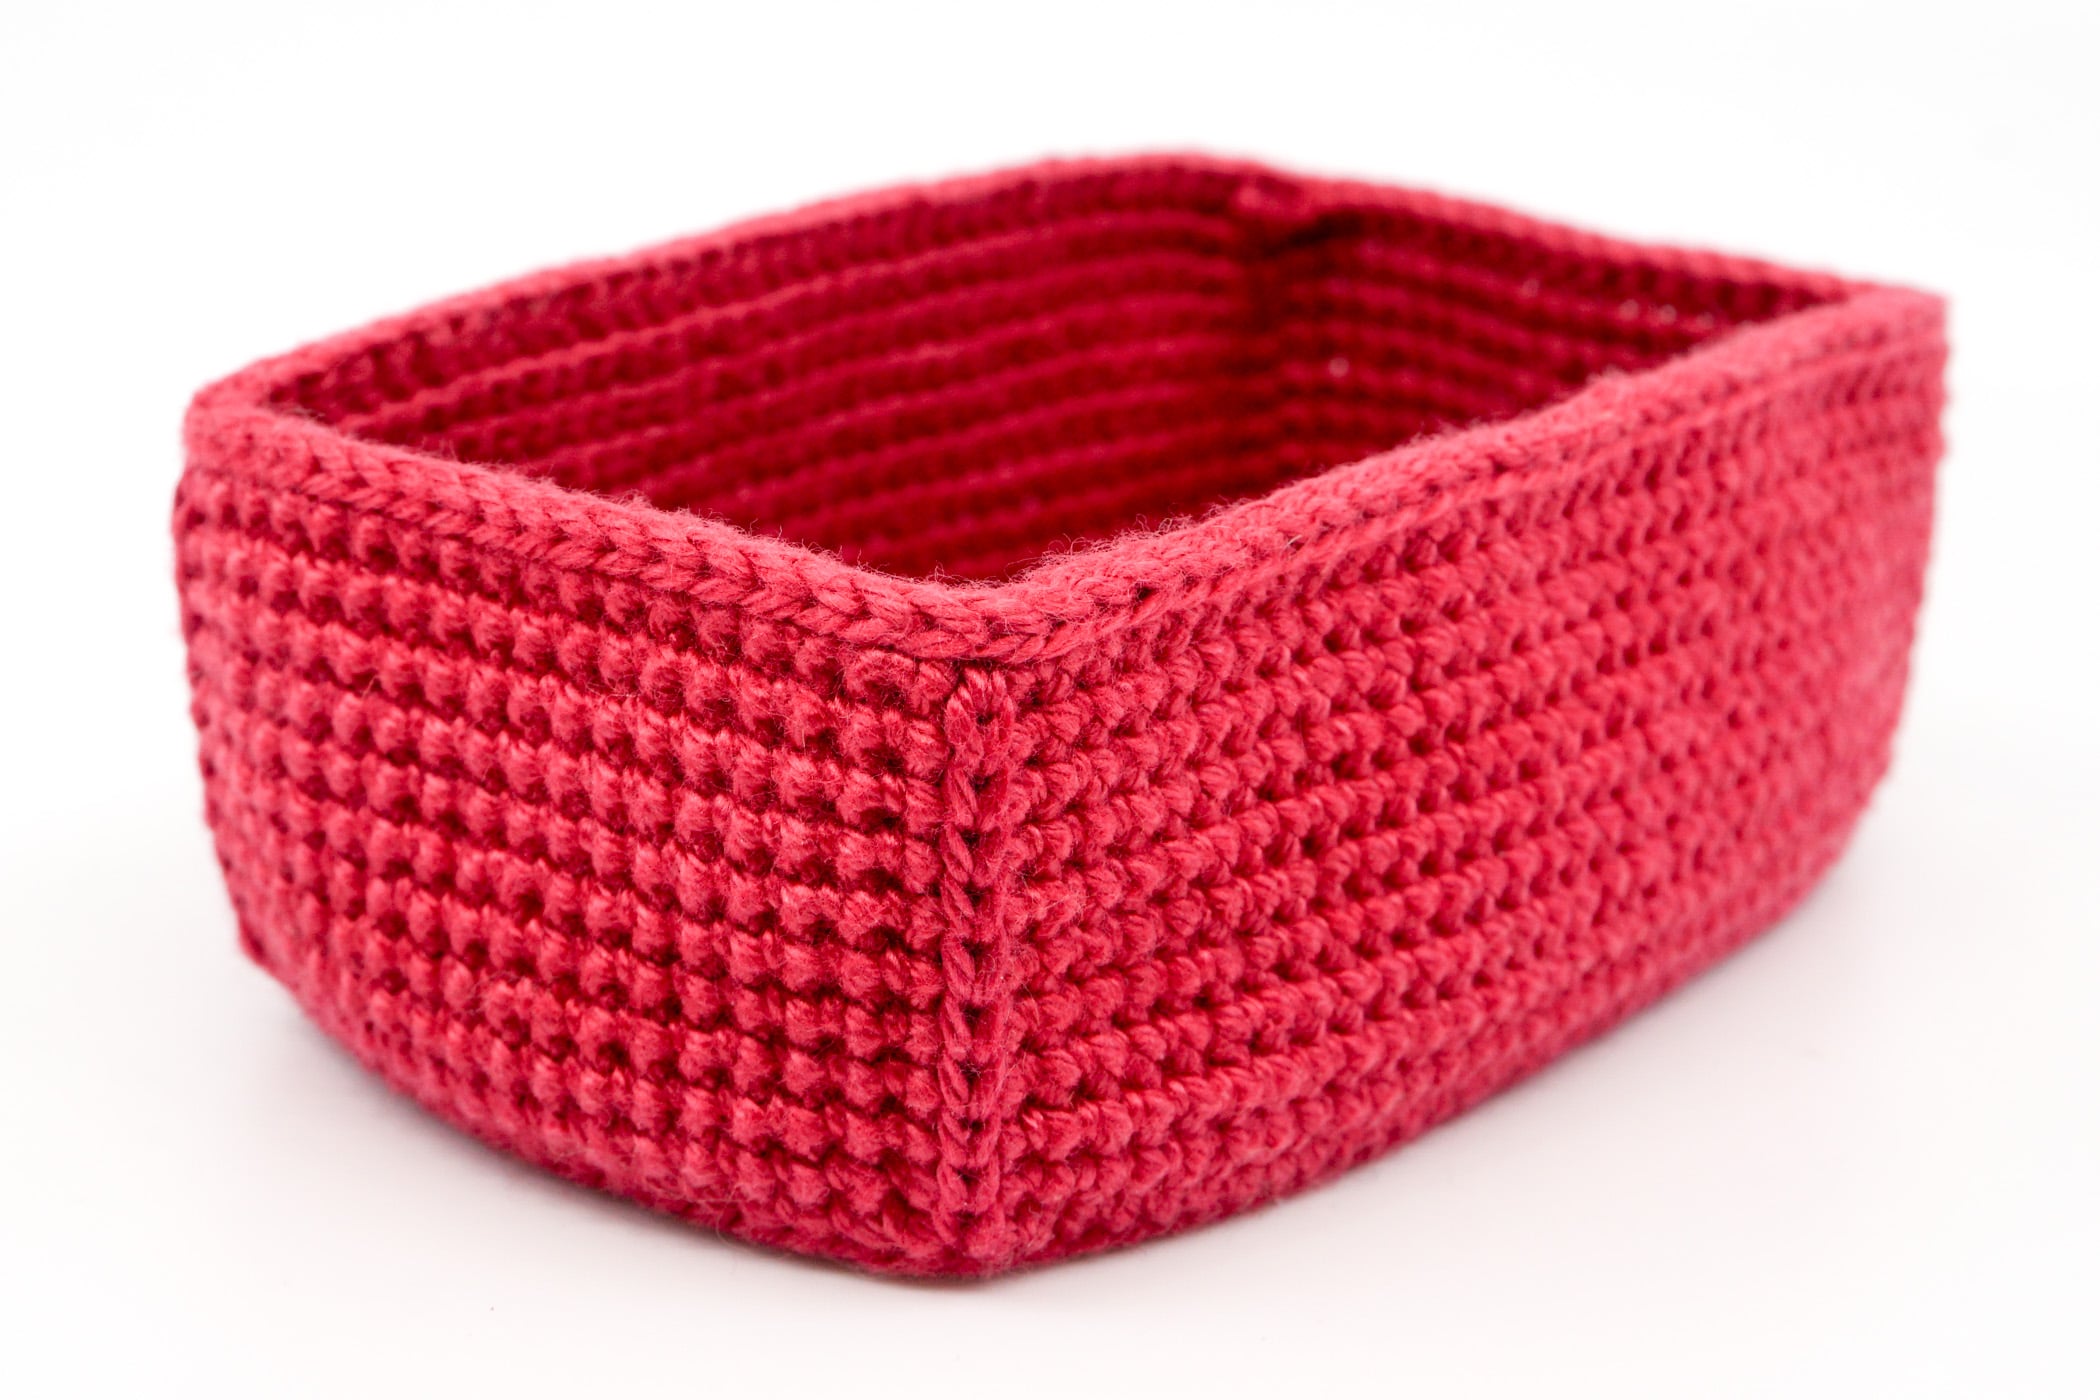
Crochet the Gift Box for the Minis
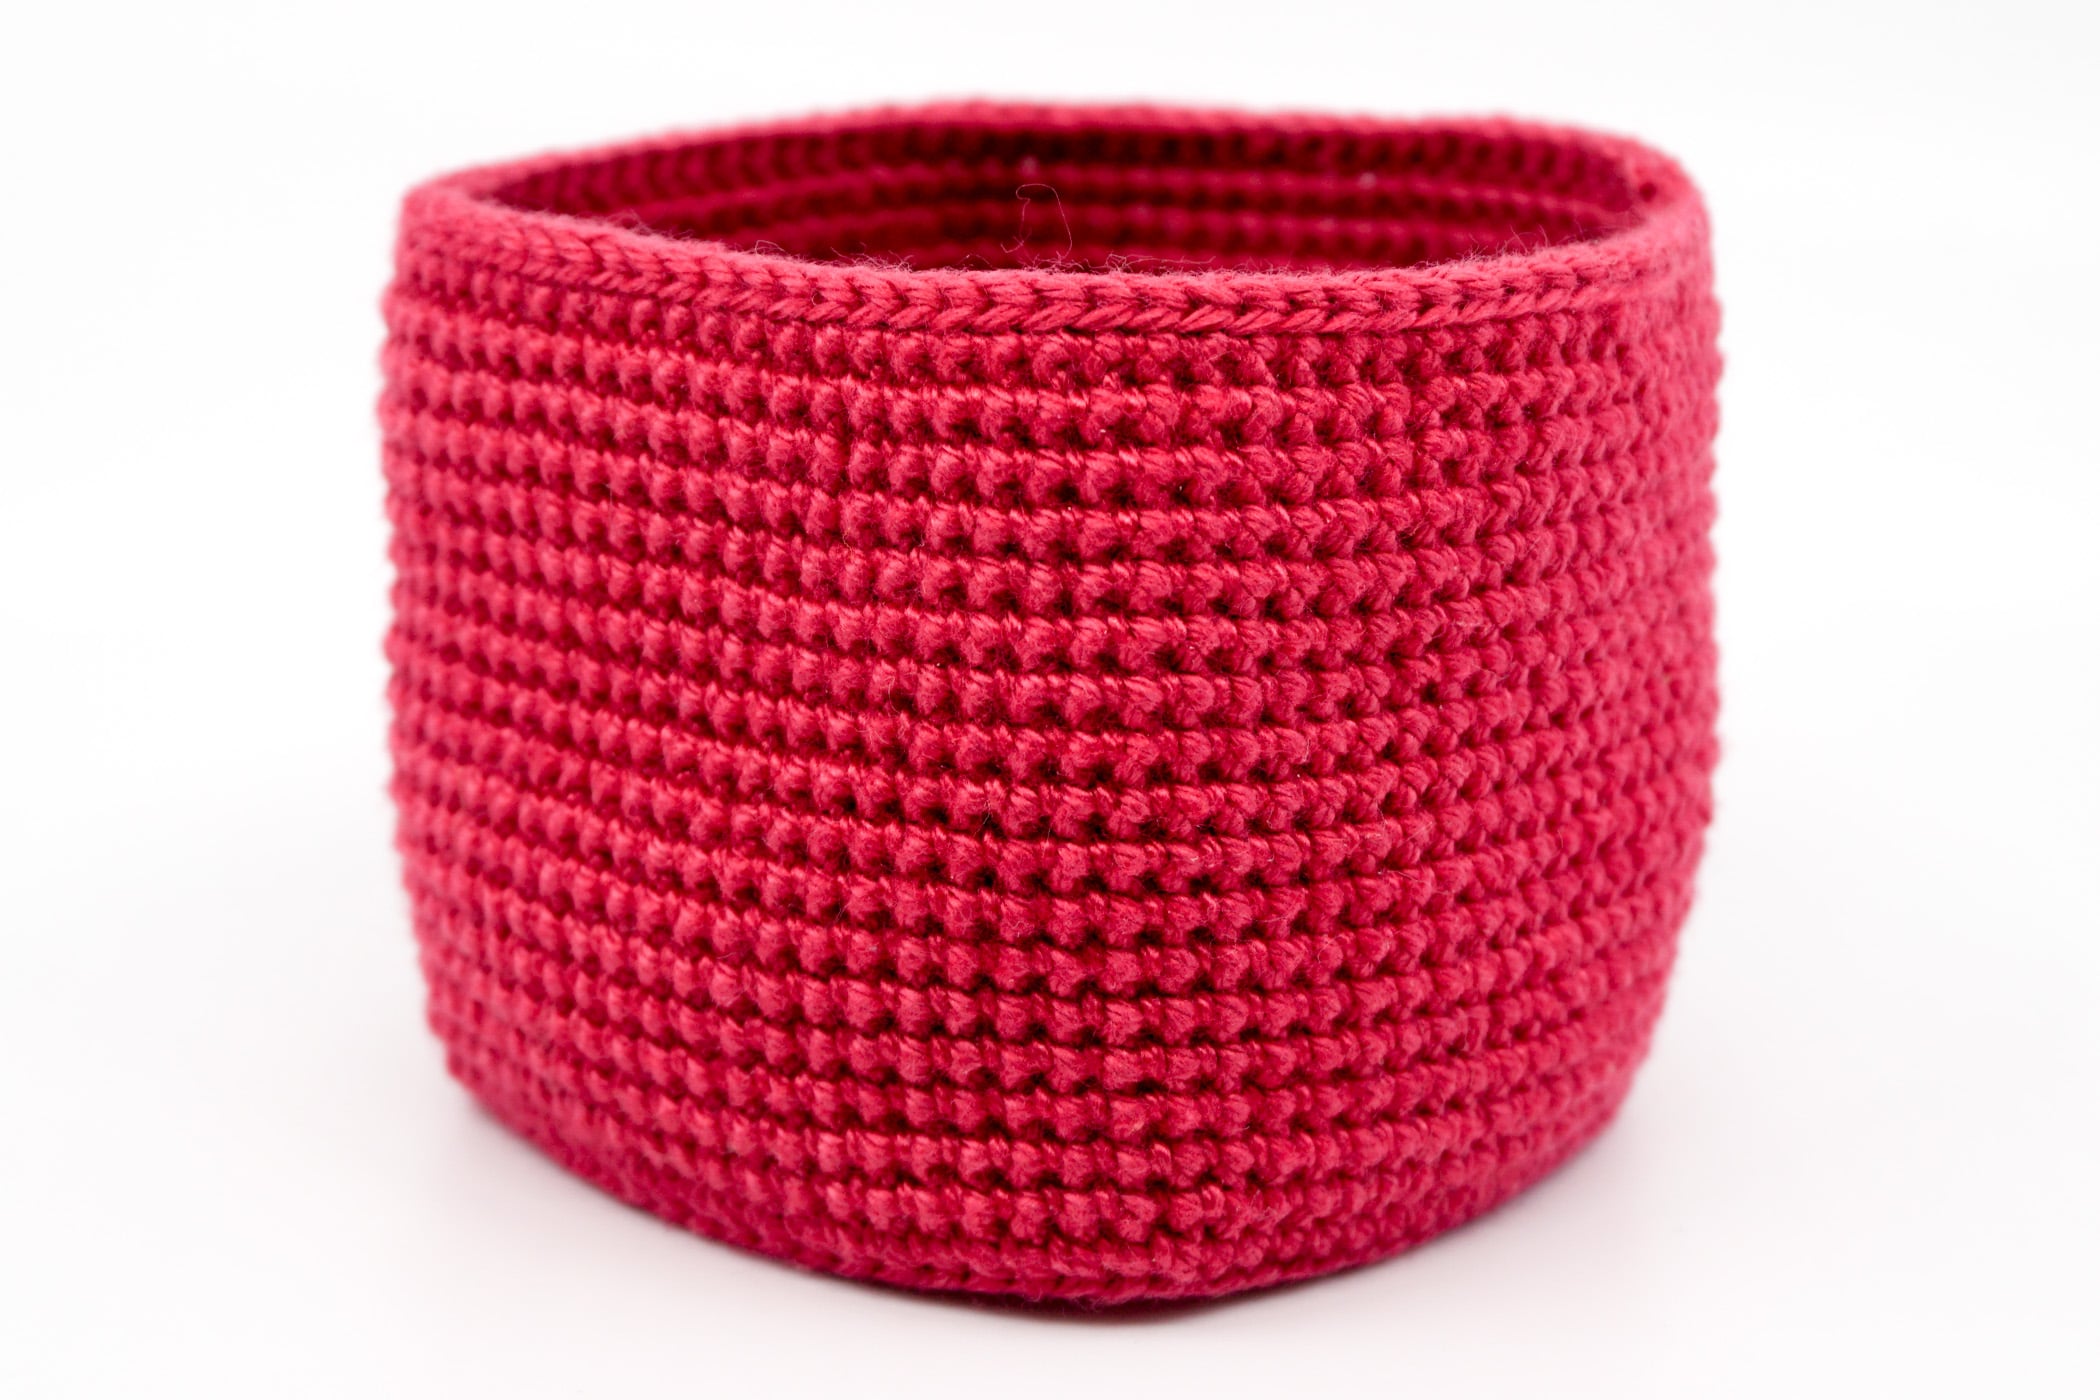
The square gift box is crocheted in one piece in Strawberry in spiral rounds with slip sitches and single crochet stitches.

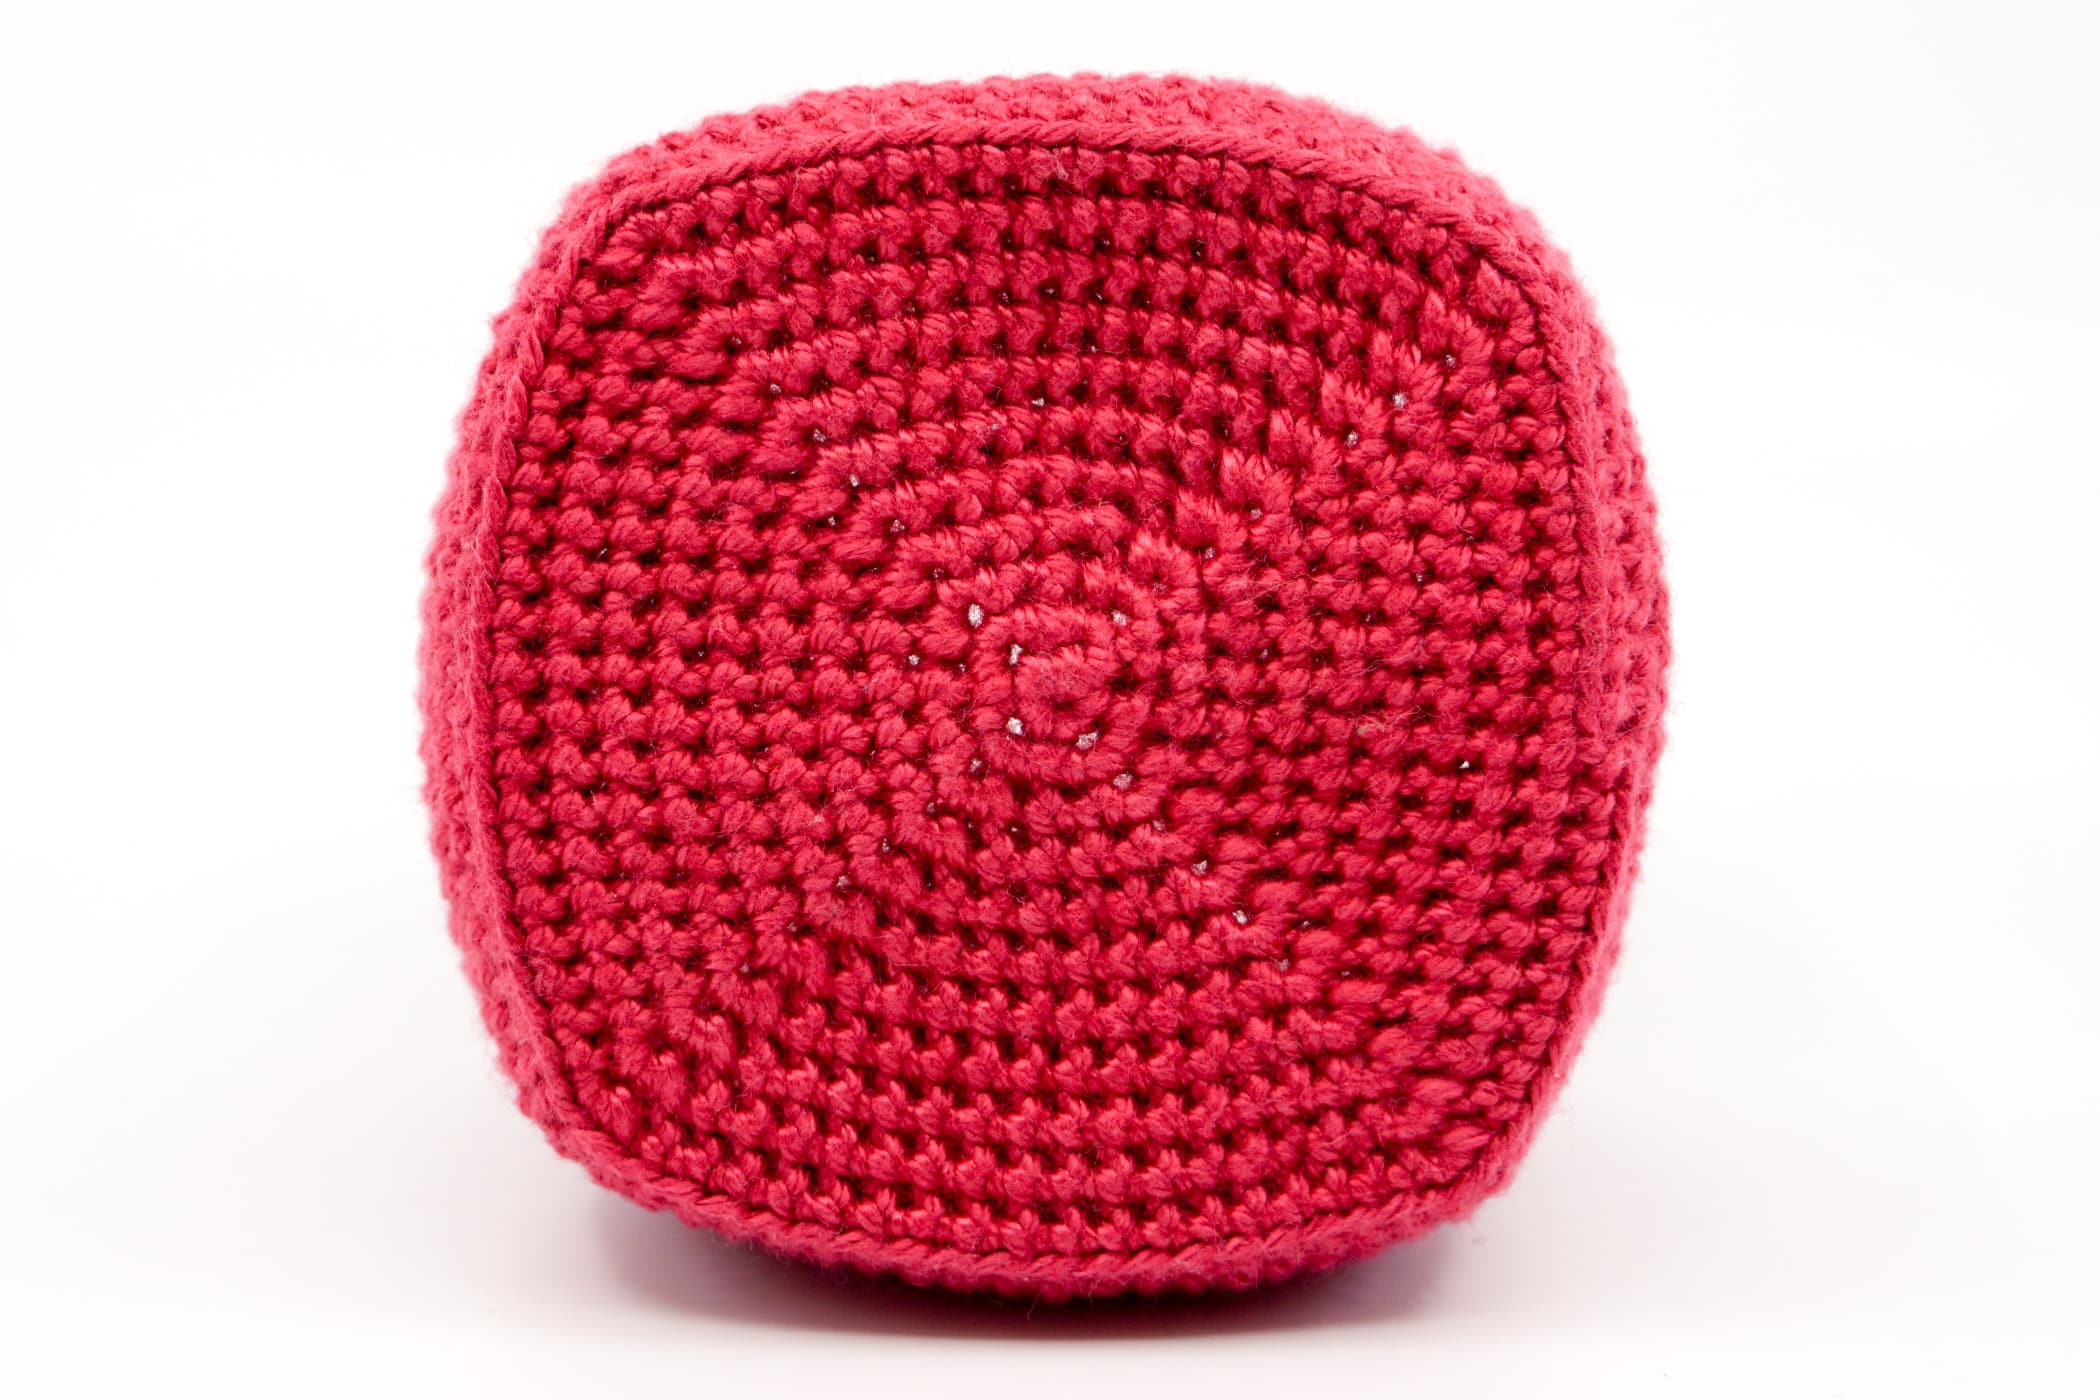
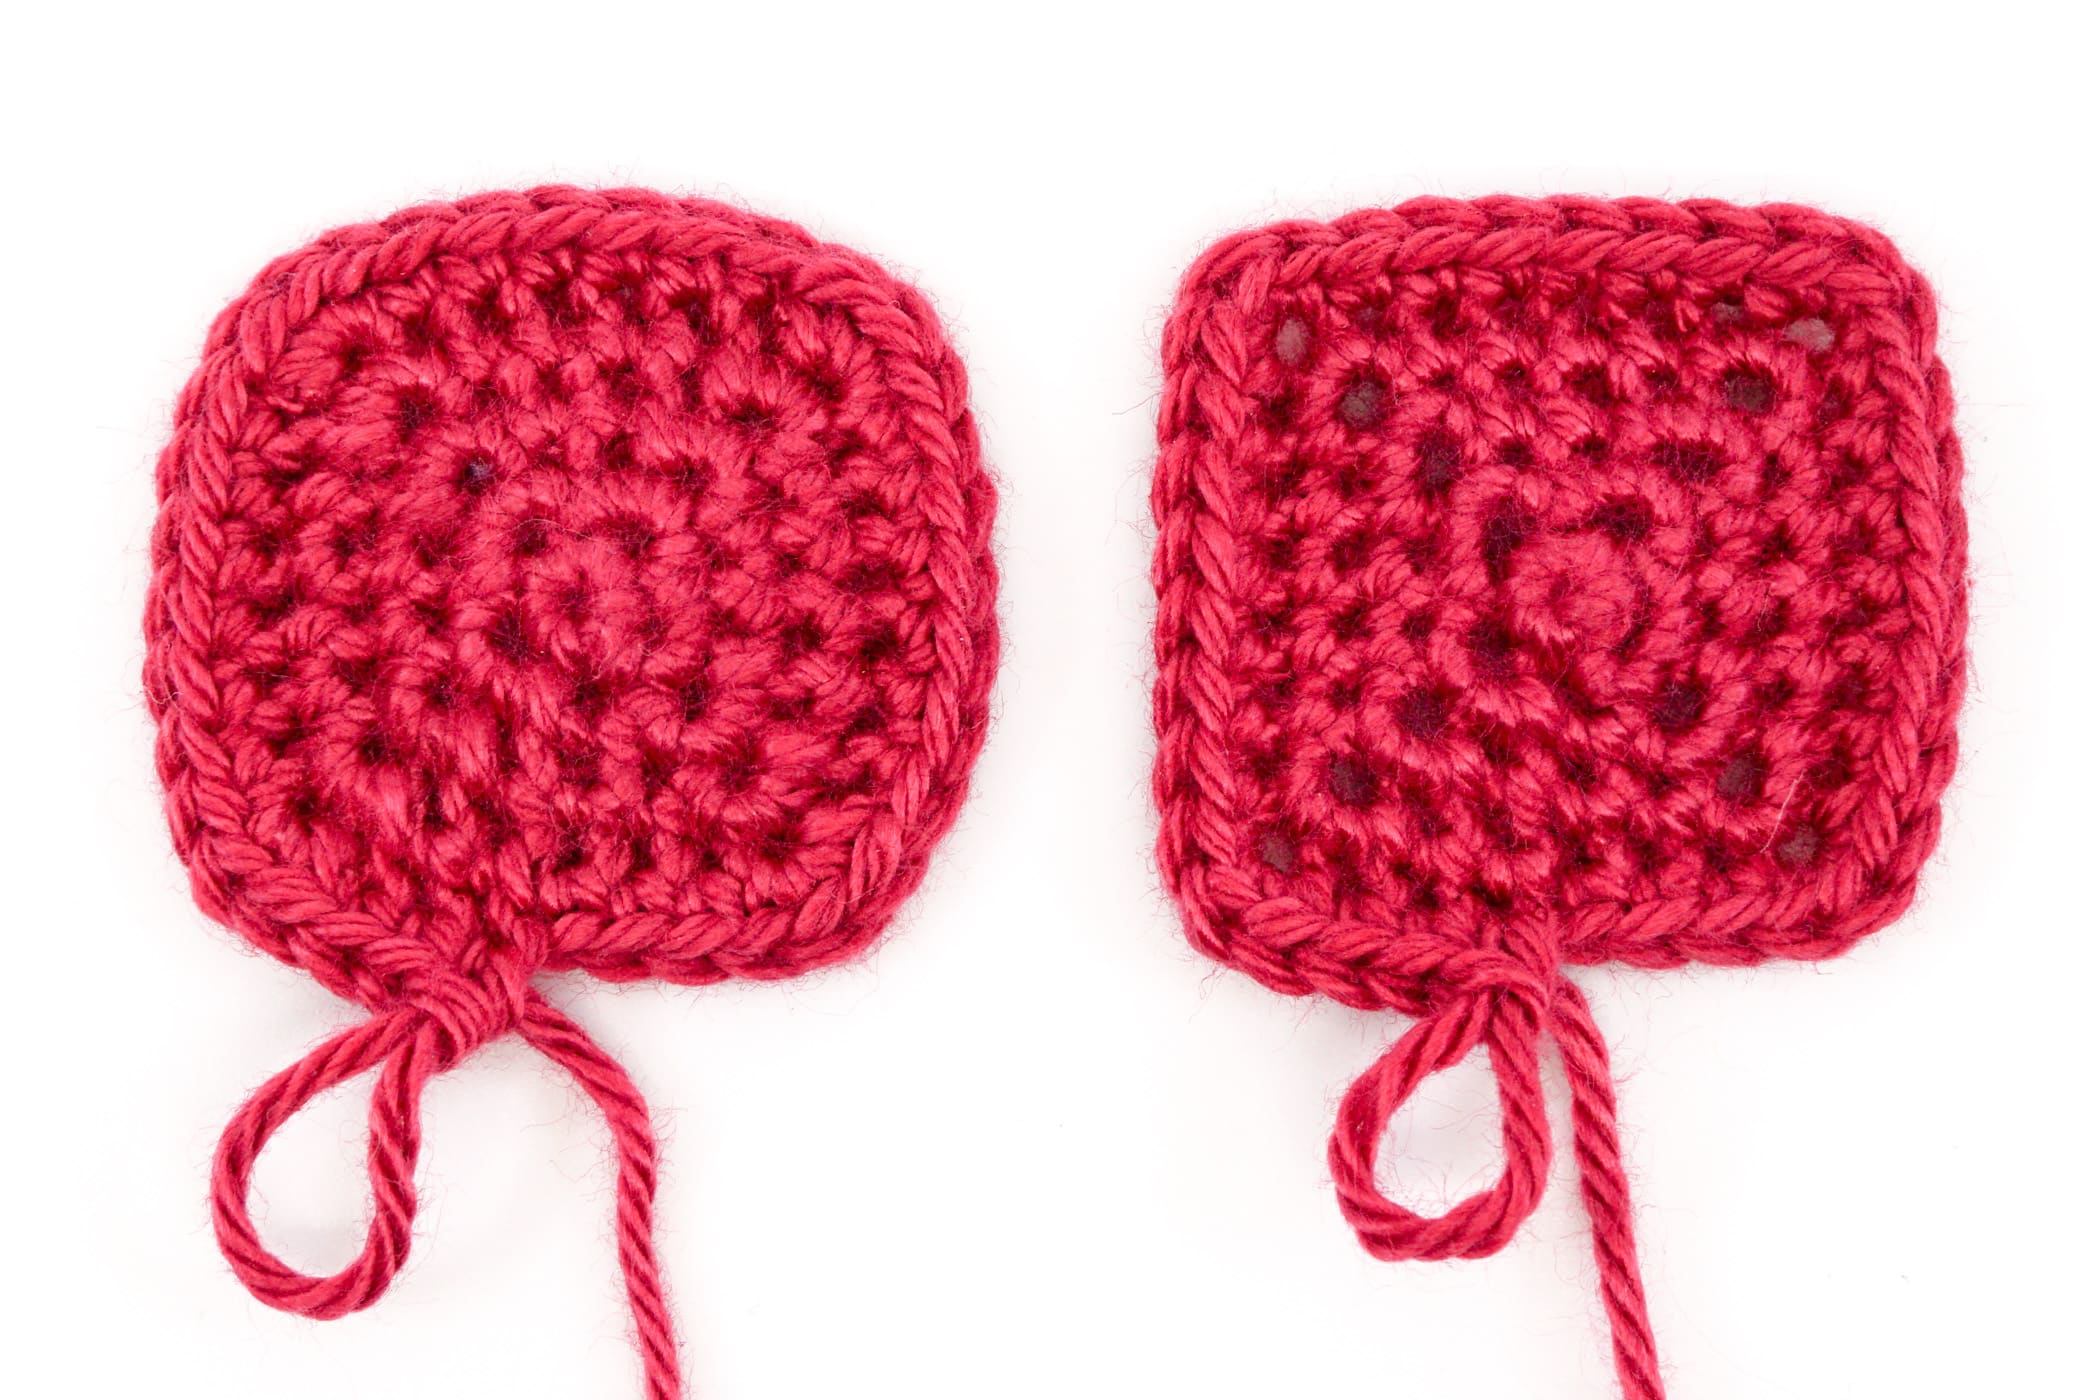
ATTENTION: All single crochet stitches are always crocheted in the front loop only, except when you have to crochet three stitches into one stitch (increases), then you have to crochet into both loops. All pictures of the finished boxes you see here were crocheted in this way.
If you always crochet the increases in both loops, you will get a slightly rounded square or rectangle. As a result, however, the lid or bottom of the boxes will bulge slightly inwards or outwards.
If you want to get a much more angular box, then crochet the increases in the same way as the single crochet stitches, only in the front loop. This also prevents the lid and box from bulging, but you get relatively large holes in the stitches in which the increases are crocheted.
Here is an example of how the respective procedure would affect the box. On the left the increases were crocheted in both loops, on the right only in the front loop. Whichever you choose, crochet the lid and box the same way.
- Crochet the square gift box in spiral rounds in Strawberry.
- Round 1: 4 sc into the Magic Ring (4 stitches).
- Round 2: [3 sc into the next stitch] repeat till end of the round (12 stitches).
- Round 3: 1 sc, [3 sc into the next stitch, 2 sc] repeat 3 times, 3 sc into the next stitch, 1 sc (20 stitches).
- Round 4: 2 sc, [3 sc into the next stitch, 4 sc] repeat 3 times, 3 sc into the next stitch, 2 sc (28 stitches).
- Round 5: 3 sc, [3 sc into the next stitch, 6 sc] repeat 3 times, 3 sc into the next stitch, 3 sc (36 stitches).
- Round 6: 4 sc, [3 sc into the next stitch, 8 sc] repeat 3 times, 3 sc into the next stitch, 4 sc (44 stitches).
- Round 7: 5 sc, [3 sc into the next stitch, 10 sc] repeat 3 times, 3 sc into the next stitch, 5 sc (52 stitches).
- Round 8: 6 sc, [3 sc into the next stitch, 12 sc] repeat 3 times, 3 sc into the next stitch, 6 sc (60 stitches).
- Round 9: 7 sc, [3 sc into the next stitch, 14 sc] repeat 3 times, 3 sc into the next stitch, 7 sc (68 stitches).
- Round 10: 8 sc, [3 sc into the next stitch, 16 sc] repeat 3 times, 3 sc into the next stitch, 8 sc (74 stitches).
- Round 11: 9 sc, [3 sc into the next stitch, 18 sc] repeat 3 times, 3 sc into the next stitch, 9 sc (84 stitches).
- Round 12: Crochet the complete round into the back loop only. Crochet 84 sc (84 stitches).
- Round 13-30: Crochet each round into the front loop only. 17 rounds, each round 84 sc (84 stitches).
- Round 31: Crochet the complete round into the front loop only. Crochet only 10 sc. The round is not crocheted till the end.
- Round 32: Crochet the complete round into both loops. Crochet 84 slip stitches (84 stitches).
- Finish: Cut the yarn and weave in.
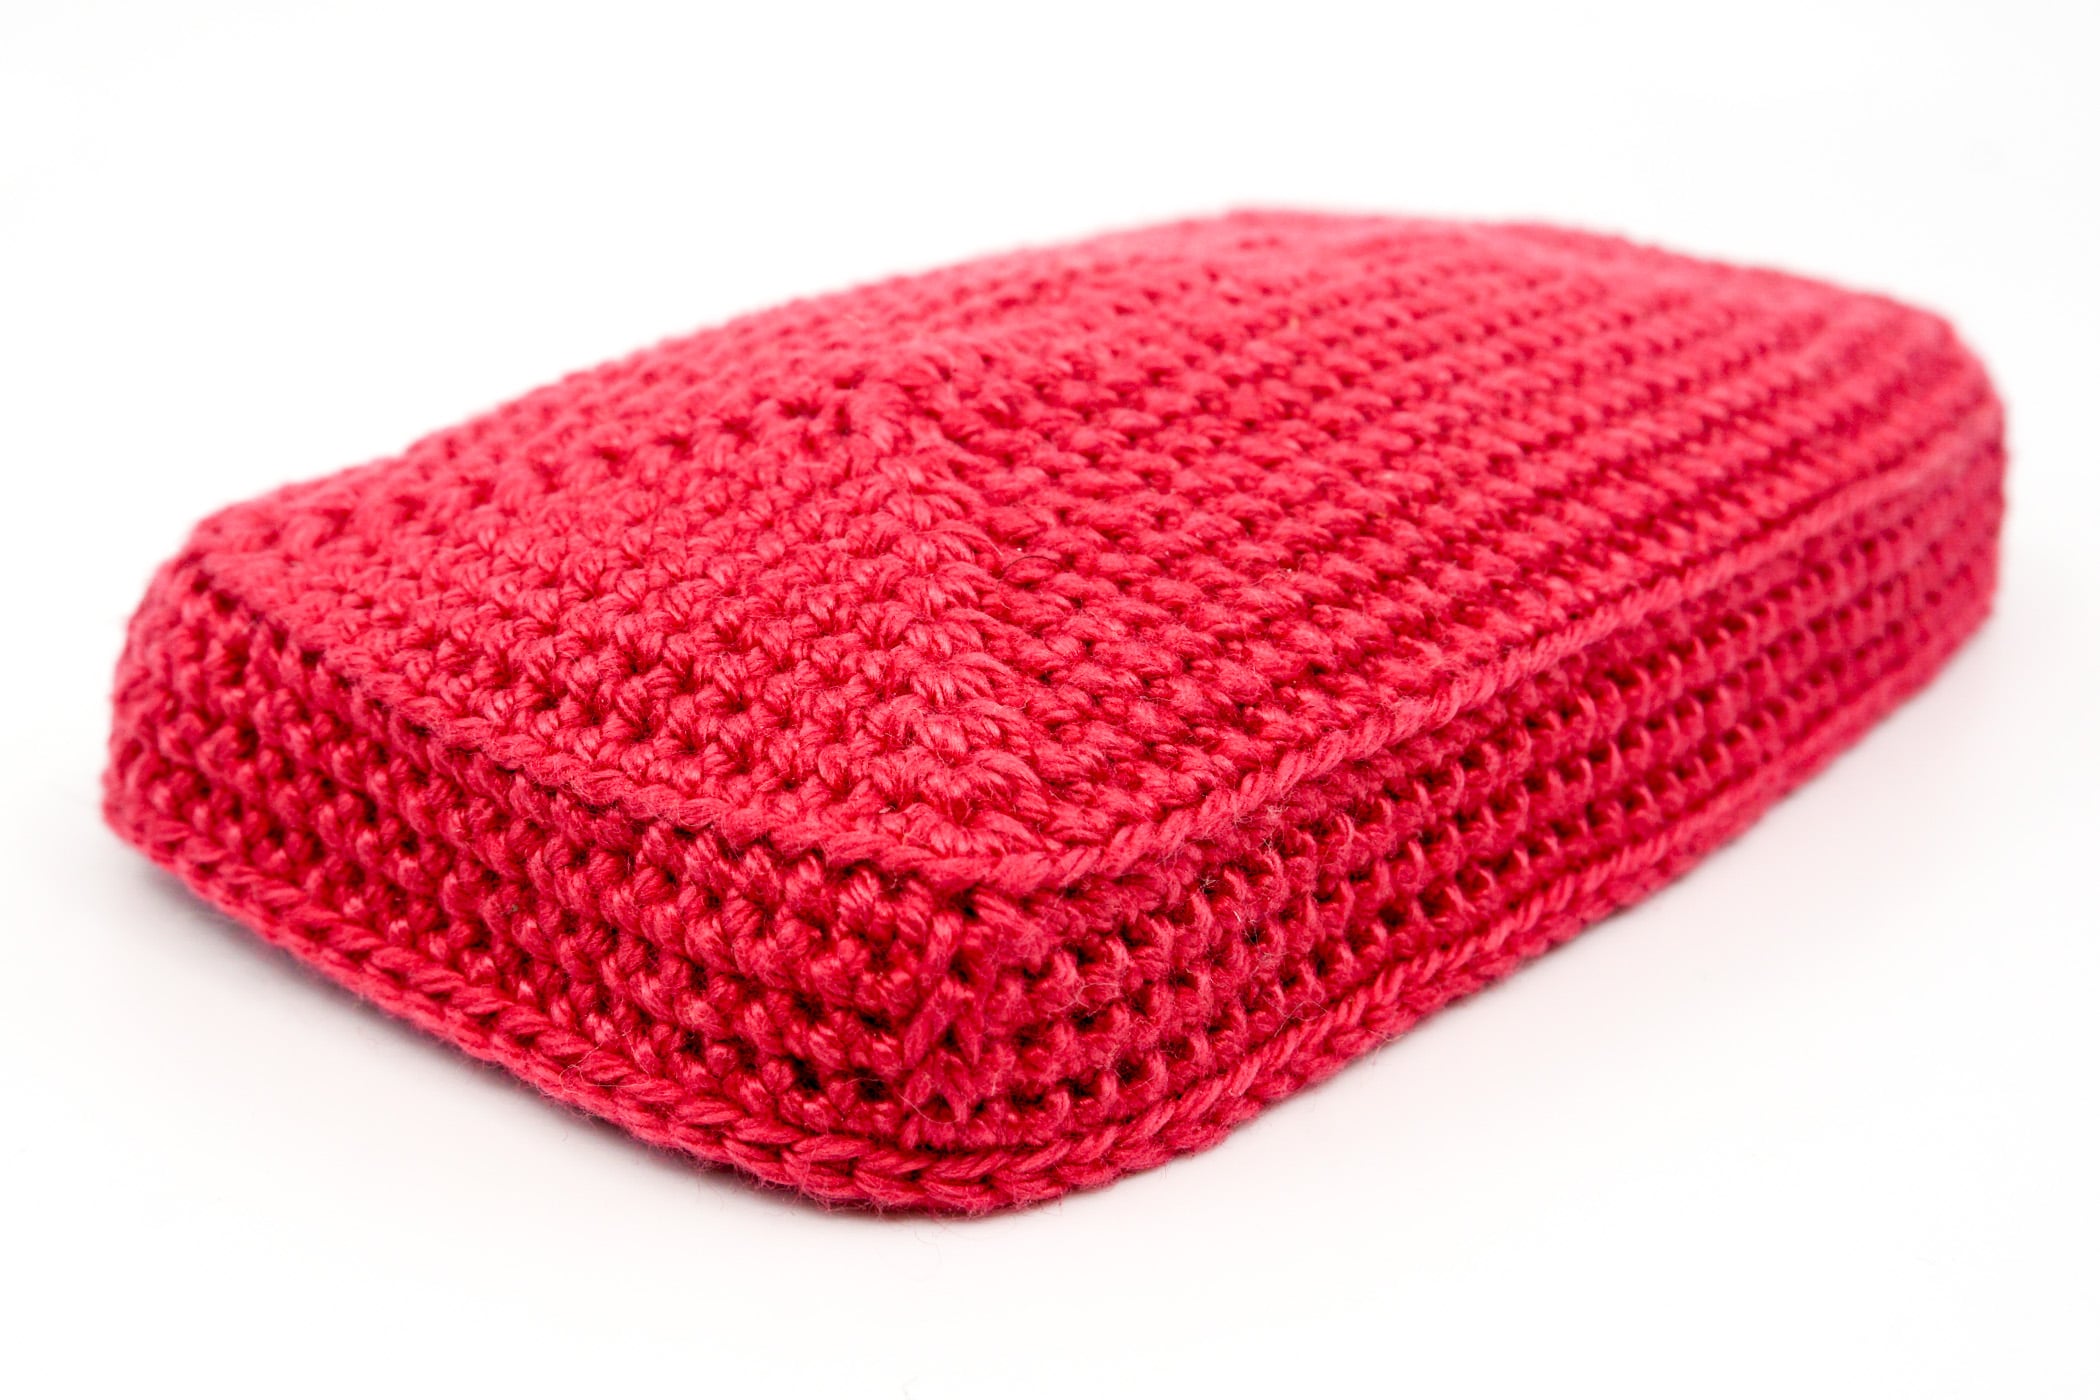
Crochet the Lid for the Square Gift Box
The square lid is crocheted in one piece in Strawberry in spiral rounds with slip sitches and single crochet stitches.

ATTENTION: All single crochet stitches are always crocheted in the front loop only, except when you have to crochet three stitches into one stitch, then you have to crochet into both loops.
- Crochet the square lid in spiral rounds in Strawberry.
- Round 1: 4 sc into the Magic Ring (4 stitches).
- Round 2: [3 sc into the next stitch] repeat till end of the round (12 stitches).
- Round 3: 1 sc, [3 sc into the next stitch, 2 sc] repeat 3 times, 3 sc into the next stitch, 1 sc (20 stitches).
- Round 4: 2 sc, [3 sc into the next stitch, 4 sc] repeat 3 times, 3 sc into the next stitch, 2 sc (28 stitches).
- Round 5: 3 sc, [3 sc into the next stitch, 6 sc] repeat 3 times, 3 sc into the next stitch, 3 sc (36 stitches).
- Round 6: 4 sc, [3 sc into the next stitch, 8 sc] repeat 3 times, 3 sc into the next stitch, 4 sc (44 stitches).
- Round 7: 5 sc, [3 sc into the next stitch, 10 sc] repeat 3 times, 3 sc into the next stitch, 5 sc (52 stitches).
- Round 8: 6 sc, [3 sc into the next stitch, 12 sc] repeat 3 times, 3 sc into the next stitch, 6 sc (60 stitches).
- Round 9: 7 sc, [3 sc into the next stitch, 14 sc] repeat 3 times, 3 sc into the next stitch, 7 sc (68 stitches).
- Round 10: 8 sc, [3 sc into the next stitch, 16 sc] repeat 3 times, 3 sc into the next stitch, 8 sc (74 stitches).
- Round 11: 9 sc, [3 sc into the next stitch, 18 sc] repeat 3 times, 3 sc into the next stitch, 9 sc (84 stitches).
- Round 12: 10 sc, [3 sc into the next stitch, 20 sc] repeat 3 times, 3 sc into the next stitch, 10 sc (92 stitches).
- Round 13: Crochet the complete round into the back loop only. Crochet 92 sc (92 stitches).
- Round 14-19: Crochet each round into the front loop only. 5 rounds, each round 92 sc (92 stitches).
- Round 20: Crochet the complete round into the back loop only. Crochet only 11 sc. The round is not crocheted till the end.
- Round 21: Crochet the complete round into the both loops. Crochet 92 slip stitches (92 stitches).
- Finish: Cut the yarn and weave in.
Crochet the Ribbon for the Square Gift Box
The ribbon for the square gift box is crocheted in one piece in Camel in rows with chain sitches and single crochet stitches.

- Crochet the ribbon in rows in Camel.
- Row 1: Crochet 221 chain stitches (221 stitches).
- Row 2: 1 sc into the 2nd stitch from the crochet hook, 219 sc (220 stitches).
- Finish: Cut the yarn and weave in.
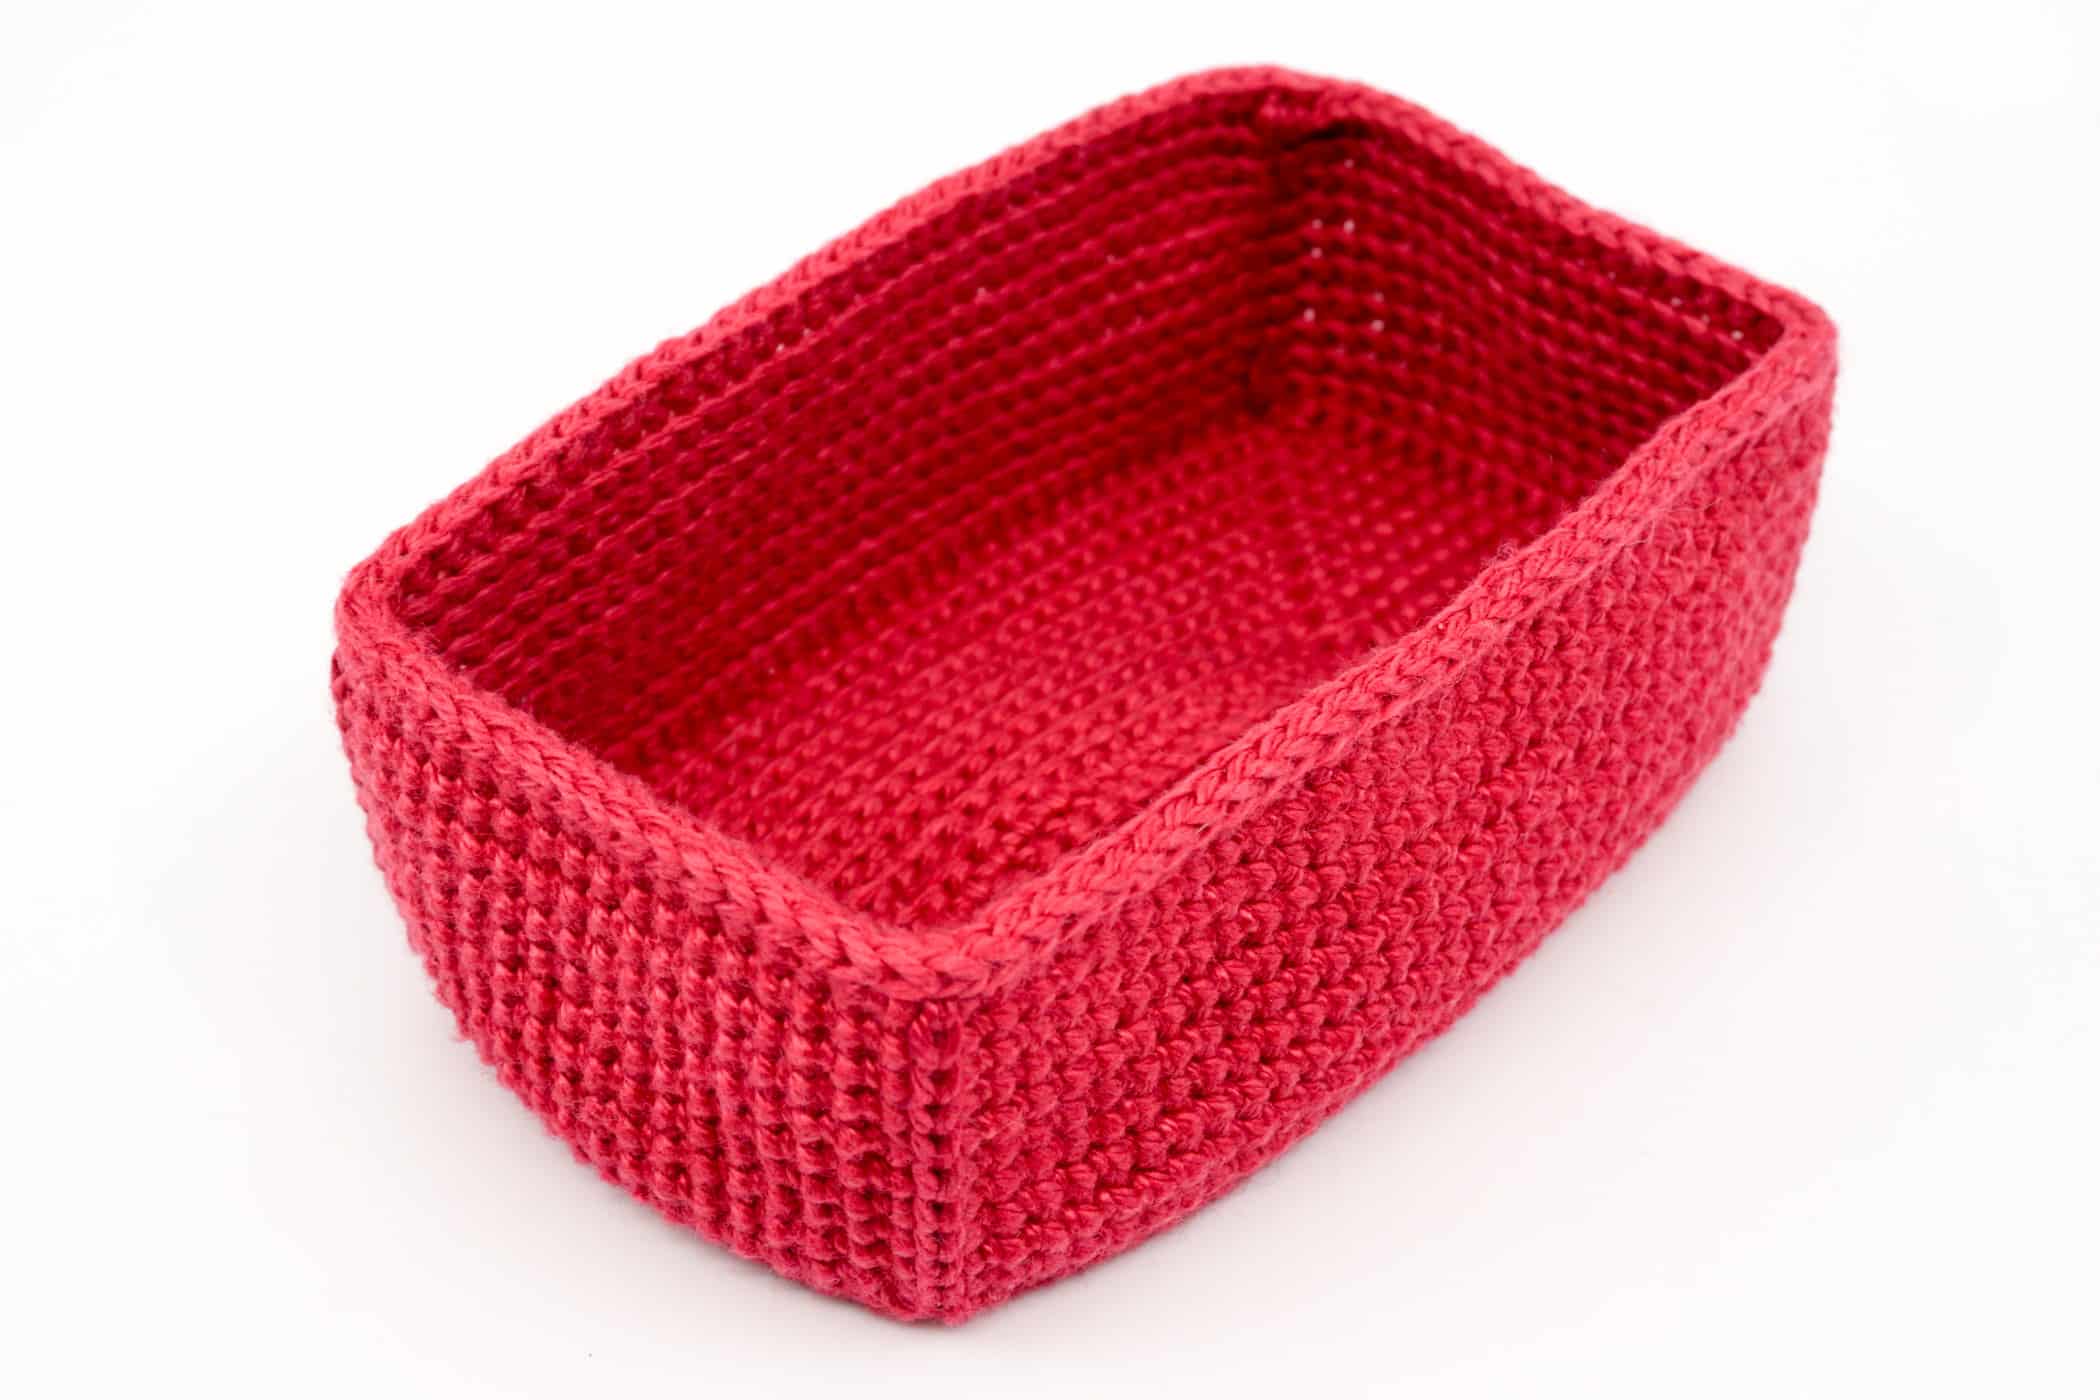
Crochet the Gift Box for the Mini Nosos
The rectangular gift box is crocheted in one piece in Strawberry in spiral rounds with slip sitches and single crochet stitches.

ATTENTION: All single crochet stitches are always crocheted in the front loop only, except when you have to crochet three stitches into one stitch, then you have to crochet into both loops.
- Crochet the rectangular gift box in spiral rounds in Strawberry.
- Round 1: 20 chain stitches, 1 sc into the 2nd stitch from the hook, 17 sc, 3 sc into the next stitch. Now continue crocheting on the bottom side of the chain. 17 sc, 1 increase, 1 slip stitch into the 1st stitch of the round (40 stitches). IMPORTANT: After the slip stitch starts a new beginning of the round.

- Round 2: [17 sc, 3 sc into the next stitch, 1 sc, 3 sc into the next stitch] repeat 2 times (48 stitches).
- Round 3: [18 sc, 3 sc into the next stitch, 3 sc, 3 sc into the next stitch, 1 sc] repeat 2 times (56 stitches).
- Round 4: [19 sc, 3 sc into the next stitch, 5 sc, 3 sc into the next stitch, 2 sc] repeat 2 times (64 stitches).
- Round 5: [20 sc, 3 sc into the next stitch, 7 sc, 3 sc into the next stitch, 3 sc] repeat 2 times (72 stitches).
- Round 6: [21 sc, 3 sc into the next stitch, 9 sc, 3 sc into the next stitch, 4 sc] repeat 2 times (80 stitches).
- Round 7: [22 sc, 3 sc into the next stitch, 11 sc, 3 sc into the next stitch, 5 sc] repeat 2 times (88 stitches).
- Round 8: [23 sc, 3 sc into the next stitch, 13 sc, 3 sc into the next stitch, 6 sc] repeat 2 times (96 stitches).
- Round 9: [24 sc, 3 sc into the next stitch, 15 sc, 3 sc into the next stitch, 7 sc] repeat 2 times (104 stitches).
- Round 10: Crochet the complete round into the front loop only. Crochet only 25 sc. The round is not crocheted to the end.
- Round 11: Crochet the complete round into the back loop only. Crochet 104 sc (104 stitches).
- Round 12-21: Crochet each round into the front loop only. 10 rounds, each round 104 sc (104 stitches).
- Round 22: Crochet the complete round into both loops. Crochet 104 sc (104 stitches).
- Finish: Cut the yarn and weave in.
Crochet the Lid for the Rectangular Gift Box
The rectangular lid is crocheted in one piece in Strawberry in spiral rounds with slip sitches and single crochet stitches.

ATTENTION: All single crochet stitches are always crocheted in the front loop only, except when you have to crochet three stitches into one stitch, then you have to crochet into both loops.
- Crochet the rectangular lid in spiral rounds in Strawberry.
- Round 1: 20 chain stitches, 1 sc into the 2nd stitch from the hook, 17 sc, 3 sc into the next stitch. Now continue crocheting on the bottom side of the chain. 17 sc, 1 increase, 1 slip stitch into the 1st stitch of the round (40 stitches). Pictures see rectangular box. IMPORTANT: After the slip stitch starts a new beginning of the round. Same procedure as for the rectangular box.
- Round 2: [17 sc, 3 sc into the next stitch, 1 sc, 3 sc into the next stitch] repeat 2 times (48 stitches).
- Round 3: [18 sc, 3 sc into the next stitch, 3 sc, 3 sc into the next stitch, 1 sc] repeat 2 times (56 stitches).
- Round 4: [19 sc, 3 sc into the next stitch, 5 sc, 3 sc into the next stitch, 2 sc] repeat 2 times (64 stitches).
- Round 5: [20 sc, 3 sc into the next stitch, 7 sc, 3 sc into the next stitch, 3 sc] repeat 2 times (72 stitches).
- Round 6: [21 sc, 3 sc into the next stitch, 9 sc, 3 sc into the next stitch, 4 sc] repeat 2 times (80 stitches).
- Round 7: [22 sc, 3 sc into the next stitch, 11 sc, 3 sc into the next stitch, 5 sc] repeat 2 times (88 stitches).
- Round 8: [23 sc, 3 sc into the next stitch, 13 sc, 3 sc into the next stitch, 6 sc] repeat 2 times (96 stitches).
- Round 9: [24 sc, 3 sc into the next stitch, 15 sc, 3 sc into the next stitch, 7 sc] repeat 2 times (104 stitches).
- Round 10: [25 sc, 3 sc into the next stitch, 17 sc, 3 sc into the next stitch, 8 sc] repeat 2 times (112 stitches).
- Round 11: Crochet the complete round into the front loop only. Crochet only 26 sc. The round is not crocheted to the end.
- Round 12: Crochet the complete round into the back loop only. Crochet 112 sc (112 stitches).
- Round 13-15: Crochet each round into the front loop only. 3 rounds, each round 112 sc (112 stitches).
- Round 16: Crochet the complete round into both loops. Crochet 112 sc (112 stitches).
- Finish: Cut the yarn and weave in.
Crochet the Ribbon for the Rectangular Gift Box
The ribbon for the rectangular gift box is crocheted in one piece in Camel in rows with chain sitches and single crochet stitches.

- Crochet the ribbon in rows in Camel.
- Row 1: Crochet 241 chain stitches (241 stitches).
- Row 2: 1 sc into the 2nd stitch from the crochet hook, 239 sc (240 stitches).
- Finish: Cut the yarn and weave in.
Assembling
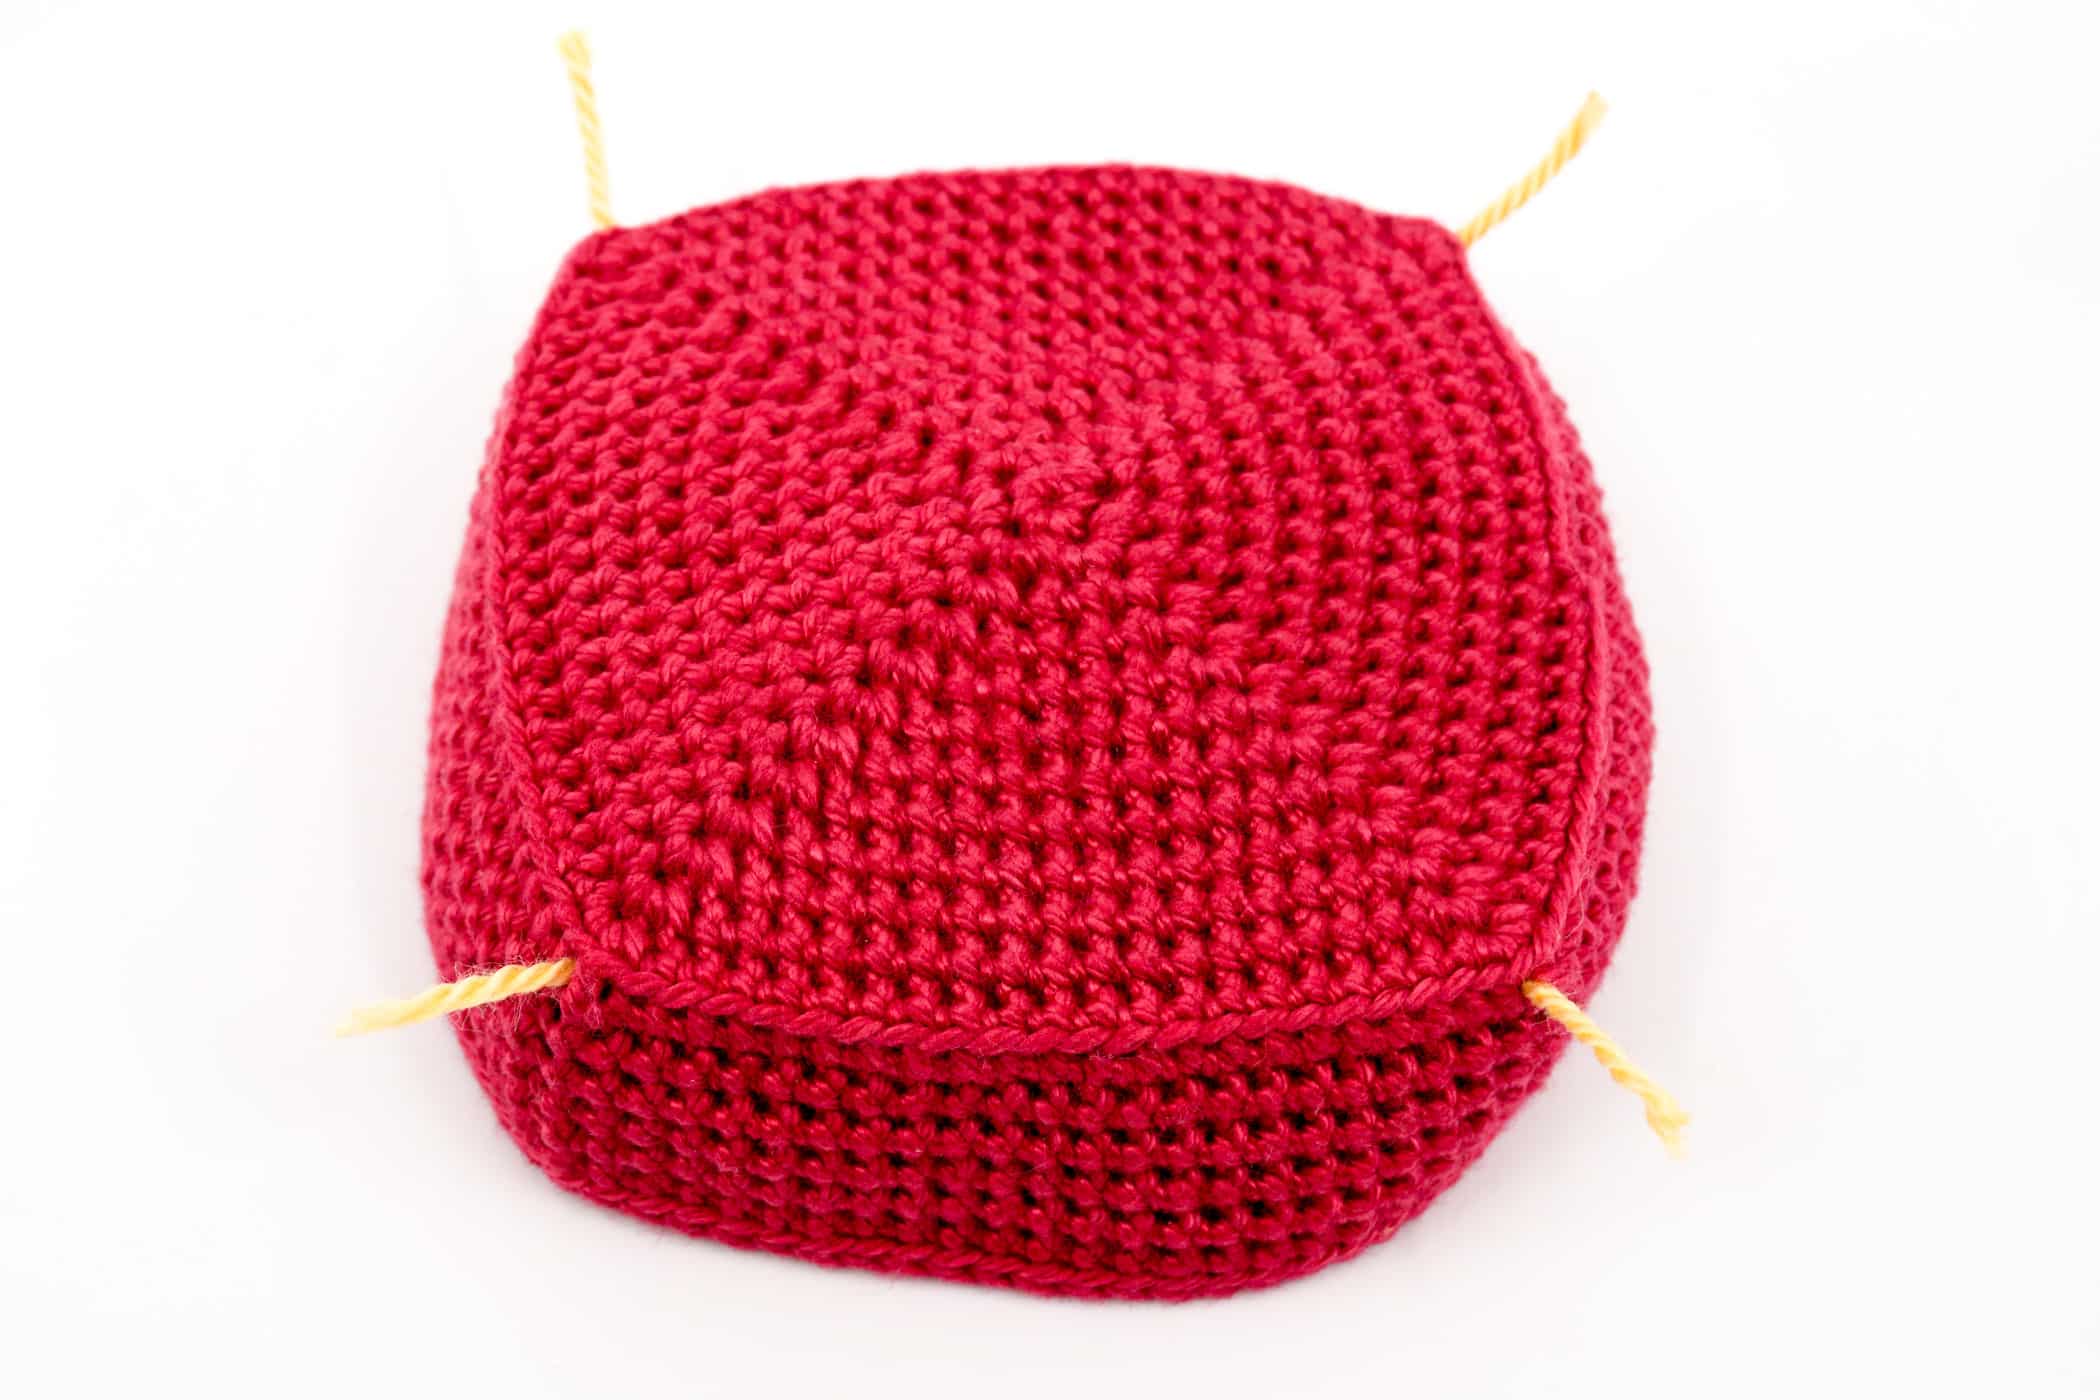
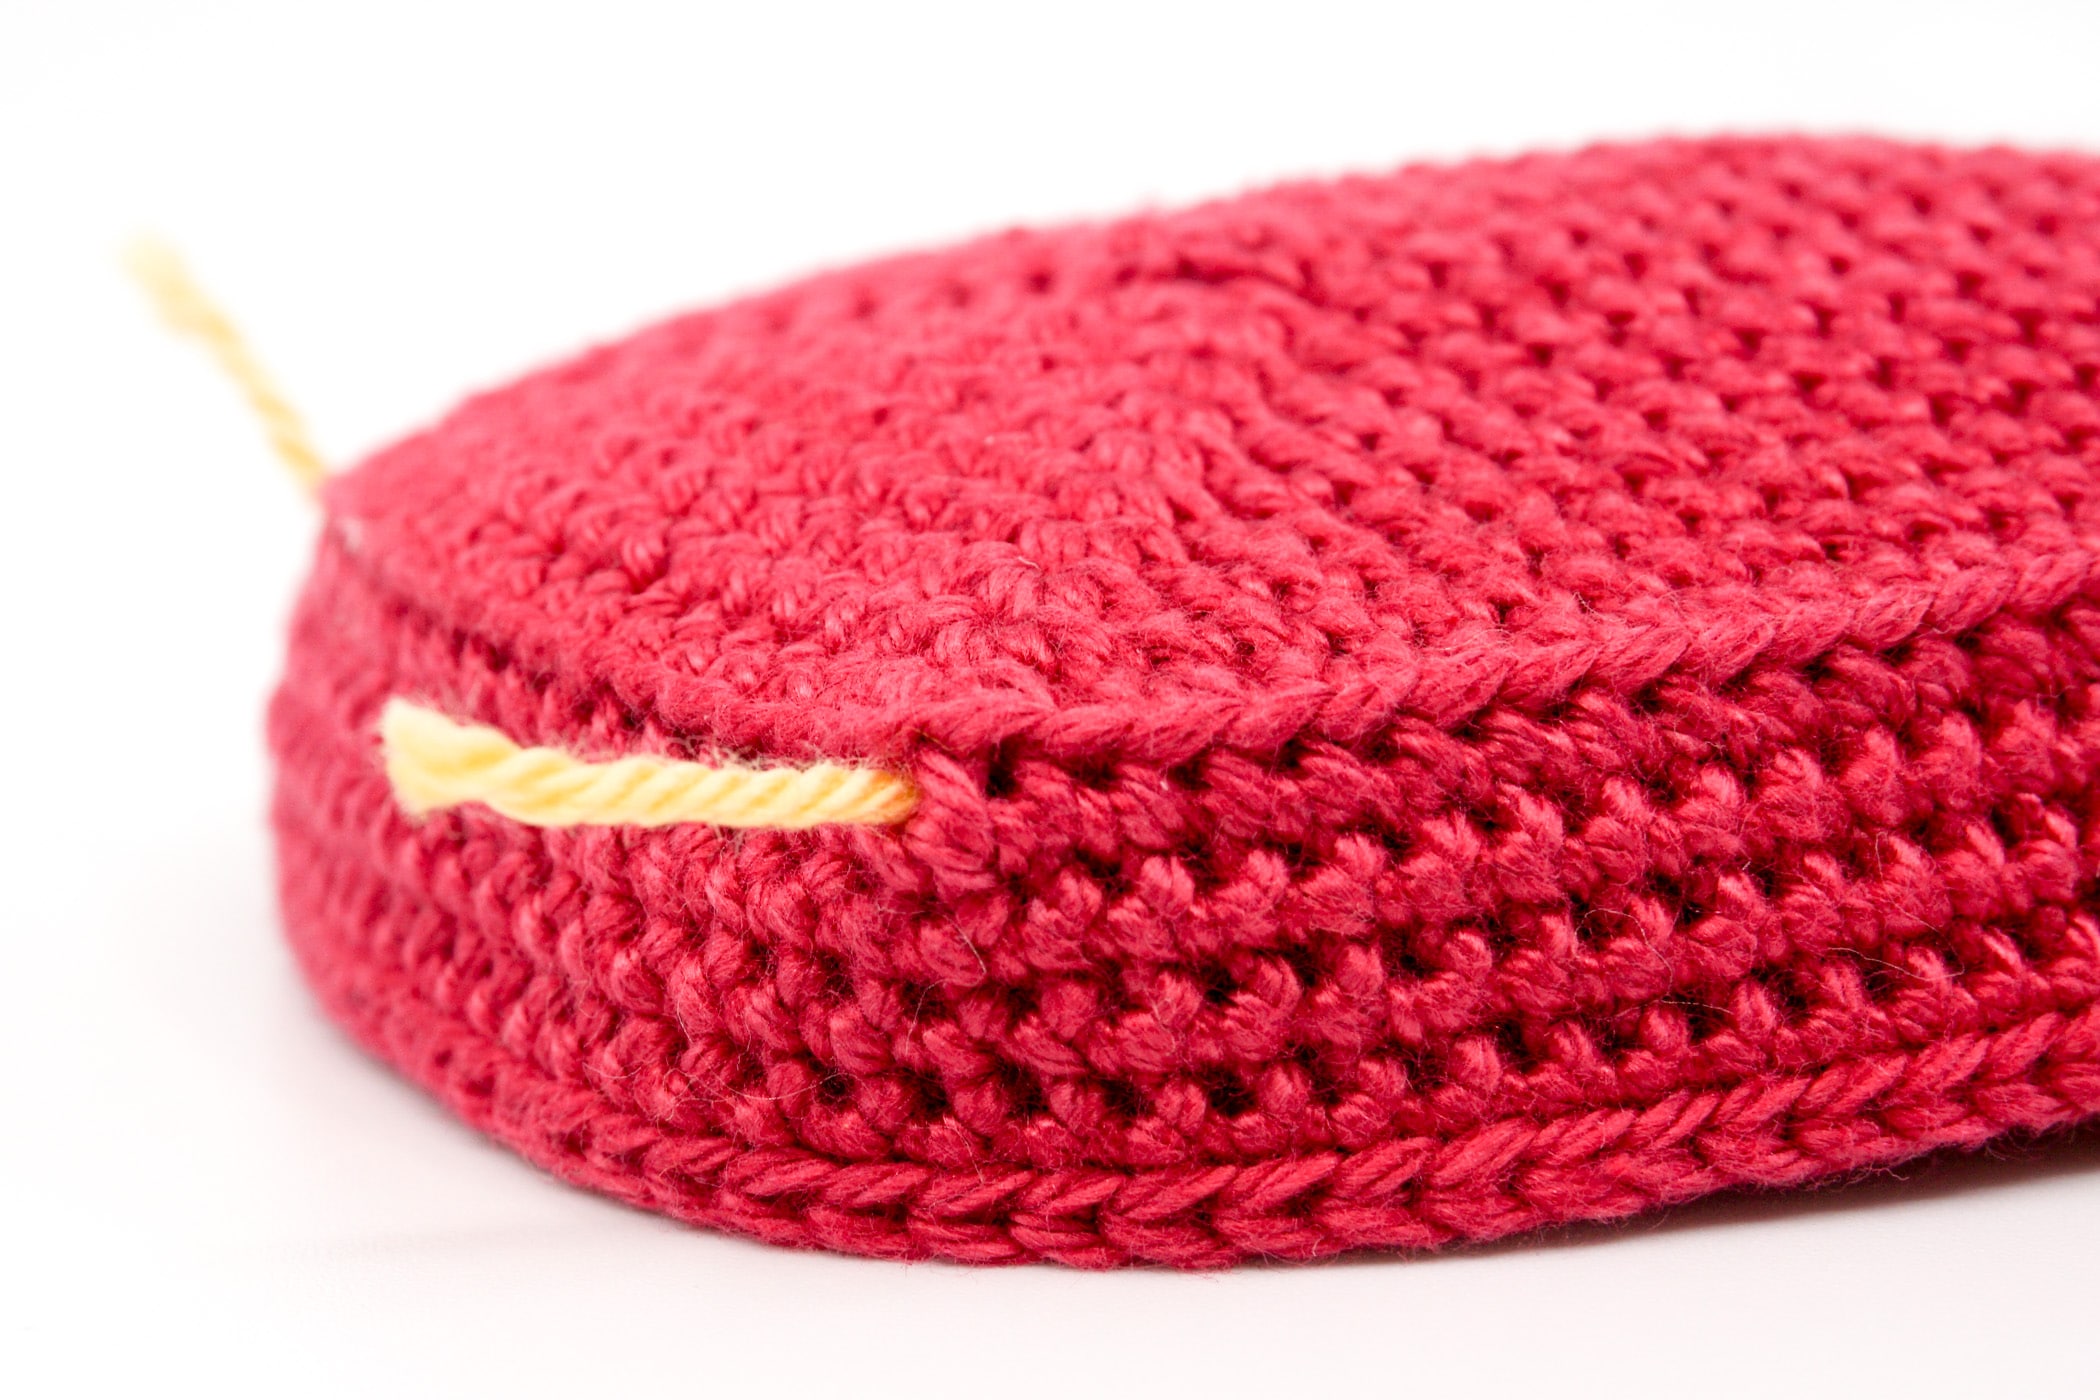
Determine the Position of the Corners: To make the gift boxes look more angular, crochet on all four corners surface slip stitches. However, before crocheting them, you need to determine the corners.
Mark the 4 corners on each box and lid with a thread in the 1st round after the stitch edge (created by the round crocheted only in the back loop).
Take your cue from the stitches where three stitches were crocheted into one stitch, they should show a larger hole in the stitch pattern. Follow the increases and mark the corner in which these ends over the edge of the stitch.
All threads should have the following distances from each other for an even final result. If you have other distances, move the marking threads until all threads have the specified distances to each other.
For the square lid, there are 22 stitches between each of the threads.
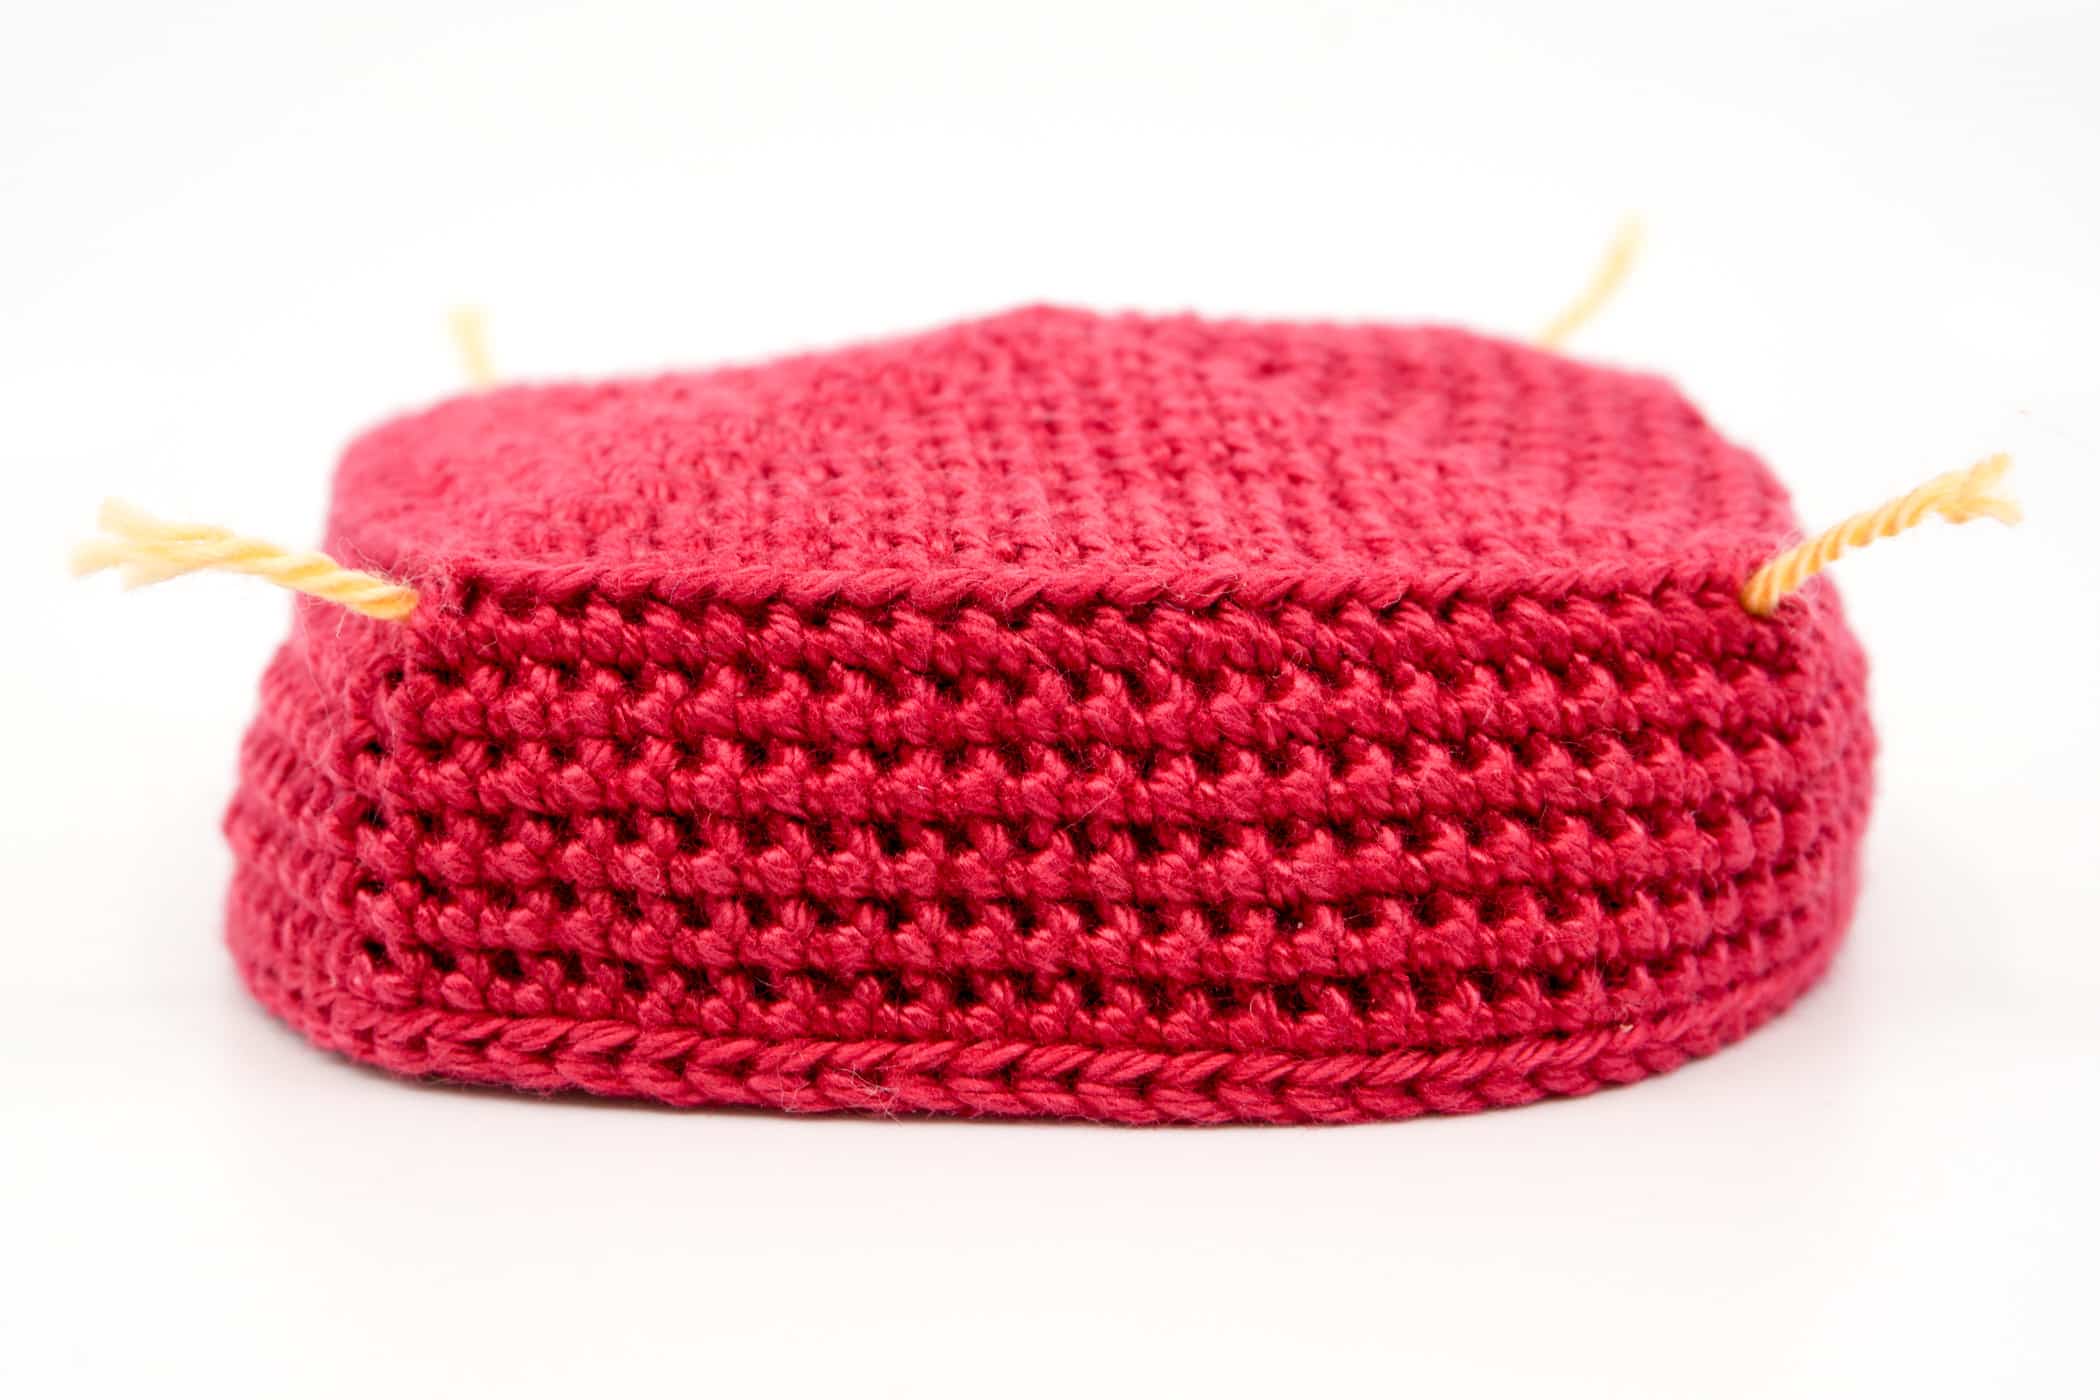
In the square box, there is a space of 20 stitches between each of the threads pulled through.
For the rectangular lid, there are 19 stitches between the threads on the narrow side and 35 stitches on the longer side.
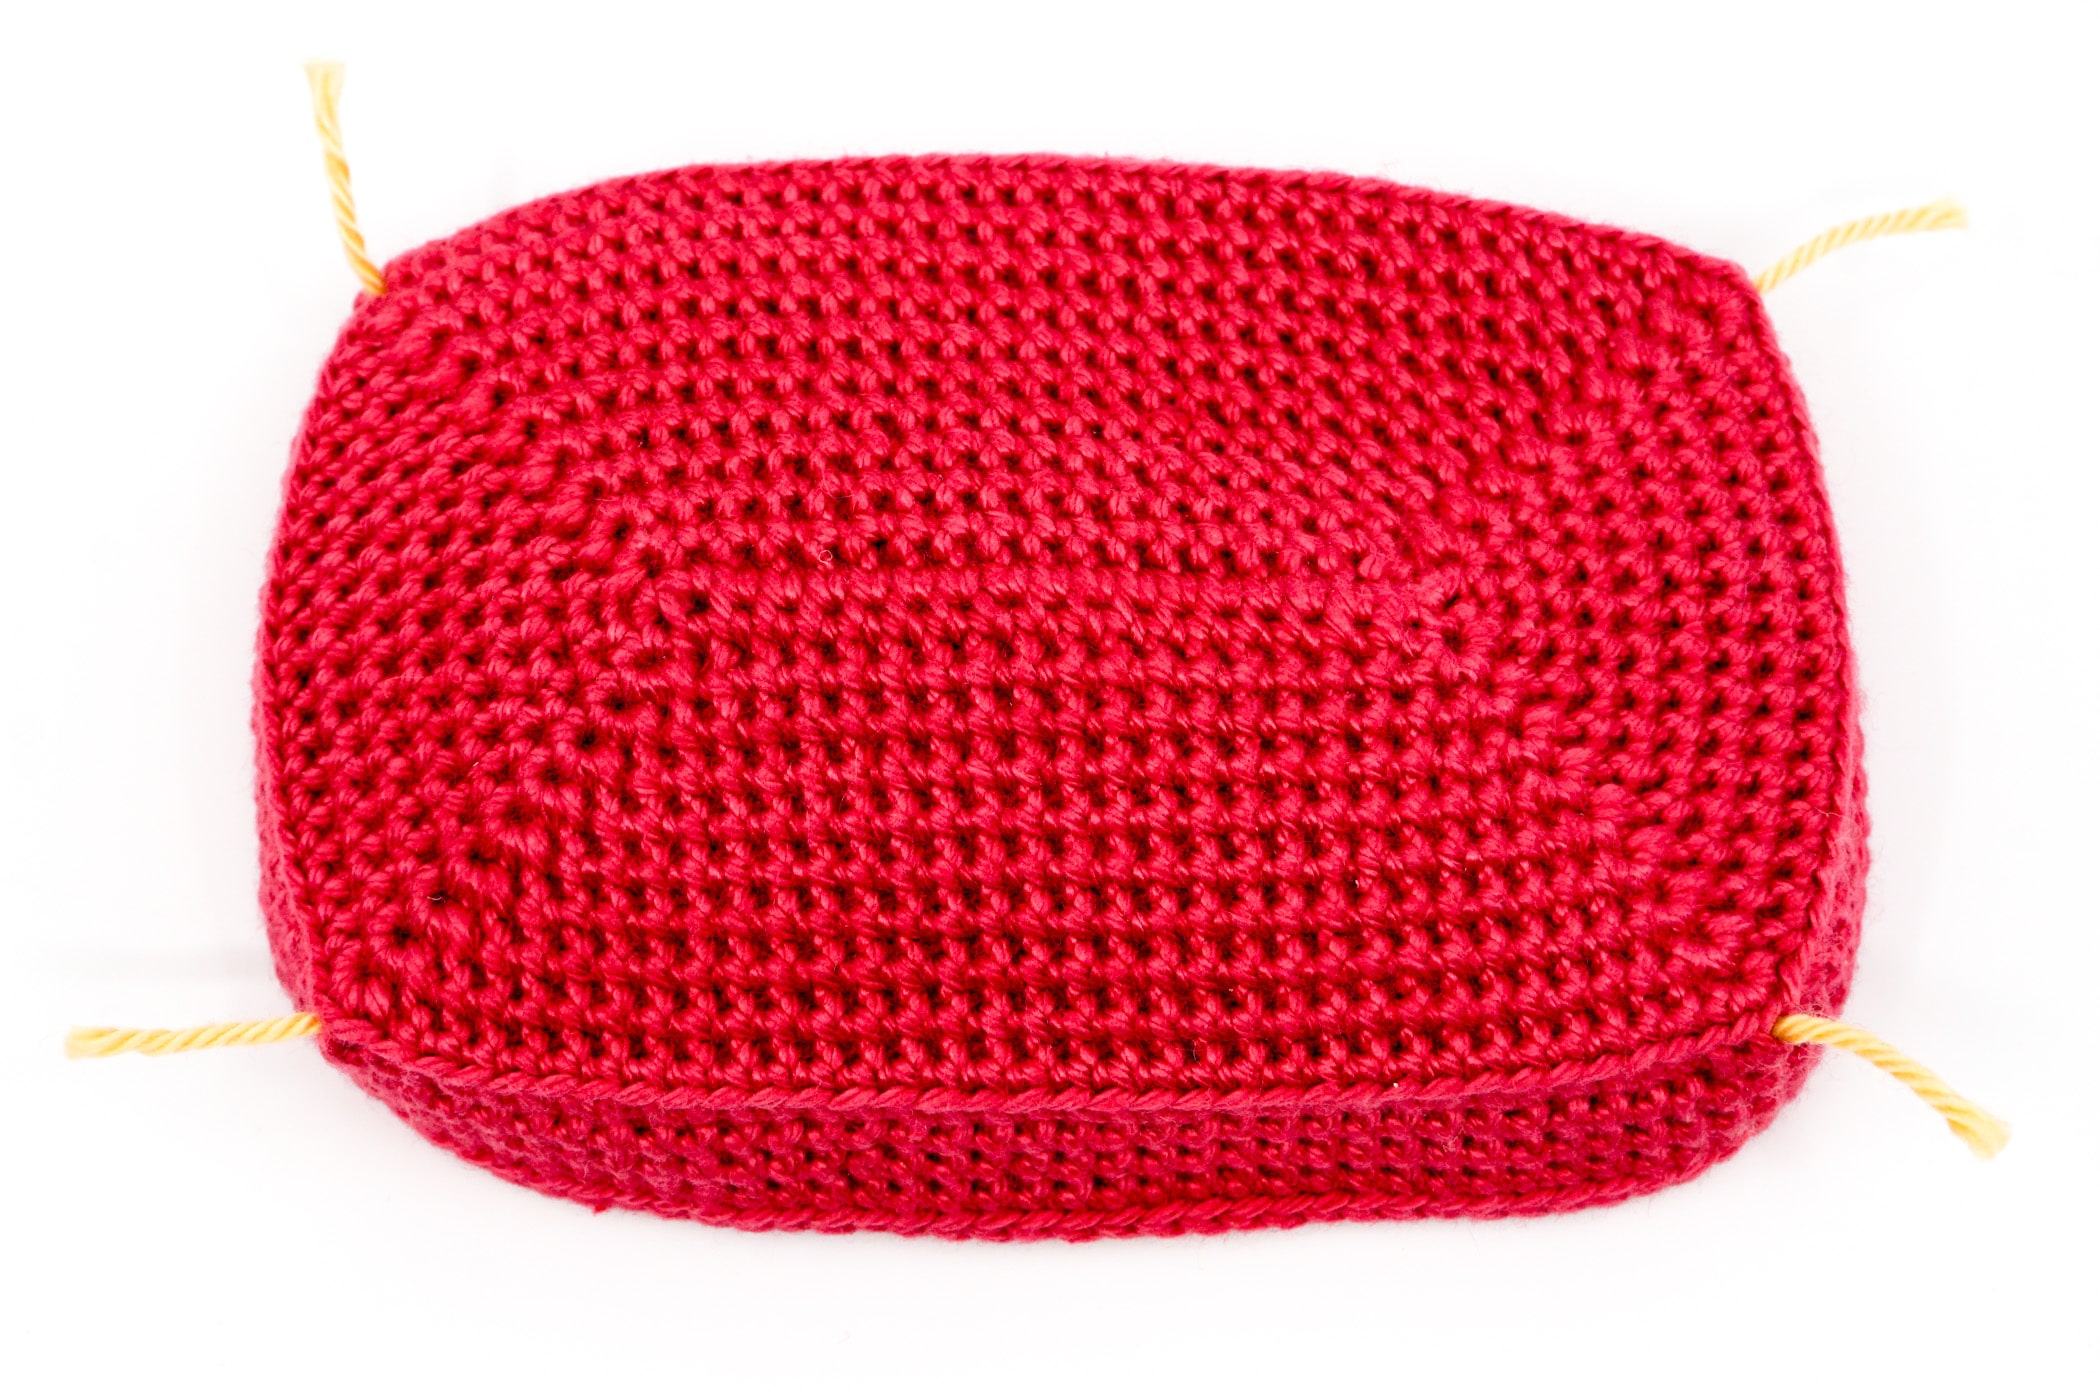

In the rectangular box, there are 17 stitches between the marking threads on the narrower side and 33 stitches on the longer side.

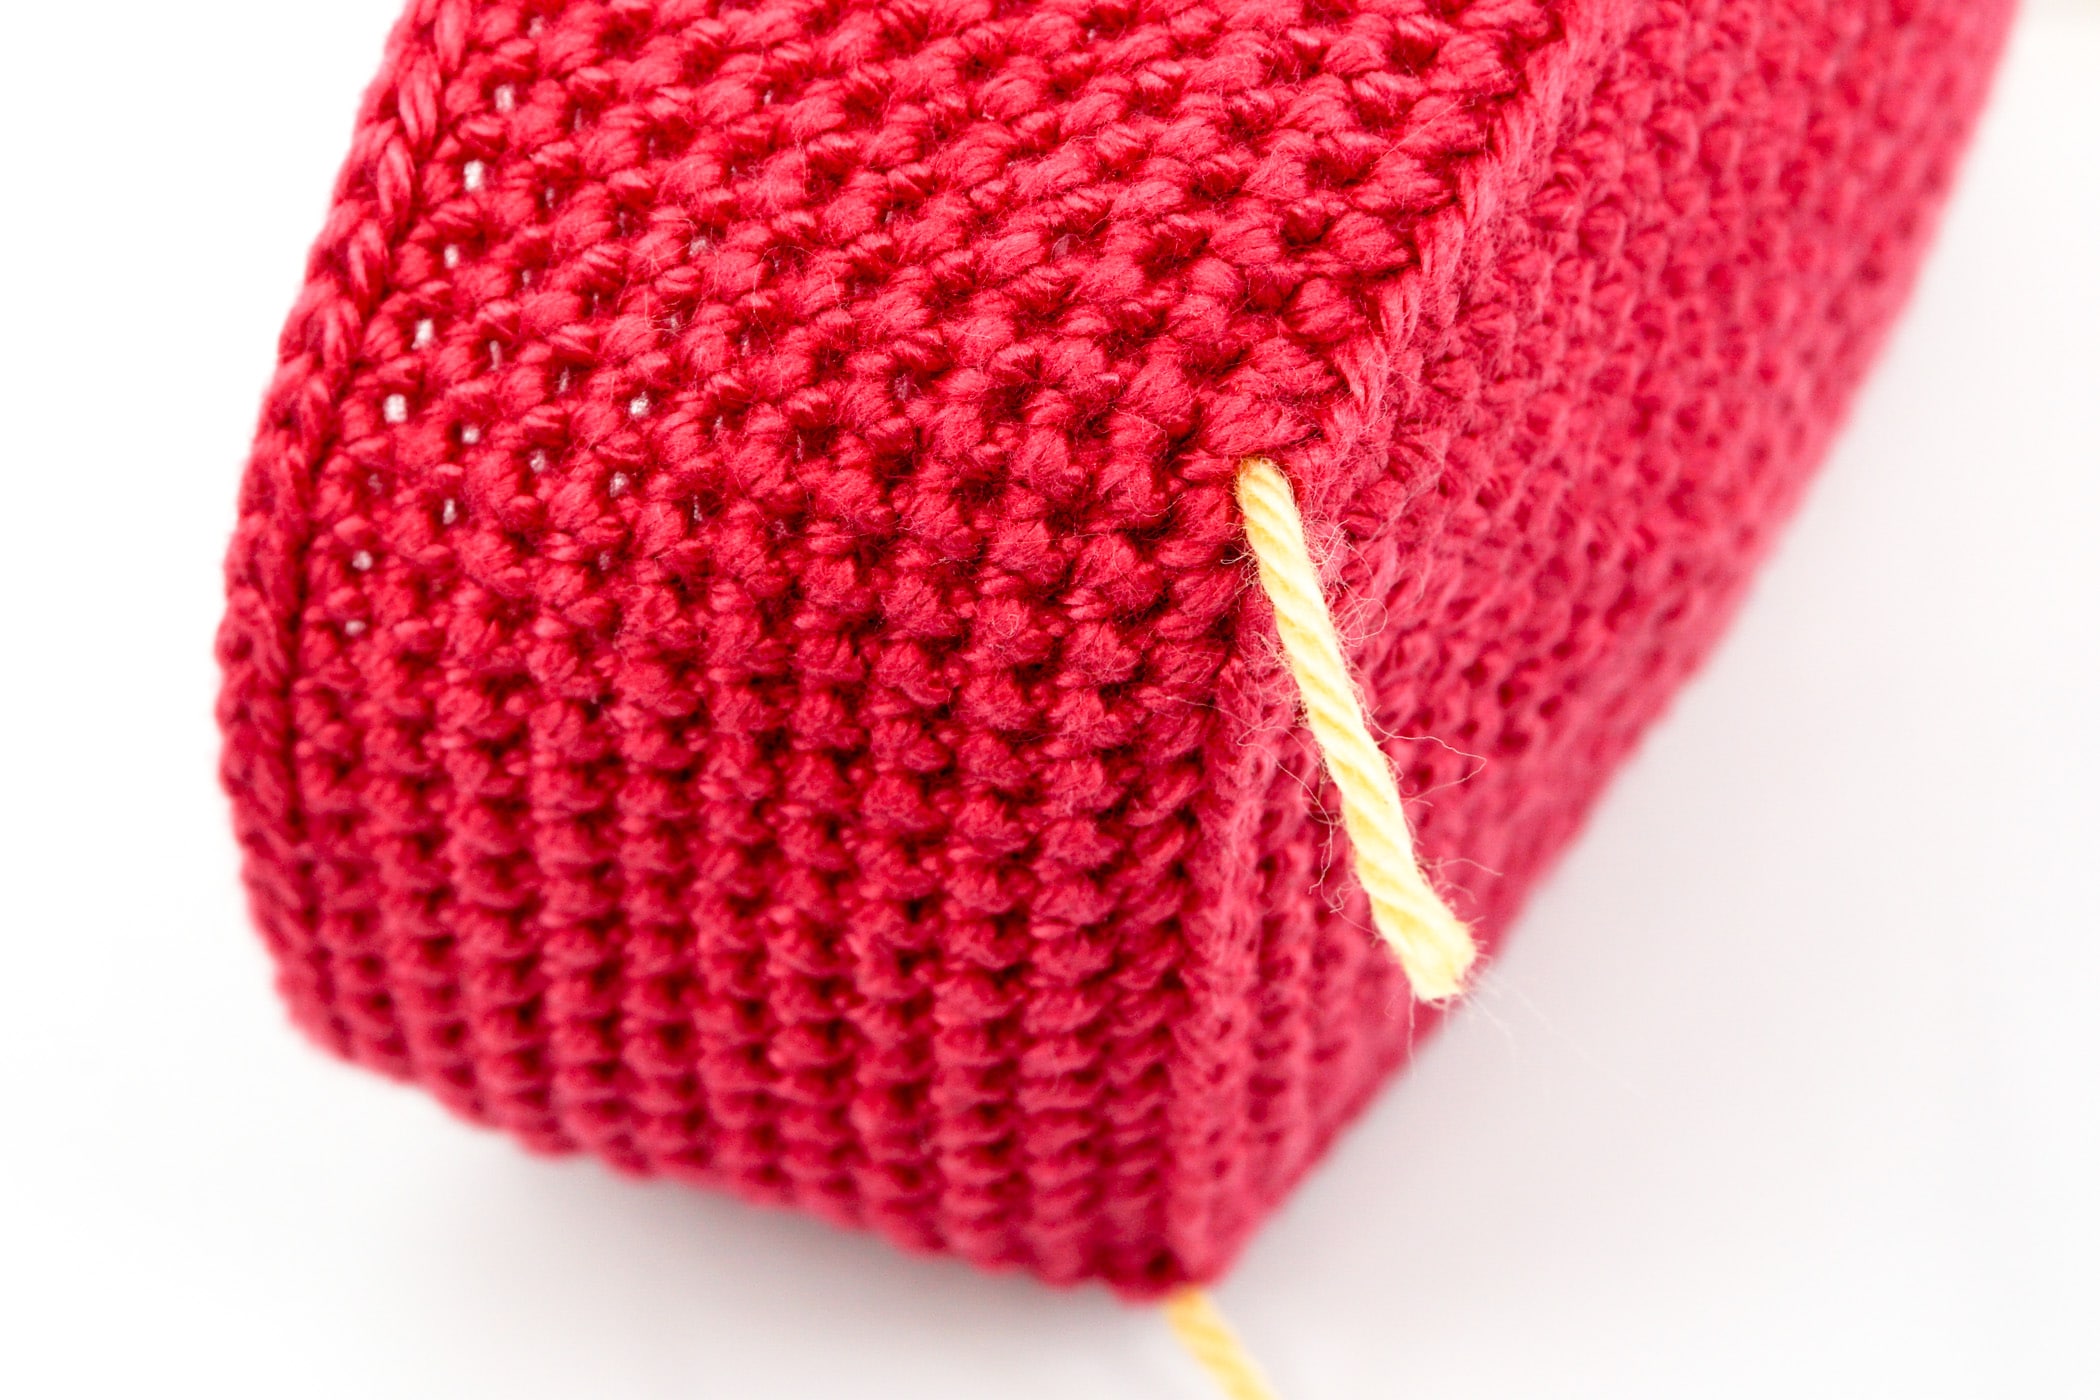
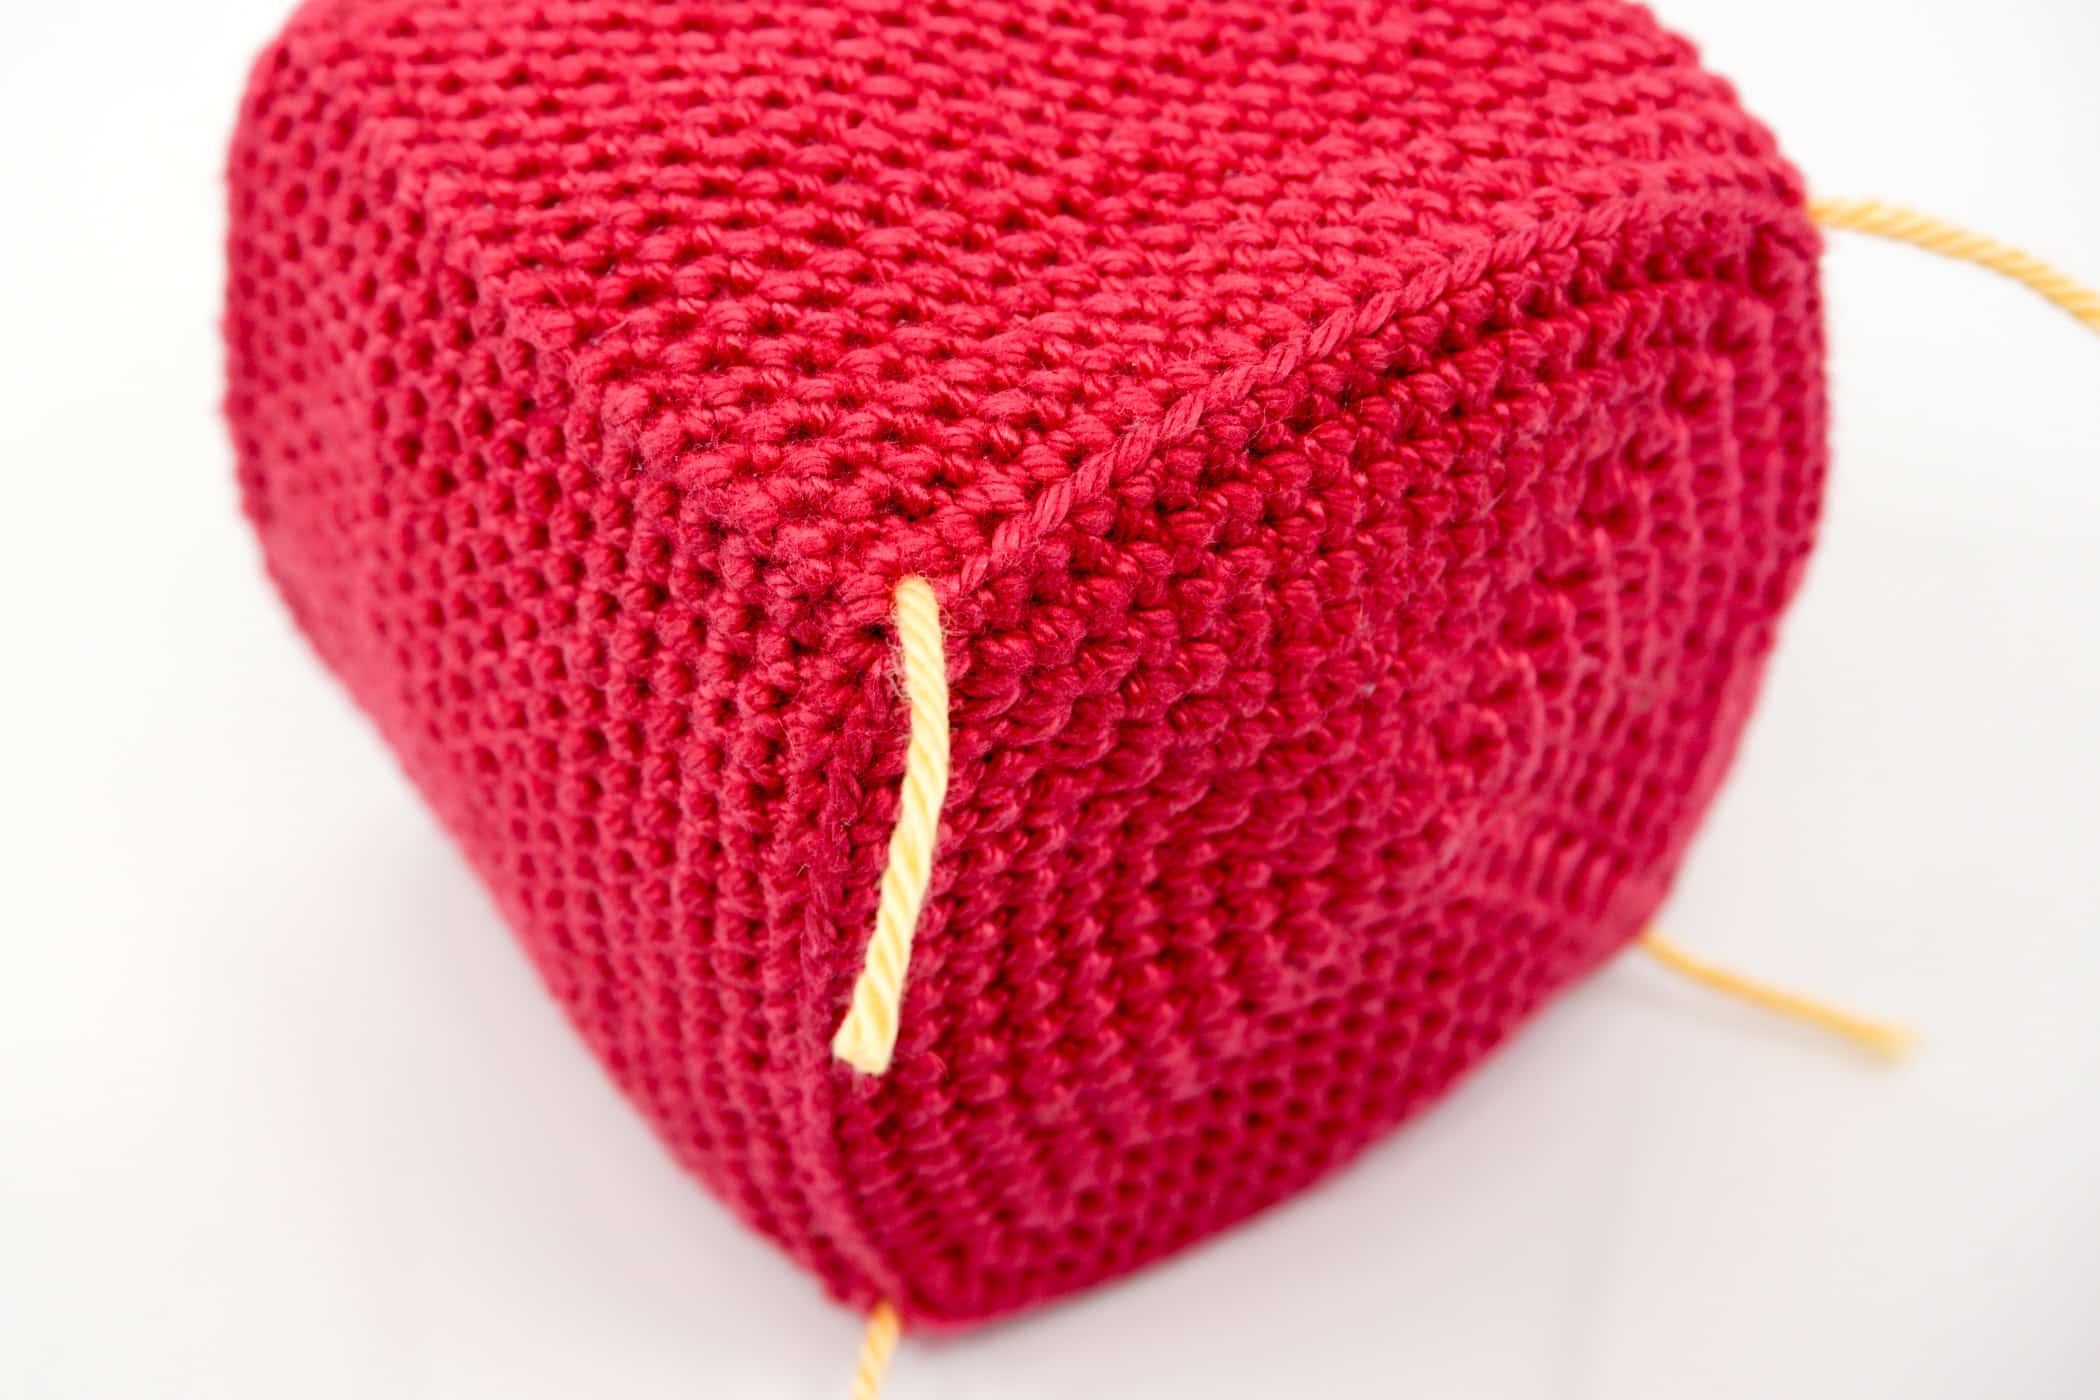
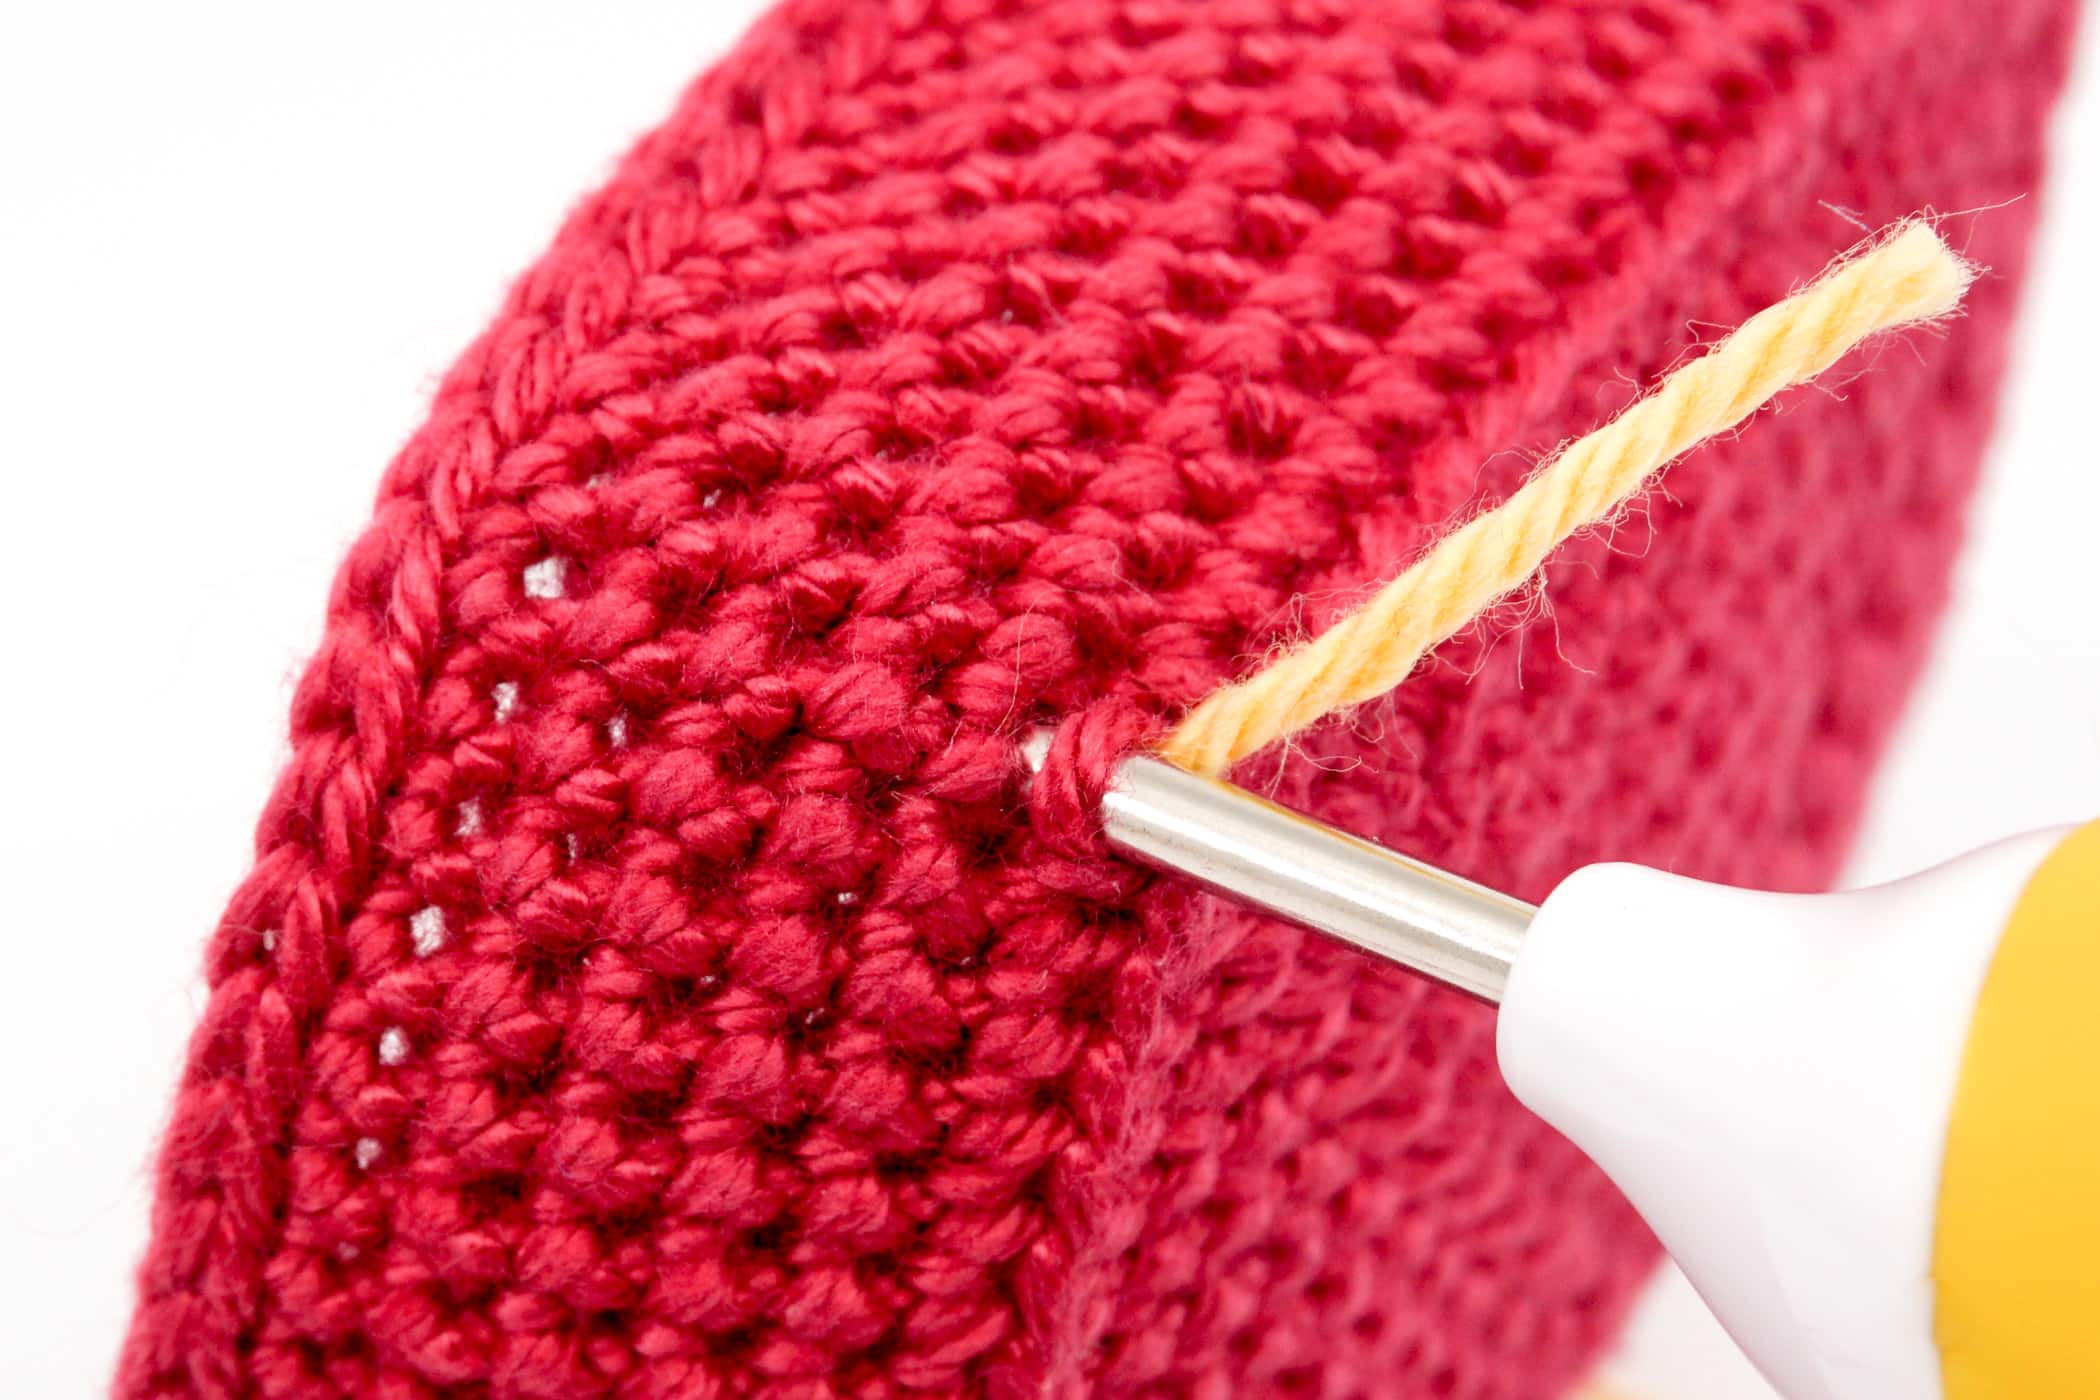
Crochet Surface Slip Stiches: Now insert the crochet hook from the outside to the inside through the stitch through which one of the marking threads was pulled through. Yarn over the Strawberry colored yarn on the inside and pull it through the stitch you just pushed through. You have a loop on the crochet hook.
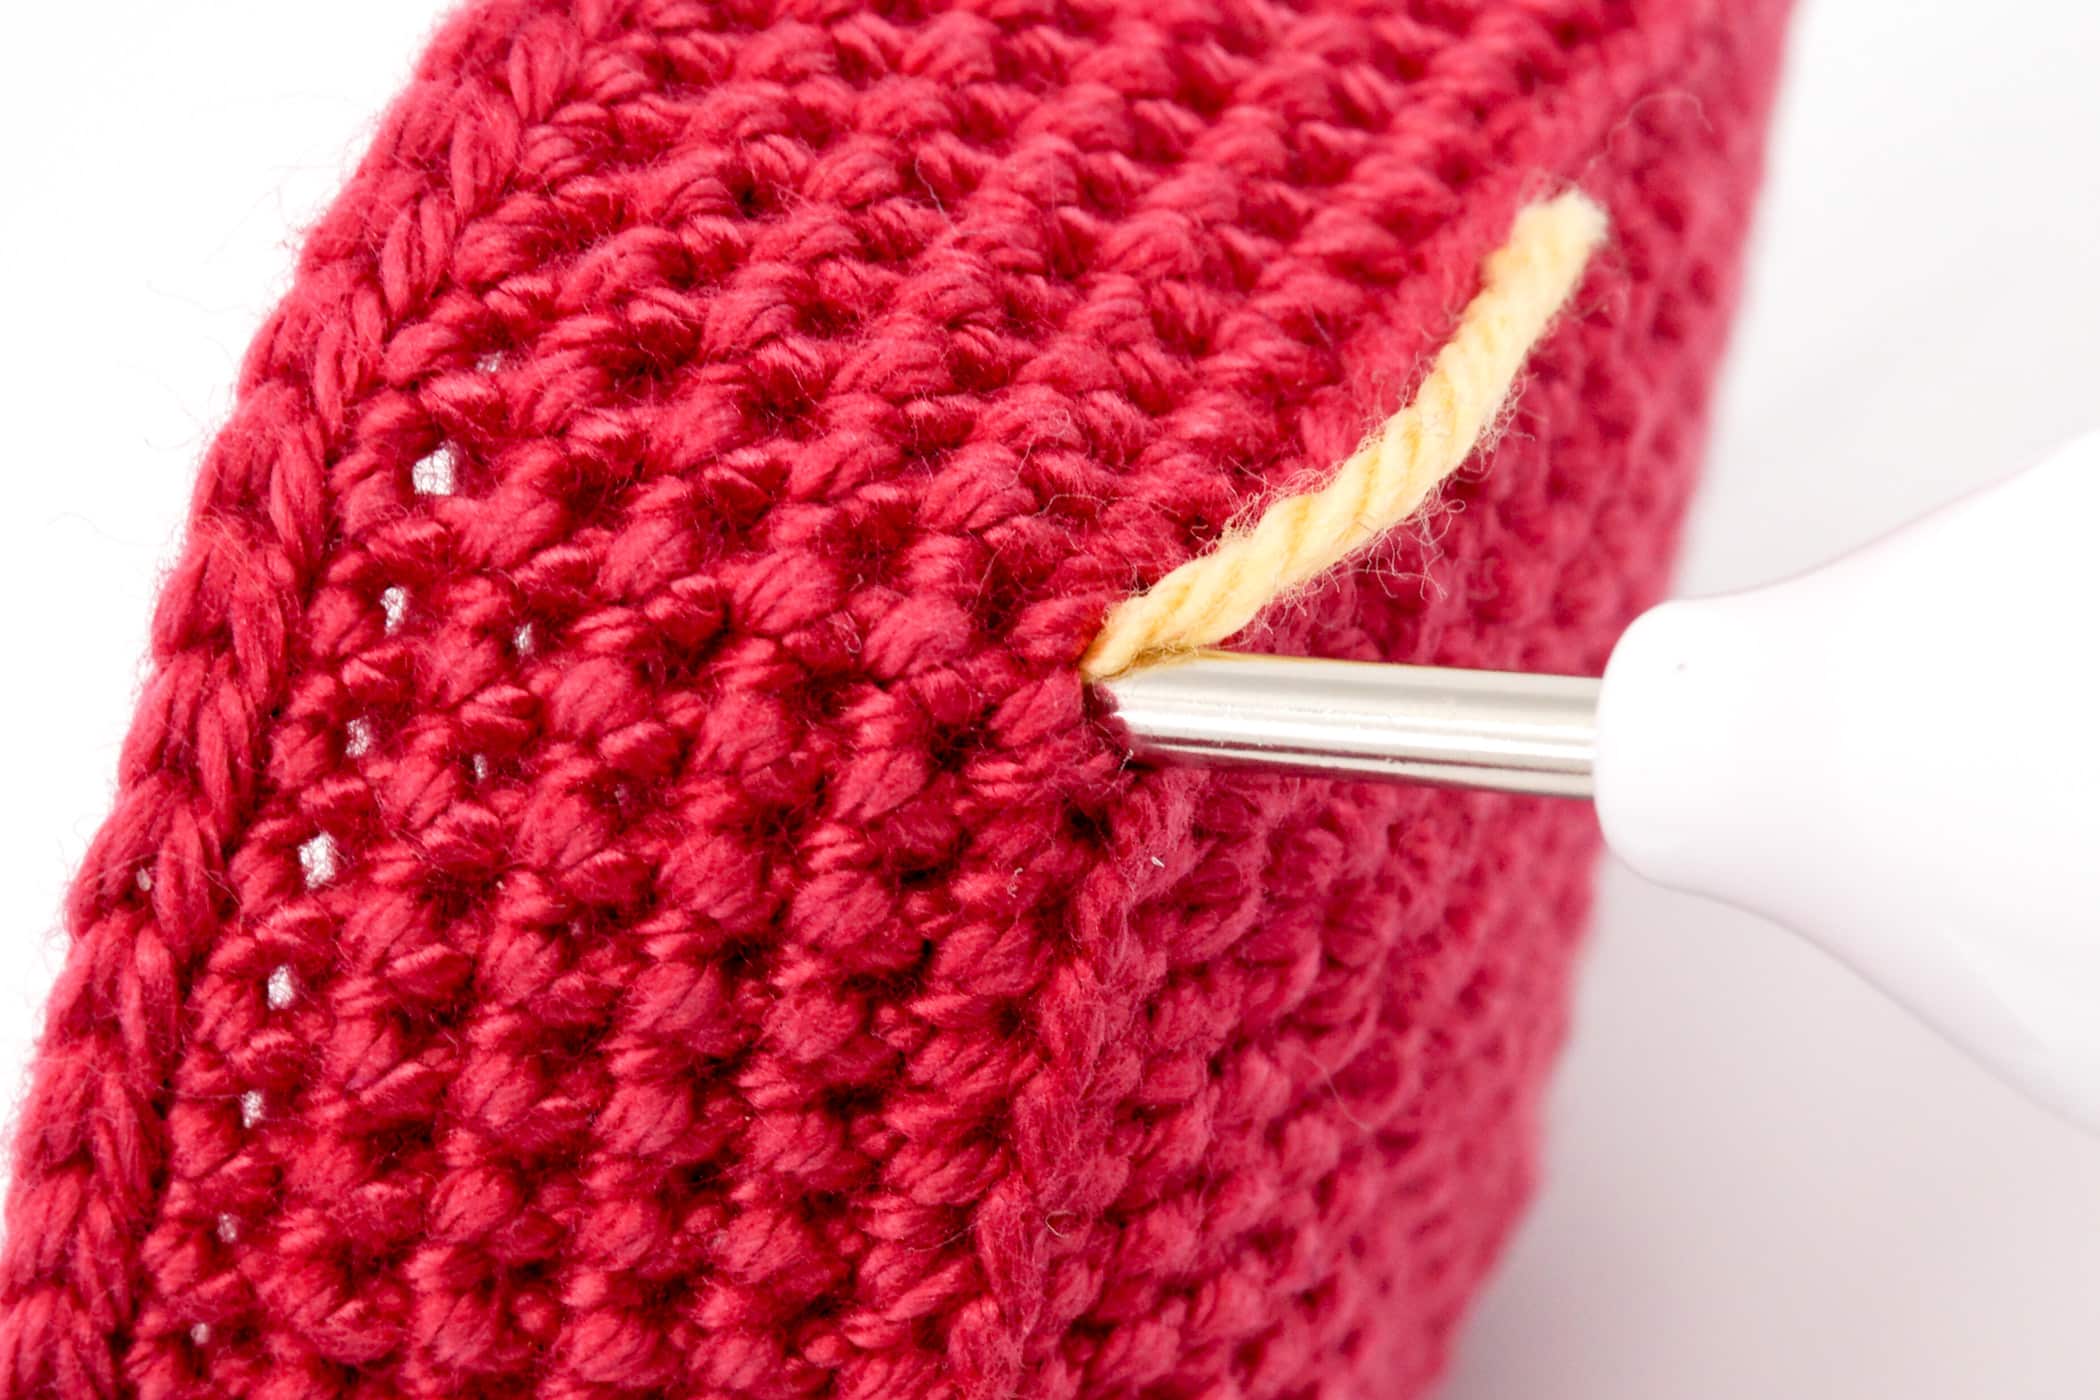
Hold the end of the thread and the yarn on the inside and now push through the next stitch above the stitch you just pushed through, towards the opening. Be sure to push through the stitch directly above it so that the edge of the box or lid is straight.
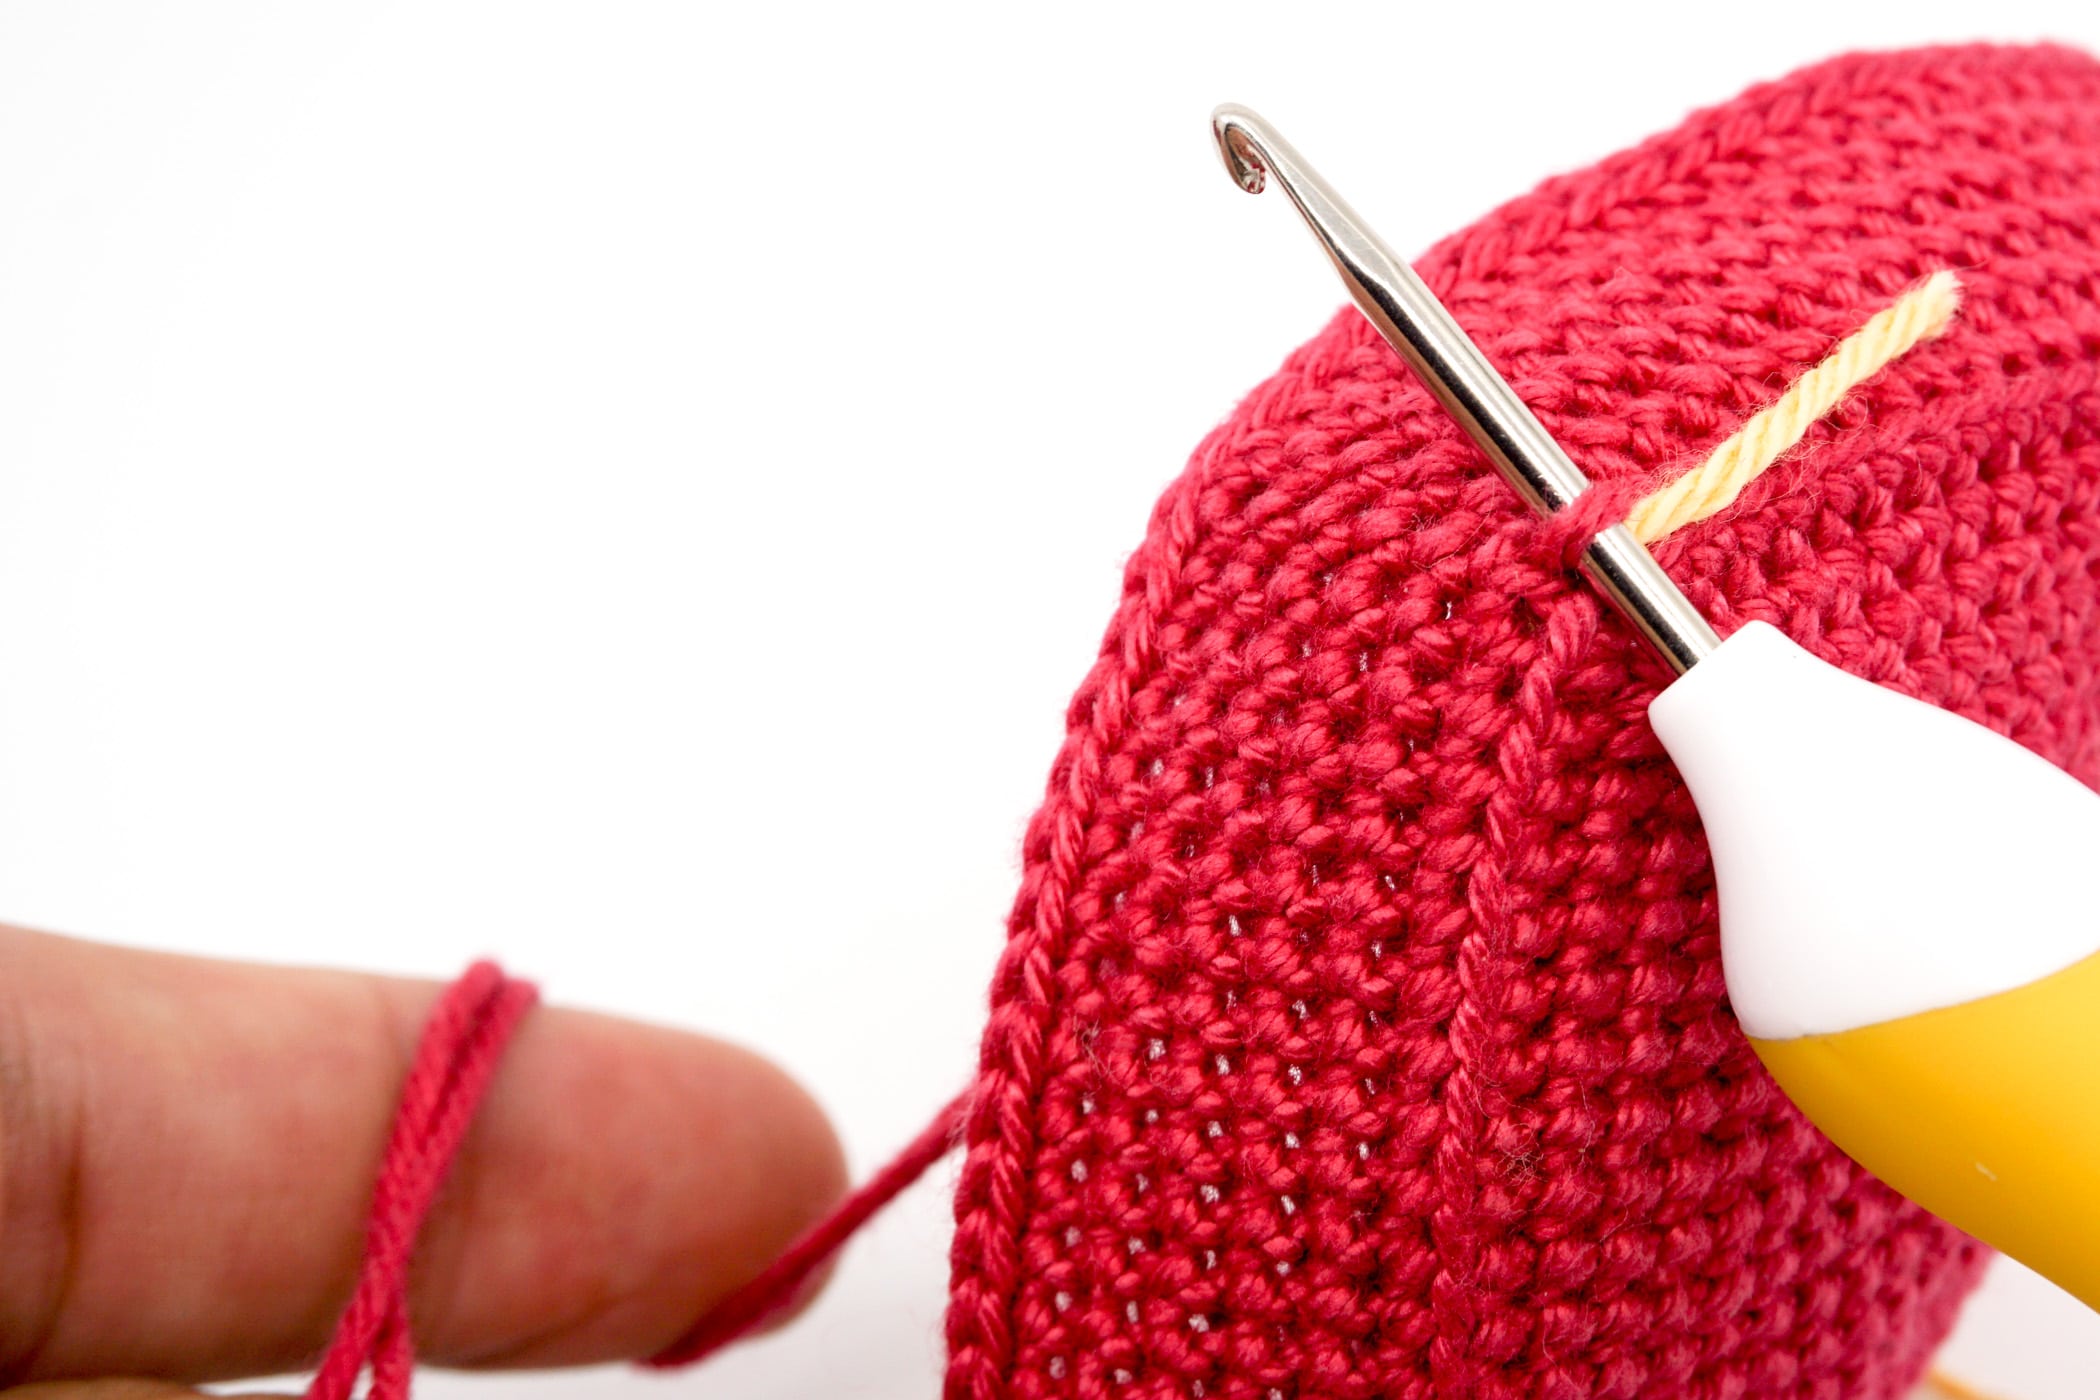
Yarn over the Strawberry colored yarn again on the inside, pull it through the stitch you just pushed through and then continue through the loop on the crochet hook. You have crocheted the 1st surface slip stitch. Be careful not to crochet too tightly, otherwise the crochet piece may warp.
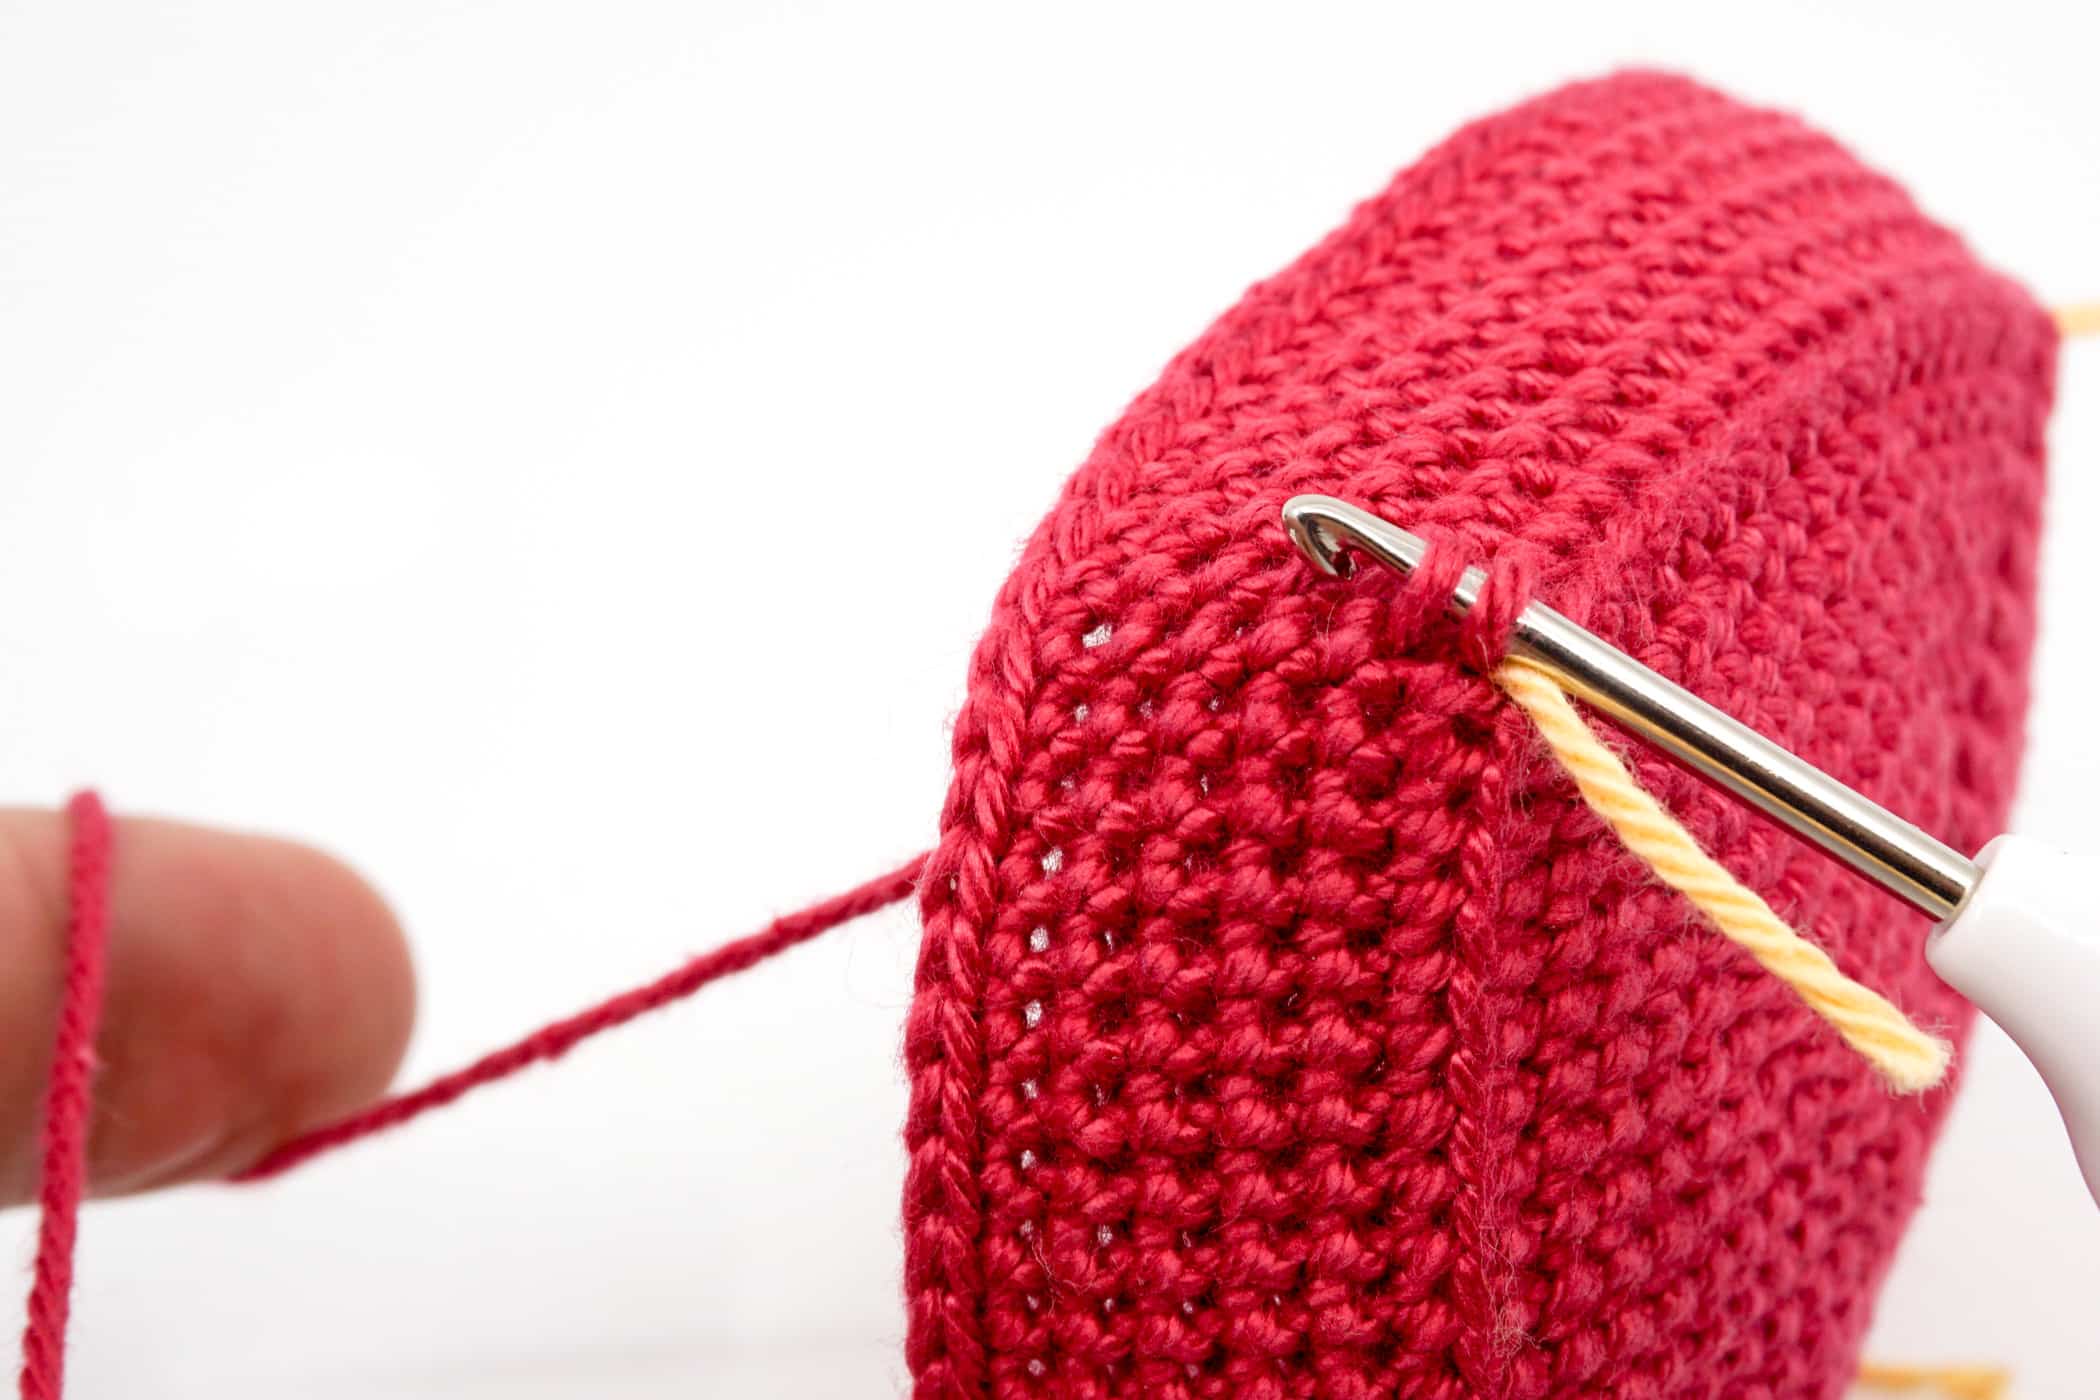
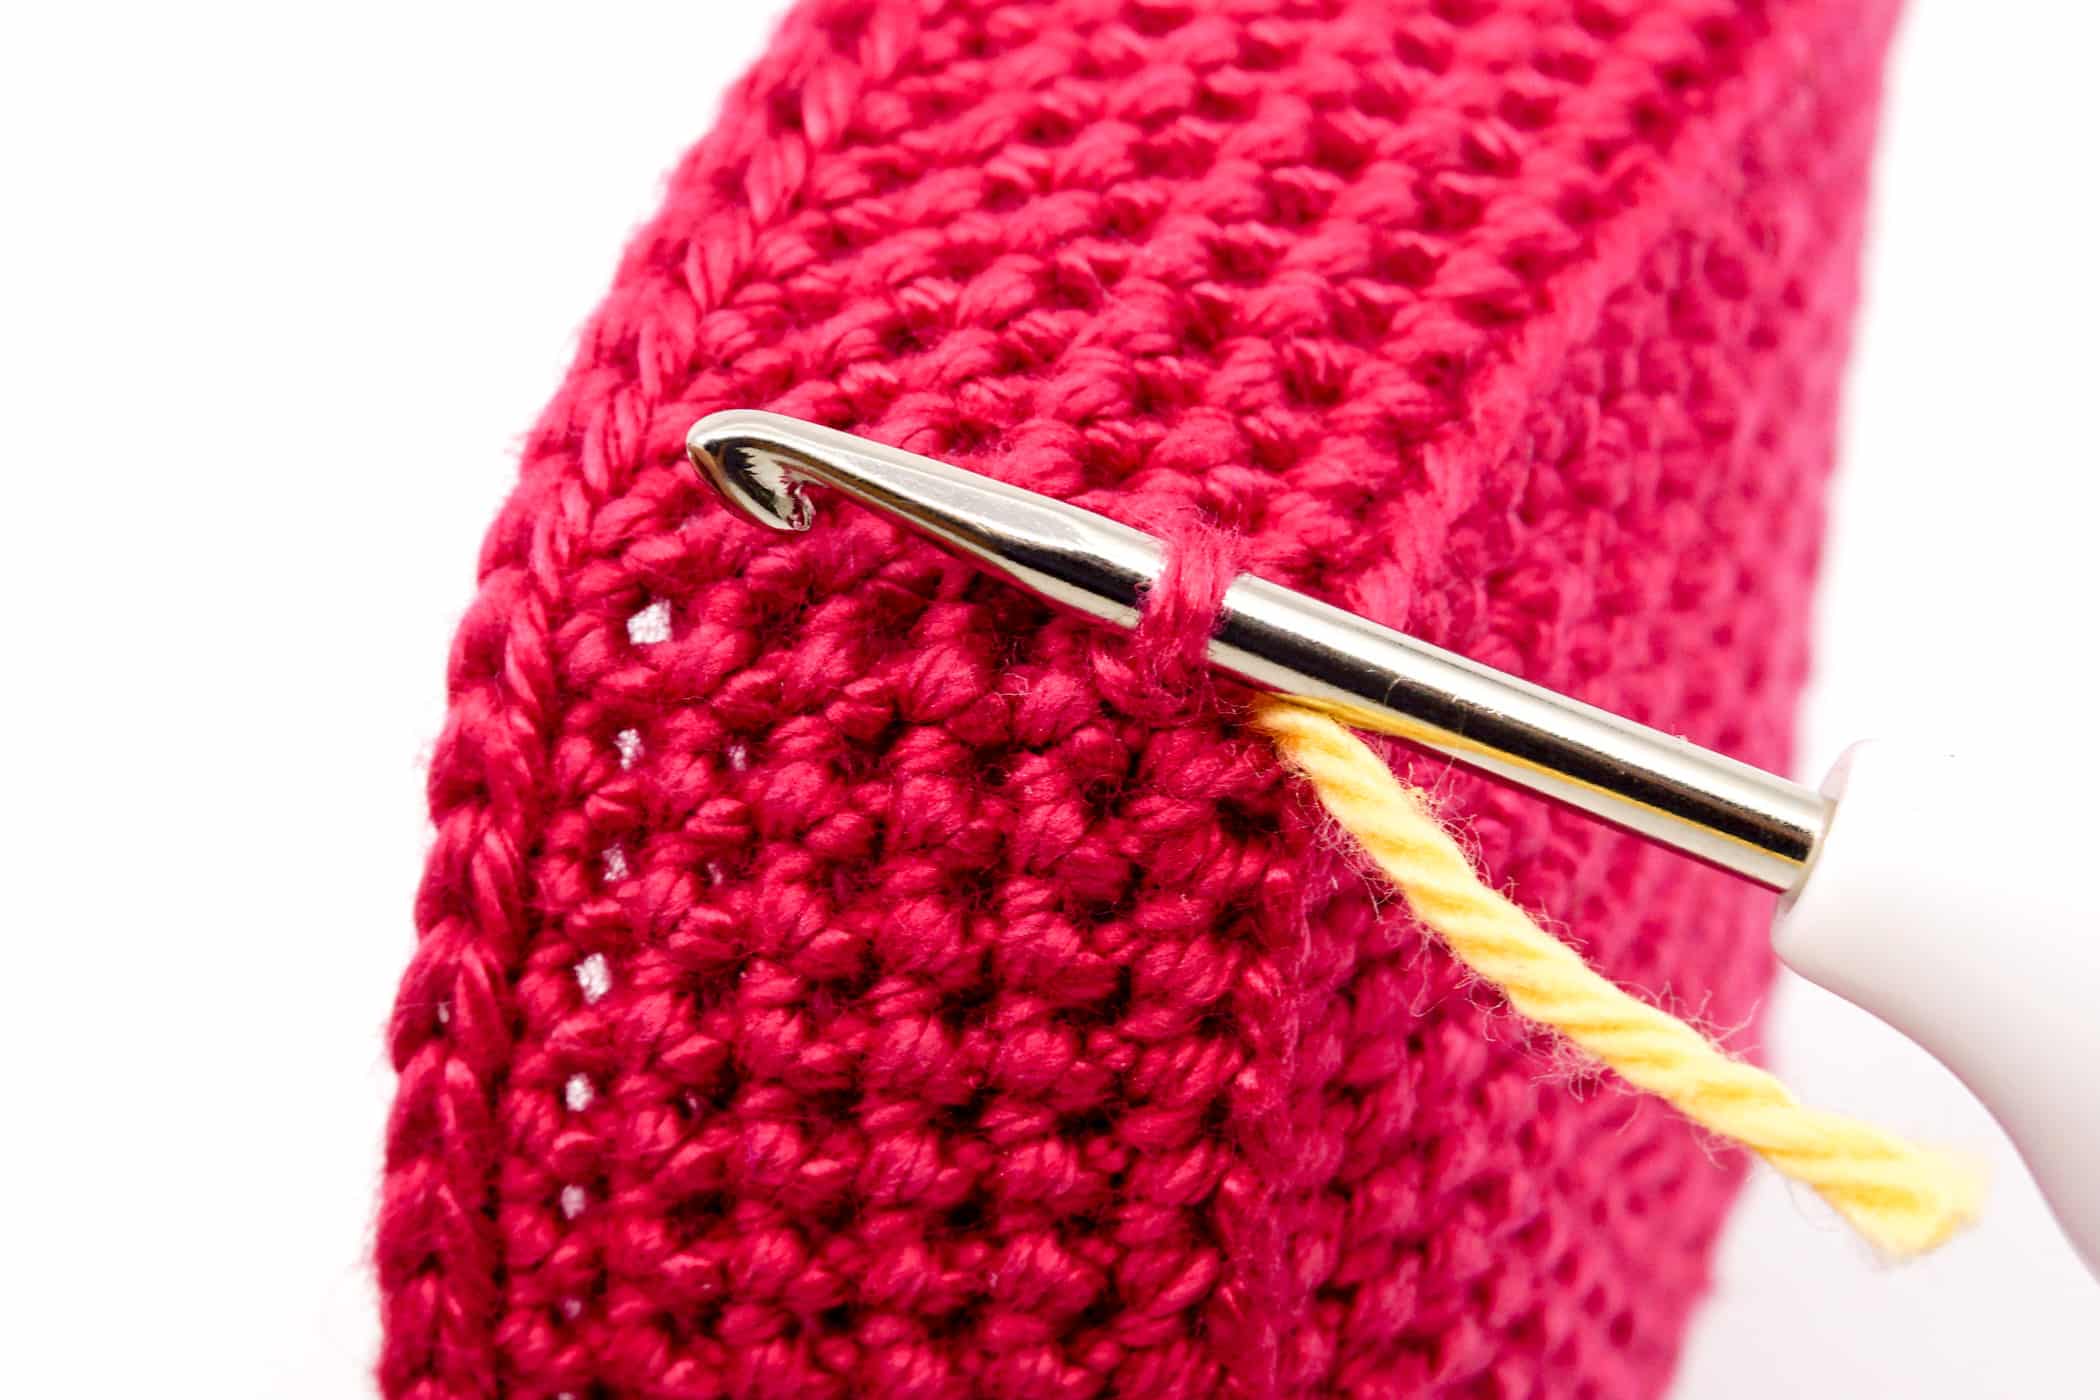

Continue by pushing through the next stitch directly above the current stitch, yarn over the thread, pull it through the stitch and then directly through the loop on the crochet hook.
Now repeat this until the last stitch which is directly before the slip stitch round.
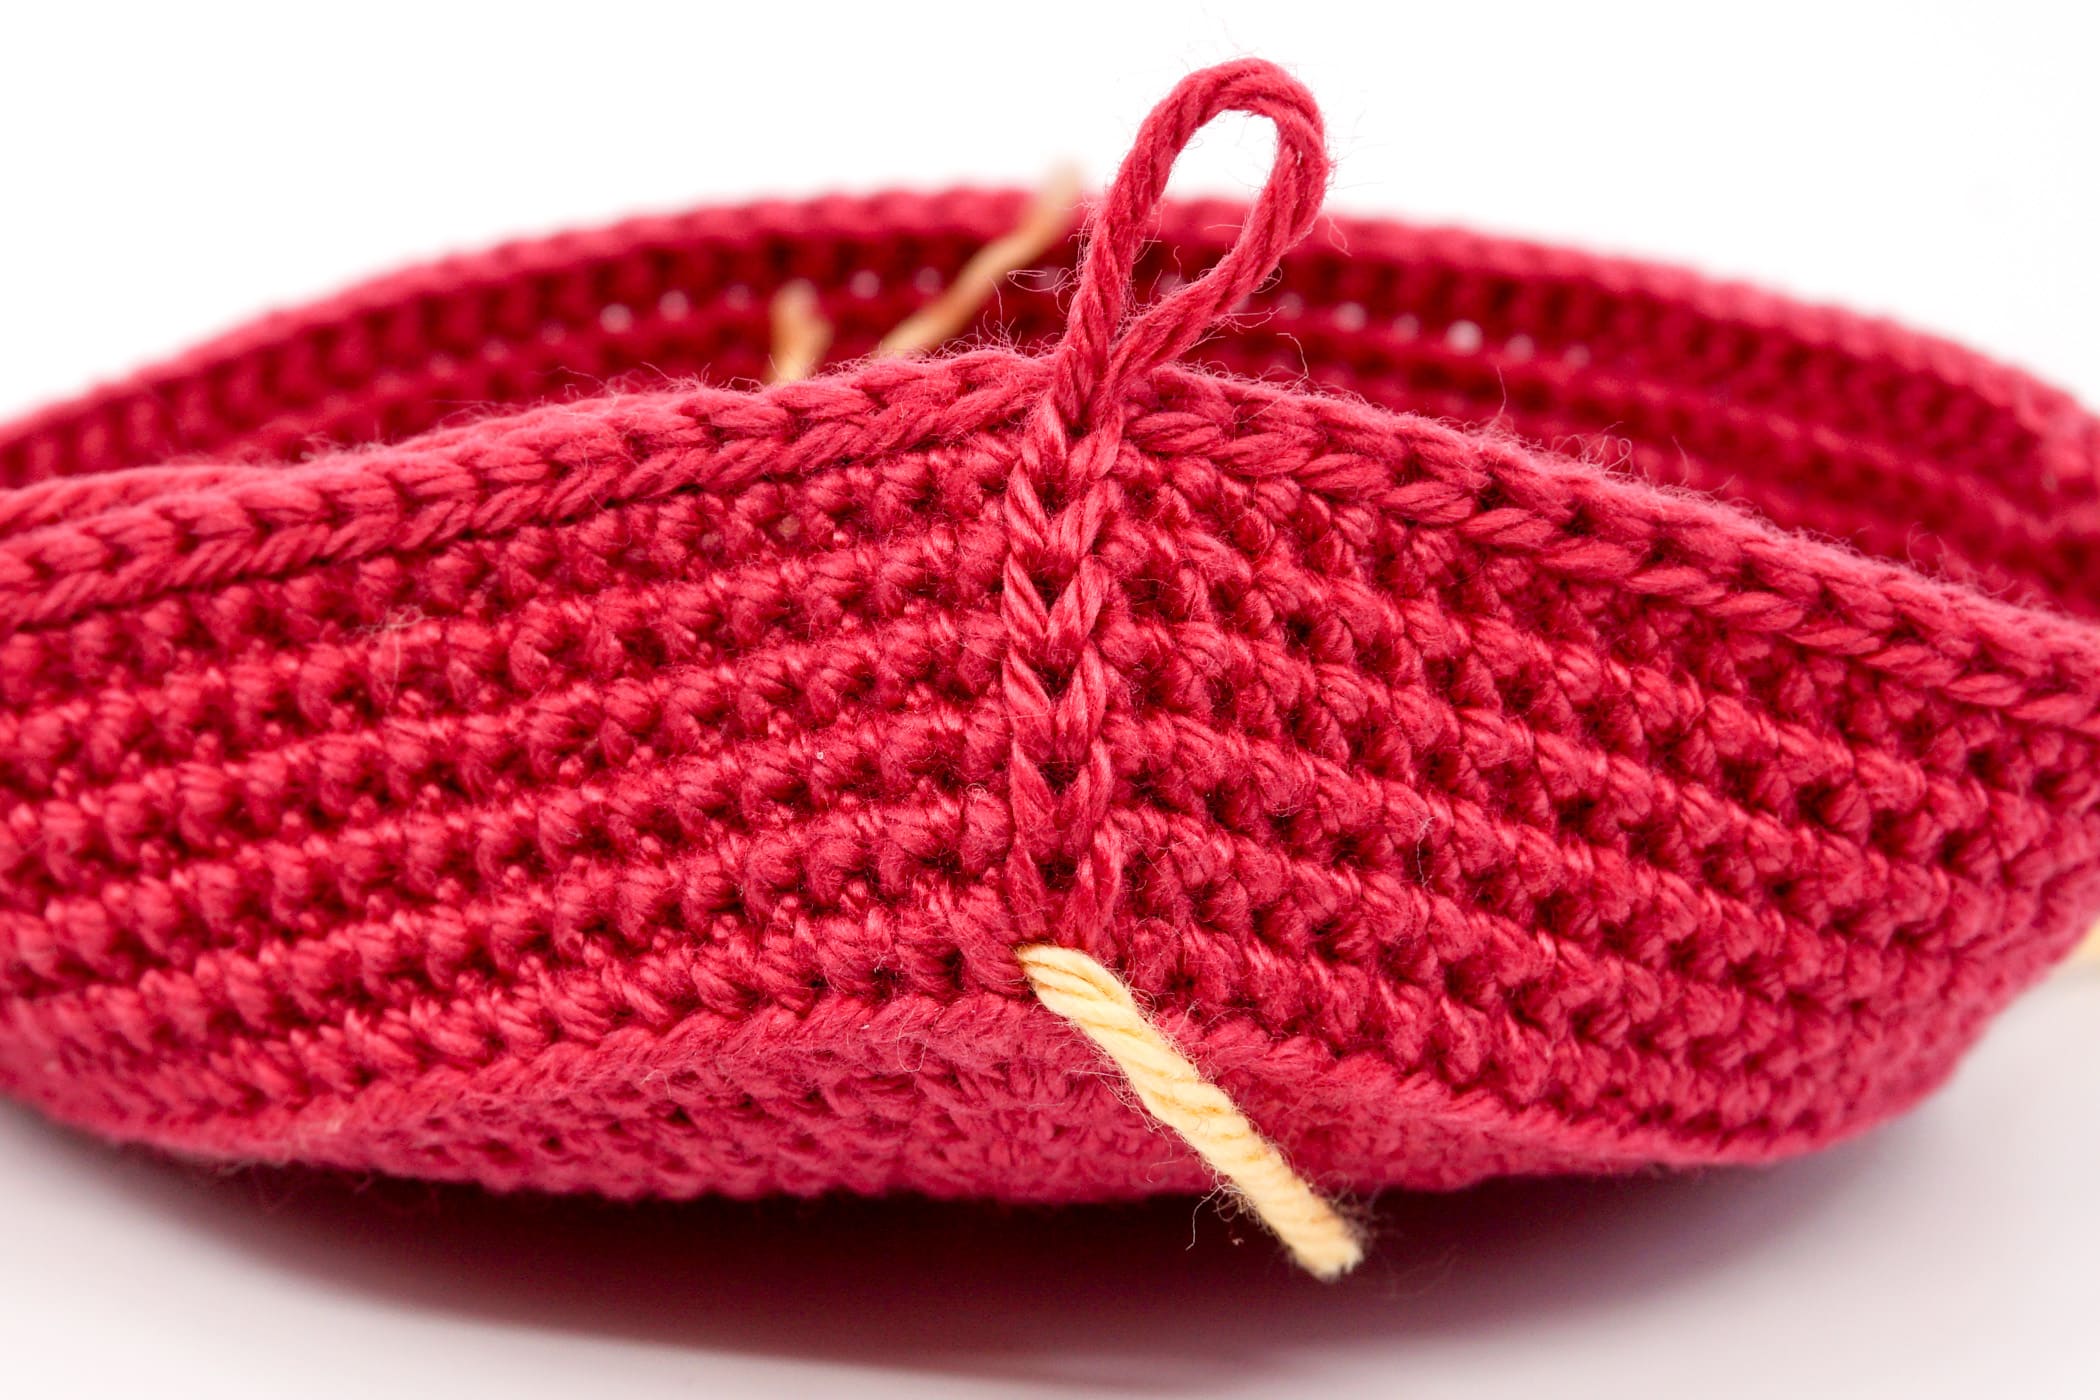
Cut the thread, pull out the thread and weave in. Finally, weave in the threads inside. Now repeat this on all four corners on the box and the lid.


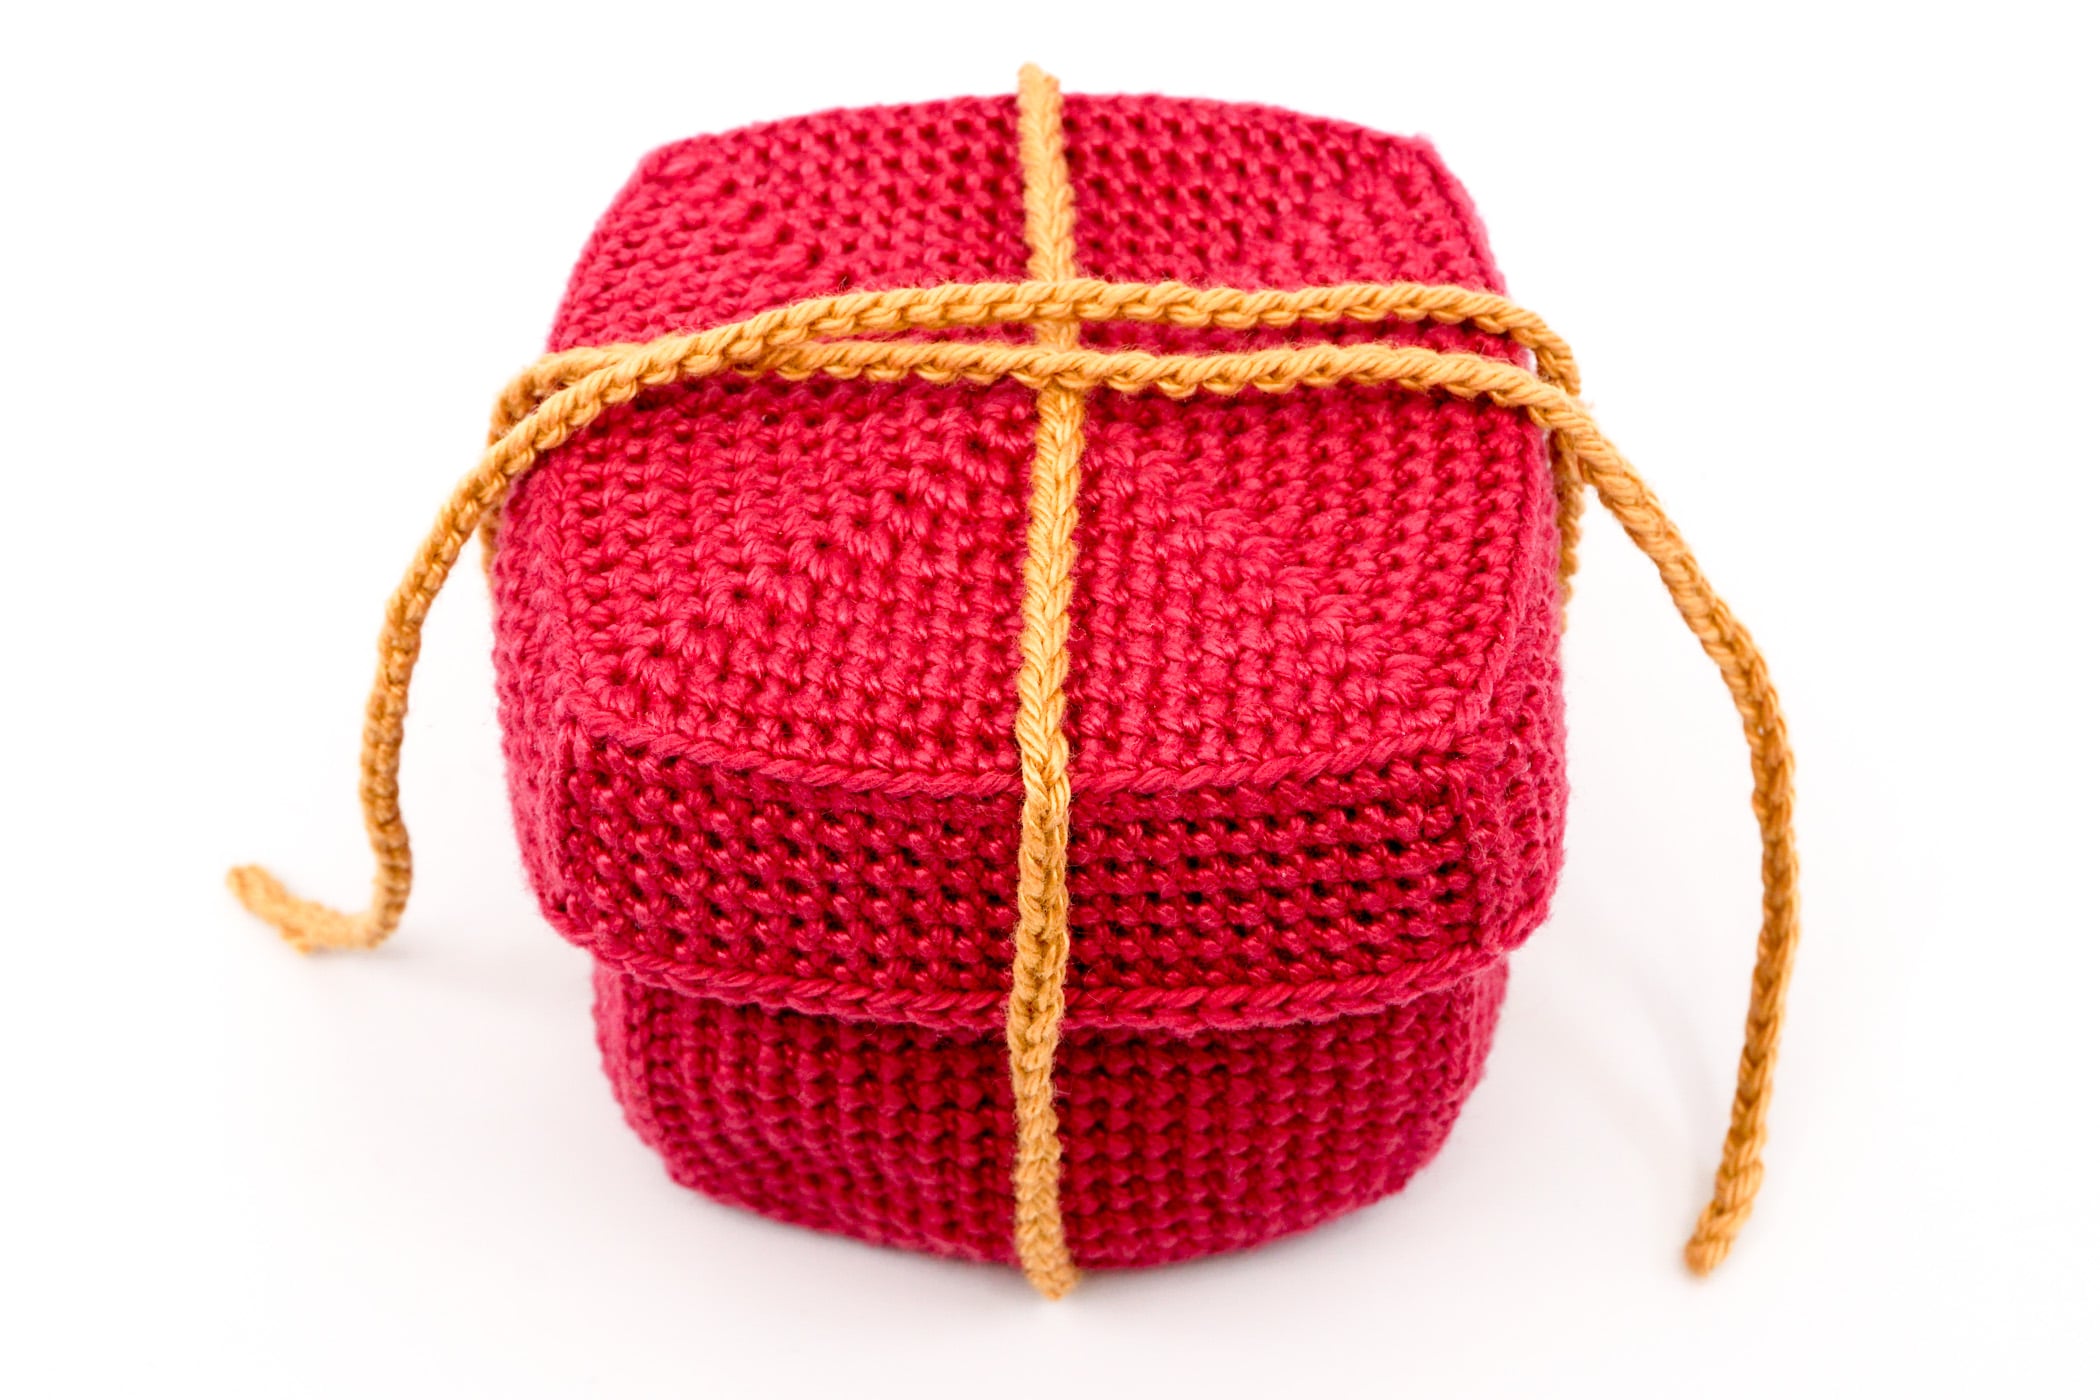
Knot the Ribbon: First, place the center of the ribbon on the lid of the gift box so that the string is the same length on both sides.
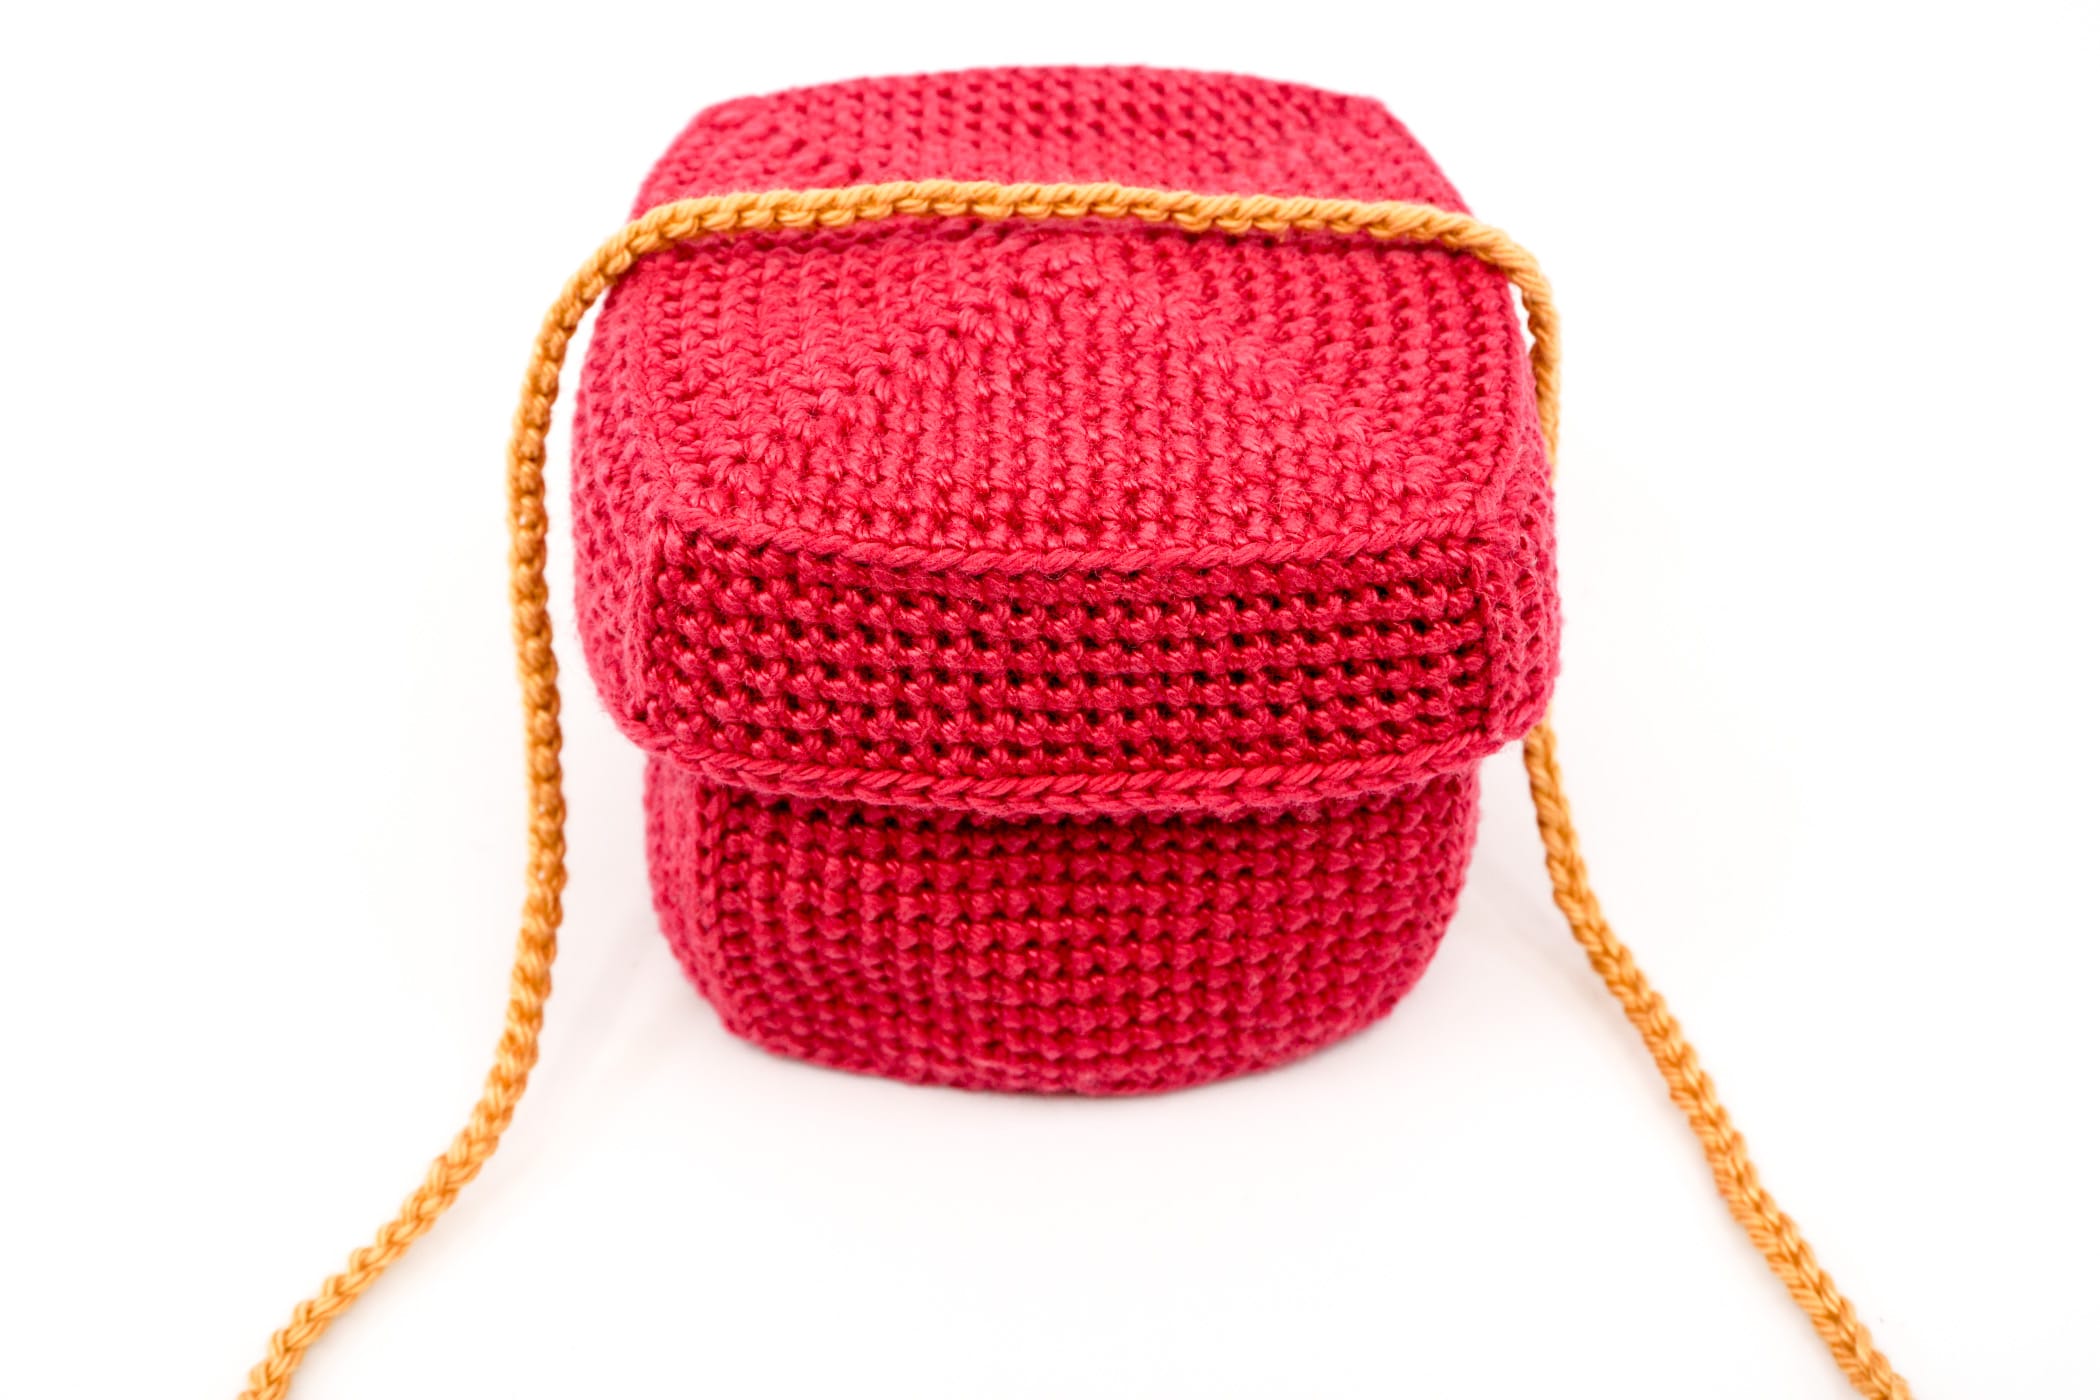
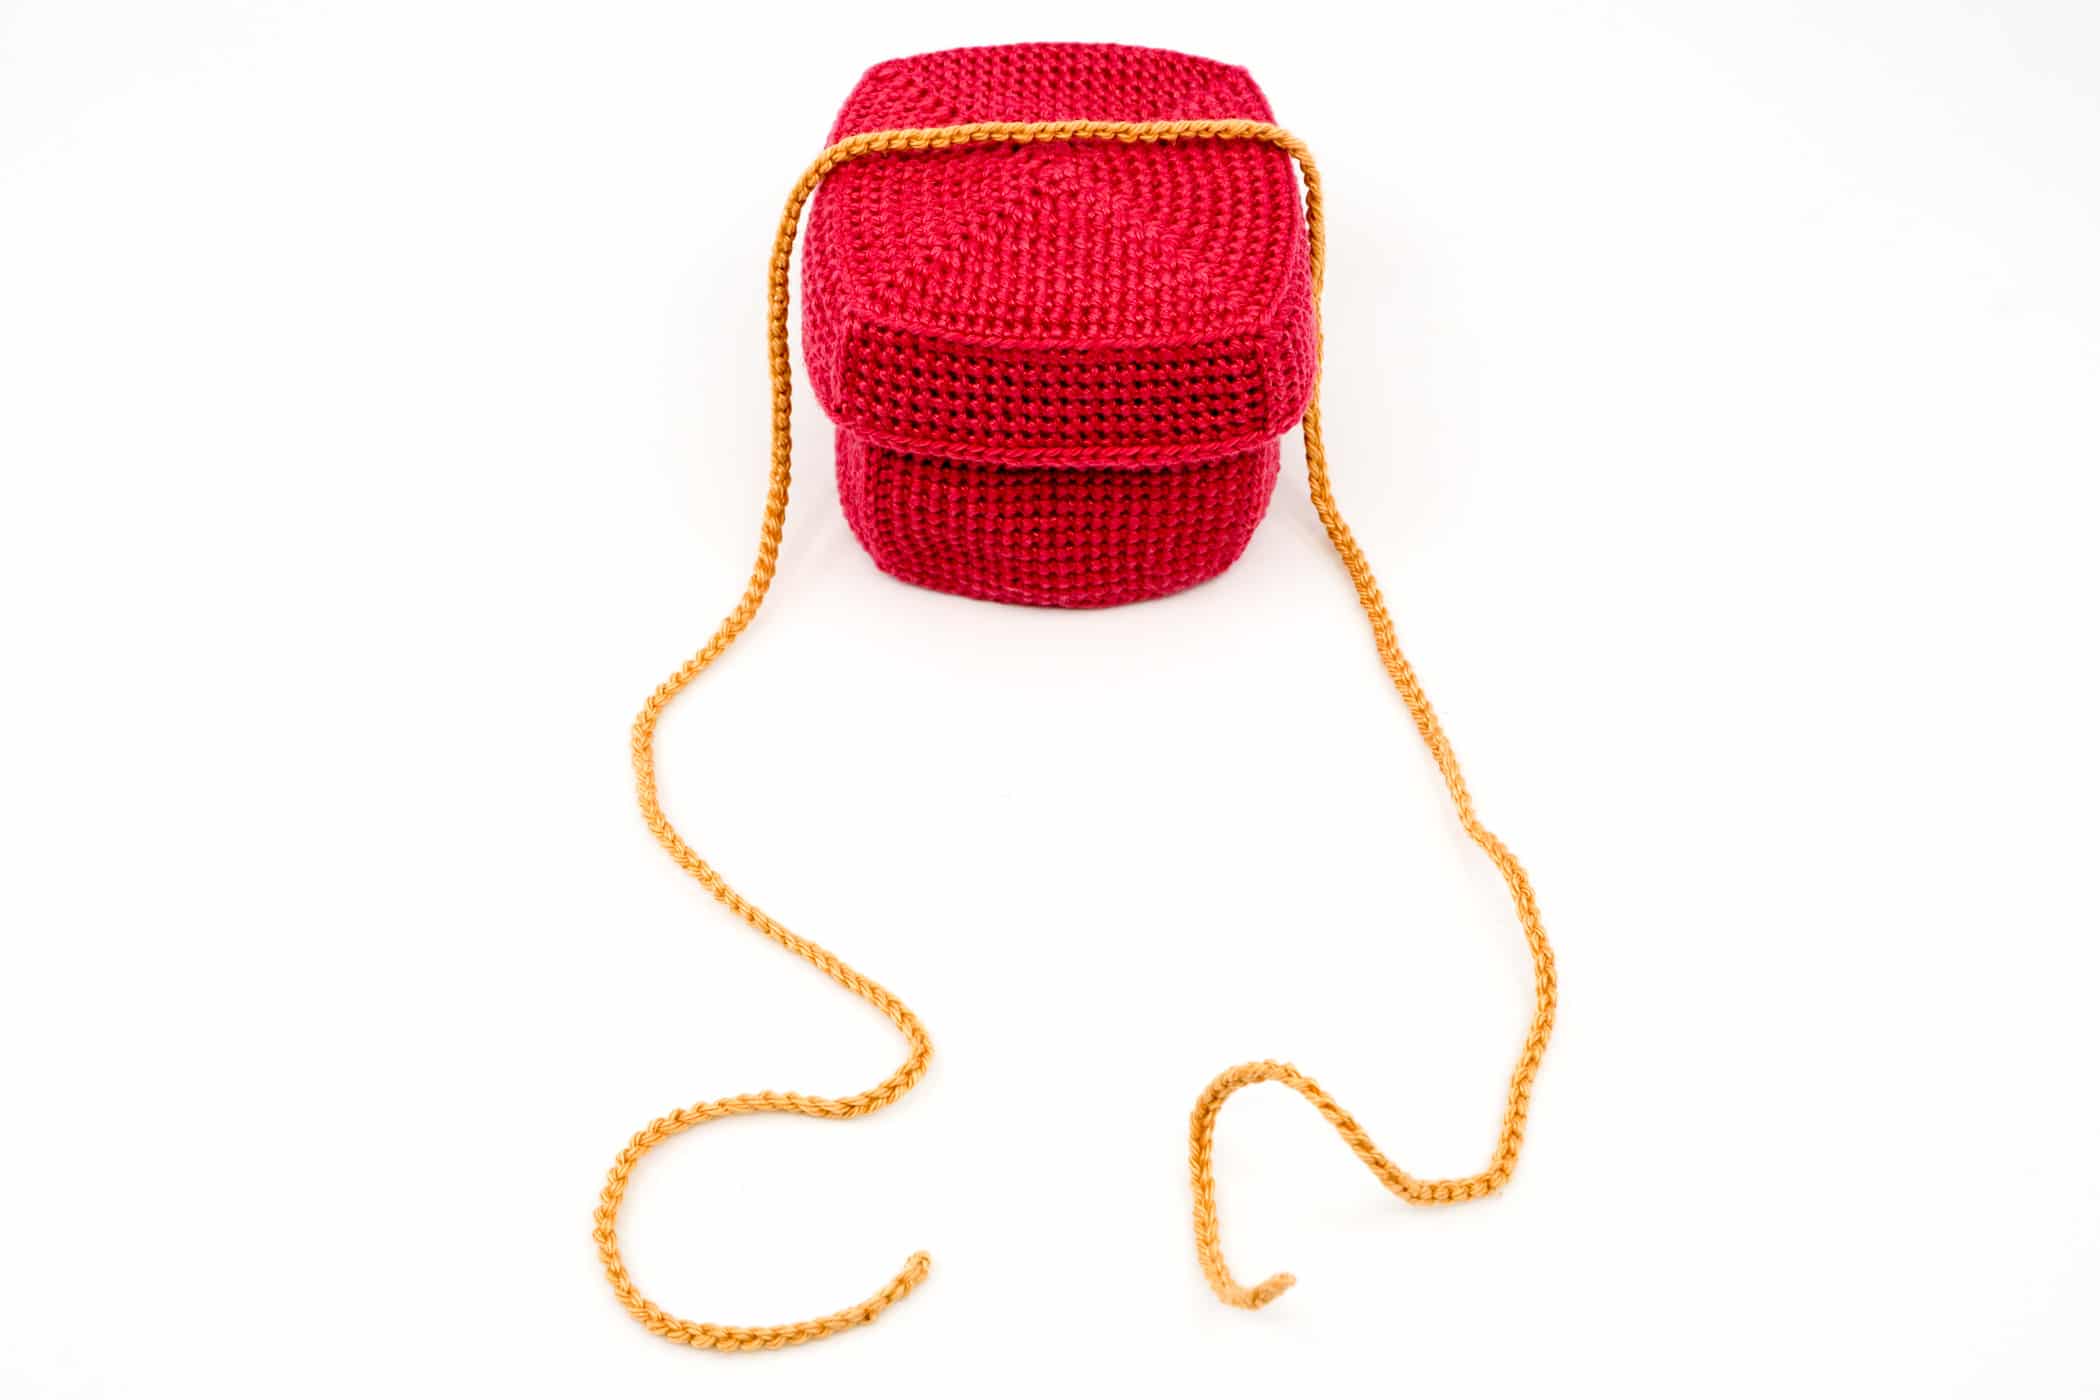
Then turn the gift box over and wrap the strings around each other once, running them back up the other sides where there is no ribbon yet.


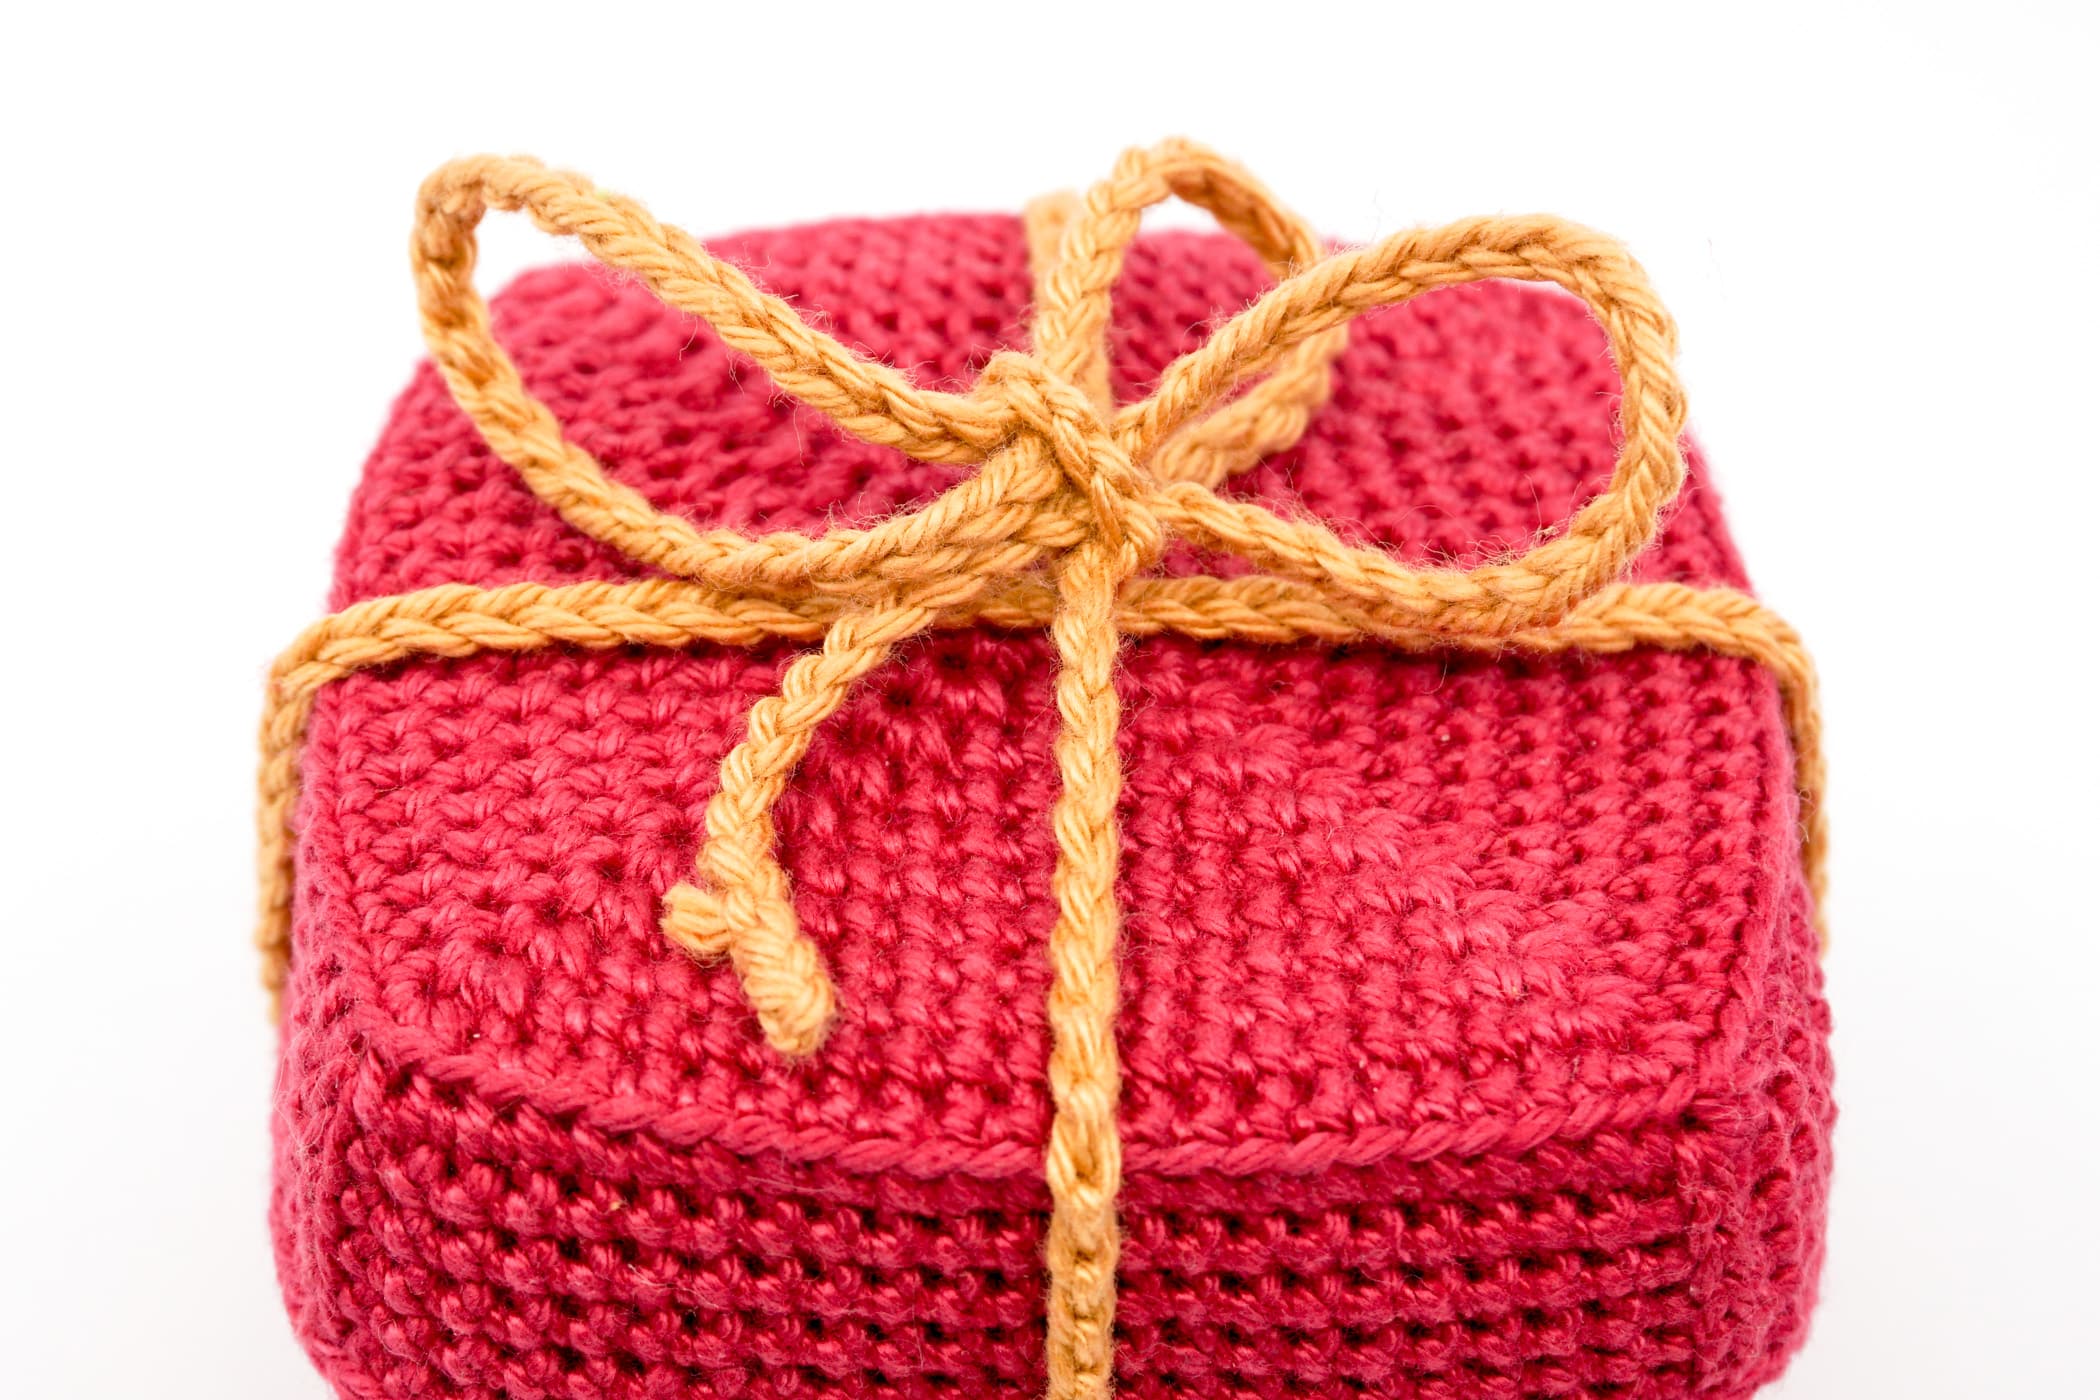
Turn the box over again and tie a loop.
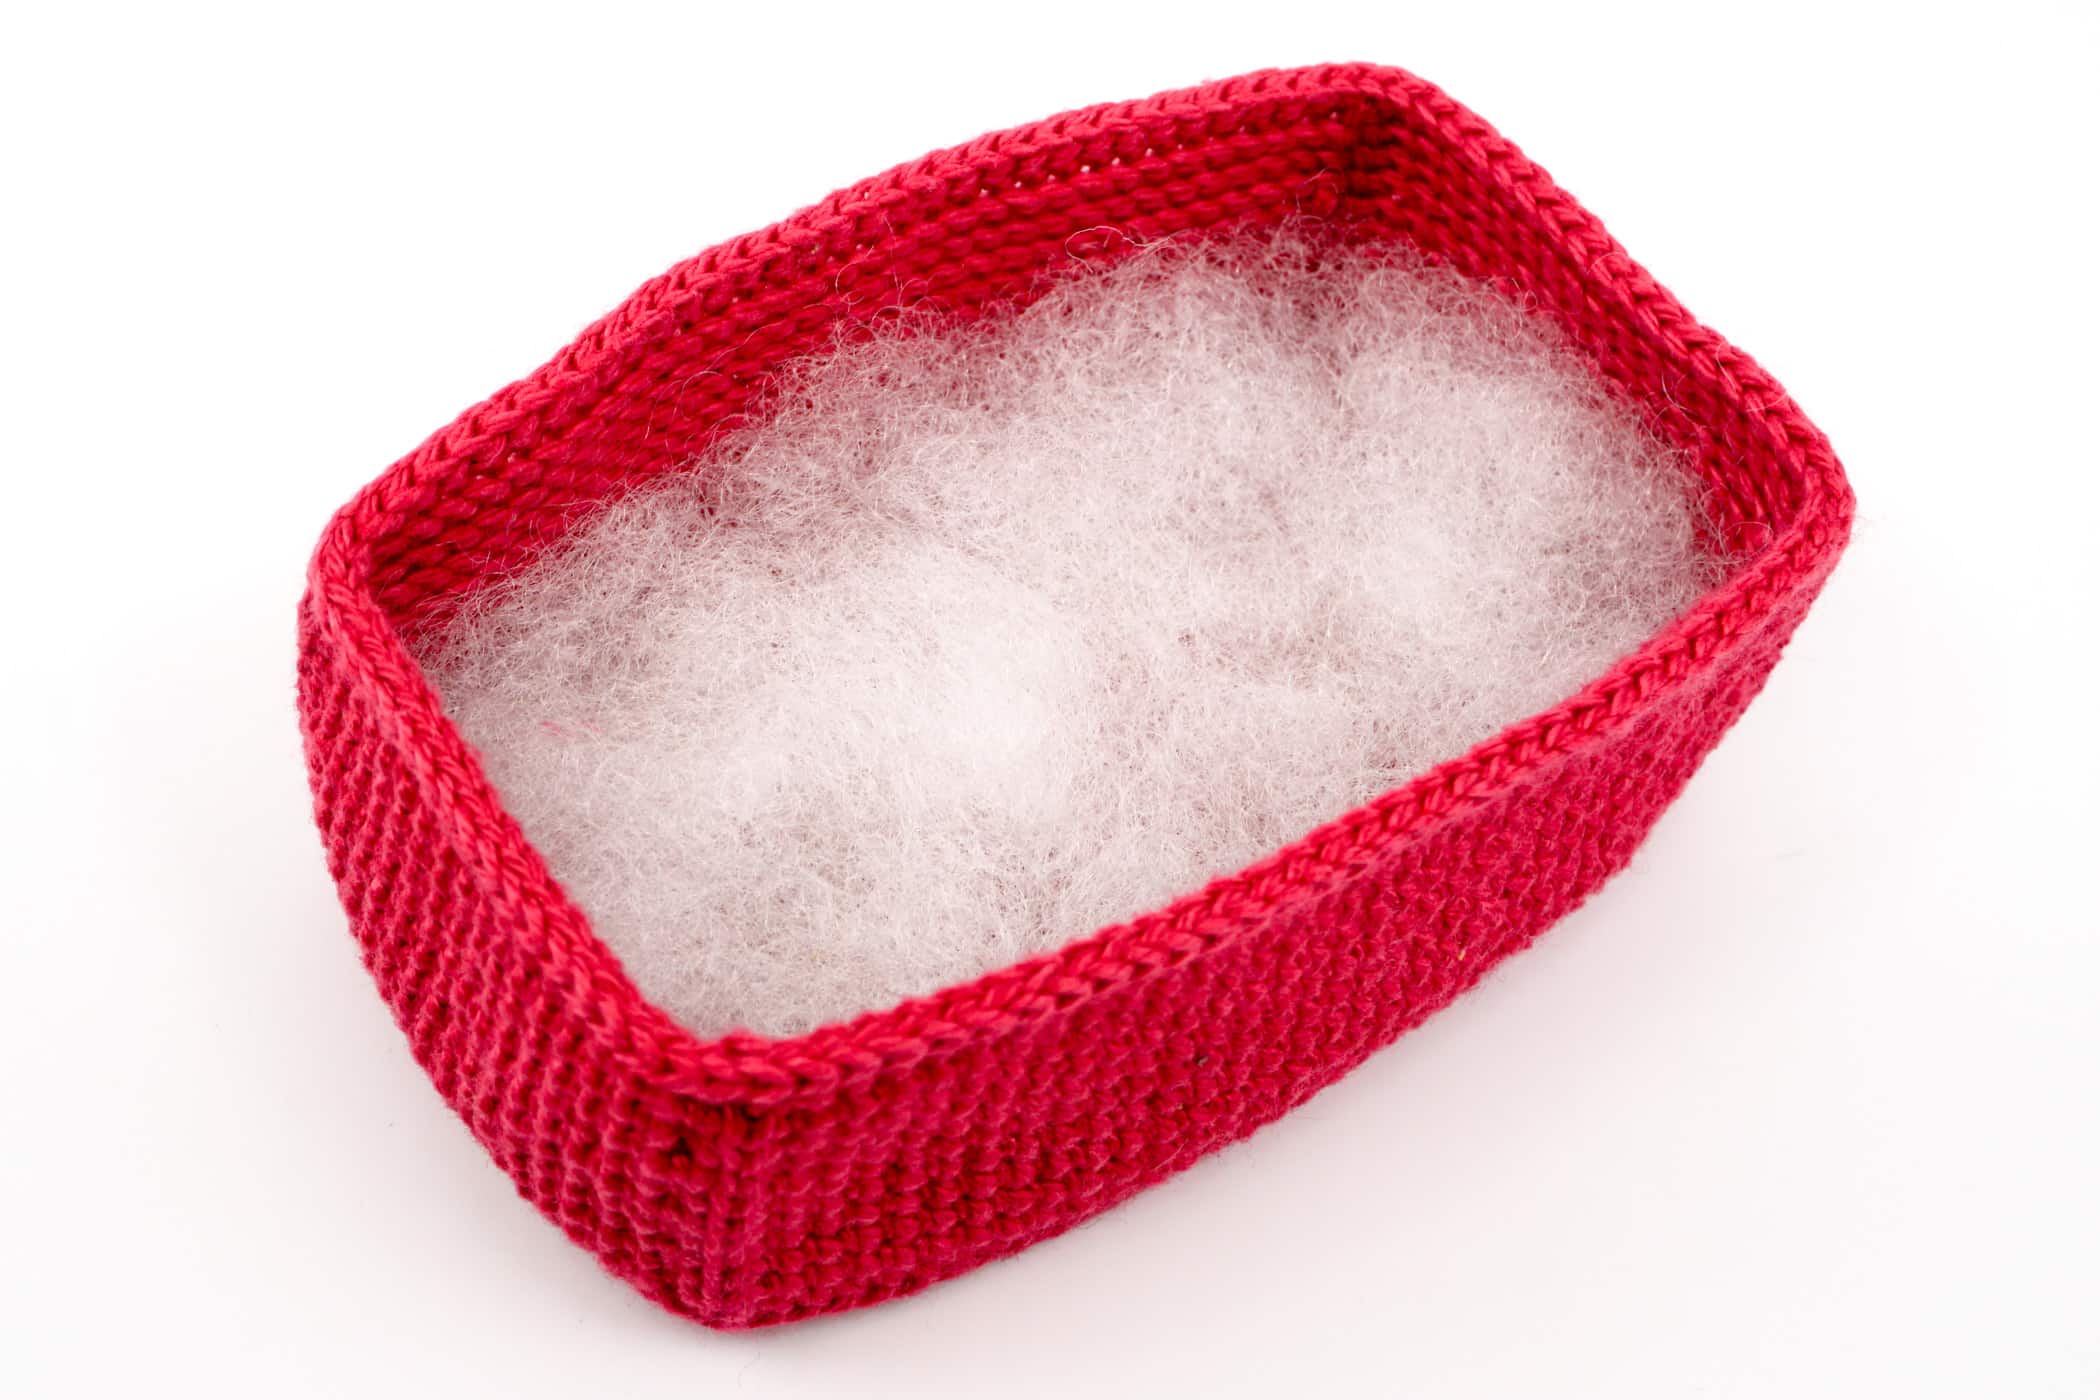
Fill the Gift Box with Polyfill: To present the contents of the gift box a little more attractive, you can fill the inside with some polyfill or other materials and then place your amigurumi on top.
Now your gift box is ready to give away! Look forward to the bright faces of your loved ones.
DONE!