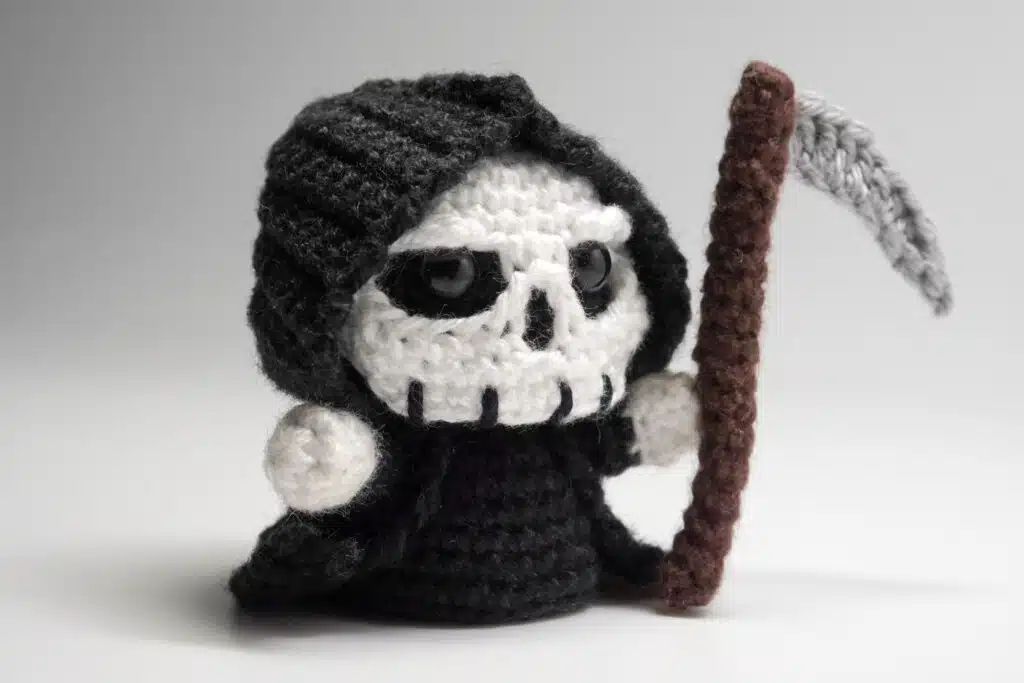
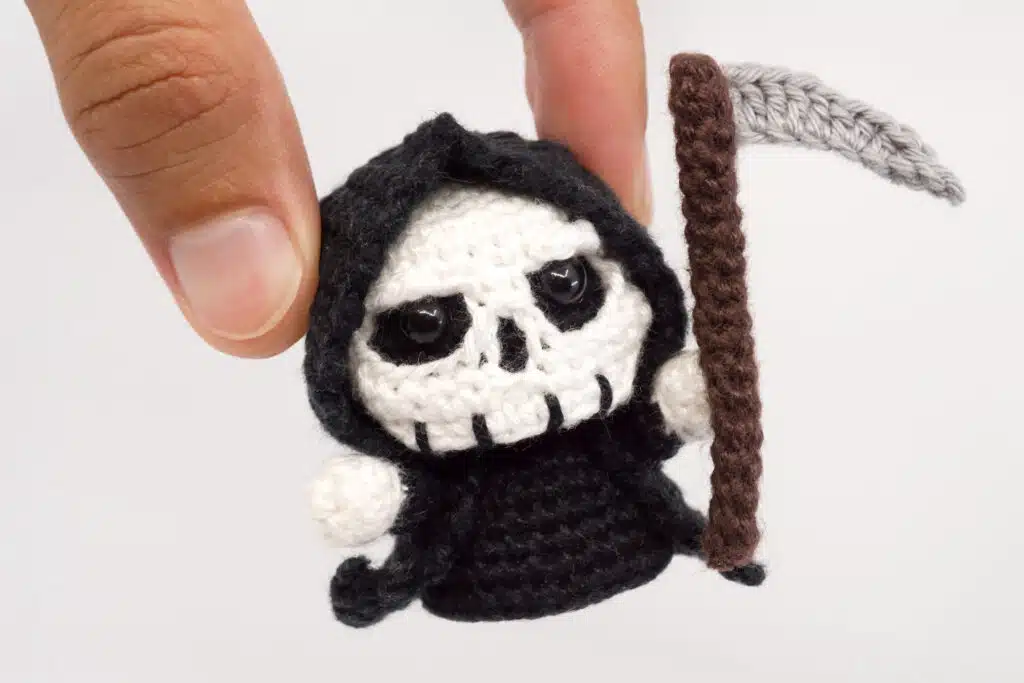
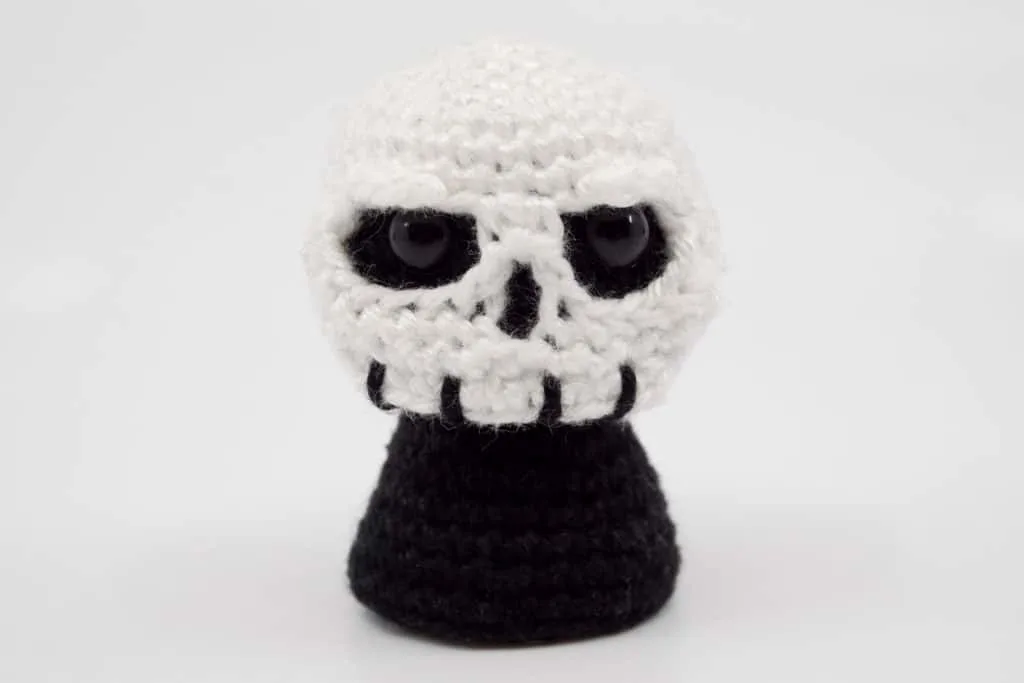
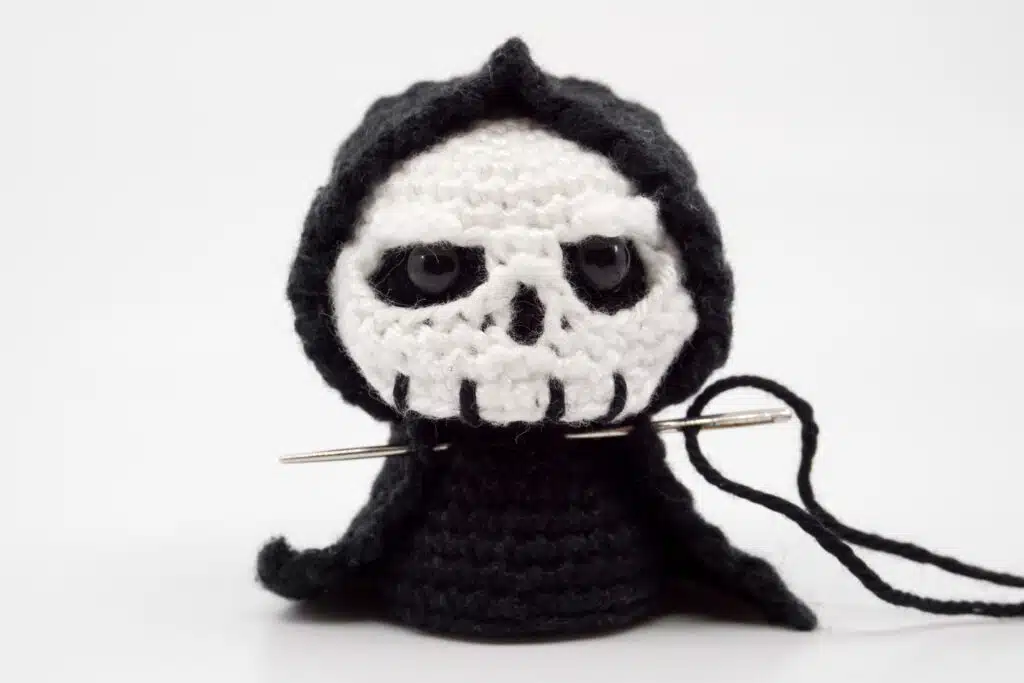
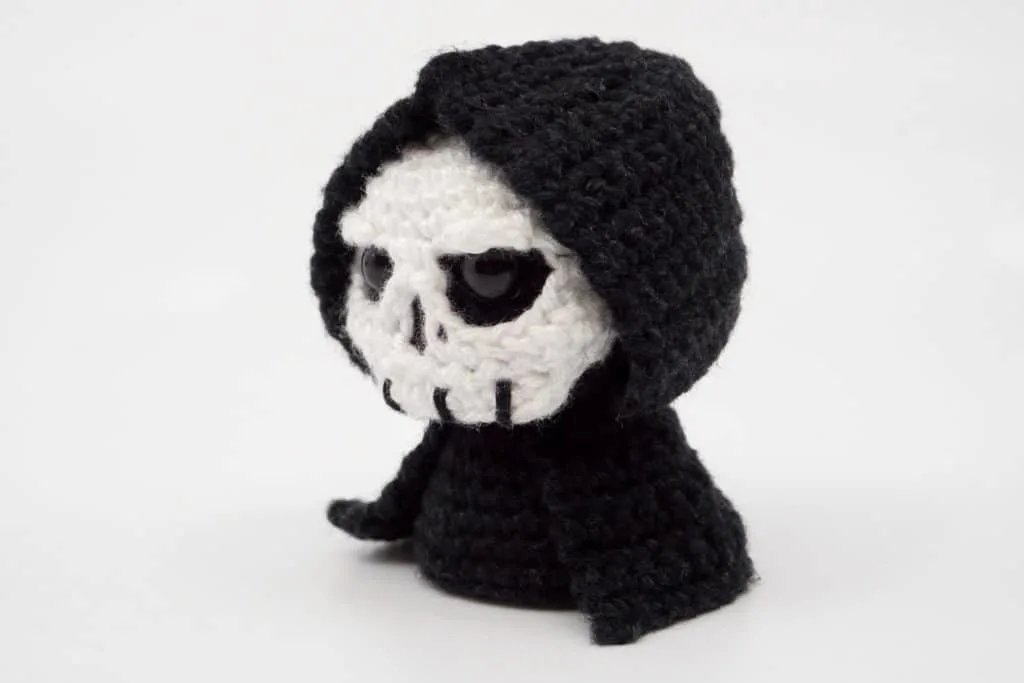
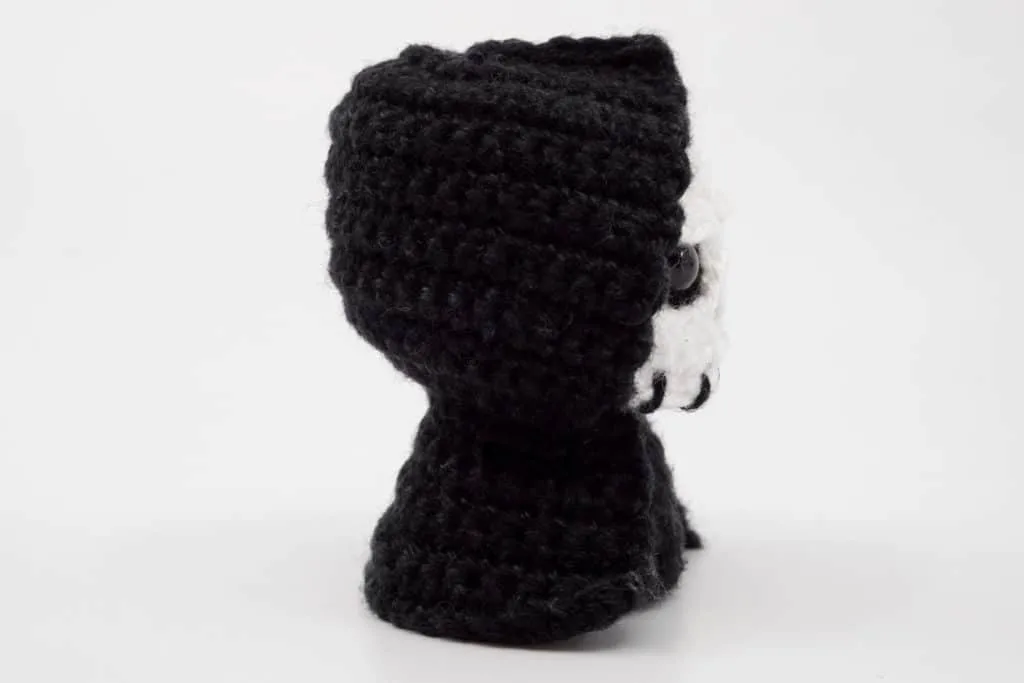
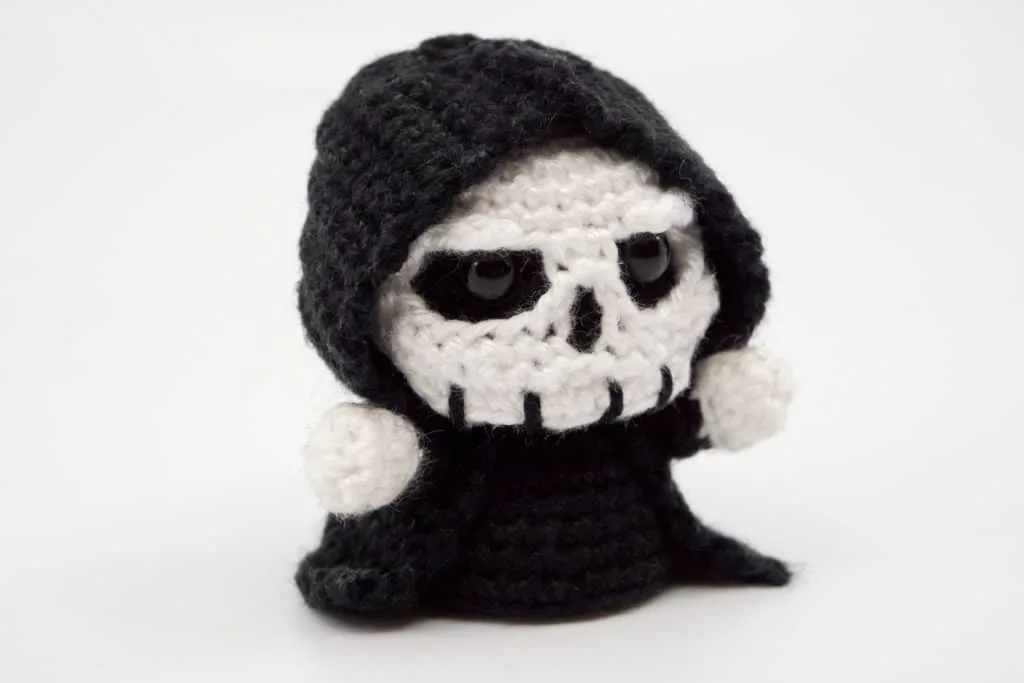
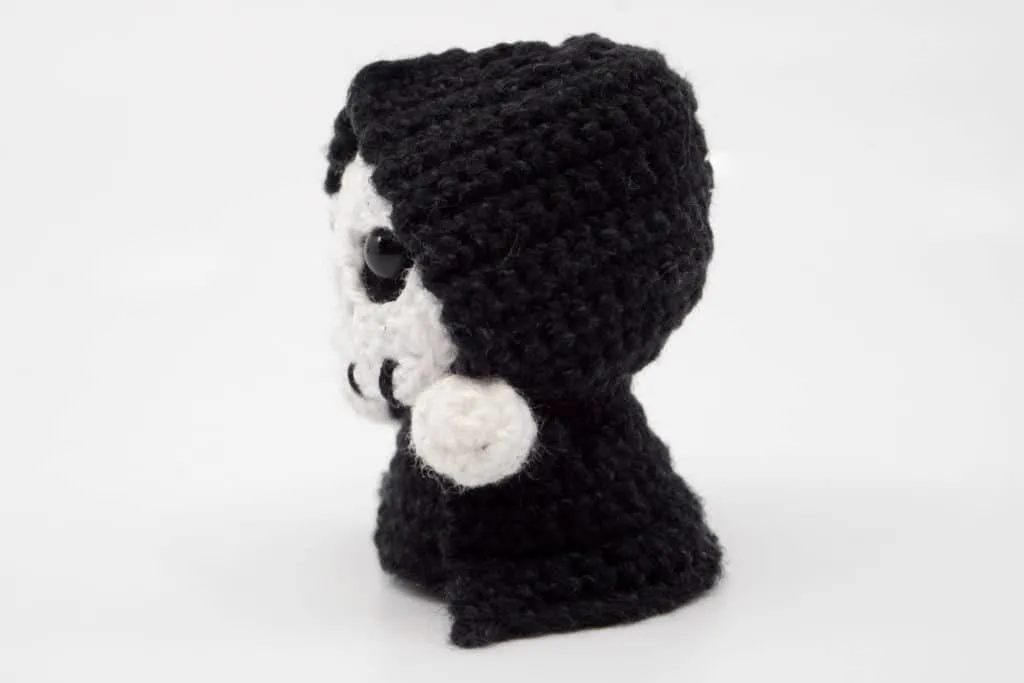
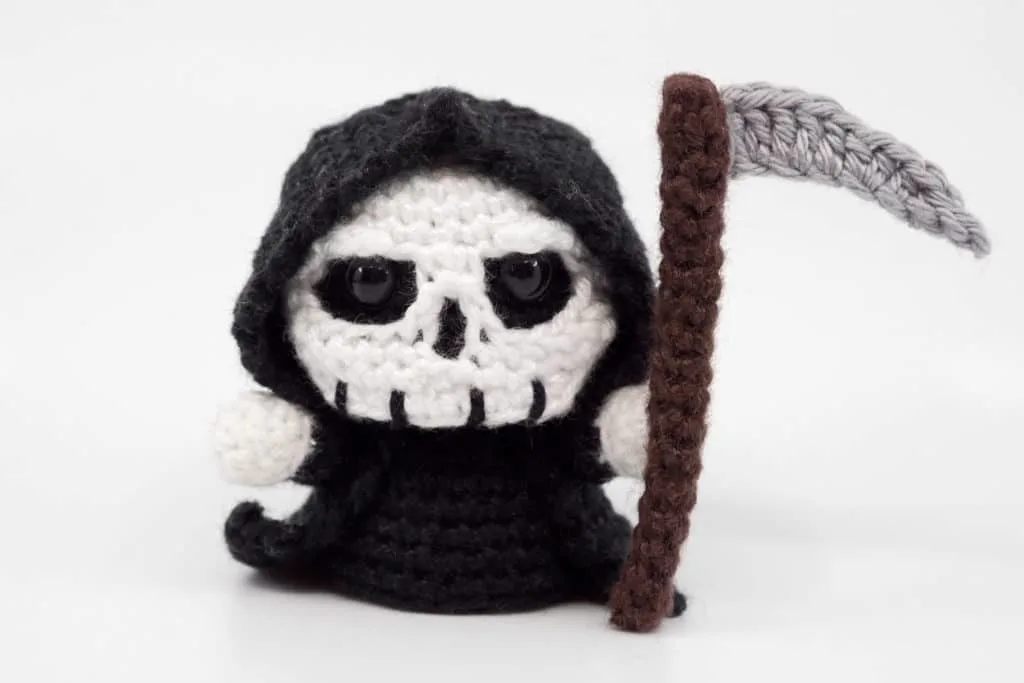
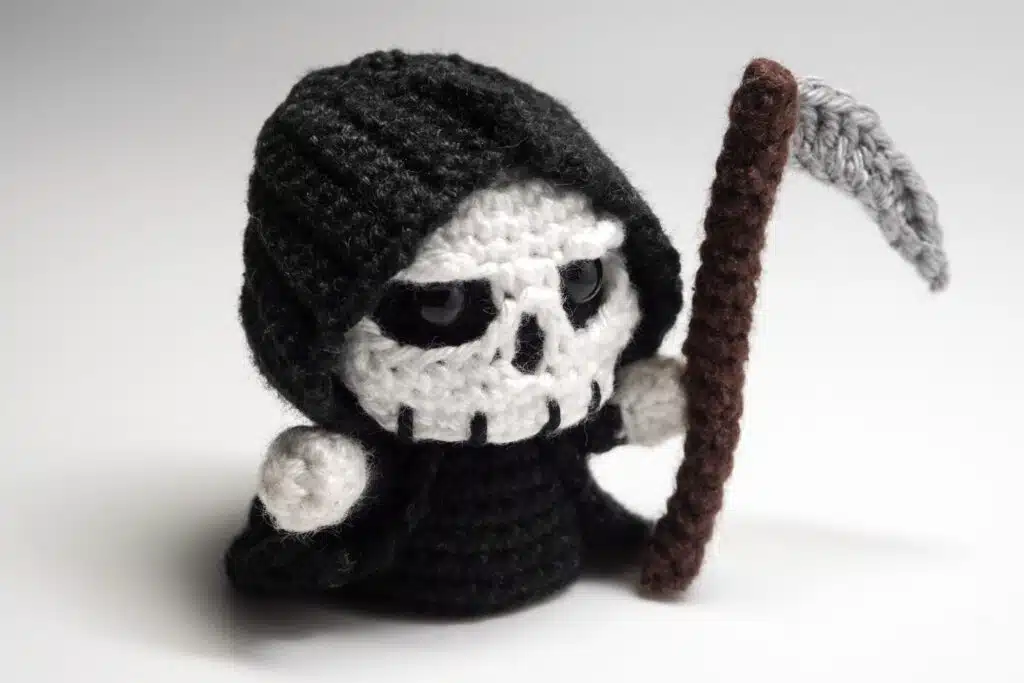
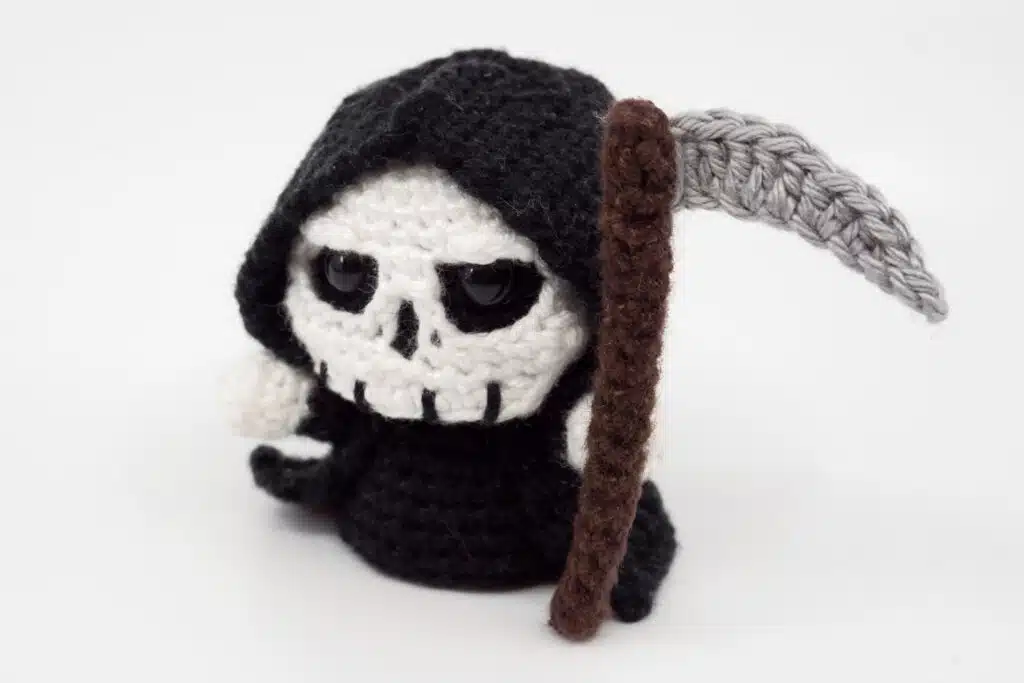
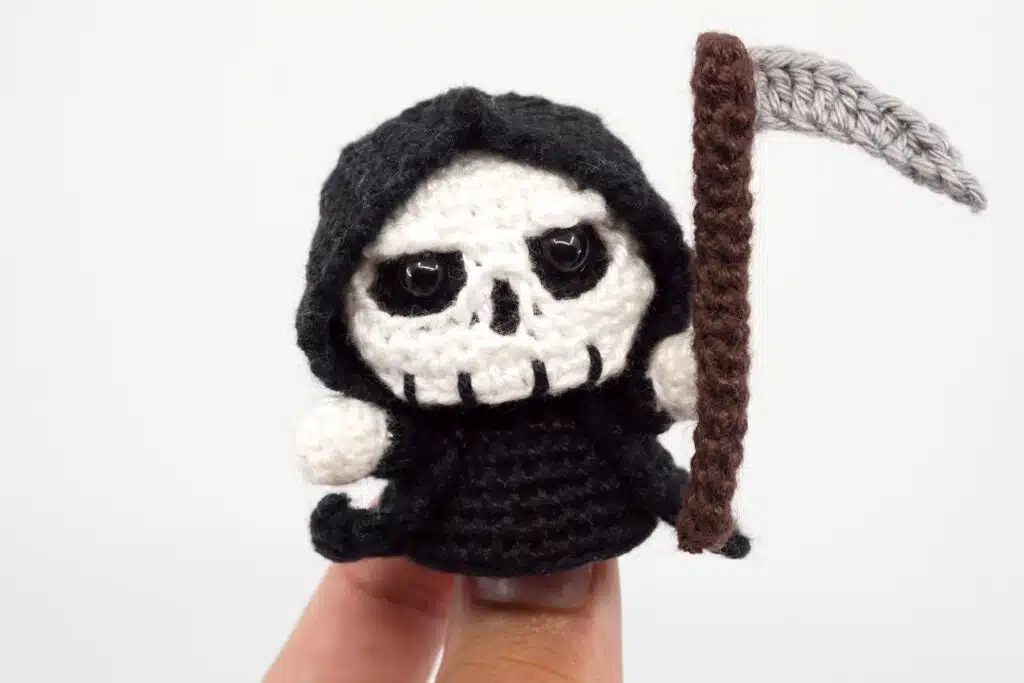
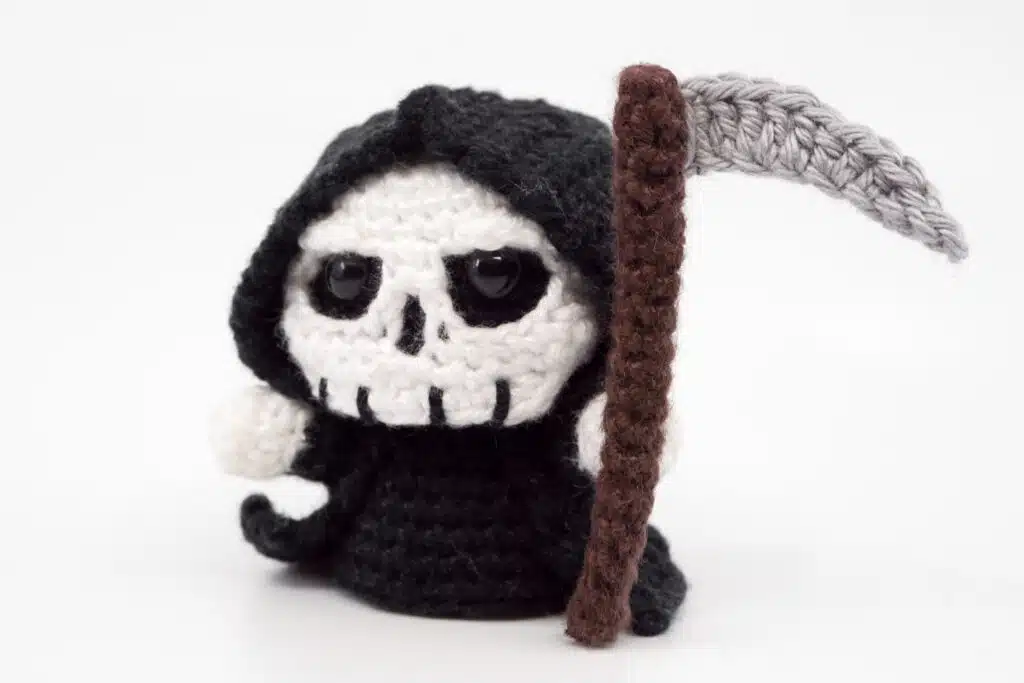
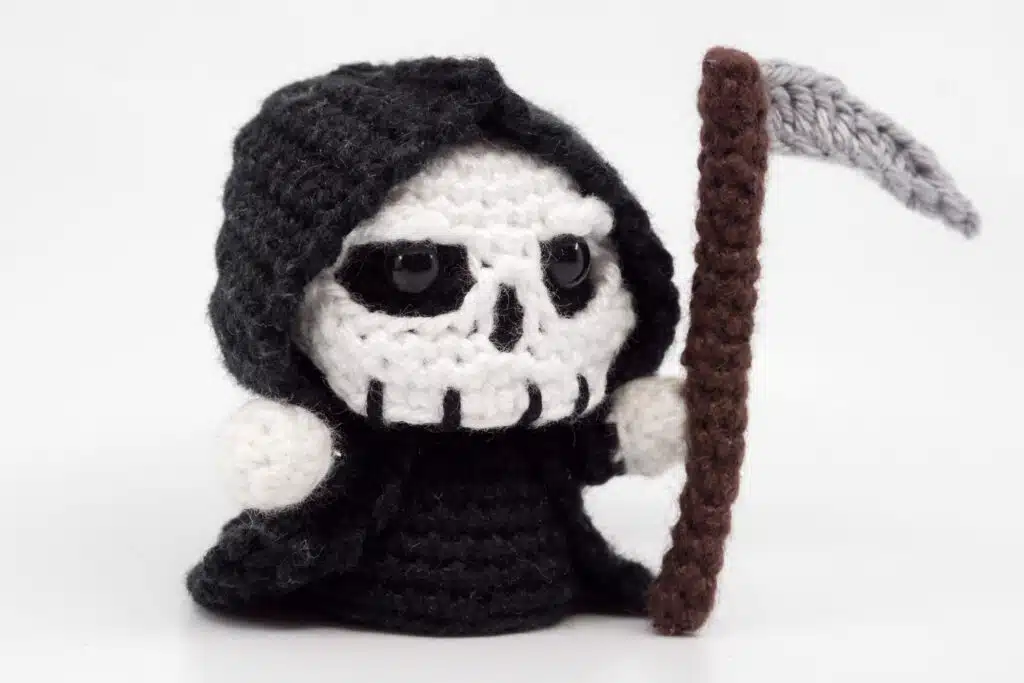
Whether known as Godfather Death or Grim Reaper, Death has a big problem with his public image.
The Grim Reaper was, when he took the job, a radiantly handsome bachelor in the bloom of his youth, with wavy hair and a steady friendly smile on his face.
However, the job of escorting people into posterity is a long-term affair, and moisturizers only help for the first 100 years in the long run.
Therefore, do not be afraid of the Grim Reaper, actually he is quite a nice guy who just wants to show you the way. Time leaves its mark not only on us mortals.
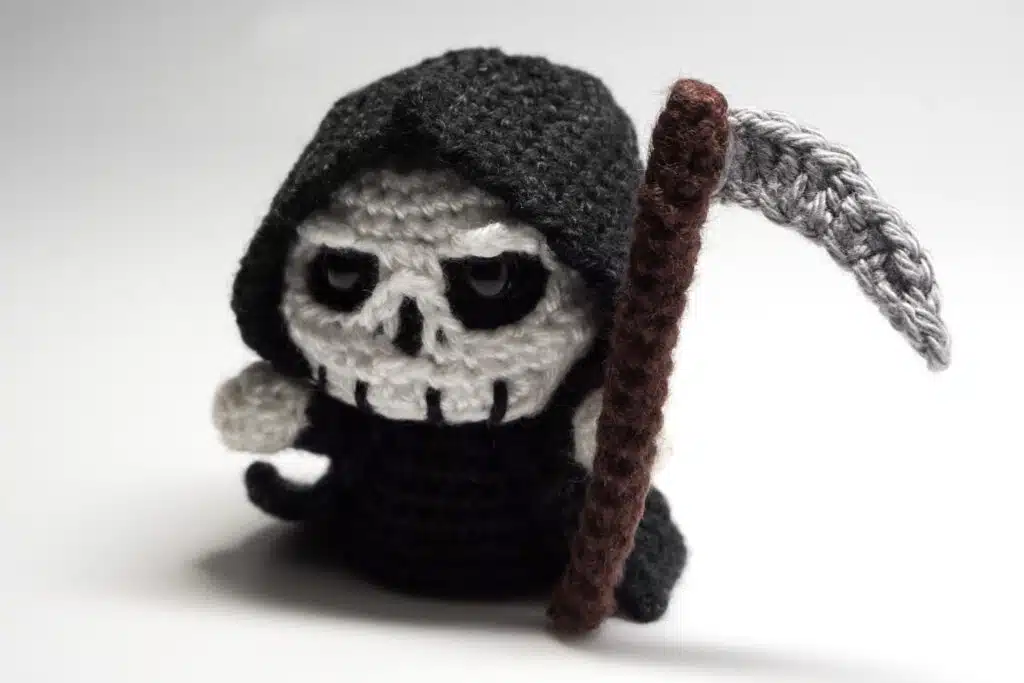
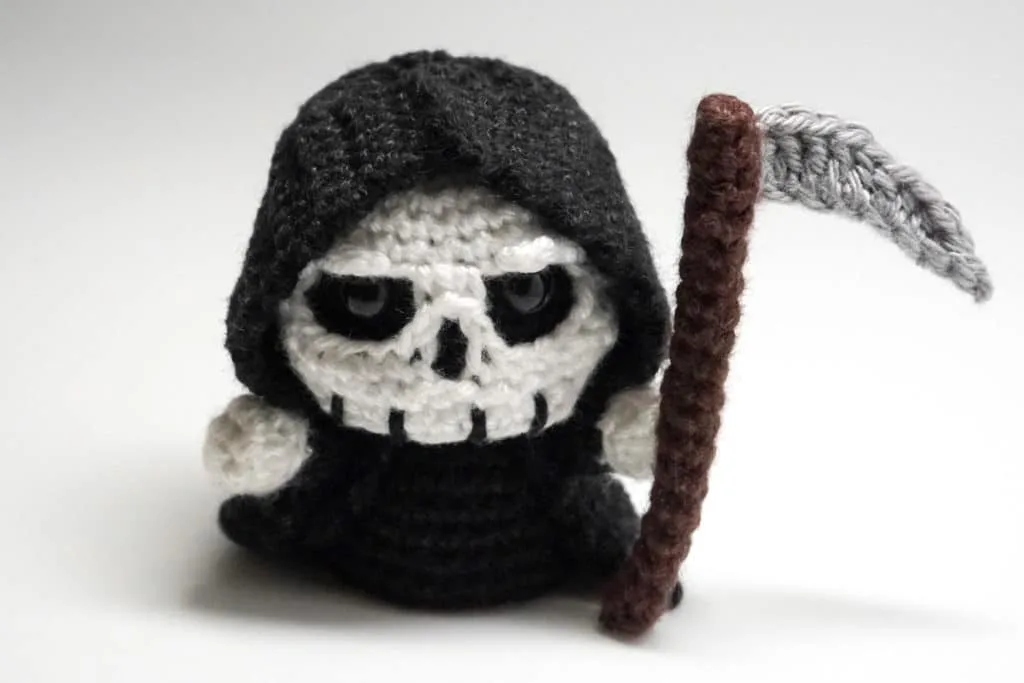
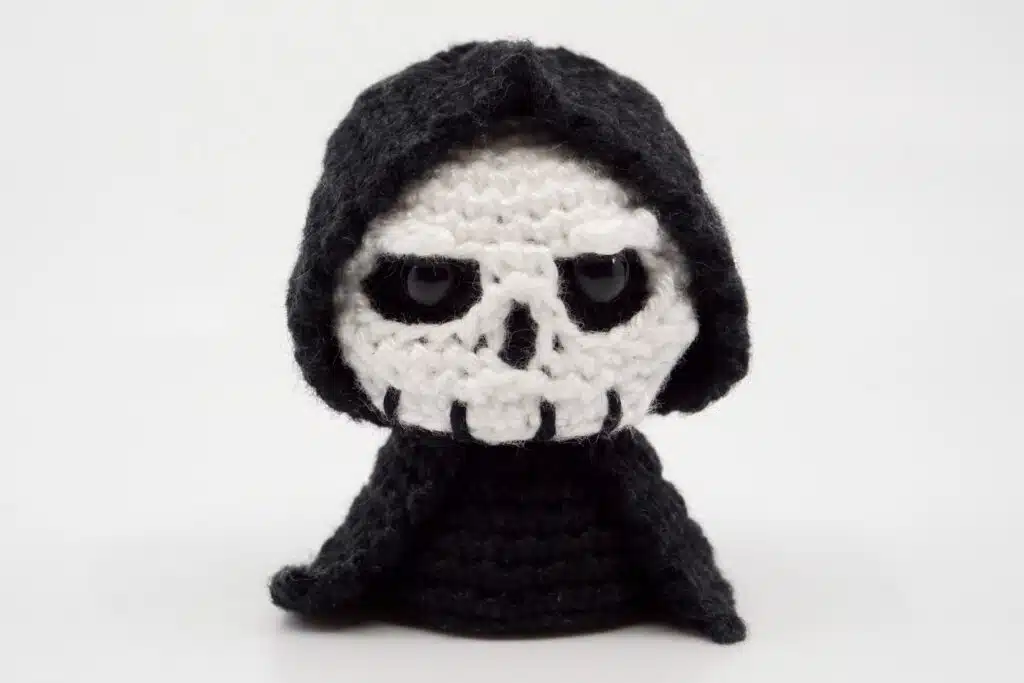
This crochet Grim Reaper is crocheted with chain stitches, slip stitches, single crochet stitches, half double crochet stitches and double crochet stitches in spiral rounds and in rows and is easy to crochet.
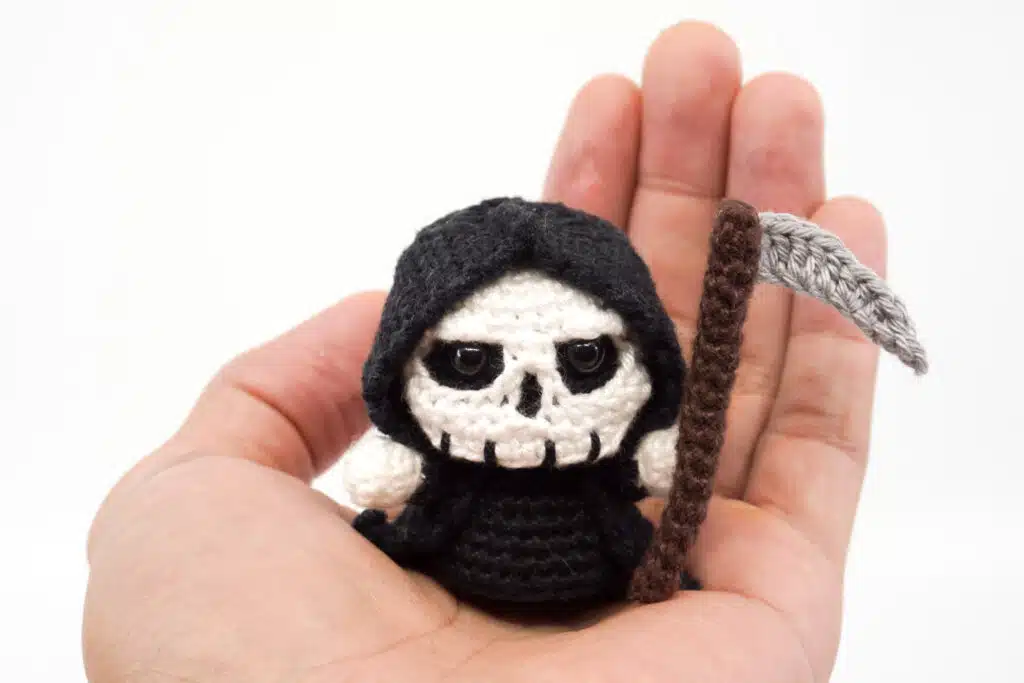
The depicted amigurumi Grim Reaper has been crocheted with the “Schachenmayr Catania” yarn with a 2.5 mm crochet hook and has a height of 5.5 cm.
Free Grim Reaper Crochet Pattern
ATTENTION: The pattern, in whole or in parts, may not be published, resold, translated, changed or exchanged in any way whatsoever!
Needed Techniques
- Slip Knot
- Magic Ring
- Chain Stitch
- Slip Stitch
- Single Crochet (sc)
- Half Double Crochet
- Double Crochet
- Increase
- Decrease
- Crochet into Front and Back Loop
- Color Change
- Close Openings
- Sewing
Needed Materials and Tools
To order the materials click on the respective link (affiliate link).
- Colors: black, white, brown, gray
- This pattern was crocheted using the “Schachenmayr Catania” yarn (100% Cotton, Meterage: 125 m, Yarn Ball Weight: 50 g, Yarn Weight: Sport – 5ply / Fine (2)) in the following colors:
- Black (Schwarz (110)), White (Weiß (106)), Coffee (Kaffee (162)), Smoke Gray (Rauchgrau (435))
- 2.5 mm Crochet Hook
- 6 mm Safety Eyes
- Polyfill
- Scissors
- Tapestry Needle
- Stitch Marker
Crochet the Head and Body
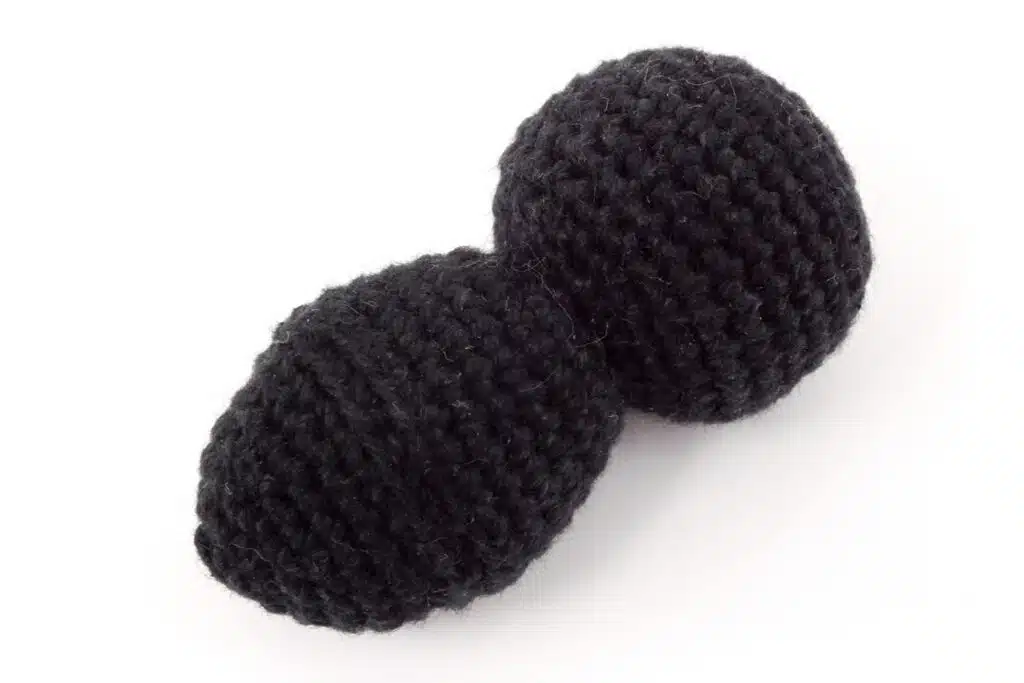
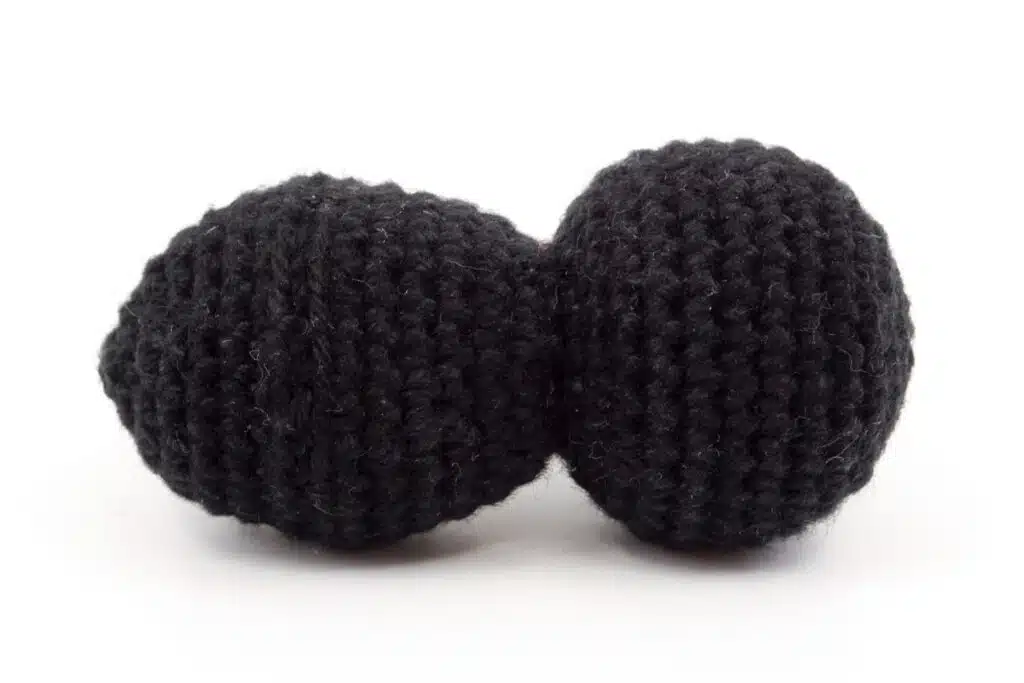
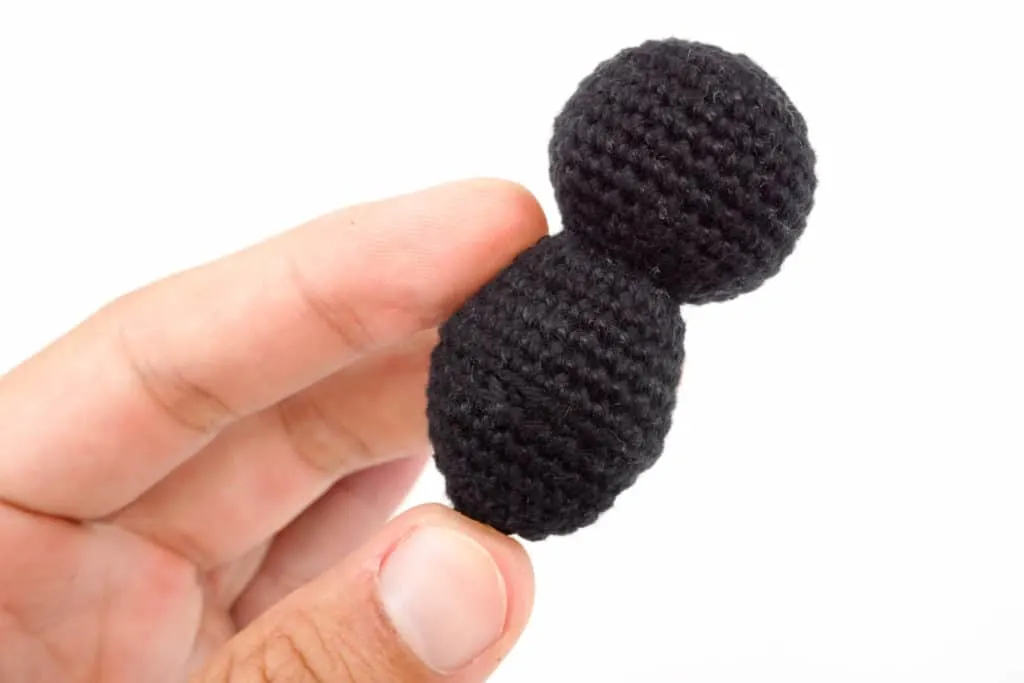
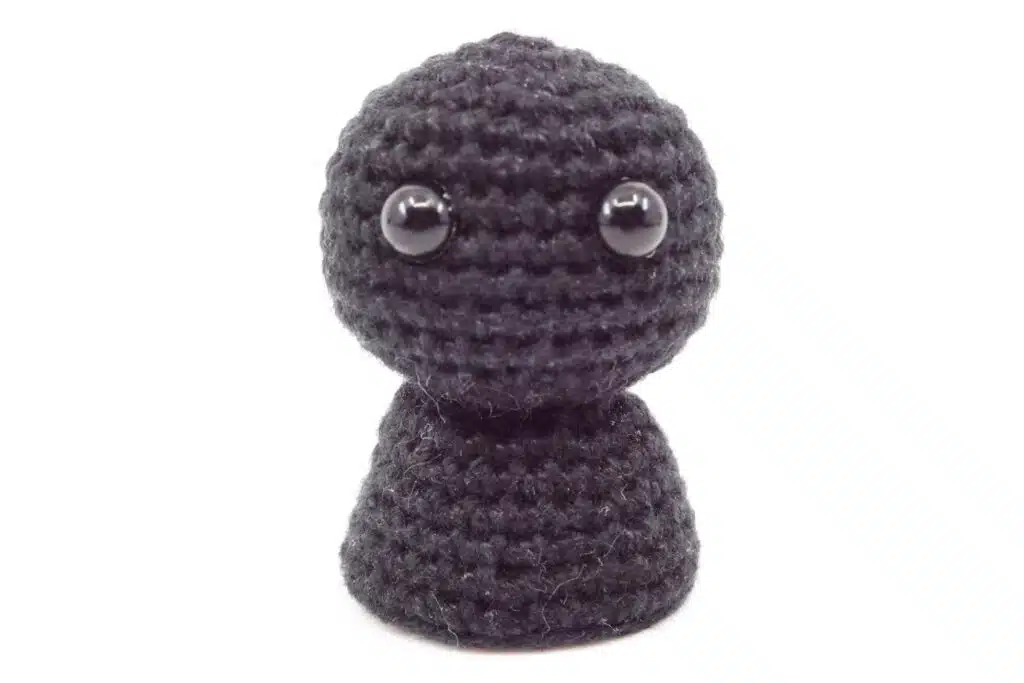
The head and body is crocheted in one piece in Black in spiral rounds with single crochet stitches.
Use the check boxes to mark your finished rounds, rows and steps.
- Crochet the head and body in spiral rounds in Black.
- Round 1: 6 sc into the Magic Ring (6 stitches).
- Round 2: [1 increase] repeat till end of the round (12 stitches).
- Round 3: [1 sc, 1 increase] repeat till end of the round (18 stitches).
- Round 4: 1 sc, 1 increase, [2 sc, 1 increase] repeat 5 times, 1 sc (24 stitches).
- Round 5: [3 sc, 1 increase] repeat till end of the round (30 stitches).
- Round 6-11: 6 rounds, each round 30 sc (30 stitches). Attach the eyes and then continue crocheting the next round.
- Round 12: [3 sc, 1 decrease] repeat till end of the round (24 stitches).
- Round 13: 1 sc, 1 decrease, [2 sc, 1 decrease] repeat 5 times, 1 sc (18 stitches).
- Round 14: [1 sc, 1 decrease] repeat till end of the round (12 stitches).
- Round 15: Crochet the complete round into the front loop only. [1 sc, 1 increase] repeat till end of the round (18 stitches).
- Round 16: Fill the head with polyfill. 1 sc, 1 increase, [2 sc, 1 increase] repeat 5 times, 1 sc (24 stitches).
- Round 17-18: 2 rounds, each round 24 sc (24 stitches).
- Round 19: [7 sc, 1 increase] repeat till end of the round (27 stitches).
- Round 20: 4 sc, 1 increase, [8 sc, 1 increase] repeat 2 times, 4 sc (30 stitches).
- Round 21: Crochet 30 sc (30 stitches).
- Round 22: Crochet the complete round into the back loop only. [3 sc, 1 decrease] repeat till end of the round (24 stitches).
- Round 23: Crochet the complete round into the back loop only. Crochet 24 sc (24 stitches).
- Round 24-25: 2 rounds, each round 24 sc (24 stitches).
- Round 26: 1 sc, 1 decrease, [2 sc, 1 decrease] repeat 5 times, 1 sc (18 stitches).
- Round 27: [1 sc, 1 decrease] repeat till end of the round (12 stitches).
- Round 28: [1 decrease] repeat till end of the round (6 stitches).
- Finish: Only fill the head with polyfill, but not the body. Cut the yarn generously, close the opening, weave in and hide the leftover yarn.
Crochet the Arms (2x)
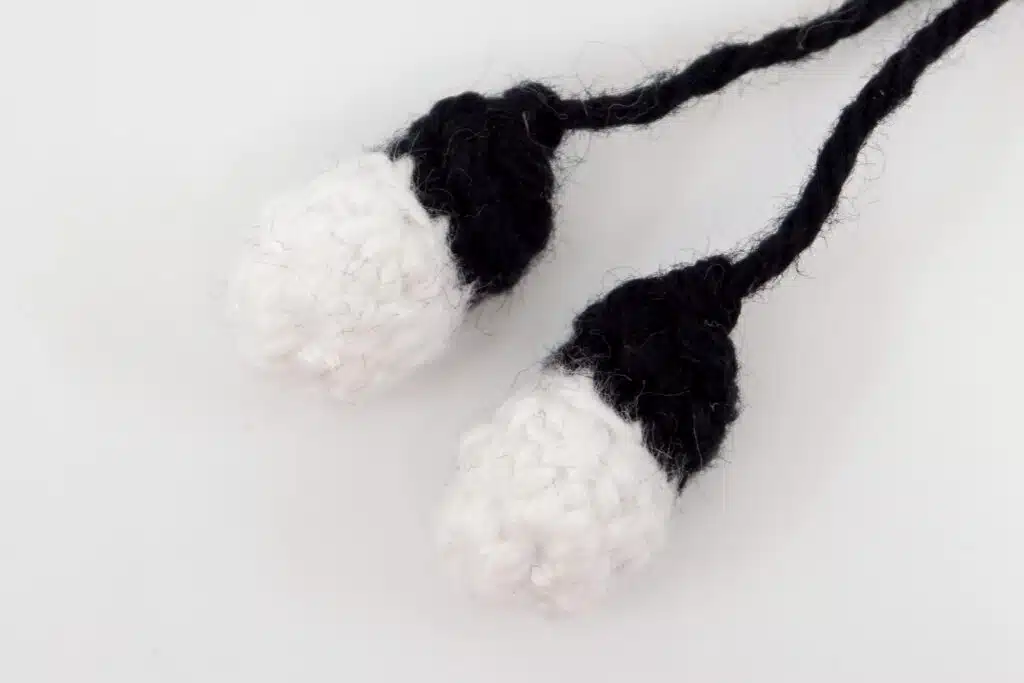
The arms are crocheted in White and Black in spiral rounds with single crochet stitches. Crochet a total of 2 arms.
- Crochet the arms in spiral rounds in White.
- Round 1: 6 sc into the Magic Ring (6 stitches).
- Round 2: [1 increase] repeat till end of the round (12 stitches).
- Round 3: [1 decrease] repeat till end of the round (6 stitches).
- Round 4: Crochet the complete round into the back loop only. Color change to Black. Crochet 6 sc (6 stitches).
- Round 5: Crochet 6 sc (6 stitches).
- Finish: Fill only the front part of the arm with polyfill. Cut the yarn generously and leave a long tail for sewing.
Crochet the Cloak
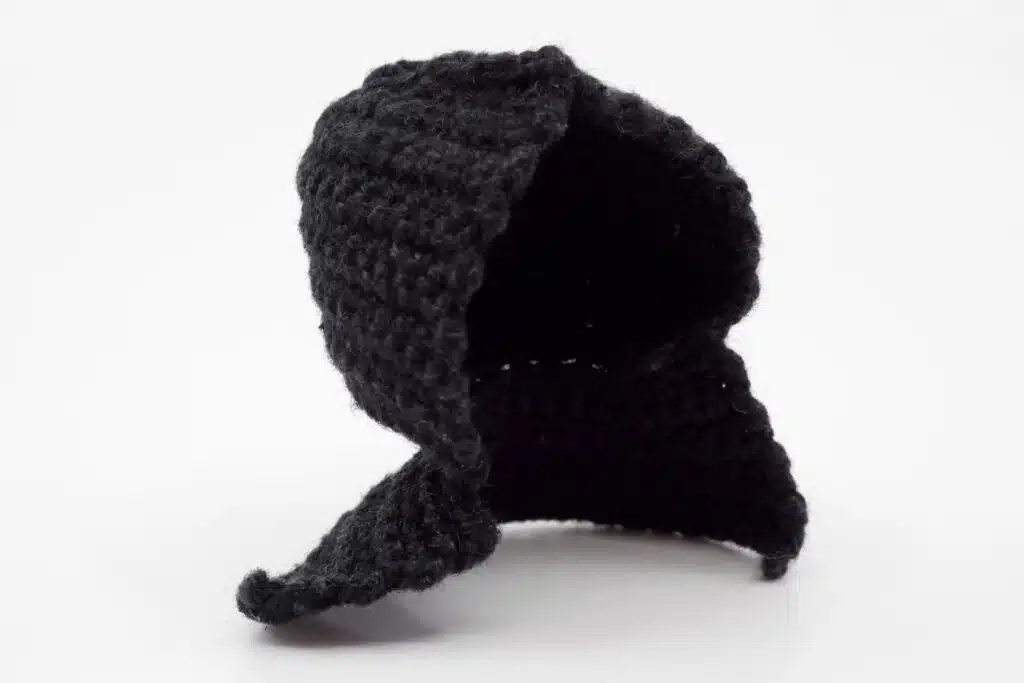
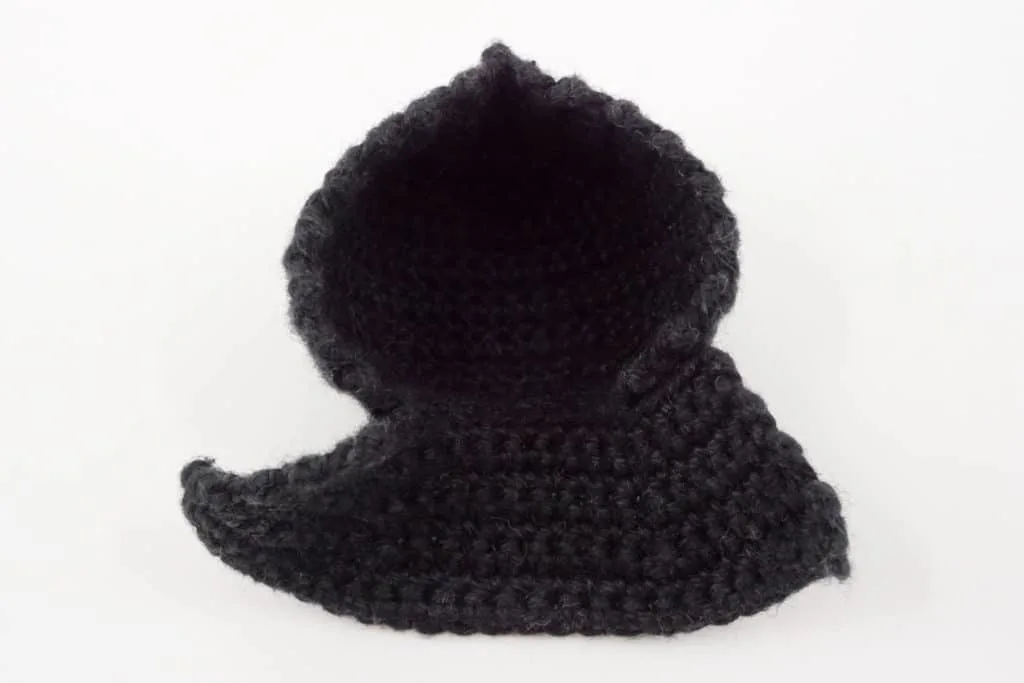
The cloak is crocheted in Black in rows with chain stitches, slip stitches and single crochet stitches.
- Crochet the cloak in rows in Black.
- Row 1: Crochet 25 chain stitches (25 stitches).
- Row 2: 1 sc into the 2nd stitch from the hook, 23 sc (24 stitches).
- Row 3: 1 turning chain, 24 sc (24 stitches).
- Row 4: 1 turning chain, 6 sc, 1 decrease, 8 sc, 1 decrease, 6 sc (22 stitches).
- Row 5: 1 turning chain, 22 sc (22 stitches).
- Row 6: 1 turning chain, 5 sc, 1 decrease, 8 sc, 1 decrease, 5 sc (20 stitches).
- Row 7: 1 turning chain, 20 sc (20 stitches).
- Row 8: 1 turning chain, 4 sc, 1 decrease, 8 sc, 1 decrease, 4 sc (18 stitches).
- Row 9: 1 turning chain, 18 sc (18 stitches).
- Row 10: Crochet the complete round into the front loop only. 1 turning chain, 4 slip stitches, 1 chain stitch, 1 sc into the 2nd stitch from the hook, 1 increase, [1 sc, 1 increase] repeat 4 times. The row is not crocheted till the end.
- Row 11: 1 turning chain, [2 sc, 1 increase] repeat 5 times (20 stitches).
- Row 12: 1 turning chain, [3 sc, 1 increase] repeat 5 times (25 stitches).
- Row 13: 1 turning chain, [4 sc, 1 increase] repeat 5 times (30 stitches).
- Row 14-23: 10 rows, each row 1 turning chain, 30 sc (30 stitches).
- Row 24: 1 turning chain, 5 sc, [2 sc, 1 decrease] repeat 5 times, 5 sc (25 stitches).
- Row 25: 1 turning chain, 5 sc, [1 sc, 1 decrease] repeat 5 times, 5 sc (20 stitches).
- Row 26: 1 turning chain, 5 sc, [1 decrease] repeat 5 times, 5 sc (15 stitches).
- Row 27: 1 turning chain, 5 sc, 1 decrease, 1 sc, 1 decrease, 5 sc (13 stitches).
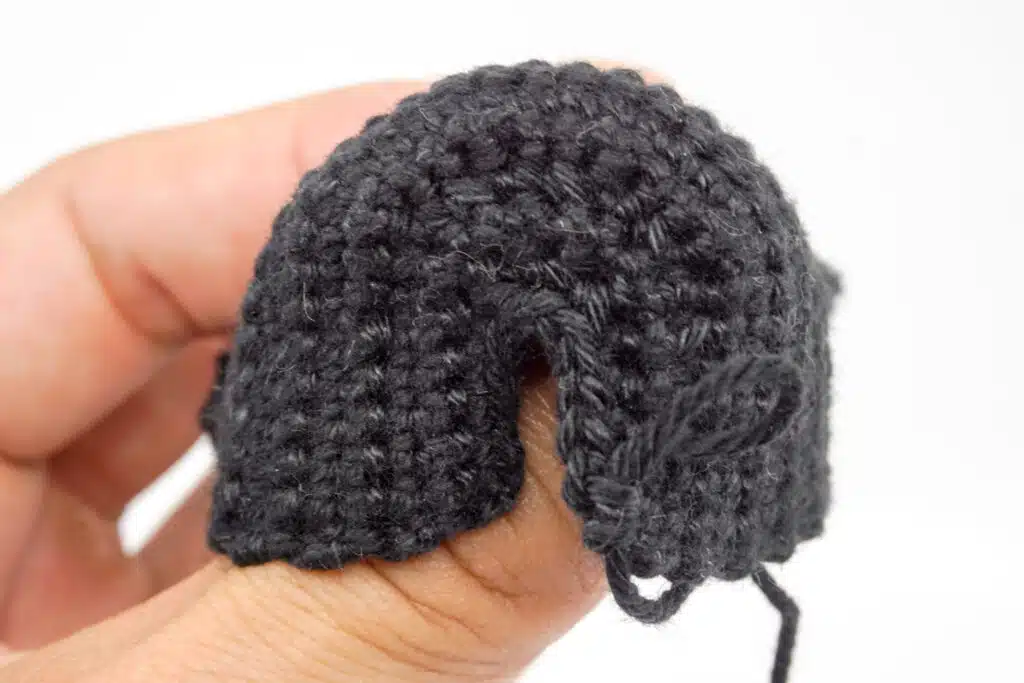
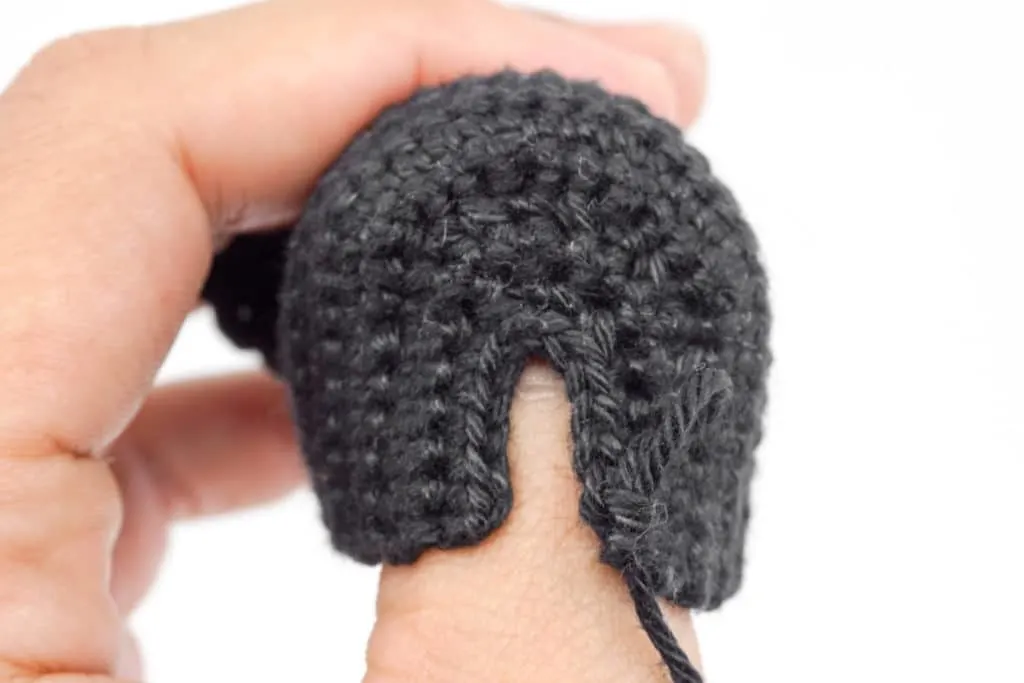
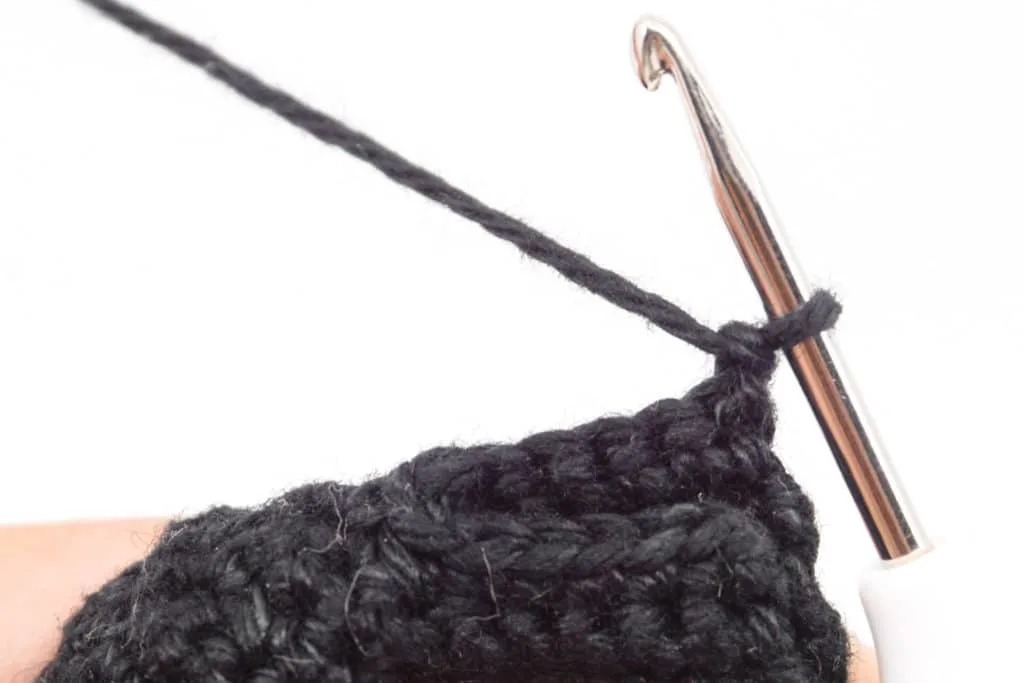
- Row 28: The upper part of the hood is now crocheted together. To do this, squeeze the current row so that the last crocheted stitch, is opposite the 1st stitch of the row. Crochet 1 chain stitch.
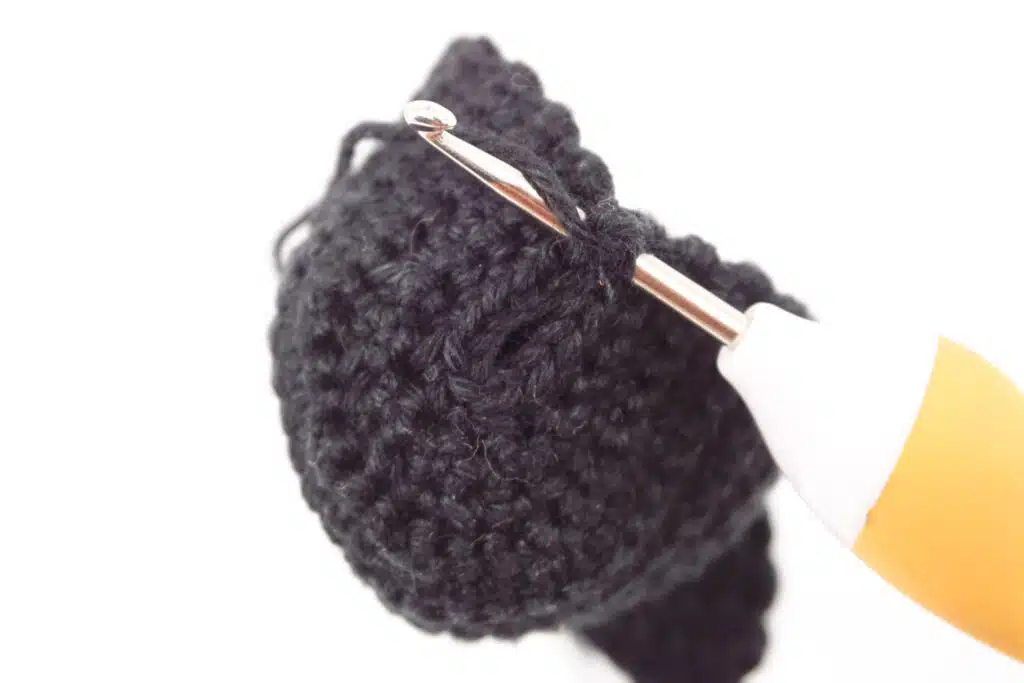
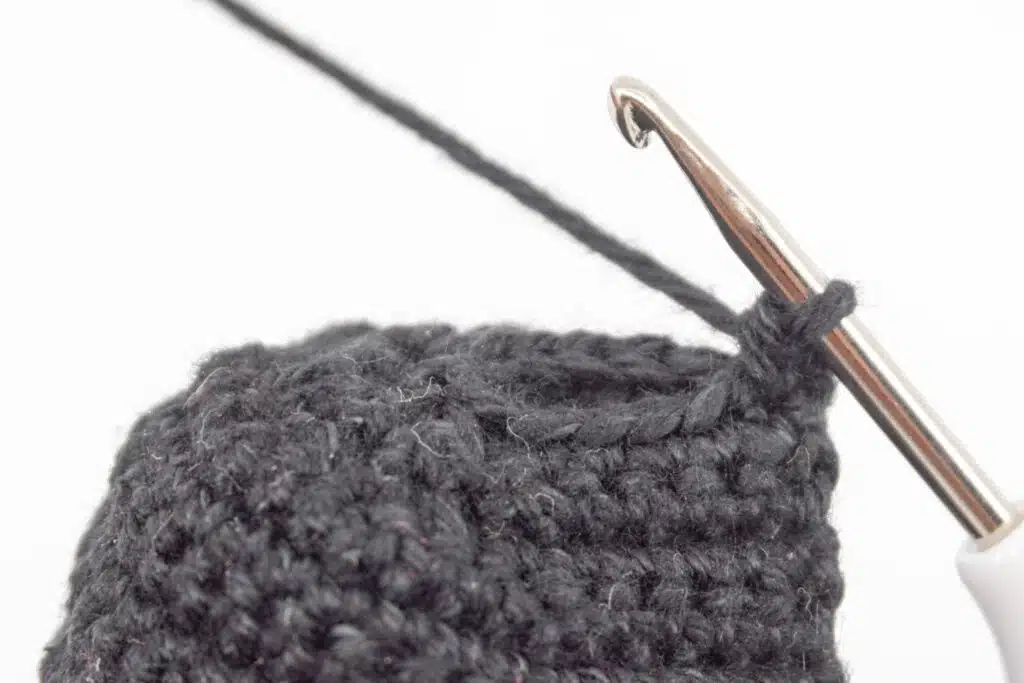
- Push the hook first through the 1st stitch of the row and then through the last crocheted single crochet stitch of the row (the one you crocheted last, but not the chain stitch). Yarn over and pull it through both pushed through stitches and crochet 1 single crochet stitch.
- Now repeat this with the remaining stitches opposite each other. Crochet the next 3 stitch pairs together with 1 single crochet stitch each, and crochet the last 2 stitch pairs together with 1 slip stitch each. At the end you have closed the hood with a total of 6 stitches (6 stitches).
- Finish: Cut the yarn and weave in.
Crochet the Staff
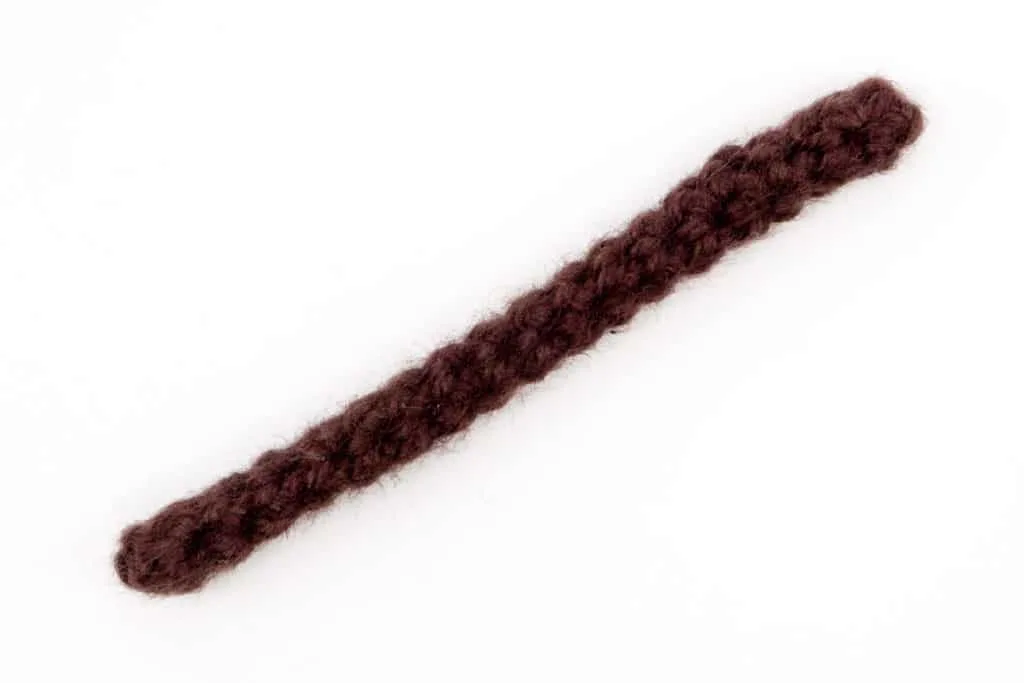
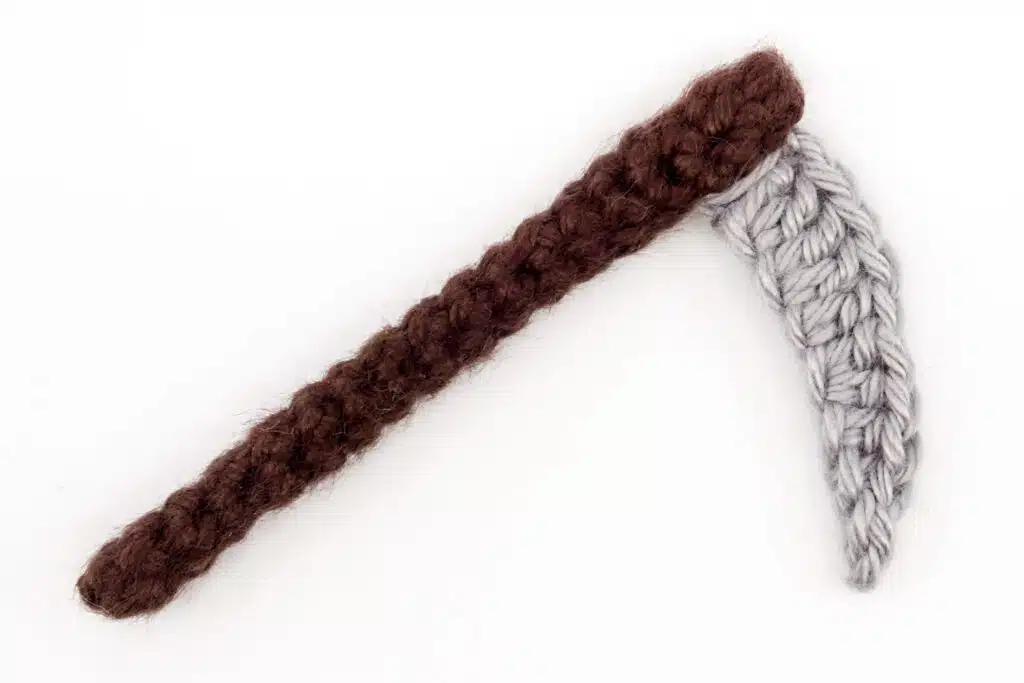
The staff is crocheted in Coffee in spiral rounds with single crochet stitches.
- Crochet the staff in spiral rounds in Coffee.
- Round 1: 5 sc into the Magic Ring (5 stitches).
- Round 2: 3 sc, 1 decrease (4 stitches).
- Round 3-19: 17 rounds, each round 4 sc (4 stitches).
- Finish: Cut the yarn and weave in.
Crochet the Scythe
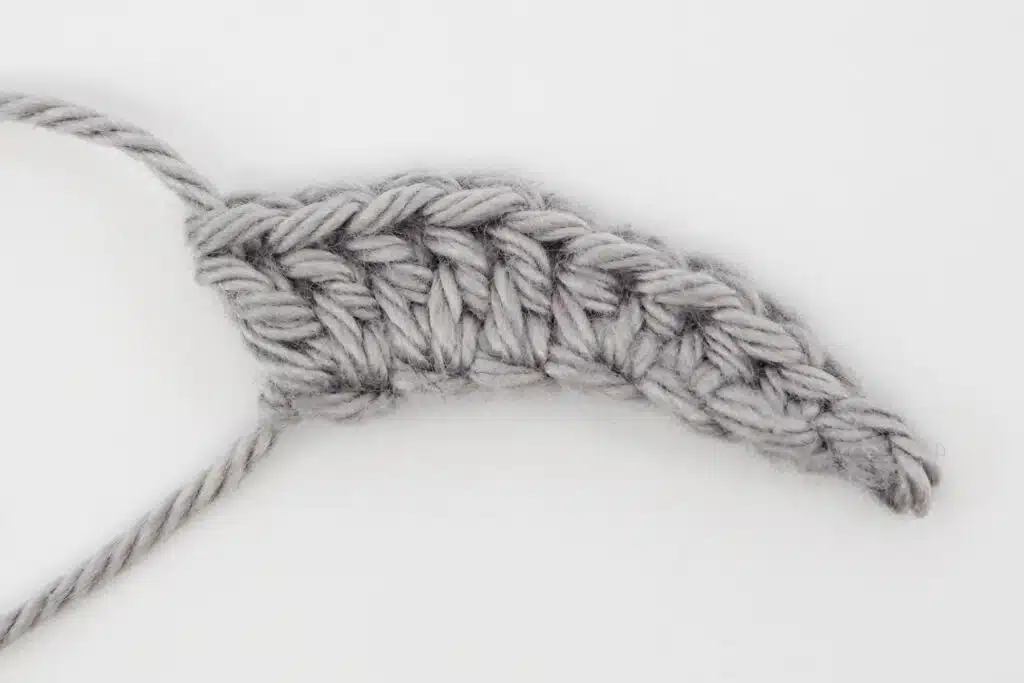
The scythe is crocheted in Smoke Gray in rows with chain stitches, slip stitches, single crochet stitches, half double crochet stitches and double crochet stitches.
- Crochet the scythe in rows in Smoke Gray.
- Row 1: Crochet 8 chain stitches (8 stitches).
- Row 2: 1 slip stitch into the 2nd stitch from the hook, 1 sc, 1 half double crochet, 1 half double crochet increase, 1 double crochet, 2 double crochet increases (10 stitches).
- Finish: Cut the yarn generously and leave a long tail for sewing.
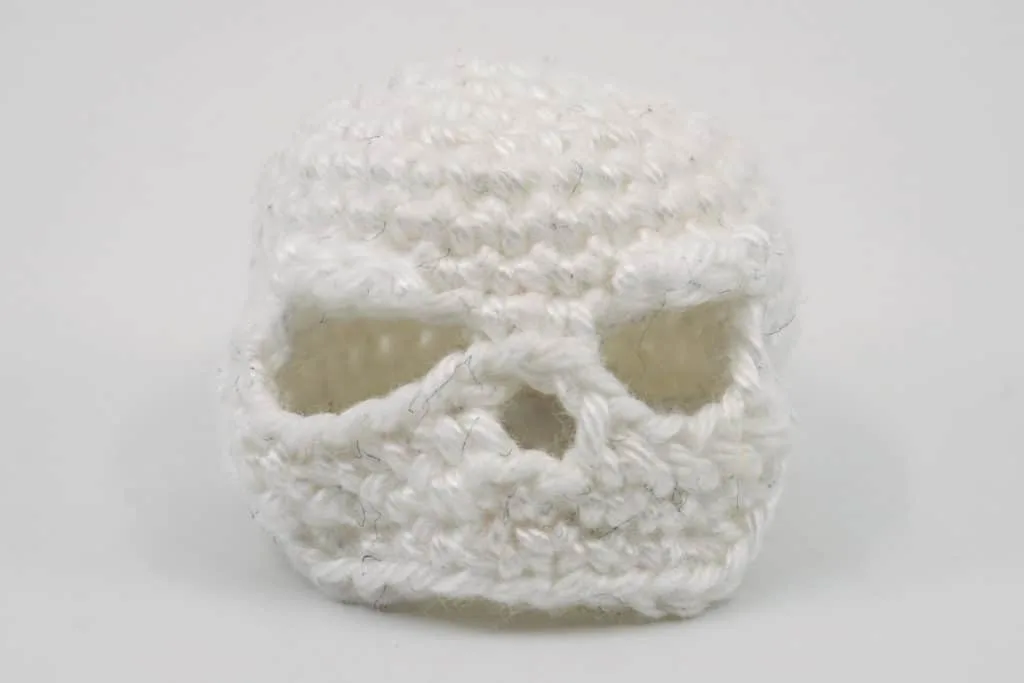
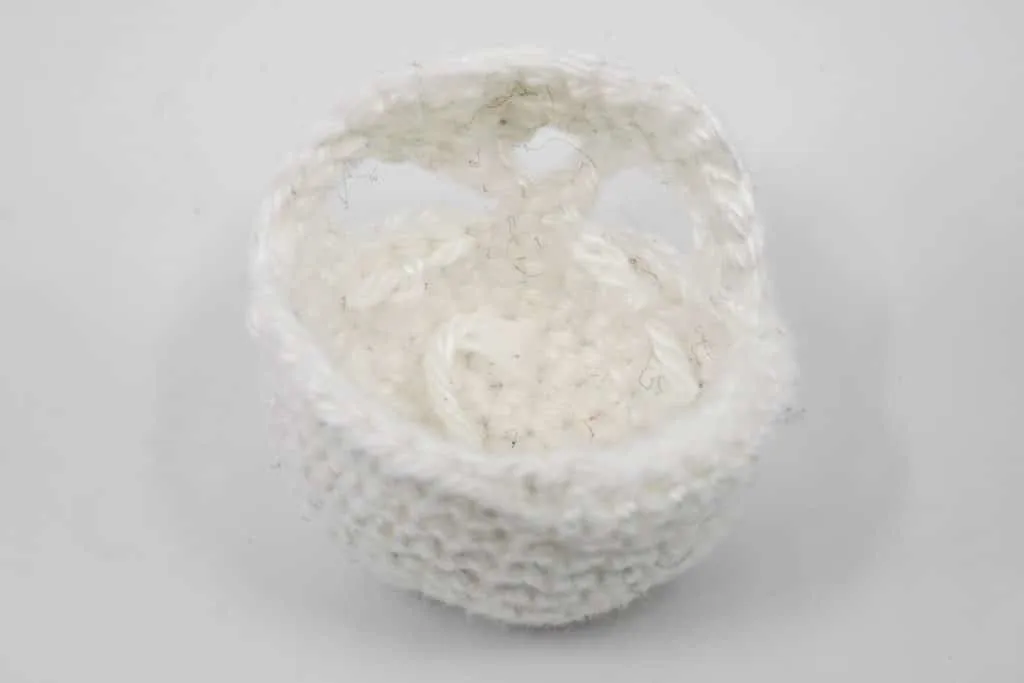
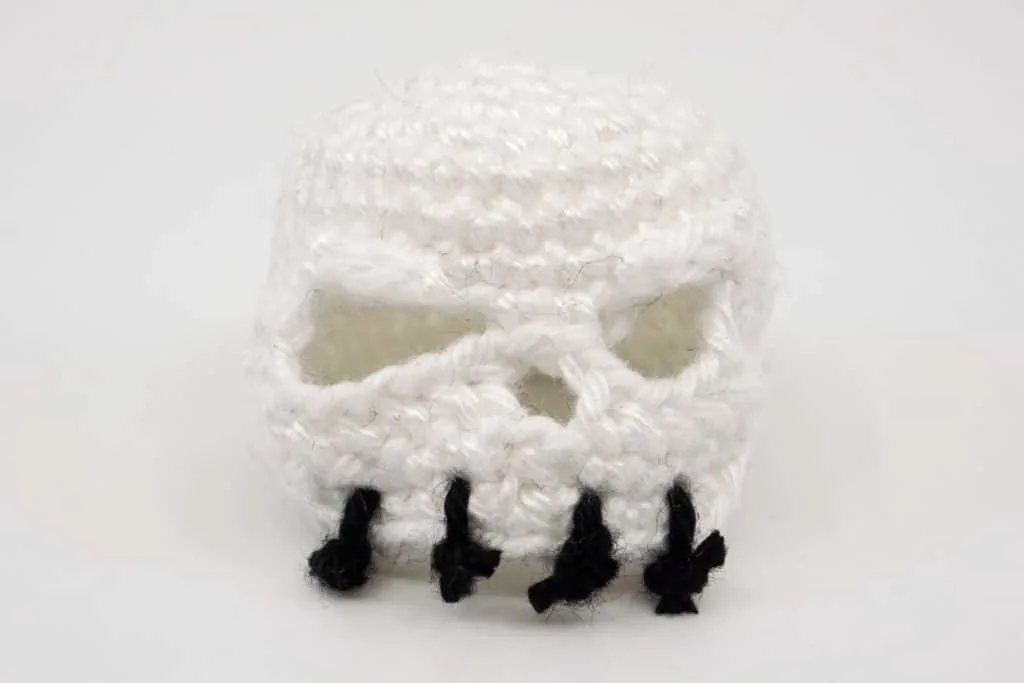
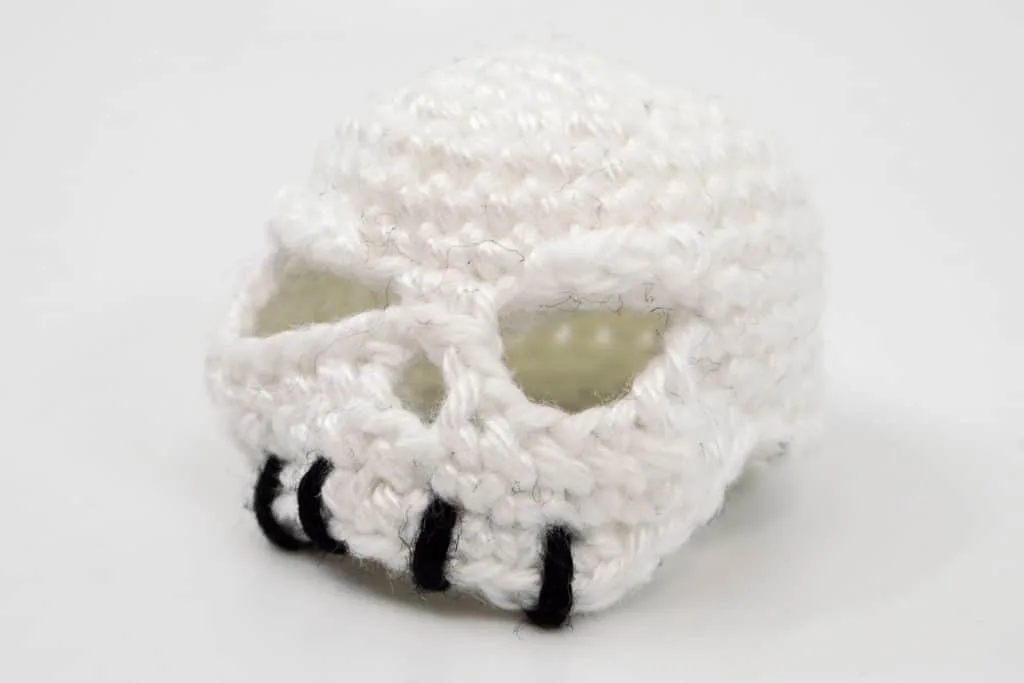
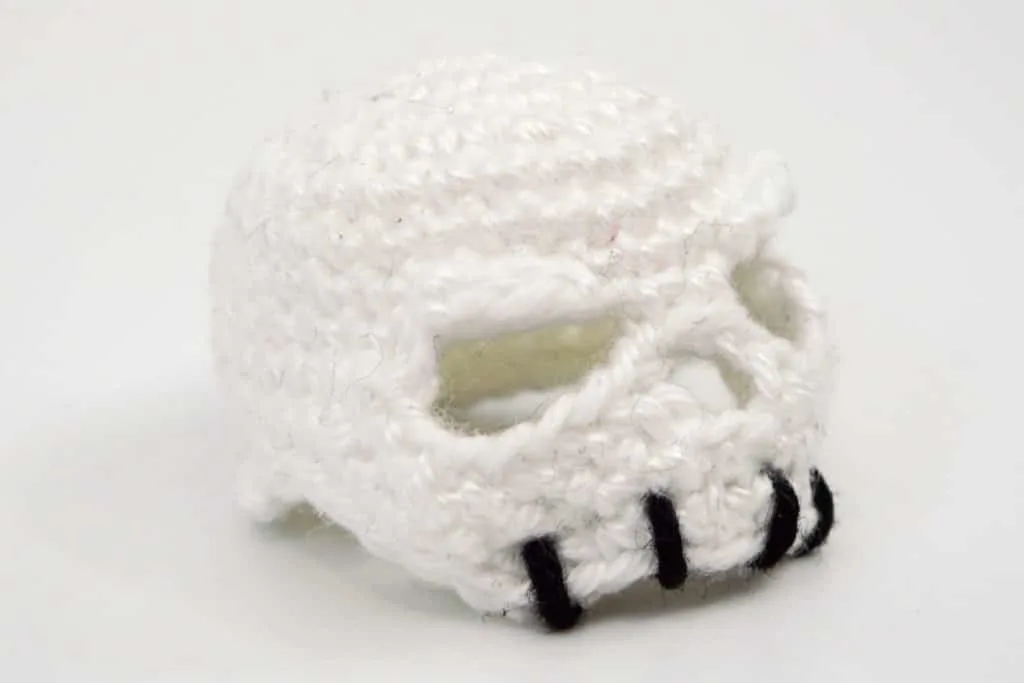
Crochet the Skull
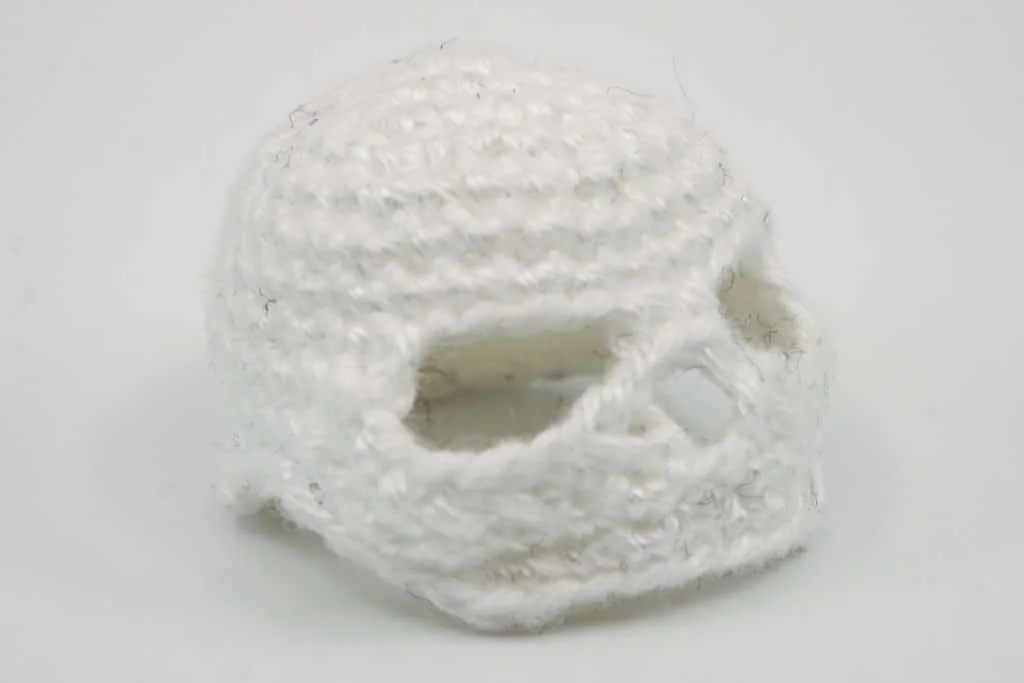
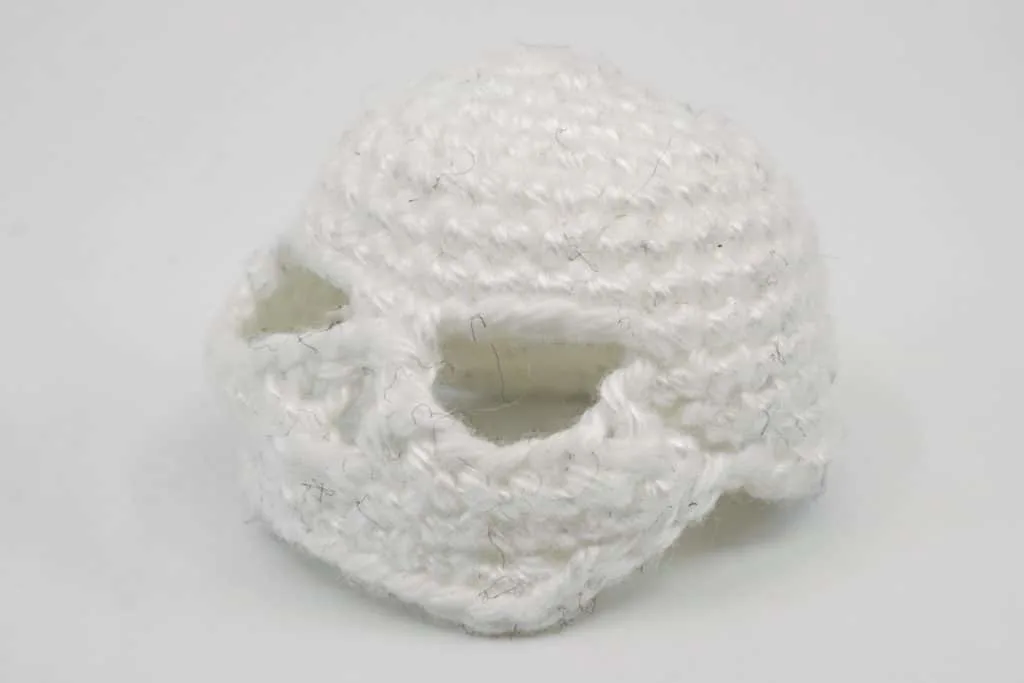
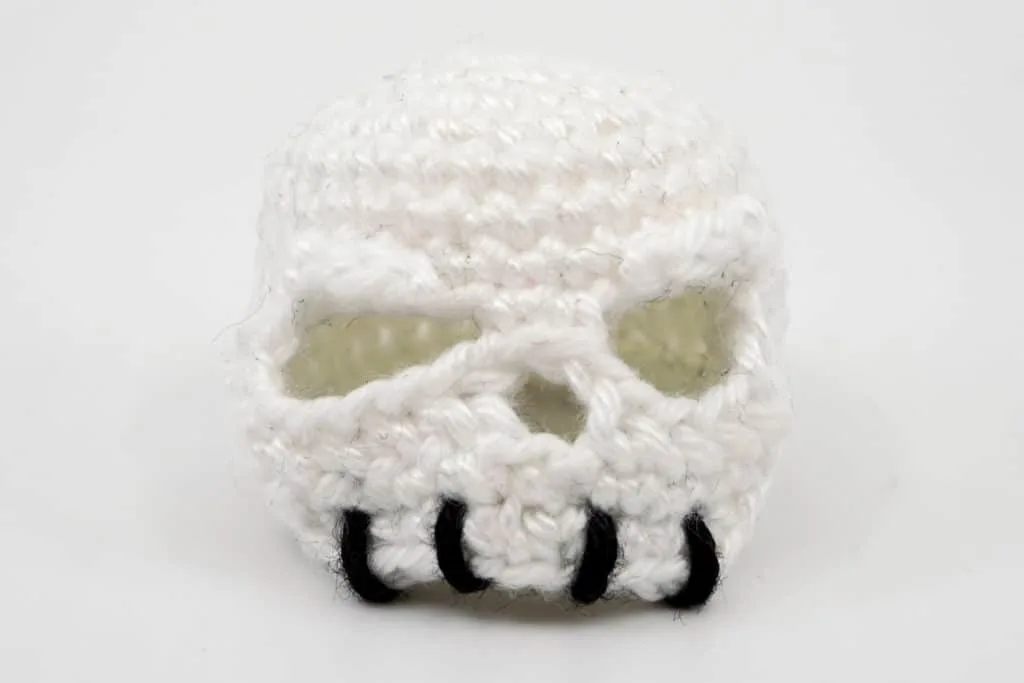
The skull is crocheted in White in spiral rounds with chain stitches, slip stitches and single crochet stitches.
- Crochet the skull in spiral rounds in White.
- Round 1: 6 sc into the Magic Ring (6 stitches).
- Round 2: [1 increase] repeat till end of the round (12 stitches).
- Round 3: [1 sc, 1 increase] repeat till end of the round (18 stitches).
- Round 4: 1 sc, 1 increase, [2 sc, 1 increase] repeat 5 times, 1 sc (24 stitches).
- Round 5: [3 sc, 1 increase] repeat till end of the round (30 stitches).
- Round 6-7: 2 rounds, each round 30 sc (30 stitches).
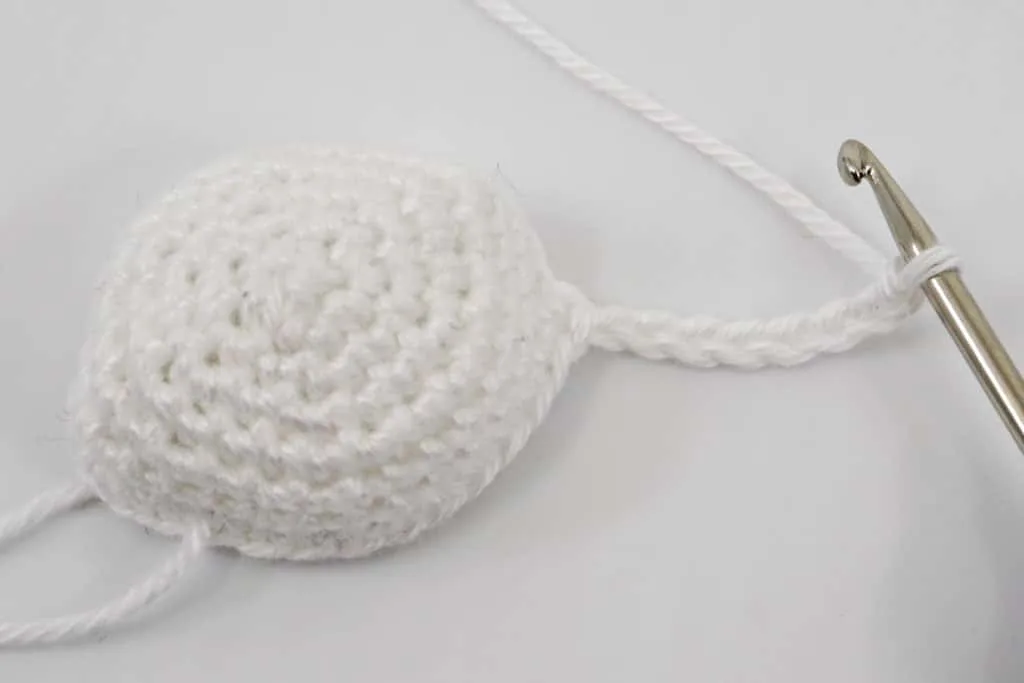
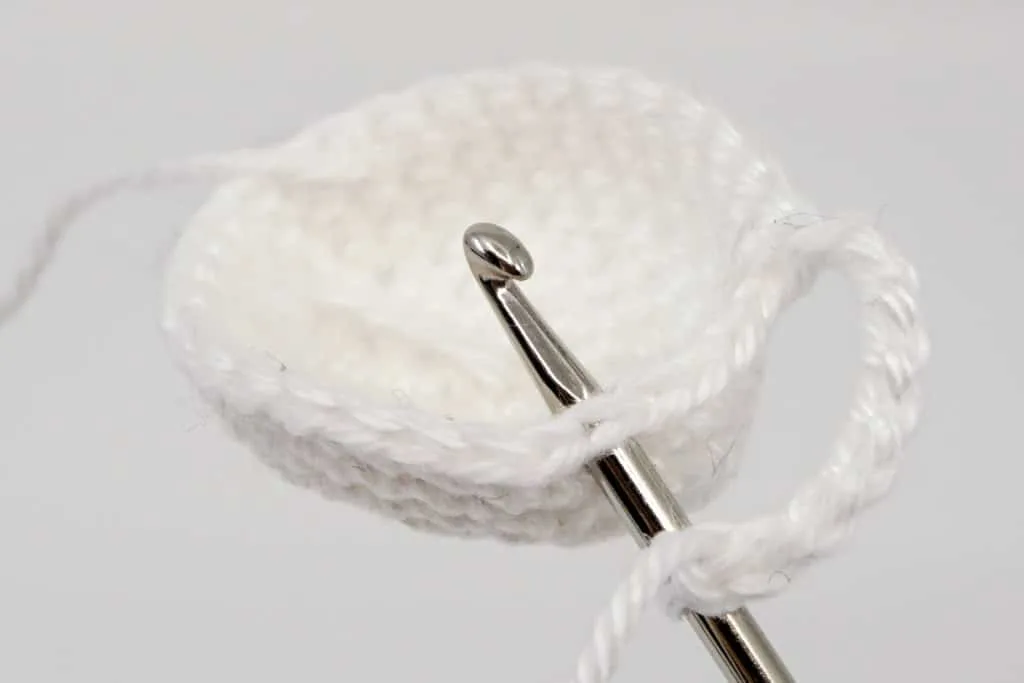
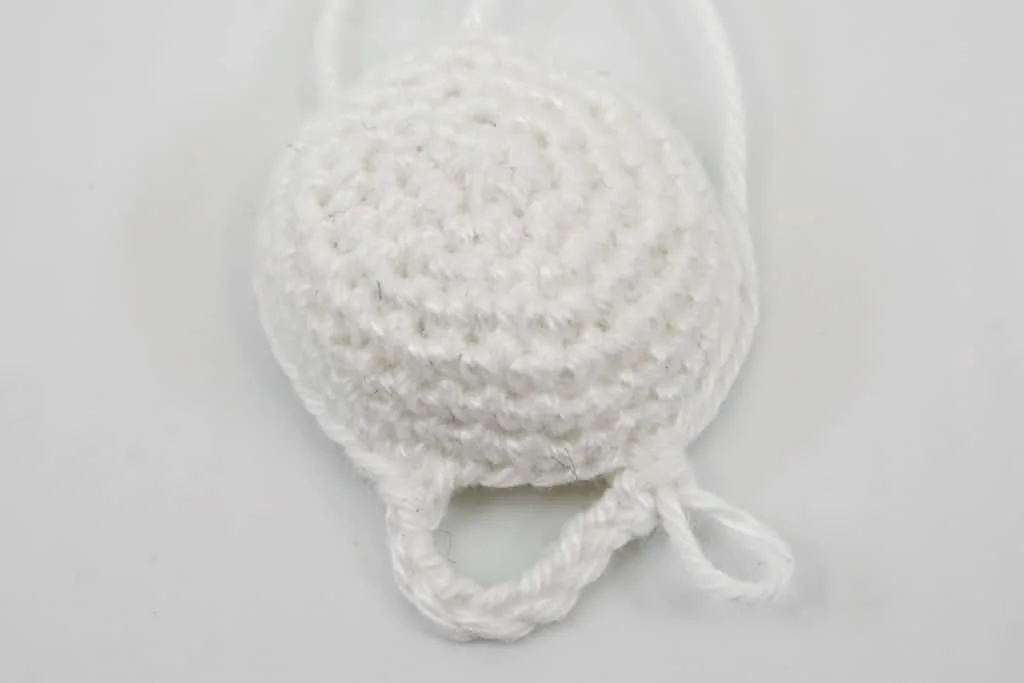
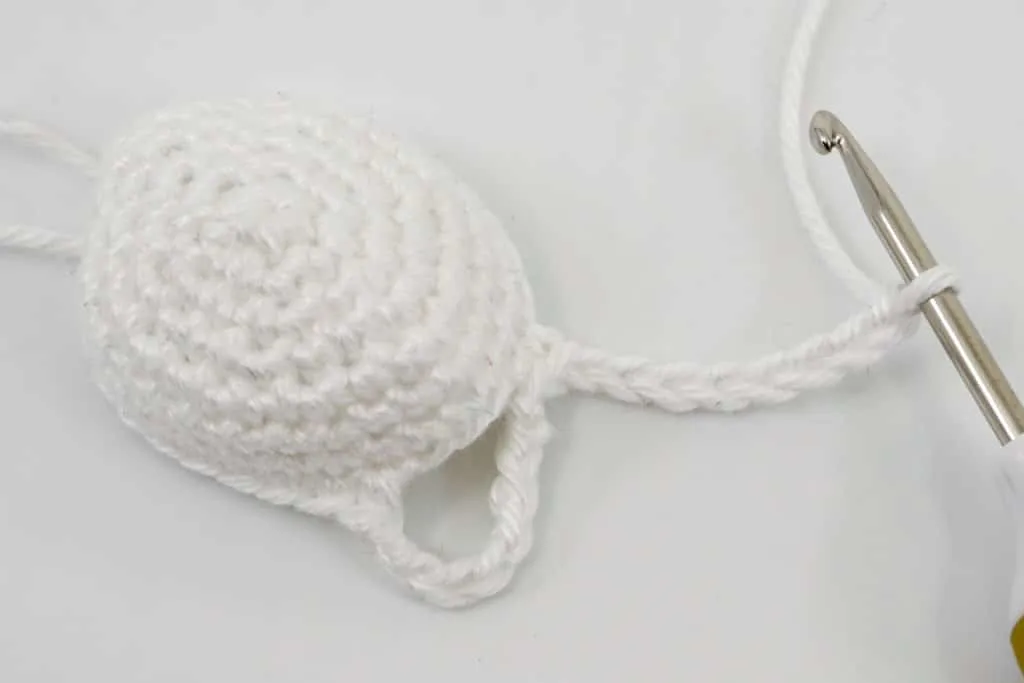
- Round 8: 11 sc, 8 chain stitches, 1 sc into the 4th stitch on the main piece, 1 sc, 8 chain stitches, 1 sc into the 4th stitch on the main piece, 10 sc (40 stitches).
- Round 9: 11 sc, 7 sc into the back loop of the chain, 2 chain stitches, 1 sc into the 7th stitch from the hook into the back loop of the chain, 6 sc into the back loop of the chain, 11 sc (38 stitches).
- Round 10: 10 sc, 1 sc into the 2nd stitch from the hook, 6 sc, 2 sc into the back loop, 7 sc, 1 sc into the 2nd stitch from the hook, 9 sc (36 stitches).
- Round 11: 8 sc, 2 slip stitches, 1 slip stitch into the 2nd stitch from the hook, 2 slip stitches, 3 sc into the next stitch, 2 sc, 1 sc decrease, 2 sc, 3 sc into the next stitch, 3 slip stitches, 1 slip stitch into the 2nd stitch from the hook, 1 slip stitch, 8 sc (37 stitches).
- Round 12: Crochet only 7 sc, 1 slip stitch.
- Round 13: Turn without turning chain, 7 slip stitches, 7 sc, 1 slip stitch.
- Round 14: Turn without turning chain, 7 slip stitches.
- Finish: Cut the yarn and weave in.
Crochet the Brow Ridges (2x)
The brow ridges are crocheted in White in rows with chain stitches. Crochet a total of 2 brow ridges.
- Crochet the brow ridges in rows in White.
- Row 1: Crochet 3 chain stitches (3 stitches).
- Finish: Cut the yarn generously and leave a long tail for sewing.
Assembling
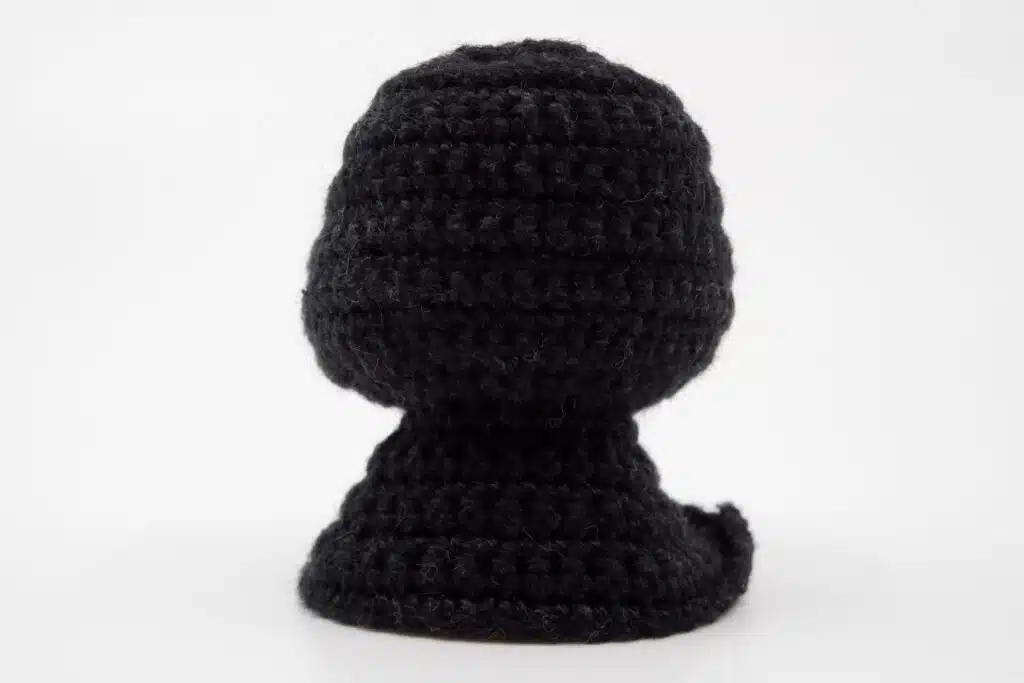
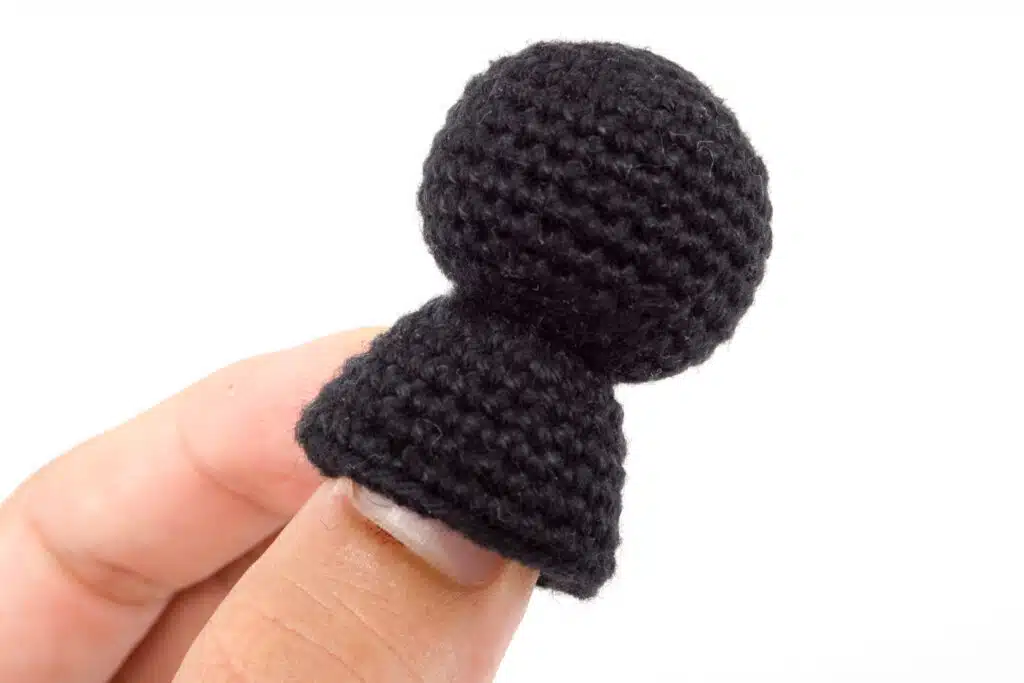
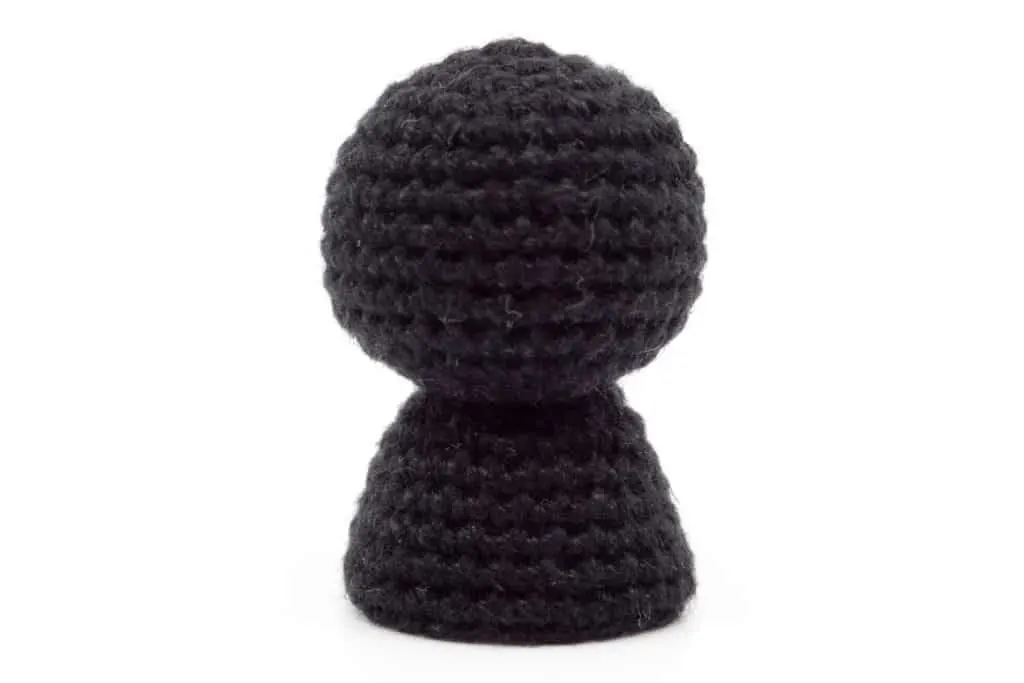
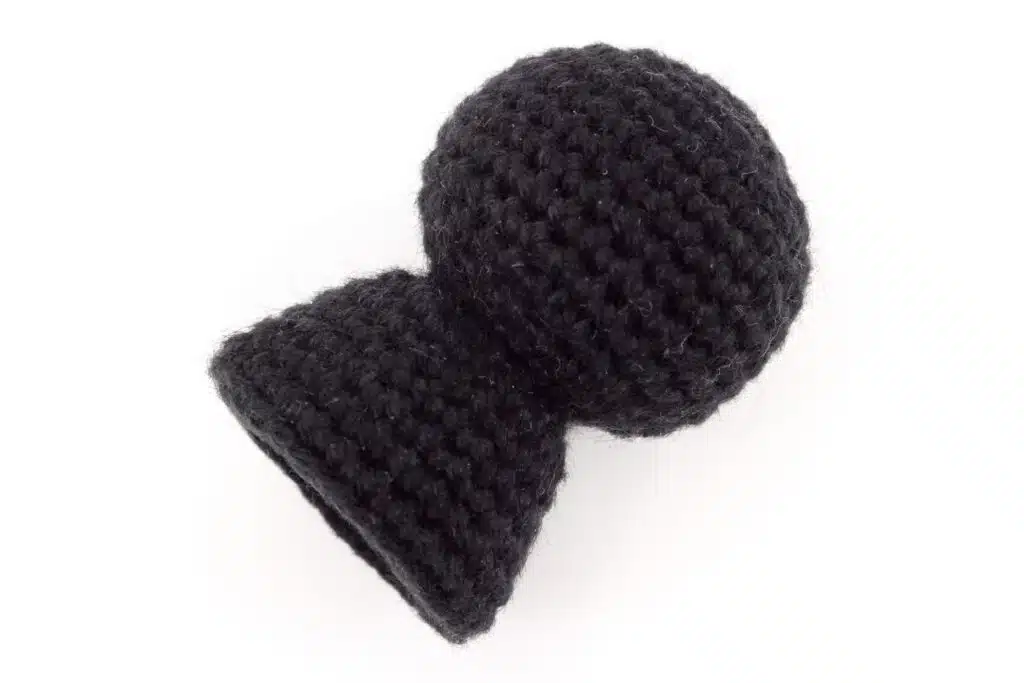
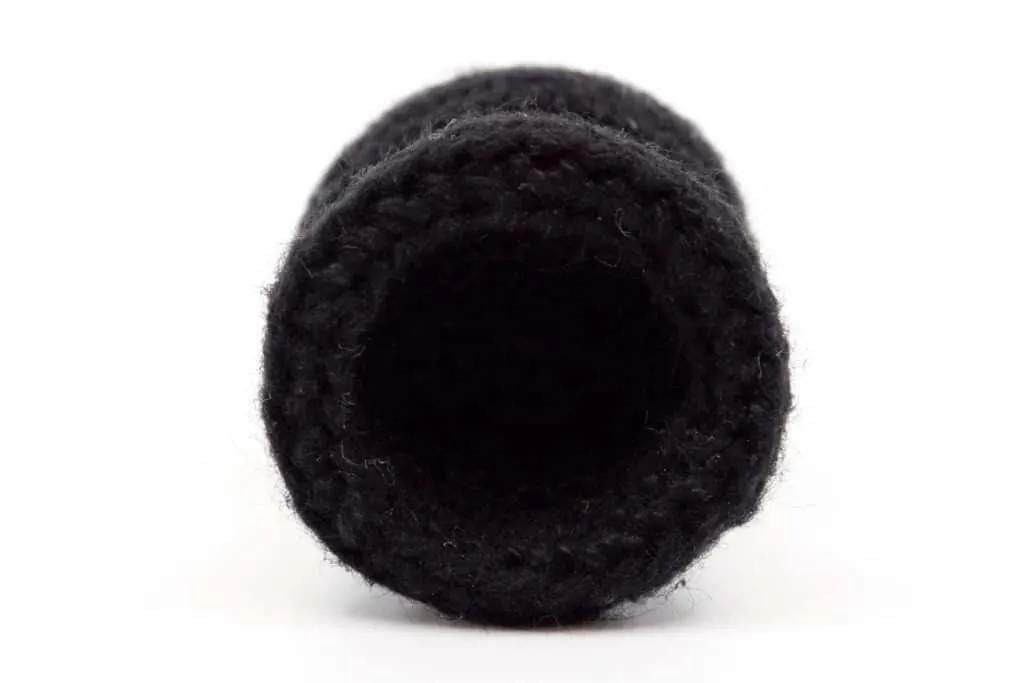
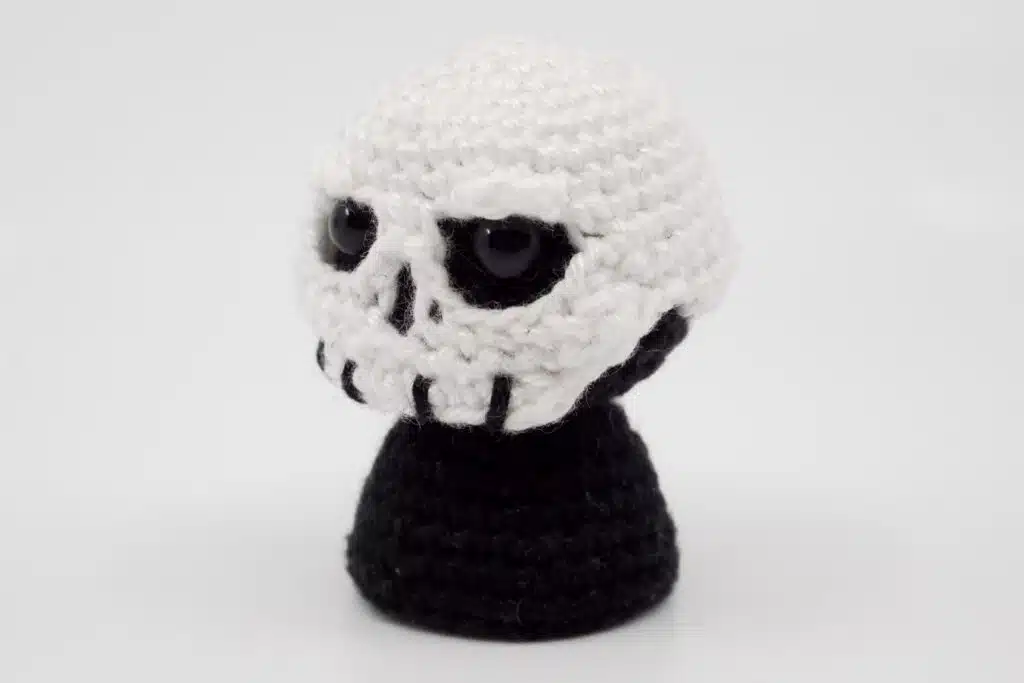
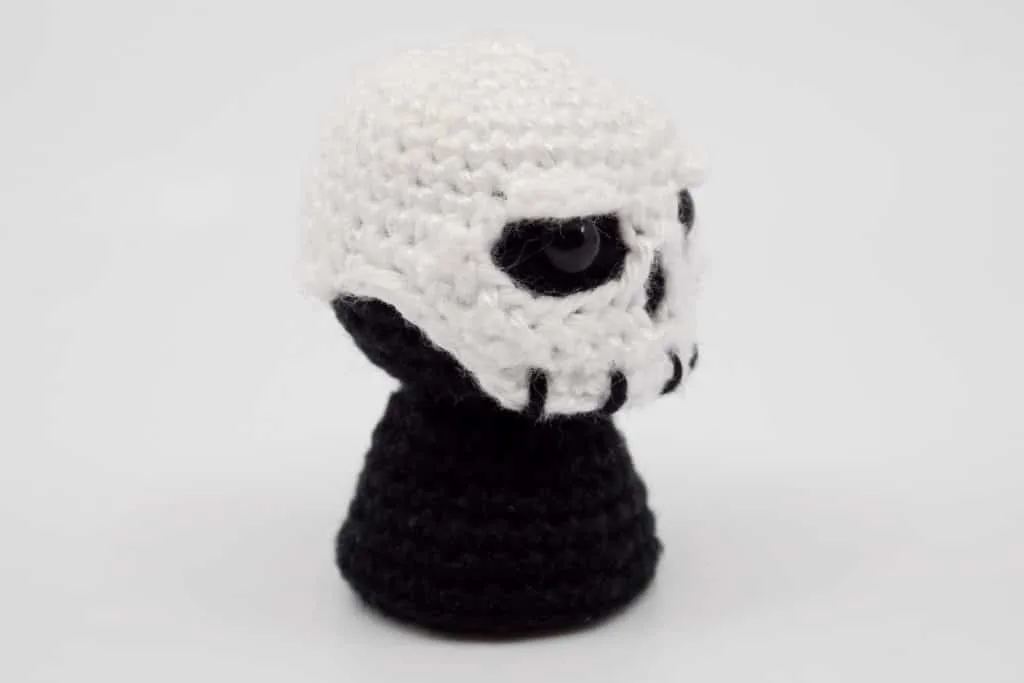
Body: Press the bottom of the body inwards, as shown in the pictures, to achieve a stable stand of the Grim Reaper. The body should fold over at the stitch edges.
Eyes: Attach the safety eyes after the 7th stitch row counting from the top center of the head. The eyes are 4 stitches apart from each other. Back to the crochet pattern.
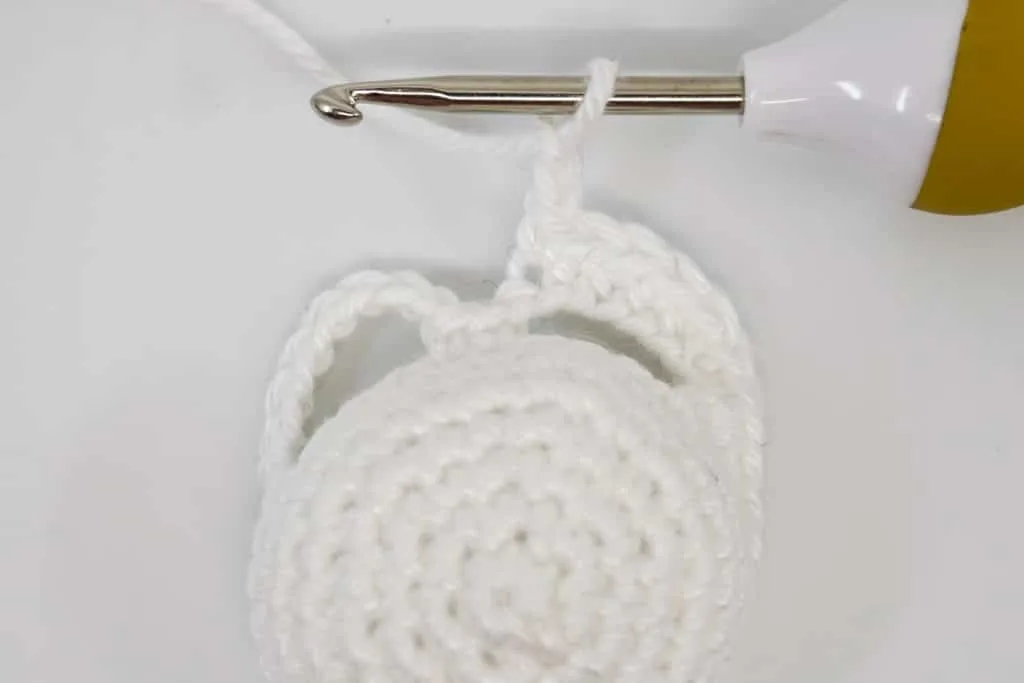
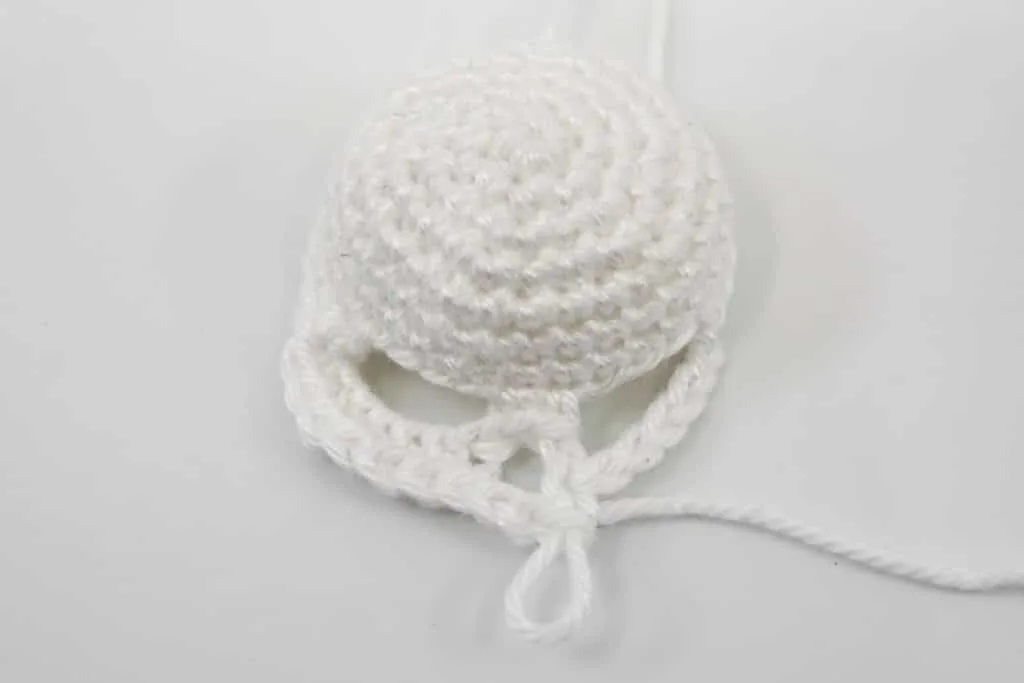
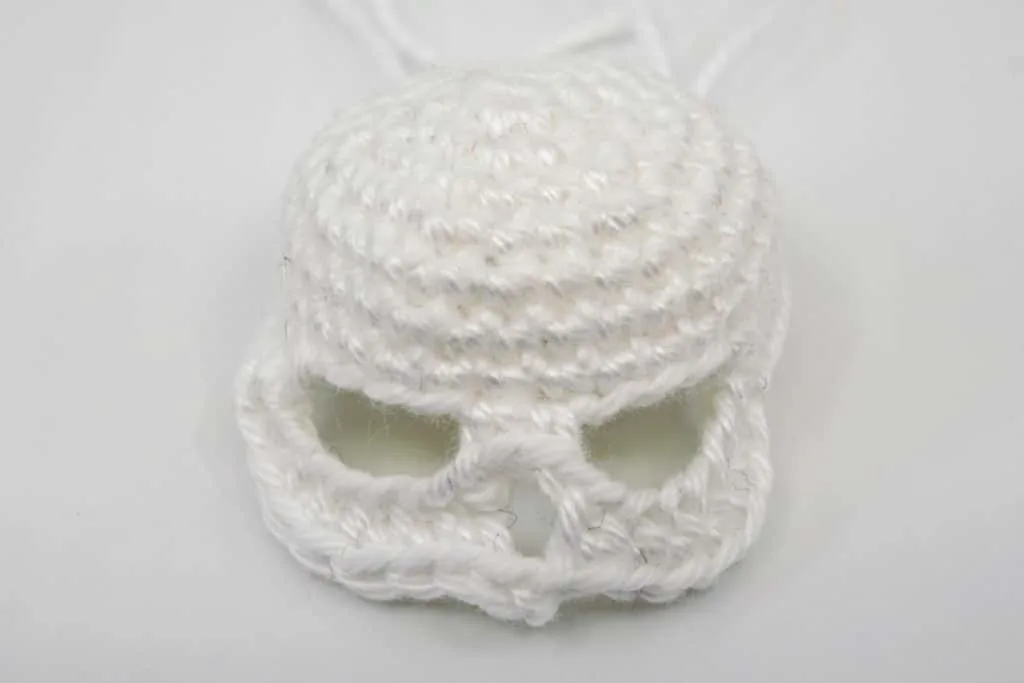
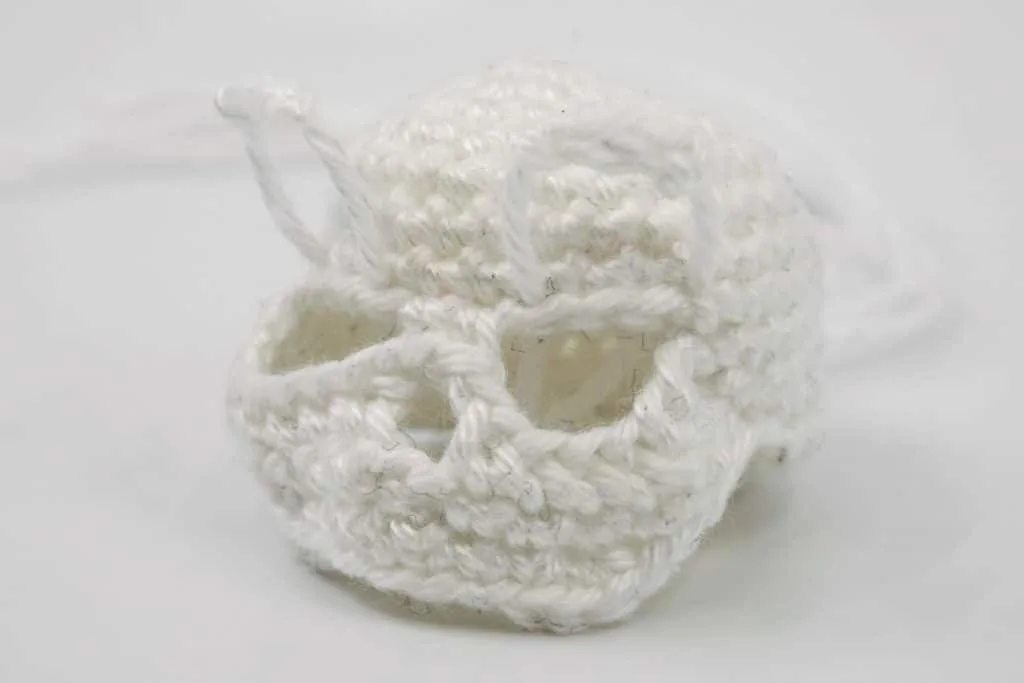
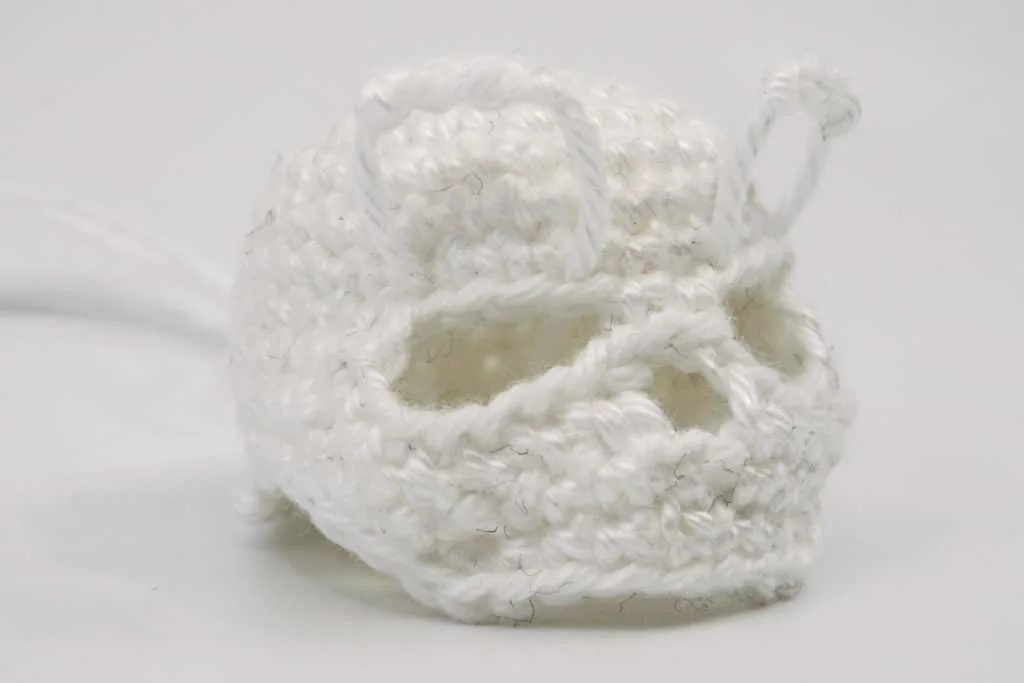
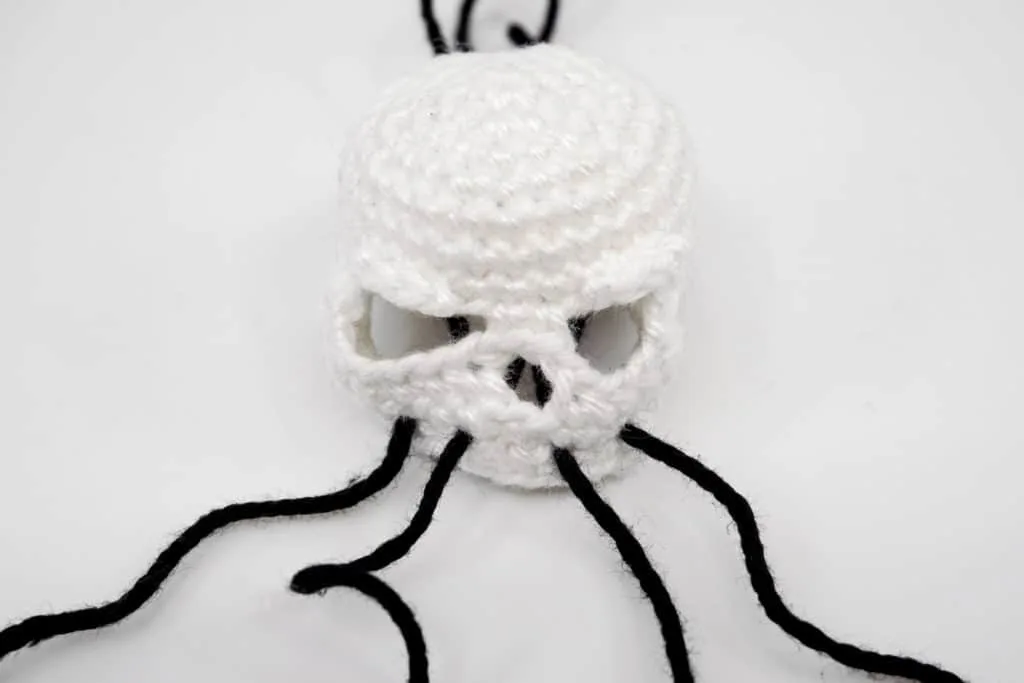
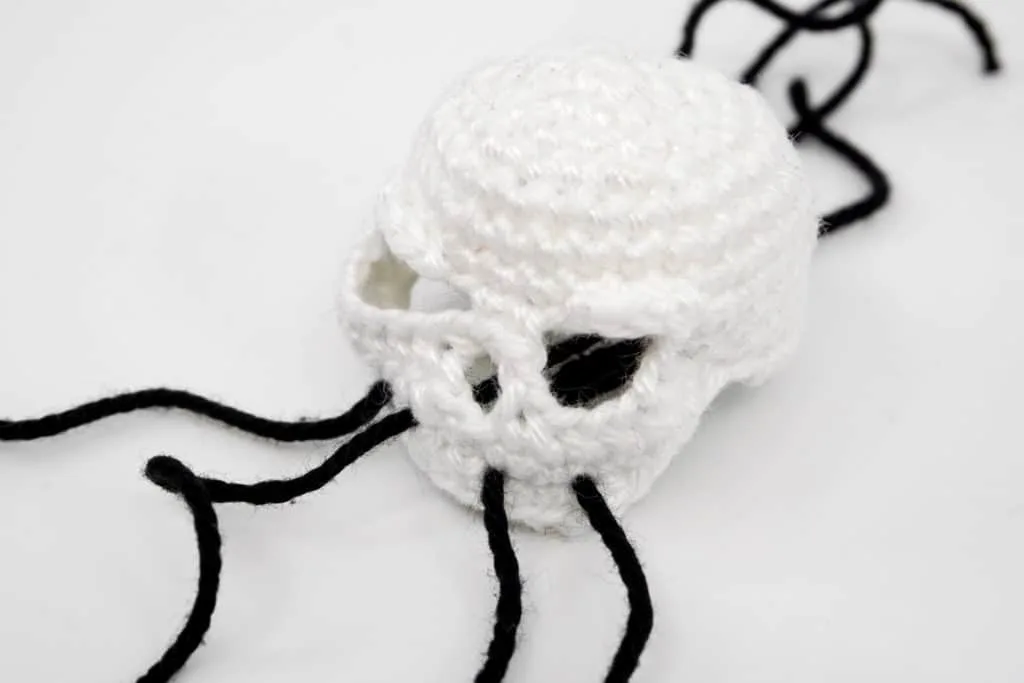
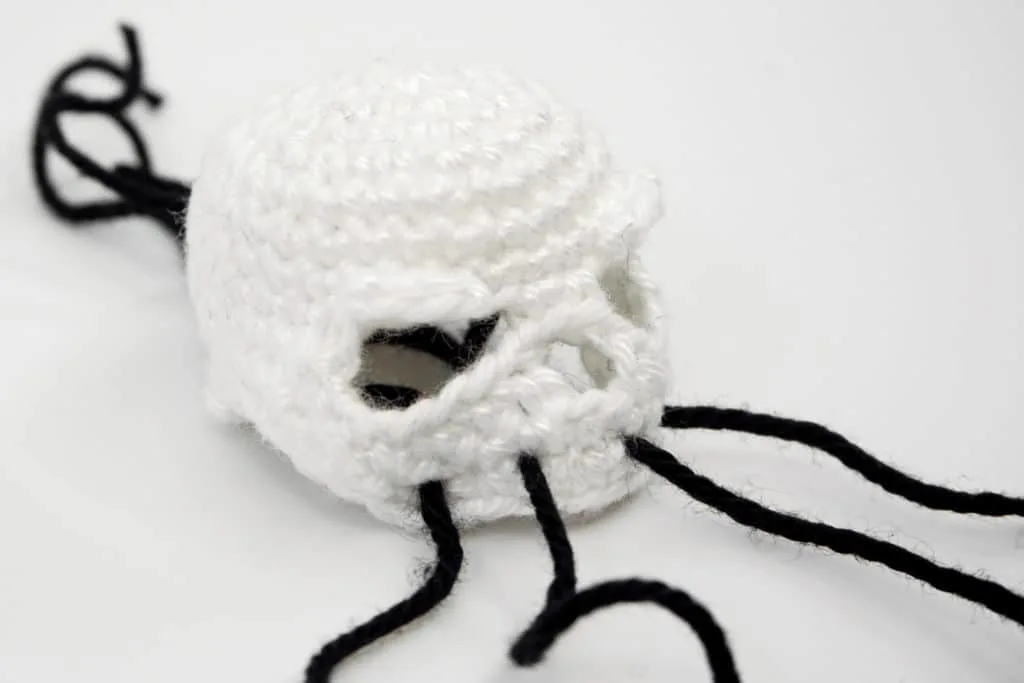
Brow Ridges: Pull a thread of each brow ridge through the stitch in the 1st upper row of each eye socket closest to the nose. From there, pull the second thread through a stitch 3 stitches left or right from the first pulled through thread. Knot the threads together on the inside, but not too tightly, otherwise the skull will be distorted. Cut the remaining threads just before the knot.
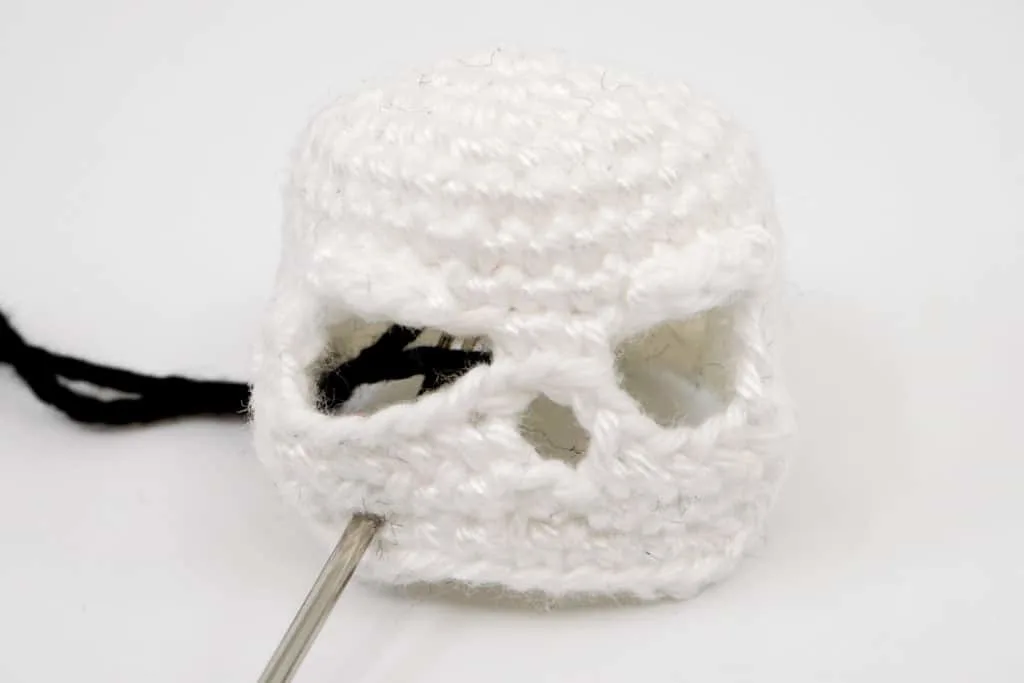
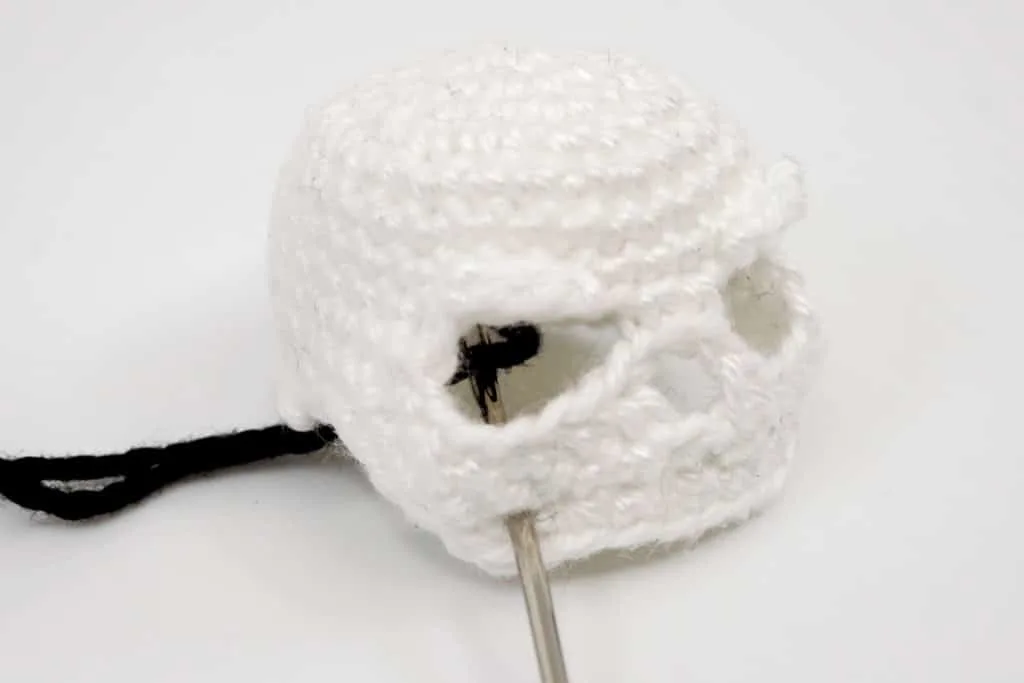
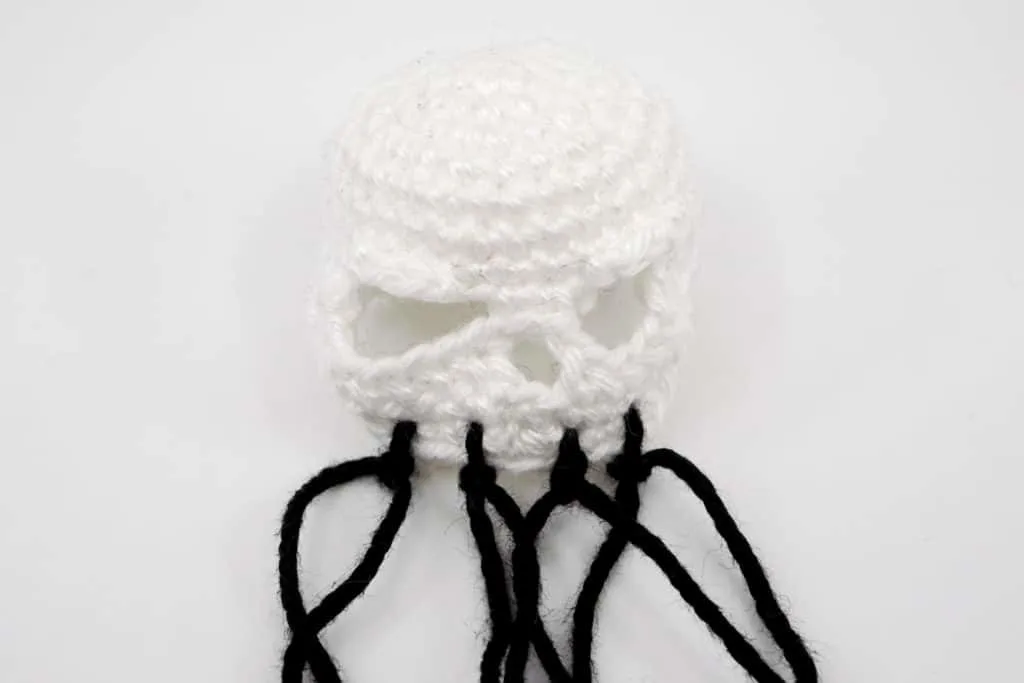
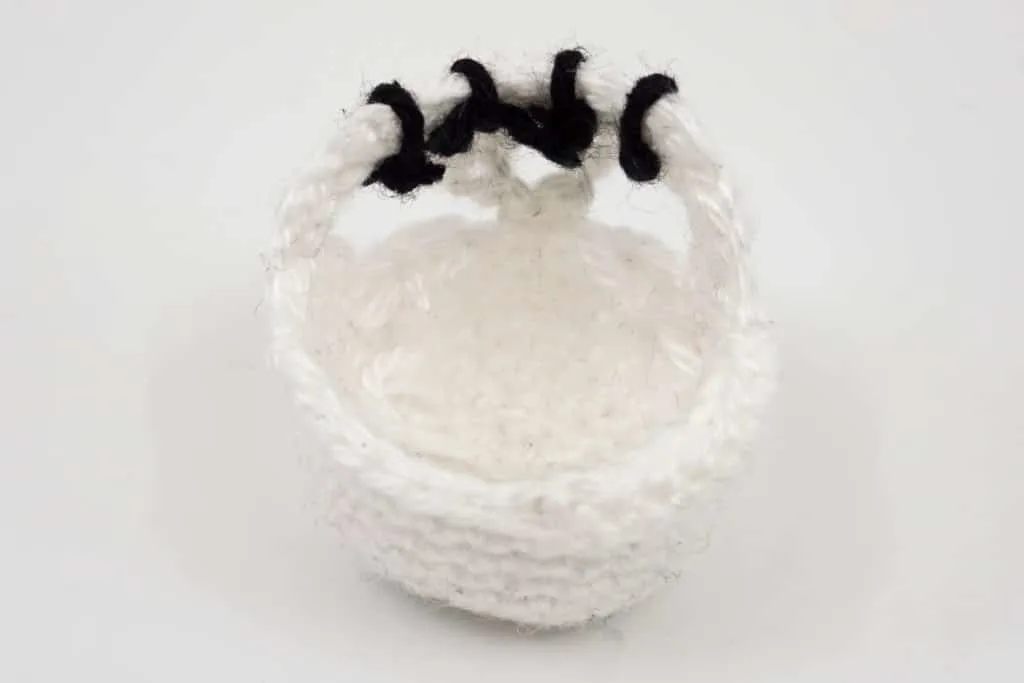
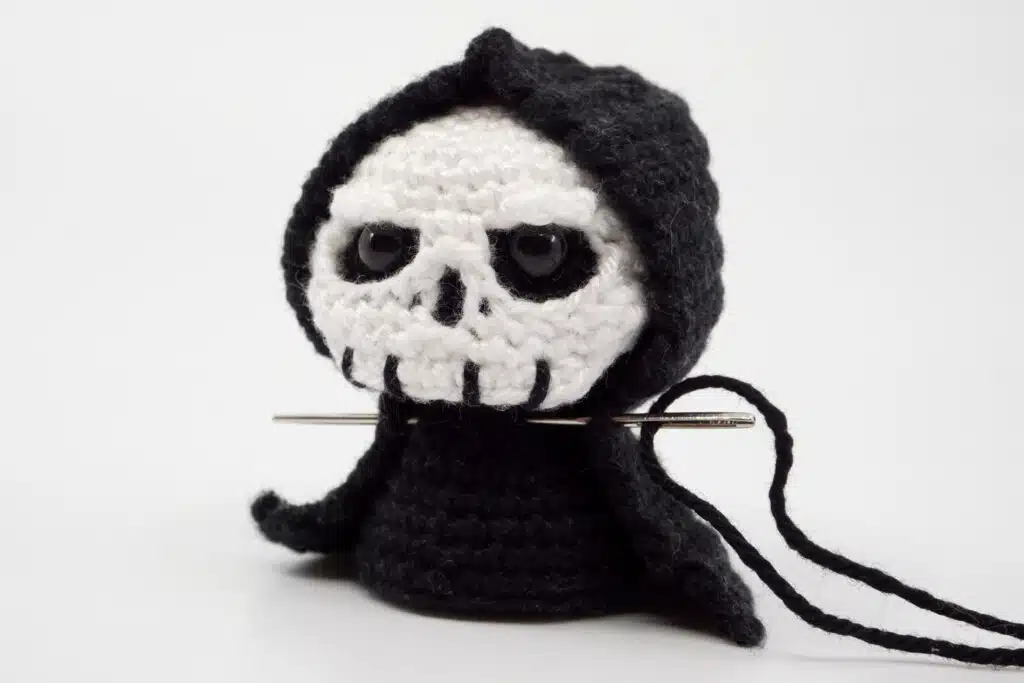
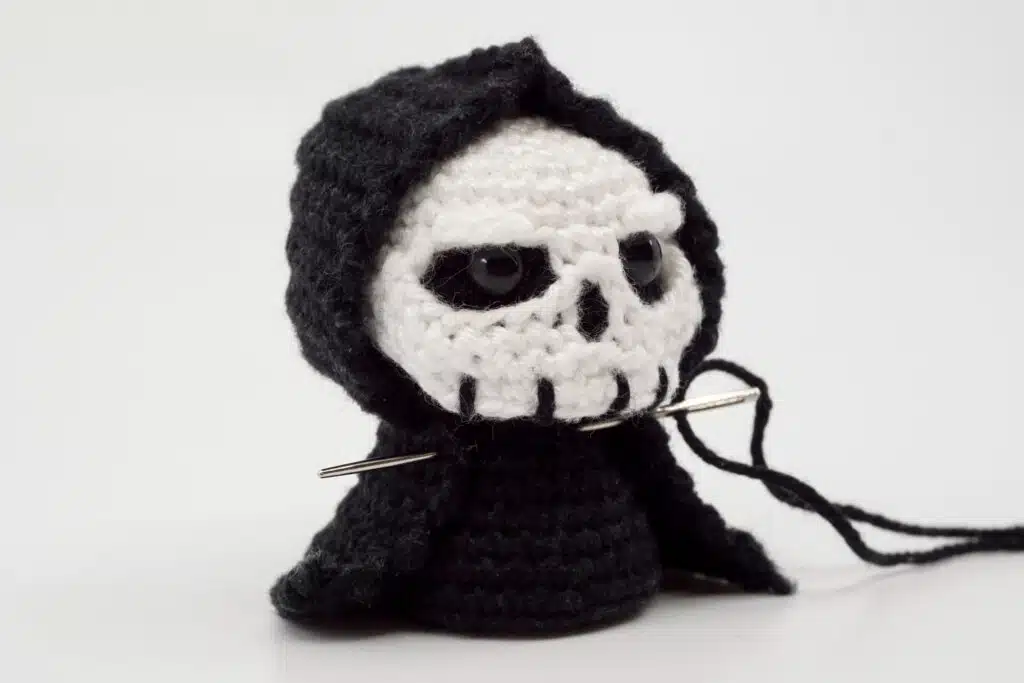
Teeth: Use a tapestry needle to pull a Black thread through 4 points on the underside of the skull, as shown in the pictures.
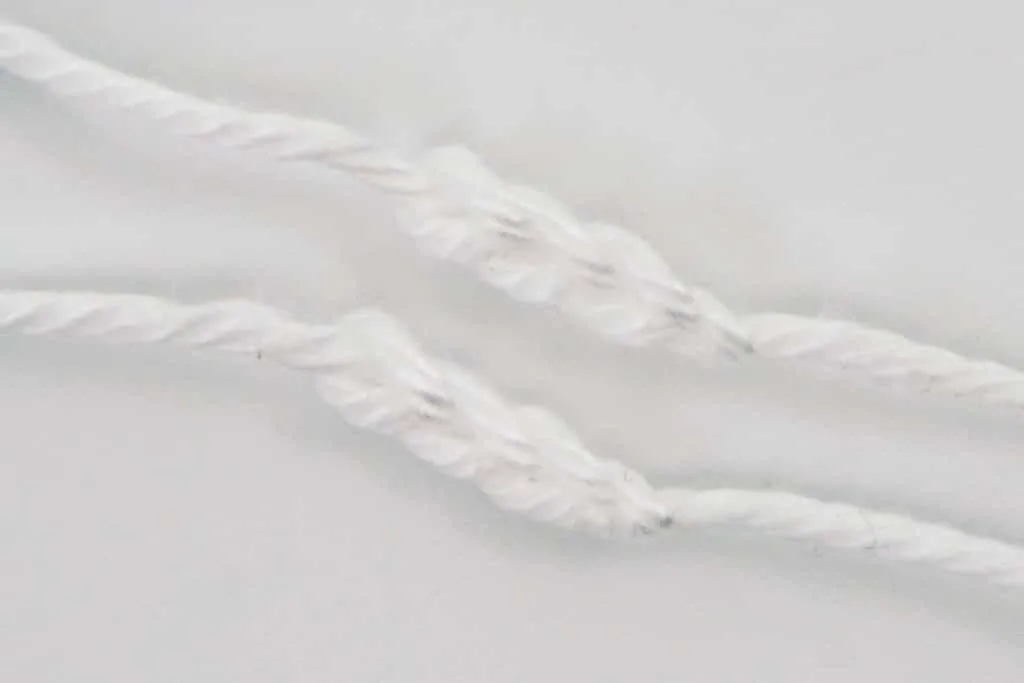
Then knot the two ends of the threads together and cut the ends directly at the knot.
Move the knots to the inside of the skull so that they are no longer visible from the outside.
Finally, pull the skull onto the head of the Grim Reaper. If necessary, it can also be sewn on.
Cloak: Wrap the cloak around the body with the opening facing forward and the hood over the head with the skull and sew it to the body with a Black thread.
Arms: Next, sew the arms to the right and left onto the cape a bit under the hood of the cloak.
Scythe: Sew the blade of the scythe to the beginning of the staff that started with the Magic Ring.
Then sew the finished scythe onto the left or right hand.
